Secure Payment Systems HYPERCOM ICE 5500 Plus ECHECK ...
Secure Payment Systems HYPERCOM ICE 5500 Plus ECHECK ...
Secure Payment Systems HYPERCOM ICE 5500 Plus ECHECK ...

You also want an ePaper? Increase the reach of your titles
YUMPU automatically turns print PDFs into web optimized ePapers that Google loves.
<strong>Secure</strong> <strong>Payment</strong> <strong>Systems</strong> Rev 1.2<br />
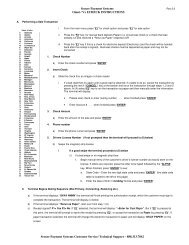
<strong>HYPERCOM</strong> <strong>ICE</strong> <strong>5500</strong> <strong>Plus</strong> <strong>ECHECK</strong> INSTRUCTIONS<br />
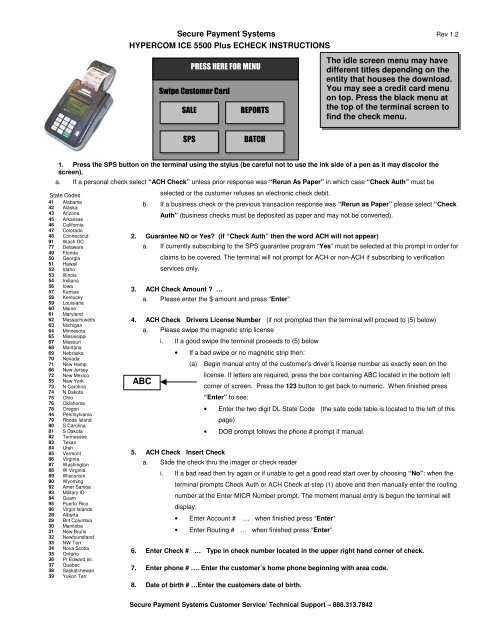
1. Press the SPS button on the terminal using the stylus (be careful not to use the ink side of a pen as it may discolor the<br />
screen).<br />
a. If a personal check select “ACH Check” unless prior response was “Rerun As Paper” in which case “Check Auth” must be<br />
State Codes<br />
41 Alabama<br />
42 Alaska<br />
43 Arizona<br />
45 Arkansas<br />
46 California<br />
47 Colorado<br />
48 Connecticut<br />
91 Wash DC<br />
77 Delaware<br />
49 Florida<br />
50 Georgia<br />
51 Hawaii<br />
52 Idaho<br />
53 Illinois<br />
54 Indiana<br />
56 Iowa<br />
57 Kansas<br />
58 Kentucky<br />
59 Louisiana<br />
60 Maine<br />
61 Maryland<br />
62 Massachusetts<br />
63 Michigan<br />
64 Minnesota<br />
65 Mississippi<br />
67 Missouri<br />
68 Montana<br />
69 Nebraska<br />
70 Nevada<br />
71 New Hamp<br />
66 New Jersey<br />
72 New Mexico<br />
55 New York<br />
73 N Carolina<br />
74 N Dakota<br />
75 Ohio<br />
76 Oklahoma<br />
78 Oregon<br />
44 Pennsylvania<br />
79 Rhode Island<br />
80 S Carolina<br />
81 S Dakota<br />
82 Tennessee<br />
83 Texas<br />
84 Utah<br />
85 Vermont<br />
86 Virginia<br />
87 Washington<br />
88 W Virginia<br />
89 Wisconsin<br />
90 Wyoming<br />
92 Amer Samoa<br />
93 Military ID<br />
94 Guam<br />
95 Puerto Rico<br />
96 Virgin Islands<br />
28 Alberta<br />
29 Brit Columbia<br />
30 Manitoba<br />
31 New Bruns<br />
32 Newfoundland<br />
33 NW Terr<br />
34 Nova Scotia<br />
35 Ontario<br />
36 Pr Edward Isl.<br />
37 Quebec<br />
38 Saskatchewan<br />
39 Yukon Terr<br />
selected or the customer refuses an electronic check debit.<br />
b. If a business check or the previous transaction response was “Rerun as Paper” please select “Check<br />
Auth” (business checks must be deposited as paper and may not be converted).<br />
2. Guarantee NO or Yes? (if “Check Auth” then the word ACH will not appear)<br />
a. If currently subscribing to the SPS guarantee program “Yes” must be selected at this prompt in order for<br />
claims to be covered. The terminal will not prompt for ACH or non-ACH if subscribing to verification<br />
services only.<br />
3. ACH Check Amount ? …<br />
a. Please enter the $ amount and press “Enter”<br />
4. ACH Check Drivers License Number (if not prompted then the terminal will proceed to (5) below)<br />
ABC<br />
a. Please swipe the magnetic strip license<br />
i. If a good swipe the terminal proceeds to (5) below<br />
• If a bad swipe or no magnetic strip then:<br />
5. ACH Check Insert Check<br />
(a) Begin manual entry of the customer’s driver’s license number as exactly seen on the<br />
license. If letters are required, press the box containing ABC located in the bottom left<br />
corner of screen. Press the 123 button to get back to numeric. When finished press<br />
“Enter” to see:<br />
• Enter the two digit DL State Code (the sate code table is located to the left of this<br />
page)<br />
• DOB prompt follows the phone # prompt if manual.<br />
a. Slide the check thru the imager or check reader<br />
i. If a bad read then try again or if unable to get a good read start over by choosing “No”: when the<br />
terminal prompts Check Auth or ACH Check at step (1) above and then manually enter the routing<br />
number at the Enter MICR Number prompt. The moment manual entry is begun the terminal will<br />
display:<br />
PRESS HERE FOR MENU<br />
Swipe Customer Card<br />
SALE REPORTS<br />
SPS BATCH<br />
• Enter Account # … when finished press “Enter”<br />
• Enter Routing # … when finished press “Enter”<br />
6. Enter Check # … Type in check number located in the upper right hand corner of check.<br />
7. Enter phone # …. Enter the customer’s home phone beginning with area code.<br />
8. Date of birth # …Enter the customers date of birth.<br />
<strong>Secure</strong> <strong>Payment</strong> <strong>Systems</strong> Customer Service/ Technical Support – 888.313.7842<br />
The idle screen menu may have<br />
different titles depending on the<br />
entity that houses the download.<br />
You may see a credit card menu<br />
on top. Press the black menu at<br />
the top of the terminal screen to<br />
find the check menu.
<strong>Secure</strong> <strong>Payment</strong> <strong>Systems</strong> Rev 1.2<br />
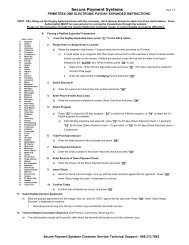
<strong>HYPERCOM</strong> <strong>ICE</strong> <strong>5500</strong> <strong>Plus</strong> <strong>ECHECK</strong> INSTRUCTIONS<br />
9. Terminal Begins Dialing Sequence (Dialing. Connecting, Receiving, Transmitting, etc.)<br />
a. If the terminal displays: “OKAY NNNN” the terminal will finish printing the authorization receipt, which the customer must sign to<br />
complete the transaction. The terminal will then prompt to print another receipt for the customer copy.<br />
10. Miscellaneous Administrative Issues<br />
a. Reprint Receipt (in case there was a printer problem)<br />
i. Press the “REPRINT” option from the screen (Press “Reports” from the main menu to see the reprint option) and enter in the<br />
invoice number found on the original copy. If the original copy is not available, press ”Reports” from the main menu, press<br />
“Audit” and then press “Enter”. (Or call customer service at (888) 313-7842 and ask for the last 6 digits of the item number of the<br />
transaction)<br />
b. If the terminal displays: “Call Ctr – NN” (where NN = a two digit number) immediately call the SPS voice authorization center for<br />
operator approval. Upon receiving approval:<br />
i. Force the authorization into the batch (similar to forcing a credit card transaction), by immediately rerunning the transaction just<br />
like the original transaction (do not delay, the customer needs to sign a printed receipt)<br />
c. If the terminal displays an error response such as: “Micr/Chk # Error” or “DL Error” or “DOB Error” or “Phone # Error” or “State<br />
Code Error” then rerun the transaction from the beginning. If the terminal responds with “Rerun As Paper” then rerun the transaction<br />
from the beginning and select “No” at step #1 above.<br />
11. Void Transaction (in case a transaction is to be cancelled)<br />
a. From the main menu, press “Void” to go to the batch menu from which, press “Void”. Press “Last” if last transaction is to be voided or<br />
“By Invoice” if a transaction is to be voided by invoice. Enter the invoice number found on the receipt or audit report. Verify that the<br />
amount is correct for the transaction and press “Enter”.<br />
12. SPS Batch Close (if using the ACH check conversion service)<br />
a. If not on “Auto Settle”, press the “Settle” option (Press “Batch” from the main menu to see the settle option). At the: “Enter<br />
password” prompt, enter the password (generally it is four zeros (0000)) then press “Enter”.<br />
i. The Terminal will scan the batch and then display totals and ask if they are correct.<br />
ii. If satisfied with totals press “Yes”. The terminal will dial the SPS processing center, clear the batch, and print a totals report.<br />
13. Printing a Summary Report<br />
a. From the main menu, press “Reports”<br />
b. From the reports menu, press “Summary”<br />
14. Printing an Audit Report<br />
a. From the main menu, press “Reports”<br />
b. From the reports menu, press “Audit”<br />
c. Enter the host number and press “Enter”<br />
15. Printing a Batch History Report<br />
a. From the main menu, press “Reports”<br />
b. From the reports menu, press “History”<br />
c. Select “02= SPS CHECK”<br />
d. Type the desired start date in a Month, Day and Year format and press “Enter”<br />
16. Automatic Image transmission --- The terminal automatically causes images to be transmitted after the batch is settled. A receipt will be<br />
printed denoting the number of images uploaded if successful, or the number of images not uploaded if unsuccessful. Please call the SPS<br />
Customer Service line if image uploads are unsuccessful for more than two days in a row.<br />
17. Manual Image Transmission (in case of failed automatic transmission – if using an imager)<br />
i. Press “FUNCTION” and then type 80 and press “Enter”<br />
ii. Terminal will display “1 = SEND 2 = CLR (clear images) 3 = INFO (states number of images in a storage)”. Select 1 to send<br />
images.<br />
Cable Requirements:<br />
Supported check readers;<br />
Magtek Mini MICR Cable Part Number: 22517577<br />
Supported imagers;<br />
Magtek MICR Imager Cable Part Number: 22410311<br />
RDM EC5000 series Cable Part Number: 810306-001 A<br />
RDM EC6000 series Cable Part Number: 810306-001 A<br />
Note: Paper based transactions (where you select non ACH) are not included in terminal reporting / batches<br />
<strong>Secure</strong> <strong>Payment</strong> <strong>Systems</strong> Customer Service/ Technical Support – 888.313.7842
PRESS HERE FOR MENU<br />
Swipe Customer Card<br />
SALE REPORTS<br />
SPS BATCH<br />
1. Activating a Gift Card<br />
<strong>Secure</strong> <strong>Payment</strong> <strong>Systems</strong> Rev 1.1<br />
<strong>HYPERCOM</strong> <strong>ICE</strong> <strong>5500</strong> <strong>Plus</strong> GIFT CARD INSTRUCTIONS<br />
a. From the idle prompt, press “Press here for menu”<br />
b. From the main menu, press “New Trans”<br />
c. Press “More” to go to the next menu<br />
d. Press “Gift” for gift card option<br />
e. Press “1=ACTIVATE” to activate your gift card<br />
f. Swipe the card through the slot on the right side of the terminal<br />
g. Type in the full reference number printed at the back of the card and press “Enter”<br />
h. Type in the amount of activation and press “Enter”<br />
i. Terminal begins Dialing sequence (Dialing, Processing, etc.) It will give an approval and print a copy of the activation receipt and will<br />
prompt to print another receipt for the customer copy<br />
2. Making a Sale transaction<br />
a. From the idle prompt, press “Sale”<br />
b. From the sale menu, press “Gift Card”<br />
c. Swipe the card through the slot on the right side of the terminal<br />
d. Type in the amount of the sale and pres “Enter”<br />
e. Terminal begins Dialing sequence (Dialing, Processing, etc.) It will give an approval and print a copy of the sale receipt and will prompt<br />
to print another receipt for the customer copy<br />
3. Performing a gift card refund<br />
a. From the idle prompt, press “Press here for Menu”<br />
b. From the main menu press “New Trans”<br />
c. Press “Refund”<br />
d. From the refund menu, press “Gift Card”<br />
e. Swipe the card through the slot on the right side of the terminal<br />
f. Type in the item number and press “Enter”<br />
g. Type in the amount of the refund and press “Enter”<br />
h. Terminal begins Dialing sequence (Dialing, Processing, etc.) It will give an approval and print a copy of the refund receipt and will<br />
prompt to print another receipt for the customer copy<br />
4. Performing a Balance Inquiry<br />
a. From the idle prompt, press “Press here for Menu”<br />
b. From the main menu, press “New Trans”<br />
c. Press “More” to go to the next menu<br />
d. Press “Inquiry”<br />
e. Press “Gift Card” for balance inquiry about the gift card<br />
f. Swipe the card through the slot on the right side of the terminal<br />
g. Terminal begins Dialing sequence (Dialing, Processing, etc.) It will display the balance on the screen, print a merchant report and go<br />
back to the idle prompt<br />
The idle screen menu may<br />
have different titles depending<br />
on the entity that houses the<br />
download. You may see a<br />
credit card menu on top. Press<br />
the black menu at the top of<br />
the terminal screen to find the<br />
check menu.<br />
<strong>Secure</strong> <strong>Payment</strong> <strong>Systems</strong> Customer Service/ Technical Support – 888.313.7842
5. Adding funds to a gift card<br />
<strong>Secure</strong> <strong>Payment</strong> <strong>Systems</strong> Rev 1.1<br />
<strong>HYPERCOM</strong> <strong>ICE</strong> <strong>5500</strong> <strong>Plus</strong> GIFT CARD INSTRUCTIONS<br />
a. From the idle prompt, press “Press here for Menu”<br />
b. From the main menu, press “New Trans”<br />
c. Press “More” to go to the next menu<br />
d. Press “Gift” for gift card option<br />
e. Press “2=ADD VALUE” to activate your gift card<br />
f. Swipe the card through the slot on the right side of the terminal. Enter the amount of value and press “Enter”<br />
g. Terminal begins Dialing sequence (Dialing, Processing, etc.) It will give an approval and print a copy of the value added receipt and<br />
will prompt to print another receipt for the customer copy<br />
6. Transferring a gift card balance<br />
a. From the idle prompt, press “Press here for Menu”<br />
b. From the main menu, press “New Trans”. Press “More” to go to the next menu<br />
c. Press “Gift” for gift card option. Press “More” to go to the next menu<br />
d. Press “6=TRANSFER BALANCE”<br />
e. Swipe the gift card from which the balance is to be transferred<br />
f. Swipe the gift card the balance is to be transferred to<br />
g. Terminal begins Dialing sequence (Dialing, Processing, etc.) It will give an approval and print a copy of the balance transfer receipt<br />
and will prompt to print another receipt for the customer copy<br />
7. Miscellaneous Administrative Issues<br />
a. Reprint Receipt (in case there was a printer problem)<br />
i. Press the “REPRINT” option from the screen (Press “Reports” from the main menu to see the reprint option) and enter in the<br />
invoice number found on the original copy. If original copy not available, press ”Reports” from the main menu, press “Audit”<br />
and then press “Enter<br />
b. Void Transaction (in case a transaction is to be cancelled)<br />
i. From the main menu, press “Void” to go to the batch menu from which, press “Void”. Press “Last” if last transaction is to be<br />
voided or “By Invoice” if a transaction is to be voided by invoice. Type in the invoice number found on the receipt or audit report.<br />
Verify that the amount is correct for the transaction and press “Enter”<br />
8. SPS Batch Close (if using the ACH check conversion service)<br />
a. If not on “Auto Settle”, press the “Settle” option (Press “Batch” from the main menu to see the settle option). At the: “Enter<br />
password” prompt, enter the password (generally it is four zeros (0000)) then press “Enter”.<br />
i. The Terminal will scan the batch, ask for the host number and then display totals and ask if they are correct.<br />
ii. If satisfied with totals press “Yes”. The terminal will dial the SPS processing center, clear the batch, and print a totals report.<br />
9. Printing a Summary Report<br />
a. From the main menu, press “Reports”<br />
b. From the reports menu, press “Summary”<br />
10. Printing an Audit Report<br />
a. From the main menu, press “Reports”<br />
b. From the reports menu, press “Audit”<br />
c. Type in the host number and press “Enter”<br />
11. Printing a Batch History Report<br />
a. From the main menu, press “Reports”<br />
b. From the reports menu, press “History”<br />
c. Select 02= SPS CHECK<br />
d. Type the desired start date in a Month, Day and Year format and press “Enter”<br />
<strong>Secure</strong> <strong>Payment</strong> <strong>Systems</strong> Customer Service/ Technical Support – 888.313.7842
PRESS HERE FOR MENU<br />
Swipe Customer Card<br />
SALE REPORTS<br />
SPS BATCH<br />
1. Issuing a Loyalty Card<br />
<strong>Secure</strong> <strong>Payment</strong> <strong>Systems</strong> Rev 1.1<br />
<strong>HYPERCOM</strong> <strong>ICE</strong> <strong>5500</strong> <strong>Plus</strong> LOYALTY CARD INSTRUCTIONS<br />
a. From the idle prompt, press “Press here for menu”<br />
b. From the main menu, press “New Trans”<br />
c. Press “More” to go to the next menu<br />
d. Press “Loyalty” for loyalty card option<br />
e. Press “2=ISSUE” to issue your loyalty card<br />
f. Swipe the card through the slot on the right side of the terminal<br />
g. Type in the full reference number printed at the back of the card and press “Enter”<br />
h. Terminal begins Dialing sequence (Dialing, Processing, etc.) It will give an approval and print a copy of the issue receipt and will<br />
prompt to print another receipt for the customer copy<br />
2. Accumulation on a Loyalty Card<br />
a. From the idle prompt, press “Press here for Menu”<br />
b. From the main menu, press “New Trans”<br />
c. Press “More” to go to the next menu<br />
d. Press “Loyalty” for loyalty card option<br />
e. Press “1=ACCUMULATION” for accumulation on your loyalty card<br />
f. Swipe the card through the slot on the right side of the terminal<br />
g. Type in the amount of accumulation and pres “Enter”<br />
h. Terminal begins Dialing sequence (Dialing, Processing, etc.) It will give an approval and print a copy of the accumulation receipt and<br />
will prompt to print another receipt for the customer copy<br />
3. Redemption on a Loyalty Card<br />
a. From the idle prompt, press “Press here for Menu”<br />
b. From the main menu press “New Trans”<br />
c. Press “More” to go to the next menu<br />
d. Press “Loyalty” for loyalty card option<br />
e. Press “3=REDEEM” for redemption on a loyalty card<br />
f. Swipe the card through the slot on the right side of the terminal<br />
g. Type in the redemption level and press “Enter”<br />
h. Terminal begins Dialing sequence (Dialing, Processing, etc.) It will give an approval and print a copy of the redemption receipt and will<br />
prompt to print another receipt for the customer copy<br />
4. Performing a Balance Inquiry<br />
a. From the idle prompt, press “Press here for Menu”<br />
b. From the main menu, press “New Trans”<br />
c. Press “More” to go to the next menu<br />
d. Press “Inquiry”<br />
The idle screen menu may<br />
have different titles depending<br />
on the entity that houses the<br />
download. You may see a<br />
credit card menu on top. Press<br />
the black menu at the top of<br />
the terminal screen to find the<br />
loyalty menu.<br />
<strong>Secure</strong> <strong>Payment</strong> <strong>Systems</strong> Customer Service/ Technical Support – 888.313.7842
<strong>Secure</strong> <strong>Payment</strong> <strong>Systems</strong> Rev 1.1<br />
<strong>HYPERCOM</strong> <strong>ICE</strong> <strong>5500</strong> <strong>Plus</strong> LOYALTY CARD INSTRUCTIONS<br />
e. Press “Loyalty Crd” for balance inquiry about the loyalty card<br />
f. Swipe the card through the slot on the right side of the terminal<br />
g. Terminal begins Dialing sequence (Dialing, Processing, etc.) It will display the balance on the screen, print a merchant report and go<br />
back to the idle prompt<br />
5. Transferring a Loyalty card balance<br />
a. From the idle prompt, press “Press here for Menu”<br />
b. From the main menu, press “New Trans”<br />
c. Press “More” to go to the next menu<br />
d. Press “Loyalty” for gift card option<br />
e. Press “More” to go to the next menu<br />
f. Press “6=TRANSFER BALANCE”<br />
g. Swipe the card from which the balance is to be transferred<br />
h. Swipe the card on which the balance is to be transferred to.<br />
i. Terminal begins Dialing sequence (Dialing, Processing, etc.) It will give an approval and print a copy of the balance transfer receipt and<br />
will prompt to print another receipt for the customer copy<br />
6. Miscellaneous Administrative Issues<br />
a. Reprint Receipt (in case there was a printer problem)<br />
i. Press the “REPRINT” option from the screen (Press “Reports” from the main menu to see the reprint option) and enter in the<br />
invoice number found on the original copy. If original copy not available, press ”Reports” from the main menu, press “Audit” and<br />
then press “Enter<br />
b. Void Transaction (in case a transaction is to be cancelled)<br />
i. From the main menu, press “Void” and go to the batch menu from which, press “Void”. Press “Last” if last transaction is to be<br />
voided or “By Invoice” if a transaction is to be voided by invoice. Type in the invoice number found on the receipt or audit report.<br />
Verify that the amount is correct for the transaction and press “Enter”<br />
7. SPS Batch Close (if using the ACH check conversion service)<br />
a. If not on “Auto Settle”, press the “Settle” option (Press “Batch” from the main menu to see the settle option). At the: “Enter<br />
password” prompt, enter the password (generally it is four zeros (0000)) then press “Enter”.<br />
i. The Terminal will scan the batch, ask for the host number and then display totals and ask if they are correct.<br />
ii. If satisfied with totals press “Yes”. The terminal will dial the SPS processing center, clear the batch, and print a totals report.<br />
8. Printing a Summary Report<br />
a. From the main menu, press “Reports”<br />
b. From the reports menu, press “Summary”<br />
9. Printing an Audit Report<br />
a. From the main menu, press “Reports”<br />
b. From the reports menu, press “Audit”<br />
c. Type in the host number and press “Enter”<br />
10. Printing a Batch History Report<br />
a. From the main menu, press “Reports”<br />
b. From the reports menu, press “History”<br />
c. Select 02= SPS CHECK<br />
d. Type the desired start date in a Month, Day and Year format and press “Enter”<br />
<strong>Secure</strong> <strong>Payment</strong> <strong>Systems</strong> Customer Service/ Technical Support – 888.313.7842