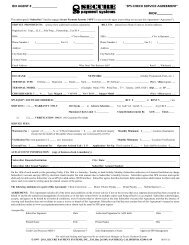
Hypercom T7Plus Guide - Secure Payment Systems
Hypercom T7Plus Guide - Secure Payment Systems
Hypercom T7Plus Guide - Secure Payment Systems

Create successful ePaper yourself
Turn your PDF publications into a flip-book with our unique Google optimized e-Paper software.
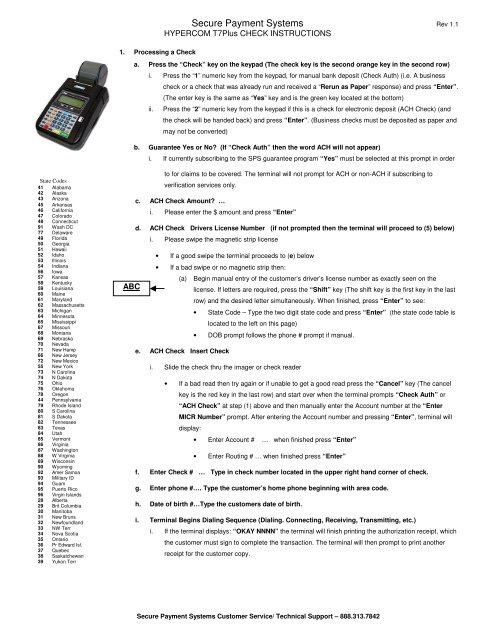
1. Processing a Check<br />
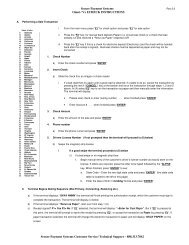
<strong>Secure</strong> <strong>Payment</strong> <strong>Systems</strong> Rev 1.1<br />
HYPERCOM <strong>T7Plus</strong> CHECK INSTRUCTIONS<br />
a. Press the “Check” key on the keypad (The check key is the second orange key in the second row)<br />
i. Press the “1” numeric key from the keypad, for manual bank deposit (Check Auth) (i.e. A business<br />
ii.<br />
check or a check that was already run and received a “Rerun as Paper” response) and press “Enter”.<br />
(The enter key is the same as “Yes” key and is the green key located at the bottom)<br />
Press the “2” numeric key from the keypad if this is a check for electronic deposit (ACH Check) (and<br />
the check will be handed back) and press “Enter”. (Business checks must be deposited as paper and<br />
may not be converted)<br />
b. Guarantee Yes or No? (If “Check Auth” then the word ACH will not appear)<br />
i. If currently subscribing to the SPS guarantee program “Yes” must be selected at this prompt in order<br />
State Codes<br />
41 Alabama<br />
42 Alaska<br />
43 Arizona<br />
45 Arkansas<br />
46 California<br />
47 Colorado<br />
48 Connecticut<br />
91 Wash DC<br />
77 Delaware<br />
49 Florida<br />
50 Georgia<br />
51 Hawaii<br />
52 Idaho<br />
53 Illinois<br />
54 Indiana<br />
56 Iowa<br />
57 Kansas<br />
58 Kentucky<br />
59 Louisiana<br />
60 Maine<br />
61 Maryland<br />
62 Massachusetts<br />
63 Michigan<br />
64 Minnesota<br />
65 Mississippi<br />
67 Missouri<br />
68 Montana<br />
69 Nebraska<br />
70 Nevada<br />
71 New Hamp<br />
66 New Jersey<br />
72 New Mexico<br />
55 New York<br />
73 N Carolina<br />
74 N Dakota<br />
75 Ohio<br />
76 Oklahoma<br />
78 Oregon<br />
44 Pennsylvania<br />
79 Rhode Island<br />
80 S Carolina<br />
81 S Dakota<br />
82 Tennessee<br />
83 Texas<br />
84 Utah<br />
85 Vermont<br />
86 Virginia<br />
87 Washington<br />
88 W Virginia<br />
89 Wisconsin<br />
90 Wyoming<br />
92 Amer Samoa<br />
93 Military ID<br />
94 Guam<br />
95 Puerto Rico<br />
96 Virgin Islands<br />
28 Alberta<br />
29 Brit Columbia<br />
30 Manitoba<br />
31 New Bruns<br />
32 Newfoundland<br />
33 NW Terr<br />
34 Nova Scotia<br />
35 Ontario<br />
36 Pr Edward Isl.<br />
37 Quebec<br />
38 Saskatchewan<br />
39 Yukon Terr<br />
to for claims to be covered. The terminal will not prompt for ACH or non-ACH if subscribing to<br />
verification services only.<br />
c. ACH Check Amount? …<br />
i. Please enter the $ amount and press “Enter”<br />
d. ACH Check Drivers License Number (if not prompted then the terminal will proceed to (5) below)<br />
i. Please swipe the magnetic strip license<br />
• If a good swipe the terminal proceeds to (e) below<br />
• If a bad swipe or no magnetic strip then:<br />
(a) Begin manual entry of the customer’s driver’s license number as exactly seen on the<br />
ABC<br />
license. If letters are required, press the “Shift” key (The shift key is the first key in the last<br />
row) and the desired letter simultaneously. When finished, press “Enter” to see:<br />
• State Code – Type the two digit state code and press “Enter” (the state code table is<br />
located to the left on this page)<br />
• DOB prompt follows the phone # prompt if manual.<br />
e. ACH Check Insert Check<br />
i. Slide the check thru the imager or check reader<br />
• If a bad read then try again or if unable to get a good read press the “Cancel” key (The cancel<br />
key is the red key in the last row) and start over when the terminal prompts “Check Auth” or<br />
“ACH Check” at step (1) above and then manually enter the Account number at the “Enter<br />
MICR Number” prompt. After entering the Account number and pressing “Enter”, terminal will<br />
display:<br />
• Enter Account # … when finished press “Enter”<br />
• Enter Routing # … when finished press “Enter”<br />
f. Enter Check # … Type in check number located in the upper right hand corner of check.<br />
g. Enter phone #…. Type the customer’s home phone beginning with area code.<br />
h. Date of birth #…Type the customers date of birth.<br />
i. Terminal Begins Dialing Sequence (Dialing. Connecting, Receiving, Transmitting, etc.)<br />
i. If the terminal displays: “OKAY NNNN” the terminal will finish printing the authorization receipt, which<br />
the customer must sign to complete the transaction. The terminal will then prompt to print another<br />
receipt for the customer copy.<br />
<strong>Secure</strong> <strong>Payment</strong> <strong>Systems</strong> Customer Service/ Technical Support – 888.313.7842
2. Miscellaneous Administrative Issues<br />
a. Reprint Receipt (in case there was a printer problem)<br />
<strong>Secure</strong> <strong>Payment</strong> <strong>Systems</strong> Rev 1.1<br />
HYPERCOM <strong>T7Plus</strong> CHECK INSTRUCTIONS<br />
i. Press the “Reprint” key (The reprint key is the last key in the third row) and enter in the invoice number found on the original<br />
copy. If original copy not available, press the “Reports” key (The reports key is the first key in the third row) on the terminal,<br />
press “3” for audit and then press “Enter”. (Or call customer service at (888) 313-7842 and ask for the last 6 digits of the item<br />
number of the transaction)<br />
b. If the terminal displays: “Call Ctr – NN” (where NN = a two digit number) you must immediately call the SPS voice authorization center<br />
for operator approval. Upon receiving approval you must then:<br />
i. Force the authorization into the batch (similar to forcing a credit card transaction), by immediately rerunning the transaction just<br />
like the original transaction (do not delay, the customer needs to sign a printed receipt)<br />
c. If the terminal displays an error response such as: “Micr/Chk # Error” or “DL Error” or “DOB Error” or “Phone # Error” or “State<br />
Code Error” then rerun the transaction from the beginning. If the terminal responds with “Rerun As Paper” then rerun the<br />
transaction from the beginning and select “1” at step #1 above.<br />
3. Voiding an eCheck transaction<br />
a. To void a transaction, press the “Void” key and enter the invoice number found on the receipt or audit report. Verify that the amount is<br />
correct for the transaction and press “Enter”<br />
4. SPS Batch Close (if using the ACH check conversion service)<br />
a. If not on “Auto Settle”, press the “Settle” key (The settle key is the fifth key in the first row) .At the: “Enter password” prompt, enter<br />
the password (generally it is four zeros (0000)) then press “Enter”<br />
i. The Terminal will scan the batch and then display totals and ask if they are correct.<br />
ii. If satisfied with totals press “Yes” or “Enter”. The terminal will dial the SPS processing center, clear the batch, and print a totals<br />
report.<br />
5. Printing Reports<br />
a. Printing a Summary Report<br />
i. Press the “Reports” key on the keypad (The Reports key is the first key in the third row)<br />
ii. Press “4” for summary and then press “Enter”<br />
b. Printing an Audit Report<br />
i. Press the “Reports” key on the keypad (The Reports key is the first key in the third row)<br />
ii. Press “3” for audit and then press “Enter”<br />
iii. Type in the Host number and press “Enter”<br />
Cable Requirements:<br />
Supported check readers;<br />
c. Printing Batch History Report<br />
Magtek Mini MICR Cable Part Number: 22517577<br />
i. Press the “Reports” key on the keypad (The Reports key is<br />
Supported imagers;<br />
the first key in the third row)<br />
Magtek MICR Imager Cable Part Number: 22410311<br />
ii. Press “5” for history and then press “Enter”<br />
RDM EC5000 series Cable Part Number: 810306-001 A<br />
iii. Type 03 for SPS and press “Enter”<br />
RDM EC6000 series Cable Part Number: 810306-001 A<br />
iv. Type the desired start date in Month, Day, and Year format,<br />
and then press “Enter”<br />
6. Automatic Image transmission --- The terminal automatically causes images to be transmitted after the batch is settled. A receipt will be<br />
printed denoting the number of images uploaded if successful, or the number of images not uploaded if unsuccessful. Please call the SPS<br />
Customer Service line if image uploads are unsuccessful for more than two days in a row.<br />
7. Manual Image Transmission (in case of failed automatic transmission – if using an imager)<br />
a. Press “FUNCTION” key (The function key is the blue key in the first row) and then type 80 and press “Enter”<br />
b. Terminal will display 1 = SEND 2 = CLR (clear images) 3 = INFO (states number of images in a storage). Select 1 to send images.<br />
Note: Paper based transactions (where you select non ACH are not included in terminal reporting / batches)<br />
<strong>Secure</strong> <strong>Payment</strong> <strong>Systems</strong> Customer Service/ Technical Support – 888.313.7842
1. Activating a gift card<br />
2. Making a Sale<br />
3. Crediting a Sale<br />
4. Voiding a Sale<br />
5. Balance Inquiry<br />
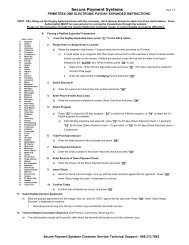
<strong>Secure</strong> <strong>Payment</strong> <strong>Systems</strong> Rev 1.1<br />
HYPERCOM <strong>T7Plus</strong> GIFT CARD INSTRUCTIONS<br />
a. Press the “Card Verify” key, select Gift and press “Enter”<br />
b. Press “1-ACTIVATE” and then press “Enter”<br />
c. Swipe the gift card<br />
d. Enter the reference number printed at the back of the card and press “Enter”<br />
e. Enter the amount of the activation and press “Enter”<br />
a. Press the “Card Verify” key, select Gift and press “Enter”<br />
b. Press the “3” key and press “Enter”<br />
c. Swipe the gift card<br />
d. Enter the amount of the purchase and press “Enter”<br />
a. Press the “Card Verify” key, select Gift and press “Enter”<br />
b. Press “4” to run the transaction as “Refund”<br />
c. Swipe the gift card<br />
d. Enter the item number found on the receipt and press “Enter”<br />
e. Enter the amount of the refund and press “Enter”<br />
a. Press the “Void” key<br />
b. Enter the invoice number found on the receipt or audit report<br />
c. Verify that the amount is correct for the transaction and press “Enter”<br />
a. Press the “Balance Inquiry” key<br />
b. Press the “3” key and press “Enter”<br />
c. Swipe the gift card<br />
<strong>Secure</strong> <strong>Payment</strong> <strong>Systems</strong> Customer Service/ Technical Support – 888.313.7842<br />
1. Activating a gift card<br />
<strong>Secure</strong> <strong>Payment</strong> <strong>Systems</strong> Rev 1.1<br />
HYPERCOM <strong>T7Plus</strong> GIFT CARD INSTRUCTIONS<br />
a. Press the “Card Verify” key, select Gift and press “Enter”<br />
b. Press “1-ACTIVATE” and then press “Enter”<br />
c. Swipe the gift card<br />
d. Enter the reference number printed at the back of the card and press “Enter”<br />
e. Enter the amount of the activation and press “Enter”<br />
2. Making a Sale<br />
a. Press the “Card Verify” key, select Gift and press “Enter”<br />
b. Press the “3” key and press “Enter”<br />
c. Swipe the gift card<br />
d. Enter the amount of the purchase and press “Enter”<br />
3. Crediting a Sale<br />
a. Press the “Card Verify” key, select Gift and press “Enter”<br />
b. Press “4” to run the transaction as “Refund”<br />
c. Swipe the gift card<br />
d. Enter the item number found on the receipt and press “Enter”<br />
e. Enter the amount of the refund and press “Enter”<br />
4. Voiding a Sale<br />
a. Press the “Void” key<br />
b. Enter the invoice number found on the receipt or audit report<br />
c. Verify that the amount is correct for the transaction and press “Enter”<br />
5. Balance Inquiry<br />
a. Press the “Balance Inquiry” key<br />
b. Press the “3” key and press “Enter”<br />
c. Swipe the gift card<br />
<strong>Secure</strong> <strong>Payment</strong> <strong>Systems</strong> Customer Service/ Technical Support – 888.313.7842
6. Adding Value to a gift card<br />
a. Press the “Card Verify” key, select Gift and press “Enter”<br />
b. Press the “2” key and press “Enter”<br />
c. Swipe the gift card<br />
d. Enter the amount to add to the card balance and press “Enter”<br />
7. Transferring funds from one gift card to another (Balance Transfer)<br />
a. Press the “Card Verify” key, select Gift and press “Enter”<br />
b. Press the arrow key to go to the next menu<br />
c. Press the “6” key for Balance Transfer<br />
d. Swipe the gift card from which the balance is to be transferred<br />
e. Swipe the gift card on which the balance is to be transferred to<br />
8. Reprint Receipt<br />
a. Press the “Reprint” key<br />
b. Enter the invoice number found on the original receipt and press “Enter”<br />
9. Closing a Batch<br />
a. If not on “Auto Settle”, press the “Settlement” key<br />
b. Enter the password and press “Enter” The default password is four zeros (0000)<br />
10. Printing a Summary Report<br />
a. Press the “Reports” key, then “4” for Summary and press “Enter”<br />
11. Printing an Audit Report<br />
a. Press the “Reports” key, then “3” for Audit and press “Enter”<br />
b. Enter the Host number and press “Enter” The gift card host is usually “03”<br />
12. Printing Batch History Report<br />
a. Press the “Reports” key, then “5” for History and press “Enter”<br />
b. Type 03 for SPS and press “Enter”<br />
c. Enter the desired start date in Month, Day, and Year format, and then press “Enter”<br />
<strong>Secure</strong> <strong>Payment</strong> <strong>Systems</strong> Customer Service/ Technical Support – 888.313.7842<br />
6. Adding Value to a gift card<br />
a. Press the “Card Verify” key, select Gift and press “Enter”<br />
b. Press the “2” key and press “Enter”<br />
c. Swipe the gift card<br />
d. Enter the amount to add to the card balance and press “Enter”<br />
7. Transferring funds from one gift card to another (Balance Transfer)<br />
a. Press the “Card Verify” key, select Gift and press “Enter”<br />
b. Press the arrow key to go to the next menu<br />
c. Press the “6” key for Balance Transfer<br />
d. Swipe the gift card from which the balance is to be transferred<br />
e. Swipe the gift card on which the balance is to be transferred to<br />
8. Reprint Receipt<br />
a. Press the “Reprint” key<br />
b. Enter the invoice number found on the original receipt and press “Enter”<br />
9. Closing a Batch<br />
a. If not on “Auto Settle”, press the “Settlement” key<br />
b. Enter the password and press “Enter” The default password is four zeros (0000)<br />
10. Printing a Summary Report<br />
a. Press the “Reports” key, then “4” for Summary and press “Enter”<br />
11. Printing an Audit Report<br />
a. Press the “Reports” key, then “3” for Audit and press “Enter”<br />
b. Enter the Host number and press “Enter” The gift card host is usually “03”<br />
12. Printing Batch History Report<br />
a. Press the “Reports” key, then “5” for History and press “Enter”<br />
b. Type 03 for SPS and press “Enter”<br />
c. Enter the desired start date in Month, Day, and Year format, and then press “Enter”<br />
<strong>Secure</strong> <strong>Payment</strong> <strong>Systems</strong> Customer Service/ Technical Support – 888.313.7842
<strong>Secure</strong> <strong>Payment</strong> <strong>Systems</strong> Rev 1.1<br />
HYPERCOM <strong>T7Plus</strong> LOYALTY CARD INSTRUCTIONS<br />
1. Issuing a Loyalty Card<br />
a. Press the “Verify” key on the keypad (The verify key is the orange key in the first row). Press the “4” numeric key from the<br />
keypad, if the transaction is intended to run as a Loyalty Card transaction and press “Enter”. (The enter key is the same as “Yes”<br />
key and is the green key located at the bottom)<br />
b. Press “2-ISSUE” to activate the loyalty card and then press “Enter”<br />
c. Swipe the loyalty card through the slot on the right side of the terminal<br />
d. Type in the full reference number printed at the back of the card and press “Enter”<br />
e. Terminal begins Dialing sequence (Dialing, Processing, etc.) It will give an approval and print a copy of the issue receipt and will<br />
prompt to print another receipt for the customer copy.<br />
2. Accumulation on a Loyalty Card<br />
a. Press the “Verify” key on the keypad (The Verify key is the orange key in the first row)<br />
b. Press the “4” numeric key from the keypad, if you intend to run the transaction as a Loyalty Card transaction and press “Enter”. (The<br />
enter key is the same as “Yes” key and is the green key located at the bottom)<br />
c. Press the “1” numeric key from the keypad, to run the transaction as a Accumulation and press “Enter”<br />
d. Swipe the card through the slot on the right side of the terminal<br />
e. Type in the amount of accumulation and press “Enter”<br />
f. Terminal begins Dialing sequence (Dialing, Processing, etc.) It will give an approval and print a copy of the accumulation receipt and<br />
will prompt to print another receipt for the customer copy.<br />
3. Redemption on a Loyalty Card<br />
a. Press the “Verify” key on the keypad (The verify key is the orange key in the first row)<br />
b. Press the “4” numeric key from the keypad to process the transaction as a loyalty card transaction and press “Enter”<br />
c. Press “3” to run the transaction as “Redeem”<br />
d. Swipe the loyalty card through the slot on the right side of the terminal<br />
e. Type in the level of redemption and press “Enter”<br />
f. Terminal begins Dialing sequence (Dialing, Processing, etc.) It will give an approval and print a copy of the redemption receipt and will<br />
prompt to print another receipt for the customer copy<br />
4. Performing a Balance Inquiry<br />
a. Press “Bal Inq” on the keypad (The balance inquiry key is the first key in the second row)<br />
b. Press the arrow key on the keypad (next to the “no” key) to go to the next menu<br />
c. Press “4” for balance inquiry about the loyalty card and swipe the card through the slot on the right side of the terminal<br />
d. Terminal begins Dialing sequence (Dialing, Processing, etc.) It will give an approval and print a copy of the balance inquiry receipt<br />
5. Transferring a Loyalty Card balance<br />
a. Press the “Verify” key on the keypad (The verify key is the orange key in the first row)<br />
b. Press the “4” numeric key from the keypad to process the transaction as a loyalty card transaction and press “Enter”<br />
c. Press the arrow key on the keypad (next to the “no” key) to go to the next menu<br />
d. Press “6” for balance transfer<br />
e. Swipe the card from which the balance is to be transferred<br />
f. Swipe in the card on which the balance is to be transferred<br />
g. Terminal begins Dialing sequence (Dialing, Processing, etc.) The terminal processes the transaction, transfers the balances, prints a<br />
copy of the balance transfer receipt and prompts to print another receipt for the customer copy<br />
<strong>Secure</strong> <strong>Payment</strong> <strong>Systems</strong> Customer Service/ Technical Support – 888.313.7842
6. Miscellaneous Administrative Issues<br />
a. Reprint Receipt (in case there was a printer problem)<br />
<strong>Secure</strong> <strong>Payment</strong> <strong>Systems</strong> Rev 1.1<br />
HYPERCOM <strong>T7Plus</strong> LOYALTY CARD INSTRUCTIONS<br />
i. Press the “Reprint” key (The reprint key is the last key in the third row) and enter in the invoice number found on the original<br />
copy. If original copy not available, press the “Reports” key (The reports key is the first key in the third row) on the terminal,<br />
press “3” for audit and then press “Enter”.<br />
b. Void Transaction (in case a transaction is to be cancelled)<br />
i. On the keypad, press the “Void” key (The void key is the third orange key from the top) and type in the invoice number found on<br />
the receipt or audit report. Verify that the amount is correct for the transaction and press “Enter”<br />
7. SPS Batch Close<br />
a. If not on “Auto Settle”, press the “Settle” key (The settle key is the fifth key in the first row) .At the: “Enter password” prompt, enter<br />
the password. (Generally it is four zeros (0000)) then press “Enter”.<br />
i. The Terminal will scan the batch and then display totals and ask if they are correct.<br />
ii. If satisfied with totals press “Yes” or “Enter”. The terminal will dial the SPS processing center, clear the batch, and print a totals<br />
report.<br />
8. Printing a Summary Report<br />
a. Press the “Reports” key on the keypad (The Reports key is the first key in the third row)<br />
b. Press “4” for summary and then press “Enter”<br />
9. Printing an Audit Report<br />
a. Press the “Reports” key on the keypad (The Reports key is the first key in the third row)<br />
b. Press “3” for audit and then press “Enter”<br />
c. Type in the Host number and press “Enter”<br />
10. Printing Batch History Report<br />
a. Press the “Reports” key on the keypad (The Reports key is the first key in the third row)<br />
b. Press “5” for history and then press “Enter”<br />
c. Type 03 for SPS and press “Enter”<br />
d. Type the desired start date in Month, Day, and Year format, and then press “Enter”<br />
<strong>Secure</strong> <strong>Payment</strong> <strong>Systems</strong> Customer Service/ Technical Support – 888.313.7842