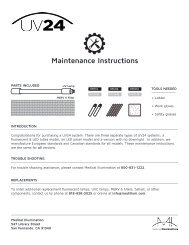
Manual UV24-Operating-Instructions-8.26.19

You also want an ePaper? Increase the reach of your titles
YUMPU automatically turns print PDFs into web optimized ePapers that Google loves.
Step 7:
With the mount in position drive the #6 self-drilling fasteners through the holes in the
mount flange, through the ceiling material, and through the ceiling grid structural members.
Pay close attention to insure the screws fully penetrate the ceiling grid structural members
and tighten properly against the mount flange. (Cutaway view provided for illustration, the
ceiling will normally be solid as shown in the previous pictures)
(Hard Ceiling Mount, Flange) (Sheet Rock) (Structural Ceiling Beam) (Image 24)
When using self-drilling screws, make sure the threaded portion of the screw is long enough to
traverse all ceiling material and completely pass through the structural ceiling member.
Take care not to strip out the fastener in the structural ceiling members. (Structural ceiling
grids are usually made from lightweight aluminum and can be stripped if close attention is not
paid during installation. If you do strip even a single screw hole, the fixture must be moved
slightly to a new positon that allows all fasteners to be re-installed so there are no stripped
screw holes. Please consult the ceiling grid manufacturer’s guidelines regarding the safe
minimum and maximum whole spacing.
IMPORTANT NOTICE: When installing the VidaShield UV24 Hard Ceiling Mount, all screws must
be utilized and all screws must pass through the structural ceiling grid. These two requirements
must be completely achieved or the installation will not meet OSHPD compliance requirements
and could result in damage or injury.
(24)
Rev. 8/26/19 18