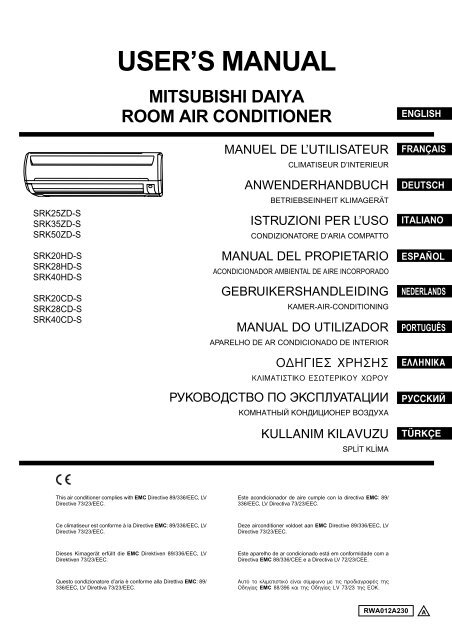
USER'S MANUAL - Mitsubishi Heavy Industries Ltd.
USER'S MANUAL - Mitsubishi Heavy Industries Ltd.
USER'S MANUAL - Mitsubishi Heavy Industries Ltd.

Create successful ePaper yourself
Turn your PDF publications into a flip-book with our unique Google optimized e-Paper software.
SRK25ZD-S<br />
SRK35ZD-S<br />
SRK50ZD-S<br />
SRK20HD-S<br />
SRK28HD-S<br />
SRK40HD-S<br />
SRK20CD-S<br />
SRK28CD-S<br />
SRK40CD-S<br />
USER’S <strong>MANUAL</strong><br />
MITSUBISHI DAIYA<br />
ROOM AIR CONDITIONER<br />
This air conditioner complies with EMC Directive 89/336/EEC, LV<br />
Directive 73/23/EEC.<br />
Ce climatiseur est conforme à la Directive EMC: 89/336/EEC, LV<br />
Directive 73/23/EEC.<br />
Dieses Kimagerät erfüllt die EMC Direktiven 89/336/EEC, LV<br />
Direktiven 73/23/EEC.<br />
Questo condizionatore d’aria è conforme alla Direttiva EMC: 89/<br />
336/EEC, LV Direttiva 73/23/EEC.<br />
MANUEL DE L’UTILISATEUR<br />
CLIMATISEUR D’INTERIEUR<br />
ANWENDERHANDBUCH<br />
BETRIEBSEINHEIT KLIMAGERÄT<br />
ISTRUZIONI PER L’USO<br />
CONDIZIONATORE D’ARIA COMPATTO<br />
<strong>MANUAL</strong> DEL PROPIETARIO<br />
ACONDICIONADOR AMBIENTAL DE AIRE INCORPORADO<br />
GEBRUIKERSHANDLEIDING<br />
KAMER-AIR-CONDITIONING<br />
<strong>MANUAL</strong> DO UTILIZADOR<br />
APARELHO DE AR CONDICIONADO DE INTERIOR<br />
√¢∏°π∂ Ã∏∏<br />
∫§πª∞∆π∆π∫√ ∂ø∆∂ƒπ∫√À Ãøƒ√À<br />
РУКОВОДСТВО ПО ЭКСПЛУАТАЦИИ<br />
КОМНАТНЫЙ КОНДИЦИОНЕР ВОЗДУХА<br />
KULLANIM KILAVUZU<br />
SPL‹T KL‹MA<br />
Este acondicionador de aire cumple con la directiva EMC: 89/<br />
336/EEC, LV Directiva 73/23/EEC.<br />
Deze airconditioner voldoet aan EMC Directive 89/336/EEC, LV<br />
Directive 73/23/EEC.<br />
Este aparelho de ar condicionado está em conformidade com a<br />
Directiva EMC 88/336/CEE e a Directiva LV 72/23/CEE.<br />
∞˘Ùfi ÙÔ ÎÏÈÌ·ÙÈÛÙÈÎfi Â›Ó·È Û‡ÌʈÓÔ Ì ÙȘ appleÚԉȷÁڷʤ˜ Ù˘<br />
√‰ËÁ›·˜ EMC 88/396 Î·È Ù˘ √‰ËÁ›·˜ LV 73/23 Ù˘ ∂√∫.<br />
RWA012A230<br />
ENGLISH<br />
FRANÇAIS<br />
DEUTSCH<br />
ITALIANO<br />
ESPAÑOL<br />
NEDERLANDS<br />
PORTUGUÊS<br />
∂§§∏¡π∫∞<br />
РУССКИЙ<br />
TÜRKÇE<br />
A
Thank you for purchasing a <strong>Mitsubishi</strong> Daiya Air Conditioner. To get the best long-lasting<br />
performance, read and follow this User’s Manual carefully before using your air conditioner.<br />
After reading, please store the Manual in a safe place and refer to it for operational<br />
questions or in the event of any irregularities.<br />
This air conditioner is intended for domestic use.<br />
This instruction manual contains the explanation of the heatpump air-conditioner.<br />
That of cooling-only air-conditioner shall be referred to the same explanation , with<br />
neglecting the information on heating-operation mode.<br />
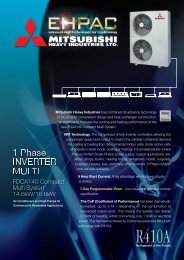
A new refrigerant (R410A) is used in this air-conditioner. When asking the dealer for<br />
service or inspection and maintenance, explain the dealer about this matter.<br />
Contents<br />
Safety precautions......................................................................................................................... 2<br />
Choice of operations and features ................................................................................................ 4<br />
Name of each part and its function ............................................................................................... 5<br />
Operation and indication section for remote control .................................................................... 7<br />
AUTO mode operation procedure ................................................................................................ 8<br />
Temperature adjustment during AUTO........................................................................................ 8<br />
COOL/HEAT/DRY/FAN mode operation procedure .................................................................. 9<br />
Concerning high power operation ................................................................................................ 9<br />
Concerning economy operation .................................................................................................... 9<br />
Air flow direction adjustment procedure .................................................................................... 10<br />
Emergency run operation............................................................................................................ 10<br />
OFF-TIMER operation procedure .............................................................................................. 11<br />
ON-TIMER operation procedure................................................................................................ 11<br />
Program TIMER operation procedure ........................................................................................ 12<br />
About TIMER operation............................................................................................................. 12<br />
Present time setting produre ....................................................................................................... 12<br />
About FAN SPEED .................................................................................................................... 13<br />
Remote control handling procedure ........................................................................................... 13<br />
When the operation fails with the remote control ...................................................................... 14<br />
Operating hints ........................................................................................................................... 14<br />
Maintenance................................................................................................................................ 15<br />
Has the unit been installed correctly? ......................................................................................... 16<br />
Troubleshooting .......................................................................................................................... 17<br />
Please remember! ....................................................................................................................... 17<br />
When to contact your distributor without delay ......................................................................... 18<br />
Air conditioner operating conditions .......................................................................................... 19<br />
Power Blackout Auto Restart Function ...................................................................................... 19<br />
Characteristics of HEAT mode operation .................................................................................. 19<br />
Self diagnosis function ............................................................................................................... 20<br />
–1–<br />
ENGLISH
Safety precautions<br />
• Before starting to use the system, please read these “Safety precautions” carefully to ensure proper operation of the system.<br />
• The safety precautions are classified as “ DANGER” and “ CAUTION”. Precautions as shown in the column “ DANGER” indicate that<br />
improper handling could have dramatic consequences like death, serious injury, etc. Nevertheless, even precautions as shown in the column<br />
“ CAUTION” might pose a serious problem, depending on the circumstances. Please observe these precautions with great care, since they are<br />
essential to your safety.<br />
• Symbols which appear frequently in the text have the following meaning:<br />
Observe instructions with<br />
Strictly prohibited Provide positive earthing<br />
great care<br />
• When you have read the instruction manual, please keep it near at hand for consultation. If someone else takes over as operator, make certain that the<br />
manual is also passed on to the new operator.<br />
❚ INSTALLATION PRECAUTIONS<br />
The system is meant for domestic, residential etc. use.<br />
If used in inferior environments, such as an engineering workplace, the equipment<br />
may function poorly.<br />
Do not install near places where inflammable gas may leak.<br />
Gas leaks may cause fire.<br />
LPG<br />
Make sure that you drain the hose properly, so that all the<br />
water has dripped out.<br />
Negligence may cause flooding in the room resulting in wet furniture.<br />
❚ OPERATION PRECAUTIONS<br />
Do not expose yourself to the cooling air for prolonged periods.<br />
This could affect your physical condition and cause health problems.<br />
Store the remote controller out of reach of infants.<br />
Failure to observe this may result in the batteries<br />
being swallowed or other accidents.<br />
DANGER<br />
CAUTION<br />
–2–<br />
Depending on the place of installation, a circuit breaker may<br />
be necessary.<br />
DANGER<br />
The system must be installed by your dealer or a qualified professional.<br />
It is not advisable to install the system yourself, as faulty handling may cause leakage<br />
of water, electric shock or fire.<br />
If you don’t fit a circuit breaker, you may cause an electric shock.<br />
Make sure that the system has been properly earthed.<br />
Earth cables should never be connected to a gas pipe, municipal water pipe, lightning<br />
conductor or telephone earth cable. Incorrect installation of the earth cable<br />
may produce an electric shock.<br />
Do not insert anything into the air inlet.<br />
This may cause injury, as the internal fan rotates at high speed.
Safety precautions<br />
Only use approved fuses.<br />
Use of steel or copper wire instead of an approved<br />
fuse is strictly forbidden, as it may cause a breakdown<br />
or fire.<br />
Do not place a combustible insecticide<br />
or paint spray near the blower, nor aim it<br />
directly at the system.<br />
This may result in a fire.<br />
The system should only be used for its original purpose<br />
and not for anything else like, for instance, preservation of<br />
food, plants or animals, precision devices or works of art.<br />
The system is only intended for use in ordinary domestic rooms.<br />
Any other use of the system may damage the quality of food, etc.<br />
Do not sit on the outdoor unit nor put<br />
anything on it.<br />
If the unit falls down or things drop off it, people<br />
could get hurt.<br />
If you operate the system together with<br />
a combustion appliance, you must regularly<br />
ventilate the indoor air.<br />
Insufficient ventilation may cause accidents due to<br />
oxygen deficiency.<br />
Consult your dealer for repairs to the<br />
system.<br />
Wrong repairs could cause an electric shock, fire, etc.<br />
CAUTION<br />
Do not handle the switches with wet<br />
hands.<br />
This may cause an electric shock.<br />
You should not expose any combustion<br />
appliance directly to the air<br />
stream of the air conditioner.<br />
The appliance may then work inadequately.<br />
Do not place anything containing water,<br />
like vases, on top of the unit.<br />
Water entering the unit could damage the insulation<br />
and therefore cause an electric shock.<br />
After a long period of use, check the unit's<br />
support structure from time to time.<br />
If you don't repair any damage straightaway, the<br />
unit may fall down and cause personal injury.<br />
Stand firmly on a stepladder or other<br />
stable object when removing the intake<br />
grill and filters.<br />
Failure to observe this may result in injury through<br />
insecure objects toppling over.<br />
❚ PRECAUTIONS FOR TRANSFER OR REPAIRS<br />
DANGER<br />
If the air conditioner is moved elsewhere,<br />
contact your dealer or a professional<br />
fitter.<br />
Faulty installation may cause water leakage, electric<br />
shock, fire, etc.<br />
–3–<br />
Don’t swing from the system.<br />
If the system falls down,<br />
you may get injured.<br />
Do not wash the air conditioner with water.<br />
This could cause an electric shock.<br />
Do not install the system at a place<br />
where the air stream of the blower is<br />
aimed directly at plants or animals.<br />
This will damage their health.<br />
Do not touch the aluminum fins on the<br />
air heat exchanger.<br />
Failure to observe this may result in injury.<br />
When you clean the system, stop the<br />
unit and turn off the power switch.<br />
Never clean the unit while the internal fan is rotating.<br />
If you notice anything abnormal (smell of<br />
burning, etc.), stop the system, turn off the<br />
power switch and consult your dealer.<br />
Continued use of the system in abnormal circumstances<br />
may result in malfunctioning, electric shock,<br />
fire, etc.
Choice of operations and features<br />
Choise of operations<br />
HEAT<br />
Page 9<br />
The unit draws in heat from the outside air,<br />
transfers it inside and heats the room.<br />
FAN<br />
Page 9<br />
Fanning by circulating room air.<br />
Characteristics<br />
COOL Page 9<br />
DRY<br />
Cooling by extracting heat from the room.<br />
–4–<br />
Page 8<br />
Automatic selection of operating mode.<br />
Amenity facility Page 12<br />
TIMER procedure Page 11,12 HI POWER mode<br />
When using the timer to switch on, the system<br />
become operational shortly before the<br />
set time, depending on the room temperature<br />
so that the desired temperature is<br />
reached at the set time.<br />
Adjustment of<br />
airflow<br />
Page 10<br />
AUTO<br />
There are two timers, for ON and OFF.<br />
They can be set as desired.<br />
• AIR SCROLL<br />
This function sets the unit at the most suitable angle<br />
for blowing, imitating a natural breeze.<br />
• MEMORY FLAP<br />
Once the flap position has been set, the unit will<br />
memorise it and continue in the same position the<br />
next time.<br />
Page 9<br />
Drying by extracting damp from the room.<br />
Functioning of micro-computer depends on<br />
setting and room temperatures. It dehumidifies<br />
while keeping room temperature almost<br />
constant.<br />
The Auto mode automatically selects the<br />
operation mode (HEAT, COOL or DRY),<br />
depending on the room temperature when<br />
switched on.<br />
Page 9<br />
Turning up the power operates the air conditioner<br />
in the power cooling and heating<br />
mode.<br />
ECONOMY mode<br />
Page 9<br />
This is an economic and healthy level of operation.
Name of each part and its function<br />
INDOOR UNIT<br />
SRK25ZD-S<br />
SRK35ZD-S<br />
SRK50ZD-S<br />
OUTDOOR UNIT<br />
SRC25ZD-S<br />
SRC20HD-S<br />
SRC20CD-S<br />
SRC35ZD-S<br />
SRC28HD-S<br />
SRC28CD-S<br />
SRK20HD-S<br />
SRK28HD-S<br />
SRK40HD-S<br />
Air inlet<br />
(on side & rear surface)<br />
Air outlet<br />
SRK20CD-S<br />
SRK28CD-S<br />
SRK40CD-S<br />
SRC50ZD-S<br />
SRC40HD-S<br />
SRC40CD-S<br />
Draws in the indoor air.<br />
–5–<br />
Air inlet grille<br />
Air filter<br />
Removes dust or dirt from the inlet air.<br />
Page 15<br />
Natural enzyme filter<br />
Photocatalytic washable deodorizing filter<br />
Room temperature detector<br />
Unit operation section<br />
Unit indication section and remote control signal receiver<br />
Air blows out of here.<br />
Drains water from the dehumidified air.<br />
Left/right air flow adjustment fin<br />
Page 10<br />
Drain hose<br />
Wireless remote control<br />
Page 7<br />
Up/down air flow direction adjustment flap<br />
Page 10<br />
Air outlet<br />
Refrigerant piping connection electric flex<br />
Accessories<br />
HI POWER ECONO<br />
AUTO<br />
HI<br />
MED<br />
LO<br />
FAN SPEED ON OFF<br />
MODE<br />
HI POWER TEMP ECONO<br />
AIR FLOW<br />
TIME<br />
CANCEL<br />
ON OFF RESERVE<br />
TIMER<br />
TIME ACL<br />
Wireless remote control<br />
Filter holder (Quantity: 2)<br />
Installation sheet<br />
Instruction manual<br />
Battery (RO3×2)<br />
Natural enzyme filter (green)<br />
Photocatalytic washable<br />
deodorizing filter (orange)<br />
Wood screw<br />
(for remote control mounting)
Unit indication section<br />
How to open the air inlet grill<br />
Place fingers at the recesses on both sides of the grill and pull up the grill to this side so that it will be opened by about 60 degrees.<br />
How to close the air inlet grill<br />
Push both sides evenly and press further lightly at the center.<br />
Unit ON/OFF button<br />
In emergencies, this button can be used for turning on/off the unit when remote control is not available. Page 10<br />
ON/OFF button<br />
Removal, installation of air inlet grill<br />
RUN (HOT KEEP) light (green)<br />
• Illuminates during operation.<br />
• Blinks at air flow stop due to the ‘HOT KEEP’.<br />
When removing the air inlet grill for internal cleaning or others, open the grill by<br />
65 degrees and then pull it to this side.<br />
Page 17<br />
TIMER light (yellow)<br />
Illuminates during TIMER operation.<br />
HI POWER light (green)<br />
Illuminates during HI POWER operation.<br />
ECONOMY light (orange)<br />
Illuminates during ECONOMY operation.<br />
–6–<br />
Secure either the upper or lower edge of the air inlet grill by lightly pushing it in,<br />
and then close the grill.
Operation and indication section for remote control<br />
Operation section<br />
FAN SPEED button<br />
Each time the button is pushed, the indicator<br />
is switched over in turn.<br />
HI POWER button<br />
This button changes the HI POWER mode.<br />
Page 9<br />
AIR FLOW button<br />
This button changes the flap mode. When<br />
pressed, this button changes the mode in the<br />
following order:<br />
(Air scroll) (SWING)<br />
Page 10<br />
ON TIMER button<br />
This button selects ON TIMER operation.<br />
Page 11<br />
Clock switch<br />
This switch for setting the clock.<br />
Page 12<br />
OFF TIMER button<br />
This button selects OFF TIMER operation.<br />
Page 11<br />
Indication section<br />
HI POWER MODE indicator<br />
Indicates during Hi power mode operation.<br />
TEMPERATURE Indicator<br />
Indicates set temperature.<br />
(Does not indicate temperature when operation<br />
mode is on AUTO)<br />
FAN SPEED Indicator<br />
Indicates set air flow rate with lamp.<br />
AIR FLOW Indicator<br />
Shows selected flap mode.<br />
ON TIMER Indicator<br />
Indicates during ON TIMER operation.<br />
Transmission procedure<br />
AUTO<br />
HI<br />
MED<br />
LO<br />
AUTO<br />
HI<br />
MED<br />
LO<br />
HI POWER ECONO<br />
FAN SPEED ON<br />
HI POWER TEMP ECONO<br />
AIR FLOW<br />
ON OFF<br />
TIME<br />
AM PM<br />
OFF<br />
HI POWER ECONO<br />
AM PM<br />
ON OFF<br />
–7–<br />
MODE<br />
CANCEL<br />
ON OFF RESERVE<br />
TIMER<br />
TIME ACL<br />
• The above illustration shows all controls, but in practice<br />
only the relevant parts are shown.<br />
OPERATION MODE select button<br />
Each time the button is pushed, the indicator<br />
is switched over in turn.<br />
ON/OFF button<br />
Press for starting operation, press again for<br />
stopping.<br />
ECONOMY button<br />
This button changes the ECONOMY mode.<br />
Page 9<br />
TEMPERATURE button<br />
This button sets the room temperature.<br />
(This button changes the present time and<br />
TIMER time.)<br />
CANCEL button<br />
This button cancels the ON timer and OFF<br />
timer.<br />
RESERVE button<br />
This button sets the present time and<br />
TIMER time.<br />
RESET switch<br />
Switch for resetting microcomputer.<br />
Page 13<br />
ECONOMY MODE indicator<br />
Indicates during economy mode operation.<br />
OPERATION MODE Indicator<br />
Indicates selected operation with<br />
ZD, HD type:<br />
lamp.<br />
[ (Auto) • (Cool) • (Heat) • (Dry)]<br />
CD type:<br />
[ (Auto) • (Cool) • (Fan) • (Dry)]<br />
Clock Indicator<br />
Indicates present time or timer setting time.<br />
OFF TIMER Indicator<br />
Indicates during OFF TIMER operation.<br />
When each button on the remote control is pressed – with the remote control pointing towards the air conditioner unit – a signal is transmitted.<br />
When the signal is received correctly, the unit will beep.
AUTO mode operation procedure<br />
■ Automatically selects the operation mode (HEAT, DRY, COOL) depending on the room temperature when switched on.<br />
AUTO<br />
HI<br />
MED<br />
LO<br />
HI POWER ECONO<br />
FAN SPEED ON<br />
HI POWER TEMP ECONO<br />
AIR FLOW<br />
AM<br />
TIME<br />
OFF<br />
MODE<br />
CANCEL<br />
ON OFF RESERVE<br />
TIMER<br />
TIME ACL<br />
Air flow direction adjustment<br />
procedure. Page 10<br />
NOTE<br />
1<br />
2<br />
Aim the remote control at the air conditioner.<br />
–8–<br />
Press the ON/OFF button.<br />
When the unit is not in AUTO mode:<br />
Press MODE button.<br />
Move the [ mark] to the (Auto) position.<br />
Temperature adjustment during AUTO<br />
Air temperature adjustment is possible even during automatic operation. There are 6 levels of adjustment possible with the button or the button.<br />
1<br />
WARM<br />
Press the button.<br />
When a change in temperature is desired.<br />
Press the or button.<br />
• Air is not blowing out during the operation.<br />
Page 17<br />
AUTO<br />
HI<br />
MED<br />
LO<br />
HI POWER ECONO<br />
FAN SPEED ON<br />
HI POWER TEMP ECONO<br />
AIR FLOW<br />
AM<br />
TIME<br />
OFF<br />
MODE<br />
CANCEL<br />
ON OFF RESERVE<br />
TIMER<br />
TIME ACL<br />
To stop: Press the ON/OFF button.<br />
AUTO mode can be<br />
operated by simply<br />
pressing the ON/OFF<br />
button.<br />
• If you don’t want the AUTO mode programme, change to<br />
HEAT, DRY or COOL instead of AUTO.<br />
Page 9<br />
COOL<br />
Press the button.<br />
■ Each time the button is pushed, the switch over occurs in the following order –6 → –5 → ............ –1 → ±0 → +1 ............ +6.<br />
When +6 is indicatored, even if the button is pushed, the indicator does not change.<br />
■ Each time the button is pushed, the switch over occurs in the following order +6 → +5 → ............ +1 → ±0 → –1 ............ –6.<br />
When –6 is indicatored, even if the button is pushed, the indicator does not change.
COOL/HEAT/DRY/FAN mode operation procedure<br />
AUTO<br />
HI<br />
MED<br />
LO<br />
HI POWER ECONO<br />
FAN SPEED ON<br />
HI POWER TEMP ECONO<br />
AIR FLOW<br />
AM<br />
TIME<br />
OFF<br />
MODE<br />
CANCEL<br />
ON OFF RESERVE<br />
TIMER<br />
TIME ACL<br />
Air flow direction adjustment procedure. Page 10<br />
NOTE<br />
• The air is not blown out during the operation.<br />
Page 17<br />
1<br />
2<br />
3<br />
4<br />
Aim the remote control at the air conditioner.<br />
–9–<br />
Press the ON/OFF button.<br />
Press the MODE select button.<br />
Move the [ mark] to the desirable operation position.<br />
ZD, HD type: (Cool), (Heat), (Dry)<br />
CD type: (Cool), (Fan), (Dry)<br />
Press the TEMP button.<br />
Press or button for the desired temperature.<br />
Standard<br />
COOL<br />
HEAT<br />
26°C~28°C 22°C~24°C 21°C~24°C FAN<br />
Press the FAN SPEED button<br />
Set the air flow rate as desired.<br />
Concerning high power operation<br />
DRY<br />
To stop: Press the ON/OFF button.<br />
Program changing procedure<br />
Set the new program.<br />
• The operation program can also be set or changed when<br />
the air conditioner is not in operation.<br />
Pressing the high power button intensifies the operating power and initiates a powerful cooling or heating operation for 15 minutes continuously.<br />
The remote controller “HI POWER” illuminates but the wind capacity display is erased.<br />
▲<br />
NOTE<br />
• During the high power operation, the room temperature is not controlled.<br />
When it causes an excessive cooling or heating, press the<br />
high power button once more to cancel the high power operation.<br />
• High power operation is not available during the dehumidifying<br />
operation.<br />
• During ON timer operation, HI POWER operation will start when<br />
the ON time is reached.<br />
Concerning economy operation<br />
Pressing the economy button initiates a soft operation with the power suppressed in order to avoid an excessive cooling or heating. The unit operates<br />
1.5°C higher than the setting temperature for the weak wind capacity during cooling or 2.5°C lower than that during heating. A message “ECONO” is<br />
displayed on the remote controller. The wind capacity display is erased.<br />
▲<br />
NOTE<br />
• If the economy operation is selected while operating with the<br />
strong or medium wind capacity, it takes about 1 minute before the<br />
wind capacity drops to the weak level.<br />
• When the following operations are conducted HI POWER operation<br />
will be canceled.<br />
1 When the HI POWER button is pressed again.<br />
2 When the operation mode is changed.<br />
3 When ECONOMY operation is conducted.<br />
• When the following operations are conducted ECONOMY operation<br />
will be canceled.<br />
1 When the ECONOMY button is pressed again.<br />
2 When HI POWER operation is selected.
Air flow direction adjustment procedure<br />
Adjusting up/down air flow direction<br />
■ Up/down direction can be adjusted with the AIRFLOW button on the remote control. Each time when you press this button the mode changes<br />
as follows:<br />
Change to AIRFLOW mode.<br />
NOTE<br />
Air scroll<br />
In COOL, DRY and FAN operation In HEAT operation<br />
Stops at this position<br />
for 5 seconds.<br />
Thick line : moves quickly<br />
Thin line : moves slowly<br />
– 10 –<br />
Flap moves up and down<br />
continuously.<br />
• If the room temperature control (thermostat) switches to the heating mode or if the defrosting operation is on, the blow flap changes automatically to a horizontal<br />
position.<br />
• If the heating operation has just started and the room temperature is still low, it may take a while before the flap moves to the above sway operation angle.<br />
• The flap may stop at the tilted down-blow position during the “sway operation” in the heating mode.<br />
MEMORY FLAP (FLAP STOPPED)<br />
When you press the AIRFLOW button once while the flap is operating, it stops swinging at an<br />
angle.Since this angle is memorized in the micro-computer, the flap will automatically be set at this<br />
angle when the next operation is started.<br />
• Recommended angle of the flap when stopping<br />
HEAT<br />
Stops at this position<br />
for 5 seconds.<br />
(Slant forward<br />
blowing)<br />
DANGER<br />
• Avoid constant airflow to the body for hours on end.<br />
CAUTION<br />
• When in COOL or DRY operation, do not operate for hours on end with the air<br />
flow blowing straight down. Otherwise, condensation may appear on the outlet<br />
grill and drip down.<br />
• Do not try to adjust the flaps by hand, as the control angle may change or the flap<br />
may not close properly.<br />
Emergency run operation<br />
• The ON/OFF button on the unit operates ON/OFF temporarily when the remote control is not used.<br />
Operation program<br />
• OPERATION MODE : AUTO<br />
• FAN SPEED : AUTO<br />
• AIR FLOW : Air scroll<br />
Thick line : moves quickly<br />
Thin line : moves slowly<br />
(Air scroll) (SWING) (flap stopped)<br />
COOL, DRY<br />
(Horizontal<br />
blowing)<br />
• Operation starts by pressing the ON/OFF button; it stops if you press the button again.<br />
SWING FLAP<br />
Adjusting left/right air flow direction<br />
Adjust the direction by moving the left/right<br />
air flow fin by hand.<br />
CAUTION<br />
Please stop the air conditioner when<br />
adjusting the air flow direction.<br />
Unit ON/OFF button
OFF-TIMER operation procedure<br />
■ The unit stops automatically at the end of the set period of time.<br />
AUTO<br />
HI<br />
MED<br />
LO<br />
HI POWER ECONO<br />
FAN SPEED ON<br />
HI POWER TEMP ECONO<br />
AIR FLOW<br />
TIME<br />
OFF<br />
PM<br />
OFF<br />
CANCEL<br />
ON OFF RESERVE<br />
TIMER<br />
TIME ACL<br />
Changing of set time<br />
MODE<br />
Set a new time by using the OFF TIMER button.<br />
Releasing procedure<br />
Press the CANCEL button to turn off the timer indicator.<br />
1<br />
2<br />
3<br />
4<br />
Example: You wish it to stop PM 10:30.<br />
If the air conditioner is not operating, aim the remote control at the air conditioner.<br />
Press the ON/OFF button.<br />
Press the OFF TIMER button.<br />
OFF TIMER indicator OFF is blinking.<br />
Press the “ or ” button.<br />
Each time the button is pressed, the indicator is switched in the order of:<br />
– 11 –<br />
AM<br />
0:00<br />
AM<br />
0:10<br />
AM<br />
0:20<br />
... AM AM ...<br />
1:00 1:10<br />
Each time the button is pressed, the indicator is switched in the order of:<br />
AM<br />
0:00<br />
Set at PM 10:30.<br />
PM<br />
11:50<br />
PM<br />
11:40<br />
Press the RESERVE button.<br />
ON-TIMER operation procedure<br />
AUTO<br />
HI<br />
MED<br />
LO<br />
HI POWER ECONO<br />
FAN SPEED ON<br />
HI POWER TEMP ECONO<br />
AIR FLOW<br />
ON<br />
AM<br />
TIME<br />
OFF<br />
MODE<br />
CANCEL<br />
ON OFF RESERVE<br />
TIMER<br />
TIME ACL<br />
Changing of set time<br />
Set a new time by using the ON TIMER button.<br />
1<br />
2<br />
... PM PM ...<br />
11:00 10:50<br />
The indication changes from blinking to steady lighting and the setting is complete.<br />
The timer light (yellow) is on.<br />
⇓<br />
• The unit stops at the end of the set period of time.<br />
■ If the room temperature is at near optimum temperature at the set time, the operation starts 5 to 60 minutes before the set time. Page 12<br />
3<br />
Example: In the case you wish to bring the temperature to nearly set temperature in at AM 8:00.<br />
Press the ON TIMER button.<br />
ON TIMER indicator ON is blinking.<br />
Press the “ or ” button.<br />
Each time the button is pressed, the indicator is switched in the order of:<br />
AM<br />
0:00<br />
AM<br />
0:10<br />
AM<br />
0:20<br />
... AM AM ...<br />
1:00 1:10<br />
Each time the button is pressed, the indicator is switched in the order of:<br />
AM<br />
0:00<br />
Set at AM 8:00.<br />
PM<br />
11:50<br />
PM<br />
11:40<br />
Press the RESERVE button.<br />
... PM PM ...<br />
11:00 10:50<br />
The indication changes from blinking to steady lighting and the setting is complete.<br />
The timer light (yellow) is on.<br />
⇓<br />
• Operation starts 5 to 60 minutes before the set time.<br />
• The TIMER light goes out at the set time.<br />
Releasing procedure<br />
Press the CANCEL button to turn off the timer indicator.
PROGRAM TIMER operation procedure<br />
■ The timer operations that consist of the combination of the timer being set at both on and off. Once this has been set and operations started,<br />
operations will commence and end at the same time every day as long as the ON/OFF button is not pressed.<br />
AUTO<br />
HI<br />
MED<br />
LO<br />
HI POWER ECONO<br />
FAN SPEED ON OFF<br />
HI POWER TEMP ECONO<br />
AIR FLOW<br />
TIME<br />
PM<br />
ON OFF<br />
MODE<br />
CANCEL<br />
ON OFF RESERVE<br />
TIMER<br />
TIME ACL<br />
Changing of set time<br />
Set a new time by using the OFF TIMER or ON TIMER button.<br />
1<br />
About TIMER operation<br />
Example: When it is desired to stop at 10:30 PM, and then start operation at 8:00 AM,<br />
near the set temperature.<br />
Press the ON/OFF button.<br />
■ OFF TIMER operation setting<br />
– 12 –<br />
Set by the procedures on page 11.<br />
Set to<br />
PM<br />
OFF<br />
.<br />
■ ON TIMER operation setting<br />
Set by the above mentioned ON TIMER operation procedures.<br />
Set to<br />
ON<br />
AM<br />
.<br />
The setting of the lighting of the timer lamp (yellow) of this unit is complete.<br />
The time will be displayed on the remote control unit. The display will change<br />
depending on the operational status.<br />
ON OFF ON OFF<br />
(Stopped) (Operating)<br />
Releasing procedure<br />
Press the CANCEL button to turn off the timer indicator.<br />
About Amenity facilities<br />
Amenity facilities enable to start the operation a little earlier, so that the room approaches optimum temperature<br />
at ON time when the operation is started by ON-TIMER.<br />
• Mechanism<br />
The room temperature is checked 60 minutes before the timer is at ON. Depending on the temperature at that<br />
time, the operation starts 5 to 60 minutes before the timer is at ON.<br />
• The Amenity facility only functions for COOL and HEAT operation mode (including AUTO). It does not<br />
work for DRY mode.<br />
Present time setting procedure<br />
■ When inserting the batteries, the present time is automatically set to PM 1:00.<br />
AUTO<br />
HI<br />
MED<br />
LO<br />
HI POWER ECONO<br />
FAN SPEED ON<br />
HI POWER TEMP ECONO<br />
AIR FLOW<br />
AM<br />
TIME<br />
OFF<br />
MODE<br />
CANCEL<br />
ON OFF RESERVE<br />
TIMER<br />
TIME ACL<br />
1<br />
2<br />
3<br />
Example: Set to AM 10:30.<br />
Press the TIME switch.<br />
▼<br />
Set temperature<br />
In COOL operation<br />
(Stop) Operation starts<br />
Check the room temp.<br />
60 mins. in advance.<br />
Press with the tip of a ball pen, etc.<br />
The time indicator blanks and can be set to the current time.<br />
Press the “ or ” button.<br />
(Set to AM 10:30)<br />
Press the RESERVE button.<br />
▼<br />
(Operation)<br />
Set time<br />
The indication changes from blinking to steady lighting and the setting is complete.<br />
NOTE<br />
Press within<br />
15 sec.!<br />
The timer is set on the basis of the present time, so please set it correctly.
About FAN SPEED<br />
■ You can choose the capacity of your air conditioner when heating or cooling.<br />
Operation capacity by your choice FAN SPEED<br />
Set automatically by microcomputer AUTO<br />
Powerful operation with high capacity HI<br />
Standard operation MED<br />
Energy-saving operation LO<br />
Remote control handling procedure<br />
Replacing the batteries<br />
The following cases signify exhausted batteries. Replace old batteries with new ones.<br />
• Receiving beep is not emitted when a signal is transmitted.<br />
• Indicator fades away.<br />
1<br />
2<br />
3<br />
Remove back lid and take out old batteries.<br />
Insert new batteries. (SUM-4 or R03x2)<br />
Close back lid.<br />
Attention to<br />
the , and .<br />
marks<br />
– 13 –<br />
■ When the indicator shows any abnormal condition, Press the reset<br />
switch with the tip of a ballpoint pen.<br />
NOTE<br />
• Don't use old and new batteries together.<br />
• Remove the batteries when the remote control is not used for a<br />
long period.<br />
• The life of a battery conforming to JIS or IEC is 6 to 12 months<br />
with normal use. If used longer, or when an unspecified battery<br />
is used, liquid may leak from the battery, causing the remote<br />
control to malfunction.<br />
• On the battery is printed its expected life. This may be shorter<br />
than that of the air conditioner, depending on the date of manufacture.<br />
• However, the battery may still be in working order after expiry<br />
of its nominal life.<br />
ACL
Warning note for remote control handling<br />
• Don’t go near high temperature<br />
places, such as an electric carpet<br />
or stove.<br />
• Don’t put any obstructing obstacles<br />
between the remote control<br />
and the unit.<br />
• Are the batteries running down? Page 13<br />
Replace the batteries with new ones and repeat the operation.<br />
Operating hints<br />
■ Please observe the following for the most economic and comfortable use of your unit.<br />
Set a suitable room temperature.<br />
Excessively high or low temperatures are not<br />
good for your health and waste electricity.<br />
Adjust the airflow direction properly.<br />
Adjust the up/down and left/right airflow to<br />
ensure a steady room temperature.<br />
• Don’t leave the remote control exposed<br />
to direct sunlight or other<br />
strong lighting.<br />
• Don’t spill water etc on the remote<br />
control.<br />
Clean the filters frequently.<br />
Clogged filters may block the air flow and<br />
cause less efficient operation.<br />
Operate the unit only when needed.<br />
Use the timer properly to operate the unit<br />
only when needed.<br />
– 14 –<br />
• Don’t drop the remote control.<br />
Handle with care.<br />
• Do not place heavy objects on the<br />
remote controller, or step on it.<br />
When the operation fails with the remote control<br />
suitable<br />
temperature<br />
• If the operation still fails, handle as per emergency<br />
run operation.<br />
Contact your dealer.<br />
Avoid direct sunlight and draught.<br />
Cut out direct sunlight by drawing the curtains<br />
or blinds when cooling. Keep windows<br />
and doors shut, except when ventilating.<br />
Generate little heat when cooling.<br />
Page 10<br />
Keep heat sources out of the room as much as<br />
possible.
Maintenance<br />
Turn off the power switch.<br />
Don’t spill water.<br />
Don’t use the following articles:<br />
• Hot water (40°C or more)<br />
It may deform or discolour the unit.<br />
• Petrol, paint thinner, benzine or polishing agents,<br />
etc.<br />
They may deform or scratch the unit.<br />
1<br />
2<br />
3<br />
4<br />
5<br />
Before maintenance During the operational season<br />
NOTE<br />
There's a danger<br />
of electric shock.<br />
Wipe the unit with a soft,<br />
dry cloth.<br />
At the end of the season<br />
Stop the unit and turn off the power switch.<br />
The unit uses appr. 5W even when the power switch has been turned<br />
off during the off-season for safety or for saving energy.<br />
Cleaning the air filter Standard interval is once every two week<br />
1<br />
Remove the air filter<br />
1 Pull up to this side the air inlet grill.<br />
2 Lightly hold the knobs at both sides and<br />
lift a little to remove the grill to this side.<br />
2<br />
3<br />
Cleaning<br />
If the filter is very dirty, clean it with warm water<br />
(approx. 30°C), and dry it thoroughly.<br />
CAUTION<br />
• Don’t clean the filters with boiling water.<br />
• Don’t dry them over an open flame.<br />
• Pull them out gently.<br />
Cleaning the unit<br />
• Wipe the unit with a soft, dry cloth, or use a vacuum cleaner.<br />
• If the unit is very dirty, wipe it with a cloth soaked in warm water.<br />
Cooling/heating is affected by an air filter clogged up with dust etc., and the operation noise becomes louder. It may also<br />
use extra electricity. Please clean the air filter at appropriate intervals.<br />
Set the temperature setting for approximately a half<br />
day at 30°C and perform the cooling operation.<br />
Dry the inside of the unit.<br />
Clean and reinstall the air filters.<br />
Clean both the indoor and outdoor units.<br />
Remove batteries from the remote control.<br />
Reinstall the air filter<br />
• Holding firmly the filter at both sides as shown at right<br />
and insert securely.<br />
• Operating without putting back the air filters will make<br />
the unit dusty, and may cause damage.<br />
Cleaning the air inlet grill<br />
• Removal, installation of air inlet grill. Page 6<br />
• The grill can be washed with water. After washing with<br />
water, wipe any moisture off the grill and dry out of direct<br />
sunlight.<br />
– 15 –<br />
1<br />
2<br />
3<br />
4<br />
5<br />
6<br />
At the beginning of the season<br />
Make certain that there are no obstacles blocking the<br />
air flow around the air intake and outlet openings of<br />
the indoor and outdoor units.<br />
Check the installation base for corrosion or rust.<br />
Ensure that nothing has snapped and that the<br />
earthed flex is not disconnected.<br />
Ensure that the air filters are clean.<br />
Turn on the power switch.<br />
Insert batteries in the remote control.
Installing, inspecting, and replacing the natural enzyme filter and the photocatalytic washable deodorizing filter<br />
• Installing the natural enzyme filter and the photocatalytic washable deodorizing filter<br />
1. Open the air inlet grill and remove the air filters.<br />
2. Install the filter holders, with the natural enzyme filter and the photocatalytic washable<br />
deodorizing filter installed in the holders, in the air conditioner.<br />
3. Install the air filters and close the air inlet grill.<br />
NOTE<br />
The natural enzyme filter and the photocatalytic washable<br />
deodorizing filter may be installed on either the right or left side of<br />
the air conditioner.<br />
• Inspecting and replacing the natural enzyme filter and the photocatalytic washable deodorizing filter<br />
1. Open the air inlet grill and remove the air filters.<br />
2. Remove the filter holders, with the natural enzyme filter and the photocatalytic washable<br />
deodorizing filter installed in the holders, from the air conditioner.<br />
3. Remove the natural enzyme filter from the filter holder and inspect the filter. Use a vacuum<br />
cleaner to remove any dust or dirt from the natural enzyme filter. Replace the natural enzyme<br />
filter if it cannot be cleaned or if it has been used for about 1 year.<br />
(The natural enzyme filter should be replaced after about 1 year of use. However, the actual<br />
replacement period may vary depending on the conditions in which the filter is used.)<br />
Remove the photocatalytic washable deodorizing filter from the filter holder and inspect the<br />
filter. Periodically, remove any dust or dirt from the photocatalytic washable deodorizing<br />
filter. If the photocatalytic washable deodorizing filter is particularly dirty, it may be washed<br />
with water. However, the filter is fragile so be sure to wash it installed in the filter holder to<br />
avoid damaging it. After washing the filter, place it in sunlight to dry. Placing the filter in<br />
sunlight revitalizes the deodorizing effect.<br />
(Do not dispose of the filter holders. They are reused.)<br />
4. Install the natural enzyme filter and the photocatalytic washable deodorizing filter in the filter<br />
holders, and then install the filter holders in the air conditioner.<br />
5. Install the air filters and close the air inlet grill.<br />
For replacement natural enzyme filters and photocatalytic washable deodorizing filters, contact your dealer.<br />
CAUTION<br />
Do not expose natural enzyme filters to direct sunlight for an extended period. The bacteriolytic effect will be lost.<br />
Item Feature Color<br />
Natural enzyme filter<br />
By using the work of oxygen, mold and bacteria on the filter are<br />
destroyed and the room air is kept clean.<br />
Green<br />
Photocatalytic washable<br />
deodorizing filter<br />
Sources of odors on the filter are broken up, resulting in a deodorizing<br />
effect.<br />
Orange<br />
Has the unit been installed correctly?<br />
Suitable installation position<br />
• Is there any obstruction in front of the indoor unit, preventing proper ventilation and functioning?<br />
• Don’t install the unit in any of the following places:<br />
• Where there is a danger of leaking inflammable gases.<br />
• Where there is substantial splashing of oil.<br />
• Malfunctioning due to corrosion may occur if the unit is installed in a spa where sulfide gases are generated, or in a seaside resort exposed to<br />
sea breezes. Contact your dealer.<br />
• The air conditioner and remote control must be at least 1 metre away from a TV set or radio.<br />
• Drain the dehumidified liquid from the indoor unit into a spot that drains well.<br />
Pay attention to operating noises!<br />
• When you install the unit, take care to choose a place that can comfortably stand the weight of the unit and does not increase the operating noise<br />
or vibration. If there is any likelihood that vibration may be transmitted through the house, fix the unit with the aid of vibration-proof pads<br />
between the unit and the fittings.<br />
• Select a place where cold or hot air and operation noises from the indoor and outdoor units do not cause any inconvenience to your neighbours.<br />
• Do not leave any obstacles near the outlet and inlet of the outdoor unit. This may cause malfunctioning and increased operating noise.<br />
• If you hear an irregular noise during operation, contact your dealer.<br />
Inspection and maintenance<br />
Dependent upon service conditions and operating environment, the inside of the air conditioner may become dirty after a number of seasons'<br />
service (3 to 5 years). This will reduce performance. In addition to normal cleaning, we would recommend inspection and maintenance. (The air<br />
conditioner has a longer life without any trouble.)<br />
• Contact your dealer, or any distributor, for inspection and maintenance. (There will be a charge for this service).<br />
• We would recommend inspection and maintenance to be carried out during the off-season.<br />
• If the supply cord of this appliance is damaged, it must only be replaced by a repair shop appointed by the manufacturer, because special<br />
purpose tools are required.<br />
– 16 –<br />
Filter holder<br />
Natural enzyme filter<br />
Filter holder<br />
Photocatalytic washable<br />
deodorizing filter<br />
Install Install
Troubleshooting<br />
Please carry out the following checks before making a service call.<br />
Has the power switch been<br />
turned off?<br />
Have you set the thermostat at a<br />
suitable temperature?<br />
suitable<br />
temperature<br />
Is there any direct sunlight entering<br />
the room?<br />
The air conditioner does not work at all.<br />
Has the timer been set in the<br />
"ON" position?<br />
Poor cooling or heating<br />
Is the air filter clean? (Not<br />
clogged?)<br />
Poor cooling<br />
Is there a heat source in the<br />
room?<br />
– 17 –<br />
Is there a power failure or a<br />
blown fuse?<br />
Did you leave any doors or<br />
windows open?<br />
Are there too many people in<br />
the room?<br />
If the air conditioner does not operate<br />
properly after you have checked<br />
the above points, or if any doubt still<br />
exists after you have consulted page<br />
17, or if things happen as shown on<br />
page 18, switch off the power and<br />
contact your dealer.<br />
A new refrigerant (R410A) is used in this air-conditioner. When asking the dealer for<br />
service or inspection and maintenance, explain the dealer about this matter.<br />
Please remember!<br />
You cannot restart the unit immediately after you have<br />
stopped it.<br />
(RUN light is on)<br />
Not<br />
operating?<br />
Air is not blown out when starting the HEATING operation.<br />
RUN light blinks slowly<br />
(1.5 sec ON, 0.5 sec OFF)<br />
Air is not blown out for 5 to 10 min. at HEATING operation.<br />
RUN light blinks slowly<br />
(1.5 sec ON, 0.5 sec OFF)<br />
Air is not blown out when starting the DRY operation.<br />
(RUN light is on)<br />
Restarting has been blocked for 3 minutes after you have stopped, to<br />
protect the unit.<br />
Please wait for<br />
three minutes.<br />
The three-minute protection timer in the microcomputer automatically<br />
starts up again. This function is not activated if you have disconnected<br />
the power.<br />
Air flow has stopped to prevent blowing out of cold air until the indoor<br />
heat exchanger has warmed up. (2 to 5 min.) (HOT KEEP)<br />
When outdoor temperature is low and humidity is high, the unit sometimes<br />
performs defrosting automatically. Please wait. During defrosting,<br />
water or steam may escape from the outdoor unit.<br />
The indoor fan may stop to prevent re-evaporation of dehumified<br />
moisture and to save energy.<br />
Some steam escapes during COOL operation. This may occur if the room's temperature and humidity are very high.<br />
It disappears as soon as the temperature and humidity decrease.
There is a slight smell. Air blown out during operation may smell. This is caused by tobacco<br />
or cosmetics sticking to the unit.<br />
You hear a slight gurgling sound. This is caused by refrigerating liquid moving within the unit.<br />
You hear a slight cracking sound. This is caused by heat expansion or contraction.<br />
You hear a hissing or clicking sound.<br />
After a power cut, you cannot re-start, even if power has<br />
been restored.<br />
Remote control signals are not received.<br />
Moisture may form on the air outlet grilles.<br />
Whistling noise is heard from the outdoor unit.<br />
(SRK-ZD model only)<br />
When to contact your distributor without delay<br />
Turn off the power switch immediately and inform your dealer in any of the following situations:<br />
The fuse or switch blows continuously.<br />
Fuse often blows.<br />
The TV, radio or other equipment<br />
starts to malfunction.<br />
When faulty movement is observed when the ON/OFF button<br />
is pressed, even after pulling out the power plug and<br />
restarting the operation after 3 minutes, the faulty movement<br />
does not disappear.<br />
The cable becomes extremely hot.<br />
The covering of the cable is cracked.<br />
A switch does not activate properly. You hear a strange noise during operation.<br />
3 minutes go<br />
by, but, why ...<br />
– 18 –<br />
This is caused by the operation of the refrigerant control valves or<br />
electric components.<br />
The memory circuit of the microcomputer has been wiped out. Use the<br />
remote control to start the operation again.<br />
Remote control signals may not be received if the signal receiver on<br />
the air conditioner is exposed to direct sunlight or other bright light.<br />
If so, cut out the sunlight or reduce the other light.<br />
If the unit is operated for a long time in high humidity, moisture may<br />
form on the air outlet grilles and start dripping.<br />
The noise means that the revolution speed is picking up on the compressor.<br />
CAUTION<br />
If the power cord becomes damaged, ask your dealer or a qualified engineer to install the<br />
replacement to avoid accidents.<br />
The RUN and TIMER lights on the unit indication section<br />
blink quickly (0.5 sec. ON; 0.5 sec. OFF) and don’t work.
Air conditioner operating conditions<br />
■ Use within the following operational range. Operating outside of this range may result in the protection devices being activated, preventing the<br />
unit from working.<br />
Characteristics of HEAT mode operation<br />
Mechanism and capacity of HEAT mode operation<br />
■ Mechanism<br />
• The unit draws in heat from the cold outside air, transfers it indoors and heats the room. The heating capacity of the heat pump mechanism decreases<br />
when the outside air temperature gets colder.<br />
• The hot air circulation system takes a while before warming up the room temperature.<br />
• If the outside temperature becomes extremely low, it would be better to use an additional source of heating.<br />
Defrosting<br />
Cooling operation Heating operation<br />
Outside temperature Approximately 21 to 43 °C Below approximately -5 to 21 °C<br />
Inside temperature Approximately 21 to 32 °C Approximately 15 to 30 °C<br />
Inside humidity<br />
Below approximately 80%<br />
The long-term use of the unit with a humidity level<br />
exceeding 80% may result in condensation forming on the<br />
surface of the indoor unit, leading to water drips.<br />
Power Blackout Auto Restart Function<br />
■ What is power-cut compensation?<br />
• Power blackout auto restart function is a function that records the operational status of the air-conditioner immediately prior to it being switched off<br />
by a power cut, and then automatically resumes operations at that point after the power has been restored.<br />
• The following settings will be cancelled:<br />
1 Timer settings<br />
2 High-power operations<br />
NOTE<br />
• Ther power blackout auto restart function is set at on when the air-conditioner is shipped from the factory. Consult with your dealer if this<br />
function needs to be switched off.<br />
• When power failure ocurrs, the timer setting is cancelled. Once power is resumed, reset the timer.<br />
If the outside temperature becomes low and humidity is high, the heat exchanger in the outdoor unit may frost over, which prevents efficient heating.<br />
If this happens, the automatic defroster is activated and during defrosting the heating operation stops for 5 to 10 minutes.<br />
• Both indoor and outdoor fans stop and the RUN light (green) blinks slowly (1.5 sec. ON, 0.5 sec. OFF) during defrosting.<br />
• The outdoor unit may give off some steam during defrosting. This is to help the defrosting process and is not a defect.<br />
• The HEAT operation resumes as soon as defrosting has been completed.<br />
– 19 –<br />
—
Self diagnosis function<br />
■ We are constantly trying to do better service to our customers by installing such judges that show abnormality of each function as follows:<br />
◆ SRK-ZD<br />
TIMER lamp ON<br />
RUN lamp keeps flashing<br />
RUN lamp ON<br />
RUN lamp<br />
1 time flash<br />
2 time flash<br />
6 time flash<br />
TIMER lamp<br />
1 time flash<br />
2 time flash<br />
1 time flash<br />
2 time flash<br />
3 time flash<br />
5 time flash<br />
6 time flash<br />
Outdoor temperature sensor error<br />
Outdoor heat exchanger fluid pipe<br />
sensor error<br />
Current cut<br />
Trouble of outdoor unit<br />
Over current<br />
Description of trouble<br />
Heat exchanger sensor error<br />
Room temperature sensor error<br />
Indoor fan motor error<br />
2 time flash<br />
RUN lamp 2 time flash Rotor lock<br />
◆ SRK-HD, SRK-CD<br />
TIMER lamp ON<br />
RUN lamp keeps flashing<br />
RUN lamp ON<br />
Over heat of compressor<br />
Error of signal transmission<br />
– 20 –<br />
Cause<br />
• Broken heat exchanger sensor wire, poorconnector<br />
connection<br />
• Broken room temperature sensor wire, poor connector connection<br />
• Defective fan motor, poor connector connection<br />
• Broken outdoor sensor wire, poor connector connection<br />
• Broken heat exchanger fluid pipe sensor wire, poor connector<br />
connection<br />
4 time flash Discharge pipe sensor error • Broken discharge pipe sensor wire, poor connector connection.<br />
7 time flash<br />
(25, 35 type only)<br />
RUN lamp<br />
1 time flash<br />
2 time flash<br />
6 time flash<br />
TIMER lamp<br />
1 time flash<br />
2 time flash<br />
Description of trouble<br />
Heat exchanger sensor error<br />
Room temperature sensor error<br />
Indoor fan motor error<br />
Outdoor heat exchanger fluid pipe<br />
sensor error<br />
4 time flash Compressor dome sensor error.<br />
1 time flash<br />
5 time flash<br />
6 time flash<br />
Outdoor fan motor error<br />
• Compressor locking, open phase on compressor output,<br />
shortcircuit on power transformer, closed control valve<br />
• Broken power transformer, broken compressor wire<br />
• Broken discharge pipe sensor wire, poor connector connection<br />
• Compressor blockage<br />
• Overload operation, overcharge<br />
• Gas shortage, defective discharge pipe sensor, closed control<br />
valve<br />
• Defective power supply, Broken signal wire, defective in/outdoor<br />
unit boards<br />
• Defective compressor<br />
• Open phase on compressor<br />
• Defective outdoor unit boards<br />
Cause<br />
• Broken heat exchanger sensor wire, poorconnector<br />
connection<br />
• Broken room temperature sensor wire, poor connector connection<br />
• Defective fan motor, poor connector connection<br />
Outdoor temperature sensor error • Broken outdoor sensor wire, poor connector connection<br />
Current cut<br />
Over heat of compressor<br />
Error of signal transmission<br />
• Defective fan motor, poor connector connection<br />
• Broken heat exchanger fluid pipe sensor wire, poor connector<br />
connection<br />
• Broken compressor dome sensor wire, poor connector connection.<br />
• Compressor locking, closed control valve<br />
2 time flash Trouble of outdoor unit<br />
• Compressor failure, overload operation<br />
• Gas shortage, defective discharge pipe sensor, closed control<br />
valve<br />
• Defective power supply, Broken signal wire, defective in/outdoor<br />
unit boards
AIR-CONDITIONING & REFRIGERATION SYSTEMS HEADQUARTERS<br />
16-5, 2-Chome, Kounan, Minato-ku, Tokyo, 108-8215, Japan<br />
Fax: (03) 6716-5926<br />
MITSUBISHI HEAVY INDUSTRIES EUROPE, LTD.<br />
AIR-CONDITIONER DIVISION<br />
3rd Floor Thavies Inn House 3-4 Holborn Circus London EC1N 2HA, ENGLAND<br />
Phone: 44(0)20 7842 8171<br />
Fax: 44(0)20 7842 8104<br />
MITSUBISHI HEAVY INDUSTRIES EUROPE, LTD.<br />
ROTTERDAM SERVICE CENTER<br />
Willem-Barentzstraat 27 Unit a 3165 aa, Rotterdam, The Netherlands<br />
Phone: 31(0)10 428 4284<br />
Fax: 31(0)10 428 4285