

Hydraulic Sinker Drill - Tool-Smith
Hydraulic Sinker Drill - Tool-Smith
Hydraulic Sinker Drill - Tool-Smith

You also want an ePaper? Increase the reach of your titles
YUMPU automatically turns print PDFs into web optimized ePapers that Google loves.
SERIOUS INJURY OR DEATH COULD<br />
RESULT FROM THE IMPROPER RE-<br />
PAIR OR SERVICE OF THIS TOOL.<br />
REPAIRS AND / OR SERVICE TO THIS<br />
TOOL MUST ONLY BE DONE BY AN<br />
AUTHORIZED AND CERTIFIED<br />
DEALER.<br />
Copyright Copyright © © 1999 1999 The The Stanley Stanley WW<br />
Works W orks<br />
OPS/MAINT USA VERSION<br />
05449 03/99 Ver 2<br />
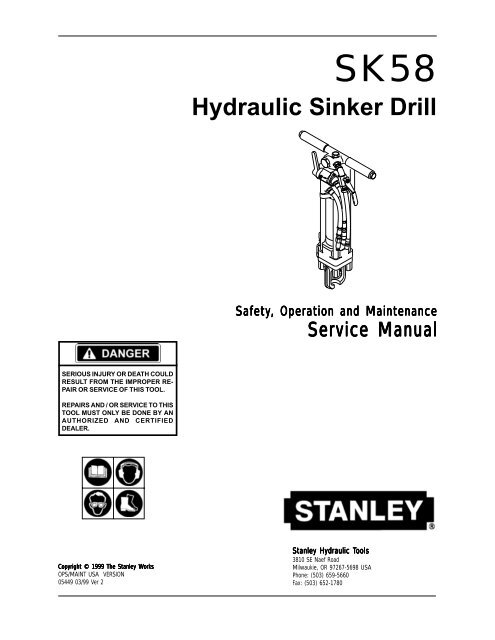
SK58<br />
<strong>Hydraulic</strong> <strong>Sinker</strong> <strong>Drill</strong><br />
Safety Safety Safety, Safety Safety , Operation Operation and and Maintenance<br />
Maintenance<br />
Service Service Manual<br />
Manual<br />
Stanley Stanley <strong>Hydraulic</strong> <strong>Hydraulic</strong> T T<strong>Tool</strong>s<br />
T ools<br />
3810 SE Naef Road<br />
Milwaukie, OR 97267-5698 USA<br />
Phone: (503) 659-5660<br />
Fax: (503) 652-1780
SAFETY FIRST<br />
It is the responsibility of the operator<br />
and service technician to read rules and<br />
instructions for safe and proper<br />
operation and maintenance.<br />
A cautious worker<br />
using common sense<br />
is the greatest safety device<br />
COPYRIGHT© 1999 The Stanley Works. All rights reserved.<br />
Under copyright law, this document may not be copied in whole or in<br />
part without the prior written consent of The Stanley Works. This exception<br />
does not permit copies to be made for others, whether or not sold.<br />
Under the law, copying includes translating into another language,<br />
format, or medium. This copyright notice must appear on any permitted<br />
copies.
1<br />
Accessories ........................................................................................................ 18<br />
<strong>Hydraulic</strong> Hose Requirements ............................................................................. 5<br />
<strong>Hydraulic</strong> Requirements ....................................................................................... 6<br />
Model Descriptions ............................................................................................. 20<br />
Operation ........................................................................................................ 7 - 8<br />
Principle of Operation ............................................................................ 6<br />
Safety Precautions .......................................................................................... 2 - 3<br />
Service Instructions ....................................................................................... 9 - 15<br />
Accumulator Charging ......................................................................... 15<br />
Accumulator Housing , Accumulator, Flow Sleeve, Piston,<br />
and Automatice Valve Service ...................................................... 12 - 14<br />
<strong>Hydraulic</strong> Motor Service ................................................................ 10 - 12<br />
Latch and Spring Service ....................................................................... 9<br />
Parts Illustration ................................................................................... 20<br />
Parts Illustration for Anti-Vibration Handle Models .............................. 21<br />
Parts Lists ............................................................................................ 19<br />
Special <strong>Tool</strong>s ........................................................................................ 18<br />
Throttle Valve Service ..................................................................... 9 - 10<br />
Specifications ..................................................................................................... 18<br />
<strong>Tool</strong> Stickers and Tags ......................................................................................... 4<br />
Troubleshooting .......................................................................................... 16 - 17<br />
Warranty ............................................................................................................. 21<br />
SERIOUS SERIOUS INJURY INJURY INJURY OR OR DEA DEATH DEA TH COULD COULD RESUL RESULT RESUL RESULT<br />
T FROM FROM THE THE<br />
THE<br />
IMPROPER IMPROPER REP REPAIR REP AIR OR OR SERVICE SERVICE OF OF THIS THIS TOOL TOOL. TOOL<br />
REP REPAIRS REP REPAIRS<br />
AIRS AND AND / / OR OR SERVICE SERVICE TO TO THIS THIS TOOL TOOL MUST MUST ONL ONL ONLY ONL ONL<br />
BE BE DONE DONE BB<br />
BY BB<br />
Y AN AN A AAUTHORIZED<br />
A UTHORIZED AND AND CERTIFIED CERTIFIED CERTIFIED DEALER DEALER. DEALER DEALER<br />
CONTENTS<br />
SERVICING THE SK58 SINKER DRILL: This manual contains safety, operation, and detailed<br />
maintenance instructions. Stanley <strong>Hydraulic</strong> <strong>Tool</strong>s recommends that servicing of hydraulic tools,<br />
other than routine maintenance, must be performed by an authorized and certified dealer. Please<br />
read the following warning.<br />
For the nearest authorized and certified dealer, call Stanley <strong>Hydraulic</strong> <strong>Tool</strong>s at 1-503-659-5660 and<br />
ask for a Customer Service Representative.
SAFETY<br />
The SK58 <strong>Hydraulic</strong> <strong>Sinker</strong> <strong>Drill</strong> will provide safe and dependable service if<br />
operated in accordance with the instructions given in this manual. Read and<br />
understand this manual and any stickers and tags attached to the tool and hoses<br />
before operation. Failure to do so could result in personal injury or equipment<br />
damage.<br />
<strong>Tool</strong> operators and maintenance personnel must always comply with the safety<br />
precautions given in this manual and on the stickers and tags attached to the tool<br />
and hose.<br />
These safety precautions are given for your safety. Review them carefully before operating the tool and before<br />
performing general maintenance or repairs.<br />
Supervising personnel should develop additional precautions relating to the specific work area and local safety<br />
regulations. If so, place the added precautions in the space provided on page 3.<br />
GENERAL SAFETY PRECAUTIONS<br />
SAFETY<br />
• Operator must start in a work area without bystanders. The operator must be familiar with all prohibited work<br />
areas such as excessive slopes and dangerous terrain conditions.<br />
Establish a training program for all operators to ensure safe operation.<br />
Do not operate the tool unless thoroughly trained or under the supervision of an instructor.<br />
Always wear safety equipment such as goggles, ear and head protection, and safety shoes at all times when<br />
operating the tool.<br />
Know the location of buried or covered underground utilities before begining any work.<br />
Do not inspect or clean the tool while the hydraulic power source is connected. Accidental engagement of the<br />
tool can cause serious injury.<br />
Always connect hoses to the tool hose couplers before energizing the hydraulic power source. Be sure all hose<br />
connections are tight.<br />
Do not operate the tool at oil temperatures above 140°F/60°C. Operation at higher oil temperatures can cause<br />
higher than normal temperatures at the tool which can result in operator discomfort.<br />
Do not operate a damaged, improperly adjusted, or incompletely assembled breaker.<br />
Do not weld, cut with an acetylene torch, or hard face the drill bit.<br />
To avoid personal injury or equipment damage, all tool repair, maintenance and service must only be performed<br />
by authorized and properly trained personnel.<br />
2
3<br />
Always replace parts with replacement parts recommended by Stanley <strong>Hydraulic</strong> <strong>Tool</strong>s.<br />
Check fastener tightness often and before each use daily.<br />
SAFETY SYMBOLS<br />
This safety symbol may appear<br />
on the tool. It is used to alert<br />
the operator of an action that<br />
could place him/her or others<br />
in a life threatening situation.<br />
This safety symbol appears in<br />
these instructions to identify<br />
an action that could cause<br />
bodily injury to the operator or<br />
other personnel.<br />
Always observe safety symbols. They are included for your safety and for the protection of the tool.<br />
LOCAL SAFETY REGULATIONS<br />
SAFETY Continued . . .<br />
Safety symbols are used to emphasize all operator, maintenance and repair actions which, if not strictly followed,<br />
could result in a life-threatening situation, bodily injury or damage to equipment.<br />
This safety symbol appears in<br />
these instructions to identify<br />
an action or condition that<br />
could result in damage to the<br />
tool or other equipment.<br />
Enter any local safety regulations here. Keep these instructions in an area accessible to the operator and maintenance<br />
personnel.
SERIAL NO. STAMPING<br />
04796 Name Tag<br />
03786 GPM Sticker<br />
The safety tag (p/n<br />
15875) at right is attached<br />
to the tool when shipped<br />
from the factory. Read<br />
and understand the safety<br />
instructions listed on this<br />
tag before removal. We<br />
suggest you retain this<br />
tag and attach it to the<br />
tool when not in use.<br />
D A N G E R<br />
1. FAILURE TO USE HYDRAULIC HOSE LABELED AND CERTI-<br />
FIED AS NON-CONDUCTIVE WHEN USING HYDRAULIC TOOLS<br />
ON OR NEAR ELECTRICAL LINES MAY RESULT IN DEATH OR<br />
SERIOUS INJURY.<br />
BEFORE USING HOSE LABELED AND CERTIFIED AS NON-<br />
CONDUCTIVE ON OR NEAR ELECTRIC LINES BE SURE THE<br />
HOSE IS MAINTAINED AS NON-CONDUCTIVE. THE HOSE<br />
SHOULD BE REGULARLY TESTED FOR ELECTRIC CURRENT<br />
LEAKAGE IN ACCORDANCE WITH YOUR SAFETY DEPART-<br />
MENT INSTRUCTIONS.<br />
2. A HYDRAULIC LEAK OR BURST MAY CAUSE OIL INJECTION<br />
INTO THE BODY OR CAUSE OTHER SEVERE PERSONAL IN-<br />
JURY.<br />
A DO NOT EXCEED SPECIFIED FLOW AND PRESSURE FOR<br />
THIS TOOL. EXCESS FLOW OR PRESSURE MAY CAUSE A<br />
LEAK OR BURST.<br />
B DO NOT EXCEED RATED WORKING PRESSURE OF HYDRAU<br />
LIC HOSE USED WITH THIS TOOL. EXCESS PRESSURE MAY<br />
CAUSE A LEAK OR BURST.<br />
C CHECK TOOL HOSE COUPLERS AND CONNECTORS DAILY<br />
FOR LEAKS. DO NOT FEEL FOR LEAKS WITH YOUR HANDS.<br />
CONTACT WITH A LEAK MAY RESULT IN SEVERE PERSONAL<br />
INJURY.<br />
IMPORTANT<br />
READ OPERATION MANUAL AND<br />
SAFETY INSTRUCTIONS FOR THIS<br />
TOOL BEFORE USING IT.<br />
USE ONLY PARTS AND REPAIR<br />
PROCEDURES APPROVED BY<br />
STANLEY AND DESCRIBED IN THE<br />
OPERATION MANUAL.<br />
TAG TO BE REMOVED ONLY BY<br />
TOOL OPERATOR.<br />
SEE OTHER SIDE<br />
15875<br />
SAFETY TAG P/N 15875(shown smaller than actual size)<br />
TOOL STICKERS & TAGS<br />
Stickers and decals placed on the tool at time of manufacture are shown below and on the next page. These stickers<br />
and decals have been placed on the tool to aid the operator with safety and general maintenance.<br />
The information listed on these stickers and decals must be legible at all times.<br />
Always replace any sticker or decal that has become worn or damaged. Replacements are available from your<br />
Stanley distributor.<br />
03786 GPM STICKER<br />
D A N G E R<br />
D DO NOT LIFT OR CARRY TOOL BY THE HOSES. DO NOT<br />
ABUSE HOSE. DO NOT USE KINKED, TORN OR DAMAGED<br />
HOSE.<br />
3. MAKE SURE HYDRAULIC HOSES ARE PROPERLY CONNECTED<br />
TO THE TOOL BEFORE PRESSURING SYSTEM. SYSTEM<br />
PRESSURE HOSE MUST ALWAYS BE CONNECTED TO TOOL<br />
"IN" PORT. SYSTEM RETURN HOSE MUST ALWAYS BE CON-<br />
NECTED TO TOOL "OUT" PORT. REVERSING CONNECTIONS<br />
MAY CAUSE REVERSE TOOL OPERATION WHICH CAN RE-<br />
SULT IN SEVERE PERSONAL INJURY.<br />
4. DO NOT CONNECT OPEN-CENTER TOOLS TO CLOSED-CEN-<br />
TER HYDRAULIC SYSTEMS. THIS MAY RESULT IN LOSS OF<br />
OTHER HYDRAULIC FUNCTIONS POWERED BY THE SAME<br />
SYSTEM AND/OR SEVERE PERSONAL INJURY.<br />
5. BYSTANDERS MAY BE INJURED IN YOUR WORK AREA. KEEP<br />
BYSTANDERS CLEAR OF YOUR WORK AREA.<br />
6. WEAR HEARING, EYE, FOOT, HAND AND HEAD PROTECTION.<br />
7. TO AVOID PERSONAL INJURY OR EQUIPMENT DAMAGE, ALL<br />
TOOL REPAIR MAINTENANCE AND SERVICE MUST ONLY BE<br />
PERFORMED BY AUTHORIZED AND PROPERLY TRAINED<br />
PERSONNEL.<br />
IMPORTANT<br />
READ OPERATION MANUAL AND<br />
SAFETY INSTRUCTIONS FOR THIS<br />
TOOL BEFORE USING IT.<br />
USE ONLY PARTS AND REPAIR<br />
PROCEDURES APPROVED BY<br />
STANLEY AND DESCRIBED IN THE<br />
OPERATION MANUAL.<br />
TAG TO BE REMOVED ONLY BY<br />
TOOL OPERATOR.<br />
SEE OTHER SIDE<br />
15875<br />
4
HOSE HOSE TYPES<br />
TYPES<br />
<strong>Hydraulic</strong> hose types authorized for use with Stanley <strong>Hydraulic</strong> <strong>Tool</strong>s are as follows:<br />
DO NOT REMOVE THIS TAG<br />
! Certified non-conductive<br />
" Wire-braided (conductive)<br />
# Fabric-braided (not certified or labeled non-conductive)<br />
Hose ! listed above is the only hose authorized for use near electrical conductors.<br />
Hoses " and # listed above are conductive and must never be used near electrical conductors.<br />
HOSE HOSE SAFETY SAFETY T TTAGS<br />
T AGS<br />
To help ensure your safety, the following DANGER tags are attached to all hose purchased from Stanley <strong>Hydraulic</strong><br />
<strong>Tool</strong>s. DO NOT REMOVE THESE TAGS.<br />
If the information on a tag is illegible because of wear or damage, replace the tag immediately. A new tag may be<br />
obtained at no charge from your Stanley Distributor.<br />
DO NOT REMOVE THIS TAG<br />
D A N G E R<br />
1 FAILURE TO USE HYDRAULIC HOSE LABELED AND CERTIFIED AS NON-CONDUCTIVE<br />
WHEN USING HYDRAULIC TOOLS ON OR NEAR ELECTRIC LINES MAYRESULT IN DEATH<br />
OR SERIOUS INJURY.<br />
FOR PROPER AND SAFE OPERATION MAKE SURE THAT YOU HAVE BEEN PROPERLY<br />
TRAINED IN CORRECT PROCEDURES REQUIRED FOR WORK ON OR AROUND ELECTRIC<br />
LINES.<br />
2. BEFORE USING HYDRAULIC HOSE LABELED AND CERTIFIED AS NON-CONDUCTIVE ON<br />
OR NEAR ELECTRIC LINES. WIPE THE ENTIRE LENGTH OF THE HOSE AND FITTING WITH<br />
A CLEAN DRY ABSORBENT CLOTH TO REMOVE DIRT AND MOSISTURE AND TEST HOSE<br />
FOR MAXIMUM ALLOWABLE CURRENT LEAKAGE IN ACCORDANCE WITH SAFETY<br />
DEPARTMENT INSTRUCTIONS.<br />
SEE OTHER SIDE<br />
D A N G E R<br />
3. DO NOT EXCEED HOSE WORKING PRESSURE OR ABUSE HOSE. IMPROPER USE OR<br />
HANDLING OF HOSE COULD RESULT IN BURST OR OTHER HOSE FAILURE. KEEP HOSE<br />
AS FAR AWAY AS POSSIBLE FROM BODY AND DO NOT PERMIT DIRECT CONTACT<br />
DURING USE. CONTACT AT THE BURST CAN CAUSE BODILY INJECTION AND SEVERE<br />
PERSONAL INJURY.<br />
4. HANDLE AND ROUTE HOSE CAREFULLY TO AVOID KINKING, ABRASION, CUTTING, OR<br />
CONTACT WITH HIGH TEMPERATURE SURFACES. DO NOT USE IF KINKED. DO NOT USE<br />
HOSE TO PULL OR LIFT TOOLS, POWER UNITS, ETC.<br />
5. CHECK ENTIRE HOSE FOR CUTS CRACKS LEAKS ABRASIONS, BULGES, OR DAMAGE TO<br />
COUPLINGS IF ANY OF THESE CONDITIONS EXIST, REPLACE THE HOSE IMMEDIATELY.<br />
NEVER USE TAPE OR ANY DEVICE TO ATTEMPT TO MEND THE HOSE.<br />
6. AFTER EACH USE STORE IN A CLEAN DRY AREA.<br />
SEE OTHER SIDE<br />
3 SIDE 1 (shown smaller than actual size)<br />
SIDE 2<br />
D A N G E R<br />
1 DO NOT USE THIS HYDRAULIC HOSE ON OR NEAR ELECTRIC LINES. THIS HOSE IS NOT<br />
LABELED OR CERTIFIED AS NON-CONDUCTIVE. USING THIS HOSE ON OR NEAR<br />
ELECTRICAL LINES MAY RESULT IN DEATH OR SERIOUS INJURY.<br />
2. FOR PROPER AND SAFE OPERATION MAKE SURE THAT YOU HAVE BEEN PROPERLY<br />
TRAINED IN CORRECT PROCEDURES REQUIRED FOR WORK ON OR AROUND ELECTRIC<br />
LINES.<br />
3. DO NOT EXCEED HOSE WORKING PRESSURE OR ABUSE HOSE. IMPROPER USE OR<br />
HANDLING OF HOSE COULD RESULT IN BURST OR OTHER HOSE FAILURE. KEEP HOSE<br />
AS FAR AWAY AS POSSIBLE FROM BODY AND DO NOT PERMIT DIRECT CONTACT<br />
DURING USE. CONTACT AT THE BURST CAN CAUSE BODILY INJECTION AND SEVERE<br />
PERSONAL INJURY.<br />
4. HANDLE AND ROUTE HOSE CAREFULLY TO AVOID KINKING, CUTTING, OR CONTACT<br />
WITH HIGH TEMPERATURE SURFACES. DO NOT USE IF KINKED. DO NOT USE HOSE TO<br />
PULL OR LIFT TOOLS, POWER UNITS, ETC.<br />
SEE OTHER SIDE<br />
HOSE HOSE PRES PRESSURE PRES SURE RA RATING RA TING<br />
HYDRAULIC HOSE REQUIREMENTS<br />
The tag shown below is attached to "certified non-conductive" hose.<br />
The tag shown below is attached to "conductive" hose.<br />
D A N G E R<br />
5. CHECK ENTIRE HOSE FOR CUTS CRACKS LEAKS ABRASIONS, BULGES, OR DAMAGE TO<br />
COUPLINGS IF ANY OF THESE CONDITIONS EXIST, REPLACE THE HOSE IMMEDIATELY.<br />
NEVER USE TAPE OR ANY DEVICE TO ATTEMPT TO MEND THE HOSE.<br />
6. AFTER EACH USE STORE IN A CLEAN DRY AREA.<br />
SEE OTHER SIDE<br />
SIDE 1 (shown smaller than actual size)<br />
SIDE 2<br />
The rated working pressure of the hydraulic hose must be equal to or higher than the relief valve setting on the<br />
hydraulic system.<br />
5<br />
DO NOT REMOVE THIS TAG<br />
DO NOT REMOVE THIS TAG
• The hydraulic system should provide a flow of 7-9<br />
gpm/26-34 lpm at an operating pressure of 2000 psi/140<br />
bar. Recommended relief valve setting is 2100-2250<br />
psi/145-155 bar.<br />
The system should have no more than 250 psi/17 bar<br />
backpressure measured at the tool end of the operating<br />
hoses. The system conditions for measurement are at<br />
maximum fluid viscosity of 400 ssu/82 centistokes<br />
(minimum operating temperatures).<br />
The hydraulic system should have enough heat<br />
rejection capacity to limit the maximum oil temperature<br />
to 140°F/60°C at the maximum expected ambient<br />
temperature.<br />
The hydraulic system should have a minimum of 25<br />
micron filtration. Stanley recommends using filter<br />
The SK58 <strong>Sinker</strong> <strong>Drill</strong> is designed to be used to drill<br />
holes in rock such as blast holes.<br />
A rock bit containing carbides is attached to drill steel<br />
which is inserted into the tool. The tool incorporates a<br />
reciprocating piston and a varible speed hydraulic<br />
motor. During the drilling process, the piston hammers<br />
on the drill steel and the hydraulic motor rotates the drill<br />
steel. It is the pounding and rotating motion of the rock<br />
bit that causes the rock to fracture into small cuttings.<br />
It is necessary to extract the rock shavings during the<br />
drilling process. If the rock shavings are not extracted,<br />
the rock bit will sit on top of the shavings, which in<br />
turn, will prevent the rock bit from penetrating into the<br />
rock.<br />
On SK58110, SK58120, and SK58310 models, air is<br />
introduced into the drill steel via a valve in the tool to<br />
blow the rock cuttings out of the hole. On the SK58130<br />
model, water is used to flush out the rock cuttings.<br />
The air requirements for effective drilling are 30 cfm at<br />
120 psi. The air supply is furnished by an air compressor.<br />
SK58 <strong>Sinker</strong> <strong>Drill</strong>s are designed to be operated and<br />
controlled by one individual. The rotation speed of the<br />
drill steel and amount of air introduced into the drill<br />
steel is adjusted by the operator based on an experience<br />
HYDRAULIC SYSTEM REQUIREMENTS<br />
elements sized for a flow of at least 30 gpm/114 lpm for<br />
cold temperature startup and maximum dirt holding<br />
capacity.<br />
The hydraulic fluid used should have a viscosity<br />
between 100 and 400 ssu/20 and 82 centistokes at the<br />
maximum and minimum expected operating temperatures.<br />
Petroleum base hydraulic fluids with antiwear<br />
properties and a viscosity index over 140 ssu/28<br />
centistokes will meet the recommended requirements<br />
over a wide range of operating temperatures.<br />
The recommended hose size is .500 inch/12 mm I.D.<br />
up to 50 ft/15 m long and .625 inch/16 mm I.D. minimum<br />
up to 100 ft/30 m long.<br />
Quick disconnect couplings must conform to NFPA<br />
T3.20,15/EHTMA specifications.<br />
PRINCIPLE OF OPERATION<br />
factor for the particular application. Incorrect rotation<br />
speed and/or inadequate extraction of the rock cuttings<br />
will significantly reduce drilling effectiveness and result<br />
in substantially increased drilling time.<br />
The tool can drill up to a 3 in./75 mm hole up to 20 feet/<br />
6 meters deep in rock. The tool has been used for other<br />
applications such as dowel drilling and gas leak detection.<br />
Because the tool has been specifically designed to be<br />
operated by an individual, it should never be mounted to<br />
and operated from a machine such as a drilling rig or<br />
small excavator. If a requirement exists to machine<br />
mount the tool, the application must first be approved by<br />
Stanley Engineering. Failure to obtain this approval can<br />
result in tool failure and void the warranty.<br />
See the "OPERATING INSTRUCTIONS" section of this<br />
manual for specific operating instructions.<br />
6
PREOPERATION PROCEDURES<br />
Preparation For Initial Use<br />
The tool, as shipped, has no special unpacking or<br />
assembly requirements prior to usage. Inspection to<br />
assure the tool was not damaged in shipping and does<br />
not contain packing debris is all that is required.<br />
Check <strong>Hydraulic</strong> Power Source<br />
1. Using a calibrated flowmeter and pressure gauge,<br />
check that the hydraulic power source develops a<br />
flow of 7-9 gpm/26-34 lpm at 1500-2000 psi/105-<br />
140 bar.<br />
2. Make certain the hydraulic power source is equipped<br />
with a relief valve set to open at 2100-2250 psi/145-<br />
155 bar minimum.<br />
3. Check that the hydraulic circuit matches the tool for<br />
open-center (OC) operation.<br />
Check <strong>Tool</strong><br />
1. Make sure all tool accessories are correctly installed.<br />
Failure to install tool accessories properly can result<br />
in damage to the tool or personal injury.<br />
2. There should be no signs of leaks.<br />
3. The tool should be clean, with all fittings and<br />
fasteners tight.<br />
Check Trigger Mechanism<br />
1. Check that the trigger operates smoothly and is free<br />
to travel between the "ON" and "OFF" positions.<br />
Install <strong>Drill</strong> Steel & Rock Bit<br />
Use standard 4-1/4 inch shank by 1 inch hex drill steel<br />
for SK58110, SK58120 and SK58310 models. Use 4-1/<br />
4 inch shank by 7/8 inch hex drill steel for the SK58130<br />
model.<br />
<strong>Drill</strong> steels are available in a variety of lengths. Start<br />
with a short length so that the tool may be operated at a<br />
normal standing position. The tool handles should<br />
never exceed chest height during operation.<br />
7<br />
OPERATING INSTRUCTIONS<br />
1. Thread a rock bit onto the drill steel.<br />
2. Rotate the latch (61) out and up.<br />
3. Slide the drill steel into the tool.<br />
4. Rotate the latch down being careful not to pinch<br />
your fingers. When correctly installed, the collar on<br />
the drill steel should be above the bottom of the<br />
latch.<br />
Connect Hoses<br />
1. Wipe all hose couplers with a clean lint-free cloth<br />
before making connections.<br />
2. Connect the hoses from the hydraulic power source<br />
to the hose couplers on the tool. It is a good practice<br />
to connect the return hose first and disconnect it last<br />
to minimize or avoid trapped pressure within the<br />
tool.<br />
3. Observe flow indicators stamped on hose couplers<br />
to be sure that oil will flow in the proper direction.<br />
The female coupler is the inlet coupler.<br />
NOTE: The pressure increase in uncoupled<br />
hoses left in the sun may result in making<br />
them difficult to connect. When possible,<br />
connect the free ends of operating hoses<br />
together.<br />
4. Connect the hose from the air supply to the hose on<br />
the tool.<br />
The air supply must be minimum 30 cfm at<br />
120 psi. Supplying less than these specifications<br />
may result in inadequate extraction<br />
of rock cuttings; cause cuttings to migrate<br />
up the drill steel and into the tool and result<br />
in tool damage; diminish drilling time; and<br />
cause premature wear of the drill bit.<br />
OPERATING PROCEDURES<br />
1. Observe all safety precautions. Make sure you are<br />
wearing eye protection, earing protection, foot<br />
protection, and head protection.
2. Start the hydraulic supply and turn the circuit<br />
control valve to the "ON" position.<br />
3. Open the air valve on the tool just enough to permit<br />
a small amount of air to flow from the rock bit.<br />
Air flow must be continuous during drilling<br />
to avoid clogging of air passages and/<br />
or backflushing of waste products into the<br />
drill.<br />
4. Place the rock bit firmly on the surface to be drilled.<br />
5. Grip the handles on the tool firmly and open the<br />
hydraulic valve lever slightly to start the tool at a<br />
slow speed. Adequate down pressure is very<br />
important.<br />
6. Ensure the rock bit is rotating at a moderate speed<br />
(not too fast, not too slow). When starting the hole,<br />
it is best to start at a slow impact and rotation speed<br />
until the rock bit has carved out a depression in the<br />
material being drilled. If the rock bit is not rotating<br />
open the hydraulic valve lever further. If the rock bit<br />
still does not rotate adjust the motor control knob<br />
until rotation is achieved.<br />
7. After the rock bit has carved out a depression in the<br />
material being drilled, open the hydraulic valve<br />
lever fully. Readjust the motor control knob to<br />
obtain a good drilling speed. Adjust the air valve to<br />
ensure the cuttings are being extracted from the drill<br />
hole.<br />
8. When the bottom of the tool comes within 6 inches<br />
of the drill hole, it is time to either add another<br />
section of drill steel or replace the existing drill steel<br />
with a longer section. Close the hydraulic valve<br />
lever but leave the air valve "ON" and then lift the<br />
tool with drill steel and rock bit out of the hole.<br />
Leaving the air valve "ON" helps prevent cuttings<br />
from falling around the bit while the bit is lifted<br />
from the hole.<br />
9. When the tool, drill steel and bit have been removed<br />
from the drill hole, turn the valve lever "OFF" and<br />
turn the hydraulic supply circuit control valve<br />
"OFF" before changing the drill steel or rock bit.<br />
COLD WEATHER OPERATION<br />
If the tool is to be used during cold weather, preheat the<br />
hydraulic fluid at low engine speed. When using the<br />
normally recommended fluids, fluid temperature should<br />
be at or above 50° F/10° C (400 ssu/82 centistokes)<br />
before use.<br />
ROUTINE MAINTENANCE<br />
A very important maintenance practice is to keep the<br />
hydraulic fluid clean at all times. Contaminated hydraulic<br />
fluid causes rapid wear and/or failure of internal<br />
parts.<br />
Periodically apply a light coat of WD40 between the<br />
throttle lever and throttle valve and the motor control<br />
knob and motor control valve.<br />
Check the nitrogen charge in the accumulator. If low,<br />
recharge the accumulator. See the section titled "ACCU-<br />
MULATOR CHARGING" found later in this manual.<br />
STORAGE<br />
Disconnect all hoses and wipe the tool clean. Spray the<br />
interior of the drive hex and motor plate with WD40.<br />
Also apply a light coat of WD40 between the throttle<br />
lever and throttle valve and the motor control knob and<br />
motor control valve.<br />
Store in a clean, dry place.<br />
8
Good maintenance practices will keep the tool on the<br />
job and increase its service life.<br />
A very important maintenance practice is to keep the<br />
hydraulic fluid clean at all times. Contaminated hydraulic<br />
fluid causes rapid wear and/or failure of internal<br />
parts.<br />
Follow the procedures contained in the HYDRAULIC<br />
SYSTEM REQUIREMENTS section of this manual to<br />
ensure peak performance from the tool. Never disassemble<br />
the tool unless proper troubleshooting procedures<br />
have isolated the problem to an internal part.<br />
Then, only disassemble it to the extent necessary to<br />
replace the defective part.<br />
Always determine and correct the cause of the problem<br />
prior to reassembly. Further wear and tool failure can<br />
result if the original cause is not corrected.<br />
PRIOR TO DISASSEMBLY<br />
9<br />
KEEP CONTAMINANTS SUCH AS DIRT AND GRIT AWAY<br />
FROM INTERNAL PARTS AT ALL TIMES.<br />
DO NOT ATTEMPT TO SERVICE THIS TOOL IF YOU<br />
ARE NOT THOROUGHLY TRAINED IN THE PROPER<br />
DISASSEMBLY AND ASSEMBLY OF THIS TOOL.<br />
IMPROPER DISASSEMBLY OR ASSEMBLY MAY<br />
RESULT IN BODILY INJURY AND DAMAGE TO THE<br />
TOOL. ALWAYS REFER ALL MAINTENANCE TO A<br />
QUALIFIED AND TRAINED TECHNICIAN.<br />
Clean the exterior of the tool.<br />
Obtain a seal kit to replace all seals exposed during<br />
disassembly. Note the orientation of seals before<br />
removing them. Install new seals in the same<br />
position as original seals.<br />
LATCH AND SPRING SERVICE<br />
1. Obtain Stanley special tools latch removal tool (p/n<br />
05045) and latch installation tool (p/n 05062).<br />
SERVICE INSTRUCTIONS<br />
2. Swing the latch (61) away from the motor plate (68).<br />
Install the latch removal tool over the retaining ring<br />
(62), spring back-up (63).<br />
3. Use 2 "C" clamps or bar clamps to squeeze the latch<br />
removal tool against the spring so that the spring<br />
back-up and spring are depressed enough to expose<br />
the retaining ring. Pry the retaining ring out.<br />
4. Slowly release the clamps and remove them.<br />
Remove the spring back-up, spring, latch washer<br />
(65), and latch.<br />
LATCH RE-ASSEMBLY<br />
1. Install the latch, latch washer, spring and spring<br />
back-up onto the motor plate with orientation as<br />
shown in the parts drawing.<br />
2. Place the retaining ring in the groove in the latch<br />
removal tool. Install the latch installation tool into<br />
the recessed bore of the latch removal tool. The<br />
retaining ring should now be between the latch<br />
removal tool and the latch installation tool. Place<br />
this assembly over the spring back-up with the<br />
protuding end of the latch installation tool inserted<br />
into the bore of the motor plate.<br />
3. Using a large mallet, strike the face of the latch<br />
removal tool with one swift blow. This should push<br />
the retaining ring into place.<br />
THROTTLE VALVE SERVICE<br />
The throttle valve can be serviced without disassembling<br />
the entire tool. Follow the instructions below.<br />
1. Remove the valve lever (8) by unscrewing the<br />
locknut (7). Lift out the key (47).<br />
2. Remove the retaining ring (9), washer (10), kap seal<br />
(11) and o-ring (6).<br />
3. Remove the inlet flange (35) by unscrewing and<br />
removing the 2 capscrews (36). Push the throttle<br />
valve (42) out of the accumulator housing toward<br />
the inlet flange side. Remove the o-ring (38) and<br />
kap seal (37), washer (39), kap seal (40) and o-ring<br />
(41).<br />
4. Inspect the surface of the throttle valve and the
throttle valve bore of the accumulator housing for<br />
damage. A light surface scuffing is normal. If deep<br />
scratches or nicks are noticed, replace the part(s).<br />
THROTTLE VALVE RE-ASSEMBLY<br />
1. Apply grease and install a new o-ring (41) into the<br />
channel in the kap seal (40) and then install the<br />
assembly into the throttle valve bore of the accumulator<br />
housing. When correctly installed, the o-ring<br />
faces the wall of the bore. Apply grease and install<br />
the washer (39).<br />
2. Lubricate the throttle valve with clean hydraulic<br />
fluid and install it into the throttle valve bore of the<br />
accumulator housing with the key way facing<br />
upward toward the handles on the accumulator<br />
housing.<br />
3. Apply grease and install a new kap seal (37) into the<br />
groove located on the inlet flange (35) (throttle<br />
valve side). Ensure the channel in the kap seal is<br />
facing outward. Apply grease and install a new<br />
o-ring (38) into the channel in the kap seal. Install<br />
the inlet flange and secure with 2 capscrews (36).<br />
4. Apply grease and install a new o-ring (6) into the<br />
channel in the kap seal (11). Install the assembly,<br />
followed by the washer (10), over the throttle valve<br />
and into the bore. Press on the washer with the<br />
appropriate o-ring tool to aid in the assembly. When<br />
correctly installed, the o-ring faces the wall of the<br />
bore.<br />
5. Install the retaining ring (9), key (47), valve lever<br />
(8), and secure with the locknut (7).<br />
6. Test the function of the throttle valve by rotating the<br />
valve lever back and forth. The lever should rotate<br />
with ease. If it seems the throttle valve is binding,<br />
disassemble the throttle valve and inspect the parts<br />
for damage. If damage is noted, replace the part(s).<br />
HYDRAULIC MOTOR SERVICE<br />
The hydraulic motor assembly can be serviced without<br />
disassembling the entire tool. Follow the instructions<br />
below.<br />
1. Complete steps 1, 2, 6, and 7 under "ACCUMULA-<br />
TOR HOUSING, FLOW SLEEVE, PISTON, &<br />
AUTOMATIC VALVE SERVICE".<br />
2. Unscrew and remove the 3 capscrews (95).<br />
3. Lift off the drive motor control block (82).<br />
4. Unscrew and remove the 2 capscrews (67).<br />
5. Lift off the motor plate (68) being careful to prevent<br />
the gears from falling out.<br />
6. Lift out the idler gear (72) and drive gear (99).<br />
7. Remove the woodruff key (77) and push the drive<br />
hex (76) out of the drive motor chamber (75).<br />
8. If it is necessary to remove the latch, refer to the<br />
section titled "LATCH AND SPRING SERVICE".<br />
9. If it is necessary to remove the bushings (70 & 71),<br />
obtain the following Stanley special tools.<br />
Collet, p/n 05871 - used to remove item 71.<br />
Actuator Pin, p/n 05067 - used with p/n 05871<br />
Collet, p/n 5068 - used to remove item 70.<br />
Actuator Pin, p/n 05067 - used with p/n 05068<br />
Bearing Installation <strong>Tool</strong>, p/n 05061<br />
Bearing Installation <strong>Tool</strong>, p/n 05044<br />
A collet is inserted into the bearing until the lip on<br />
the collet is under the bearing. The actuator pin is<br />
then inserted into the collet to cause the collet to<br />
spread. A puller is installed to the actuator to apply<br />
force to pull the bearing out.<br />
Bearing installation tools are inserted into the<br />
bearing and then used with an arbor press to press<br />
the bearing into the bore. Use of a bearing installation<br />
tool ensures a straight bearing to bore installation<br />
and correct depth.<br />
10. Loosen the set screw (86) in the knob (87) and<br />
remove the knob. Unscrew and remove the valve<br />
guide (88). Reinstall the knob and setscrew and then<br />
unscrew the motor control valve (89) to remove it.<br />
INSPECTION AND CLEANING<br />
Inspect and clean all parts as follows:<br />
Cleaning<br />
Clean all parts with a degreasing solvent. Blow dry with<br />
compressed air and wipe clean. Use only lint-free<br />
cloths.<br />
Drive Motor Chamber<br />
The chamber bores and bottoms around the bushings<br />
should be polished and not rough or grooved. If the<br />
10
ushing bores are yellow-bronze, replace them and<br />
investigate the cause of wear.<br />
The flat surfaces around the chamber and bolt holes<br />
should be flat and free of nicks or burrs that could cause<br />
misalignment or leaks.<br />
Bushings<br />
The inside of the bushings should be gray with<br />
some bronze showing through. If significant yellowbronze<br />
shows, replace the bushings. Inspect the drive<br />
hex and idler gear for corresponding wear and replace as<br />
required.<br />
Gears<br />
The drive and idler gears should have straight tips<br />
without nicks; square tooth ends and a smooth even<br />
polish on the teeth and end faces. Check for cracks<br />
between the drive gear keyway and gear tooth root.<br />
Replace the gear if cracks are present.<br />
Motor Plate<br />
The surface near the gears should show two interconnecting<br />
polished circles without a step.<br />
Drive Hex and Idler Gear Shaft<br />
The surface diameter at the bushing and seal locations<br />
must be smooth. Grooves, roughness or a reduced<br />
diameter indicate fluid contamination or damaged<br />
bushings. If abnormal wear as above occurs (more than<br />
normal polishing), replace the drive hex, idler gear and<br />
associated bushings.<br />
Also check the hydraulic system for excess contamination<br />
in the fluid and for filter condition.<br />
MOTOR RE-ASSEMBLY<br />
1. If new bushings were installed (see paragraph 9<br />
under "HYDRAULIC MOTOR SERVICE", ensure each<br />
bushing is flush with the surface of the part the bushing<br />
is installed into. If the bushing sits higher than the<br />
surface of the part, it will cause binding of related<br />
components.<br />
2. Apply grease and install a new back-up ring (81)<br />
and a new quad ring (80) into the motor plate (68)<br />
and into the drive motor control block (82).<br />
3. Lubricate the drive hex (76) with clean hydraulic<br />
fluid and install it into the drive motor chamber<br />
(75).<br />
11<br />
4. Install the woodruff key (77) into the slot in the<br />
drive hex.<br />
5. Lubricate the idler gear (72) and drive gear (99)<br />
with clean hydraulic fluid and then install them into<br />
the drive motor chamber.<br />
6. Apply grease and install a new o-ring (73) into the<br />
groove in the drive motor chamber.<br />
7. Install the motor plate to the drive motor chamber<br />
and secure with 2 capscrews (67). Check that the<br />
drive hex rotates freely.<br />
8. Install the thrust washer (98) and thrust back-up<br />
washer (97) over the drive hex and against the drive<br />
motor chamber.<br />
9. Install a new gasket (79) onto the drive motor<br />
chamber.<br />
10. Install the drive motor control block to the drive<br />
motor chamber and secure with 3 capscrews (95).<br />
Check that the drive hex rotates freely.<br />
11. Apply grease and install a new cup seal (93) into the<br />
drive motor control block, lips facing down. Install<br />
the seal washer (92) on top of the cup seal. Apply<br />
grease and install a new rod seal (91) on top of the<br />
washer, lips facing up.<br />
12. Apply grease and install a new o-ring (90) into the<br />
groove on the drive motor control block.<br />
13. Apply grease and install a new o-ring (84) into the<br />
groove in the motor control valve (89). Install new<br />
nylon cap locks (83) to the motor control valve.<br />
Install the knob (86) and tighten the set screw.<br />
Thread the motor control valve into the drive motor<br />
control block. Loosen the set screw and remove the<br />
knob.<br />
14. Apply grease and install a new o-ring (85) onto the<br />
valve guide (88). Place the valve guide over the<br />
motor control valve and thread it into the drive<br />
motor control block. Tighten it securely. Re-install<br />
the knob and tighten the setscrew.<br />
15. Install the motor over the side rods and into the flow<br />
sleeve tube ensuring the roll pin is correctly aligned<br />
with the hole in the flow sleeve (31) and the motor<br />
control valve is oriented correctly with the handles.<br />
16. Install the 4 side rod nuts. Tighten in 20 ft lb/25 Nm<br />
increments to 75 ft lb/100 Nm in a cross pattern.
MOTOR BREAK-IN<br />
Motor break-in is required whenever major components<br />
of the motor have been replaced. Break-in the motor by<br />
operating the tool with the motor control valve fully<br />
open for approximately 15 minutes. Do not attempt to<br />
drill with the tool during the break-in period.<br />
ACCUMULATOR HOUSING,<br />
ACCUMULATOR, FLOW SLEEVE,<br />
PISTON, AND AUTOMATIC VALVE<br />
SERVICE<br />
1. Secure the tool in a bench vise, with the “IN” and<br />
“OUT” ports up, clamping on the flow sleeve tube<br />
between the side rods. Soft vise jaws are recommended.<br />
2. Remove the pigtail hose assemblies.<br />
Note: The tool is full of fluid and will drip from the<br />
ports when the hoses are removed.<br />
3. Remove the charge valve cap (12) (1-3/8 inch hex). .<br />
Loosen the 5/8 inch hex lock nut on the charging<br />
valve (14) 1-1/2 turns. Using a small punch, depress<br />
the stem in the charge valve to discharge the<br />
accumulator completely.<br />
4. Remove the charge valve.<br />
5. Remove the blower tube nut (43).<br />
6. Remove the four side rod nuts (66) (1 inch hex).<br />
7. Using a soft faced mallet, tap on the edges of the<br />
motor assembly to drive it from the flow sleeve tube<br />
(30).<br />
8. Remove the accumulator housing assembly (46)<br />
from the flow sleeve tube by tapping on alternate<br />
ends of the side rods (78) with a soft faced mallet.<br />
Be careful to prevent the washer (27), valve body<br />
(56), automatic valve (32), and push pins (57) from<br />
falling out when the accumulator housing assembly<br />
is separated from the flow sleeve tube.<br />
a. If the valve body remains in the accumulator<br />
housing assembly, lift the automatic valve and<br />
push pins out immediately after the accumulator<br />
housing assembly separates from the flow<br />
sleeve tube. Set the accumulator housing<br />
assembly aside.<br />
b. If the valve body remains in the flow sleeve<br />
tube when the accumulator housing is separated<br />
from the tube, proceed with step 9.<br />
9. Skip this step if the valve body remained with the<br />
accumulator housing assembly when separated from<br />
the flow sleeve tube. Grasp the valve body with one<br />
hand and slide the valve body off of the piston and<br />
away from the flow sleeve. Use your other hand to<br />
prevent the washer, automatic valve, and push pins<br />
from falling out. Remove the washer, automatic<br />
valve, and 2 push pins. Do not use a magnet to<br />
remove the push pins.<br />
10. Slide the piston (29) out of the flow sleeve (31).<br />
Slide it toward the accumulator housing end of the<br />
flow sleeve.<br />
11. Remove the flow sleeve tube from the vise and<br />
position it over a work bench so as to allow the push<br />
pins (58) to drop out. Hold a finger over the flow<br />
sleeve to prevent it from sliding out of the flow<br />
sleeve tube.<br />
12. Holding the flow sleeve tube in one hand, push on<br />
the flow sleeve to slide it out of the flow sleeve tube.<br />
The flow sleeve may be removed from the flow<br />
sleeve tube from either end of the tube. Use extreme<br />
care in handling the flow sleeve as it contains very<br />
sharp edges which can cut you. If the flow sleeve<br />
does not seem to be easily removeable from the flow<br />
sleeve tube, do not remove it unless necessary. To<br />
assist in the removal of a flow sleeve that has proven<br />
difficult to remove, use the following procedures.<br />
a. Place the Stanley special split ring tool (p/n<br />
04908) on top of the Stanley special flow<br />
sleeve removal tool (p/n 04910). Place the flow<br />
sleeve tube on top of the split rings. Using an<br />
arbor press and the Stanley special accumulator<br />
cylinder puller tool (p/n 05640) to protect<br />
the flow sleeve, push the flow sleeve out of the<br />
tube.<br />
13. Obtain the accumulator housing assembly. Insert<br />
Stanley special accumulator removal tool (p/n<br />
05639) or a 1/2-20 long threaded rod through the<br />
blower tube nut hole and thread it into the top of the<br />
accumulator. Tap on the special tool or rod with a<br />
mallet to drive the accumulator assembly (22, 23,<br />
24, 25, & 26) out of the accumulator housing. If the<br />
valve body is in the accumulator housing it will be<br />
driven out along with the accumulator assembly.<br />
Make sure the washer (27) between the valve body<br />
and accumulator is properly located in its<br />
counterbore before driving out the valve body and<br />
12
13<br />
accumulator. If the washer is not properly located,<br />
the parts will be damaged. If the entire accumulator<br />
assembly is removed, proceed to step 14. If the<br />
accumulator cylinder (22) remains in the accumulator<br />
housing, it can be removed using the following<br />
procedures.<br />
a. If the entire accumulator assembly was removed,<br />
skip this step and proceed to step 14.<br />
Assemble the Stanley special accumulator<br />
cylinder puller tool (p/n 05640) to a slide<br />
hammer containing a 1/2 inch diameter shank.<br />
Insert the puller tool into the bottom of the<br />
accumulator cylinder so that it seats on the<br />
inside lower contour of the cylinder. Hammer<br />
the cylinder out of the accumulator housing.<br />
14. Remove the tube connector (102) by pulling it out of<br />
the accumulator chamber.<br />
15. To remove the accumulator chamber and<br />
diaphragem (23) from the accumulator cylinder,<br />
place the accumulator assembly on Stanley special<br />
disassembly tools (p/n 05508 ring and p/n 04910<br />
tube). Place a rag in the bottom of the tube to protect<br />
the accumulator chamber when it is removed. Drive<br />
the chamber and diaphragm out of the cylinder by<br />
tapping on the charge valve end of the chamber with<br />
a maller or pushing on it with an arbor press.<br />
16. Squeeze the accumulator diaphragm and slide it off<br />
the charge valve end of the accumulator chamber.<br />
17. Remove the cup seal (26) and back-up washer (25)<br />
from the accumulator chamber.<br />
18. Remove the air tube (1) (or water tube if applicable).<br />
ACCUMULATOR RE-ASSEMBLY<br />
1. Apply grease and install a new o-ring (100) into the<br />
groove on the accumulator chamber. NOTE: This oring<br />
was only used on early models. It was eliminated<br />
on later models.<br />
2. Apply a light coating of WD-40 to the accumulator<br />
diaphragm (23) and accumulator chamber (24).<br />
Slide the accumulator diaphragm onto the accumulator<br />
chamber from the tube connector (102) end.<br />
3. Use grease or rubber lubricant on the inside of the<br />
accumulator cylinder (22) and the outside diameter<br />
of the diaphragm. Push the accumulator chamber<br />
and diaphragm, tube connector end first, halfway<br />
into the accumulator cylinder. Be sure the accumulator<br />
diaphragm is free of wrinkles and the seal beads<br />
are seated correctly to the accumulator chamber<br />
before completing the assembly. Use an arbor press<br />
to completely seat the assembly using short movements<br />
during the last 1/2 inch/12 mm of travel to<br />
gently seat the diaphragm.<br />
4. Apply grease and install a new o-ring (21) into the<br />
groove on the accumulator cylinder.<br />
5. Apply grease and install the back-up washer (25)<br />
and a new cup seal (26) (lips facing out) in the<br />
accumulator chamber counterbore.<br />
6. Apply grease and install new o-rings (101) into the<br />
grooves on the tube connector. Install the tube<br />
connector into the accumulator chamber.<br />
FLOW SLEEVE, PISTON, & AUTOMATIC<br />
VALVE RE-ASSEMBLY<br />
The best way to assemble the flow sleeve (31), automatic<br />
valve body (56) and piston (29) is by using an<br />
assembly fixture such as that shown in figure 1. The<br />
fixture permits the parts to be stacked vertically during<br />
the assembly process. After the parts are stacked, the<br />
handle assembly can then be placed on top of the<br />
stacked parts and tapped into place.<br />
The assembly fixture shown in figure 1 should be<br />
constructed of aluminum or brass and should be at least<br />
3-1/2 in/88 mm high but no more than 8 in/203 mm<br />
high.<br />
Figure 1.<br />
1. Lubricate the flow sleeve with clean hydraulic fluid<br />
and install it into the flow sleeve tube (30). The flow<br />
sleeve has a wide groove around the outside of one<br />
end. Install this end first. Then place the flow sleeve<br />
tube and flow sleeve on top of the assembly fixture<br />
shown in figure 1.
2. Apply grease and install an o-ring (21) onto the flow<br />
sleeve tube.<br />
3. Apply clean hydraulic fluid and install 4 push pins<br />
(58) into the holes in the top of the flow sleeve tube.<br />
One end of each push pin contains a machined<br />
surface. This surface must be facing up as each push<br />
pin is installed. Each push pin must slide freely in or<br />
out of the hole. If a push pin does not slide freely or<br />
seems to stick, the hole may contain contamination<br />
or the top edge of the hole contains a burr. Remove<br />
burrs with a deburring tool, clean the hole thoroughly<br />
and try the push pin again.<br />
4. Tap the roll pin (33) into the hole on the automatic<br />
valve body (56).<br />
5. Apply grease and install an o-ring (21) onto the<br />
automatic valve body.<br />
6. Lubricate with clean hydraulic fluid and install 2<br />
push pins (57) into the holes in the valve body. One<br />
end of each push pin contains a machined surface.<br />
This surface must be facing up as each push pin is<br />
installed. Each push pin must slide freely in or out<br />
of the hole. If a push pin does not slide freely or<br />
seems to stick, the hole may contain contamination<br />
or the top edge of the hole contains a burr. Remove<br />
burrs with a deburring tool, clean the hole thoroughly<br />
and try the push pin again.<br />
7. Lubricate the automatic valve (32) with clean<br />
hydraulic fluid and install it into the valve body.<br />
The automatic valve must freely slide back and<br />
forth. If it does not, the valve body or valve may<br />
contain contaminants or the bore of the valve body<br />
contains burrs. Remove the push pins and scrub the<br />
bore of the valve body with emery cloth and then<br />
thoroughly clean the bore, push pin holes and valve.<br />
Reinstall the push pins and valve.<br />
8. Grasp the automatic valve body and valve so that<br />
one or more fingers are gripping the valve to prevent<br />
it and the push pins from falling out when the valve<br />
body and valve are turned upside down (roll pin<br />
facing down). Place the assembly on top of the flow<br />
sleeve making sure the roll pin aligns with the<br />
appropriate hole in the flow sleeve.<br />
9. Lubricate the piston (29) with clean hydraulic fluid<br />
and install into the top of the automatic valve body.<br />
Apply grease and install a new o-ring (28) into the<br />
groove in the piston (water flush models only).<br />
10. Install the washer (27), smaller diameter first, over<br />
the stem of the piston and onto the automatic valve<br />
body.<br />
11. Install the accumulator assembly over the stem of<br />
the piston and down to the top of the automatic<br />
valve body.<br />
12. Insert the air tube (1) (or water tube if applicable)<br />
into the top of the accumulator ensuring it aligns<br />
with the hole in the piston.<br />
13. Use a felt tip marker to place a mark on the accumulator<br />
cylinder and the accumulator housing to align<br />
the tube connector with the port in the accumulator<br />
housing.<br />
14. Apply grease liberally to the o-ring surfaces on the<br />
accumulator, automatic valve body, flow sleeve tube<br />
and to the bore of the accumulator housing.<br />
15. Place the accumulator housing over the top of the<br />
accumulator, ensure that the felt pen marks are<br />
alligned, and then tap it down until the lower part of<br />
the housing covers the o-ring on the flow sleeve<br />
tube.<br />
16. Lay the completed assembly on its side being careful<br />
to prevent movement of the flow sleeve. Remove the<br />
assembly fixture.<br />
17. Place the completed assembly horizontally in a vice<br />
with soft jaws, oil ports up, and clamp on the flow<br />
sleeve tube.<br />
18. Apply grease and Install a new cup seal (93) with<br />
lips facing down, the washer (92), new rod seal (91)<br />
with lips facing up, and a new o-ring (90).<br />
19. Install the motor over the side rods and into the flow<br />
sleeve tube ensuring the roll pin is correctly aligned<br />
with the hole in the flow sleeve and the motor<br />
control valve is oriented correctly with the handles.<br />
20. Install the 4 side rod nuts. Tighten in 20 ft lb/25 Nm<br />
increments to 75 ft lb/100 Nm in a cross pattern.<br />
21. Apply grease and install new o-rings (44 & 45) to<br />
the blower tube nut. Install the blower tube nut to<br />
the accumulator housing.<br />
22. Install the charge valve (14).<br />
23. Charge the accumulator with 600 psi/42 bar nitrogen<br />
as described in the "CHARGING THE ACCUMU-<br />
LATOR" section of this manual.<br />
24. Apply grease and install a new o-ring (13) onto the<br />
charge valve cap (12). Install the charge valve cap.<br />
14
CHARGING THE ACCUMULATOR<br />
To check or charge the accumulator the following<br />
equipment is required:<br />
15<br />
Accumulator tester (Part Number 02835).<br />
Charging assembly (Part Number 06545) (includes a<br />
regulator, hose and fitting).<br />
NITROGEN bottle with a 800 psi/56 bar minimum<br />
charge.<br />
1. On charge valves containing 5/8 inch hex locking<br />
nuts, first loosen the locking nut 1-1/2 turns.<br />
2. Holding the chuck end of the Stanley tester (p/n<br />
02835), turn the gauge fully counterclockwise to<br />
ensure the stem inside the chuck is completely<br />
retracted.<br />
3. Thread the tester onto the charging valve of the tool<br />
accumulator (do not advance the gauge-end into the<br />
chuck end. Turn as a unit). Seat the chuck on the<br />
accumulator charging valve and hand tighten only.<br />
4. Advance the valve stem by turning the gauge- end<br />
clockwise.<br />
5. Connect the charging assembly to the valve on the<br />
tester.<br />
Regulator<br />
06545 ACCUMULATOR<br />
CHARGE KIT<br />
Includes: Regulator, hose<br />
and charge fitting.<br />
6. Adjust the regulator on the nitrogen bottle to 600<br />
psi/42 bar.<br />
NOTE: It may be necessary to set the regulator at<br />
650-700 psi/45-48 bar to overcome any pressure<br />
drop through the charging system.<br />
7. Open the valve on the charging assembly hose.<br />
When the tester gauge reads 600 to 700 psi/42 to 48<br />
bar, close the valve on the charging assembly hose<br />
and remove the charging assembly.<br />
8. Turn the gauge end of the tester fully counterclockwise<br />
to retract the plunger in the chuck. Remove the<br />
tester from the charge valve.<br />
9. On charge valves containing 5/8 inch hex locking<br />
nuts, tighten the locking nut.<br />
TESTING THE ACCUMULATOR<br />
PRESSURE<br />
1. Follow instructions 1 through 4 under "CHARGING<br />
THE ACCUMULATOR".<br />
2. Read the pressure on the gauge (pressure should be<br />
between 500 & 600 psi/35 & 42 bar.<br />
3. If the pressure is low, recharge the tool.<br />
Nitrogen Tank<br />
ACCUMULATOR CHARGING<br />
02835 TESTER<br />
Hose w/<br />
Charge Fitting<br />
Gauge<br />
Charging Valve<br />
Chuck
If symptoms of poor performance develop, the following<br />
chart can be used as a guide to correct the problem.<br />
When diagnosing faults in operation of the tool, always<br />
check that the hydraulic power source is supplying the<br />
correct hydraulic flow and pressure to the tool as listed<br />
in the table. Use a flowmeter known to be accurate.<br />
Check the flow with the hydraulic oil temperature at<br />
least 80°F/27°C.<br />
PROBLEM CAUSE SOLUTION<br />
TROUBLE SHOOTING<br />
<strong>Tool</strong> doesn’t run. Power unit not functioning. Check power unit for proper<br />
flow and pressure (7-9 gpm<br />
@ 1500-2000 psi).<br />
Couplers or hoses blocked. Remove obstruction.<br />
Pressure and return line hoses Be sure hoses are connected to<br />
reversed at ports. the proper ports.<br />
Mechanical failure of piston or Disassemble drill and inspect<br />
automatic valve. for damaged parts.<br />
<strong>Tool</strong> doesn’t drill effectively. Power unit not functioning. Check power unit for proper<br />
flow and pressure (7-9 gpm @<br />
1500-2000 psi).<br />
Couplers or hoses blocked. Remove obstruction.<br />
Insufficient air or water 20 cmf minimum.<br />
Accumulator charge (pressure Recharge accumulator. Replace<br />
hose pulses more than normal). diaphragm if charge loss<br />
continues.<br />
Oil too hot (above 140°F). Provide cooler to maintain<br />
proper oil temperature<br />
(under 140°F).<br />
continued<br />
16
17<br />
PROBLEM CAUSE SOLUTION<br />
<strong>Tool</strong> operates slow Low gpm supply from power unit. Check power unit for proper<br />
flow (7-9 gpm)<br />
High backpressure. Check hydraulic system for<br />
excessive backpressure<br />
(over 250 psi).<br />
Couplers or hoses blocked. Remove obstruction.<br />
Orifice plug blocked. Remove restriction.<br />
Oil too hot (above 140°F) Check power unit for proper oil<br />
or cold (below 60°). temperature. Bypass cooler to<br />
warm oil up, or provide cooler to<br />
maintain proper temperature.<br />
Relief valve set too low. Adjust relief valve to<br />
2100-2250 psi.<br />
<strong>Tool</strong> gets hot. Hot oil going through tool. Check power unit. Be sure flow<br />
rate is not too high causing part<br />
of the oil to go through the<br />
relief valve. Provide cooler to<br />
maintain proper oil temperature<br />
(under 140°F).<br />
Check relief valve setting.<br />
Oil leakage on drill steel. Lower piston or drive hex Replace seals.<br />
seal failure.<br />
Oil leakage through charge Upper piston seal failure or Replace seals, recharge or<br />
valve cap. accumulator or o-ring failure replace accumulator<br />
or accumulator charge loss diaphragm.<br />
or failure.<br />
Oil leakage around trigger. Valve spool seal failure. Replace seals.<br />
Low rotation torque. Motor not completely broken in. Continue operation to break in<br />
motor.<br />
Excessive oil temperature Provide cooler to maintain oil<br />
causes operating pressure loss. temperature (under 140°F).<br />
Damage to motor clearances. Repair as required.<br />
Insufficient air or water. 20 CFM minimum.<br />
Mechanical binding during drilling. Take care to guide drill straight.
Pressure Range ............................................................................................................................................ 1500-2000 psi/104-140 bar<br />
Shank Size (SK58110 (Air) ,SK58120 (Water) , & SK58310 UW (Air)........................................................................4-1/4 in. x 1 in. hex<br />
Shank Size (SK58130(Air ) ................................................................................................................................4-1/4 in. x 7/8 in. hex<br />
Maximum Back Pressure .................................................................................................................................................. 250 psi/17 bar<br />
Flow Range ................................................................................................................................................................ 7-9 gpm/26-34 lpm<br />
Porting ................................................................................................................................................................................ -8 SAE O-ring<br />
Couplers ............................................................................................................................................................................... Not Included<br />
Connect Size and Type ................................................................................................................................... 3/8 in. Male Pipe Adapter<br />
Hose Whips ................................................................................................................................................................................ Included<br />
Weight ......................................................................................................................................................................... 67 lbs / 30 kg<br />
Overall Length ................................................................................................................................................................... 26 in. / 66 cm<br />
Overall Width - Standard Handle ....................................................................................................................................... 18 in. / 46 cm<br />
Maximum Fluid Temperature .............................................................................................................................................. 140° F/60° C<br />
DESCRIPTION PART NUMBER<br />
<strong>Drill</strong> Steels for Use with Air<br />
1 in. Hex x 4-1/4 in. H thread, 12 in./30 cm U/C 05168<br />
1 in. Hex x 4-1/4 in. H thread, 18 in./46 cm U/C 05169<br />
1 in. Hex x 4-1/4 in. H thread, 24 in./61 cm U/C 05170<br />
1 in. Hex x 4-1/4 in. H thread, 36 in./91 cm U/C 04915<br />
1 in. Hex x 4-1/4 in. H thread, 48 in./122 cm U/C 05171<br />
1 in. Hex x 4-1/4 in. H thread, 72 in./183 cm U/C 08905<br />
1 in. Hex x 4-1/4 in. H thread, 96 in./244 cm U/C 08906<br />
7/8 in. Hex x 4-1/4 in. H thread, 12 in./30 cm U/C 05172<br />
7/8 in. Hex x 4-1/4 in. H thread, 24 in./61 cm U/C 05174<br />
7/8 in. Hex x 4-1/4 in. H thread, 36 in./91 cm U/C 05175<br />
7/8 in. Hex x 4-1/4 in. H thread, 48 in./122 cm U/C 05176<br />
<strong>Drill</strong> Steels for Use with Water<br />
1 in. Hex x 4-1/4 in. 125 Rope Thread, 48 in./122 cm U/C 05189<br />
1 in. Hex x 4-1/4 in. 125 Rope Thread, 60 in./152 cm U/C 05184<br />
Striking Bar, 1 in. Hex x 4-1/4 in. 125 Rope Thread 05192<br />
Coupling, 125 Rope Thread 05193<br />
Replacement Cup Seal for Striking Bar 06929<br />
Carbide Rock Bits for Use with Air (Shoulder Design)<br />
1-3/8 in. Diameter, H thread 05177<br />
1-1/2 in. Diameter, H thread 05178<br />
Carbide Rock Bits for Use with Water<br />
2 in. Diameter, 125 Rope Thread 05189<br />
2-1/4 in. Diameter, 125 Rope Thread 05190<br />
2-1/2 in. Diameter, 125 Rope Thread 05191<br />
DESCRIPTION PART NUMBER USAGE<br />
SPECIFICATIONS<br />
O-ring <strong>Tool</strong> Kit 04337 General Service of Seals<br />
Spil Ring (Auto Valve Removal) 04908 Auto Valve Removal - Requires 04910<br />
Flow Sleeve Removal Tube 04910 Used with 04908 & 05508<br />
Bearing Puller Kit 05064 General Bearing Pulling<br />
Bearing Installation <strong>Tool</strong> 05044 Install Motor Bushings<br />
Bearing Installation <strong>Tool</strong> 05061 Install Motor Bushings<br />
Latch Removal <strong>Tool</strong> 05045 Removal of Retaining Ring and Latch<br />
Latch Installation <strong>Tool</strong> 05879 Installation of Retaining Ring and Latch<br />
Accumulator Disassembly <strong>Tool</strong> 05508 Removal of Chamber from Cylinder<br />
Accumulator Cylinder Puller 05640 Removal of Cylinder from Accumulator Housing<br />
Collet, 7/8 inch 05871 Removal of Motor Bushings<br />
Collet 05068 Removal of Motor Bushings<br />
Accumulator Removal <strong>Tool</strong> 05639 Removal of Accumulator from Accumulator Housing<br />
ACCESSORIES<br />
SPECIAL SERVICE TOOLS<br />
18
Item<br />
No<br />
Part<br />
No<br />
Qty Description<br />
1 04763 1 AIR TUBE (SK58110, SK58 130 &<br />
SK58310 MODELS ONLY)<br />
04965 1 WATER TUBE (SK58120 MODEL<br />
ONLY)<br />
2 07064 1 VENT PLUG<br />
3 04964 2 HANDLE GRIP ASSEMBLY<br />
4 01714 1 NUT HEAVY HEX JAM<br />
5 04786 2 WASHER 5/8 TYPE A N<br />
6 04794 1 O-RING 2-214 R16<br />
7 04147 1 LOCKNUT 1/2-20<br />
8 04718 1 VALVE LEVER<br />
9 04902 1 RETAINING RING<br />
10 04751 1 WASHER<br />
11 04793 1 KAP SEAL<br />
12 04775 1 CHARGE VALVE CAP<br />
13 04052 1 O-RING 3-914 R17<br />
14 04051 1 CHARGING VALVE<br />
15 ——- 1 O-RING (INCLD WITH ITEM 14)<br />
16 00955 1 PIPE PLUG<br />
17 00955 1 PIPE PLUG<br />
18 01411 1 O-RING 3-906 R17<br />
19 04772 1 ORIFICE PLUG<br />
20 01605 2 O-RING<br />
21 04054 3 O-RING 2-233 R17<br />
22 04060 1 ACCUMULATOR CYLINDER<br />
23 04059 1 ACCUMULATOR DIAPHRAG<br />
24 04779 1 ACCUMULATOR CHAMBER<br />
25 04780 1 BACK UP WASHER<br />
26 04386 1 CUP SEAL<br />
27 04750 1 WASHER<br />
28 06268 1 TUBE SEAL (SK58120 & SK58130<br />
MODELS ONLY)<br />
29 04734 1 PISTON (SK58110 MODEL ONLY)<br />
06265 1 PISTON (SK58120, SK58130 &<br />
SK58310 MODELS ONLY)<br />
30 04068 1 FLOW SLEEVE TUBE<br />
31 07889 1 FLOW SLEEVE<br />
32 04065 1 AUTOMATIC VALVE<br />
33 07890 1 ROLL PIN 3/16 X 1.5<br />
34 01652 2 PIGTAIL HOSE ASSEMBLY<br />
35 04781 1 INLET FLANGE<br />
36 02688 2 CAPSCREW<br />
37 04792 1 KAP SEAL<br />
38 02003 1 O-RING 2-113 R16<br />
39 04771 1 WASHER<br />
40 04791 1 KAP SEAL<br />
41 04795 1 O-RING 2-218 R16<br />
42 04777 1 THROTTLE VALVE<br />
43 04778 1 BLOWER TUBE NUT<br />
44 00016 1 O-RING 2-015 R16<br />
45 00175 1 O-RING 2-014 R17<br />
46 04660 1 HOUSING<br />
47 00772 1 KEY<br />
48 07291 1 MODIFIED CAPSCREW<br />
49 04512 1 RETAINING RING<br />
50 04764 1 SWIVEL FITTING<br />
51 00106 1 O-RING 2-012 R16<br />
52 04765 1 INLET SWIVEL BODY<br />
53 04767 1 STREET ELBOW 45° 3/8<br />
54 05202 1 VALVE-AIR ONLY (SK58110,<br />
SK58130 & SK58310 MODELS<br />
ONLY)<br />
55 04801 1 HOSE ASSEMBLY<br />
MODEL DESIGNATIONS<br />
SK58110 1 in. x 4-1/4 hex shank, air<br />
SK58120 1 in. x 4-1/4 hex shank, water<br />
SK58130 7/8 in. x 4-1/4 hex shank, air<br />
SK58310 1 in. x 4-1/4 hex shank, air,<br />
under water use<br />
19<br />
Item Part Qty Description<br />
No No<br />
56 04066 1 AUTOMATIC VALVE BODY<br />
57 04571 2 PUSH PIN<br />
58 04067 4 PUSH PIN<br />
59 03786 1 GPM STICKER 7-9 2000P<br />
60 05152 1 STANLEY STICKER<br />
61 04721 1 LATCH CASTING<br />
62 04761 1 RETAINING RING<br />
63 04759 1 SPRING BACK-UP<br />
64 04758 1 COIL SPRING<br />
65 04756 1 LATCH WASHER<br />
66 04075 4 SIDE ROD NUT<br />
67 01217 2 CAPSCREW 3/8-16UNCX2-1/4<br />
68 04748 1 MOTOR PLATE<br />
69 00783 2 PIPEPLUG 1/16-27X.242<br />
70 04788 2 DU BEARING<br />
71 03826 2 DU BEARING<br />
72 04033 1 IDLER GEAR<br />
73 01277 1 O-RING 2-044 R17<br />
74 00713 2 DOWEL PIN<br />
75 04744 1 DRIVE MOTOR CHAMBER<br />
76 04784 1 DRIVE HEX (SK58110 MODEL ONLY)<br />
06267 1 DRIVE HEX (SK58120 & SK58310<br />
MODELS ONLY)<br />
05195 1 DRIVE HEX (SK58130 MODEL ONLY)<br />
77 04787 1 WOODRUFF KEY<br />
78 04373 4 SIDE ROD<br />
79 04774 1 GASKET<br />
80 23395 2 QUAD RING -327<br />
81 23399 2 BACK-UP RING<br />
82 04769 1 DRIVE MOTOR CONTROL BLOCK<br />
(SK58110, SK58130 & SK58310<br />
MODELS ONLY)<br />
06266 1 DRIVE MOTOR CONTROL BLOCK<br />
(SK58120 MODEL ONLY)<br />
83 00634 2 NYLON CAP LOCK<br />
84 01362 1 O-RING 2-011 R16<br />
85 01605 1 O-RING 3-908 R17<br />
86 18643 1 SETSCREW 10-24 X 1/4<br />
87 04753 1 MOTOR CONTROL KNOB<br />
88 04773 1 VALVE GUIDE<br />
89 04783 1 MOTOR CONTROL VALVE<br />
90 04073 1 O-RING 2-231 R17<br />
91 30890 1 ROD SEAL<br />
92 04755 1 SEAL WASHER<br />
93 04790 1 CUP SEAL<br />
94 03009 1 ROLL PIN<br />
95 02688 1 HSHCS 5/16-18UNCX3/4<br />
96 03047 2 ROLL PIN 3/16DIAX3/4<br />
97 04754 1 THRUST BACK-UP WASHER<br />
98 04789 1 THRUST WASHER<br />
99 04752 1 DRIVE GEAR<br />
100 05641 1 O-RING 2-3/8X2-1/2X1/16 90D (USED<br />
ON EARLY MODELS ONLY)<br />
101 00026 2 O-RING 2-008 R16<br />
102 04776 1 TUBE CONNECTOR<br />
103 04796 1 NAME TAG-SK58 (NOT A SERVICE<br />
ITEM)<br />
104 04768 1 WATER VALVE (SK58120 MODEL<br />
ONLY)<br />
SEAL KIT P/N 04805<br />
PARTS LIST<br />
NOTE: Use Part Number, Part Name when<br />
ordering.<br />
• Denotes Part Furnished in Seal Kit 04805.
SK58 SINKER DRILL MODELS<br />
SK58110, SK58120, SK58130, & SK58310<br />
March 1999<br />
20
21<br />
WARRANTY<br />
Stanley <strong>Hydraulic</strong> <strong>Tool</strong>s (hereinafter called “Stanley”), subject to the exceptions contained below, warrants new hydraulic tools for a period of one year<br />
from the date of sale to the first retail purchaser, or for a period of 2 years from the shipping date from Stanley, whichever period expires first, to be free<br />
of defects in material and/or workmanship at the time of delivery, and will, at its option, repair or replace any tool or part of a tool, or new part, which is<br />
found upon examination by a Stanley authorized service outlet or by Stanley’s factory in Milwaukie, Oregon to be DEFECTIVE IN MATERIAL AND/OR<br />
WORKMANSHIP.<br />
EXCEPTIONS FROM WARRANTY<br />
NEW PARTS: New parts which are obtained individually are warranted, subject to the exceptions herein, to be free of defects in material and/or<br />
workmanship at the time of delivery and for a period of 6 months after the date of first usage. Seals and diaphragms are warranted to be free of<br />
defects in material and/or workmanship at the time of delivery and for a period of 6 months after the date of first usage or 2 years after the date of<br />
delivery, whichever period expires first. Warranty for new parts is limited to replacement of defective parts only. Labor is not covered.<br />
FREIGHT COSTS: Freight costs to return parts to Stanley, if requested by Stanley for the purpose of evaluating a warranty claim for warranty credit,<br />
are covered under this policy if the claimed part or parts are approved for warranty credit. Freight costs for any part or parts which are not approved for<br />
warranty credit will be the responsibility of the individual.<br />
SEALS & DIAPHRAGMS: Seals and diaphragms installed in new tools are warranted to be free of defects in material and/or workmanship for a period<br />
of 6 months after the date of first usage, or for a period of 2 years from the shipping date from Stanley, whichever period expires first.<br />
CUTTING ACCESSORIES: Cutting accessories such as breaker tool bits are warranted to be free of defects in material and or workmanship at the<br />
time of delivery only.<br />
ITEMS PRODUCED BY OTHER MANUFACTURERS: Components which are not manufactured by Stanley and are warranted by their respective<br />
manufacturers.<br />
a. Costs incurred to remove a Stanley manufactured component in order to service an item manufactured by other<br />
manufacturers.<br />
ALTERATIONS & MODIFICATIONS: Alterations or modifications to any tool or part. All obligations under this warranty shall be terminated if the new<br />
tool or part is altered or modified in any way.<br />
NORMAL WEAR: any failure or performance deficiency attributable to normal wear and tear such as tool bushings, retaining pins, wear plates,<br />
bumpers, retaining rings and plugs, rubber bushings, recoil springs, etc.<br />
INCIDENTAL/CONSEQUENTIAL DAMAGES: To the fullest extent permitted by applicable law, in no event will STANLEY be liable for any incidental,<br />
consequential or special damages and/or expenses.<br />
FREIGHT DAMAGE: Damage caused by improper storage or freight handling.<br />
LOSS TIME: Loss of operating time to the user while the tool(s) is out of service.<br />
IMPROPER OPERATION: Any failure or performance deficiency attributable to a failure to follow the guidelines and/or procedures as outlined in the<br />
tool’s operation and maintenance manual.<br />
MAINTENANCE: Any failure or performance deficiency attributable to not maintaining the tool(s) in good operating condition as outlined in the<br />
Operation and Maintenance Manual.<br />
HYDRAULIC PRESSURE & FLOW, HEAT, TYPE OF FLUID: Any failure or performance deficiency attributable to excess hydraulic pressure, excess<br />
hydraulic back-pressure, excess hydraulic flow, excessive heat, or incorrect hydraulic fluid.<br />
REPAIRS OR ALTERATIONS: Any failure or performance deficiency attributable to repairs by anyone which in Stanley’s sole judgement caused or<br />
contributed to the failure or deficiency.<br />
MIS-APPLICATION: Any failure or performance deficiency attributable to mis-application. “Mis-application” is defined as usage of products for which<br />
they were not originally intended or usage of products in such a matter which exposes them to abuse or accident, without first obtaining the written<br />
consent of Stanley. PERMISSION TO APPLY ANY PRODUCT FOR WHICH IT WAS NOT ORIGINALLY INTENDED CAN ONLY BE OBTAINED<br />
FROM STANLEY ENGINEERING.<br />
WARRANTY REGISTRATION: STANLEY ASSUMES NO LIABILITY FOR WARRANTY CLAIMS SUBMITTED FOR WHICH NO TOOL REGISTRA-<br />
TION IS ON RECORD. In the event a warranty claim is submitted and no tool registration is on record, no warranty credit will be issued without first<br />
receiving documentation which proves the sale of the tool or the tools’ first date of usage. The term “DOCUMENTATION” as used in this paragraph is<br />
defined as a bill of sale, or letter of intent from the first retail customer. A WARRANTY REGISTRATION FORM THAT IS NOT ALSO ON RECORD<br />
WITH STANLEY WILL NOT BE ACCEPTED AS “DOCUMENTATION”.<br />
NO ADDITIONAL WARRANTIES OR REPRESENTATIONS<br />
This limited warranty and the obligation of Stanley thereunder is in lieu of all other warranties, expressed or implied including merchantability or fitness<br />
for a particular purpose except for that provided herein. There is no other warranty. This warranty gives the purchaser specific legal rights and<br />
other rights may be available which might vary depending upon applicable law.
Stanley <strong>Hydraulic</strong> <strong>Tool</strong>s • 3810 S.E. Naef Road Milwaukie, Oregon 97267-5698<br />
Phone: 503/659-5660 Fax: 503/652-1780


