hydraulic power unit twin circuit diesel - Tool-Smith
hydraulic power unit twin circuit diesel - Tool-Smith
hydraulic power unit twin circuit diesel - Tool-Smith
Create successful ePaper yourself
Turn your PDF publications into a flip-book with our unique Google optimized e-Paper software.
WARNING<br />
Copyright © 2003, The Stanley Works<br />
OPS/SVCE USA<br />
35883 1/2004 Ver 2<br />
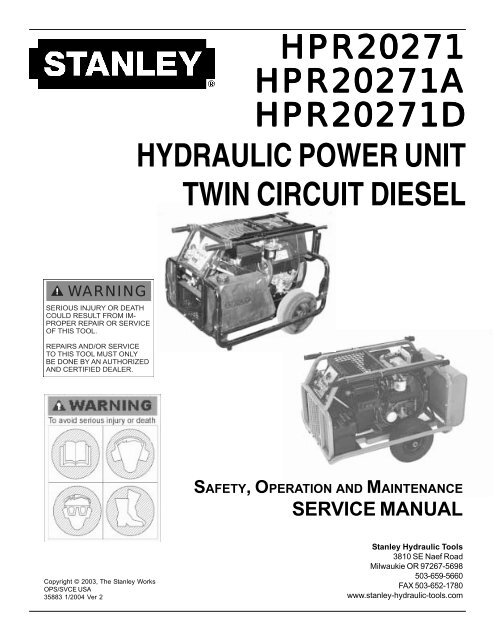
HPR20271<br />
HPR20271<br />
HPR20271A<br />
HPR20271A<br />
HPR20271D<br />
HPR20271D<br />
HYDRAULIC POWER UNIT<br />
TWIN CIRCUIT DIESEL<br />
SAFETY, OPERATION AND MAINTENANCE<br />
SERVICE MANUAL<br />
Stanley Hydraulic <strong>Tool</strong>s<br />
3810 SE Naef Road<br />
Milwaukie OR 97267-5698<br />
503-659-5660<br />
FAX 503-652-1780<br />
www.stanley-<strong>hydraulic</strong>-tools.com
TABLE OF CONTENTS<br />
Safety Symbols ........................................................................................ 4<br />
Safety Precautions ................................................................................... 5<br />
<strong>Tool</strong> Stickers & Tags................................................................................. 6<br />
Hydraulic Hose Requirements .................................................................. 7<br />
HTMA Requirements ................................................................................ 8<br />
Operation ................................................................................................. 9<br />
Routine Maintenance .............................................................................. 13<br />
Troubleshooting ...................................................................................... 14<br />
Specifications ......................................................................................... 16<br />
Accessories ........................................................................................... 16<br />
Service ................................................................................................... 17<br />
Parts Lists.............................................................................................. 20<br />
Parts Drawings ....................................................................................... 20<br />
Engine & Blower Parts Model HPR20271 ......................................... 20<br />
Engine & Blower Parts Models HPR20271A & HPR20271D ............. 21<br />
Frame Parts Model HPR20271 ......................................................... 22<br />
Frame Parts Models HPR20271A & HPR20271D ............................. 23<br />
Valve & Dash Panel All Models ........................................................ 24<br />
Hydraulic Tank Parts Model HPR20271 ............................................ 25<br />
Hydraulic Tank Parts Models HPR20271 & HPR20271D .................. 26<br />
Hose, Fittings & Clamps Model HPR20271 ...................................... 27<br />
Hose, Fittings & Clamps Models HPR20271A & HPR20271D .......... 28<br />
Wiring Diagram Models HPR20271 & HPR20271D ........................... 29<br />
Wiring Diagram Model HPR20271A .................................................. 30<br />
Warranty ................................................................................................ 31<br />
SERVICING THE STANLEY POWER UNIT: This manual contains safety, operation, and routine maintenance<br />
instructions. Stanley Hydraulic <strong>Tool</strong>s recommends that servicing of <strong>hydraulic</strong> tools, other than<br />
routine maintenance, must be performed by an authorized and certified dealer. Please read the following<br />
warning.<br />
WARNING<br />
SERIOUS INJURY OR DEATH COULD RESULT FROM THE IM-<br />
PROPER REPAIR OR SERVICE OF THIS TOOL.<br />
REPAIRS AND / OR SERVICE TO THIS TOOL MUST ONLY BE<br />
DONE BY AN AUTHORIZED AND CERTIFIED DEALER.<br />
For the nearest authorized and certified dealer, call Stanley Hydraulic <strong>Tool</strong>s at the number listed on the<br />
back of this manual and ask for a Customer Service Representative.<br />
3
Safety symbols and signal words, as shown below, are used to emphasize all operator, maintenance and repair<br />
actions which, if not strictly followed, could result in a life-threatening situation, bodily injury or damage to equipment.<br />
This is the safety alert symbol. It is used to alert you to potential personal<br />
injury hazards. Obey all safety messages that follow this symbol to avoid<br />
possible injury or death.<br />
DANGER<br />
WARNING<br />
CAUTION<br />
NOTICE<br />
IMPORTANT<br />
SAFETY SYMBOLS<br />
This safety alert and signal word indicate an imminently hazardous situation<br />
which, if not avoided, will result in death or serious injury.<br />
This safety alert and signal word indicate a potentially hazardous situation<br />
which, if not avoided, could result in death or serious injury.<br />
This safety alert and signal word indicate a potentially hazardous situation<br />
which, if not avoided, may result in minor or moderate injury.<br />
This signal word indicates a potentially hazardous situation which, if not<br />
avoided, may result in property damage.<br />
This signal word indicates a situation which, if not avoided, will result in<br />
damage to the equipment.<br />
This signal word indicates a situation which, if not avoided, may result in<br />
damage to the equipment.<br />
Always observe safety symbols. They are included for your safety and for the protection of the tool.<br />
LOCAL SAFETY REGULATIONS<br />
Enter any local safety regulations here. Keep these instructions in an area accessible to the operator and maintenance<br />
personnel.<br />
4
<strong>Tool</strong> operators and maintenance personnel must always comply with the safety<br />
precautions given in this manual and on the stickers and tags attached to the<br />
equipment.<br />
These safety precautions are given for your safety. Review them carefully before<br />
operating the tool and before performing general maintenance or repairs.<br />
Supervising personnel should develop additional precautions relating to the specific<br />
work area and local safety regulations. If so, place the added precautions in the<br />
space provided on page 4.<br />
In addition to this manual, read and understand safety and operating instructions in<br />
the Engine Operation Manual furnished with the <strong>power</strong> <strong>unit</strong>.<br />
The HPR20271 Hydraulic Diesel Power Unit will provide safe and dependable<br />
service if operated in accordance with the instructions given in this manual. Read<br />
and understand this manual and any stickers and tags attached to the Power Unit.<br />
Failure to do so could result in personal injury or equipment damage.<br />
• Operator must start in a work area without bystanders. The operator must be familiar with all prohibited work areas<br />
such as excessive slopes and dangerous terrain conditions.<br />
Establish a training program for all operators to ensure safe operation.<br />
Do not operate the <strong>power</strong> <strong>unit</strong> unless thoroughly trained or under the supervision of an instructor.<br />
Always wear safety equipment such as goggles, ear, head protection, and safety shoes at all times when operating the<br />
<strong>power</strong> <strong>unit</strong> and a <strong>hydraulic</strong> tool.<br />
Do not inspect or clean the <strong>power</strong> <strong>unit</strong> while it is running. Accidental engagement of the <strong>unit</strong> can cause serious injury.<br />
Always us hoses and fittings rated at 2500 psi/172 bar with a 4 to 1 safety factor. Be sure all hose connections are<br />
tight.<br />
Be sure all hoses are connected for correct flow direction to and from the tool being used.<br />
Do not inspect hoses and fittings for leaks by using bare hands. “Pin-hole” leaks can penetrate the skin.<br />
NEVER OPERATE THE POWER UNIT IN A CLOSED SPACE. Inhalation of engine exhaust can be fatal.<br />
Do not operate a damaged, improperly adjusted <strong>power</strong> <strong>unit</strong>.<br />
Never wear loose clothing that can get entangled in the working parts of the <strong>power</strong> <strong>unit</strong>.<br />
Keep all parts of your body away from the working parts of the <strong>power</strong> <strong>unit</strong>.<br />
Keep clear of hot engine exhaust.<br />
SAFETY PRECAUTIONS<br />
Do not add fuel to the <strong>power</strong> <strong>unit</strong> while the <strong>power</strong> <strong>unit</strong> is running or is still hot.<br />
Do not operate the <strong>power</strong> <strong>unit</strong> if gasoline odor is present.<br />
Do not use flammable solvents around the <strong>power</strong> <strong>unit</strong> engine.<br />
Do not operate the <strong>power</strong> <strong>unit</strong> within 3.3 ft/1 m of buildings, obstructions or flammable objects.<br />
Do not reverse tool rotation direction by changing fluid flow direction.<br />
Allow <strong>power</strong> <strong>unit</strong> engine to cool before storing in an enclosed space.<br />
Always keep critical tool markings, such as lables and warning stickers legible.<br />
To avoid personal injury or equipment damage, all tool repair, maintenance and service must only be performed by<br />
authorized and properly trained personnel.<br />
5
TOOL STICKERS & TAGS<br />
CAUTION<br />
DIESEL FUEL ONLY<br />
CERTAIN PARTS OF<br />
THE POWER UNIT<br />
WILL BE HOT.<br />
AVOID CONTACT WITH<br />
THOSE PARTS TO<br />
PREVENT INJURY.<br />
32331<br />
DIESEL FUEL ONLY DECAL<br />
(located on fuel tank)<br />
28047<br />
HOT PARTS DECAL<br />
(located on dash panel)<br />
OFF ON<br />
HYDRAULIC<br />
VALVE<br />
CHECK HYDRAULIC FLUID LEEL<br />
WITH ENGINE AT IDLE. ADD FLUID<br />
WHEN ENGINE IS OFF.<br />
51297<br />
CHECK HYDRAULIC FLUID DECAL<br />
(located on dash panel)<br />
The safety tag at right is<br />
attached to the <strong>power</strong> <strong>unit</strong><br />
when shipped from the<br />
factory. Read and understand<br />
the safety instructions<br />
listed on this tag<br />
before removal. We<br />
suggest you retain this tag<br />
and attach it to the tool<br />
when not in use.<br />
DANGER<br />
OPERATE UNIT ONLY IN A<br />
WELL VENTILATED AREA.<br />
ENGINES PRODUCE CARBON<br />
MONOXIDE WHICH IS AN<br />
ODORLESS DEADLY POISON.<br />
28046<br />
CARBON MONOXIDE DECAL<br />
(located on dash panel)<br />
CALIFORNIA<br />
PROPOSITION 65 WARNING<br />
ENGINE EXHAUST CONTAINS CHEMICALS KNOWN TO<br />
THE STATE OF CALIFORNIA TO CAUSE CANCER, BIRTH<br />
DEFECTS AND OTHER REPRODUCTIVE HARM.<br />
SERIAL NO. LOCATION<br />
(At top of dash panel)<br />
BATTERY CHARGE TAG<br />
(Do not remove until read)<br />
DANGER<br />
1. FAILURE TO USE HYDRAULIC HOSE LABELED AND CER-<br />
TIFIED AS NON-CONDUCTIVE WHEN USING HYDRAU-<br />
LIC TOOLS ON OR NEAR ELECTRICAL LINES MAY RE-<br />
SULT IN DEATH OR SERIOUS INJURY.<br />
BEFORE USING HOSE LABELED AND CERTIFIED AS<br />
NON-CONDUCTIVE ON OR NEAR ELECTRIC LINES BE<br />
SURE THE HOSE IS MAINTAINED AS NON-CONDUCTIVE.<br />
THE HOSE SHOULD BE REGULARLY TESTED FOR ELEC-<br />
TRIC CURRENT LEAKAGE IN ACCORDANCE WITH<br />
YOUR SAFETY DEPARTMENT INSTRUCTIONS.<br />
2. A HYDRAULIC LEAK OR BURST MAY CAUSE OIL INJEC-<br />
TION INTO THE BODY OR CAUSE OTHER SEVERE PER-<br />
SONAL INJURY.<br />
A DO NOT EXCEED SPECIFIED FLOW AND PRESSURE<br />
FOR THIS TOOL. EXCESS FLOW OR PRESSURE MAY CAUSE<br />
A LEAK OR BURST.<br />
B DO NOT EXCEED RATED WORKING PRESSURE OF HY-<br />
DRAULIC HOSE USED WITH THIS TOOL. EXCESS PRES-<br />
SURE MAYCAUSE A LEAK OR BURST.<br />
C CHECK TOOL HOSE COUPLERS AND CONNECTORS<br />
DAILY FOR LEAKS. DO NOT FEEL FOR LEAKS WITH YOUR<br />
HANDS. CONTACT WITH A LEAK MAY RESULT IN SEVERE<br />
PERSONAL INJURY.<br />
IMPORTANT<br />
READ OPERATION MANUAL AND<br />
SAFETY INSTRUCTIONS FOR THIS<br />
TOOL BEFORE USING IT.<br />
USE ONLY PARTS AND REPAIR<br />
PROCEDURES APPROVED BY<br />
STANLEY AND DESCRIBED IN THE<br />
OPERATION MANUAL.<br />
DANGER<br />
DANGER<br />
D DO NOT LIFT OR CARRY TOOL BY THE HOSES. DO<br />
NOT ABUSE HOSE. DO NOT USE KINKED, TORN OR<br />
DAMAGED HOSE.<br />
3. MAKE SURE HYDRAULIC HOSES ARE PROPERLY CON-<br />
NECTED TO THE TOOL BEFORE PRESSURING SYSTEM.<br />
SYSTEM PRESSURE HOSE MUST ALWAYS BE CON-<br />
NECTED TO TOOL "IN" PORT. SYSTEM RETURN HOSE<br />
MUST ALWAYS BE CONNECTED TO TOOL "OUT" PORT.<br />
REVERSING CONNECTIONS MAY CAUSE REVERSE<br />
TOOL OPERATION WHICH CAN RESULT IN SEVERE PER-<br />
SONAL INJURY.<br />
4. DO NOT CONNECT OPEN-CENTER TOOLS TO CLOSED-<br />
CENTER HYDRAULIC SYSTEMS. THIS MAY RESULT IN<br />
LOSS OF OTHER HYDRAULIC FUNCTIONS POWERED<br />
BY THE SAME SYSTEM AND/OR SEVERE PERSONAL IN-<br />
JURY.<br />
5. BYSTANDERS MAY BE INJURED IN YOUR WORK AREA.<br />
KEEP BYSTANDERS CLEAR OF YOUR WORK AREA.<br />
6. WEAR HEARING, EYE, FOOT, HAND AND HEAD PROTEC-<br />
TION.<br />
7. TO AVOID PERSONAL INJURY OR EQUIPMENT DAMAGE,<br />
ALL TOOL REPAIR MAINTENANCE AND SERVICE MUST<br />
ONLY BE PERFORMED BY AUTHORIZED AND PROPERLY<br />
TRAINED PERSONNEL.<br />
IMPORTANT<br />
READ OPERATION MANUAL AND<br />
SAFETY INSTRUCTIONS FOR THIS<br />
TOOL BEFORE USING IT.<br />
USE ONLY PARTS AND REPAIR<br />
PROCEDURES APPROVED BY<br />
STANLEY AND DESCRIBED IN THE<br />
OPERATION MANUAL.<br />
TAG TO BE REMOVED ONLY BY<br />
TAG TO BE REMOVED ONLY BY<br />
TOOL OPERATOR.<br />
SEE OTHER SIDE<br />
15875<br />
TOOL OPERATOR.<br />
15875<br />
SAFETY TAG (shown smaller then actual size)<br />
6<br />
29133<br />
CALIFORNIA PROPOSITION<br />
HYDRAULIC<br />
FLUID<br />
ON<br />
CHECK HYDRAULIC FLUID LEVEL<br />
WITH ENGINE AT IDLE<br />
FULL<br />
OK<br />
ADD FLUID<br />
STOP ENGINE TO ADD FLUID<br />
OFF<br />
28044<br />
CHECK HYDRAULIC FLUID LEVEL<br />
FOR ONE OR TWO 5 GPM TOOLS,<br />
PUSH THE COMBINER KNOB IN.<br />
FOR ONE 10 GPM TOOL, PULL THE<br />
COMBINER KNOB OUT AND TURN<br />
BOTH TOOL VALVES ON.<br />
28045<br />
1 OR 2 GPM<br />
35686<br />
HYDRAULIC FLUID DECAL<br />
(located on <strong>hydraulic</strong> tank filter block)<br />
TO START:<br />
BOTH HYDRAULIC VALVES OFF TURN<br />
KEY TO START, HOLD TO CRANK<br />
ENGINE.<br />
RELEASE KEY TO RUN<br />
NOTE: FOR COLD STARTS, TURN KEY TO<br />
ON, PRESS AND HOLD GLOW PLUG<br />
BUTTON FOR 10-15 SECONDS BEFORE<br />
CRANKING.<br />
TO STOP:<br />
BOTH HYDRAULIC VALVES OFF ENGINE<br />
THROTTLE TO SLOW TURN SWITCH KEY<br />
OFF.<br />
TO OPERATE TOOLS:<br />
CONNECT TOOL(S), TURN VALVE(S) ON.<br />
25677<br />
TO START
HYDRAULIC HOSE REQUIREMENTS<br />
HOSE TYPES<br />
Hydraulic hose types authorized for use with Stanley Hydraulic <strong>Tool</strong>s are as follows:<br />
! Certified non-conductive<br />
" Wire-braided (conductive)<br />
$ Fabric-braided (not certified or labeled non-conductive)<br />
Hose ! listed above is the only hose authorized for use near electrical conductors.<br />
Hoses " and $ listed above are conductive and must never be used near electrical conductors.<br />
HOSE SAFETY TAGS<br />
To help ensure your safety, the following DANGER tags are attached to all hose purchased from Stanley Hydraulic<br />
<strong>Tool</strong>s. DO NOT REMOVE THESE TAGS.<br />
If the information on a tag is illegible because of wear or damage, replace the tag immediately. A new tag may be<br />
obtained from your Stanley Distributor.<br />
DO NOT REMOVE THIS TAG<br />
DO NOT REMOVE THIS TAG<br />
THE TAG SHOWN BELOW IS ATTACHED TO "CERTIFIED NON-CONDUCTIVE" HOSE<br />
D A N G E R<br />
1 FAILURE TO USE HYDRAULIC HOSE LABELED AND CERTIFIED AS NON-CONDUCTIVE WHEN<br />
USING HYDRAULIC TOOLS ON OR NEAR ELECTRIC LINES MAYRESULT IN DEATH OR SERIOUS<br />
INJURY.<br />
FOR PROPER AND SAFE OPERATION MAKE SURE THAT YOU HAVE BEEN PROPERLY TRAINED IN<br />
CORRECT PROCEDURES REQUIRED FOR WORK ON OR AROUND ELECTRIC LINES.<br />
2. BEFORE USING HYDRAULIC HOSE LABELED AND CERTIFIED AS NON-CONDUCTIVE ON OR<br />
NEAR ELECTRIC LINES. WIPE THE ENTIRE LENGTH OF THE HOSE AND FITTING WITH A CLEAN<br />
DRY ABSORBENT CLOTH TO REMOVE DIRT AND MOSISTURE AND TEST HOSE FOR MAXIMUM<br />
ALLOWABLE CURRENT LEAKAGE IN ACCORDANCE WITH SAFETY DEPARTMENT<br />
INSTRUCTIONS.<br />
3<br />
SEE OTHER SIDE<br />
SIDE 1 SIDE 2<br />
(shown smaller than actual size)<br />
THE TAG SHOWN BELOW IS ATTACHED TO "CONDUCTIVE" HOSE.<br />
D A N G E R<br />
1 DO NOT USE THIS HYDRAULIC HOSE ON OR NEAR ELECTRIC LINES. THIS HOSE IS NOT<br />
LABELED OR CERTIFIED AS NON-CONDUCTIVE. USING THIS HOSE ON OR NEAR ELECTRICAL<br />
LINES MAY RESULT IN DEATH OR SERIOUS INJURY.<br />
2. FOR PROPER AND SAFE OPERATION MAKE SURE THAT YOU HAVE BEEN PROPERLY TRAINED IN<br />
CORRECT PROCEDURES REQUIRED FOR WORK ON OR AROUND ELECTRIC LINES.<br />
3. DO NOT EXCEED HOSE WORKING PRESSURE OR ABUSE HOSE. IMPROPER USE OR HANDLING<br />
OF HOSE COULD RESULT IN BURST OR OTHER HOSE FAILURE. KEEP HOSE AS FAR AWAY AS<br />
POSSIBLE FROM BODY AND DO NOT PERMIT DIRECT CONTACT DURING USE. CONTACT AT<br />
THE BURST CAN CAUSE BODILY INJECTION AND SEVERE PERSONAL INJURY.<br />
4. HANDLE AND ROUTE HOSE CAREFULLY TO AVOID KINKING, CUTTING, OR CONTACT WITH<br />
HIGH TEMPERATURE SURFACES. DO NOT USE IF KINKED. DO NOT USE HOSE TO PULL OR LIFT<br />
TOOLS, POWER UNITS, ETC.<br />
SEE OTHER SIDE<br />
HOSE PRESSURE RATING<br />
D A N G E R<br />
3. DO NOT EXCEED HOSE WORKING PRESSURE OR ABUSE HOSE. IMPROPER USE OR HANDLING<br />
OF HOSE COULD RESULT IN BURST OR OTHER HOSE FAILURE. KEEP HOSE AS FAR AWAY AS<br />
POSSIBLE FROM BODY AND DO NOT PERMIT DIRECT CONTACT DURING USE. CONTACT AT THE<br />
BURST CAN CAUSE BODILY INJECTION AND SEVERE PERSONAL INJURY.<br />
4. HANDLE AND ROUTE HOSE CAREFULLY TO AVOID KINKING, ABRASION, CUTTING, OR CONTACT<br />
WITH HIGH TEMPERATURE SURFACES. DO NOT USE IF KINKED. DO NOT USE HOSE TO PULL OR<br />
LIFT TOOLS, POWER UNITS, ETC.<br />
5. CHECK ENTIRE HOSE FOR CUTS CRACKS LEAKS ABRASIONS, BULGES, OR DAMAGE TO<br />
COUPLINGS IF ANY OF THESE CONDITIONS EXIST, REPLACE THE HOSE IMMEDIATELY. NEVER<br />
USE TAPE OR ANY DEVICE TO ATTEMPT TO MEND THE HOSE.<br />
6. AFTER EACH USE STORE IN A CLEAN DRY AREA.<br />
SEE OTHER SIDE<br />
D A N G E R<br />
5. CHECK ENTIRE HOSE FOR CUTS CRACKS LEAKS ABRASIONS, BULGES, OR DAMAGE TO<br />
COUPLINGS IF ANY OF THESE CONDITIONS EXIST, REPLACE THE HOSE IMMEDIATELY. NEVER<br />
USE TAPE OR ANY DEVICE TO ATTEMPT TO MEND THE HOSE.<br />
6. AFTER EACH USE STORE IN A CLEAN DRY AREA.<br />
SIDE 1 SIDE 2<br />
(shown smaller than actual size)<br />
The rated working pressure of the <strong>hydraulic</strong> hose must be equal to or higher than the relief valve setting on the<br />
<strong>hydraulic</strong> system.<br />
7<br />
SEE OTHER SIDE<br />
DO NOT REMOVE THIS TAG<br />
DO NOT REMOVE THIS TAG
FLOW RATE<br />
TOOL OPERATING PRESSURE<br />
(at the <strong>power</strong> supply outlet)<br />
SYSTEM RELIEF VALVE SETTING<br />
(at the <strong>power</strong> supply outlet)<br />
MAXIMUM BACK PRESSURE<br />
(at tool end of the return hose)<br />
Measured at a max. fluid viscosity of:<br />
(at min. operating temperature)<br />
TEMPERATURE<br />
Sufficient heat rejection capacity<br />
to limit max. fluid temperature to:<br />
(at max. expected ambient temperature)<br />
Min. cooling capacity<br />
at a temperature difference of<br />
between ambient and fluid temps<br />
HTMA REQUIREMENTS<br />
NOTE:<br />
Do not operate the tool at oil temperatures above 140° F (60° C). Operation at higher temperatures can cause operator<br />
discomfort at the tool.<br />
FILTER<br />
Min. full-flow filtration<br />
Sized for flow of at least:<br />
(For cold temp. startup and max. dirt-holding capacity)<br />
HYDRAULIC FLUID<br />
Petroleum based<br />
(premium grade, anti-wear, non-conductive)<br />
VISCOSITY<br />
(at min. and max. operating temps)<br />
4-6 gpm 7-9 gpm 11-13 gpm 9-10.5 gpm<br />
(15-23 lpm) (26-34 lpm) (42-49 lpm) (34-40 lpm)<br />
2000 psi 2000 psi 2000 psi 2000 psi<br />
(138 bar) (138 bar) (138 bar) (138 bar)<br />
2100-2250 psi 2100-2250 psi 2100-2250 psi 2200-2300 psi<br />
(145-155 bar) (145-155 bar) (145-155 bar) (152-159 bar)<br />
250 psi 250 psi 250 psi 250 psi<br />
(17 bar) (17 bar) (17 bar) (17 bar)<br />
400 ssu* 400 ssu* 400 ssu* 400 ssu*<br />
(82 centistokes) (82 centistokes) (82 centistokes) (82 centistokes)<br />
140° F 140° F 140° F 140° F<br />
(60° C) (60° C) (60° C) (60° C)<br />
3 hp 5 hp 7 hp 6 hp<br />
(2.24 kW) (3.73 kW) (4.47 kW) (5.22 kW)<br />
40° F 40° F 40° F 40° F<br />
(22° C) (22° C) (22° C) (22° C)<br />
25 microns 25 microns 25 microns 25 microns<br />
30 gpm 30 gpm 30 gpm 30 gpm<br />
(114 lpm) (114 lpm) (114 lpm) (114 lpm)<br />
100-400 ssu* 100-400 ssu* 100-400 ssu* 100-400 ssu*<br />
(20-82 centistokes)<br />
NOTE:<br />
When choosing <strong>hydraulic</strong> fluid, the expected oil temperature extremes that will be experienced in service determine the<br />
most suitable temperature viscosity characteristics. Hydraulic fluids with a viscosity index over 140 will meet the requirements<br />
over a wide range of operating temperatures.<br />
*SSU = Saybolt Seconds Universal<br />
NOTE:<br />
These are general <strong>hydraulic</strong> system requirements. See tool Specification page for tool specific requirements.<br />
8<br />
TOOL CATEGORY<br />
HYDRAULIC SYSTEM<br />
REQUIREMENTS TYPE 1 TYPE II TYPE III TYPE RR
ENGINE<br />
PREPARATION FOR USE<br />
Do not operate the <strong>power</strong> <strong>unit</strong> until you<br />
have read the engine operating and<br />
maintenance instructions manual furnished<br />
in addition to this manual.<br />
ENGINE CRANKCASE OIL LEVEL<br />
Always check the oil level before starting tne engine. Make<br />
sure the oil level is at the FULL MARK on the dipstick. Do<br />
not overfill. Use oil as specified in the engine operating and<br />
maintenance manual.<br />
The engine oil sump must never be<br />
overfilled. Overfilling can cause the to<br />
engine to overheat and cause crankshaft<br />
seal damage.<br />
ENGINE FUEL LEVEL<br />
Check the fuel level. If low, fill with DF-1 or DF-2 <strong>diesel</strong> fuel<br />
(A.S.T.M. D975-66T No. 1 or no. 2 dark).<br />
Shut the engine off before attempting<br />
to add fuel to the fuel tank. Do not remove<br />
the fuel cap while the engine is<br />
running. Do not add fuel to the tank<br />
while the engine is hot. Do not fill the<br />
fuel tank to a point of overflowing.<br />
HYDRAULIC FLUID<br />
Check the sight pipe in the <strong>hydraulic</strong> fluid reservoir for the<br />
proper fiuid level. Proper fluid level is indicated when the<br />
center section of the sight pipe is dark. If the center section<br />
of the sight pipe is not dark, add <strong>hydraulic</strong> fluid. Use fluids<br />
OPERATION<br />
9<br />
meeting the following specifications.<br />
Viscosity (Fluid Thickness)<br />
U.S. METRIC<br />
50°F 450 SSU Maximum 10°C 95 Centistokes<br />
100°F 130-200 SSU 38°C 27-42 C.S.<br />
140°F 85 SSU Minimum 60°C 16.5 C.S. Minimum<br />
PourPoint -10°F/-23°C Minimum (for cold startup)<br />
Vicsosity Index (ASTM D-2220) 140 Minimum<br />
Demulsibility (ASTM D-1401) 30 Minutes Maximum<br />
Flash Point (ASTM D-92) 340°F/171°C Minimum<br />
Rust Inhibition (ASTM D-665 A & B) Pass<br />
Oxidation (ASTM D-943) 1000 Hours Minimum<br />
Pump Wear Test (ASTM D-2882) 60 mg Maximum<br />
The following fluids work well over a wide temperature range<br />
at starup, allow moisture to settle out and resist biological<br />
growth that may occur in cool operating <strong>hydraulic</strong> <strong>circuit</strong>s.<br />
These fluids are recommended by Stanley Hydraulic <strong>Tool</strong>s.<br />
Other fluids that meet or exceed the specifications of these<br />
fluids may also be used.<br />
BATTERY<br />
Chevron AW-MV-32<br />
Exxon "Univis" J-26<br />
Mobil D.T.E. 13<br />
Gulf "Harmony" AW-HVI-150-32<br />
Shell "Tellus" T-32<br />
Texaco "Rando" HD-AZ<br />
Union "Unax" AW-WR-32<br />
The supplied battery is maintenance free.
PRESSURE<br />
PRESSURE RETURN<br />
VALVE BLOCK<br />
PRESSURE<br />
RETURN PRESSURE<br />
OPERATION<br />
10<br />
HYDRAULIC HOSE & FITTING<br />
CONNECTIONS<br />
ADAPTER, 1/2 INCH MALE PIPE x -10 SAE O-RING<br />
(STANLEY P/N 07882 ADAPTER)<br />
H.T.M.A. 1/2 INCH MALE QUICK DISCONNECT COU-<br />
PLER<br />
(STANLEY P/N 24061 COUPLER NOSE or STANLEY P/<br />
N 24070 COUPLER SET - nose & body)<br />
H.T.M.A. 1/2 INCH FEMALE QUICK DISCONNECT<br />
COUPLER<br />
(STANLEY P/N 24060 COUPLER BODY or STANLEY P/<br />
N 24070 COUPLER SET - nose & body)<br />
1/2 INCH I.D. HOSE, 25 FT TO 50 FT LONG.<br />
(FOR 25 FEET, STANLEY P/N 04978 HYDRAULIC HOSE<br />
or STANLEY P/N 05008 DUAL HYDRAULIC HOSES)<br />
(FOR 50 FEET, STANLEY P/N 04979 HYDRAULIC HOSE<br />
or STANLEY P/N 05009 DUAL HYDRAULIC HOSES)<br />
1/2 INCH MALE PIPE HOSE END<br />
H.T.M.A. 1/2 INCH MALE QUICK DISCONNECT COU-<br />
PLER<br />
(STANLEY P/N 24061 COUPLER NOSE or STANLEY P/<br />
N 24070 COUPLER SET - nose & body)<br />
H.T.M.A. 3/8 INCH FEMALE QUICK DISCONNECT<br />
COUPLER<br />
(STANLEY P/N 24058 COUPLER BODY or STANLEY P/<br />
N 24069 COUPLER SET - nose & body)<br />
ADAPTER, 3/8 INCH MALE PIPE x -8 SAE O-RING<br />
(STANLEY P/N 00936 ADAPTER) NOTE: ADAPTERS<br />
OR HOSE WHIPS ARE INCLUDED WITH TOOLS.
HYDRAULIC CIRCUIT CONTROLS<br />
The HPR Diesel Power Unit provides two <strong>circuit</strong>s, each with<br />
an oil flow of 5 gpm/19 lpm up to 2000 psi<br />
/140 bar. Or, - the two <strong>circuit</strong>s may be combined into one<br />
<strong>circuit</strong> providing 10 gpm/38 lpm up to 2000 psi/140 bar.<br />
The HPR Diesel Power Unit contains a <strong>hydraulic</strong> pump with<br />
two sections. Each pump section will provide 5 gpm/19 lpm<br />
at the maximum, governed engine throttle. The output (5<br />
gpm/19 lpm) of each pump section is directed to the panel<br />
control valve assembly. It is the position of the <strong>hydraulic</strong><br />
<strong>circuit</strong> combiner knob on the panel control valve assembly<br />
which keeps the output of each pump section separated or<br />
combined.<br />
When the <strong>hydraulic</strong> <strong>circuit</strong> combiner knob is pulled out, the<br />
two <strong>circuit</strong>s are combined into one 10 gpm/38 lpm <strong>circuit</strong>.<br />
One <strong>hydraulic</strong> tool may be connected to one <strong>circuit</strong>. The<br />
other <strong>circuit</strong> must not have a tool connected to it or have the<br />
hoses connected. The <strong>circuit</strong> is activated by pushing both<br />
<strong>circuit</strong> levers up.<br />
When the <strong>hydraulic</strong> <strong>circuit</strong> combiner knob is pushed in, the<br />
two <strong>circuit</strong>s are not combined and each <strong>circuit</strong> provides 5<br />
gpm/19 lpm. One <strong>hydraulic</strong> tool may be connected to each<br />
<strong>circuit</strong>. Each <strong>circuit</strong> is activated by pushing the <strong>circuit</strong> lever<br />
up.<br />
Oil flow is regulated by pulling the throttle control to the full<br />
throttle position. This setting will produce 10 gpm/38 lpm up<br />
to 2000 psi/140 bar.<br />
STARTING & STOPPING<br />
Engine<br />
Control Panel<br />
Key Switch<br />
Oil Pressure<br />
Light<br />
Battery Charge Light<br />
1.Before starting the engine make sure the <strong>hydraulic</strong> <strong>circuit</strong><br />
control levers are in the "OFF" position.<br />
2.Turn the key clockwise until the engine begins to crank.<br />
When the engine starts, release the key.<br />
For cold starts, turn the key until the battery charge light<br />
comes on and then press and hold the glow plug button for<br />
OPERATION<br />
Glow Plug<br />
Button<br />
11<br />
Control Lever<br />
Hydraulic Circuit<br />
Combiner Knob<br />
10-15 seconds (on models HPR20271 and HPR20271D with<br />
this feature). Release the glow plug button and then turn the<br />
key to crank the engine.<br />
3.When the engine is warmed up the throttle may be advanced<br />
and the <strong>hydraulic</strong> tool <strong>circuit</strong>s may be used.<br />
ENGINE SHUTDOWN<br />
Place the <strong>circuit</strong> control levers in the "OFF" position. Push<br />
the throttle control completely in. Allow the engine to idle for<br />
approximately one minute and then turn the key to "OFF".<br />
On models HPR20271 and HPR20271D, pull the "STOP"<br />
knob to shutdown the <strong>unit</strong>.<br />
INSTRUMENTS<br />
BATTERY CHARGE LIGHT<br />
A problem with the charging <strong>circuit</strong> exists if the battery<br />
charge light remains on after the engine has started. Shutdown<br />
the engine and then have the charging <strong>circuit</strong> serviced<br />
by a qualified technician.<br />
OIL PRESSURE LIGHT<br />
Male Couplers (Pressure)<br />
Female Couplers (Return)<br />
Hour Meter<br />
Panel Control Valve for HPR20290, HPR20291 and<br />
Panel Control Valve for the HPR Diesel Power Unit<br />
HPR20296 Power Units<br />
A problem with the engine oil lubricating system exists if the<br />
oil pressure light remains on after the engine has started.<br />
Shutdown the engine and then have the lubricating system<br />
serviced by a qualified technician.
COLD WEATHER STARTUP<br />
1. Use the procedures described under "Starting The<br />
Engine" and then follow the procedures below.<br />
2. Hydraulic fluids are thicker in cold weather, therefore, it is<br />
recommended that the engine be run at low idle long enough<br />
to bring the fluid temperature up to a minimum of 50°F/10°C<br />
or until the top of the <strong>hydraulic</strong> filter feels warm.<br />
3. If the tools and tool hoses are cold, it is recommended to<br />
allow <strong>hydraulic</strong> fluid to circulate through the tool hoses until<br />
warm before using the tools.<br />
USING HANDLE BARS<br />
The <strong>power</strong> <strong>unit</strong> is equipped with retractable handle bars so it<br />
can easily be moved at the job site.<br />
1. To use the handle bars, pull each handle bar straight out<br />
until the bar locking mechanism engages. The <strong>power</strong> <strong>unit</strong><br />
may now be pushed about in a wheel-barrow fashion.<br />
2. To retract the handle bar, push the latch away from the<br />
handle bar to release the lock. Then push the handle bar in.<br />
Latch<br />
Model HPR20271 Latch Mechanism<br />
OPERATION<br />
12<br />
STORAGE<br />
Clean the <strong>unit</strong> thoroughly before storage. Do not use water<br />
pressure.<br />
Always store the <strong>unit</strong> in a clean and dry facility.<br />
If the <strong>unit</strong> will be stored for a prolonged period (over 30 days<br />
and up to 6 months), replace the fuel filter then add <strong>diesel</strong><br />
fuel preservative to the fuel tank. Follow the directions<br />
provided with the fuel preservative.<br />
Check <strong>hydraulic</strong> reservoir for water. If water is found, hange<br />
the oil and circulate it through the tool hose and tool. (See<br />
"HYDRAULIC SYSTEM MAINTENANCE" later in this<br />
section).<br />
Disconnect tool hoses.
ENGINE MAINTENANCE<br />
Follow the maintenance schedule and general maintenance<br />
instructions in the engine maintenance and operation manual<br />
furnished with the <strong>power</strong> <strong>unit</strong>. Normal maintenance includes:<br />
Inspect the air filter daily. Clean if necessary.<br />
Replace dry air filter every 200 hours of operation.<br />
Replace fuel filter every 100 hours of operation.<br />
Change engine oil after first 50 hours of operation, then<br />
after every 200 hours of operation. Change more often if cold,<br />
moist or dusty conditions exist.<br />
Change oil filter when engine oil is changed.<br />
Check oil level daily.<br />
Each day, remove dirt and debris from engine with a cloth<br />
or brush. Do not use water spray.<br />
HYDRAULIC SYSTEM MAINTENANCE<br />
Observe the following for maximum performance and service<br />
life from the <strong>hydraulic</strong> system.<br />
Always keep <strong>hydraulic</strong> system and fluids clean.<br />
Keep water out of fluid.<br />
ROUTINE MAINTENANCE<br />
Check <strong>hydraulic</strong> lines and fittings daily for leaks, kinks,<br />
etc. Do not use your hand to perform this check.<br />
Make sure the suction hose (from the <strong>hydraulic</strong> tank to the<br />
inlet manifold) is clamped securely. This reduces the risk of<br />
pump cavitation. All pump fittings should be tight.<br />
Change the <strong>hydraulic</strong> filter element every 200 hours of<br />
operation. Change more often if cold, moist or dusty conditions<br />
exist.<br />
Check oil cooler for debris. Remove debris with air pressure.<br />
Keep air out of <strong>hydraulic</strong> lines. Hydraulic system overheating<br />
and foam at the <strong>hydraulic</strong> tank breather indicate air is<br />
present in the lines. Keep all suction line fittings and clamps<br />
tight.<br />
13<br />
GENERAL MAINTENANCE<br />
Hydraulic system wear is noted by increased heat during<br />
tool operation, reduced tool performance and eventual<br />
system breakdown.<br />
Operate with the fluid temperature at 50° - 140° F/10° - 60°<br />
C for improved seal and hose life, and maximum efficiency.<br />
FILLING THE RESERVOIR<br />
1. Make sure the engine is stopped before opening the filler<br />
cap. Fill slowly with the recommended fluid as listed in the<br />
"Operation" section of this manual.<br />
2. Add fluid as needed. Stop filling when the sight pipe<br />
changes from center dark to full dark. Fluid must be visible<br />
in the sight pipe gauge at all times.<br />
3. Secure the filler cap before restarting the engine.<br />
REMOVING CONDENSED MOISTURE FROM<br />
HYDRAULIC FLUID<br />
Condensation is a frequent problem with cool <strong>hydraulic</strong><br />
<strong>circuit</strong>s. This condition occurs in moist or cold climates.<br />
When warm air in the <strong>hydraulic</strong> tank draws moisture from the<br />
cooler air outside, water accumulates in the tank.<br />
1. To remove water from the <strong>hydraulic</strong> system, use the<br />
"PRESSURE" hose without the quick-disconnect coupler<br />
attached. Start the engine and let it run at the idle speed.<br />
Pump the fluid into a clean 5 gal./20 ltr container.<br />
2. Turn the engine "OFF" as soon as the <strong>hydraulic</strong> tank<br />
(reservoir) is empty. DO NOT operate the engine with an<br />
empty <strong>hydraulic</strong> tank as pump damage may occur.<br />
3. Allow the fluid to sit long enough for the water to settle to<br />
the bottom of the container. Slowly pour the fluid back into<br />
the <strong>hydraulic</strong> tank, avoiding the water at the bottom of the<br />
container.
TESTING & TROUBLESHOOTING<br />
TESTING & TROUBLESHOOTING<br />
GENERAL<br />
Tests and adjustments should be performed periodically to<br />
ensure the <strong>power</strong> <strong>unit</strong> is operating at maximum efficiency.<br />
Stanley Circuit Tester (Part Number 04182) is recommended.<br />
This tester can be used to isolate problems in both the<br />
engine and <strong>hydraulic</strong> system prior to any <strong>power</strong> <strong>unit</strong> disassembly.<br />
TESTING THE HYDRAULIC CIRCUIT<br />
The following tests can be performed to ensure that the<br />
<strong>hydraulic</strong> pump is supplying the correct flow and pressure<br />
and that the system relief valve is operating properly.<br />
During these tests, make sure the engine is warm<br />
and operating smoothly. If test results are not as specified,<br />
refer to the troubleshooting table given in this section for<br />
possible causes.<br />
TESTING THE 5 GPM HTMA TYPE I CIRCUITS<br />
To test either of the two <strong>circuit</strong>s, proceed as follows:<br />
1. Set both Circuit Control Levers to the "OFF" (down)<br />
position. Push the Combiner Knob "IN" to separate the two<br />
<strong>circuit</strong>s.<br />
2. Connect the Stanley Circuit Tester across two hose ends<br />
(where the tool would normally be connected) of one <strong>circuit</strong>.<br />
3. Fully open the tester restrictor valve (counter clockwise).<br />
4. Start the engine and allow it to run until warm.<br />
5. Pull the engine throttle control completely "OUT" so that<br />
the engine is running at full RPM.<br />
6. Move the Circuit Control Lever for the <strong>circuit</strong> to be tested<br />
to the "ON" (up) position.<br />
7. With the engine at high speed, the test flow gauge should<br />
read 4-5 gpm/15-19 lpm.<br />
8. Slowly turn the restrictor valve clockwise while watching<br />
the pressure gauge. The flow rate should stay at 4-5 gpm/<br />
15-19 Ipm as the pressure gauge reaches 2100-2200 psi/<br />
148-155 bar.<br />
9. At 2100-2200 psi/148-155 bar the relief valve should begin<br />
to open. The pressure at which the relief valve just begins to<br />
14<br />
open is commonly referred to as the "cracking pressure". At<br />
the "cracking pressure", the flow rate should start to drop<br />
because the relief valve is allowing fluid to bypass to the<br />
<strong>hydraulic</strong> reservoir. The "cracking pressure" is preset at the<br />
factory and if it is not within the above range, the relief valve<br />
must be reset as follows:<br />
a. Access to the relief valves can be gained through the top<br />
of the <strong>power</strong> <strong>unit</strong> between the dash panel and top grille. If<br />
more room is required, remove the dash panel. Use a open<br />
end or box end wrench to remove the cap on the relief valve.<br />
b. Use an Allen wrench to adjust the relief valve. Turn<br />
clockwise to raise the pressure and counterclockwise to<br />
reduce the pressure.<br />
c. Replace the cap and test for 2100-2200 psi/148-155 bar<br />
as described above.<br />
d. Repeat the above test with the hoses and tester connected<br />
to the other <strong>circuit</strong>.<br />
TESTING THE 10 GPM HTMA TYPE RR<br />
CIRCUIT<br />
The 10 gpm <strong>circuit</strong> is formed when the combiner knob is<br />
pulled out and both <strong>circuit</strong> control levers are set to the "ON"<br />
(up) position. This allows the output of both pump sections to<br />
be combined at one set of fittings to provide 10 gpm/38 Ipm<br />
flow to a single tool. To test the <strong>circuit</strong>, proceed as follows:<br />
1. Perform steps 1 through 5 under "Testing The 5 gpm<br />
HTMA Type I Circuits". Make sure a tool and hoses ARE<br />
NOT CONNECTED to the other tool <strong>circuit</strong>.<br />
2. Pull the combiner knob "OUT" to combine the two <strong>circuit</strong>s.<br />
3. Raise both control levers to the "ON" position.<br />
4. With the engine at high speed, the test flow gauge should<br />
read 9-10 gpm/34-38 lpm as the pressure gauge reaches<br />
2100-2200 psi/148-155 bar.<br />
5. Perform step 9 under "Testing The 5 gpm HTMA Type I<br />
Circuits".
TROUBLESHOOTING<br />
PROBLEM CAUSE REMEDY<br />
Engine will not run. Battery not connected. Attach battery cables, check wires.<br />
Weak battery. Test battery, charge or replace.<br />
No fuel. Add Fuel.<br />
Fuel filter plugged. Replace fuel filter.<br />
Fluid blowing out of fluid Defective pump seal. Replace pump seal.<br />
reservoir vent.<br />
Hydraulic tank overfilled. Correct the fluid level.<br />
Hydraulic tool won't operate. Control lever setting incorrect. Set control lever to "TOOL ON".<br />
Incorrect hose connection to Make sure the tool hose goes<br />
tool. from pressure fitting to tool<br />
and back to the return fitting.<br />
Fluid always flows from the male to<br />
female fittings.<br />
Quick disconnect fittings Detach from hose, connect set<br />
defective. together and check for free flow.<br />
Hydraulic fluid level low. Check for correct fluid level. Fill<br />
using the recommended fluid.<br />
Pump coupling defective. Check coupling between pump and<br />
blower. The coupler should slide only<br />
..03-.06 in./.80-1.60 mm inches<br />
between blower and pump.<br />
Relief valve stuck open. Adjust or replace valve.<br />
Incorrect throttle setting Pull throttle completely out so that<br />
engine runs at full rpm.<br />
15
SPECIFICATIONS<br />
Capacity .................................................................................. Two 20 lpm / 5 gpm <strong>circuit</strong>s or One 40 lpm / 10 gpm <strong>circuit</strong><br />
Pressure Range ..........................................................................................................................70-140 bar / 1000-2000 psi<br />
Couplers ................................................................................................................................ HTMA Flush Face Type Male & Female<br />
Weight<br />
Model HP20271 ............................................................................................................... 152 kg / 335 lbs<br />
Model HP20271A/D ......................................................................................................... 169 kg / 372 lbs<br />
Overall Length<br />
Model HP20271..................... ............................. ................................................................................99 cm / 39 in.<br />
Model HP20271A/D..................... ......................... ...........................................................................90 cm / 35.5 in.<br />
Overall Width<br />
Model HP20271.............. ............................ ....................................................................................76.2 cm / 30 in.<br />
Model HP20271A/D................................... .........................................................................................61 cm / 24 in.<br />
Overall Height<br />
Model HP20271.......................................... ............................ ........................................................73.6 cm / 29 in.<br />
Model HP20271A/D.................................. .......................... ................................................................74 cm / 29 in.<br />
Engine........................................................................... ..................... Duetz Ruggerini MD191, 2 cylinder, <strong>diesel</strong>, 19 hp<br />
Fuel Tank Capacity<br />
Model HPR20271.............................. ........................... ......................................................................18.9 ltr / 5 gal<br />
Model HPR20271A/HPR20271D............. ...... .....................................................................................16 ltr / 4.2 gal<br />
Oil Reservoir Capacity.................................................................................................... ..................... ....11 ltr / 2.7 gal<br />
or EHTMA Category.........................."C" (20 lpm @ 138 bar) or "D" (30 lpm @ 138 bar)<br />
ACCESSORIES<br />
DESCRIPTION PART NO.<br />
50 ft. Dual Hydraulic Hose, 1/2 in. ID, Wire Braid, with Couplers ................................................................................... 31848<br />
25 ft. Dual Hydraulic Hose, 1/2 in. ID, Wire Braid, with Couplers ................................................................................... 31972<br />
50 ft. Dual Hydraulic Hose, 1/2 in. ID, (2) Wire Braid, Abrasion Resistant Cover, with Couplers ..................................... 58448<br />
25 ft. Dual Hydraulic Hose, 1/2 in. ID, (2) Wire Braid, Abrasion Resistant Cover, with Couplers .................................... 58451<br />
Faster Flush Face Coupler Set, 1/2 in. NPT .................................................................................................................. 24070<br />
Bruning Flush Face Coupler Set, 1/2 in. NPT ................................................................................................................ 03974<br />
Flow and Pressure Tester .............................................................................................................................................. 04182<br />
Adapter, 1/2 SAE to 3/8 in. Male Pipe ........................................................................................................................... 00936<br />
Bushing, 1/2 in. to 3/4 in. .............................................................................................................................................. 02151<br />
Hex Nipple, 1/2 in. Male Pipe ........................................................................................................................................ 04192<br />
Hex Nipple, 3/8 in. Male Pipe ........................................................................................................................................ 03044<br />
16
GENERAL<br />
Service instructions in this section are limited to parts and<br />
components manufactured by Stanley Hydraulic <strong>Tool</strong>s.<br />
Other major components such as the engine and <strong>hydraulic</strong><br />
pump should be serviced by representatives of the respective<br />
manufacturers as follows:<br />
ENGINE<br />
Duetz Ruggerini, 19 hp<br />
Model MD191<br />
The engine should be serviced only by Ruggerini Dealers. It<br />
is recommended to contact the Deutz Corporation for the<br />
nearest authorized Ruggerini dealer at 1-770-564-7100.<br />
HYDRAULIC PUMP<br />
Casappa<br />
PLP20.6,3-31SI-LOC/OC/20.6,3-LOC/OC-D-N-EL<br />
ENGINE REMOVAL<br />
Most engine servicing can be performed without removing the<br />
engine. Consult with your Ruggerini Dealer regarding engine<br />
repairs.<br />
1. Remove both battery connections. Remove the battery<br />
strap or battery hold down. Remove the battery.<br />
2. Remove the wheels by first removing one retaining ring,<br />
slide one washer and wheel off of the axle, then pull the<br />
other wheel and axle out of the axle brackets.<br />
FUEL LINES AND FUEL TANK<br />
SERVICE INSTRUCTIONS<br />
3.Follow the applicable instructions below to disconnect<br />
engine fuel lines.<br />
Model HPR20271: The hoses at the fuel tank must be<br />
disconnected. Obtain the following materials for plugging the<br />
fuel tank ports and the fuel hoses.<br />
a. Two short lengths (2 to 3 inches) of fuel hose one with 1/4<br />
inch inside diameter and one with 1/8 inch inside diameter.<br />
b. Four plug fittings or wood dowels to plug one end of each<br />
of the short hoses and also the ends of the hoses disconnected<br />
from the fuel tank.<br />
17<br />
Using the fittings or the wood dowels, plug one end of each<br />
of the short hoses.<br />
c. Thoroughly clean the exterior of the connections of the<br />
fuel supply line (16, fig 5) and the fuel return line (12, fig 5)<br />
where they are connected to the fuel tank. Disconnect one<br />
fuel line at a time, quickly plugging the fuel line and the tank<br />
port with the wood dowels or fittings and the short hose<br />
lengths to minimize spillage. Wipe up any spillage using<br />
appropriate disposal methods.<br />
Model HPR20271A/HPR20271D: The fuel tank must be<br />
removed in order to remove the engine.<br />
a. Disconnect the hoses (13 & 14, fig 5A) and plug them<br />
with a plug fittings or wood dowels.<br />
b. Remove the 3 capscrews (23, fig 2A) that secure the tank<br />
to the frame. Remove the fuel tank.<br />
4. Remove the air cleaner cover and air cleaner.<br />
5. Remove the top grille (8, fig 2 or 47, fig 2A).<br />
6. Remove the fasteners that retain the cooler mounts (6 &<br />
10, fig 1 & fig 1A) and the cooler brace (12, fig 1 and fig 1A)<br />
and remove the mounts and brace. The switch box (7, fig 1)<br />
and wiring will be loose after this procedure and can then be<br />
removed with the engine (this does not apply to model<br />
HP20271A).<br />
7. Tie the cooler (8, fig 1 and fig 1A) to the frame rails of the<br />
frame (55, fig 2 or 39 fig 2A) so that it will not interfere with<br />
removal of the engine.<br />
8. Disconnect the two wires leading to the hour meter.<br />
9. Disconnect the throttle cable (6, fig 2 or fig 2A) at the<br />
engine. On model HP20271A, disconnect the stop cable (1,<br />
fig 2A) at the engine.<br />
10. Using an Allen wrench, loosen the setscrews on the<br />
coupling assy (27 & 28, fig 2 or 16, fig 2A).<br />
11. Unscrew and remove the nuts (37, fig 2 or 35, fig 2A) and<br />
capscrews (20, fig 1 & fig 1A) and washers.<br />
12. Slide the engine forward being careful not to entangle the<br />
electrical wiring and not to damage other components.<br />
13. Remove the coupling sleeve (28, fig 2 or 17, fig 2A).
14. Slide the engine, with blower housing attached, out the<br />
battery side of the frame for the HP20271 model. For the<br />
HP20271A model, slide the engine out the fuel tank side of<br />
the frame.<br />
TO REINSTALL ENGINE<br />
1. Reverse the above procedures to reinstall the engine.<br />
2. Install the capscrews (20, fig 1 & fig 1A) so that one<br />
washer (21, fig 1 or 36 fig 1A) is installed next to the head of<br />
the capscrew, one washer is installed between the engine<br />
mounting bracket and the frame and one washer is installed<br />
between the nut (37, fig 2 or 35, fig 2A) and the frame.<br />
Tighten the capscrews and nuts to 20 ft. lb torque.<br />
3. After installing the engine, adjust the coupling sleeve as<br />
follows:<br />
a. Move the coupling flange forward or backwards on the<br />
engine drive shaft until the drive shaft is recessed into the<br />
coupling flange bore .435 inches. Tighten the setscrews.<br />
b. Adjust the coupling flange on the pump until the coupling<br />
sleeve has 1/32-1/16 inch end play.<br />
BLOWER HUB, BLOWER WHEEL,<br />
INLET RING, & BLOWER HOUSING<br />
1. Remove the engine as described earlier in this section.<br />
2. To remove the blower wheel, remove the five screws (31,<br />
fig 1 or fig 1A) around the housing inlet ring (30, fig 1 or 1A)<br />
and remove the ring.<br />
3. Remove the blower wheel (26, fig 1 or 24, fig 1A) with the<br />
blower hub (it may be required to remove the three screws<br />
and use them as jack screws in the adjacent holes) (25, fig 1<br />
or 1A) by loosening the set screws on the coupler flange (28,<br />
fig 1 or 1A).<br />
4. Remove the four capscrews (14, fig 1 or 1A) holding the<br />
blower housing (16, fig 1 or 1A) to the engine. Remove the<br />
housing.<br />
RE-ASSEMBLY<br />
1. Reverse the above procedure to reinstall the above<br />
components and observe the following added procedures.<br />
a. Install capscrews which hold the blower housing to the<br />
engine using Loctite 242.<br />
SERVICE<br />
18<br />
b. Install capscrews which hold the blower wheel to the<br />
blower hub using Loctite 680 and torque to 80-100 lb. in.<br />
OIL COOLER<br />
1. Remove the top grille (8, fig 2 or 47, fig 2A).<br />
2. Remove the hoses (3 & 11, fig 5 or 5A).<br />
3. Remove the fasteners that retain the cooler mounts (6 &<br />
10, fig 1 or 1A) and the cooler brace (12, fig 1 or 1A) and<br />
remove the mounts and brace. The switch box (7, fig 1) and<br />
wiring will be loose after this procedure (this does not apply<br />
to model HP20271A).<br />
4. Lift the cooler out.<br />
RE-ASSEMBLY<br />
1. Reverse the above procedure to reinstall the cooler.<br />
HYDRAULIC PUMP<br />
1. First remove the <strong>hydraulic</strong> fluid from the tank by either<br />
pumping it out with a portable drill pump or draining it into a<br />
container.<br />
2. Remove the grille (19, fig 2 or 5, fig 2A).<br />
3. Disconnect the pressure hoses and inlet manifold at the<br />
pump.<br />
3. Remove the 2 capscrews (21, fig 2 or 10, fig 2A) and then<br />
remove the pump.<br />
RE-ASSEMBLY<br />
1. Reverse the above procedure to reinstall the pump and<br />
observe the following step.<br />
a. Insure the coupling sleeve is installed correctly (see<br />
REINSTALL ENGINE).<br />
FUEL TANK<br />
1. If the fuel tank contains fuel, take extreme precautions to
emove the fuel into approved containers. Do not attempt to<br />
service the fuel tank in unventilated areas or in areas containing<br />
electric or natural gas appliances which may start-up<br />
unexpectantly or in shop areas where grinding or welding is<br />
present, all of which can ignite the fuel vapors.<br />
2. Follow step 3 under "ENGINE REMOVAL" to disconnect<br />
and plug the fuel lines.<br />
To remove the tank on the model HP20271, remove the<br />
capscrews (47, fig 2) and brackets (44, fig 2) at the top of the<br />
fuel tank only. Lift the fuel tank out of the lower brackets.<br />
To remove the tank on the model HP20271A, remove three<br />
capscrews (23, fig 2A) and bracket 37, fig 2A). Slide the tank<br />
out.<br />
RE-ASSEMBLY<br />
1.Reverse the above procedures to reinstall the fuel tank.<br />
HYDRAULIC TANK<br />
1. First remove the <strong>hydraulic</strong> fluid from the tank by either<br />
pumping it out with a portable drill pump or draining it into a<br />
container.<br />
2. Remove the grille (19, fig. 2 or 5, fig 2A) by removing the 4<br />
capscrews (9, fig. 2 or 3, fig 2A).<br />
3. Remove the hoses (7 & 11, fig. 5 or 5A) by loosening the<br />
hose clamps.<br />
4. The <strong>hydraulic</strong> tank can now be removed by removing the 2<br />
capscrews (32, fig. 2 or 23, fig 2A) and the tank support tab<br />
(29, fig. 2 or 26, fig 2A).<br />
5. The filter can be removed from the filter head (6, fig. 4) by<br />
spinning it off counter clockwise (this does not apply to<br />
model HP20271A).<br />
6. On model HP20271, the filter block (4, fig. 4) is removed<br />
by first removing the capscrews (2, fig. 4). Hold the grip plate<br />
in place with your fingers to prevent it from falling into the<br />
tank. For the model HP20271A, the filter assembly is<br />
removed by first removing the breather (6, fig 4A) and the<br />
dipstick bolt (12, fig 4A).<br />
RE-ASSEMBLY<br />
1. Reinstall the components and complete assembly to the<br />
frame by reversing the above procedures.<br />
SERVICE<br />
19<br />
DASH PANEL & VALVE ASSY<br />
1. If it is necessary to remove the valve assembly, the battery<br />
must first be removed in order to gain access to the hose<br />
fittings and wiring located on the back of the panel<br />
(HPR20271).<br />
2. After the hoses are removed, the valve assembly may be<br />
removed by first removing the capscrews (15, fig. 2 or 3, fig<br />
2A and 27, fig. 3). Then remove the capscrews (27, fig 3)<br />
holding the valve to the dash panel.<br />
VALVE SPOOLS & COMBINER SPOOL<br />
1. To remove the valve spools, remove the retaining rings (14,<br />
fig. 3) and pull the valve spools out of the valve body.<br />
2. The combiner spool is removed by first unscrewing the<br />
knob (24, fig. 3) and then pushing the valve spool out.<br />
3. Inspect the finish of the valve spools and bores of the valve<br />
block. If scored or scratched, replace the part(s).<br />
RELIEF VALVES<br />
DESCRIPTION: The relief valves allow oil to by-pass to the<br />
reservoir when the system pressure reaches a pre-set value.<br />
The relief valves are set to by-pass at a "cracking" pressure<br />
of 2100-2200 psi/148-155 bar.<br />
While adjustments can be made to the relief settings (see<br />
TESTING and TROUBLESHOOTING), the parts of the relief<br />
valves are not serviceable.<br />
RE-ASSEMBLY<br />
1. Reverse the above procedure to reinstall the above<br />
components.
FIGURE 1<br />
ENGINE & BLOWER PARTS<br />
MODEL HPR20271<br />
ITEM P/N QTY DESCRIPTION<br />
1 ----- -- Fuel Filter Assy<br />
2 02073 2 Capscrew<br />
3 2 Capscrew<br />
4 31241 4 Capscrew<br />
5 03031 4 Lockwasher<br />
6 07752 1 Cooler Mount<br />
7 31918 1 Switch Box<br />
8 07802 1 Oil Cooler<br />
9 27931 2 Capscrew<br />
10 21724 1 Cooler Mount<br />
11 25610 1 Sticker, “Help Desk”<br />
12 21709 1 Cooler Brace<br />
13 08668 10 Sheet Metal Screw<br />
14 02474 4 Capscrew<br />
15 02477 4 Washer<br />
16 07783 1 Blower Housing<br />
AR = As Required<br />
20<br />
ITEM P/N QTY DESCRIPTION<br />
17 21681 4 Spacer<br />
18 ----- -- No Item<br />
19 21675 1 Engine, Ruggerini MD191<br />
20 14876 4 Capscrew<br />
21 04585 AR Washer<br />
22 07818 1 Square Key<br />
23 01521 1 Capscrew<br />
24 00720 1 Setscrew<br />
25 32217 1 Blower Hub<br />
26 32216 1 Blower Wheel<br />
27 32232 4 Capscrew<br />
28 21687 1 Coupler Assy<br />
29 08669 1 Gasket<br />
30 07809 1 Inlet Ring<br />
31 08667 5 Tapping Screw<br />
32 21683 1 Bracket
FIGURE 1A<br />
ENGINE & BLOWER PARTS<br />
MODEL HPR20271A/HPR20271D<br />
ITEM P/N QTY DESCRIPTION<br />
1 ----- 1 Filter Bracket (Supplied<br />
with Item 19)<br />
2 370508 2 Capscrew<br />
3 ----- 2 Capscrew (Supplied<br />
with Item 19)<br />
4 31241 7 Capscrew<br />
5 03031 10 Lock Washer<br />
6 40053 1 Cooler Mount<br />
7 56670 1 Fuel Filter Bracket<br />
8 40078 1 Cooler<br />
9 ----- -- NO ITEM<br />
10 40054 1 Cooler Mount<br />
11 ----- -- NO ITEM<br />
12 56637 1 Cooler Brace<br />
13 08668 10 Sheet Metal Screw<br />
14 02474 4 Capscrew<br />
15 02477 8 Washer<br />
16 07783 1 Blower Housing<br />
ITEM P/N QTY DESCRIPTION<br />
17 21681 4 Spacer<br />
18 07818 1 Key<br />
19 56641 1 Engine, Ruggerini MD191<br />
20 14876 4 Capscrew<br />
21 04585 22 Washer<br />
22 32232 4 Capscrew<br />
23 38878 1 Spacer<br />
24 56640 1 Blower Wheel<br />
25 38877 1 Blower Hub<br />
26 39057 1 QD Bushing<br />
27 ----- 4 Capscrew (Supplied with<br />
Item 26)<br />
28 21687 1 Coupling Assy<br />
29 08669 1 Gasket<br />
30 56643 1 Inlet Ring<br />
31 08667 5 Tapping Screw<br />
32 03906 2 Locknut<br />
21
ITEM P/N QTY DESCRIPTION<br />
1 21695 1 Battery<br />
2 10499 1 Battery Pad<br />
3 15479 2 Capscrew<br />
4 21714 2 Bumper<br />
5 04539 14 Washer<br />
6 21715 1 Throttle Cable<br />
7 35133 1 Throttle Bracket<br />
8 21716 1 Top Grille<br />
9 21319 6 Capscrew<br />
10 08076 2 Handle Tube<br />
11 370101 2 Capscrew<br />
12 08080 2 Handle Grip<br />
13 21319 4 Capscrew<br />
14 29133 1 Sticker, “Warning”<br />
15 21319 2 Capscrew<br />
16 ----- -- Key<br />
(Included w/pump)<br />
17 35345 1 Pump<br />
18 27767 2 90° Elbow<br />
19 27759 1 Grille<br />
20 01298 4 Lockwasher<br />
21 12116 2 Capscrew<br />
FIGURE 2<br />
FRAME PARTS<br />
MODEL HPR20271<br />
ITEM P/N QTY DESCRIPTION<br />
22 01459 2 Lockwasher<br />
23 35346 2 Tube Fitting<br />
24 350237 1 SAE Plug<br />
25 35106 1 Inlet Manifold<br />
26 ----- -- Hydraulic Tank<br />
Assy (See Fig. 6)<br />
27 ----- -- Part of Coupling<br />
Assy #28<br />
28 21687 1 Coupler Assy<br />
29 08669 1 Gasket<br />
30 07809 1 Inlet Ring<br />
31 08667 5 Tapping Screw<br />
32 04416 3 Capscrew<br />
33 00719 14 Locknut<br />
34 ----- -- No Item<br />
35 03760 1 Capscrew<br />
36 21696 1 Battery Clamp<br />
37 04353 12 Locknut<br />
38 00147 1 Nut<br />
39 21700 1 Foot<br />
40 21713 1 Vibration Mount<br />
41 04585 12 Washer<br />
22<br />
ITEM P/N QTY DESCRIPTION<br />
42 21701 2 Carry Handle<br />
43 ----- -- No Item<br />
44 31553 4 Fuel Tank Bracket<br />
45 31554 4 Bracket Liner<br />
46 16251 8 Capscrew<br />
47 15479 8 Capscrew<br />
48 31552 1 Fuel Tank<br />
49 32231 1 Decal<br />
“Diesel Fuel Only”<br />
50 ----- -- Cap( Incld w/tank)<br />
51 16310 2 Wheel<br />
52 21318 2 Washer<br />
53 31240 2 Retaining Ring<br />
54 33372 1 Axle<br />
55 35194 1 Frame<br />
56 10762 2 Roll Pin<br />
57 10759 2 Latch Pin<br />
58 10760 2 Handle Latch<br />
59 10757 2 Handle Stop<br />
60 10750 2 Spring<br />
61 10760 2 Bar<br />
62 03047 2 Roll Pin
FIGURE 2A<br />
FRAME PARTS<br />
MODEL HPR20271A/HPR20271D<br />
ITEM P/N QTY DESCRIPTION<br />
1 56634 1 Stop Cable<br />
2 08080 2 Handle Grip<br />
3 21319 11 Capscrew<br />
4 04539 15 Washer<br />
5 56632 1 Grille<br />
60802 1 Grille (HPR20271D)<br />
6 21715 1 Throttle Cable<br />
7 29133 1 Warning Sticker<br />
8 01219 4 Lockwasher<br />
9 56672 1 Plug<br />
10 02116 2 Capscrew<br />
11 01459 2 Lock Washer<br />
12 21335 1 Elbow<br />
13 27767 2 Elbow<br />
14 56659 1 Pump<br />
15 ----- 1 Key (Included with<br />
pump)<br />
16 21687 1 Coupling Assy<br />
(Incld items 17)<br />
17 ----- 1 Part of Item 16<br />
18 52754 1 Hydraulic Tank<br />
ITEM P/N QTY DESCRIPTION<br />
19 56669 1 Battery Hold Down<br />
59139 1 Battery Hold Down<br />
(HPR20271D)<br />
20 04303 1 Battery<br />
59136 1 Battery (HPR20271D)<br />
21 10499 1 Battery Pad<br />
22 21713 2 Vibration Mount<br />
23 31241 5 Capscrew<br />
24 04539 4 Washer<br />
25 56671 2 Capscrew<br />
26 56644 1 Tank Support<br />
27 03031 10 Washer<br />
28 04416 3 Capscrew<br />
29 21319 1 Capscrew<br />
30 00719 10 Locknut<br />
31 ----- -- NO ITEM<br />
32 03906 4 ESNA Nut<br />
33 31699 2 Carry Handle<br />
34 370513 4 Capscrew<br />
35 04353 12 Locknut<br />
36 04585 22 Washer<br />
37 56645 1 Tank Support<br />
23<br />
54<br />
ITEM P/N QTY DESCRIPTION<br />
38 56631 1 Axle<br />
39 56619 1 Frame Weldment<br />
40 28089 1 Handle Tube<br />
56676 1 Handle Tube<br />
(HPR20271D)<br />
41 56653 2 Wheel, Foam Filled<br />
16310 2 Wheel (HPR20271D)<br />
42 21318 2 Washer<br />
43 31240 2 Retaining Ring<br />
44 56635 1 Fuel Tank<br />
45 56636 1 Fuel Tank Cap<br />
46 ----- -- Supplied with<br />
Item 44<br />
47 27759 1 Top Grille<br />
48 35686 1 Decal, Hyd. Fluid<br />
49 04585 2 Washer<br />
50 00147 2 Nut<br />
51 26831 2 Washer<br />
52 21714 2 Bumper<br />
53 60773 6 Grommet<br />
(HPR20271D)<br />
54 60770 2 Spacer (HPR20271D)
FIGURE 3<br />
VALVE & DASH PANEL<br />
MODEL HPR20271/HPR20271A/HPR20271D<br />
ITEM P/N QTY DESCRIPTION<br />
1 35112 1 Dash Panel<br />
2 20606 1 Hour Meter<br />
3 28046 1 Decal, Carbon Monoxide<br />
4 28047 1 Decal, Hot Parts<br />
5 07492 4 Spirol Pin<br />
6 00016 2 O-ring<br />
7 05848 1 Combiner Spool<br />
8 05043 2 Relief Valve<br />
9 07161 2 Adapter, Long<br />
10 07821 1 Elbow, Hose Barb<br />
11 05844 1 ON/OFF Spool, LH<br />
12 06989 2 O-ring<br />
13 06988 2 Back-up Ring<br />
14 04313 2 Retaining Ring<br />
15 04216 2 Washer<br />
16 00147 2 Nut<br />
17 05849 2 Rod<br />
ITEM P/N QTY DESCRIPTION<br />
18 02633 2 Knob<br />
19 07492 4 Spirol Pin<br />
20 01545 7 Pipe Plug<br />
21 27661 1 Control Block<br />
22 07882 2 Adapter<br />
-10 SAE x 1/2 Male NPT<br />
23 24061 2 Male Coupler Body<br />
24 05847 1 Combiner Knob<br />
25 24060 2 Female Coupler Body<br />
26 05843 1 ON/OFF Spool, RH<br />
27 27931 2 Capscrew<br />
28 04532 2 Washer<br />
29 28045 1 Decal, Circuit 1 or 2<br />
30 35677 1 Decal, To Start<br />
31 51297 1 Decal, Check Hydraulics<br />
24
ITEM P/N QTY DESCRIPTION<br />
1 21323 1 Filler/Breather Cap<br />
2 08253 4 Capscrew<br />
3 01271 2 Pipe Plug<br />
4 35238 1 Filter Block<br />
5 27654 1 Pipe Nipple<br />
6 21326 1 Spin-on Filter Head<br />
7 350219 1 Reducer<br />
8 07821 1 Elbow<br />
9 25417 1 Filter, Zinga AE-25<br />
10 07784 1 Hydraulic Tank<br />
11 07748 1 Sight Pipe<br />
12 34361 1 Relief Vent<br />
13 09591 1 Filter Grip Plate<br />
14 09590 1 Gasket<br />
15 27655 1 Oil Tube<br />
16 35686 1 Decal<br />
FIGURE 4<br />
HYDRAULIC TANK PARTS<br />
MODEL HPR20271<br />
25
ITEM P/N QTY DESCRIPTION<br />
FIGURE 4A<br />
HYDRAULIC TANK PARTS<br />
MODEL HPR20271A/HPR20271D<br />
52754 1 Hydraulic Tank Kit<br />
1 52774 1 Lid<br />
2 52775 1 Spring<br />
3 01202 1 O-Ring<br />
4 40408 1 Filter Element<br />
40080 1 Filter Assy (Incl items 1-5 & 11-13)<br />
5 58487 1 Filter Bowl<br />
6 26070 1 Breather Vent<br />
7 40364 1 Elbow, 45°<br />
8 43688 1 Capscrew<br />
9 58650 1 Tank<br />
10 40133 1 Grip Plate<br />
11 52782 1 Gasket<br />
12 52773 1 Dipstick Bolt<br />
13 52772 1 Dipstick<br />
14 04306 1 Hose<br />
15 58486 1 Filter Head<br />
16 03044 1 Nipple<br />
17 58460 1 Coupling<br />
18 58489 1 Plastic Washer<br />
19 04889 1 Hose Clamp<br />
20 01258 1 O-Ring<br />
SERVICE KIT P/N 43592<br />
03652 1 Lid<br />
1 O-Ring<br />
1 Filter Receptacle<br />
1 O-Ring<br />
1 Breather Element<br />
1 Breather Cover<br />
26
FIGURE 5<br />
HOSES, FITTINGS & CLAMPS<br />
MODEL HPR20271<br />
27<br />
ITEM P/N QTY DESCRIPTION<br />
1 07821 2 90° Elbow<br />
2 04889 4 Hose Clamp<br />
3 35220 1 Hose, Cooler Supply<br />
4 35218 1 Hose Assy<br />
5 35217 1 Hose Assy<br />
6 08045 1 Hose Clamp<br />
7 35343 1 Hose, Suction<br />
8 11179 2 Hose Clamp<br />
9 07747 1 Sleeve, Suction<br />
10 27781 1 Tube, Suction<br />
11 27998 1 Hose, Cooler Return<br />
12 21711 1 Hose, Fuel Return<br />
13 09898 1 Male Connector<br />
14 21750 1 Hose Barb<br />
15 04317 2 Hose Clamp<br />
16 04308 1 Hose, Fuel Supply
FIGURE 5A<br />
HOSES, FITTINGS & CLAMPS<br />
MODEL HPR20271A/HPR20271D<br />
28<br />
ITEM P/N QTY DESCRIPTION<br />
1 07821 2 90° Elbow<br />
2 04889 4 Hose Clamp<br />
3 35220 1 Hose, Cooler Supply<br />
4 35218 1 Hose Assy<br />
5 35217 1 Hose Assy<br />
6 08045 1 Hose Clamp<br />
7 35343 1 Hose, Suction<br />
8 11179 2 Hose Clamp<br />
9 07747 1 Sleeve, Suction<br />
10 27781 1 Tube, Suction<br />
11 04306 1 Hose<br />
12 56696 1 Hose<br />
13 04317 2 Hose Clamp<br />
14 04308 1 Hose
FIGURE 6<br />
WIRING DIAGRAM<br />
MODEL HPR20271/HPR20271D<br />
HPR20271 HPR20271D<br />
ITEM P/N P/N QTY DESCRIPTION<br />
1 21815 59143 1 Wire Assy, Black<br />
2 23683 23683 1 Wire Assy, Green<br />
3 08725 08724 1 Wire Assy, Black<br />
4 21776 60930 1 Circuit Breaker<br />
5 21775 21775 1 Glow Plug Switch<br />
6 21812 59141 1 Wire Assy, White<br />
29
ITEM P/N QTY DESCRIPTION<br />
1 ----- -- NO ITEM<br />
2 23683 1 Wire Assy, Green<br />
3 56640 1 Wire Assy, Black<br />
FIGURE 6A<br />
WIRING DIAGRAM<br />
MODEL HPR20271A<br />
30
Stanley Hydraulic <strong>Tool</strong>s (hereinafter called “Stanley”), subject to the exceptions contained below, warrants new <strong>hydraulic</strong> tools for a period of one year from the date of sale<br />
to the first retail purchaser, or for a period of 2 years from the shipping date from Stanley, whichever period expires first, to be free of defects in material and/or<br />
workmanship at the time of delivery, and will, at its option, repair or replace any tool or part of a tool, or new part, which is found upon examination by a Stanley authorized<br />
service outlet or by Stanley’s factory in Milwaukie, Oregon to be DEFECTIVE IN MATERIAL AND/OR WORKMANSHIP.<br />
EXCEPTIONS FROM WARRANTY<br />
NEW PARTS: New parts which are obtained individually are warranted, subject to the exceptions herein, to be free of defects in material and/or workmanship at the time of<br />
delivery and for a period of 6 months after the date of first usage. Seals and diaphragms are warranted to be free of defects in material and/or workmanship at the time of<br />
delivery and for a period of 6 months after the date of first usage or 2 years after the date of delivery, whichever period expires first. Warranty for new parts is limited to<br />
replacement of defective parts only. Labor is not covered.<br />
FREIGHT COSTS: Freight costs to return parts to Stanley, if requested by Stanley for the purpose of evaluating a warranty claim for warranty credit, are covered under<br />
this policy if the claimed part or parts are approved for warranty credit. Freight costs for any part or parts which are not approved for warranty credit will be the responsibility<br />
of the individual.<br />
SEALS & DIAPHRAGMS: Seals and diaphragms installed in new tools are warranted to be free of defects in material and/or workmanship for a period of 6 months after the<br />
date of first usage, or for a period of 2 years from the shipping date from Stanley, whichever period expires first.<br />
CUTTING ACCESSORIES: Cutting accessories such as breaker tool bits are warranted to be free of defects in material and or workmanship at the time of delivery only.<br />
ITEMS PRODUCED BY OTHER MANUFACTURERS: Components which are not manufactured by Stanley and are warranted by their respective manufacturers.<br />
a. Costs incurred to remove a Stanley manufactured component in order to service an item manufactured by other manufacturers.<br />
ALTERATIONS & MODIFICATIONS: Alterations or modifications to any tool or part. All obligations under this warranty shall be terminated if the new tool or part is altered or<br />
modified in any way.<br />
NORMAL WEAR: any failure or performance deficiency attributable to normal wear and tear such as tool bushings, retaining pins, wear plates, bumpers, retaining rings and<br />
plugs, rubber bushings, recoil springs, etc.<br />
INCIDENTAL/CONSEQUENTIAL DAMAGES: To the fullest extent permitted by applicable law, in no event will STANLEY be liable for any incidental, consequential or<br />
special damages and/or expenses.<br />
FREIGHT DAMAGE: Damage caused by improper storage or freight handling.<br />
LOSS TIME: Loss of operating time to the user while the tool(s) is out of service.<br />
WARRANTY<br />
IMPROPER OPERATION: Any failure or performance deficiency attributable to a failure to follow the guidelines and/or procedures as outlined in the tool’s operation and<br />
maintenance manual.<br />
MAINTENANCE: Any failure or performance deficiency attributable to not maintaining the tool(s) in good operating condition as outlined in the Operation and Maintenance<br />
Manual.<br />
HYDRAULIC PRESSURE & FLOW, HEAT, TYPE OF FLUID: Any failure or performance deficiency attributable to excess <strong>hydraulic</strong> pressure, excess <strong>hydraulic</strong> backpressure,<br />
excess <strong>hydraulic</strong> flow, excessive heat, or incorrect <strong>hydraulic</strong> fluid.<br />
REPAIRS OR ALTERATIONS: Any failure or performance deficiency attributable to repairs by anyone which in Stanley’s sole judgement caused or contributed to the failure<br />
or deficiency.<br />
MIS-APPLICATION: Any failure or performance deficiency attributable to mis-application. “Mis-application” is defined as usage of products for which they were not<br />
originally intended or usage of products in such a matter which exposes them to abuse or accident, without first obtaining the written consent of Stanley. PERMISSION TO<br />
APPLY ANY PRODUCT FOR WHICH IT WAS NOT ORIGINALLY INTENDED CAN ONLY BE OBTAINED FROM STANLEY ENGINEERING.<br />
WARRANTY REGISTRATION: STANLEY ASSUMES NO LIABILITY FOR WARRANTY CLAIMS SUBMITTED FOR WHICH NO TOOL REGISTRATION IS ON RECORD. In<br />
the event a warranty claim is submitted and no tool registration is on record, no warranty credit will be issued without first receiving documentation which proves the sale of<br />
the tool or the tools’ first date of usage. The term “DOCUMENTATION” as used in this paragraph is defined as a bill of sale, or letter of intent from the first retail customer.<br />
A WARRANTY REGISTRATION FORM THAT IS NOT ALSO ON RECORD WITH STANLEY WILL NOT BE ACCEPTED AS “DOCUMENTATION”.<br />
NO ADDITIONAL WARRANTIES OR REPRESENTATIONS<br />
This limited warranty and the obligation of Stanley thereunder is in lieu of all other warranties, expressed or implied including merchantability or fitness for a particular<br />
purpose except for that provided herein. There is no other warranty. This warranty gives the purchaser specific legal rights and other rights may be available<br />
which might vary depending upon applicable law.<br />
31
Stanely Hydraulic <strong>Tool</strong>s<br />
3810 SE Naef Road<br />
Milwaukie, Oregon<br />
503-659-5660 / Fax 503-652-1780<br />
www.stanley-<strong>hydraulic</strong>-tools.com


