May/June 2021

You also want an ePaper? Increase the reach of your titles
YUMPU automatically turns print PDFs into web optimized ePapers that Google loves.
7<br />
A kerb trim will also need to be fitted<br />
around the front edge and down two<br />
sides, along with a gutter trim along the<br />
back edge. Clip the corner and join the<br />
trims into place.<br />
The front step<br />
Position the step frame in place, fasten to the garden room and to the concrete base.<br />
The step needs to be edged with cladding and the decking panels, and it will also need to be<br />
framed and edged.<br />
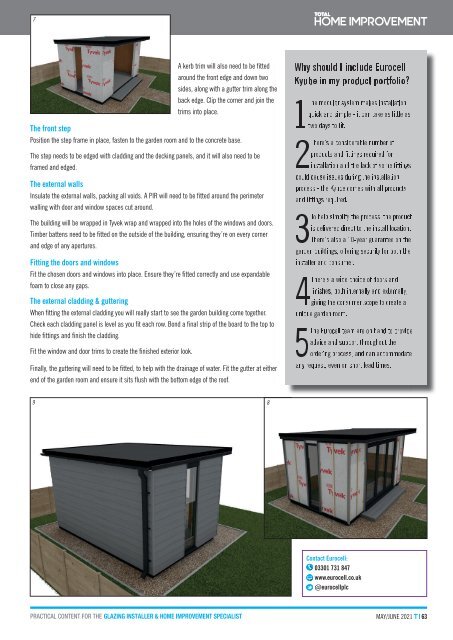
The external walls<br />
Insulate the external walls, packing all voids. A PIR will need to be fitted around the perimeter<br />
walling with door and window spaces cut around.<br />
The building will be wrapped in Tyvek wrap and wrapped into the holes of the windows and doors.<br />
Timber battens need to be fitted on the outside of the building, ensuring they’re on every corner<br />
and edge of any apertures.<br />
Fitting the doors and windows<br />
Fit the chosen doors and windows into place. Ensure they’re fitted correctly and use expandable<br />
foam to close any gaps.<br />
The external cladding & guttering<br />
When fitting the external cladding you will really start to see the garden building come together.<br />
Check each cladding panel is level as you fit each row. Bond a final strip of the board to the top to<br />
hide fittings and finish the cladding.<br />
Fit the window and door trims to create the finished exterior look.<br />
Finally, the guttering will need to be fitted, to help with the drainage of water. Fit the gutter at either<br />
end of the garden room and ensure it sits flush with the bottom edge of the roof.<br />
9<br />
8<br />
Contact Eurocell:<br />
03301 731 847<br />
www.eurocell.co.uk<br />
@eurocellplc<br />
PRACTICAL CONTENT FOR THE GLAZING INSTALLER & HOME IMPROVEMENT SPECIALIST<br />
MAY/JUNE <strong>2021</strong> TI 63