NZPhotographer Issue 45, July 2021
As of December 2022, NZPhotographer magazine is only available when you purchase an annual or monthly subscription via the NZP website. Find out more: www.nzphotographer.nz
As of December 2022, NZPhotographer magazine is only available when you purchase an annual or monthly subscription via the NZP website. Find out more: www.nzphotographer.nz

Create successful ePaper yourself
Turn your PDF publications into a flip-book with our unique Google optimized e-Paper software.
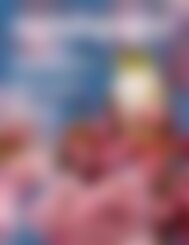
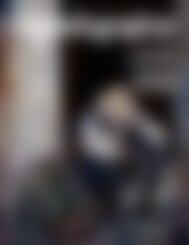
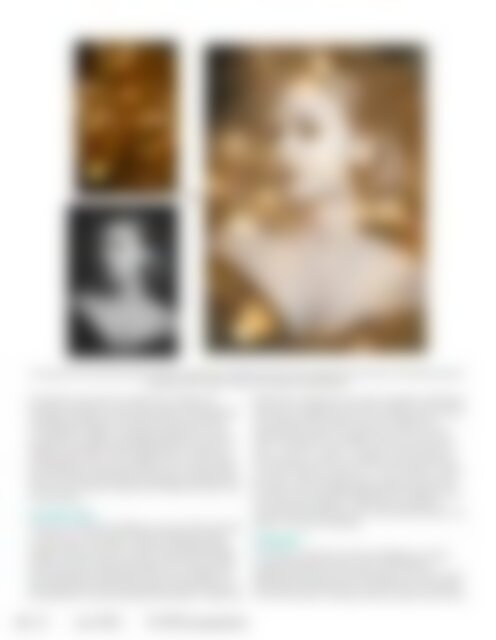
An example of how using blend modes can affect an image. Here, the bokeh texture layer was set above the portrait layer and the blend mode was<br />
changed to Screen. Model, makeup, and styling by Laura Macdonald.<br />
Sometimes the best fit to blend an image with<br />
another is simply to lower the opacity. The option to<br />
change the opacity of a layer can be found next<br />
to the blend mode in the layers panel and is set<br />
by default to 100%. Lowering the opacity can help<br />
make a composite more believable or achieve a<br />
faded effect. This is also a great way to tone down<br />
an adjustment layer if you feel it is too strong. Many<br />
fine-art works are finished by adding a texture layer<br />
set to a low opacity to give the image the feel of an<br />
old painting.<br />
SAVING FILES<br />
Once you’re finished editing, save your file using File<br />
-> Save As. If you want to keep editing and save<br />
all your layers, it’s best to save as a Photoshop file<br />
(.PSD), but that this can only be opened by Adobe<br />
software and the files are large. You can also save<br />
all your layers by selecting a .TIFF if you prefer, but<br />
these files tend to be even larger (though they can<br />
be opened in more software). Saving as a .JPEG will<br />
effectively merge all your layers together, flattening<br />
them into a single file. This will compress your image<br />
and there will be a slider for you to select the<br />
appropriate quality according to the file size you<br />
want to achieve. For images I want to use on the<br />
web, I use File -> Export -> Save for Web (Legacy).<br />
This converts my file to an sRGB colour space and<br />
to 72 dpi, ideal for online use. I can choose a .JPEG<br />
file type, set the image size and adjust the quality<br />
as well as see the predicted file size change in realtime<br />
using this method. .JPEG files are ideal for<br />
everyday and digital use but most good printers will<br />
expect .TIFF files at 300 dpi.<br />
SUMMARY<br />
This article contains all the knowledge you need<br />
to get Photoshop setup and to start playing.<br />
Experimenting with what Photoshop can do can be<br />
extremely rewarding and can elevate your images<br />
to the next level. It will also help you get used to the<br />
52 <strong>July</strong> <strong>2021</strong> <strong>NZPhotographer</strong>