

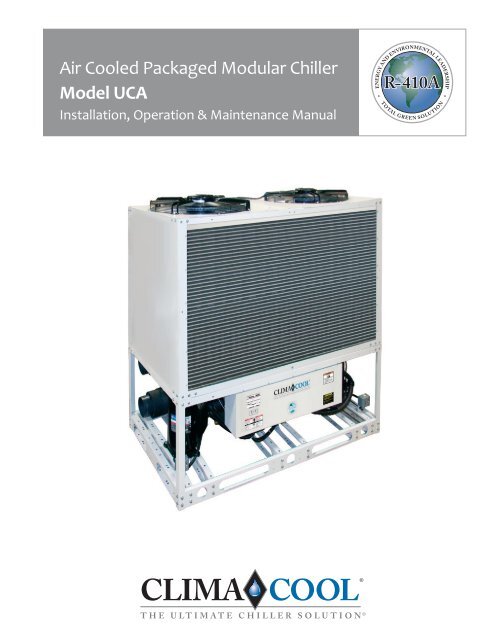
Air Cooled Packaged Modular Chiller Model UCA - ClimaCool ...
Air Cooled Packaged Modular Chiller Model UCA - ClimaCool ...
Air Cooled Packaged Modular Chiller Model UCA - ClimaCool ...

You also want an ePaper? Increase the reach of your titles
YUMPU automatically turns print PDFs into web optimized ePapers that Google loves.
<strong>Air</strong> <strong>Cooled</strong> <strong>Packaged</strong> <strong>Modular</strong> <strong>Chiller</strong><br />
<strong>Model</strong> <strong>UCA</strong><br />
Installation, Operation & Maintenance Manual<br />
ENERGY AND ENVIRONMENTAL LEADERSHIP<br />
• •<br />
TOTAL GREEN<br />
SOLU TION
Table of Contents<br />
Introduction . . . . . . . . . . . . . . . . . . . . . . . . . . . . . . . . . . . . . . . . . 3<br />
Pre-Installation . . . . . . . . . . . . . . . . . . . . . . . . . . . . . . . . . . . . . . . 4<br />
Unit Installation . . . . . . . . . . . . . . . . . . . . . . . . . . . . . . . . . . . . . . 5<br />
Physical Data . . . . . . . . . . . . . . . . . . . . . . . . . . . . . . . . . . . . . . . . . 6<br />
Dimensional Data and Drawings . . . . . . . . . . . . . . . . . . . . . . . . 7<br />
Rigging and Lifting Procedures . . . . . . . . . . . . . . . . . . . . . . . . . 8<br />
Mounting Rail and Vibration Isolation . . . . . . . . . . . . . . . . . . . 9<br />
Recommended Service Clearances . . . . . . . . . . . . . . . . . . . . . 10<br />
Bank Dimensions . . . . . . . . . . . . . . . . . . . . . . . . . . . . . . . . . . . . 11<br />
Water Piping . . . . . . . . . . . . . . . . . . . . . . . . . . . . . . . . . . . . . . . . 12<br />
Water Piping Confi gurations . . . . . . . . . . . . . . . . . . . . . . . . . . 13<br />
Water Temperature Requirement and<br />
Hydronic Refrigeration . . . . . . . . . . . . . . . . . . . . . . . . . . . . . . . 14<br />
Filling the Water System . . . . . . . . . . . . . . . . . . . . . . . . . . . . . . 15<br />
Water Treatment . . . . . . . . . . . . . . . . . . . . . . . . . . . . . . . . . . . . 16<br />
Evaporator Water Pressure Drop Charts . . . . . . . . . . . . . .17-18<br />
Electrical Connection . . . . . . . . . . . . . . . . . . . . . . . . . . . . . . . . . 19<br />
Pre-Startup . . . . . . . . . . . . . . . . . . . . . . . . . . . . . . . . . . . . . . .20-21<br />
2<br />
Pre-Startup Check List . . . . . . . . . . . . . . . . . . . . . . . . . . . . . . . . 22<br />
Startup . . . . . . . . . . . . . . . . . . . . . . . . . . . . . . . . . . . . . . . . . . 23-24<br />
Startup and Warranty Form . . . . . . . . . . . . . . . . . . . . . . . . 25-26<br />
Operation and Maintenance . . . . . . . . . . . . . . . . . . . . . . . . . . 27<br />
Heat Exchangers . . . . . . . . . . . . . . . . . . . . . . . . . . . . . . . . . 28-29<br />
Operational Limitations . . . . . . . . . . . . . . . . . . . . . . . . . . . . . .30<br />
Compressor Information . . . . . . . . . . . . . . . . . . . . . . . . . . . . . 31<br />
Refrigeration Circuit Diagram . . . . . . . . . . . . . . . . . . . . . . 32-33<br />
Refrigeration Systems Re-Processing and Charging . . . . . . 34<br />
Factory Installed Options . . . . . . . . . . . . . . . . . . . . . . . . . . . . . 35<br />
Y Type and Basket Type Strainers . . . . . . . . . . . . . . . . . . . 36-37<br />
Electrical Data . . . . . . . . . . . . . . . . . . . . . . . . . . . . . . . . . . . . . . .38<br />
Power Distribution Drawing . . . . . . . . . . . . . . . . . . . . . . . . . . .39<br />
Wiring Diagrams . . . . . . . . . . . . . . . . . . . . . . . . . . . . . . . . . . 40-43<br />
Troubleshooting Guide . . . . . . . . . . . . . . . . . . . . . . . . . . . . . . .44<br />
Warranty . . . . . . . . . . . . . . . . . . . . . . . . . . . . . . . . . . . . . . . . . . . 45<br />
www.climacoolcorp.com
Introduction<br />
General Description<br />
Introducing <strong>ClimaCool</strong>’s ® newest addition to the product<br />
line: <strong>Air</strong> <strong>Cooled</strong> <strong>Packaged</strong> <strong>Modular</strong> <strong>Chiller</strong> - <strong>Model</strong> <strong>UCA</strong>.<br />
Modules are available in 20 and 30 tons and can be<br />
confi gured to provide project turndown and capacity<br />
requirements from 20 to 360 tons. By simply adding<br />
modules, the <strong>UCA</strong> can satisfy future incremental growth<br />
needs. This model is a quiet, serviceable and extremely<br />
effi cient system that will provide years of reliable operation.<br />
Safety<br />
Throughout this manual warning, danger, caution and<br />
attention notices appear. Read these items carefully before<br />
attempting any installation, service or troubleshooting of<br />
the equipment. All labels on unit access panels must be<br />
observed.<br />
WARNING<br />
This unit contains HFC-(R410A), an azeotropic mixture of R-32 (Difluoromethane) and R-125 (Pentafluoroethane).<br />
DO NOT VENT HFC-(R410A) to the atmosphere. The U.S. Clean <strong>Air</strong> Act requires the recovery of any residual<br />
refrigerant. Do not use R-22 service equipment or components on R410A systems.<br />
SAFETY WARNING<br />
High voltage is used to operate this equipment. Failure to observe standard electrical safety procedures may result<br />
in serious injury. Only persons qualified and / or properly trained should attempt to install, operate and maintain this<br />
equipment. These chillers come fully charged with refrigerant. Installation, and start – up should be accomplished by<br />
technicians who are fully certified to handle refrigerants, as required by 40 CRF Part 82, subpart F of the Recycling<br />
and Emissions Reduction Act. Scroll compressors are used in this equipment. Phase verification is required for proper<br />
rotation direction. Incorrect rotation will result in elevated sound and internal overload trip failure.<br />
ATTENTION INSTALLER<br />
3 Phase Scroll Compressor Units<br />
•If this unit uses a 3 Phase Scroll Compressor, the following<br />
instructions MUST BE followed:<br />
- Unit power supply MUST BE wired in the proper sequence<br />
to avoid damage to the 3 Phase Scroll Compressor.<br />
- Scroll Compressors with INCORRECT rotation show the<br />
following characteristics:<br />
1.) High sound level;<br />
2.) High suction pressure and low discharge pressure;<br />
3.) Low current draw.<br />
- If any of the three above characteristics exist, swap two<br />
of the three supply wires at the discount and recheck<br />
compressor for incorrect rotation.<br />
www.climacoolcorp.com<br />
WARNING: Indicates potentially hazardous situation which,<br />
if not avoided, could result in death or serious injury.<br />
DANGER: Indicates an immediate hazardous situation<br />
which, if not avoided, will result in death or serious injury.<br />
CAUTION: Indicates a potentially hazardous situation or an<br />
unsafe practice which, if not avoided, could result in minor<br />
or moderate injury or product or property damage.<br />
ATTENTION: Notifi cation of installed, operation or<br />
maintenance information which is important, but which is<br />
not hazard-related.<br />
WARNING<br />
To avoid the release of refrigerant into the atmosphere,<br />
the refrigerant circuit of this unit must be serviced only by<br />
technicians who meet local, state and federal profi ciency<br />
requirements.<br />
All refrigerant discharged from this unit must be recovered<br />
WITHOUT EXCEPTION. Technicians must follow industry<br />
accepted guidelines and all local, state and federal statutes for<br />
the recovery and disposal of refrigerants.<br />
If a compressor is removed from this unit, system refrigerant<br />
circuit oil will remain in the compressor. To avoid leakage of<br />
compressor oil, the refrigerant lines of the compressor must<br />
be sealed after it is removed.<br />
�������<br />
�� �������������������������������������������<br />
���������������������������������������������<br />
WILL DAMAGE���������������������������������<br />
WILL VOID YOUR WARRANTY!<br />
DANGER<br />
�<br />
�� ����������������������<br />
�� ������������������������������<br />
�� �����������������������������<br />
�����������������<br />
�� �����������������������������<br />
������������������<br />
� DANGER<br />
�� ��������������������������<br />
�� ������������������������������<br />
�����������<br />
�� ��������������������������������<br />
���������������������������<br />
�� ���������������������������������<br />
������������������<br />
� ������� � ���������<br />
�� ���������������������������������<br />
���������������<br />
�� �������������������������<br />
���������<br />
�� ������������������������������<br />
�������<br />
�� ���������������������������������<br />
��������������������<br />
RECOVER<br />
REFRIGERANT<br />
WARNING!<br />
WARNING! To avoid possible injury or death due to electrical<br />
shock, open the power supply disconnect switch and secure it<br />
in an open position during installation.<br />
CAUTION!<br />
CAUTION! Use only copper conductors for field installed<br />
electrical wiring. Unit terminals are not designed to accept<br />
other types of conductors.<br />
�� ����������������������������<br />
��������������������<br />
�� �����������������������������<br />
���������<br />
�� ������������������������������<br />
����������<br />
�� �������������������������������<br />
����������������������<br />
�������������<br />
3
Pre-Installation<br />
Inspection<br />
Upon receipt of equipment, carefully check the shipment<br />
against the bill of lading and inspect each chiller for<br />
any damage incurred during shipment. Thoroughly<br />
check for any visible damage of control panels, electrical<br />
and/or refrigeration components or broken copper lines.<br />
The carrier must make proper notation of any damages or<br />
shortages on all copies of the bill of lading and complete<br />
a common carrier inspection report prior to your fi nal<br />
acceptance of the shipment.<br />
Note: It is the responsibility of the purchaser to fi le all<br />
necessary claims with the carrier. In addition, please<br />
notify the <strong>ClimaCool</strong> Customer Service Department at<br />
405-745-3185 or customerservice@climacoolcorp.com<br />
of all damage immediately.<br />
Handling of Modules<br />
Carefully remove the module’s packaging. The chiller’s<br />
steel base cutouts provide maneuverability by forklift or<br />
pallet jack into its fi nal position (see Rigging and Lifting<br />
Procedures Figures 1 and 2 on page 8). Verify that all header<br />
grooved couplings, groove by groove 6” nipples and<br />
mounting hardware kits are on site prior to connecting the<br />
modules.<br />
4<br />
Rigging and Lifting<br />
Each module should be lifted by using a pallet jack or fork<br />
lift. If it is necessary to utilize a crane for rigging or lifting<br />
each module shall be lifted by using lifting straps and<br />
spreader bars using rigging points identifi ed in the Rigging<br />
and Lifting Procedures on page 8.<br />
Warranty<br />
To ensure proper equipment longevity, design performance<br />
and reliability, all <strong>ClimaCool</strong> chillers must be installed,<br />
operated and maintained in accordance with <strong>ClimaCool</strong><br />
IO&M manuals. Water quality is of the utmost importance<br />
for the proper care and maintenance of your modular<br />
chiller system and regular treatment of the water will<br />
increase longevity of your system. Failure to provide<br />
adequate fi ltration or treatment of evaporator water<br />
will void the <strong>ClimaCool</strong> module’s warranty. A factory<br />
authorized technician is required to perform the startup<br />
of your <strong>ClimaCool</strong> chiller. Please contact the <strong>ClimaCool</strong><br />
Customer Service Department at 405-745-3185 or at<br />
customerservice@climacoolcorp.com to schedule. There<br />
is a minimum of 3 weeks’ notice required to schedule your<br />
factory startup.<br />
www.climacoolcorp.com
Unit Installation<br />
Foundation for Unit Placement<br />
The minimum foundation requirement for the <strong>ClimaCool</strong><br />
chiller is a level surface capable of bearing the combined<br />
operating weight of the modules (See Physical Data -<br />
page 6).<br />
Service Access<br />
The recommended service clearances for front service<br />
access is 42”, unobstructed height clearance for airfl ow<br />
and 36” for rear service access as identifi ed in the<br />
Recommended Service Clearances and Bank Dimensions on<br />
page 10 and 11. Local building or electrical codes may require<br />
additional clearance – please consult applicable codes.<br />
Draining<br />
When performing standard maintenance procedures such<br />
as fl ushing a heat exchanger, it will be necessary to close<br />
off a section of a module. <strong>ClimaCool</strong> modular chillers off er<br />
optional water isolation valves for this purpose.<br />
Assembling Modules<br />
<strong>ClimaCool</strong> recommends locking down the chiller to a<br />
concrete base, or to two 4” base mounting rails using<br />
the bolt holes provided in the unit base. Although the<br />
compressors are installed on anti-vibration mountings,<br />
further isolation of the chiller from the structure is available<br />
by installing vibration eliminating springs or pads under<br />
the base rails on which the chiller will rest (See page 9 –<br />
Mounting Rail and Vibration Isolation). One end of the<br />
modules should be chosen as the reference module and<br />
carefully located.<br />
Mounting hardware kits, header grooved coupling kits and<br />
groove by groove nipples are factory provided for adjoining<br />
each module. Each hardware kit contains necessary bolts,<br />
spacers, nuts and washers. The header grooved coupling<br />
kit consists of two (2) grooved couplings and the groove by<br />
groove nipple kit has two (2) 6” groove by groove nipples<br />
with gaskets. In addition, there will be one header end cap<br />
kit consisting of (2) grooved couplings with gasket and (2)<br />
end caps.<br />
Inspect the pipe ends to ensure they are free from any<br />
indentations, projections, roll marks or other harmful<br />
surface defects such as loose paint, scale, dirt, chips,<br />
grease and rust. Inspect the grooved coupling gasket<br />
for any defects. Apply a thin layer of silicone or other<br />
non-petroleum lubricant to the sealing lips of the gasket<br />
and to the exterior of the gasket. Install gaskets on the<br />
pipe ends of one of the two modules to be mated. Be sure<br />
the gasket is completely on the pipe so damage will not<br />
occur in the next step. One groove by groove 6” nipple per<br />
header is required to complete the connection between<br />
each module. Move the second module into position and<br />
www.climacoolcorp.com<br />
line up the piping. Ensure you are maintaining alignment<br />
for any additional modules to be added. When pipe ends<br />
are aligned, slide the gasket over the ends and center it<br />
between the grooves. No part of the gasket should protrude<br />
into the groove of either pipe end. Place the coupling halves<br />
over the gasket and make sure that the coupling keys,<br />
the part that goes into the groove, are engaged into the<br />
grooves. Insert the bolts and install nuts to hand tight. Make<br />
sure that the oval neck of the bolt engages into the bolt<br />
hole of the housing. Tighten nuts alternately and equally<br />
until the bolt pads meet and make metal to metal contact.<br />
Tighten nuts by another 1/4 to 1/2 turn to make sure the nuts<br />
and bolts are snug and secure; the use of a torque wrench<br />
is usually not required. Be aware that uneven tightening<br />
of bolts may cause the gasket to be pinched resulting in<br />
immediate or delayed leaks.<br />
Header Insulation<br />
Chilled water piping is pre-insulated on each module at<br />
the factory with 3/4” closed cell insulation. After bolting<br />
all modules together and leak testing, the entire coupling<br />
connection will need to be insulated by the installing<br />
contractor.<br />
5
Physical Data<br />
6<br />
<strong>Model</strong>�<strong>UCA</strong>� 20 30<br />
Capacity�(Tons)¹<br />
19.0 28.7<br />
EER 10.8 10.8<br />
Refrigerant�Circuits�(quantity)<br />
2 2<br />
Compressor�Type<br />
scroll scroll<br />
Compressor�Quantity<br />
2 2<br />
Compressor�Nominal�Hp�(per�circuit)<br />
10 15<br />
Refrigerant�Charge�(per�circuit)�R�410A�(lbs)<br />
39 48<br />
Module�Operating�Weight�w/Water�(lbs)³<br />
1,710 1,870<br />
Module�Shipping�Weight�(lbs)�<br />
1,495 1,655<br />
Condenser�Fans<br />
20 30<br />
Motor�Type<br />
T.E. T.E.<br />
HP 1.5 1.5<br />
Quantity<br />
1 2<br />
Fan�Type �Axial Axial<br />
Diameter 31.5" 31.5<br />
<strong>Air</strong>flow�(cfm�per�circuit) 6000 9,800<br />
RPM 850 850<br />
Maximum�Design�Working�Pressure���refrigerant�(PSI)<br />
650 650<br />
Condenser�Coils<br />
20 30<br />
Fin�Material Aluminum Aluminum<br />
Tube�Material Copper Copper<br />
Dimensions�(Quantity) 22"�x�78"�(4) 22"�x�78"�(4)<br />
Rows�Deep 3 4<br />
Fins�Per�Inch 12 12<br />
Evaporator<br />
Heat�Exchanger�(Type)<br />
Independent�Refrigerant�Circuits�(quantity)<br />
Water�Storage�Volume�HX�Only�(gals.)<br />
Water�Storage�Volume�HX�Plus�6"�Main�Headers�(gals)<br />
Flow�Rate�(GPM)�<br />
Maximum�Design�Working�Pressure���Water�Side�(PSI)<br />
Header�Water�Connections���Inlet/Outlet�(inches)²<br />
www.climacoolcorp.com<br />
20 30<br />
Brazed�Plate Brazed�Plate<br />
2 2<br />
2.6 2.6<br />
39.6 39.6<br />
Min 23 35<br />
Max 77 116<br />
300 300<br />
6" 6"<br />
Notes:<br />
1.��Unit�tonnage�ARI�rating�conditions:��44°F�leaving�chilled�water�temperature,�95°F�entering�condenser�air�temprature,�flow�rate�is<br />
�����2.4�GPM�per�ton�through�the�evaporator�with�a�.0001�fouling�factor.�<br />
2.��Main�header�water/fluid�connections�are�ASME,�6"�scheduled�40�pipe�with�grooved�couplings,�300�psig�manimum�working�pressure.<br />
3.��Module�operational�weight�includes�water,�compressor�oil,�and�refrigerant�charge.��Multiply�times�the�number�of�modules�for�a<br />
������total�system�operational�weight.��<br />
4.��Unit�shipping�weight�includes�refrigerant�charge,�compressor�oil�and�packaging.<br />
5.��The�minimum/maximum�flow�rates�are�based�on�an�approximate�temperature�differential�of�5.9°F�to�20°F�through�the�evaporator.��
Dimensional Data and Drawings<br />
B<br />
<strong>Air</strong> Discharge<br />
Front<br />
<strong>Model</strong> <strong>UCA</strong> Voltage<br />
A<br />
A<br />
Unit<br />
Width<br />
B<br />
Unit<br />
Height<br />
www.climacoolcorp.com<br />
C<br />
Unit<br />
Depth<br />
Unit<br />
Weight1 (lbs)<br />
Operating<br />
Weight2 (lbs)<br />
Header<br />
Connection<br />
Size (in.)<br />
020 208/230/460/575/3/60 83 3/4 84 39 3/4 1,495 1,710 6<br />
030 208/230/460/575/3/60 83 3/4 84 39 3/4 1,655 1,870 6<br />
Notes:<br />
1. Shipping weight includes refrigerant charge, compressor oil and packaging.<br />
2. Operational weight includes refrigerant charge, compressor oil and water.<br />
<strong>Air</strong> Intake<br />
<strong>Air</strong> Intake<br />
<strong>Air</strong> Discharge<br />
C<br />
Chilled Water<br />
Intake<br />
Chilled Water<br />
Outlet<br />
7
Rigging and Lifting Procedures<br />
Rigging<br />
Each module should be lifted by using lift straps threaded through the steel base cutouts and the use of a spreader bar.<br />
Lifting and Transporting Modules<br />
8<br />
Spreader Bar<br />
Lifting Strap<br />
Spreader Bar<br />
Pallet jacks or forklifts are required for lifting and transporting the module. Each module has base cutouts provided for ease<br />
of maneuverability.<br />
www.climacoolcorp.com<br />
Lifting Strap<br />
Spreader Bar
Mounting Rail and Vibration Isolation<br />
<strong>ClimaCool</strong> recommends locking down the chiller to a concrete base or to three 4” base mounting rails using the six bolt<br />
holes provided in each base pan. Due to the low vibration of the modules, <strong>ClimaCool</strong> does not require the application of<br />
spring isolators or pads. Should isolators or pads be desired install in accordance with Figures 1 and 2.<br />
Figure 1 - Spring Vibration Isolators Option<br />
Figure 2 – Vibration Isolation Pads Option<br />
4” Rail Minimum<br />
Recommended<br />
(by others)<br />
4” Rail Minimum<br />
Recommended<br />
(by others)<br />
Note: Size and weight distribution is to be determined by a qualifi ed structural engineer per individual job requirements.<br />
www.climacoolcorp.com<br />
Concrete Pad (by others)<br />
Concrete Pad (by others)<br />
Spring Vibration<br />
Isolators (by others)<br />
9
Recommended Service Clearances<br />
End-to-End Confi guration<br />
10<br />
See Note<br />
4 for side<br />
clearance<br />
Back-to-Back Confi guration<br />
See Note<br />
4 for side<br />
clearance<br />
Top View<br />
Notes:<br />
1. Allow 42” clearance for electrical panels and 36” clearance for rear access to modules.<br />
2. Allow an unobstructed height clearance for airfl ow.<br />
3. Local building or electrical codes may require additional clearance. Consult applicable codes.<br />
4. Provide side clearance as required for fi eld piping connections and components.<br />
www.climacoolcorp.com<br />
Rear Service Access<br />
<strong>Air</strong> Intake <strong>Air</strong> Intake<br />
Service and <strong>Air</strong> Intake<br />
Clearance<br />
<strong>Air</strong> Intake<br />
<strong>Air</strong> Intake<br />
Service and <strong>Air</strong> Intake<br />
Clearance<br />
Service and <strong>Air</strong> Intake<br />
Clearance<br />
See Note<br />
4 for side<br />
clearance<br />
See Note<br />
4 for side<br />
clearance
Bank Dimensions<br />
<strong>Model</strong>�<strong>UCA</strong><br />
1�Module<br />
2�Modules<br />
3�Modules<br />
4�Modules<br />
5�Modules<br />
6�Modules<br />
7�Modules<br />
8�Modules<br />
9�Modules<br />
10�Modules<br />
11�Modules<br />
12�Modules<br />
Width��(inches)<br />
Single�(combine�<br />
with�back�to�back)<br />
End�to�End�<br />
ONLY<br />
www.climacoolcorp.com<br />
Depth�(inches)<br />
Single�(combine�<br />
with�end�to�end�) Back�to�Back<br />
Height�<br />
(inches)<br />
83�3/4 83�3/4 39�3/4 � 84<br />
83�3/4 168�1/2 39�3/4 80�1/2 84<br />
168�1/2 253�1/4 39�3/4 80�1/2 84<br />
168�1/2 338 39�3/4 80�1/2 84<br />
253�1/4 422�3/4 39�3/4 80�1/2 84<br />
253�1/4 507�1/2 39�3/4 80�1/2 84<br />
338 592�1/4 39�3/4 80�1/2 84<br />
338 677 39�3/4 80�1/2 84<br />
422�3/4 761�3/4 39�3/4 80�1/2 84<br />
422�3/4 846�1/2 39�3/4 80�1/2 84<br />
507�1/2 931�1/4 39�3/4 80�1/2 84<br />
507�1/2 1016 39�3/4 80�1/2 84<br />
Notes:<br />
1. <strong>Modular</strong> chiller bank width dimensions above include 1” for spacing between modules (Refer to page 12 -<br />
Water Piping Confi guration - Figure 1). Example: 5 modules in an end-to-end confi guration is 422 3/4” wide or<br />
in a back-to back confi guration is 253 1/4” wide and 80 1/2” deep.<br />
2. When piping more than 5 modules, it is recommended to use reverse return (Refer to page 12 - Water<br />
Piping Confi guration - Figure 2). Example: 7 modules in an end-to-end confi guration is 592 1/4” wide or in a<br />
back-to-back confi guration is 338” wide and 80 1/2” deep.<br />
3. Maximum water fl ow rates for both evaporator and condenser water header systems in one bank of<br />
modules is 1,000 GPM.<br />
11
Water Piping<br />
As with any water system, it is important that the system<br />
be clean. The pipe work installer must remove weld scale,<br />
rust and contamination during pipe work fabrication.<br />
The system water piping must be fl ushed thoroughly<br />
with recommended alkaline fl ush or other chemicals that<br />
are compatible with 316 stainless steel prior to making<br />
connections to the <strong>ClimaCool</strong> chiller. There are certain<br />
necessary components that should always be installed in<br />
the chilled water system. (See Figures 1 and 2 on page 13 -<br />
Water Piping Confi gurations for confi gurations with multiple<br />
modules). All water piping must be installed in accordance<br />
with applicable codes and standards.<br />
Temperature Sensor and Wells<br />
<strong>ClimaCool</strong> provides (2) temperature sensors and wells with<br />
each chiller system confi gured by the CoolLogic Control<br />
System. They must be fi eld installed 36” - 60” away from the<br />
bank and before the strainer on the chilled water inlet and<br />
chilled water outlet (See Water Piping Confi gurations – page<br />
13). Sensors must be fully inserted into the well to obtain<br />
proper readings.<br />
Pressure Diff erential Flow Sensor or Switch<br />
It is imperative that minimum and maximum water fl ow<br />
rates, as defi ned in the Physical Data tables on page 6,<br />
are not exceeded. To prevent the operation of the chiller<br />
without suffi cient water fl ow to the evaporator it is a<br />
required safety device to install a pressure diff erential fl ow<br />
sensor or switch in the chilled water circuit, downstream of<br />
the strainer (See Water Piping Confi gurations – page 13).<br />
12<br />
Pressure Taps<br />
The installing contractor must provide access ports for<br />
connecting the pressure diff erential fl ow sensor or switch<br />
and pressure gauges for the chilled water system. A 1/4”<br />
pressure tap is required on the inlet and the outlet of the<br />
chilled water system for a total of four taps. If a port is<br />
shared by the pressure diff erential fl ow sensor or switch and<br />
the pressure gauge it will require two 1/2” taps. (See Water<br />
Piping Confi gurations – page 13).<br />
Water Isolation Valves<br />
It is recommended to provide bank water isolation valves for<br />
proper isolation and maintenance of the chiller, pump and<br />
strainer (See Water Piping Confi gurations – page 13).<br />
Strainers – Minimum 60 Mesh Screen Required<br />
<strong>ClimaCool</strong> chillers utilize brazed plate heat exchangers<br />
which are extremely sensitive to debris. Therefore, it is<br />
mandatory that all chilled water systems include a strainer<br />
with a minimum of 60 mesh screen for proper fi ltration at<br />
all times when the chiller is operating. The strainers must<br />
be installed as shown in the Water Piping Confi gurations on<br />
page 13.<br />
<strong>ClimaCool</strong>’s warranty does not cover and does not apply to<br />
products which have defects or damages due to freezing<br />
of the water supply, an inadequate or interrupted water<br />
supply, corrosives or abrasives in the water supply, or<br />
improper or inadequate fi ltration or treatment of the<br />
water supply.<br />
www.climacoolcorp.com
Water Piping Confi gurations<br />
Notes:<br />
1. Figures 1 and 2 are required piping for proper water regulation and distribution through <strong>ClimaCool</strong> modular chillers.<br />
2. Module order and incoming/outgoing water fl ow, as shown in both Figure 1 and 2, can be set up as either a left-to-right or right-to-left<br />
confi guration.<br />
3. For chilled water (evaporator) inlet/outlet location dimensions, refer to page 7 - Dimension Data and Drawings.<br />
4. A pressure diff erential fl ow sensor or switch is a required safety device for <strong>ClimaCool</strong> modular chillers on the chilled water circuit.<br />
5. A strainer with a minimum of 60 mesh stainless steel screen is a required safety to protect the brazed plate heat exchanger on the chilled water<br />
side of the system and must be in place at all times when the chiller is operating.<br />
6. Maximum water fl ow rates for the evaporator water header system in one bank of modules is 1,000 GPM.<br />
www.climacoolcorp.com<br />
Figure 2 - Field Piping Reverse Return -(Preferred 1 to 5 modules) Required for more than 6 modules<br />
Figure 1- Field Piping Direct Return - 1 to 5 Modules<br />
13
Water Temperature Requirement and Hydronic Refrigeration<br />
Chilled Water Temperature<br />
Modudes are designed for a leaving water temperature<br />
range from 40°F to 62°F. All cataloged modules can operate<br />
safely in this range without the need of special controls or<br />
glycol additives. Leaving water temperatures below 40°F<br />
can result in evaporator suction temperatures below the<br />
freezing point of water. Therefore, a glycol solution additive<br />
is required that will protect the evaporator from freeze ups<br />
at lower operating suction temperatures. The full range of<br />
leaving chiller fl uid using glycol is 20°F to 62°F.<br />
Hydronic Refrigeration<br />
Figure 1 - Chilled Water Circuit<br />
Note: Figure 1 depicts hydronic piping in each <strong>ClimaCool</strong> chiller module and is shown with water isolation valves.<br />
14<br />
Isolation Ball Valves<br />
(2 or 2-1/2”)<br />
Service Ports (3/4”)<br />
Leaving Chilled Water<br />
Temperature Sensor<br />
Pete’s Ports Heat Exchanger<br />
www.climacoolcorp.com<br />
Refrigerant Circuit #1<br />
Refrigerant Circuit #2
Filling the Water System<br />
It is imperative that the water systems are free from debris<br />
prior to initial operation. See Water Treatment - page 16 for<br />
a comprehensive list of precautions.<br />
Filling, Purging and Leak Testing the System<br />
After the water system has been properly installed, a visual<br />
inspection should be made to all joints for tightness. If<br />
the chiller is to be installed in an existing system, the<br />
cleanliness of the existing system can be judged from the<br />
operating conditions of the present machines. The cooling<br />
tower in particular should be inspected and cleaned if<br />
required. It is a good practice to at least fl ush the existing<br />
system and ideally, to acid wash the system before<br />
connecting a new chiller.<br />
The following sequence is recommended to fi ll and leak<br />
check the water system for modules WITHOUT Water<br />
Isolation Valves:<br />
1. Ensure that all drain valves are closed and that all main<br />
water header isolation valves (external to the system)<br />
are opened.<br />
2. All modules are equipped with 3/4” fi ll and fl ush valves<br />
with lines teed into the inlet and outlet connections into<br />
and out of the heat exchanger. Ensure these 3/4” valves<br />
are CLOSED.<br />
3. The system should be fi lled with clean water sent<br />
through a strainer and the system checked for leaks.<br />
4. Once the main water lines and the chiller headers are<br />
fi lled with clean water, purge and repeat the fi lling<br />
process several times.<br />
5. Following the fi nal fi lling and leak checking procedure,<br />
air should be purged from the system.<br />
The following sequence is recommended to fi ll and leak<br />
check the water system for modules WITH Water Isolation<br />
Valves:<br />
1. Close all water isolation valves inside each module<br />
which isolate the individual heat exchanger.<br />
2. Ensure that all drain valves are closed and that all water<br />
main isolation valves (external to the system) are<br />
opened.<br />
3. The system should be fi lled with clean water sent<br />
through a strainer and the system checked for leaks.<br />
4. Once the main water lines and the chiller headers are<br />
fi lled with clean water, purge and repeat the fi lling<br />
process several times.<br />
5. All modules are equipped with 3/4” fi ll and fl ush valves<br />
with lines teed into the inlet and outlet connections into<br />
and out of the heat exchanger. Ensure these 3/4” valves<br />
are CLOSED.<br />
6. Open the water isolation valves inside each modular<br />
chiller and repeat the fi lling process, this time also<br />
checking for leaks inside each module.<br />
7. Following the fi nal fi lling and leak checking procedure,<br />
air should be purged from the system.<br />
www.climacoolcorp.com<br />
Cleaning the System<br />
The following sequence is recommended to properly clean<br />
the water systems:<br />
1. Whenever possible, install a temporary bypass line<br />
between the main supply and return water header of<br />
the chilled water system prior to cleaning the system.<br />
Open the main header bypass lines to divert the initial<br />
water fl ow around the module heat exchanger until you<br />
are confi dent the circulating water is mostly pure.<br />
2. Provided the main header bypass lines are installed,<br />
close all water isolation valves inside all modules<br />
equipped with manual or automatic water isolation<br />
valves. If the modules are NOT equipped with water<br />
isolation valves, we recommend installing 3-way main<br />
header bypass valves so the initial water fl ow bypasses<br />
all module heat exchangers.<br />
3. The pumps should be run with the strainer in place (see<br />
Starting the Pumps section for proper pump startup).<br />
All external hydronic branches should be open to all<br />
devices in the system.<br />
4. After several hours of operation, the strainer should<br />
be isolated and cleaned. Repeat until there is no more<br />
debris being collected by the strainer.<br />
5. Open all water isolation valves inside each module<br />
equipped with manual or automatic water isolation<br />
valves (see step 6 for modules NOT equipped with<br />
water valves). If bypass lines are not installed as<br />
described in step 1 above, it is recommended to drain<br />
out the initial fi ll of water to help fl ush out debris.<br />
Finally, close off the main header bypass lines referred<br />
to in step 1 above, and open the fl ow to the main water<br />
headers. Repeat steps 3 and 4 until there is no more<br />
debris being collected by the strainer.<br />
6. If bypass lines are not installed as described in step<br />
1 above, and if the modules are NOT equipped with<br />
water isolation valves, it is recommended to drain out<br />
the initial fi ll of water to help fl ush out debris. Before<br />
refi lling and purging the system again, the strainers<br />
should be removed and cleaned. Repeat steps 3 and<br />
4 until there is no more debris being collected by the<br />
strainer.<br />
Starting the Pumps<br />
Follow the manufacturer’s recommendations when starting<br />
the pumps for the fi rst time. The system should be checked<br />
for leaks and air purged with the pumps in operation. The<br />
pressure drop across the heat exchangers will give a good<br />
indication of fl ow through the system (See page 17 - 18 –<br />
Evaporator Water Pressure Drop Charts). This should be<br />
immediately checked against the expected pressure drop<br />
for the fl ow rate required. If the pressure drop begins to<br />
fall and the fl ow rate is falling, this could indicate a need to<br />
clean the strainers.<br />
15
Water Treatment<br />
Water quality is of the utmost importance for the proper<br />
care and maintenance of the modular chiller system.<br />
Proper water treatment is a specialized industry and we<br />
recommend consulting an expert in this fi eld to analyze the<br />
water for compliance with the water quality parameters<br />
listed in Table 1. The material used in the <strong>ClimaCool</strong> chiller<br />
exposed to the water are type 316 stainless steel, pure<br />
copper, and carbon steel. Other materials may exist external<br />
to the <strong>ClimaCool</strong> chiller. It is the user’s responsibility to<br />
ensure these materials are compatible with the treated<br />
water. Regular treatment of the water will increase<br />
longevity of your system. Failure to provide adequate<br />
fi ltration or treatment of evaporator water will void the<br />
<strong>ClimaCool</strong> module’s warranty.<br />
Heavy-Contaminated Water<br />
In such instances whereby the particulates in the water are<br />
excessive it is recommended to install an intermediate plate<br />
and frame heat exchanger to isolate the <strong>ClimaCool</strong> chiller<br />
from the building water system.<br />
16<br />
Table 1 - Water Quality Parameters<br />
www.climacoolcorp.com<br />
WATER�CONTAINING CONCENTRATION<br />
Ammonia Less�than�2.0�mg/l<br />
CaCO3�Alkalinity 30����500�mg/l<br />
CaCO3�Hardness 30����500�mg/l<br />
Chlorides Less�than�200�mg/l<br />
Dissolved�Solids Less�than�1000�mg/l<br />
Iron Less�than�5.0�mg/l<br />
Manganese Less�than�0.4�mg/l �<br />
Nitrate Less�than�100�mg/l<br />
pH 7.0���9.0��<br />
Sulphate Less�Than�200�mg/l<br />
�������<br />
�� �������������������������������������������<br />
���������������������������������������������<br />
WILL DAMAGE���������������������������������<br />
WILL VOID YOUR WARRANTY!
Evaporator Water Pressure Drop Charts<br />
Pressure ressure Drop Drop (Ft. (Ft. of of Water) Water)<br />
r)<br />
100<br />
100<br />
80<br />
60<br />
50<br />
45<br />
40<br />
35<br />
30<br />
25<br />
20<br />
18<br />
16<br />
14<br />
12<br />
10<br />
8 8<br />
6<br />
4<br />
2<br />
Evaporator Water Pressure Drop<br />
20 & 30-Ton, 30 T "<strong>Packaged</strong> "P k dAi <strong>Air</strong>-<strong>Cooled</strong>" C l d" S Series i<br />
<strong>Model</strong> #: <strong>UCA</strong>020 & <strong>UCA</strong>030<br />
1<br />
10 100 1000<br />
120 140 160 180 200 1<br />
0.43<br />
240 280 400 500<br />
10 30 40 60 80 100 220 260 300<br />
1000<br />
120 140 160 180 200 0.43<br />
240 280<br />
400 500<br />
30 40 60 80<br />
220 260 300<br />
Flow (GPM)<br />
www.climacoolcorp.com<br />
43.3<br />
34 34.7 34.7 34.7 7<br />
26.0 26.0<br />
21.7<br />
19.5<br />
17.3<br />
15.5<br />
13 13<br />
10.8<br />
8.7<br />
7.8<br />
7.0<br />
6.1<br />
5.2<br />
4.3<br />
3.5<br />
2.6<br />
1.7<br />
0.87<br />
Pressure Pressure Pressure Pressure ure Drop (PSI)<br />
SI)<br />
17
Evaporator Water Pressure Drop Charts<br />
Table 1 - Performance Adjustment Factors vs. Altitude vs. <strong>Chiller</strong> Temperature Drop<br />
<strong>Chiller</strong><br />
Water�<br />
Sea�Level 2000�ft. 4000�ft. 6000�ft.<br />
Temp.��Capacity�<br />
°F Multiplier<br />
Flow�gpm�<br />
Multiplier<br />
kW�Power� Capacity�<br />
Multiplier Multiplier<br />
Flow�gpm�<br />
Multiplier<br />
kW�Power� Capacity�<br />
Multiplier Multiplier<br />
Flow�gpm�<br />
Multiplier<br />
kW�Power� Capacity�<br />
Multiplier Multiplier<br />
Flow�gpm�<br />
Multiplier<br />
kW�Power�<br />
Multiplier<br />
8 0.995 1.246 0.998 0.990 1.244 1.003 0.986 1.238 1.006 0.980 1.232 1.012<br />
10 1.000 1.000 1.000 0.993 0.997 1.004 0.989 0.990 1.007 0.983 0.996 1.014<br />
12 1.005 0.834 1.001 0.996 0.831 1.004 0.992 0.826 1.008 0.986 0.821 1.016<br />
14 1.010 0.716 1.001 0.998 0.714 1.005 0.994 0.709 1.009 0.989 0.704 1.018<br />
18<br />
www.climacoolcorp.com
Electrical Connection<br />
The compliance of the installation to relevant local and<br />
national codes is the responsibility of the installer. Before<br />
carrying out any electrical work, confi rm that the main<br />
supply is isolated. The installer must ensure that the correct<br />
electrical drawing is available. Before power is applied to<br />
the system, the wiring should be visually inspected for loose<br />
connections or grayed terminal connections. All control<br />
wiring should follow wiring instructions supplied in the<br />
project submittal package.<br />
Incoming Module Power Wiring<br />
The power for all modules is taken from a suitable circuit<br />
breaker or fused disconnect power supply within the main<br />
panel. The electrical service enters the individual units<br />
through the control panel enclosure. Proper grounding of<br />
the module is mandatory. A typical power wiring is located<br />
on page 39 – Power Distribution Drawing.<br />
CoolLogic Control System Wiring<br />
A separate 115 volt power supply is required to power the<br />
CoolLogic Master Control Panel. Communication between<br />
the Master Controller and chiller modules requires a simple<br />
two-conductor, 16 gauge shielded cable rated at 60°C<br />
minimum, daisy chain connection. Control wiring cannot be<br />
installed in the same conduit as line voltage wiring or with<br />
wires that switch highly inductive loads such as contactor<br />
and relay coils. Refer to the Power Distribution schematic on<br />
page 39 of this manual for more information. All wiring shall<br />
be in compliance with all local and national codes.<br />
Electrical Phase Sequencing<br />
Proper clockwise rotation for scroll compressor motors is<br />
important to prevent damaging the compressors. <strong>ClimaCool</strong><br />
recommends the use of a phase sequence indicating<br />
instrument following the manufactures directions. Another<br />
alternative would be to “bump test” the compressors one<br />
at a time with pressure gauges attached to the high and<br />
low gauge ports of the compressors to check for proper<br />
rotation. Energize the compressor for a few seconds to<br />
ensure the discharge pressure gauge increases signifi cantly.<br />
If the discharge pressure does not increase, proper<br />
rotation is reversed. Compressor rotation can be reversed<br />
by opening the main electrical disconnect and switching<br />
any two of the main power supply leads feeding that<br />
compressor’s contactor.<br />
WARNING!<br />
WARNING! To avoid possible injury or death due to electrical<br />
shock, open the power supply disconnect switch and secure it<br />
in an open position during installation.<br />
CAUTION!<br />
CAUTION! Use only copper conductors for field installed<br />
electrical wiring. Unit terminals are not designed to accept<br />
other types of conductors.<br />
www.climacoolcorp.com<br />
Proper Voltage Balance<br />
Occasionally, in three phase circuits, a voltage imbalance<br />
occurs between phases. It is not recommended to operate<br />
equipment when an imbalance greater that 2% occurs. This<br />
causes motors to run at high temperatures and may aff ect<br />
their longevity. The following example describes how to<br />
calculate the average voltage of the three phases to see if<br />
the imbalance is greater than 2%.<br />
Example: Line 1 = 226v Line 2 = 230v Line 3 = 228v<br />
The average is: (226+230+228)/3 = 228v<br />
Next, [100(228-226)]/228 = 0.9%<br />
The voltage imbalance of the three phase circuit is 0.9%. This<br />
is well under the 2% range.<br />
Voltage/Phase Monitor<br />
Voltage/phase monitors are factory supplied, one required<br />
per bank, for fi eld installation with the CoolLogic Master<br />
Control Panel. The voltage/phase monitor helps guard the<br />
chiller bank against voltage fl uctuations, phase failure or<br />
phase reversal conditions. The voltage/phase monitor has<br />
three wires that connect to the main three phase power<br />
chiller bank input. Two low voltage control wires are<br />
connected to the CoolLogic Master Control Panel and must<br />
be run together with the power wiring. Do not install control<br />
wiring in the same conduit as line voltage wiring or with<br />
wires that switch highly inductive loads such as contactor<br />
and relay coils.<br />
Install one (1) monitor per bank at main power fi eld to<br />
monitor the module.<br />
DANGER<br />
�<br />
�� ����������������������<br />
�� ������������������������������<br />
�� �����������������������������<br />
�����������������<br />
�� �����������������������������<br />
������������������<br />
� DANGER<br />
�� ��������������������������<br />
�� ������������������������������<br />
�����������<br />
�� ��������������������������������<br />
���������������������������<br />
�� ���������������������������������<br />
������������������<br />
� ������� � ���������<br />
�� ���������������������������������<br />
���������������<br />
�� �������������������������<br />
���������<br />
�� ������������������������������<br />
�������<br />
�� ���������������������������������<br />
��������������������<br />
RECOVER<br />
REFRIGERANT<br />
ATTENTION INSTALLER<br />
3 Phase Scroll Compressor Units<br />
�� ����������������������������<br />
��������������������<br />
�� �����������������������������<br />
���������<br />
�� ������������������������������<br />
����������<br />
�� �������������������������������<br />
����������������������<br />
�������������<br />
•If this unit uses a 3 Phase Scroll Compressor, the following<br />
instructions MUST BE followed:<br />
- Unit power supply MUST BE wired in the proper sequence<br />
to avoid damage to the 3 Phase Scroll Compressor.<br />
- Scroll Compressors with INCORRECT rotation show the<br />
following characteristics:<br />
1.) High sound level;<br />
2.) High suction pressure and low discharge pressure;<br />
3.) Low current draw.<br />
- If any of the three above characteristics exist, swap two<br />
of the three supply wires at the discount and recheck<br />
compressor for incorrect rotation.<br />
19
Pre-Startup<br />
All startups must be performed by <strong>ClimaCool</strong> factory<br />
trained personnel. Prior to chiller startup, there are certain<br />
essential checks which must be completed. Failure to carry<br />
out these checks could result in damage to the chiller<br />
voiding the modules warranty.<br />
Assembly<br />
<strong>ClimaCool</strong> recommends locking down the chiller to a<br />
concrete base or to two 4” base mounting rails using the<br />
bolt holes provided in the unit base. Confi rm that bolts have<br />
been properly tightened during installation.<br />
Electrical<br />
It is imperative to turn off the main electrical power supply<br />
and follow proper lock-out/tag-out procedures prior to<br />
servicing any of the chiller’s electrical components. The<br />
following procedures can be performed only after the<br />
electrical power is confi rmed to be off :<br />
1. The installation must be inspected and approved by the<br />
respective agent and be in compliance with all local and<br />
national electrical codes.<br />
2. Check and tighten as required all electrical terminal<br />
connections on each module. Utilize any lock-out/<br />
tag-out procedures required for your project location<br />
when performing this operation. If no procedure exists<br />
take all precautions necessary to prevent the power<br />
from being turned on. A systematic tightening of all<br />
terminals inside the electrical control panel on each<br />
module should be carried out. This will include the<br />
compressor motor terminals, which would require<br />
removal of the compressor terminal cover. Check<br />
connections at each safety and every termination in the<br />
panel.<br />
3. Verify that a separate 115 volt power supply is used<br />
to power the CoolLogic Master Control Panel. Field<br />
connections are simplifi ed requiring only a two<br />
conductor shielded cable daisy chain from the Master<br />
Controller to the modules. These control wires should<br />
be two-conductor shielded having #18 AWG minimum<br />
up to 50 feet, #16 AWG minimum up to 100 feet, rated<br />
at 60°C minimum. All fi eld wiring must be identifi ed<br />
(tagged).<br />
4. All fi eld connections should be checked for tightness.<br />
5. Check all fuses for proper sizing as indicated on the<br />
chiller data plate and/or the electrical diagram on the<br />
inside door of the electrical panel.<br />
6. Verify proper operation of the mandatory fi eld installed<br />
pressure diff erential fl ow sensor or switch.<br />
7. Verify proper installation of the fi eld installed voltage/<br />
phase monitor.<br />
20<br />
WARNING<br />
This unit contains HFC-(R410A), an azeotropic mixture of R-32 (Difluoromethane) and R-125 (Pentafluoroethane).<br />
DO NOT VENT HFC-(R410A) to the atmosphere. The U.S. Clean <strong>Air</strong> Act requires the recovery of any residual<br />
refrigerant. Do not use R-22 service equipment or components on R410A systems.<br />
Refrigeration<br />
1. Refrigerant piping and components should be inspected<br />
for damage.<br />
2. Place refrigerant gauges on the discharge and suction<br />
access ports of each refrigerant circuit to ensure a<br />
refrigerant charge is present. Leave the gauges on for<br />
compressor rotation check.<br />
3. Confi rm the settings on all pressure switches.<br />
Water System<br />
1. Confi rm that leak testing has been carried out.<br />
2. Confi rm that the system is clean.<br />
3. Confi rm that necessary water treatment systems are in<br />
place with the evaporator water systems.<br />
4. Confi rm that appropriate water analysis has been<br />
conducted by the end-user or facility manager.<br />
5. Confi rm that the results of this water analysis do not<br />
confl ict with the acceptable constituent ppm levels as<br />
indicated in Table 1, page 16.<br />
6. Confi rm the chilled water circulating pumps are<br />
operational and water is fl owing through the<br />
exchanger.<br />
7. Shut the entering water valve and blow out some water<br />
to check for particles or coloration from suspended<br />
particles. Record the pressure diff erential across the<br />
chiller heat exchanger measured at the Pete’s ports at<br />
each module.<br />
8. Confi rm correct water fl ow rates through the<br />
evaporator. Acquire the design parameters for the<br />
chiller bank from the <strong>ClimaCool</strong> Selection Program data<br />
(available from your local representative). Compare the<br />
measured diff erential pressures from step 7 above with<br />
the predicted fl ow rates to ensure proper correlation to<br />
the fl ow results.<br />
9. Verify proper installation of the fi eld installed<br />
temperature sensors and wells and verify calibration of<br />
sensors read through CoolLogic Control System.<br />
10. Confi rm installation of the mandatory fi eld installed<br />
chilled water strainer with minimum of 60 mesh screen.<br />
www.climacoolcorp.com<br />
�<br />
DANGER<br />
�� ����������������������<br />
�� ������������������������������<br />
�� �����������������������������<br />
�����������������<br />
�� �����������������������������<br />
������������������<br />
� DANGER<br />
�� ��������������������������<br />
�� ������������������������������<br />
�����������<br />
�� ��������������������������������<br />
���������������������������<br />
�� ���������������������������������<br />
������������������<br />
� ������� � ���������<br />
�� ���������������������������������<br />
���������������<br />
�� �������������������������<br />
���������<br />
�� ������������������������������<br />
�������<br />
�� ���������������������������������<br />
��������������������<br />
RECOVER<br />
REFRIGERANT<br />
�� ����������������������������<br />
��������������������<br />
�� �����������������������������<br />
���������<br />
�� ������������������������������<br />
����������<br />
�� �������������������������������<br />
����������������������<br />
�������������
<strong>Chiller</strong> Pre-Startup Procedures<br />
1. Turn selector switches inside the module starter/control<br />
panel (low voltage side) to the off position. For future<br />
reference write the circuit number and power panel<br />
identifi cation inside of the module control panel with a<br />
permanent marker.<br />
2. Ensure the correct fuses are installed in the control<br />
transformer fuse blocks inside of each <strong>ClimaCool</strong><br />
module. Turn on the power to each module (indicated<br />
by the “power” light turning on)<br />
3. Override the CoolLogic Control System outputs to the<br />
compressors.<br />
• Within the “Service Menu” of the CoolLogic Control<br />
System index to the “Diagnostics Manual Mode”<br />
section to engage the compressors individually for<br />
startup purposes.<br />
• Index to the “M1 Manual Mode” prompt so the<br />
cursor is at the “Off ” prompt to the right. Press<br />
“Enter.”<br />
• Use the increment key so that the “Off ” prompt<br />
changes to “On” and then press “Enter” or the<br />
“OK” key.<br />
• Index down to the “M1C1 Manual Mode On”<br />
prompt so the cursor is at the “Off ” prompt to the<br />
right. Press “Enter.”<br />
• Use the increment key so that the “Off ” prompt<br />
changes to “On” and then press “Enter” or the<br />
“OK” key.<br />
• Inside the module’s low voltage control section<br />
(left-most control door), you will fi nd two toggle<br />
switches, one marked “Compressor 1” and one<br />
marked “Compressor 2”. Turn the Compressor 1<br />
switch ON to bump compressor 1 and check for<br />
proper rotation using pressure gauges.<br />
• Once this is complete and correct rotation is<br />
verifi ed, turn the compressor 1 switch off and<br />
reverse the manual mode for M1C1 compressor so it<br />
is “Off ” by similar prompts as outlined above.<br />
• Use this same technique to manually override the<br />
M1C2 compressor to the “On” state.<br />
• Turn on the switch marked “Compressor 2” to<br />
bump the compressor and verify that circuit 2<br />
compressor has correct rotation.<br />
Always use proper electrical safety precautions.<br />
www.climacoolcorp.com<br />
4. Slowly close the chiller water inlet isolating valve and<br />
note that the pressure diff erential fl ow sensor or switch<br />
stops the machine. Note the fl ow rate at which this<br />
occurs. If too much fl ow is lost before the chiller is<br />
stopped, reset switch setting. The pressure diff erential<br />
fl ow switch should be set so the chiller shuts down<br />
when the fl ow rate to each evaporator water circuit<br />
drops below 60% of rated ARI full-load conditions<br />
(indicating a 10°F temperature change through the<br />
evaporator heat exchanger).<br />
5. Repeat the tests of all other safety interlocks which may<br />
be connected.<br />
6. The temperature sensor at the evaporator outlet for<br />
each module should be set to stop the compressors<br />
from operating when the leaving chilled water<br />
temperature drops below 38°F.<br />
WARNING<br />
This unit contains HFC-(R410A), an azeotropic mixture of R-32 (Difluoromethane) and R-125 (Pentafluoroethane).<br />
DO NOT VENT HFC-(R410A) to the atmosphere. The U.S. Clean <strong>Air</strong> Act requires the recovery of any residual<br />
refrigerant. Do not use R-22 service equipment or components on R410A systems.<br />
WARNING!<br />
WARNING! To avoid possible injury or death due to electrical<br />
shock, open the power supply disconnect switch and secure it<br />
in an open position during installation.<br />
CAUTION!<br />
CAUTION! Use only copper conductors for field installed<br />
electrical wiring. Unit terminals are not designed to accept<br />
other types of conductors.<br />
21
22<br />
PreStartUp R-410A Pkg<strong>Air</strong>Cool Rev. 0<br />
Pre�Start�Up�Check�List* (<strong>Packaged</strong>�<strong>Air</strong>�<strong>Cooled</strong>)<br />
�<br />
E�mail�customerservice@climacoolcorp.com��<br />
or�Fax�to:�405�745�2072�<br />
Project�Name:���_________________________����� � Date:��___________________�<br />
Address:��� � _________________________� �<br />
� � � �� � _________________________�<br />
� � � � � � �<br />
� � � � � � � � � � � � � � � � � � � � � YES�� NO�<br />
� � � � � � �<br />
1.���� Are�modules�connected�properly�“per�Codes�and�Installation�Manual?����������� � � � ����____� ____�<br />
� � (Installation,�Operation�&�Maintenance�Manual�is�available�at�www.climacoolcorp.com)�<br />
2.����� Is�there�a�60�80�mesh�strainer�on�the�evaporator�inlet�water?� � � � � � � ����������____�� ____�<br />
� (Fill�water�to�<strong>Chiller</strong>�being�sure�to�pass�through�60�80�mesh�strainer.)�<br />
�<br />
3.� � Is�chilled�water�system�filled,�flushed�and�all�air�purged�from�system?� � � � � � ���____�������____�<br />
� � (All�air�must�be�purged�from�system�prior�to�startup.�See�Filling�the�Water�System�in�IO&M)�<br />
�<br />
4.� � Are�all�pumps�tested�and�operational?�� � � � � � � � � � � � � � ���____�������____�<br />
��<br />
5.� � Are�required�GPM’s�(verified�by�pressure�differential)�supplied�to�the�<strong>Chiller</strong>?� � � � ���____�� ____�<br />
� � (See�project�specifications�or�selection�and�performance�sheets�available�from�<strong>ClimaCool</strong>�Sales�Rep)�<br />
�<br />
6.� � Pressure�differential�flow�sensor/switch�set�to�trip�on�drop�below�required�flows?�� ���������____�� ____�<br />
� � (Set�to�trip�on�low�flow�(less�than�75%�flow),�not�pump�on/off.)�<br />
�<br />
7.� � Have�all�<strong>Chiller</strong>�coupling�connections�been�leak�tested?� � � � � � � � ����������������____�� ____�<br />
� � �<br />
8.� � Is�there�water�presently�circulating�through�chiller?� � � � � � � � � ���������������____�� ____�<br />
�<br />
9.� � Verified�that�temperature�sensors�and�voltage/phase�monitor�have�been�installed?�� � ��____�� ____�<br />
�<br />
10.�� Verified�power�supply�agrees�with�chiller�nameplate?� � � � � � � � ��������������____� � ____�<br />
� � �<br />
11.�� Is�power�and�communication�wiring�complete�to�each�module?�� � � � � � � ��____�� ____�<br />
�<br />
12.�� Verify�that�wiring�and�devices�meet�with�approved�electrical�submittal�drawings?����������������____�� ____�<br />
�<br />
13.�� Is�required�load�available�to�run�multiple�compressors�at�start�up?� � � ��������������������� ��____�� ____� � �<br />
� � �<br />
14.��������Is�condenser�functional�to�maintain�condenser�required�operation?� � � ����������������������____�� ____� �<br />
� ������(This�includes�maintaining�“minimum”�inlet�temperature.��See�“Operational�Limitations”�in�IO&M”.)�<br />
�<br />
If�you�checked�“No”�to�any�question�above,�provide�the�line�reference�number�and�the�date�of�scheduled�completion�<br />
below.��Please�note�all�conditions�must�be�complete�prior�to�the�start�up�date.�<br />
___________________________________________________________________________________________________<br />
___________________________________________________________________________________________________<br />
*This�form�must�be�completed�and�submitted�to�<strong>ClimaCool</strong>�Corp.�two�(2)�weeks�prior�to�final�scheduling�of�any�Start�up.��<br />
Note:�If�any�of�the�above�items�are�not�complete�at�time�of�start�up,�backcharges�will�be�assessed�for�additional�costs.�<br />
�<br />
Contractor�Name:� � ___________________________� �<br />
Address:� � � � � ___________________________� �<br />
� � � � � � � ___________________________� � � � � � � � � � � � �<br />
Phone:�� � � � � ___________________________� � � _________________________________� �<br />
� � � � � � � � � � � � � � � � � � � � (Authorized�Signature)� � � � � � �<br />
www.climacoolcorp.com
Startup<br />
All startups must be performed by <strong>ClimaCool</strong> factory<br />
trained personnel.<br />
1. Built into the logic of the CoolLogic Control System<br />
is an anti-short cycle timer which will prevent the<br />
compressors from re-starting immediately following a<br />
compressor shutdown.<br />
2. If the chilled water temperature is above the normal<br />
operating level (greater than 90°F), all load should be<br />
removed from the chilled water system and the suction<br />
temperature should be monitored to prevent high<br />
current draw.<br />
3. When all temperatures are within operating limits, all<br />
high and low pressure safety switches should be tested<br />
for each refrigeration system.<br />
4. Once stable conditions have been achieved, the<br />
refrigeration system’s high and low pressures,<br />
compressor amp draw, voltage input level, and water<br />
system temperatures and pressures should be logged<br />
for each chiller module separately.<br />
5. Check that the oil level is between 1/3 and 1/2 of the<br />
sight glass. (See page 31– Oil Levels).<br />
6. The action of the controller should be checked for<br />
correct operation and control.<br />
7. Extract three water samples from the evaporator<br />
water system using bottles provided from the water<br />
sample test kit. Confi rm that the sample bottles are<br />
fi lled to the top leaving no air in the bottles. All three<br />
sample bottles must have labels fi lled out per the<br />
instructions included with the bottles. Ship the bottles<br />
immediately to the appropriate water testing laboratory<br />
per the instructions included with the bottles.<br />
www.climacoolcorp.com<br />
Adjusting Unit Charge and TXV’s Using Superheat<br />
and Subcooling Method<br />
Due to varying installation conditions/applications and<br />
to optimize performance, proper refrigerant charge and<br />
TXV adjustment must be confi rmed. This process must be<br />
performed in cooling mode only.<br />
After checking compressor rotation, choose a circuit to be<br />
tested fi rst. Connect test equipment to monitor the suction<br />
line and liquid line temperatures simultaneously. Place a<br />
manifold gauge set on the suction line and liquid line and<br />
start the compressor. As long as the suction pressure is high<br />
enough to prevent the low pressure switch from tripping,<br />
run the compressor for fi ve minutes.<br />
Verify proper superheat by subtracting the saturated<br />
evaporative temperature from the suction line temperature.<br />
The saturated evaporative temperature is found by<br />
converting the suction pressure reading on the manifold<br />
gauge to the related temperature. The proper superheat<br />
temperature range is 6-12°F. If superheat is low, this may<br />
indicate that TXV is overfeeding. To adjust the TXV, turn the<br />
adjustment stem clockwise. This will cause the superheat<br />
to rise. Wait fi ve minutes before checking results of the<br />
adjustment. Repeat until desired superheat is achieved.<br />
After verifying proper superheat, then verify proper<br />
subcooling. This is accomplished by subtracting the<br />
liquid line temperature from the saturated condensing<br />
temperature. Saturated condensing temperature is found by<br />
converting the liquid line pressure reading on the manifold<br />
gauge, to the related temperature. Normal subcooling<br />
temperature range at the condenser is 5 – 15°F BUT for total<br />
accuracy please follow the charge recommendations found<br />
in the selection program. If subcooling is too low, then<br />
refrigerant must be added to the system. Add the charge<br />
and wait fi ve minutes before checking results. If subcooling<br />
is too high, then refrigerant must be removed from the<br />
system.<br />
23
Caution: Do not charge to achieve subcooling temperature when the TXV is overfeeding. If the TXV is overfeeding,<br />
readings may still indicate low subcooling and low superheat, but circuit may not be undercharged.<br />
24<br />
Is Superheat<br />
Low or High?<br />
Low<br />
Turn TXV<br />
Adjustment<br />
Stem Clockwise<br />
Add Refrigerant<br />
Turn TXV<br />
Adjustment Stem<br />
Counter Clockwise<br />
High<br />
Is Subcooling<br />
Low or High?<br />
Low<br />
High<br />
Run<br />
Compressor<br />
for 5 Minutes<br />
Is Superheat<br />
in Range?<br />
No<br />
Yes<br />
www.climacoolcorp.com<br />
Is Subcooling<br />
in Range?<br />
No<br />
Is Subcooling<br />
Low or High?<br />
Low<br />
High<br />
Yes<br />
Recheck Superheat<br />
and Complete<br />
Start-up and<br />
Warranty Form<br />
Remove<br />
Refrigerant<br />
Add Refrigerant<br />
Startup Documentation<br />
All startup paperwork and documentation must be submitted to <strong>ClimaCool</strong>. Future warranty claims cannot be processed<br />
without a completed Startup and Warranty Registration form on fi le (See page 25 for warranty registration form and page<br />
45 for warranty).
�<br />
�<br />
�<br />
�<br />
�<br />
Start�Up�and�Warranty�Registration�Form<br />
(<strong>Air</strong>�<strong>Cooled</strong>)�<br />
Sign,�date�and�E�mail�to�customerservice@climacoolcorp.com�or��<br />
Fax:�(405)�745�2072�Attn:�Customer�Service.�<br />
Page�1�of�2�<br />
Project�Name:� _______________________________�� Start�Up�Date:��__________________�<br />
Address:��� ������_______________________________�<br />
������_______________________________�<br />
�<br />
Module�<strong>Model</strong>�Number_______________������Serial�Number�_______________________________�<br />
Compressor�<strong>Model</strong>�__________________�� Serial�Number�#1�_______________�#2________________�<br />
<strong>Chiller</strong>�#�_______�Bank�#�_________� � � �<br />
Evaporator�entering�pressure�_______���� � Evaporator�leaving�pressure�_______���P_______�<br />
Evaporator�“flow�devices”�shut�off�chiller�below�approx.�40%�loss�of�flow�_________�<br />
�<br />
Water�Samples�taken�(Mark�“X”)��Evaporator�____���<br />
For�initial�water�sample,�bottles�are�provided.��Follow�instructions�on�label�and�mail�same�day�sample�is�taken.�<br />
�<br />
All�wiring�terminations�in�module�panel,�safeties�and�compressors�tightened��_______�<br />
Voltage�/�Ground�� � ���� � � � � � � ������L1�________�������������L2�________�������� L3�________�<br />
Phase�/�Phase� �<br />
�<br />
Circuit�#�1�<br />
� � � � � � � � ������L1/�L2�________� L2/�L3�________� L1/�L3�______�<br />
Amperage� � ������ � ���������������L1�________������������L2�________�����������L3�________�<br />
� � � � �<br />
� � � � � � � � Comments:� � �<br />
Sight�Glass�Oil�Level� ���________� _______________________________�<br />
Suction�Pressure�(PSIG)� � � � � � � � ________� _______________________________�<br />
Suction�Temperature�(°F)�� � � � � � � ________� _______________________________�<br />
Compressor�Superheat�(°F)� � � � � � � ________� _______________________________�<br />
Discharge�Pressure�(PSIG)�� � � � � � � ________� _______________________________�<br />
Discharge�Temperature�(°F)� � � � � � � ________� _______________________________�<br />
Evaporator�Entering�Water�Temperature�(°F)�� ________� _______________________________�<br />
Evaporator�Leaving�Water�Temperature�(°F)� � ________� _______________________________�<br />
Condenser�Entering�<strong>Air</strong>�Temperature�(°F)�� � ________� _______________________________�<br />
Condenser�Leaving�<strong>Air</strong>�Temperature�(°F)����� � ________� _______________________________�<br />
Condenser�Liquid�Line�Temperature�(°F)� � � ________� _______________________________�<br />
Condenser�Liquid�Subcooling�Temperature�(°F)� ________� _______________________________�<br />
Evaporator�Pressure�Differential�(PSIG)��<br />
�<br />
� � ________� _______________________________�<br />
Verify�Safety�Settings:���<br />
�<br />
� Low�Limit____�High�Pressure�Limit�____Low�Pressure�Limit�____�<br />
www.climacoolcorp.com<br />
25
�<br />
�<br />
�<br />
�<br />
�<br />
�<br />
�<br />
26<br />
Start�Up�and�Warranty�Registration�Form�<br />
(<strong>Air</strong>�<strong>Cooled</strong>)�<br />
Sign,�date�and�E�mail�to�customerservice@climacoolcorp.com�or�<br />
Fax:�(405)�745�2072�Attn:�Customer�Service.�<br />
Page�2�of�2�<br />
�<br />
Circuit�#�2� �<br />
Amperage� � ������ � ���������������L1�________������������L2�________������L3�________�<br />
�<br />
� � � � � � � � Comments:� � � �<br />
Sight�Glass�Oil�Level� ���________� _______________________________�<br />
Suction�Pressure�(PSIG)� � � � � � � � ________� _______________________________�<br />
Suction�Temperature�(°F)�� � � � � � � ________� _______________________________�<br />
Compressor�Superheat�(°F)� � � � � � � ________� _______________________________�<br />
Discharge�Pressure�(PSIG)�� � � � � � � ________� _______________________________�<br />
Discharge�Temperature�(°F)� � � � � � � ________� _______________________________�<br />
Evaporator�Entering�Water�Temperature�(°F)�� ________� _______________________________�<br />
Evaporator�Leaving�Water�Temperature�(°F)� � ________� _______________________________�<br />
Condenser�Entering�<strong>Air</strong>�Temperature�(°F)�� � ________� _______________________________�<br />
Condenser�Leaving�<strong>Air</strong>�Temperature�(°F)����� � ________� _______________________________�<br />
Condenser�Liquid�Line�Temperature�(°F)� � � ________� _______________________________�<br />
Condenser�Liquid�Subcooling�Temperature�(°F)� ________� _______________________________�<br />
Evaporator�Pressure�Differential�(PSIG)�� � � ________� _______________________________�<br />
�<br />
Verify�Safety�Settings:��� � Low�Limit____�High�Pressure�Limit�____Low�Pressure�Limit�____�<br />
�<br />
NOTE:��Correct�rotation�of�scroll�compressors�is�extremely�critical.��Incorrect�rotation�could�damage�the�<br />
compressor.�<br />
�<br />
�<br />
Contractor�Name:� ����___________________________�� � � �<br />
Address:�� � � ����___________________________�� � � � � �<br />
� � � � � ����___________________________�� � � __________________________________�<br />
Phone:� � � � ���____________________________� � ��������������������������(Authorized�Signature)�� � � �<br />
� �<br />
�<br />
�<br />
�<br />
�<br />
�<br />
�<br />
�<br />
�<br />
�<br />
�<br />
� � � �<br />
www.climacoolcorp.com
<strong>Chiller</strong> Operation and Maintenance<br />
Pressure and Temperature Log<br />
A log of temperatures and pressures should be taken<br />
regularly. Periodically conduct a visual inspection of the<br />
chiller to identify problems before they reach the point<br />
of failure. As with any mechanical system, it is necessary<br />
to conduct a series of checks to the <strong>ClimaCool</strong> chiller to<br />
confi rm correct operation.<br />
Maintaining a Daily Log<br />
����<br />
�����������<br />
����������<br />
�����������������������<br />
�����������<br />
����������������������<br />
�����������<br />
���������������������������<br />
�����������������������������<br />
���� ���� ���� ���� ����� ���� ����<br />
Daily<br />
• A daily operational log should be kept.<br />
• Perform visual inspection.<br />
• Record entering and leaving chiller water temperatures<br />
and pressures.<br />
• Note any problems that may exist and immediately plan<br />
for further investigation. If repair is necessary, schedule<br />
for earliest possible date.<br />
• Properly document all data taken.<br />
Weekly<br />
• Review daily log from previous week.<br />
• Perform visual inspection.<br />
• Properly document all data taken.<br />
• Note any problems that may exist. Immediately plan for<br />
further investigation. If repair is necessary, schedule for<br />
earliest possible date.<br />
www.climacoolcorp.com<br />
Quarterly<br />
Check controller operating parameters and setpoints.<br />
• Check temperature drop/rise on heat exchanger. *<br />
• Check compressor oil level.<br />
• Check compressor oil color.<br />
• Check water fl ow rates and pressure drops across<br />
evaporator heat exchanger.<br />
• Properly document all data taken.<br />
* The temperature drop/rise on a fully loaded (both compressors)<br />
heat exchanger is generally 10°F. If only one compressor is<br />
running the temperature drop/rise will be approximately<br />
5°F. Some projects are designed to have a higher or lower<br />
temperature drop on the evaporator depending on application.<br />
Consult the bank performance sheet for your specifi c project<br />
for these values. If the temperature drop/rise is greater than the<br />
design, your heat exchanger may need to be back fl ushed or the<br />
strainer may need to be cleaned.<br />
Annual<br />
• Back fl ush all heat exchangers. If fouling is suspected,<br />
use only <strong>ClimaCool</strong> recommended de-scalers (see page<br />
28 - Chemical Clean In Place Washing).<br />
• Remove and clean all waterside strainers.<br />
• Manually operate all waterside isolation valves, if<br />
provided, on each module.<br />
• Check all electrical connections for tightness.<br />
• Perform leak check on all refrigerant circuits.<br />
• Check all header piping couplings for tightness.<br />
• Check oil level and color on each compressor.<br />
• Check and test all refrigerant safeties for proper<br />
operation.<br />
• Check all peripheral systems for proper operation.<br />
• Check and test CoolLogic Control System.<br />
• Verify setpoints, sensors and general control<br />
confi guration.<br />
• Properly document all data taken.<br />
27
Heat Exchangers<br />
Draining<br />
When performing standard maintenance procedures such<br />
as fl ushing a heat exchanger, it will be necessary to close<br />
off a section of a module. This can easily be done if factory<br />
mounted water isolation valves are provided.<br />
Back Washing<br />
It may become evident from the recorded weekly log<br />
data that the performance of the chiller is gradually<br />
degrading. This could be due to a buildup of debris or<br />
sludge obstructing the free passage of fl ow through the<br />
heat exchangers. This debris can be removed by a back<br />
washing process which involves the introduction of a forced<br />
violent backwards fl ow through the heat exchanger using a<br />
carefully formulated fl ushing solution. To be eff ective, this<br />
back fl ow should be slightly higher than the normal fl ow,<br />
and in the opposite direction. The diffi culties and practicality<br />
of this method depends on the back wash pumping system<br />
itself. Another method is to back fl ush each heat exchanger<br />
using city water as opposed to system water (see Figure<br />
1 on page 29 – City Water Cleaning Arrangement). The<br />
back washing procedure is accomplished by isolating each<br />
individual heat exchanger and introducing the city water<br />
using a connection hose to the 3/4” service port to fl ow in<br />
an opposite direction from the normal heat exchanger fl ow<br />
direction. On the opposite 3/4” service port, connect a drain<br />
hose continuing back fl ow until all debris is removed.<br />
Chemical Clean In Place Washing Without Water<br />
Isolation Valves<br />
Chemical Clean in place washing will typically provide<br />
the best debris removal, even from severely clogged<br />
heat exchangers. In order to clean the heat exchangers<br />
for modules WITHOUT water isolation valves, it will be<br />
necessary to mechanically and electrically isolate each<br />
module separately from the bank of modules. The rest of<br />
the chiller modules will need to be disabled during this<br />
cleaning procedure as the fl ow through the main bank<br />
header will be interrupted. The cleaning tank, pump and<br />
pump strainer should be arranged in the manner shown<br />
in Figure 2 on page 29 - In Place Cleaning Arrangement.<br />
The fl ow of the cleaning is arranged in the opposite fl ow<br />
to the normal operational direction. Connection points<br />
are provided using the 3/4” service ports at each heat<br />
exchanger. The cleaning solution used can be either a<br />
detergent or hot water to remove particles and simple<br />
cleaning. If correct water treatment has been implemented,<br />
this should provide adequate cleaning for most situations.<br />
The solution can be pumped through the heat exchangers<br />
and allowed to “soak” for a time and then pumped again.<br />
Upon successful cleaning of a module, proceed to isolate<br />
a second module separately from the bank to repeat the<br />
cleaning process.<br />
28<br />
Chemical Clean In Place Washing With Water<br />
Isolation Valves<br />
Chemical Clean in place washing will typically provide<br />
the best debris removal, even from severely clogged<br />
heat exchangers. It is only necessary to mechanically and<br />
electrically isolate one chiller module at a time. The rest of<br />
the chiller modules can continue to operate to satisfy the<br />
cooling load required. The cleaning tank, pump and pump<br />
strainer should be arranged in the manner shown in Figure<br />
2 on page 29- In Place Cleaning Arrangement. The fl ow of<br />
the cleaning is arranged in the opposite fl ow to the normal<br />
operational direction. Connection points are provided<br />
using the 3/4” service ports at each heat exchanger. The<br />
cleaning solution used can be either a detergent or hot<br />
water to remove particles and simple cleaning. If correct<br />
water treatment has been implemented, this should provide<br />
adequate cleaning for most situations. The solution can<br />
be pumped through the heat exchangers and allowed to<br />
“soak” for a time and then pumped again. If it is required<br />
to remove carbonates, then an acidic wash should be used.<br />
A 2% solution of phosphoric or sulfamic acids in pure water<br />
are generally acceptable. These acid solutions should only<br />
be allowed to circulate within the heat exchanger for 10 to<br />
15 minutes, followed by a thorough pure water fl ush for 10<br />
to 15 minutes. Hydrochloric or sulfuric acids must not be<br />
used. In any case, consult the chemical supplier to establish<br />
the correct formulation and handling process. The materials,<br />
which will be exposed to the wash, are stated on page 16 –<br />
Water Treatment.<br />
Once the washing is complete, the solution should be<br />
fl ushed out completely by pumping clean, fresh water<br />
through the chiller. To achieve a reasonable level of dilution,<br />
it may be required to change the water several times. After<br />
cleaning, the water quality and water treatment should be<br />
confi rmed.<br />
www.climacoolcorp.com
Heat Exchanger<br />
Cleaning Pump<br />
Service Port (3/4”)<br />
Isolation Ball Valve (2”)<br />
From Cooling Tower<br />
Header<br />
Refrigerant Circuit #2<br />
To Cooling Tower<br />
Header<br />
Service Port (3/4”)<br />
Cleaning Tank<br />
Connected to City Water<br />
Isolation Ball Valve (2”)<br />
Refrigerant Circuit #1<br />
Figure 2 - In Place Cleaning Arrangement<br />
www.climacoolcorp.com<br />
Heat Exchanger<br />
To Drain<br />
Service Port (3/4”)<br />
Isolation Ball Valve (2”)<br />
From Cooling Tower<br />
Header<br />
Refrigerant Circuit #2<br />
To Cooling Tower<br />
Header<br />
Service Port (3/4”)<br />
Connected to City Water<br />
Isolation Ball Valve (2”)<br />
Refrigerant Circuit #1<br />
Figure 1 - City Water Cleaning Arrangement<br />
29
Operational Limitations<br />
30<br />
Voltage�Limitations<br />
Compressor�Operating�Limitations <strong>UCA</strong><br />
Maximum�Compression�Ratio 5.7:1<br />
Minimum�Operating�Pressure�Differential�(psi) 85<br />
Maximum�Operating�Pressure�Differential�(psi) 475<br />
Minimum�Discharge�Pressure�(psig) 235<br />
The�following�voltage�limitations�are�absolute�and� Maximum�Discharge�Pressure�(psig) 590<br />
����operation�beyond�these�limitations�may�cause Minimum�Suction�Pressure�(No�Glycol)(psig) 95<br />
�������������serious�damage�to�the�compressor. Minimum�Suction�Pressure�(With�Glycol)(psig) 70<br />
Maximum�Suction�Pressure�(psig) 155<br />
Maximum�Discharge�Temperature�(°F) 265<br />
Minimum�Subcooling�(°F) 8<br />
Maximum�Subcooling�(°F) 14<br />
Voltage Minimum�Voltage Maximum�Voltage Minimum�Superheat�at�Compressor�(°F) 6<br />
208/230/3/60 187 253 Maximum�Superheat�at�Compressor�(°F) 12<br />
460/3/60 414 506 Maximum�Oil�Temperature�(Max)�(°F) 200<br />
575/3/60 518 632 Maximum�Saturation�Discharge�Temperature�(°F) 145<br />
Water�Flow�Data <strong>UCA</strong>020 <strong>UCA</strong>030<br />
Minimum�Evaporator�Water�Flow�(gpm) 23 34<br />
Maximum�Evaporator�Water�Flow�(gpm) 113 164<br />
Minimum�Leaving�Evaporator�Water�Temperature�(No�Glycol)(°F) 40 40<br />
Minimum Minimum�Leaving�Evaporator�Water�Temperature�(with�Glycol)( Leaving Evaporator Water Temperature (with Glycol)(°F) F) 20 20<br />
Maximum�Leaving�Evaporator�Water�Temperature�(°F) 60 60<br />
Minimum�Evaporator�Water�Differential�Temperature�(°F) 4.5 4.6<br />
Maximum�Evaporator�Water�Differential�Temperature�(°F) 20 20<br />
Minimum�Entering�Condenser�<strong>Air</strong>�Temperature�(°F) �20 �20<br />
Maximum�Entering�Condenser�<strong>Air</strong>�Temperature�(@30FTD)((°F) 115 115<br />
Maximum�Condenser�Temperature�Differential��(°F) 25 25<br />
www.climacoolcorp.com
Compressor Information<br />
Highly effi cient and extremely reliable scroll compressors<br />
are used on <strong>Model</strong> <strong>UCA</strong>. The information contained in this<br />
manual will be useful for their care.<br />
Compressor Rotation<br />
All scroll-type machines are unidirectional and will only<br />
compress in one direction. Operating in the reverse rotation<br />
can be destructive and will be indicated by a loud operating<br />
noise together with a lack of compression.<br />
Compressor Lubrication<br />
The compressor operates on a sealed system and oil can<br />
only be lost if leak occurs. There are few cases when oil will<br />
need to be added to a machine in normal operation.<br />
Oil Type<br />
The oil in all scroll compressors used in <strong>ClimaCool</strong> chillers<br />
is polyolester type oil, (POE), and is intended for R-410A<br />
refrigerant use. All POE refrigerant oils require special<br />
handling and should be protected from contamination.<br />
They are extremely hygroscopic and will absorb moisture<br />
rapidly from the air. It is strongly recommended to store and<br />
dispense POE oils from sealed metal cans. Suitable POE oils<br />
are:<br />
• Copeland Ultra 22 CC<br />
• Mobile EAL Arctic 22 CC<br />
• ICI Emkarate RL 32 CF<br />
ATTENTION INSTALLER<br />
3 Phase Scroll Compressor Units<br />
•If this unit uses a 3 Phase Scroll Compressor, the following<br />
instructions MUST BE followed:<br />
- Unit power supply MUST BE wired in the proper sequence to<br />
avoid damage to the 3 Phase Scroll Compressor.<br />
- Scroll Compressors with INCORRECT rotation show the<br />
following characteristics:<br />
1.) High sound level;<br />
2.) High suction pressure and low discharge pressure;<br />
3.) Low current draw.<br />
- If any of the three above characteristics exist, swap two of the<br />
three supply wires at the discount and recheck compressor for<br />
incorrect rotation.<br />
www.climacoolcorp.com<br />
Oil Levels<br />
The oil level in the compressor should be checked with the<br />
compressor running. The compressor oil level may vary<br />
during operation and particularly on the startup. The normal<br />
operating compressor oil level should be between 1/3 and<br />
1/2 of the sight glass. During operation, a certain amount of<br />
oil is carried out into the refrigerant system. The system has<br />
been designed to bring the oil back to the compressor. If the<br />
level in the sight glass falls, it may be due to the operating<br />
conditions and enough time (up to 6 hours of operation)<br />
should be given to allow the oil to return before more oil is<br />
added. The compressor should not be allowed to operate<br />
with less than 1/8” oil sight glass for longer than 4-6 hours.<br />
Adding Oil<br />
The compressor must never be run in a vacuum. A suitable<br />
hydraulic pump should be used to add oil and reserved<br />
for this process. Oil should only be added to a compressor<br />
while it is operating to observe valid oil sight glass levels.<br />
Oil is pressure-injected either into a gauge connection on<br />
the suction line or injected into the oil process port at the<br />
bottom of the compressor housing. Only enough oil should<br />
be added to raise the level above the 1/3 sight glass point.<br />
WARNING<br />
To avoid the release of refrigerant into the atmosphere,<br />
the refrigerant circuit of this unit must be serviced only by<br />
technicians who meet local, state and federal profi ciency<br />
requirements.<br />
All refrigerant discharged from this unit must be recovered<br />
WITHOUT EXCEPTION. Technicians must follow industry<br />
accepted guidelines and all local, state and federal statutes for<br />
the recovery and disposal of refrigerants.<br />
If a compressor is removed from this unit, system refrigerant<br />
circuit oil will remain in the compressor. To avoid leakage of<br />
compressor oil, the refrigerant lines of the compressor must<br />
be sealed after it is removed.<br />
31
Refrigeration Circuit Diagram<br />
REFRIGERANT<br />
CIRCUIT #2<br />
CHILLER OUTLET<br />
WATER MAIN (6")<br />
S2<br />
APPROVED<br />
32<br />
FACTORY CHILLER<br />
WATER PIPING<br />
CHILLER<br />
WATER OUTLET<br />
VALVE<br />
(WHEN USED)<br />
FLUSH<br />
SHUT-OFF<br />
VALVE<br />
DATE<br />
03/14/2011<br />
CHILLER<br />
WATER INLET<br />
VALVE<br />
(WHEN USED)<br />
PETE'S<br />
PORTS<br />
10<br />
CHILLER INLET<br />
WATER MAIN (6")<br />
FILL<br />
SHUT-OFF<br />
VALVE<br />
SYMBOL LEGEND<br />
S # = TEMPERATURE SENSOR<br />
# = LEGEND ITEM #<br />
PT#<br />
TXV<br />
= SOLDER JOINT<br />
= SILVER SOLDER JOINT<br />
= PRESSURE TRANSDUCER<br />
= "TEE" SOLDER JOINT<br />
= REFRIGERANT FLOW PATH<br />
REVISED<br />
REVISED<br />
FILENAME<br />
RefriDiag-<strong>UCA</strong><br />
-<br />
-<br />
REFRIGERANT<br />
CIRCUIT #1<br />
= PRESSURE ACCESS FITTING<br />
= THERMAL EXPANSION VALVE<br />
TXV<br />
9<br />
TXV<br />
BULB<br />
6<br />
7<br />
8<br />
TITLE<br />
DESCRIPTION<br />
SIZE<br />
A<br />
S<br />
EQUALIZER<br />
LINE<br />
S3<br />
<strong>ClimaCool</strong> Corp.<br />
RefrigDiag-<strong>UCA</strong><br />
SCALE<br />
NONE<br />
EQUALIZER<br />
LINE<br />
PT2<br />
1<br />
REFRIGERATION CIRCUIT DIAGRAM<br />
(CIRCUIT #1 OF 2 SHOWN)<br />
PACKAGE AIR-COOLED MODULAR CHILLER<br />
CLIMACOOL <strong>Model</strong> # <strong>UCA</strong>020,030<br />
DRAWN BY<br />
Gus Olivera<br />
www.climacoolcorp.com<br />
3<br />
(WHEN USED)<br />
2<br />
S<br />
PT1<br />
4<br />
(WHEN USED)<br />
S1<br />
DATE<br />
03/14/2011<br />
5<br />
DWG NO<br />
RefriDiag-<strong>UCA</strong><br />
AIR COOLED<br />
CONDENSER SECTION<br />
COMPONENT LEGEND<br />
CONDENSER<br />
AIR EXHAUST<br />
CONDENSER FAN(S)<br />
CONDENSER<br />
AIR INTAKE<br />
1. COMPRESSOR<br />
2. HIGH PRESSURE SWITCH<br />
3. HOT GAS BYPASS VALVE (IF USED)<br />
4. HOT GAS BYPASS SOLENOID VALVE (IF USED)<br />
5. AIR COOLED CONDENSER SECTION<br />
6. FILTER DRIER<br />
7. SIGHT GLASS MOISTURE INDICATOR<br />
8. LIQUID LINE SOLENOID VALVE<br />
9. THERMAL EXPANSION VALVE<br />
10. CHILLER EVAPORATOR HX<br />
S1. DISCHARGE TEMPERATURE SENSOR<br />
S2. LEAVING CHILLER WATER TEMP. SENSOR<br />
S3. SUCTION TEMPERATURE SENSOR<br />
PT1. DISCHARGE PRESSURE TRANSDUCER<br />
PT2. SUCTION PRESSURE TRANSDUCER<br />
SHEET 1 OF 1<br />
REV<br />
-
Refrigeration Circuit Diagram<br />
REFRIGERANT<br />
CIRCUIT #2<br />
CHILLER OUTLET<br />
WATER MAIN (6")<br />
S2<br />
APPROVED<br />
FACTORY CHILLER<br />
WATER PIPING<br />
CHILLER<br />
WATER OUTLET<br />
VALVE<br />
(WHEN USED)<br />
FLUSH<br />
SHUT-OFF<br />
VALVE<br />
DATE<br />
03/14/2011<br />
CHILLER<br />
WATER INLET<br />
VALVE<br />
(WHEN USED)<br />
PETE'S<br />
PORTS<br />
16<br />
CHILLER INLET<br />
WATER MAIN (6")<br />
FILL<br />
SHUT-OFF<br />
VALVE<br />
SYMBOL LEGEND<br />
S # = TEMPERATURE SENSOR<br />
# = LEGEND ITEM #<br />
PT#<br />
TXV<br />
= SOLDER JOINT<br />
= SILVER SOLDER JOINT<br />
= PRESSURE TRANSDUCER<br />
= "TEE" SOLDER JOINT<br />
= REFRIGERANT FLOW PATH<br />
REVISED<br />
REVISED<br />
FILENAME<br />
RefriDiag-<strong>UCA</strong> (-20°F Ambient)<br />
-<br />
-<br />
REFRIGERANT<br />
CIRCUIT #1<br />
= PRESSURE ACCESS FITTING<br />
= THERMAL EXPANSION VALVE<br />
TXV<br />
15<br />
TXV<br />
BULB<br />
12<br />
13<br />
14<br />
TITLE<br />
DESCRIPTION<br />
SIZE<br />
A<br />
S<br />
EQUALIZER<br />
LINE<br />
S3<br />
<strong>ClimaCool</strong> Corp.<br />
RefriDiag-<strong>UCA</strong> (-20°F Ambient)<br />
SCALE<br />
NONE<br />
11<br />
10<br />
EQUALIZER<br />
LINE<br />
PT2<br />
1<br />
REFRIGERATION CIRCUIT DIAGRAM<br />
www.climacoolcorp.com<br />
9<br />
3<br />
(WHEN USED)<br />
2<br />
(CIRCUIT #1 OF 2 SHOWN)<br />
PACKAGE AIR-COOLED MODULAR CHILLER<br />
-20°F LOW AMBIENT CONTROL<br />
CLIMACOOL <strong>Model</strong> # <strong>UCA</strong>020,030<br />
DRAWN BY<br />
Gus Olivera<br />
8<br />
LOCATE BULB SO IT<br />
SENSES OUTDOOR AIR<br />
S<br />
PT1<br />
4<br />
(WHEN USED)<br />
S1<br />
R<br />
D<br />
C<br />
DATE<br />
03/14/2011<br />
7<br />
6<br />
5<br />
DWG NO<br />
RefriDiag-<strong>UCA</strong> (-20°F Ambient)<br />
AIR COOLED<br />
CONDENSER SECTION<br />
COMPONENT LEGEND<br />
CONDENSER<br />
AIR EXHAUST<br />
CONDENSER FAN(S)<br />
CONDENSER<br />
AIR INTAKE<br />
1. COMPRESSOR<br />
2. HIGH PRESSURE SWITCH<br />
3. HOT GAS BYPASS VALVE (IF USED)<br />
4. HOT GAS BYPASS SOLENOID VALVE (IF USED)<br />
5. AIR COOLED CONDENSER SECTION<br />
6. LOW AMBIENT CONTROL VALVE (LAC)<br />
7. LIQUID LINE CHECK VALVE<br />
8. LIQUID LINE BALL VALVE #1<br />
9. LIQUID RECEIVER<br />
10. PRESSURE RELIEF VALVE<br />
11. LIQUID LINE BALL VALVE #2<br />
12. FILTER DRIER<br />
13. SIGHT GLASS MOISTURE INDICATOR<br />
14. LIQUID LINE SOLENOID VALVE<br />
15. THERMAL EXPANSION VALVE<br />
16. CHILLER EVAPORATOR HX<br />
S1. DISCHARGE TEMPERATURE SENSOR<br />
S2. LEAVING CHILLER WATER TEMP. SENSOR<br />
S3. SUCTION TEMPERATURE SENSOR<br />
PT1. DISCHARGE PRESSURE TRANSDUCER<br />
PT2. SUCTION PRESSURE TRANSDUCER<br />
SHEET 1 OF 1<br />
REV<br />
-<br />
33
Refrigeration System Re-Processing and Charging<br />
Conforming to local and national codes is the responsibility<br />
of the service technician or installing contractor. The<br />
service technician should be familiar with the following<br />
codes:<br />
• ASHRAE Standard Safety Code for Mechanical<br />
Refrigeration, ANSI/ASHRAE 15-1978<br />
• American National Standard Code for Pressure Piping,<br />
ANSI B31.5-1974<br />
Factory Tested<br />
<strong>ClimaCool</strong> modular chillers have been pressure-tested,<br />
evacuated and charged with R-410A refrigerant. In the<br />
unlikely event that a refrigerant leak is detected at startup,<br />
the following guidelines should be consulted before<br />
reprocessing the refrigeration systems.<br />
Refrigeration System Reprocessing<br />
Debris and moisture can enter copper tubing in a matter<br />
of minutes. All tubing, coil connections, or any refrigerant<br />
containing portions should be temporarily capped or sealed<br />
to keep contaminants to a minimum. Filter driers should<br />
be opened just prior to brazing into the system to prevent<br />
moisture infi ltration whenever possible.<br />
After all of the repairs have been made to the refrigeration<br />
system, a pressure test using refrigerant and nitrogen<br />
should be performed. Pressurize the system with dry<br />
nitrogen to 20 psi and check for any obvious leaks. If no<br />
leaks are present introduce a “trace” amount of refrigerant<br />
to the system (raise system pressure to 30-40 psi). With a<br />
dry nitrogen tank equipped with a regulator set to 550 psi,<br />
continue to pressurize the system to 550 psi. Using a leak<br />
detector, carefully check the system for any remaining leaks.<br />
If the system is free of leaks, you may release the pressure.<br />
Evacuating the System<br />
The compressors should never be run while the system<br />
is in a vacuum. This could cause immediate failure to the<br />
compressors. After the system has been leak tested and<br />
sealed, any moisture that entered the system should be<br />
dehydrated and removed. While the pressure is reduced<br />
under a vacuum, the boiling point of moisture trapped<br />
inside the lines is also reduced. A pressure of .0095 psia, or<br />
500 microns absolute pressure or better must be reached<br />
and sustained for several hours in order for the system to<br />
be considered free from moisture. It is necessary to use a<br />
micron meter equipped with an absolute pressure gauge<br />
(or transducer) to take this reading. <strong>ClimaCool</strong> recommends<br />
the double evacuation process to ensure proper removal of<br />
moisture and contaminants from the refrigeration system.<br />
After the initial vacuum is reached and held on the system,<br />
allow dry nitrogen back into the system until the pressure<br />
reaches zero psig or slightly higher. Then, repeat the entire<br />
evacuation process described above. The evacuation<br />
process is considered complete ONLY after a successful<br />
“blank-off ” test is performed.<br />
34<br />
A “blank-off ” test is defi ned as:<br />
a) Pulling a vacuum level less than 500 microns on the<br />
system and holding it for several hours.<br />
b) Record the vacuum level in the system in microns,<br />
then close off the vacuum pump from the system for 15<br />
minutes and continue to monitor the micron level inside<br />
the refrigeration system.<br />
c) If the vacuum level inside the system does NOT rise<br />
more than 400 microns above the recorded vacuum level<br />
at the start of the 15 minute period, then the evacuation<br />
process is complete.<br />
If the vacuum level rises more than 400 microns in 15<br />
minutes, then continue to evacuate the system for 1-2 hours<br />
then repeat a “blank-off ” test.<br />
Recharging the System<br />
After all repairs have been completed, the system has<br />
been leak tested, and proper vacuum pressures have been<br />
reached and maintained, refrigerant may be recharged<br />
into the system. With a known weight of refrigerant in<br />
the cylinder, use the gauge manifold set to connect the<br />
cylinder’s liquid charging port to the charging access port<br />
near the refrigerant liquid line valve. Open the compressor<br />
suction and discharge line valves. Gradually meter the<br />
appropriate weight of liquid refrigerant into the condenser<br />
side of the system fi rst, until no additional refrigerant can<br />
be dispensed. Accurate refrigerant charge per circuit may<br />
be found in the Physical Data information on page 6. Then<br />
continue the charging process by fi lling the evaporator side<br />
of the system with refrigerant. Close the refrigerant cylinder<br />
charging port, close all gauge manifold ports and start the<br />
compressor. Be careful when continuing to charge the<br />
balance of the refrigerant, constantly maintaining a positive<br />
compressor suction pressure (>25 psig) at all times.<br />
WARNING<br />
This unit contains HFC-(R410A), an azeotropic mixture of R-32 (Difluoromethane) and R-125 (Pentafluoroethane).<br />
DO NOT VENT HFC-(R410A) to the atmosphere. The U.S. Clean <strong>Air</strong> Act requires the recovery of any residual<br />
refrigerant. Do not use R-22 service equipment or components on R410A systems.<br />
www.climacoolcorp.com<br />
WARNING<br />
To avoid the release of refrigerant into the<br />
atmosphere, the refrigerant circuit of this unit must<br />
be serviced only by technicians who meet local, state<br />
and federal profi ciency requirements.<br />
All refrigerant discharged from this unit must be<br />
recovered WITHOUT EXCEPTION. Technicians<br />
must follow industry accepted guidelines and all<br />
local, state and federal statutes for the recovery and<br />
disposal of refrigerants.<br />
If a compressor is removed from this unit, system<br />
refrigerant circuit oil will remain in the compressor.<br />
To avoid leakage of compressor oil, the refrigerant<br />
lines of the compressor must be sealed after it is<br />
removed.
Options<br />
Field Installed Options<br />
Free Cooling Module<br />
Directly coupled to chiller bank, including free cooling coils,<br />
condenser fans and 3-way bypass valves.<br />
Pump Module<br />
Module includes primary and standby in-line centrifugal<br />
pumps in a lead/lag confi guration coupled to the common<br />
chiller header controlled through the CoolLogic control<br />
system.<br />
Water Header Bypass<br />
When using motorized valves, a water header bypass<br />
prevents pump deadheading with a bypass kit utilizing<br />
motorized two position actuators.<br />
Pressure Diff erential Flow Sensor/Switch<br />
To prevent operation of chiller without suffi cient water fl ow<br />
to the evaporator.<br />
Manual Strainers<br />
Increase effi ciency and ensure long life of the equipment<br />
with Y-style and Basket strainers of cast iron 200 psi or<br />
carbon 275 psi with 60 mesh stainless steel screens. All<br />
strainers are fi eld installed external to the chiller bank for<br />
ease of service.<br />
www.climacoolcorp.com<br />
Factory Installed Options<br />
Low Ambient to -20oF Variable speed fan control for all condenser fans provides<br />
optimum head pressure control. Liquid receivers and<br />
fl ood-back head pressure control valves are provided for all<br />
refrigerant circuits.<br />
Coil Guards<br />
Protection of air cooled condensers.<br />
Harsh Environment<br />
Coil coating protection.<br />
Hot Gas Bypass<br />
Provided on both circuits allowing unit operation below the<br />
minimum step of unloading.<br />
Heat Recovery<br />
Desuperheater provides hot water.<br />
Heat Pump<br />
Reverse cycle heat pump for heating and cooling operation.<br />
35
“Y” Strainer<br />
Before installing the “Y” strainer, be sure its pressure<br />
rating is correct for the system. If the end connections are<br />
threaded or designed for soldering or brazing, be sure the<br />
piping is straight and not at an angle or off set. If the strainer<br />
has fl anged ends, be sure the fl anges of the connecting<br />
piping are square with the pipe so that no undue stress are<br />
put on the strainer or piping when tightening fl ange bolts.<br />
Tighten in sequence, crossing to opposites.<br />
For maximum effi ciency, a diff erential pressure gauge<br />
installed across the inlet and outlet will indicate pressure<br />
loss due to clogging and may be used as a guide to<br />
determine when cleaning is required. Normally, when<br />
diff erential pressure reaches 5 - 10 psi, screen must be<br />
cleaned. If the strainer is equipped with a blow-down valve,<br />
open and fl ush out until any sediment is removed. If the<br />
strainer is not fi tted for blow-down cleaning, (strainer must<br />
be off line), remove the cover or cap and clean the screen.<br />
Reinstall the screen in the strainer in the same position<br />
as before and tighten cover or cap. Replace the gasket if<br />
necessary.<br />
Keeping a spare, clean screen will minimize shut<br />
down time.<br />
Warning<br />
Individuals performing removal and disassembly should be<br />
provided with suitable protection from possibly hazardous<br />
liquids.<br />
Note: Large size “Y” strainers are supplied with<br />
Breech-Lok screens. To remove screen, rotate screen 450 ,<br />
Breech-Lok will disengage.<br />
Spare Parts<br />
To order replacement screens or gaskets, you should specify<br />
the following:<br />
• Size and model number of strainer or casting number as<br />
it appears on the body of the strainer<br />
• Specify the type of service. For example: water, steam,<br />
gas, oil, air. The working pressure and temperature<br />
of the system and the particle size to be strained out<br />
should also be specifi ed.<br />
36<br />
Body<br />
Screen<br />
Body<br />
www.climacoolcorp.com<br />
Typical flanged end "Y" strainer<br />
Gasket<br />
Typical threaded "Y" strainer<br />
Screen<br />
Gasket<br />
Mounting Positions<br />
Vertical Horizontal<br />
Cover Bolts<br />
Cover<br />
NPT tapping for drain plug<br />
(Optional on some models)<br />
The cover of the "Y" side should face down<br />
Cap<br />
(Tapping for NPT<br />
drain plug optional on<br />
some sizes)
Basket Strainer<br />
Warning<br />
Individuals performing removal and disassembly should be<br />
provided with suitable protection from possibly hazardous<br />
liquids. Knob and clamp type quick opening covers should<br />
not be used for high temperature service. Consult factory<br />
for recommendations.<br />
Installation<br />
Before installing the simplex basket strainer, be sure<br />
its pressure rating is correct for the system. If the end<br />
connections are threaded, be sure the piping is straight and<br />
not at an angle or off set. If the strainer has fl anged ends, be<br />
sure the fl anges of the connecting piping are square with<br />
the pipe so that no undue stresses are put on the strainer<br />
or piping when tightening fl ange bolts. Tighten bolts in<br />
sequence crossing to opposites.<br />
Maintenance<br />
For maximum effi ciency, a diff erential pressure gauge<br />
installed across the inlet and outlet will indicate pressure<br />
loss due to clogging and may be used, as a guide to<br />
determine when cleaning is required. If the strainer is not<br />
set up for backwash cleaning, remove the cover access to<br />
the basket. After cleaning, replace the basket in the same<br />
position as before and tighten cover. Replace the gasket<br />
or O-ring if necessary. Keeping a spare, clean basket will<br />
minimize shut down time.<br />
Spare Parts<br />
To order replacement baskets or gaskets and O-rings, which<br />
are the only items normally required, specify the following.<br />
• Size and model number of strainer or casting number as<br />
it appears on the body of the strainer.<br />
• Specify service. For example: water, steam, gas, air, oil.<br />
The working pressure and temperature of the system<br />
and particle size to be strained out should also be<br />
specifi ed.<br />
www.climacoolcorp.com<br />
Basket<br />
Cover<br />
O-Ring<br />
Basket<br />
Cover Knobs<br />
NPT Plug<br />
O-Ring<br />
NPT Plug<br />
Cover Cover Bolts<br />
Body<br />
Body<br />
Gasket<br />
Basket Strainers should be installed in the position<br />
shown in the illustrations above.<br />
37
Electrical Data<br />
38<br />
NOTES:<br />
1. RLA - Rated Load Amps are calculated as per UL1995.<br />
2. MCA - Minimum Circuit Ampacity is: [ 125% of the RLA of the largest compressor motor plus 100%<br />
of the RLA of all other concurrent motors and/or electrical loads].<br />
3. MOP - Maximum Overcurrent Protection or Max.Fuse Size is rounded down from: [ 225% of the RLA<br />
of the largest compressor motor plus 100% of the RLA of all other concurrent electrical loads].<br />
4. Recommended Dual Element Fuse Sizing: Rounded up from 150% of the RLA of the largest compressor<br />
motor plus 100% of the RLA of all other concurrent electrical loads.<br />
5. LRA - Locked Rotor Amps are instantaneous starting amperage per compressor.<br />
6. Module internal wiring is per NEC.<br />
7. Voltage Tolerance Range<br />
208-230V / 60 Hz: Min. 187V Max. 253V<br />
460V / 60 Hz: Min. 414V Max. 506V<br />
575V / 60 Hz: Min. 518V Max. 632V<br />
8. MOP Device or Recommended Fusing Device for Module Power Wiring supplied by others.<br />
These are recommended values for electrical power protection of Modules selected.<br />
9. Disconnect Switch for Module Power Wiring supplied by others.<br />
These are recommended values for electrical power protection of Modules selected.<br />
<strong>UCA</strong>030AN <strong>UCA</strong>030AFASAC00S 575V/ 3PH/ 60HZ 47.7 53.2 70.0 60.0 80.0 4.0 5.0 7.5 21.9 27.4 128.0 45.0 35.0<br />
<strong>UCA</strong>030AF <strong>UCA</strong>030AFASAC00S 460V/ 3PH/ 60HZ 59.6 66.4 80.0 80.0 90.0 5.0 6.3 10.0 27.4 34.2 173.0 60.0 45.0<br />
www.climacoolcorp.com<br />
<strong>UCA</strong>030AH <strong>UCA</strong>030AFASAC00S 208V-230V/ 3PH/ 60HZ 129.7 144.7 175.0 175.0 200.0 9.0 11.3 16.0 60.4 75.5 425.0 125.0 100.0<br />
<strong>UCA</strong>020AN <strong>UCA</strong>020AFASAC00S 575V/ 3PH/ 60HZ 30.8 34.3 45.0 40.0 50.0 2.7 3.4 6.0 14.1 17.6 109.0 35.0 35.0<br />
<strong>UCA</strong>020AF <strong>UCA</strong>020AFASAC00S 460V/ 3PH/ 60HZ 38.5 42.9 50.0 50.0 60.0 3.4 4.3 7.5 17.6 22.0 150.0 40.0 40.0<br />
Amps 1<br />
Size 4<br />
<strong>UCA</strong>020AH <strong>UCA</strong>020AFASAC00S 208V-230V/ 3PH/ 60HZ 83.9 93.6 125.0 110.0 150.0 6.4 8.0 12.0 38.9 48.6 300.0 90.0 70.0<br />
Load Amps Size Fuse Switch Load Amps Size Load Amps Rotor Size Fuse<br />
(MCA) 2<br />
(MOP) 3,8 Size 4,8<br />
Size 9<br />
Amps 1<br />
(MCA) 2<br />
(MOP) 3<br />
Amps 1<br />
(MCA) 2<br />
(LRA) 5<br />
(MOP) 3<br />
<strong>ClimaCool</strong> Typical Voltage Power Wiring - per Module Internal Wiring - Cond. Fans<br />
Internal Wiring - per Compressor<br />
Base <strong>Model</strong> <strong>Model</strong> # Rated Min.Cir. MaxFuse Rec. Discon. Rated Min.Cir. MaxFuse Rated Min.Cir. Locked MaxFuse Rec.<br />
ELECTRICAL DATA : <strong>Packaged</strong> Outdoor <strong>Air</strong> <strong>Cooled</strong> <strong>Chiller</strong>: <strong>UCA</strong>020 and <strong>UCA</strong>030 Base <strong>Chiller</strong> <strong>Model</strong>s
Power Distribution Drawing<br />
Notes:<br />
1. Breaker panel represents fi eld power supply and is to be installed by others. Not provided as part of <strong>ClimaCool</strong> modular chiller system.<br />
2. Breaker panels can be supplied for skid mount pump/tank packages or new construction projects as options. Consult your local <strong>ClimaCool</strong><br />
representative.<br />
3. Control wiring is by others.<br />
www.climacoolcorp.com<br />
39
Wiring Diagram - <strong>UCA</strong>020<br />
40<br />
www.climacoolcorp.com
Wiring Diagram - <strong>UCA</strong>020<br />
www.climacoolcorp.com<br />
41
Wiring Diagram - <strong>UCA</strong>030<br />
42<br />
www.climacoolcorp.com
Wiring Diagram - <strong>UCA</strong>030<br />
www.climacoolcorp.com<br />
43
Troubleshooting Guide<br />
WARNING!<br />
The troubleshooting guidelines recommended in this<br />
section could result in exposure to electrical safety hazards.<br />
Please refer to the safety warnings provided in this manual.<br />
Failure to follow all of the recommended safety warnings<br />
provided could result in death or serious injury. When<br />
�������������� ������<br />
�������� ����������������������������<br />
�������������� ����������������<br />
���������������� ������������������������<br />
�������������������������� �������������������������������<br />
��������������������<br />
����������������������������������������������������<br />
������������������������<br />
������������������������������ ��������������������������������������������<br />
�������������� ������<br />
�����������<br />
��������������������������������������������������<br />
������������������������������<br />
���������� ����������������������������<br />
�������������� ������<br />
������������������������������ ��������������������������������������������<br />
44<br />
�������������� ������<br />
��������������������������������������������� �������������������������������<br />
����������������������������������������������������<br />
��������������������<br />
��������������������������������<br />
�������������������� ���������������������������������<br />
������������������������ �������������������������<br />
������������������������� �����������������������������������������������������<br />
������������������������������������� ����������������������������������<br />
���������������������������������������������������<br />
����������������������<br />
������<br />
�������������������������������� ����������������������������������<br />
���������������������������������� ��������������������������������<br />
���������������������������������������������������<br />
��������������������������������������������� ��<br />
���������������������������������<br />
���������������������������������<br />
�������������������������������������<br />
����������������������<br />
����������������������������������<br />
���������������������������������<br />
��������������������������������������������������<br />
�����������������������������������������������������<br />
�����������������������������������������������������<br />
�������������������������������������������������������<br />
��������������������<br />
������������������������������������������������<br />
���������������������������������������<br />
�������������������������������������������������������<br />
������������������������������������������������������<br />
��������������������������������������������������������<br />
������������������������������������������������<br />
�����������������������������������<br />
possible, disconnect all electrical power including remote<br />
disconnects before servicing. Follow proper lockout-tagout<br />
procedures. Only a qualifi ed licensed electrician or persons<br />
trained to handle live electrical components should be<br />
allowed to work with energized electrical components.<br />
�������������� ������<br />
������������������������������������������������� ����������������<br />
������������������������������������������ �������������������������������<br />
������������������������������������������������<br />
���������������������������������������� ������������������������������������������������������<br />
������������<br />
�����������������������������������������������������<br />
��������������������������<br />
��������������������������������������������������������<br />
���������������������������������������������<br />
����������������������������� �����������������������������<br />
�����������������<br />
���������������������������������<br />
��������������������������������<br />
www.climacoolcorp.com<br />
�������������� ���������<br />
��������������������������������������������������<br />
����������������������������������������������<br />
�<br />
������������������������������������������<br />
DANGER<br />
�� ����������������������<br />
�� ������������������������������<br />
�� �����������������������������<br />
�����������������<br />
�� �����������������������������<br />
������������������<br />
���������������������������������<br />
����������������������������������������������������<br />
�������������������������������������������������������<br />
�������������������������������<br />
�����������������������������������������������������<br />
�����������������������������������������������������<br />
��������������������������������������������������������<br />
�����������������������������������������<br />
����������������������������������������������������<br />
����������������������<br />
����������������������������������������������������<br />
�����������������������������������������������<br />
��������������������������<br />
��������������������������������������������<br />
������������������������������������<br />
������������������������������������������������<br />
����������������������������������������������������<br />
�������������<br />
� DANGER<br />
�� ��������������������������<br />
�� ������������������������������<br />
�����������<br />
�� ��������������������������������<br />
���������������������������<br />
�� ���������������������������������<br />
������������������<br />
� ������� � ���������<br />
�� ���������������������������������<br />
���������������<br />
�� �������������������������<br />
���������<br />
�� ������������������������������<br />
�������<br />
�� ���������������������������������<br />
��������������������<br />
RECOVER<br />
REFRIGERANT<br />
�� ����������������������������<br />
��������������������<br />
�� �����������������������������<br />
���������<br />
�� ������������������������������<br />
����������<br />
�� �������������������������������<br />
����������������������<br />
�������������
Warranty<br />
CLIMACOOL CORPORATION<br />
LIMITED EXPRESS WARRANTY/LIMITATION OF REMEDIES AND LIABILITY<br />
WARRANTY DISCLAIMER<br />
It is expressly understood that unless a statement is specifically identified as a warranty, statements made by <strong>ClimaCool</strong> Corp., an Oklahoma corporation (“CC”), or its representatives, relating to CC’s products, whether<br />
oral, written or contained in any quote, sales literature, catalog or any agreement, are not express warranties and do not form a part of the basis of the bargain, but are merely CC’s opinion or commendation of CC’s<br />
products. EXCEPT AS SPECIFICALLY SET FORTH HEREIN, THERE IS NO EXPRESS WARRANTY AS TO ANY OF CC’S PRODUCTS. CC MAKES NO WARRANTY AGAINST LATENT<br />
DEFECTS. CC MAKES NO WARRANTY OF MERCHANTABILITY OF THE GOODS OR OF THE FITNESS OF THE GOODS FOR ANY PARTICULAR PURPOSE.<br />
GRANT OF LIMITED EXPRESS WARRANTY<br />
CC warrants CC’s products purchased and retained in the United States of America and Canada to be free from defects in material and workmanship under normal use and maintenance only as follows: (a) All modular<br />
chillers built or sold by CC for twelve (12) months from date of unit start-up or eighteen (18) months from date of shipment (from CC’s warehouse), whichever comes first; and (b) Repair and replacement parts, which are<br />
not supplied under warranty, for ninety (90) days from date of shipment (from CC’s warehouse). All parts must be returned to CC’s warehouse in Oklahoma City, Oklahoma, freight prepaid, no later than sixty (60) days<br />
after the date of the failure of the part. If CC determines the part to be defective and within CC’s Limited Express Warranty, CC shall, when such part has been either replaced or repaired, return such to a CC recognized<br />
dealer, contractor or service organization, F.O.B. CC’s warehouse, Oklahoma City, Oklahoma, freight prepaid. The warranty on any part repaired or replaced under warranty expires at the end of the original warranty<br />
period.<br />
This warranty does not cover and does not apply to : (1) Fuses, refrigerant, fluids, oil; (2) Products relocated after initial installation; (3) Any portion or component of the system that is not supplied by CC, regardless of the<br />
cause of the failure of such portion or component; (4) Products on which the module identification tags or labels have been removed or defaced; (5) Products on which payment to CC is or has been in default; (6) Products<br />
which have defects or damage which result from improper installation, wiring, electrical imbalance characteristics or maintenance (including, without limitation, defects or damages caused by voltage surges, inadequate<br />
voltage conditions, phase imbalance, any form of electrical disturbances, inadequate or improper electrical circuit installation or protection, failure to perform common maintenance, etc.); or are caused by accident, misuse<br />
or abuse, fire, flood, alteration or misapplication of the product; (7) Products which have defects or damage which result from a contaminated or corrosive air or liquid supply, operation at abnormal temperatures, or<br />
unauthorized opening of refrigerant circuit; (8) Products subjected to corrosion or abrasion; (9) Mold, fungus or bacteria damage; (10) Products manufactured or supplied by others; (11) Products which have been<br />
subjected to misuse, negligence or accidents; (12) Products which have been operated in a manner contrary to CC’s printed instructions; or, (13) Products which have defects, damage or insufficient performance as a result<br />
of insufficient or incorrect system design or the improper application of CC’s products; (14) Products which have defects or damages due to freezing of the water supply, an inadequate or interrupted water supply,<br />
corrosives or abrasives in the water supply, or improper or inadequate filtration or treatment of the water or air supply.<br />
CC is not responsible for: (1) The costs of any fluids, refrigerant or other system components, or associated labor to repair of replace the same, which is incurred as a result of a defective part covered by CC’s Limited<br />
Express Warranty; (2) The costs of labor, refrigerant, materials of service incurred in removal of the defective part, or in obtaining and replacing the new or repaired part; or, (3) Transportation costs of the defective part<br />
from the installation site to CC or of the return of any part not covered by CC’s Limited Express Warranty.<br />
www.climacoolcorp.com<br />
Limitation: This Limited Express Warranty is given in lieu of all other warranties. If, notwithstanding the disclaimers contained herein, it is determined that other warranties exist, any such warranty, including without<br />
limitation any express warranties or any implied warranties of fitness for particular purpose and merchantability shall be limited to the duration of the Limited Express Warranty.<br />
LIMITATION OF REMEDIES<br />
In the event of a breach of the Limited Express Warranty, CC will only be obligated at CC’s option to repair the failed part or module or to furnish a new or rebuilt part or module in exchange for the part or module which<br />
has failed. If, after written notice to CC’s Head Office in Oklahoma City, Oklahoma of each defect, malfunction or other failure and a reasonable number of attempts by CC to correct the defect, malfunction or other<br />
failure and the remedy fails of its essential purpose, CC shall refund the purchase price paid to CC in exchange for the return of the sold good(s), Said refund shall be the maximum liability of CC. THIS REMEDY IS<br />
THE SOLE AND EXCLUSIVE REMEDY OF THE BUYER AGAINST CC FOR THE BREACH OF CONTRACT, FOR THE BREACH OF ANY WARRANTY OR FOR CC’S OWN NEGLIGENCE OR IN<br />
STRICT LIABILITY.<br />
LIMITATION OF LIABILITY<br />
CC shall have no liability for any damages if manufacturer’s performance is delayed for any reason or is prevented to any extent by any event such as, but not limited to, any war, civil unrest, government restrictions or<br />
restraints, strikes or work stoppages, fire, flood, accident, shortage of transportation, fuel, material, or labor, acts of God or any other reason beyond the sole control of CC. CC EXPRESSLY DISCLAIMS AND<br />
EXCLUDES ANY LIABILITY FOR CONSEQUENTIAL OR INCIDENTAL DAMAGE IN CONTRACT, FOR BREACH OF ANY EXPRESS OF IMPLIED WARRANTY, OR IN TORT, WHETHER FOR<br />
CC’S OWN NEGLIGENCE OR AS STRICT LIABILITY.<br />
OBTAINING WARRANTY PERFORMANCE<br />
Normally, the contractor or service organization who installed the products will provide warranty performance for the owner. Should the installer be unavailable, contact any CC recognized contractor or service<br />
organization. If assistance is required in obtaining warranty performance, write:<br />
<strong>ClimaCool</strong> Corp. • P.O. Box 2055 • Oklahoma City, Oklahoma 73102 • (405)745-3185 • e-mail: Claims@climacoolcorp.com<br />
NOTE: Some states or Canadian provinces do not allow limitations on how long an implied warranty lasts, or the limitation or exclusion of consequential or incidental damages, so the foregoing exclusion and limitations may not apply to you. This<br />
warranty gives you specific legal rights, and you may also have other rights which vary from state to state and from Canadian province to Canadian province.<br />
Please refer to the CC Installation, Operation and Maintenance manual for operating and maintenance instructions.<br />
forms\ccool\standard forms\word files\warranty certificate 05-10.doc<br />
45
•<br />
ENERGY AND ENVIRONMENTAL LEADERSHIP<br />
TOTAL GREEN<br />
<strong>ClimaCool</strong> works continually to improve its products. As a result, the design and speci cations of each product at the time<br />
for order may be changed without notice and may not be as described herein. Please contact <strong>ClimaCool</strong>’s Customer Service<br />
Department at 405-745-3185 for speci c information on the current design and speci cations. Statements and other information<br />
contained herein are not express warranties and do not form the basis of any bargain between the parties, but are merely<br />
<strong>ClimaCool</strong>’s opinion or commendation of its products.<br />
The management system governing the manufacture of <strong>ClimaCool</strong>’s products is ISO 9001:2000 certiif ed. ‘USGBC ® ’ and related<br />
logo is a trademark owned by the U.S. Green Building Council ® and is used with permission.<br />
<strong>ClimaCool</strong> is a subsidiary of LSB Industries, Inc. - NYSE symbol: LXU<br />
*97B0089N01*<br />
Doc#<br />
97B0089N01<br />
•<br />
SOLU TION<br />
ISO 9001:2000<br />
Certified<br />
Quality: First & Always<br />
7300 S.W. 44th St.<br />
Oklahoma City, OK 73179<br />
Phone: 405-745-3185<br />
Fax: 405-745-2072<br />
www.climacoolcorp.com<br />
© <strong>ClimaCool</strong><br />
Corp.<br />
2011<br />
Rev.<br />
: 3/<br />
11