ATH Pneumatischer Montagefinger Bedienungsanleitung
ATH Pneumatischer Montagefinger Bedienungsanleitung
ATH Pneumatischer Montagefinger Bedienungsanleitung

Sie wollen auch ein ePaper? Erhöhen Sie die Reichweite Ihrer Titel.
YUMPU macht aus Druck-PDFs automatisch weboptimierte ePaper, die Google liebt.
BENUTZERHANDBUCH<br />
151044<br />
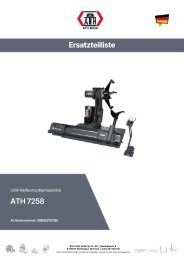
<strong>Pneumatischer</strong> Montagekopf<br />
© Copyright <strong>ATH</strong>-Heinl GmbH & Co. KG, 2013, Alle Rechte vorbehalten / Druckfehler und technische Änderungen vorbehalten / Stand:<br />
08/2013<br />
1
Index<br />
EINFÜHRUNG .......................................................................................................................................3<br />
Allgemeine Informationen....................................................................................................................3<br />
Beschreibung .........................................................................................................................................4<br />
Technische Daten ...............................................................................................................................4<br />
Verpacken...........................................................................................................................................4<br />
INSTALLATION......................................................................................................................................5<br />
Ort der Installation...............................................................................................................................5<br />
Montage..............................................................................................................................................5<br />
BETRIEB................................................................................................................................................7<br />
Sicherheitshinweise ............................................................................................................................7<br />
Betriebsanleitung ................................................................................................................................8<br />
Verwenden Sie ....................................................................................................................................9<br />
Wulstbruch eines Reifens ...................................................................................................................9<br />
Befestigung der Räder......................................................................................................................10<br />
Einstellen des Montagekopfes ..........................................................................................................11<br />
Demontage eines Reifens.................................................................................................................11<br />
Montage eines Reifens .....................................................................................................................13<br />
Füllen eines Reifens .........................................................................................................................15<br />
WARTUNG...........................................................................................................................................17<br />
Fehlersuche ......................................................................................................................................17<br />
Plan für Wartung und Schmierung....................................................................................................17<br />
KONFORMITÄTSERKLÄRUNG................................................................................................................18<br />
ERSATZTEILBUCH...................................................................................................................................19<br />
Explosionszeichnung ........................................................................................................................20<br />
Ersatzteilliste .....................................................................................................................................21<br />
ANLAGE...............................................................................................................................................23<br />
Pneumatisches Diagramm ................................................................................................................23<br />
GARANTIE-HINWEIS ...........................................................................................................................24<br />
ANMERKUNGEN .................................................................................................................................26<br />
© Copyright <strong>ATH</strong>-Heinl GmbH & Co. KG, 2013, Alle Rechte vorbehalten / Druckfehler und technische Änderungen vorbehalten / Stand:<br />
08/2013<br />
2
EINFÜHRUNG<br />
Allgemeine Informationen<br />
DIESES HANDBUCH IST EIN FESTER BESTANDTEIL DER MASCHINE.<br />
SIE MUSS VOM BEDIENER GELESEN UND VERSTANDEN WERDEN.<br />
ES WIRD KEINE HAFTUNG FÜR SCHÄDEN ÜBERNOMMEN, DIE SICH AUS DER<br />
NICHTBEACHTUNG DIESER ANLEITUNG ODER DEN SCHULDHAFTEN<br />
SICHERHEITSVORSCHRIFTEN ERGEBEN.<br />
ACHTUNG: Befolgen Sie die Anweisungen, um Verletzungen oder Schäden zu vermeiden.<br />
TIPP: Gibt weitere Informationen zu den Funktionen und Tipps zur effizienten Nutzung des Geräts.<br />
Bei allen Arbeiten an der beschriebenen Maschine muss Schutzkleidung getragen werden.<br />
© Copyright <strong>ATH</strong>-Heinl GmbH & Co. KG, 2013, Alle Rechte vorbehalten / Druckfehler und technische Änderungen vorbehalten / Stand:<br />
08/2013<br />
3
Beschreibung<br />
1<br />
2<br />
3<br />
4<br />
1 Steuerknüppel (funktioniert NUR, sobald der Montagekopf pneumatisch fixiert ist)<br />
2 Pneumatik-Zylinder<br />
3 Montagekopf<br />
4 <strong>Montagefinger</strong><br />
Technische Daten<br />
Arbeitsdruck:<br />
Lärm:<br />
Gewicht:<br />
8-10 bar (0,8-1,0 Mpa)<br />
Hinweise für Transport und Lagerung:<br />
- Heben Sie es vorsichtig und mit geeignetem, gut erhaltenem Werkzeug an.<br />
- Vermeiden Sie unerwartete Anstiege und Rucke. Achten Sie auf Unebenheiten, Armbrüche usw.<br />
- Bewahren Sie die entfernten Verpackungsteile in einem für Kinder und Tiere unzugänglichen Raum auf, bis sie entsorgt<br />
werden.<br />
- Lager-Temperatur: 0°C ~ +50 °C<br />
INSTALLATION<br />
Ort der Aufstellung<br />
Es muss sichergestellt sein, dass der Bediener vom Bedienplatz aus das gesamte Gerät und die Umgebung überblicken kann.<br />
Der Betreiber muss das Betreten dieses Bereichs durch Unbefugte verhindern und gefährliche Gegenstände entfernen.<br />
Zulässige Betriebstemperaturen: 0-50 °C<br />
Maximal zulässige Luftfeuchtigkeit:<br />
10-90% (ohne Kondensation)<br />
Höhe über dem Meeresspiegel:<br />
≤2000m<br />
Die Installation des Hilfsarms ist in feuchten, nassen oder explosionsgefährdeten Räumen nicht zulässig.<br />
Montage<br />
Diese Anleitung ist nicht als Aufbauratgeber zu verstehen, sie gibt nur technischen und fachkundigen<br />
Monteuren Anweisungen und Hilfestellungen. Für die folgenden Arbeiten müssen geeignete Kleidung und<br />
individuelle Schutzausrüstung getragen werden.<br />
Unsachgemäßer Einbau und Einstellungen führen zu Haftungs- und Garantieausschlüssen.<br />
1. Vorbereitung:<br />
a. Trennen Sie die Maschine von der Druckluftzufuhr und der elektrischen Zuleitung<br />
b. Vergewissern Sie sich, dass die Montagemaschine entsprechend den Vorgaben auf dem Boden befestigt<br />
ist.<br />
c. Entfernen Sie den vorhandenen Montagekopf (17), indem Sie die beiden vorderen Inbusschrauben<br />
(15) und die untere Sechskantschraube (21) einschließlich der Unterlegscheibe und der<br />
Federscheibe entfernen.<br />
d. Um an den Pneumatikzylinder zu gelangen, entfernen Sie die obere Abdeckung (8), indem Sie die<br />
Befestigungsschrauben (6, 7 und 9) mit Unterlegscheiben und Federringen entfernen.<br />
© Copyright <strong>ATH</strong>-Heinl GmbH & Co. KG, 2013, Alle Rechte vorbehalten / Druckfehler und technische Änderungen vorbehalten / Stand:<br />
08/2013<br />
5
2. Einbau:<br />
a. Setzen Sie den Montagekopf wieder auf den pneumatischen <strong>Montagefinger</strong> und befestigen Sie ihn mit<br />
den Inbusschrauben an der Sechskantstange.<br />
b. Trennen Sie die Pneumatikleitung von der Druckdose und schließen Sie sie mit einem T-Stück an den<br />
pneumatischen <strong>Montagefinger</strong> an.<br />
3. Oberfläche<br />
a. Bringen Sie den Deckel des Montagearms wieder an.<br />
b. Überprüfen Sie vor dem Gebrauch alle Schrauben, Muttern usw. auf ihre Festigkeit und alle Verbindungen auf<br />
Dichtheit.<br />
© Copyright <strong>ATH</strong>-Heinl GmbH & Co. KG, 2013, Alle Rechte vorbehalten / Druckfehler und technische Änderungen vorbehalten / Stand:<br />
08/2013<br />
6
BETRIEB<br />
Sicherheitshinweise<br />
1. Die Maschine darf nur von geschultem Personal bedient werden.<br />
2. Arbeiten Sie nicht an beschädigten Maschinen<br />
3. Ohne die Zustimmung des jeweiligen Herstellers darf die Maschine in keiner Weise verändert werden<br />
4. Lesen und verstehen Sie die Betriebsanleitung, bevor Sie die Maschine in Betrieb nehmen<br />
5. Der Gefahrenbereich darf nur von autorisierten Personen betreten werden.<br />
6. Arbeiten Sie nicht an beschädigten Maschinen<br />
7. Bei Betrieb und Wartung müssen alle geltenden Unfallverhütungsvorschriften eingehalten werden.<br />
8. Beim Betrieb der Maschine sind alle notwendigen Hinweise des Reifen- oder Felgenherstellers zu<br />
beachten<br />
9. Das Gerät darf nicht unter fließendem Wasser gereinigt werden.<br />
10. Wenn Sie das Gerät nicht benutzen, stellen Sie den <strong>Montagefinger</strong> in die obere Position.<br />
© Copyright <strong>ATH</strong>-Heinl GmbH & Co. KG, 2013, Alle Rechte vorbehalten / Druckfehler und technische Änderungen vorbehalten / Stand:<br />
08/2013<br />
7
Betriebsanleitung<br />
Betriebsanleitung Status: Dezember 2010<br />
Umfang und Aktivitäten Unterzeichnet am: 10.12.2012<br />
ANWENDUNGSBEREICH<br />
<strong>Pneumatischer</strong> <strong>Montagefinger</strong><br />
GEFAHREN FÜR MENSCH UND UMWELT<br />
• Verletzungsgefahr durch rotierende Teile<br />
• Quetschgefahr durch den Tragarm<br />
• Scharfe Kanten an Felgen oder Risse durch abstehende Drähte an Reifen<br />
SCHUTZMASSNAHMEN UND VERHALTENSREGELN<br />
• Benutzen Sie stets ordnungsgemäße und geeignete Arbeitsmittel und Arbeitsgeräte.<br />
• Tragen Sie geeignete Schutzkleidung (z. B. Schutzbrille, Gehörschutz, Sicherheitsschuhe usw.).<br />
• Beachten Sie die angegebenen Daten, Hinweise und technischen Daten des<br />
Maschinenherstellers bzw. des Herstellers des zu verarbeitenden Produktes.<br />
• Achten Sie bei der Bedienung der Baugruppe auf alle beweglichen Teile.<br />
• Achten Sie darauf, dass der Abstand so groß ist, dass er nicht entdeckt werden kann.<br />
• Stellen Sie sicher, dass sich keine anderen Personen im Arbeitsbereich aufhalten.<br />
• Achten Sie immer darauf, dass der zu montierende Reifen korrekt montiert ist.<br />
BEDINGUNGEN FÜR VERLETZUNGEN UND GEFAHREN<br />
• Bei sicherheitsrelevanten Fehlern die Maschine sofort in Betrieb nehmen und gegen<br />
Benutzung sichern<br />
• Im Falle von Mängeln informieren Sie Ihre Vorgesetzten.<br />
• Lassen Sie eventuelle Mängel von einem Fachmann beheben.<br />
UNFALLBEDINGUNGEN - ERSTE HILFE<br />
• Sichern Sie den Unfall.<br />
• Erste Hilfe leisten, Ersthelfer informieren<br />
und Aufsichtsperson<br />
• Kümmern Sie sich um die verletzte Person.<br />
• Standort des Lagerplatzes und des Vereinsbuches:<br />
• EMERGENCY:<br />
• Datensätze in das Vereinsbuch eintragen<br />
WARTUNG, ENTSORGUNG<br />
• Wartungsarbeiten an Hebebühnen werden von:<br />
• Für die Entsorgung (z.B. Altöl) ist verantwortlich:<br />
© Copyright <strong>ATH</strong>-Heinl GmbH & Co. KG, 2013, Alle Rechte vorbehalten / Druckfehler und technische Änderungen vorbehalten / Stand:<br />
08/2013<br />
8
Verwenden Sie<br />
Abdrücken eines Reifens<br />
Vorbereitung<br />
Bevor Sie das Gerät in Betrieb nehmen, sollten Sie die folgenden Punkte überprüfen:<br />
- Kontrollieren Sie den Ölstand, den Wasserstand und den anliegenden Luftdruck an der Wartungseinheit<br />
- Prüfen Sie, ob der Netzanschluss richtig angeschlossen ist.<br />
Entfernen Sie den Ventileinsatz und lassen Sie die Luft vollständig entweichen.<br />
Drehen oder klemmen Sie die Klauen so, dass keine Bauteile (Zylinder,<br />
Pneumatikverschraubungen usw.) vom Reifen berührt werden können.<br />
Platzieren Sie das Rad so, dass Sie die äußere Seitenwulst des Rades<br />
zuerst abdrücken können.<br />
Legen Sie nun das drucklose Rad auf die Seite des speziellen Gummipuffers<br />
am Maschinengehäuse.<br />
Mit dem Führungshebel kann die Abdrückschaufel an der Außenseite des<br />
Reifens positioniert werden. Für eine beschädigungsfreie Montage muss die<br />
Schaufel ca. 1 cm vom Felgenrand entfernt sein.<br />
Betätigen Sie das Pedal für den Abdrücker, bis sich der Reifen von der Felge<br />
löst, und lassen Sie dann das Pedal sofort los.<br />
Drehen Sie das Rad weiter und wiederholen Sie den Abdrückvorgang, bis<br />
sich der Reifen von der Felge gelöst hat.<br />
Um die weitere Demontage des Reifens von der Felge zu erleichtern oder<br />
schonender zu gestalten, ist es zweckmäßig, die zu lösenden Reifen- und<br />
Felgenteile mit einem handelsüblichen Reifenschmiermittel einzuschmieren.<br />
Verwenden Sie nur zugelassene Mittel!<br />
Verwenden Sie auch auf der Rückseite des Rades.<br />
© Copyright <strong>ATH</strong>-Heinl GmbH & Co. KG, 2013, Alle Rechte vorbehalten / Druckfehler und technische Änderungen vorbehalten / Stand:<br />
08/2013<br />
9
Befestigung der Räder<br />
Vorbereitung<br />
Bevor Sie das Rad festziehen, sollten Sie die folgenden Punkte überprüfen:<br />
- Entfernen Sie Schmutz und alte Auswuchtgewichte vom Rad<br />
Verriegeln Sie die Befestigung des Montagekopfes wieder.<br />
Setzen Sie den Montagekopf in die höchste und in die hinterste Position und<br />
verriegeln Sie ihn. Beim M52 & M72 muss der Montageturm nach hinten<br />
geschwenkt werden.<br />
Felgen mit einem asymmetrisch angeordneten Tiefbett müssen so platziert<br />
werden, dass die schmale Felgenschulter oben liegt.<br />
Um Beschädigungen an Leichtmetallfelgen bei der Befestigung zu vermeiden,<br />
wird empfohlen, diese nur von außen mit Kunststoffschutzbacken zu<br />
befestigen.<br />
Drücken Sie leicht auf das Pedal, um die gewünschte Felgengröße<br />
einzustellen. Wenn diese eingestellt ist, lassen Sie das Pedal los.<br />
Das Pedal befindet sich nun in der ersten Raststellung.<br />
Setzen Sie das Rad so auf, dass die Klauen nur den<br />
Reifen berühren. Drücken Sie die Felge nach unten,<br />
bis diese die Klauen berührt.<br />
Für extrem harte Reifen kann optional ein Hilfsarm an der Maschine installiert<br />
© Copyright <strong>ATH</strong>-Heinl GmbH & Co. KG, 2013, Alle Rechte vorbehalten / Druckfehler und technische Änderungen vorbehalten / Stand:<br />
08/2013<br />
10
werden.<br />
© Copyright <strong>ATH</strong>-Heinl GmbH & Co. KG, 2013, Alle Rechte vorbehalten / Druckfehler und technische Änderungen vorbehalten / Stand:<br />
08/2013<br />
11
Drücken Sie das Pedal nach unten, um die Felge zu fixieren, und nehmen<br />
Sie den Fuß ab. Die Felge ist nun fixiert.<br />
Justierung des Montagekopfes<br />
Bei überwiegendem Einsatz von großen Rädern bis 24" oder kleinen 8"-Rädern ist es zweckmäßig, die<br />
Einstellung des Montagekopfes dem Felgendurchmesser anzupassen.<br />
Die Einstellung des Montagekopfes wird im Abschnitt WARTUNG ausführlich erläutert.<br />
Kippen oder schwenken Sie den Montagekopf in die Arbeitsposition und lösen<br />
Sie die Arretierung, um ihn von Hand an das Felgenhorn zu bringen. Die<br />
Führungsrolle<br />
(3) oder das Kunststoffschleifstück (bei Alufelgen) die jeweilige Felgenkontur<br />
berühren.<br />
Durch die Arretierung des Montagekopfes wird der Montagekopf automatisch<br />
in Höhe und Abstand von der Felge entfernt. Beim M32 muss auch das<br />
Stellrad für den Seitenschwenk eingestellt werden.<br />
Die Einstellung des automatischen Abstands wird im Kapitel "Wartungs- und<br />
Servicearbeiten" erläutert.<br />
Um sicherzustellen, dass Leichtmetallfelgen bei der Montage nicht<br />
beschädigt werden, empfiehlt es sich, diese nur mit Kunststoff-<br />
Schutzbacken oder einem Kunststoff-Montagekopf zu montieren.<br />
Demontage eines Reifens<br />
© Copyright <strong>ATH</strong>-Heinl GmbH & Co. KG, 2013, Alle Rechte vorbehalten / Druckfehler und technische Änderungen vorbehalten / Stand:<br />
08/2013<br />
12
Bei der (De-)Montage von Reifen sind grundsätzlich die WdK-Richtlinien (Wirtschaftsverband der<br />
deutschen Kautschukindustrie) zu beachten.<br />
Drehen Sie das Rad, bis sich das Ventil etwa 10 cm vor dem<br />
Montagekopf befindet.<br />
Drücken Sie den Reifen an der Stelle des Montagekopfes nach unten, um<br />
ihn gut an den Felgenrand anzupassen.<br />
Fahren Sie den <strong>Montagefinger</strong> nach unten, um den Wulst des Reifens an<br />
der Unterseite zu erfassen.<br />
Wenn der Finger nicht unter den Wulst kommt, kann es hilfreich sein, das<br />
Rad leicht zu drehen.<br />
Drücken Sie den Wulst auf der gegenüberliegenden Seite des Montagekopfes<br />
nach unten.<br />
Danach können Sie den Wulst über das Felgenhorn heben, wodurch der<br />
Reifen auf der gegenüberliegenden Seite in das Tiefbett der Felge wandert,<br />
so dass er leichter und ungefährlicher zu montieren ist.<br />
Drücken Sie das Pedal für die Drehung des Plattentellers, um die Drehung im<br />
Uhrzeigersinn zu starten.<br />
Fahren Sie mit der Drehung fort, bis sich die gesamte Seite des Reifens über<br />
der Felge befindet.<br />
Bei Reifen mit Schläuchen können Sie den Schlauch jetzt entfernen.<br />
© Copyright <strong>ATH</strong>-Heinl GmbH & Co. KG, 2013, Alle Rechte vorbehalten / Druckfehler und technische Änderungen vorbehalten / Stand:<br />
08/2013<br />
13
Um die Unterseite des Reifens zu demontieren, bringen Sie den Finger in die<br />
untere Position.<br />
Heben Sie den Reifen an, bis er sich im Tiefbett befindet.<br />
Danach den Reifenwulst mit dem Steuerknüppel über dem Luftfinger<br />
positionieren und den Luftfinger nach oben bewegen, um den Reifen über den<br />
Felgenrand zu heben.<br />
Beginnen Sie die Drehung des Rades wie bei dem oberen Wulst.<br />
Nach der Demontage drücken Sie das Pedal zum Zurückkippen des<br />
Montageturms, um den Reifen herauszunehmen.<br />
Montage eines Reifens<br />
Bei der (De-)Montage von Reifen sind grundsätzlich die WdK-Richtlinien (Wirtschaftsverband der<br />
deutschen Kautschukindustrie) zu beachten.<br />
Ersetzen Sie das Ventil vor der Montage des Reifens.<br />
Befestigen Sie die Felge oder drehen Sie die Felge auf dem Drehteller, den<br />
das Ventil auf der gegenüberliegenden Seite des Montagekopfes hat.<br />
Schmieren Sie die Felge und den Reifen sorgfältig mit Reifenschmiermittel ein.<br />
© Copyright <strong>ATH</strong>-Heinl GmbH & Co. KG, 2013, Alle Rechte vorbehalten / Druckfehler und technische Änderungen vorbehalten / Stand:<br />
08/2013<br />
14
Prüfen Sie, ob der Montagekopf die richtige Einstellung für die Felge hat.<br />
Stellen Sie ihn ggf. wie im Unterabschnitt "Einstellen des Montagekopfes"<br />
beschrieben ein.<br />
Setzen Sie nun den Reifen schräg auf die Felge, so dass der Montagekopf<br />
beim Schwenken keine Reifenteile berührt.<br />
Kippen Sie den Montageturm, indem Sie das entsprechende Pedal betätigen.<br />
Positionieren Sie den Reifen so, dass sich der Reifenwulst noch unter der<br />
Nase, aber auf der Führungsschiene des Montagekopfes befindet.<br />
Beachten Sie, dass sich der Reifen gegenüber dem Montagekopf im der<br />
Tiefbett der Felge befindet.<br />
Starten Sie nun die Drehung des Drehteller.<br />
Achten Sie bei der Montage auf den richtigen Wulstverlauf. Bei<br />
Nichtbeachtung kann es zu schweren Reifenschäden kommen.<br />
Bei Schlauchreifen muss der Schlauch nun richtig im Reifen positioniert<br />
werden. Achten Sie darauf, dass dieser so im Reifen liegt, dass er bei der<br />
weiteren Montage nicht beschädigt wird.<br />
Bei der Montage der zweiten Perle verfahren Sie wie im ersten Punkt<br />
beschrieben.<br />
Wichtig ist auch, dass der Reifen richtig in der dem Montagekopf<br />
gegenüberliegenden Felgenseite sitzt.<br />
Gegebenenfalls die pneumatische Montageeinheit etwas nach unten<br />
positionieren, damit der Wulst nicht herausspringen kann. !!! WARNUNG ein<br />
späteres Herunterdrücken NUR durch den Finger kann zur Beschädigung<br />
© Copyright <strong>ATH</strong>-Heinl GmbH & Co. KG, 2013, Alle Rechte vorbehalten / Druckfehler und technische Änderungen vorbehalten / Stand:<br />
08/2013<br />
15
des Montagekopfes führen!!!<br />
© Copyright <strong>ATH</strong>-Heinl GmbH & Co. KG, 2013, Alle Rechte vorbehalten / Druckfehler und technische Änderungen vorbehalten / Stand:<br />
08/2013<br />
16
Starten Sie nun die Drehung des Drehteller.<br />
Achten Sie bei der Montage auf den richtigen Wulstverlauf. Bei<br />
Nichtbeachtung kann es zu schweren Reifenschäden kommen.<br />
!!! WARNUNG Versuchen Sie niemals, den Reifen mit dem pneumatischen<br />
<strong>Montagefinger</strong> zu drücken. Dies kann zu einer Beschädigung des<br />
Montagekopfes führen!!!<br />
Entriegeln Sie schließlich die Felge und nehmen Sie das Rad vom Drehteller<br />
ab.<br />
Füllen eines Reifens<br />
Der maximale Druck des Reifens darf 3,5 bar nicht<br />
überschreiten. Alle Körperteile sollten vom Reifen<br />
ferngehalten werden.<br />
Während des Betriebs kann der Geräuschpegel bis zu 85 dB (A) erreichen, weshalb der Bediener<br />
entsprechende Sicherheitsvorkehrungen treffen sollte.<br />
Stellen Sie sicher, dass der Reifen vollständig<br />
geschmiert ist. Beginnen Sie den Füllvorgang.<br />
© Copyright <strong>ATH</strong>-Heinl GmbH & Co. KG, 2013, Alle Rechte vorbehalten / Druckfehler und technische Änderungen vorbehalten / Stand:<br />
08/2013<br />
17
Reicht die Luftmenge aus dem Reifenfüller nicht aus, um den Reifen über den<br />
Felgenwulst zu drücken, kann diese durch Entfernen des Ventileinsatz erhöht<br />
werden. Danach muss es schnell wieder eingesetzt werden.<br />
© Copyright <strong>ATH</strong>-Heinl GmbH & Co. KG, 2013, Alle Rechte vorbehalten / Druckfehler und technische Änderungen vorbehalten / Stand:<br />
08/2013<br />
18
Vergewissern Sie sich, dass der Reifen mit dem richtigen Druck gefüllt ist.<br />
Beachten Sie die Anweisungen des Herstellers.<br />
Zu niedriger Reifendruck kann zu erhöhtem Verschleiß und verkürzter<br />
Lebensdauer des Reifens führen. Auch die Innenseite des Reifens kann<br />
beschädigt werden.<br />
Der Reifendruck muss einmal pro Woche überprüft werden.<br />
Prüfen Sie den Reifendruck nur bei normaler Reifentemperatur (d.h. das<br />
Fahrzeug wurde nicht mehr als 2-3 km bewegt)<br />
© Copyright <strong>ATH</strong>-Heinl GmbH & Co. KG, 2013, Alle Rechte vorbehalten / Druckfehler und technische Änderungen vorbehalten / Stand:<br />
08/2013<br />
19
WARTUNG<br />
Reparaturen dürfen nur von autorisierten Servicepartnern oder, nach Rücksprache mit <strong>ATH</strong>, vom Kunden selbst durchgeführt<br />
werden.<br />
Vor Wartungs- und Reparaturarbeiten muss die Maschine von den elektrischen und pneumatischen Leitungen<br />
getrennt werden (Hauptschalter ausschalten, Netzstecker ziehen). Gegen Wiedereinschalten durch eine<br />
andere Person sichern.<br />
Arbeiten am elektrischen Teil der Maschine oder an der Zuleitung dürfen nur von Fachleuten oder Elektrikern durchgeführt<br />
werden.<br />
Fehlersuche<br />
Symptome Ursache Lösung<br />
Wenn der Steuerknüppel nach oben Keine Luftzufuhr<br />
Prüfen Sie die Luftzufuhr<br />
oder unten bewegt wird, funktioniert<br />
das Gerät nicht.<br />
Luftschlauch ist undicht oder defekt Ersetzen oder versiegeln<br />
Plan für Wartung und Schmierung<br />
Prüfung: Bestandteile: Prüfung für:<br />
Wöchentlich<br />
Monatlich<br />
<strong>Montagefinger</strong><br />
Gelenke<br />
Schieben<br />
Sauberkeit<br />
Schmieren<br />
Schmieren Sie<br />
Schmieren Sie<br />
Hinweis: Die Häufigkeit der hier beschriebenen Tätigkeiten bezieht sich auf eine normale Nutzung der Maschine.<br />
Es wird empfohlen, die Maschine zu überprüfen und die außerordentliche Wartung so bald wie nötig durchzuführen -<br />
auch häufiger als hier angegeben.<br />
© Copyright <strong>ATH</strong>-Heinl GmbH & Co. KG, 2013, Alle Rechte vorbehalten / Druckfehler und technische Änderungen vorbehalten / Stand:<br />
08/2013<br />
20
KONFORMITÄTSERKLÄRUNG<br />
Konformitätserklärung<br />
Für<br />
Typ<br />
<strong>Pneumatischer</strong> <strong>Montagefinger</strong> <strong>ATH</strong> 151044<br />
Die folgenden EG-Richtlinien werden berücksichtigt<br />
Die folgenden harmonisierten Normen werden angewandt<br />
Hersteller<br />
<strong>ATH</strong>-Heinl GmbH &Co. KG<br />
Gewerbepark 9<br />
D-92278 Illschwang<br />
Deutschland<br />
Hiermit bestätigen wir, dass die oben genannten Maschinen den genannten EG-Richtlinien entsprechen.<br />
<strong>ATH</strong>-Heinl GmbH &Co. KG<br />
Gewerbepark 9<br />
D-92278 Illschwang<br />
Deutschland<br />
Im Juni 2009<br />
<strong>ATH</strong>-Heinl GmbH & Co. KG/ Hans Heinl<br />
(Geschäftsführer)<br />
DURCH ÄNDERUNGEN AM TOOL WIRD DIE CE-PRÜFUNG AUSGESCHLOSSEN UND DIE HAFTUNG<br />
AUSGESCHLOSSEN.<br />
© Copyright <strong>ATH</strong>-Heinl GmbH & Co. KG, 2013, Alle Rechte vorbehalten / Druckfehler und technische Änderungen vorbehalten / Stand:<br />
08/2013<br />
21
ERSATZTEILBUCH
Explosionszeichnung<br />
66<br />
© Copyright <strong>ATH</strong>-Heinl GmbH & Co. KG, 2013, Alle Rechte vorbehalten / Druckfehler und technische Änderungen vorbehalten / Stand:<br />
08/2013<br />
20
Ersatzteilliste<br />
# ART. # Beschreibung Hinweis<br />
1 Schraube M8x16<br />
2 Federring Ø8<br />
3 RMK0002 Montagekopf Hebellos<br />
4 RSS0742 Waschmaschine<br />
5 RSS0007 Kunststoffeinsatz vertikal für Lever-Less<br />
5 RSS0007.02 Kunststoffeinsatz vertikal für Lever-Less<br />
6 Schraube M4x10<br />
7 RLL0006 Achse für Lever-Less-Joint<br />
8 Schraube M5x8<br />
9 RLL0009 Achse für Lever-Less-Joint<br />
10 RLL0011 Achse<br />
11 RLL0007 Finger für Lever-Less-Joint<br />
12 HSR1002 Sicherheitsring Ø10<br />
13 RLL0012 Schraube für Lever-Less<br />
14 RLL0010 Zugstück für Lever-Less-Joint<br />
15 RLL0004 Zieharm links für Lever-Less-Joint<br />
16 RLL0008 Distanzstück für Lever-Less-Joint<br />
17 Montage der Fingerauflage<br />
18 Nuss M12<br />
19 Federring Ø12<br />
20 Waschmaschine Ø12<br />
21 RLL0003 Achse für Lever-Less-Joint<br />
22 Befestigungsplatte<br />
23 Waschmaschine Ø6<br />
24 Federring Ø6<br />
25 Schraube M6x16<br />
26 Schraube M10x25<br />
27 Federring Ø10<br />
28 Waschmaschine Ø10<br />
29 Abstandshalter links<br />
30 Abstandshalter rechts<br />
31 Schraube M10x30<br />
32 Zylinderhalterung<br />
33 Pneumatik-Ventil komplett<br />
34 Ellenbogenverbinder G1/8"-Ø6<br />
35 RWV0438 Pneumatisches Ventil D4H2307-06BB<br />
36 Auspuff G1/8"<br />
37 Ventildeckel<br />
38 Schraube M8x16<br />
39 Waschmaschine Ø8<br />
40 RHG0006 Handgriff<br />
41 Luftleitung Ø6<br />
42 Luftleitung Ø6<br />
43 Spiralschlauch Ø6<br />
44 T-Stück Ø6-Ø6-Ø6<br />
45 RPZ8006 Pneumatik-Zylinder<br />
46 Nuss M8<br />
47 Waschmaschine Φ8<br />
48 Obere Abdeckung<br />
49 O-Ring Ø16x2,4<br />
50 Schraube<br />
51 Zylinderrohr<br />
© Copyright <strong>ATH</strong>-Heinl GmbH & Co. KG, 2013, Alle Rechte vorbehalten / Druckfehler und technische Änderungen vorbehalten / Stand:<br />
08/2013<br />
21
52 Nuss M12<br />
53 Waschmaschine Ø12<br />
54 Kolben<br />
55 O-Ring Ø75x2.65<br />
56 RKS8005 Kolbenstange<br />
57 O-Ring Ø16x2,4<br />
58 Y-Ring Ø32x20x6<br />
59 O-Ring Ø25x3,1<br />
60 O-Ring Ø25x3,1<br />
61 Ellenbogenverbinder G1/8″ Ø6<br />
62 Titelblatt<br />
63 Nuss M8<br />
64 Schraube M12x16<br />
65 <strong>Pneumatischer</strong> <strong>Montagefinger</strong> komplett<br />
66 RLL0001 Hebelloses Gelenk<br />
© Copyright <strong>ATH</strong>-Heinl GmbH & Co. KG, 2013, Alle Rechte vorbehalten / Druckfehler und technische Änderungen vorbehalten / Stand:<br />
08/2013<br />
22
ANLAGE<br />
Pneumatisches Diagramm<br />
1.1 Schlauch 1.2 Druckregler<br />
1.3 Schlauch 1.4 Ventil (5 Anschlüsse)<br />
1.5 Schlauch 1.6 Schlauch<br />
1.7 Doppeltwirkender Zylinder<br />
© Copyright <strong>ATH</strong>-Heinl GmbH & Co. KG, 2013, Alle Rechte vorbehalten / Druckfehler und technische Änderungen vorbehalten / Stand:<br />
08/2013<br />
23
GARANTIE-HINWEIS<br />
Adresse des Händlers:<br />
Unternehmen (eventuell Kundennummer)<br />
Ansprechpartner:<br />
Straße:<br />
Postleitzahl & Ort:<br />
Tel. & Fax:<br />
e-Mail:<br />
Adresse des Kunden:<br />
Unternehmen (eventuell Kundennummer)<br />
Ansprechpartner:<br />
Straße:<br />
Postleitzahl & Ort:<br />
Tel. & Fax:<br />
e-Mail:<br />
Hersteller & Modell: Seriennummer: Jahr der Herstellung: Referenznummer:<br />
Beschreibung der Massage:<br />
Beschreibung der benötigten Ersatzteile:<br />
Ersatzteil: Artikel Nummer: Menge:<br />
WICHTIGE HINWEISE:<br />
Schäden, die durch unsachgemäße Handhabung, mangelnde Wartung oder mechanische Beschädigung verursacht<br />
werden, fallen nicht unter die Garantie. Für Maschinen, die nicht von einem lizenzierten Techniker der Firma <strong>ATH</strong><br />
installiert werden, beschränkt sich die Garantie auf die Bereitstellung der notwendigen Ersatzteile.<br />
Schäden bei der Durchfuhr:<br />
Offensichtliche Mängel (Vermerk auf dem Lieferschein des Spediteurs, Kopie des Lieferscheins, Fotos der<br />
Lieferung sind unverzüglich an <strong>ATH</strong>-Heinl zu senden)<br />
Verdeckter Mangel (Versandschaden wird beim Auspacken der Ware festgestellt, Schadensmeldung mit Bildern<br />
innerhalb von 24 Stunden an <strong>ATH</strong>-Heinl senden)<br />
Ort & Datum<br />
Zeichen & Stempel<br />
© Copyright <strong>ATH</strong>-Heinl GmbH & Co. KG, 2013, Alle Rechte vorbehalten / Druckfehler und technische Änderungen vorbehalten / Stand:<br />
08/2013<br />
24
Produktgarantie<br />
- Fünf Jahre auf die Ausrüstungsstruktur<br />
- Für Aggregate, Hydraulikzylinder und alle anderen Verschleißteile wie Drehteller, Gummiplatten, Seile, Ketten, Ventile,<br />
Schalter usw. gilt e i n e Garantie von einem Jahr bei normalem Zustand/Benutzung.<br />
- <strong>ATH</strong>-Heinl repariert oder ersetzt die zurückgesandten Teile innerhalb der Garantiezeit nach eigener Prüfung<br />
Die Garantie erstreckt sich nicht auf ...<br />
- Mängel, die durch normalen Verschleiß, unsachgemäßen Gebrauch, Transportschäden, unsachgemäße Installation<br />
und Spannung oder fehlende Wartung verursacht wurden.<br />
- Schäden, die durch Vernachlässigung oder Nichteinhaltung der in dieser <strong>Bedienungsanleitung</strong> und / oder<br />
anderen beiliegenden Anleitungen angegebenen Anweisungen verursacht werden.<br />
- Gewöhnlicher Verschleiß von Einzelteilen, die eine Wartung erfordern, um das Produkt in einem sicheren Betriebszustand zu<br />
halten.<br />
- Alle Komponenten, die beim Transport beschädigt wurden.<br />
- Andere Komponenten, die nicht ausdrücklich aufgeführt sind, aber als allgemeine Verschleißteile behandelt werden.<br />
- Wasserschäden, z. B. durch Regen, übermäßige Feuchtigkeit, korrosive Umgebung oder andere Verunreinigungen.<br />
- Unreinheiten, die die Funktion nicht beeinträchtigen.<br />
DIE GARANTIE GILT NICHT, WENN DER GARANTIESCHEIN NICHT AN <strong>ATH</strong>-HEINL GESENDET WURDE.<br />
Es wird darauf hingewiesen, dass die Gewährleistung ausgeschlossen ist für Schäden oder Funktionsstörungen, die<br />
durch Nichtbeachtung von Wartungs- und Einstellarbeiten (gemäß Betriebsanleitung bzw. Anleitung), fehlerhafte<br />
elektrische Anschlüsse (Drehfeld, Nennspannung und Absicherung) oder unsachgemäßen Gebrauch (Überlastung,<br />
Außenaufstellung und technische Änderungen) verursacht werden!<br />
© Copyright <strong>ATH</strong>-Heinl GmbH & Co. KG, 2013, Alle Rechte vorbehalten / Druckfehler und technische Änderungen vorbehalten / Stand:<br />
08/2013<br />
25
ANMERKUNGEN<br />
© Copyright <strong>ATH</strong>-Heinl GmbH & Co. KG, 2013, Alle Rechte vorbehalten / Druckfehler und technische Änderungen vorbehalten / Stand:<br />
08/2013<br />
26
© Copyright <strong>ATH</strong>-Heinl GmbH & Co. KG, 2013, Alle Rechte vorbehalten / Druckfehler und technische Änderungen vorbehalten / Stand:<br />
08/2013<br />
27
<strong>ATH</strong>-Heini GmbH & Co. KG<br />
Kauerhofer Str. 2<br />
92237 Sulzbach-Rosenberg<br />
DEUTSCHLAND<br />
Tel.:+49 (0)9661-87764-00<br />
Fax:+49 (0)9661-87764-01<br />
info@ath-heinI.de<br />
www.ath-heim.de<br />
Mitglied im Bundesverband der Hersteller und Im0orteure von Automobil Service Ausrüstungen e<br />
V Mitglied im Bundesverband Ash iAssociatioc ar Hersteller und Im0orteure von Automobil Service<br />
Ausrüstungen'<br />
www.ath-heim.de
USER MANUAL<br />
151044<br />
Pneumatic mounting head<br />
© Copyright <strong>ATH</strong>-Heinl GmbH & Co. KG, 2013, All rights reserved / Printing errors and technical changings reserved / Version: 08/2013<br />
1
Index<br />
INTRODUCTION ........................................................................................................................... 3<br />
General Informations ................................................................................................................ 3<br />
Description .................................................................................................................................. 4<br />
Technical data .......................................................................................................................... 4<br />
Packing .................................................................................................................................... 4<br />
INSTALLATION ............................................................................................................................ 5<br />
Place of installation ................................................................................................................... 5<br />
Montage ................................................................................................................................... 5<br />
OPERATING ................................................................................................................................. 7<br />
Safety instructions .................................................................................................................... 7<br />
Operating instructions ............................................................................................................... 8<br />
Use .......................................................................................................................................... 9<br />
Bead breaking of tire................................................................................................................. 9<br />
Fix the wheels ........................................................................................................................ 10<br />
Adjustment of the mounting head ............................................................................................ 11<br />
Demounting a tire ................................................................................................................... 11<br />
Mounting a tire ....................................................................................................................... 13<br />
Filling a tire ............................................................................................................................ 15<br />
MAINTENANCE .......................................................................................................................... 17<br />
Troubleshooting ...................................................................................................................... 17<br />
Maintenance and lubrication schedule ...................................................................................... 17<br />
DECLARATION OF CONFORMITY ................................................................................................ 18<br />
SPARE PART BOOK .................................................................................................................... 19<br />
Exploded drawing ................................................................................................................... 20<br />
Spare part list ......................................................................................................................... 21<br />
ATTACHMENT ............................................................................................................................ 23<br />
Pneumatic diagram ................................................................................................................. 23<br />
WARRANTY NOTE ...................................................................................................................... 24<br />
NOTES ...................................................................................................................................... 26<br />
© Copyright <strong>ATH</strong>-Heinl GmbH & Co. KG, 2013, All rights reserved / Printing errors and technical changings reserved / Version: 08/2013<br />
2
INTRODUCTION<br />
General Informations<br />
THIS MANUAL IS AN INHERENT PART OF THE MACHINE.<br />
IT MUST BE READ AND UNDERSTOOD FROM THE OPERATOR.<br />
THERE IS NO RESPONSIBILITY FOR DAMAGES, WHICH ARE RESULTING FROM NON-<br />
OBSERVANCE OF THIS MANUAL OR THE GUILTY SAFETY REGULATIONS.<br />
ATTENTION: Follow the instructions to avoid injuries or damages.<br />
TIP: Gives further informations to the functions and tips for using the machine efficiently.<br />
Protective clothes must be worn for all works on the described machine.<br />
© Copyright <strong>ATH</strong>-Heinl GmbH & Co. KG, 2013, All rights reserved / Printing errors and technical changings reserved / Version: 08/2013<br />
3
Description<br />
1<br />
2<br />
3<br />
4<br />
1 Control stick (working ONLY as soon as the mounting head is pneumatically fixed)<br />
2 Pneumatic-Cylinder<br />
3 Mounting head<br />
4 Mounting finger<br />
Technical data<br />
Working pressure:<br />
Noise:<br />
Weight:<br />
8-10 bar (0,8-1,0 Mpa)<br />
Notes for transport and storage:<br />
- Lift up carefully, with suitable tools in a good condition.<br />
- Avoid unexpected increases and jerks. Beware of bumps, crossbows, etc.<br />
- Keep the removed packing parts at an ambulance inaccessible to children and animals until they are disposed of.<br />
- Storage-Temperature: 0°C ~ +50 °C<br />
INSTALLATION<br />
Place of installation<br />
It must be ensured that the operator can see from the operating position, the entire device and the environment.<br />
The operator must prevent the entry of unauthorized persons in this area and remove objects which present hazards.<br />
Permissible operating temperatures: 0-50 °C<br />
Maximum permissible humidity:<br />
10-90% (w/o condensing)<br />
Height above sea level:<br />
≤2000m<br />
The installation of the auxiliary arm is not permitted in damp, wet or explosive rooms.<br />
Montage<br />
This manual is not to be seen as a set-up guide, only technical and expert fitters are given instructions and<br />
assistance. Suitable clothing and individual protective equipment must be worn for the following work.<br />
Incorrect installation and adjustments result in liability and guarantee exclusion.<br />
1. Preparation:<br />
a. Disconnect the machine from the compressed air supply and the electrical supply line<br />
b. Ensure that the mounting machine is fixed to the ground according to the specifications.<br />
c. Remove the existing mounting head (17) by removing the two front blade screws (15) and the lower<br />
hexagonal screw (21), including the washer and spring washer<br />
d. To reach the pneumatic cylinder, remove the top cover (8) by removing the fastening screws (6, 7, and 9)<br />
with shims and spring washers.<br />
© Copyright <strong>ATH</strong>-Heinl GmbH & Co. KG, 2013, All rights reserved / Printing errors and technical changings reserved / Version: 08/2013<br />
5
2. Installation:<br />
a. Replace the mounting head with the pneumatic mounting finger and secure it with the blade screws on<br />
the hexagon rod.<br />
b. Disconnect the pneumatic line to the pressure socket and connect it to the pneumatic mounting finger<br />
using a T-connector.<br />
3. Finish<br />
a. Reattach the cover of the pressure receptacle<br />
b. Before using, check all screws, nuts etc. for strength and all connections for leaks<br />
© Copyright <strong>ATH</strong>-Heinl GmbH & Co. KG, 2013, All rights reserved / Printing errors and technical changings reserved / Version: 08/2013<br />
6
OPERATING<br />
Safety instructions<br />
1. The machine may only be operated by trained personnel.<br />
2. Do not work on damaged machines<br />
3. Without the consent of the respective manufacturer, the machine may not be modified in any way<br />
4. Read and understand the operating instructions before operating the machine<br />
5. Only authorized persons are allowed to enter the hazardous area.<br />
6. Do not work on damaged machines<br />
7. During operation and maintenance, all applicable accident prevention regulations must be complied with.<br />
8. When operating the machine, all necessary instructions on the part of the tire or rim manufacturer must be<br />
observed<br />
9. The machine must not be cleaned under running water.<br />
10. When not in use, place the mounting finger in the upper position.<br />
© Copyright <strong>ATH</strong>-Heinl GmbH & Co. KG, 2013, All rights reserved / Printing errors and technical changings reserved / Version: 08/2013<br />
7
Operating instructions<br />
Operating instructions Status: December 2010<br />
Scope and activities Signed at: 10.12.2012<br />
SCOPE OF APPLICATIONS<br />
Pneumatic mounting finger<br />
DANGERS FOR HUMANS AND ENVIROMENT<br />
• Risk of injury from rotating parts<br />
• Risk of crushing through the mounting arm<br />
• Sharp edge on rims or tear due to protruding wires on tires<br />
PROTECTIVE MEASURES AND RULES OF CONDUCT<br />
• Always use proper and appropriate work and work equipment.<br />
• Wear suitable protective clothing (e.g., goggles, ear protection, safety shoes, etc.).<br />
• Observe the specified data, instructions and technical data of the machine manufacturer or the<br />
manufacturer of the product to be processed.<br />
• Observe all moving parts when operating the assembly.<br />
• Ensure that there is sufficient clearance so that it cannot be detected.<br />
• Make sure that there are no other persons in the work area.<br />
• Always ensure that the tire to be assembled is installed correctly.<br />
CONDITIONS OF INJURY AND DANGER<br />
• In the case of safety-relevant faults, immediately set the machine to operation and secure<br />
against use<br />
• In the case of defects, inform superiors.<br />
• Have any defects repaired by a specialist.<br />
CONDITIONS OF ACCIDENT – FIRST AID<br />
• Secure the accident.<br />
• Provide first aid, inform first aid provider ________________<br />
and supervisor<br />
________________<br />
• Look after the injured person.<br />
• Location of the storage bay and association book: ________________<br />
• EMERGENCY: ________________<br />
• Enter records in the association book<br />
MAINTENANCE, DISPOSAL<br />
• Maintenance work on lifting platforms is carried out by: _________________<br />
• Disposal (e.g. waste oil) is responsible for: _________________<br />
© Copyright <strong>ATH</strong>-Heinl GmbH & Co. KG, 2013, All rights reserved / Printing errors and technical changings reserved / Version: 08/2013<br />
8
Use<br />
Bead breaking of tire<br />
Preparation<br />
Before you operate the unit, the following points should be checked:<br />
- Check the oil level, the water level and the adjacent air pressure at the maintenance unit<br />
- Check whether the mains connection is connected correctly.<br />
Remove the valve insert and allow air to escape completely.<br />
Turn or clamp the claws in such a way that no components (cylinder,<br />
pneumatic screw connections, etc.) can be touched by tire.<br />
Place the wheel so that you can break the outer side bead of the wheel first.<br />
Now place the pressure less wheel on the side of the special rubber pad on<br />
the machine housing.<br />
With the guide lever, the braking pad can be locate to the outer side of the<br />
tire. For damage-free assembly, the blade must be approx. 1 cm from the rim<br />
edge.<br />
Press the pedal for the bead breaker until the tire is loosen from the rim, then<br />
release the pedal immediately.<br />
Rotate the wheel further and repeat the pushing action until the tire is loosen<br />
of the rim.<br />
In order to make easier the further demounting of tire from the rim or to make<br />
it more gentle, it is expedient to lube the tire and rim parts which are loosed<br />
with a commercially available tire lube.<br />
Use only legal mediums!<br />
Use the inner wheel side as well.<br />
© Copyright <strong>ATH</strong>-Heinl GmbH & Co. KG, 2013, All rights reserved / Printing errors and technical changings reserved / Version: 08/2013<br />
9
Fix the wheels<br />
Preparation<br />
Before you tighten the wheel, the following points should be checked:<br />
- Remove dirt and old balance weights from the wheel<br />
Re-Lock the fixing of the mounting head.<br />
Place the mounting head in the highest and in backside position and lock it.<br />
On the M52 & M72, the mounting tower must be pivoted backwards.<br />
Rims with an asymmetrically arranged low bed must be placed so that the<br />
narrow rim shoulder is at the top.<br />
In order to avoid damage on alloy rims while fixing, it is recommended to fix<br />
them only from the outside using plastic protection jaws.<br />
Lightly press the pedal to adjust the required rim size. When this is set,<br />
release the pedal.<br />
The pedal is now in the first locking position.<br />
Place the wheel so that the claws touch only the tire.<br />
Press down the rim until this touch the claws.<br />
For extremely hard tires an optional assist arm can be optionally installed on<br />
the machine.<br />
© Copyright <strong>ATH</strong>-Heinl GmbH & Co. KG, 2013, All rights reserved / Printing errors and technical changings reserved / Version: 08/2013<br />
10
Press down the pedal for fixing the rim and remove the foot. The rim will be<br />
fixed.<br />
Adjustment of the mounting head<br />
In the case of mainly use large wheels up to 24 "or small 8" wheels, it is expedient to adjust the<br />
mounting head setting to the rim diameter.<br />
The setting of the mounting head is explained in detail in the MAINTENANCE section.<br />
Tilt or swivel the mounting head into the working position and loosen the<br />
locking device in order to bring it to the wheel flange by hand. The guide roller<br />
(3) or the plastic grinding piece (for alloy rims) may touch the respective rim<br />
contour.<br />
By locking the mounting head, the mounting head will automatically be<br />
removed in height and distance from the rim. For the M32, the adjusting<br />
wheel for the side swivel must also be adjusted.<br />
The setting of the automatic distance is explained in the chapter<br />
"Maintenance and service work".<br />
To ensure that light alloy rims are not damaged during assembly, it is<br />
advisable to mount these only with plastic protection jaws or a plastic<br />
mounting head.<br />
Demounting a tire<br />
© Copyright <strong>ATH</strong>-Heinl GmbH & Co. KG, 2013, All rights reserved / Printing errors and technical changings reserved / Version: 08/2013<br />
11
By (de-)mounting of tires, the WdK guidelines (the German Rubber Industry Association) must always<br />
be observed.<br />
Turn the fixed wheel until the valve is about 10cm in front of the mounting<br />
head.<br />
Press down the tire on the location of the mounting head in order to adjust it<br />
well on the edge of the rim.<br />
Drive the mounting finger downside to catch the bead of the tire on the<br />
underside.<br />
If the finger not moves under the bead it can be helpful to turn the wheel<br />
slightly.<br />
Press the bead on the opposite side of the mounting head downside.<br />
After this you can lift up the bead upper the hump, hereby the tire move on<br />
the opposite side into the hump of the rim, so it´s easier and harmless to<br />
mount.<br />
Press down the pedal for the rotation of the turntable, to start the clockwise<br />
rotation.<br />
Continue with the rotation until the complete side of the tire is above the rim.<br />
By tires with tubes you can remove the tube now.<br />
© Copyright <strong>ATH</strong>-Heinl GmbH & Co. KG, 2013, All rights reserved / Printing errors and technical changings reserved / Version: 08/2013<br />
12
To demount the underside of the tire, locate the finger in the downside<br />
position.<br />
Lift up the tire until this is located in the hump of the rim.<br />
After this locate the bead above the pneumatic finger use the control stick and<br />
move the pneumatic finger on the upside position to level the tire above the<br />
edge of the rim.<br />
Begin the rotation of the wheel like by the upside bead.<br />
After the demounting press the pedal for tilting back the mounting tower to<br />
take out the tire.<br />
Mounting a tire<br />
By (de-)mounting of tires, the WdK guidelines (the German Rubber Industry Association) must always<br />
be observed.<br />
Replace the tire valve before mounting the tire.<br />
Fix the rim or rotate the rim on the turning plate that the valve in on the<br />
opposite site of the mounting head.<br />
Carefully lube the rim and the tire with tire lube.<br />
© Copyright <strong>ATH</strong>-Heinl GmbH & Co. KG, 2013, All rights reserved / Printing errors and technical changings reserved / Version: 08/2013<br />
13
Check that the mounting head is in the correct setting for the rim. If<br />
necessary, adjust it as described in the subsection "Adjusting the mounting<br />
head".<br />
Now place the tire diagonally on the rim so that the mounting head does not<br />
touch any tire parts during pivoting.<br />
Tilt the mounting tower by pressing the corresponding pedal.<br />
Position the tire so that the tire bead is still under the nose but still on the<br />
guide track of the mounting head.<br />
Note that the tire is located opposite the mounting head in the recess of the<br />
rim.<br />
Now start the rotation of the turntable.<br />
Pay attention to the correct bead course during the assembly process. Failure<br />
to observe this can result in serious tire damage.<br />
For tube tires, the tube must now be properly positioned in the tire. Make sure<br />
that this is so in the tire that it will not be damaged during further mounting.<br />
When mounting the second bead proceed as described for the first bead.<br />
It is also important to ensure that the tire is correctly positioned in the rim<br />
edge opposite the mounting head.<br />
If necessary, position the pneumatic mounting unit slightly downwards so that<br />
the bead cannot jump out. !!! WARNING a later pressing down ONLY through<br />
the finger can cause damage to the mounting head!!!<br />
© Copyright <strong>ATH</strong>-Heinl GmbH & Co. KG, 2013, All rights reserved / Printing errors and technical changings reserved / Version: 08/2013<br />
14
Now start the rotation of the turntable.<br />
Pay attention to the correct bead course during the assembly process. Failure<br />
to observe this can result in serious tire damage.<br />
!!! WARNING Never try to push the tire with the pneumatic mounting finger.<br />
This can lead to damage to the mounting head!!!<br />
Finally, unlock the rim and remove the wheel from the turntable.<br />
Filling a tire<br />
The maximum pressure of the tire must not exceed 3.5 bar.<br />
All part of the body should be kept away from the tire.<br />
During operation, the noise can reach 85dB (A), so the operator should take appropriate safety<br />
precautions.<br />
Make sure the tire is completely lubricated.<br />
Start the filling process.<br />
If the air volume from the tire filler is not sufficient to press the tire over the<br />
bead of the rim, this can be increased by removing the inner valve. Afterwards<br />
it has to be re-inserted quickly.<br />
© Copyright <strong>ATH</strong>-Heinl GmbH & Co. KG, 2013, All rights reserved / Printing errors and technical changings reserved / Version: 08/2013<br />
15
Make sure the tire is filled with the correct pressure. Observe the<br />
manufacturer's instructions.<br />
Too low tire pressure can lead to increased wear and shortened life of the tire.<br />
The inside of the tire may also be damaged.<br />
The tire pressure must be checked once a week.<br />
Check the tire pressure only under normal tire temperature (i.e. the vehicle<br />
has not been moved for more than an hour and not more than 2-3 km)<br />
© Copyright <strong>ATH</strong>-Heinl GmbH & Co. KG, 2013, All rights reserved / Printing errors and technical changings reserved / Version: 08/2013<br />
16
MAINTENANCE<br />
Repair work may only be carried out by authorized service partners or, after consultation with <strong>ATH</strong>, by the customer.<br />
The machine must be disconnected from the electrical and pneumatic lines before maintenance and repair work<br />
(Switch off the main switch, pull the mains plug). Secure against turning on again by another person’s.<br />
Work on the electrical part of the machine or on the supply line may only be carried out by experts or electricians.<br />
Troubleshooting<br />
Symptoms Cause Solution<br />
When the control stick is moved up or No air supply<br />
Check the air supply<br />
down, the device does not work. Air hose is leaking or defect<br />
Replace or seal<br />
Maintenance and lubrication schedule<br />
Testing: Components: Testing for:<br />
Weekly<br />
Monthly<br />
Mounting finger<br />
Joints<br />
Sliding<br />
Cleanliness<br />
Lubricate<br />
Lubricate<br />
Lubricate<br />
Note: The frequency of the activities described here refers to a normal use of the machine.<br />
It is recommended to check the machine and to carry out the extraordinary maintenance as soon as necessary - also<br />
more frequently than stated here.<br />
© Copyright <strong>ATH</strong>-Heinl GmbH & Co. KG, 2013, All rights reserved / Printing errors and technical changings reserved / Version: 08/2013<br />
17
DECLARATION OF CONFORMITY<br />
Declaration of conformity<br />
For<br />
Type<br />
Pneumatic mounting finger <strong>ATH</strong> 151044<br />
The following EG-directives are considered<br />
The following harmonized standards are applied<br />
Manufacturer<br />
<strong>ATH</strong>-Heinl GmbH &Co. KG<br />
Gewerbepark 9<br />
D-92278 Illschwang<br />
Germany<br />
Herewith we confirm that the above named machines are according to the named EC-directives.<br />
<strong>ATH</strong>-Heinl GmbH &Co. KG<br />
Gewerbepark 9<br />
D-92278 Illschwang<br />
Germany<br />
In June 2009<br />
<strong>ATH</strong>-Heinl GmbH & Co. KG/ Hans Heinl (General<br />
manager)<br />
THROUGH CHANGES BY THE TOOL, THE CE EXAMINATION IS EXCLUDED AND EXCLUSION OF LIABILITY.<br />
© Copyright <strong>ATH</strong>-Heinl GmbH & Co. KG, 2013, All rights reserved / Printing errors and technical changings reserved / Version: 08/2013<br />
18
SPARE PART BOOK<br />
© Copyright <strong>ATH</strong>-Heinl GmbH & Co. KG, 2013, All rights reserved / Printing errors and technical changings reserved / Version: 08/2013<br />
19
Exploded drawing<br />
66<br />
© Copyright <strong>ATH</strong>-Heinl GmbH & Co. KG, 2013, All rights reserved / Printing errors and technical changings reserved / Version: 08/2013<br />
20
Spare part list<br />
# ART. # Description Note<br />
1 Screw M8x16<br />
2 Spring ring Ø8<br />
3 RMK0002 Mounting head Lever-Less<br />
4 RSS0742 Washer<br />
5 RSS0007 Plastic insert vertically for Lever-Less<br />
5 RSS0007.02 Plastic insert vertically for Lever-Less<br />
6 Screw M4x10<br />
7 RLL0006 Axle for Lever-Less-Joint<br />
8 Screw M5x8<br />
9 RLL0009 Axle for Lever-Less-Joint<br />
10 RLL0011 Axle<br />
11 RLL0007 Finger for Lever-Less-Joint<br />
12 HSR1002 Safety ring Ø10<br />
13 RLL0012 Screw for Lever-Less<br />
14 RLL0010 Pulling piece for Lever-Less-Joint<br />
15 RLL0004 Pulling arm left for Lever-Less-Joint<br />
16 RLL0008 Distance piece for Lever-Less-Joint<br />
17 Mounting finger support<br />
18 Nut M12<br />
19 Spring ring Ø12<br />
20 Washer Ø12<br />
21 RLL0003 Axle for Lever-Less-Joint<br />
22 Fixing plate<br />
23 Washer Ø6<br />
24 Spring ring Ø6<br />
25 Screw M6x16<br />
26 Screw M10x25<br />
27 Spring ring Ø10<br />
28 Washer Ø10<br />
29 Spacer left<br />
30 Spacer right<br />
31 Screw M10x30<br />
32 Cylinder support<br />
33 Pneumatic-valve complete<br />
34 Elbow connector G1/8“-Ø6<br />
35 RWV0438 Pneumatic valve D4H2307-06BB<br />
36 Exhaust G1/8“<br />
37 Valve cover<br />
38 Screw M8x16<br />
39 Washer Ø8<br />
40 RHG0006 Handle<br />
41 Air line Ø6<br />
42 Air line Ø6<br />
43 Spiral tube Ø6<br />
44 T-Piece Ø6-Ø6-Ø6<br />
45 RPZ8006 Pneumatic-Cylinder<br />
46 Nut M8<br />
47 Washer Φ8<br />
48 Upper cover<br />
49 O-Ring Ø16x2.4<br />
50 Bolt<br />
51 Cylinder tube<br />
© Copyright <strong>ATH</strong>-Heinl GmbH & Co. KG, 2013, All rights reserved / Printing errors and technical changings reserved / Version: 08/2013<br />
21
52 Nut M12<br />
53 Washer Ø12<br />
54 Piston<br />
55 O-Ring Ø75x2.65<br />
56 RKS8005 Piston rod<br />
57 O-Ring Ø16x2.4<br />
58 Y-Ring Ø32x20x6<br />
59 O-Ring Ø25x3.1<br />
60 O-Ring Ø25x3.1<br />
61 Elbow connector G1/8″ Ø6<br />
62 Front cover<br />
63 Nut M8<br />
64 Screw M12x16<br />
65 Pneumatic mounting finger complete<br />
66 RLL0001 Lever-Less Joint<br />
© Copyright <strong>ATH</strong>-Heinl GmbH & Co. KG, 2013, All rights reserved / Printing errors and technical changings reserved / Version: 08/2013<br />
22
ATTACHMENT<br />
Pneumatic diagram<br />
1.1 Hose 1.2 Pressure regulator<br />
1.3 Hose 1.4 Valve (5-port)<br />
1.5 Hose 1.6 Hose<br />
1.7 Double-acting cylinder<br />
© Copyright <strong>ATH</strong>-Heinl GmbH & Co. KG, 2013, All rights reserved / Printing errors and technical changings reserved / Version: 08/2013<br />
23
WARRANTY NOTE<br />
Dealer address:<br />
Company (eventually customer number)<br />
Contact person:<br />
Street:<br />
ZIP code & town:<br />
Tel. & Fax:<br />
e-Mail:<br />
Customer address:<br />
Company (eventually customer number)<br />
Contact person:<br />
Street:<br />
ZIP code & town:<br />
Tel. & Fax:<br />
e-Mail:<br />
Manufacturer & model: Serial number: Year of manufacture: Reference number:<br />
Description of the massage:<br />
Description of required spare parts:<br />
Spare part: Article number: Quantity:<br />
IMPORTANT NOTES:<br />
Damage caused by improper handling, lack of maintenance or mechanical damage, does not fall into the warranty. For<br />
machines that are not installed by a licensed technician from the company <strong>ATH</strong>, the warranty is limited to the provision of<br />
necessary spare parts.<br />
Damages by transit:<br />
Obvious defect (note on carrier's delivery note, a copy of delivery note, Photos of the delivery have to be sent<br />
immediately to <strong>ATH</strong>-Heinl)<br />
Latent defect (Shipping damage is discovered upon unpacking the goods, send damage report with pictures<br />
within 24 hours to <strong>ATH</strong>-Heinl)<br />
Place & Date<br />
Sign & Stamp<br />
© Copyright <strong>ATH</strong>-Heinl GmbH & Co. KG, 2013, All rights reserved / Printing errors and technical changings reserved / Version: 08/2013<br />
24
Product warranty<br />
- Five year on equipment structure<br />
- For power units, hydraulic cylinder and all other wear parts as turntables, rubber plates, ropes, chains, valves, switches<br />
and so on the warranty is limited to one year in case of ordinary condition/use.<br />
- <strong>ATH</strong>-Heinl repairs or replaces the returned parts within warranty time after own investigation<br />
The warranty does not extend to ...<br />
- deficiencies caused by ordinary wear, misuse, transport damages, improper installation, and voltage or missing needed<br />
maintenance.<br />
- Damages caused by neglect or failure to comply with the stated instructions in this user´s manual and / or other<br />
enclosed instructions.<br />
- Ordinary wear of single parts which require a service to maintain the product in a safe operating condition.<br />
- All components which were damaged during transport.<br />
- Other components which are not explicitly listed but are handled as general wear parts.<br />
- Water damages caused e.g. by rain, excessive humidity, corrosive environment or other contaminants.<br />
- Blemishes that do not affect the function.<br />
WARRANTY DOES NOT APPLY WHEN WARRANTY NOTE HAS NOT BEEN SENT TO <strong>ATH</strong>-HEINL.<br />
It should be noted that warranty is excluded for any damage or malfunction caused by non-observance of maintenance and<br />
adjustment works (according to operation instructions and/or instructions), faulty electrical connections (rotating field, rated<br />
voltage, and fuse protection) or improper use (overload, outdoor installation, and technical changes)!<br />
© Copyright <strong>ATH</strong>-Heinl GmbH & Co. KG, 2013, All rights reserved / Printing errors and technical changings reserved / Version: 08/2013<br />
25
NOTES<br />
© Copyright <strong>ATH</strong>-Heinl GmbH & Co. KG, 2013, All rights reserved / Printing errors and technical changings reserved / Version: 08/2013<br />
26
© Copyright <strong>ATH</strong>-Heinl GmbH & Co. KG, 2013, All rights reserved / Printing errors and technical changings reserved / Version: 08/2013<br />
27
© Copyright <strong>ATH</strong>-Heinl GmbH & Co. KG, 2013, All rights reserved / Printing errors and technical changings reserved / Version: 08/2013<br />
28