The PCLinuxOS Magazine - From: ibiblio.org
The PCLinuxOS Magazine - From: ibiblio.org
The PCLinuxOS Magazine - From: ibiblio.org

Create successful ePaper yourself
Turn your PDF publications into a flip-book with our unique Google optimized e-Paper software.
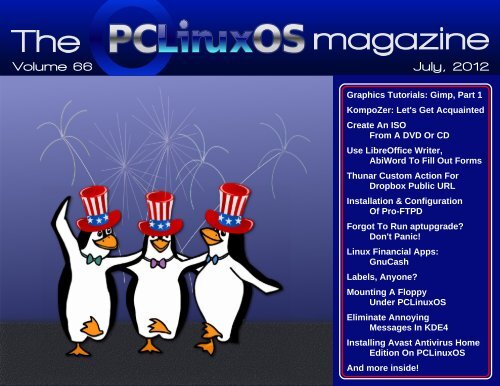
Volume 66 July, 2012<br />
Graphics Tutorials: Gimp, Part 1<br />
KompoZer: Let's Get Acquainted<br />
Create An ISO<br />
<strong>From</strong> A DVD Or CD<br />
Use LibreOffice Writer,<br />
AbiWord To Fill Out Forms<br />
Thunar Custom Action For<br />
Dropbox Public URL<br />
Installation & Configuration<br />
Of ProFTPD<br />
F<strong>org</strong>ot To Run aptupgrade?<br />
Don't Panic!<br />
Linux Financial Apps:<br />
GnuCash<br />
Labels, Anyone?<br />
Mounting A Floppy<br />
Under <strong>PCLinuxOS</strong><br />
Eliminate Annoying<br />
Messages In KDE4<br />
Installing Avast Antivirus Home<br />
Edition On <strong>PCLinuxOS</strong><br />
And more inside!
Table Of Contents<br />
3 Welcome <strong>From</strong> <strong>The</strong> Chief Editor<br />
4 Graphics Tutorials: Gimp, Part 1<br />
7 Forum Foibles: Featuring Family Foibler longtom<br />
8 Mark's Quick Gimp Tip & Double Take<br />
9 F<strong>org</strong>ot To Run aptupgrade? Don't Panic!<br />
10 Screenshot Showcase<br />
11 KompoZer: Let's Get Acquainted<br />
15 Mounting A Floppy Under <strong>PCLinuxOS</strong><br />
17 Screenshot Showcase<br />
18 Use LibreOffice Writer, AbiWord To Fill Out Forms<br />
22 Forum Foibles: ms_meme's ABC Book<br />
24 Eliminate Annoying Messages In KDE4<br />
25 Linux Financial Apps: GnuCash<br />
28 Screenshot Showcase<br />
29 QEMU: <strong>The</strong> Other Virtual Machine, Part 2<br />
33 Screenshot Showcase<br />
34 Forum Foibles: Featuring Family Foibler longtomjr<br />
35 Thunar Custom Action For Dropbox Public URL<br />
38 Labels, Anyone?<br />
40 Installing Avast Antivirus Home Edition On <strong>PCLinuxOS</strong><br />
43 Install & Configure ProFTPD On <strong>PCLinuxOS</strong><br />
45 Screenshot Showcase<br />
46 ms_meme's Nook: Tra La La PCLOS<br />
47 Create An ISO <strong>From</strong> A DVD or CD<br />
48 More Screenshot Showcase<br />
<strong>The</strong> <strong>PCLinuxOS</strong> name, logo and colors are the trademark of<br />
Texstar.<br />
<strong>The</strong> <strong>PCLinuxOS</strong> <strong>Magazine</strong> is a monthly online publication<br />
containing <strong>PCLinuxOS</strong>related materials. It is published<br />
primarily for members of the <strong>PCLinuxOS</strong> community. <strong>The</strong><br />
magazine staff is comprised of volunteers from the<br />
<strong>PCLinuxOS</strong> community.<br />
Visit us online at http://www.pclosmag.com<br />
This release was made possible by the following volunteers:<br />
Chief Editor: Paul Arnote (parnote)<br />
Assistant Editor: Meemaw<br />
Artwork: Sproggy, Timeth, ms_meme, Meemaw<br />
<strong>Magazine</strong> Layout: Paul Arnote, Meemaw, ms_meme<br />
HTML Layout: Rudge, Sproggy<br />
Staff:<br />
Neal Brooks ms_meme<br />
Galen Seaman Mark Szorady<br />
Patrick Horneker Darrel Johnston<br />
Guy Taylor Meemaw<br />
Andrew Huff Gary L. Ratliff, Sr.<br />
Pete Kelly Daniel MeißWilhelm<br />
Contributors:<br />
David Moore AndrzejL<br />
<strong>The</strong> <strong>PCLinuxOS</strong> <strong>Magazine</strong> is released under the Creative<br />
Commons AttributionNonCommercialShareAlike 3.0<br />
Unported license. Some rights are reserved.<br />
Copyright © 2012.<br />
<strong>PCLinuxOS</strong> <strong>Magazine</strong> Page 2
Welcome <strong>From</strong> <strong>The</strong> Chief Editor<br />
Shhhhh! Be varwy varwy quiet! But the 3.2.18x<br />
kernel has made its way to the regular repos.<br />
Without any fanfare, and without any<br />
announcement, the 3.2.18x kernel has been freed<br />
from the testing repos. Remember that your kernel is<br />
not updated as part of your routine and regular<br />
updates. Instead, you will need to specifically install<br />
it from Synaptic. <strong>The</strong> new kernel will be installed<br />
right next to your currently installed kernel, allowing<br />
you an easy route to revert back to your old kernel,<br />
should the new kernel have some issues with your<br />
hardware. Also, remember that the first time you<br />
boot your computer with your newly installed kernel<br />
will take a little extra time, as all the modules and<br />
drivers are rebuilt for your new kernel.<br />
If you are fearful about updating to the new kernel –<br />
don’t be. So far, I’ve updated three of my computers<br />
to the new kernel and everything has gone just fine,<br />
except for a minor issue with a wireless adapter no<br />
longer able to connect using WEP. I had been<br />
meaning to change from WEP to WPAPSK for<br />
some time now, and the situation just got me off of<br />
my duff and forced me to stop procrastinating.<br />
Do you have to update your kernel? In one word,<br />
nope. If the 2.8.38 kernel is performing well for you,<br />
then you can continue using it. Remember that<br />
kernel updates are not a part of your regular and<br />
routine updates. Eventually, you will want to – and<br />
may even have to – update to the newer kernels.<br />
But for the moment, you can continue using your<br />
current kernel.<br />
In other news … you may have noticed that <strong>The</strong><br />
<strong>PCLinuxOS</strong> <strong>Magazine</strong> now comes in two new<br />
“flavors.” As if he hasn’t done enough for the<br />
magazine by providing the magazine’s new web<br />
server, David Moore (a.k.a. YouCanToo) has<br />
undertaken the chore of converting the monthly<br />
magazine issues into *.epub and *.mobi ebook<br />
editions. <strong>The</strong>se ebook editions now make it easy to<br />
view <strong>The</strong> <strong>PCLinuxOS</strong> <strong>Magazine</strong> on your B&N Nook,<br />
Amazon Kindle, and most other modern ebook<br />
readers on the market. YouCanToo will be creating<br />
ebook editions of all the magazine’s 2012 issues, so<br />
keep an eye on the magazine’s website to grab your<br />
copies when they become available.<br />
Also, Leiche has released a new, updated 2012.06<br />
version of the LXDE Live CD. Of course, if you’ve<br />
kept your installation regularly updated, you already<br />
have the “latest” version of LXDE. Still, if you are<br />
planning to install LXDE on a friend’s computer in<br />
the near future, you may want to download and use<br />
the updated LXDE Live CD. It’ll help streamline the<br />
installation and update process.<br />
Until next month, I wish each and every one of you<br />
peace, happiness, serenity and prosperity.<br />
<strong>PCLinuxOS</strong> <strong>Magazine</strong> Page 3
y Meemaw<br />
Graphics Tutorials: GIMP, Part 1<br />
I’ve been using GIMP since I started using Linux.<br />
While I can do most of what I want to do fairly easily,<br />
GIMP contains many options that I haven’t used<br />
much. In these articles, I will try to explain a little<br />
about GIMP and how to use it.<br />
GIMP, of course, stands for Gnu Image Manipulation<br />
Program. <strong>The</strong> website is http://www.gimp.<strong>org</strong>/. It<br />
can be found in most any distro’s repository and<br />
<strong>PCLinuxOS</strong> is no exception. It can also be installed<br />
in Mac and Windows, so I use it at work in Win7, as<br />
well as at home with <strong>PCLinuxOS</strong>.<br />
When you open it, you are shown three windows as<br />
shown below:<br />
While many of our graphics programs are displayed<br />
all in one window, Gimp has had them separate for<br />
years. GIMP 2.8 has been released now. It has a<br />
single window display, but has the option of leaving<br />
the windows separate. I really like the separate<br />
windows, because I can arrange the them the way I<br />
want them. However, it hasn’t made it to our repos<br />
yet, so be patient – GIMP 2.6 works very well.<br />
<strong>The</strong> window on the left of the screen is your main<br />
toolbox. <strong>The</strong> tools there are the ones you will use<br />
the most. For each tool, there is a corresponding<br />
config section, so the bottom of that window will<br />
change depending on the tool chosen at the top.<br />
<strong>The</strong> area at the top of the toolbox (where you see<br />
Wilber, the Gimp critter’s eyes and nose) is the Drop<br />
Target area. If you have a file manager open too,<br />
you can drag the item you want to work on to this<br />
area and it will open in Gimp.<br />
Going across the rows in<br />
order, the tools are as<br />
follows:<br />
Rectangle Select You<br />
can designate a<br />
rectangular area and<br />
manipulate it.<br />
Elliptical Select Create<br />
a circular or elliptical area<br />
and manipulate it.<br />
Freehand Select Create<br />
an irregularshaped area<br />
by clicking your mouse<br />
along the outside of the<br />
area. Very handy!<br />
Continuous Region Select This selects<br />
connected areas.<br />
Color Select Selects areas of similar color.<br />
Intelligent Scissors (Select from image) Selects<br />
along an edge ….<br />
Foreground Select You can use this for cutting<br />
items out of photographs... complicated tool.<br />
Path Tool You can use this to create a path, which<br />
you can then edit<br />
Color Picker If you want to exactly duplicate a<br />
color in a picture, choose this tool and click on the<br />
color. You can use the selected color to edit your<br />
drawing.<br />
Zoom You can see your work closeup with the<br />
Zoom tool.<br />
Measure Tool Measures distances in your<br />
drawing.<br />
Move Tool Click on this to move your object into<br />
place.<br />
<strong>PCLinuxOS</strong> <strong>Magazine</strong> Page 4
Align You can choose 2 or more objects or layers<br />
and align them<br />
Crop You can crop an image. Click and drag for<br />
your area, then press enter to crop.<br />
Rotate Clicking on this tool will let you rotate your<br />
object.<br />
Scale To resize your drawing or object<br />
Shear To skew an object. (Example: You can<br />
change a square to a diamond.)<br />
Perspective You can apply perspective to a 2<br />
dimensional image to make it look more 3D.<br />
Flip Used to flip your object horizontally or<br />
vertically<br />
Text Tool To add text to your creation<br />
Bucket Fill To add one color to a large area<br />
Gradient Fill To create a gradient in your object<br />
Pencil Draws thin lines, like a pencil line, but not<br />
smooth. Works better for very small objects where<br />
the pixels have to be in exactly the right spot.<br />
Paintbrush This tool draws smoother lines than<br />
the pencil, and this is probably the most used tool.<br />
Eraser Erases the color from your image. Actually,<br />
it changes whatever you stroke to transparency, so it<br />
can also be used as a paint tool.<br />
Airbrush Paints like an airbrush, using a spray or<br />
fuzzy effect rather than a solid line.<br />
Ink Tool Draws lines more like a calligraphy pen.<br />
Clone Tool Use this to clone parts of an image.<br />
Healing Tool This will heal small blemishes in<br />
photos.<br />
Perspective Clone Advanced tool for cloning<br />
something into the image which may not look as it<br />
looks now (like cloning a face so it looks like it’s a<br />
picture on the wall).<br />
Blur/Sharpen Softens or sharpens colored edges<br />
and blends colors together.<br />
Smudge Drawing with this through two colors will<br />
cause the colors to blend, although maybe not the<br />
way you want.<br />
Dodge/Burn Can make an area darker or lighter.<br />
<strong>The</strong> window on the right contains the Layers,<br />
Channels, Paths and Undo tools, and we will use<br />
that as well, but I will cover it separately, in an<br />
upcoming article.<br />
OK, let’s experiment. Your center window contains<br />
all your menus (and all of your tools can be<br />
accessed from here as well). Click on File > New.<br />
You will see a window for a new image. Here you<br />
should designate the size of your image, and in<br />
Advanced Options, whether the background should<br />
be white, black or transparent. I clicked on the<br />
dropdown and selected 800 px x 600 px, then<br />
opened the Advanced Options and selected white,<br />
and clicked OK.<br />
Select either the paintbrush or pencil, and draw a<br />
circle. Play with it a little bit just to get the feel of the<br />
tool. It doesn’t have to be a perfect circle.<br />
Playing more with your brush<br />
tool, make a face on your<br />
circle. Since some of us<br />
aren’t artists (myself<br />
included!), your face will look<br />
different from mine. Getting<br />
the feel of the tool, you can<br />
make several strokes. If you<br />
make one you don’t like, you<br />
can go to Edit > Undo, or press + to<br />
remove the stroke. If you use the keystroke CTRLZ,<br />
you can hold down CTRL and press the Z as many<br />
times as you wish to remove as many strokes as you<br />
need.<br />
Sooner or later you’ll have to<br />
save your file. Just as with<br />
other programs, go to File ><br />
Save as... and name your<br />
file, then designate a<br />
location in which to save it<br />
so you can find it again. <strong>The</strong><br />
default file format for Gimp is<br />
.xcf, which is designed to<br />
save all your layers while<br />
Graphics Tutorials: GIMP, Part 1<br />
you are working on your creation. You can save your<br />
finished product as any number of image types,<br />
such as *.jpg or *.png.<br />
Lets add some color to our drawing. <strong>From</strong> the<br />
toolbox, you will see a color swatch (the black &<br />
white rectangles underneath the tools). Click on the<br />
swatch and the Edit Foreground or Edit Background<br />
color window will open. <strong>From</strong> here you can choose<br />
whatever color you want to use. <strong>The</strong> default<br />
foreground color is black and the default background<br />
color is white.<br />
You will have several tabs in your window (top left<br />
corner). On the first tab, you will see the default color<br />
square (probably in shades of red & black) with a<br />
rainbowcolored vertical bar to the right of it. To the<br />
right of that you will see six horizontal bars of color<br />
with letters next to them. Those letters are for the<br />
following words, which are color settings you can<br />
adjust:<br />
Hue: This is the color you want. You should<br />
probably click it in the vertical bar first, then all the<br />
other settings will display the color you are working<br />
with.<br />
Saturation: This is how pale a color is (I think of it<br />
as how much of the color used). <strong>The</strong> slider will make<br />
it more or less intense.<br />
<strong>PCLinuxOS</strong> <strong>Magazine</strong> Page 5
Value: I think of this as how light or dark a color is,<br />
but Gimp’s glossary says it is how much light is<br />
emitted by a color.<br />
Red, Blue & Green: <strong>The</strong>se are the colors that will<br />
be mixed for everything you do. Each individual<br />
slider can be adjusted separately to produce just the<br />
right color. To the right of each slider is a blank<br />
containing a number. Each color can be described<br />
with a series of numbers from 0 to 255 (0,0,0 is<br />
black and 255,255,255 is white. All other colors are<br />
in between.) If you have the numerical code for the<br />
perfect color, you can adjust the numbers in these<br />
blanks. If you are deciding on a color, each slider<br />
can be adjusted individually.<br />
In addition, all colors can also be described with a 6digit<br />
hexidecimal code. (000000 is black and ffffff is<br />
white. One shade of purple is 430da9.) If you know<br />
the code for your perfect color, you can enter it in<br />
the space provided in this window. (Also called<br />
HTML notation)<br />
One of the tabs will have a printer on it and be the<br />
CYMK, referring to the printer colors Cyan, Magenta,<br />
Yellow & Black. This is not really supported in Gimp<br />
so they don’t describe it much, but it is apparently to<br />
adjust your colors according to the cartridge colors<br />
of your printer. That would have been a great idea<br />
with one of my older printers it printed everything<br />
several shades too dark.<br />
One tab will have a paintbrush on it and it is the<br />
Watercolor wheel. It gives you a color square and<br />
you click the color you want. <strong>The</strong> more times you<br />
click, the more intense the color will be.<br />
One tab will have the “color wheel” on it (also called<br />
the Triangle Selector). It is the multicolored circle<br />
around a multicolored triangle. Click the color (Hue)<br />
you want in the circle, then drag the white ring into<br />
the interior of the triangle to adjust Saturation and<br />
Value.<br />
<strong>The</strong> Palette tab will have a grid of the colors<br />
contained in the color palette being used by Gimp.<br />
You can choose one of those, and go back to the<br />
first tab and edit your color there.<br />
I use the first tab and the color wheel the most. Click<br />
on the vertical bar between yellow and orange.<br />
Looking at the horizontal bars to the right, you can<br />
adjust your color until it is an approximate skin tone,<br />
whatever color you want to make the face. <strong>The</strong> color<br />
will show in a bar underneath the color square or<br />
wheel. You can keep adjusting until you get it just<br />
right. <strong>The</strong>re are also small swatches that will save up<br />
a record of the last 12 colors you used. Click OK,<br />
then choose the Bucket Fill tool and click inside your<br />
face. Your drawing should now have a skintone<br />
color in it. If you don’t like the color after all, press<br />
your + to undo it, then go to your color<br />
window and adjust your color again.<br />
NOTE: <strong>The</strong> Undo function keeps track of everything<br />
you do so you can click undo over and over to<br />
remove lots of things. HOWEVER, once you save<br />
your drawing, all the undo history is gone, so make<br />
sure it is the way you want it before you save it and<br />
close down Gimp.<br />
Play with this a little, and have some fun! Next<br />
month we’ll learn more about the interface and then<br />
add more to our drawing.<br />
Graphics Tutorials: GIMP, Part 1<br />
International Community<br />
<strong>PCLinuxOS</strong> Sites<br />
Turkey<br />
Denmark<br />
Netherlands<br />
Czechoslovakia<br />
<strong>PCLinuxOS</strong> <strong>Magazine</strong> Page 6<br />
Italy<br />
Poland<br />
Brazil
Forum Foibles:<br />
Featuring Family Foibler longtom<br />
longtom comes from a long line<br />
of distinguished animal trainers How longtom sees himself<br />
longtom practicing<br />
with BubbaBlues<br />
longtom exhausted<br />
from signing autographs<br />
How his animals see longtom<br />
~ longtom and longtomjr ~<br />
Proud members of the Forum<br />
<strong>PCLinuxOS</strong> <strong>Magazine</strong> Page 7
Mark's Quick Gimp Tip & Double Take<br />
Mark's Quick Gimp Tip<br />
In previous articles, I've<br />
written about adding filters<br />
and brushes to Gimp from<br />
third parties. But, it needs to<br />
be pointed out that<br />
<strong>PCLinuxOS</strong> has many Gimp tools already<br />
available in its repository. Just launch the<br />
repository, reload, and search for “Gimp.”<br />
within the returned results you'll find a<br />
number of filters and brushes. That install<br />
with one click. I added the Trees brush.<br />
This brush gives you a variety of tree<br />
shapes that you can use to add some fun to<br />
your photos. For instance, check out the<br />
two photos below. (<strong>The</strong> image is a free<br />
wallpaper I obtained from my Alma mater's<br />
website, <strong>The</strong> Ohio State University). Using<br />
the Gimp Tree brush, I added<br />
a colorful autumn tree to the<br />
foreground. I simply created a<br />
new layer, sized the brush,<br />
picked the color, and clicked. I<br />
overlaid an additional color<br />
(with the exact brush and size)<br />
and offset just a bit to create a<br />
blur as if the tree were out of<br />
focus in the foreground. I also<br />
applied a bit of transparency to<br />
this second added layer. So,<br />
get some brushes from the<br />
repo and get creative!<br />
Mark Szorady is a nationally<br />
syndicated cartoonist with<br />
ge<strong>org</strong>etoon.com. He blogs at<br />
ge<strong>org</strong>etoon.com/blog.<br />
Email Mark at<br />
ge<strong>org</strong>etoon@gmail.com.<br />
Answers on Page 10<br />
<strong>PCLinuxOS</strong> <strong>Magazine</strong> Page 8
y AndrzejL<br />
F<strong>org</strong>ot To Run aptupgrade? Don't Panic!<br />
Several months ago, there was a “demand” from<br />
<strong>PCLinuxOS</strong> devs to install and run the aptupgrade<br />
package. This was a crucial package. Everywhere<br />
on the forum, there were reminders about doing this.<br />
Why was it so important? Because it was upgrading<br />
apt, rpm and their libraries. Also, Synaptic Package<br />
Manager was upgraded.<br />
Whoever did not upgrade it in time (they had a few<br />
months’ window) should reinstall with a fresh copy of<br />
the latest iso after creating a list of all the installed<br />
apps and backing up their /home folder. Why?<br />
Because the packages created using the latest rpm<br />
would not be compatible with the systems that were<br />
not upgraded.<br />
That was the suggested solution. Reinstall. BUT<br />
what if you do not want to or cannot install from<br />
scratch due to many personal tweaks and/or for any<br />
other valid reasons?<br />
If you are desperate/brave/crazy enough (like me)<br />
and you are willing to take some risks (like me) –<br />
please continue reading. I don’t have to tell you that<br />
I won’t take any responsibility for a borked system<br />
right? Right.<br />
Recently, I visited a friend who is dualbooting<br />
Windows XP and <strong>PCLinuxOS</strong>. I tried to install<br />
gparted, and noticed he had not upgraded his lappy<br />
for 10 months or so. I tried to upgrade it, but all I got<br />
was librpm dependency problems – no matter what<br />
I did. So, I said right – aptupgrade was not done.<br />
So here is (more or less) what I did to fix it. (I am<br />
skipping all the investigation steps).<br />
Open a terminal and run:<br />
su<br />
followed by<br />
root's password<br />
and then…<br />
cd /root/<br />
wget c http://andrzejl.cyryl.net/<br />
WoTW/WoTW_files/aptupgrade/aptupgrade1.0<br />
7pclos2011.src.rpm<br />
rpm ivh /root/aptupgrade1.0<br />
7pclos2011.src.rpm<br />
unxz /root/rpmbuild/SOURCES/ aptupgrade<br />
1.0.tar.xz<br />
cd /root/rpmbuild/SOURCES<br />
tar xvf ./aptupgrade1.0.tar<br />
cd ./aptupgrade1.0<br />
rpm ivh nodeps force ignorearch ignoresize<br />
ignoreos ./*.rpm<br />
rm f /root/aptupgrade1.0<br />
7pclos2011.src.rpm<br />
rm Rf /root/rpmbuild/<br />
BE CAREFUL WHILE USING THE RPM<br />
COMMANDS!<br />
Now, leave this terminal window open and follow this<br />
very important step.<br />
Open Synaptic. When it reloads, you will get three or<br />
four errors (in one error window) about multiple<br />
versions of packages (like apt, libapt and synaptic)<br />
being installed. Write down the names of these<br />
packages and click on OK to clear the message<br />
from your screen. Now search for those packages in<br />
Synaptic. You will find that indeed there are multiple<br />
versions installed. Compare their version numbers<br />
and “Mark for complete removal” the older versions.<br />
Apply the changes. Wait for the packages to be<br />
removed and Synaptic to reload. Close and reopen<br />
Synaptic. <strong>The</strong>re may be another message about<br />
<strong>PCLinuxOS</strong> <strong>Magazine</strong> Page 9
duplicate packages. Write down their names, find<br />
them, mark the older versions for complete removal,<br />
apply, wait till finished, close and reopen Synaptic.<br />
Repeat till there are no duplicate packages error<br />
messages when starting Synaptic. I guess this could<br />
be done by using dupeclean package but I did it by<br />
hand just to make sure nothing really important<br />
would get removed when dealing with duplicates.<br />
When this is done close Synaptic.<br />
Now go back to that terminal window that you had<br />
open and type in:<br />
aptget update<br />
and when done<br />
aptget distupgrade<br />
Wait for the question about<br />
installing/upgrading/removing etc., etc., etc. Read,<br />
understand and if all is ok – confirm by pressing y,<br />
followed by Enter.<br />
Wait until it finishes and reboot. Why not use<br />
Synaptic to do the upgrade? Because I was afraid<br />
that replacing/upgrading so many crucial system<br />
libraries after such a long time of not upgrading the<br />
system at all could crash synaptic in the middle of<br />
the upgrade and could cause systemwide<br />
corruptions and multiple problems.<br />
On a side note, at my friends house I recently got<br />
937 packages to be upgraded, 36 new to be<br />
installed and 33 to be removed. Over 1080 MB of<br />
upgrades. After upgrading and rebooting, the system<br />
worked perfectly without the tiniest issue. Even<br />
funnier was that I f<strong>org</strong>ot that I had testing section<br />
enabled and upgraded fully with it enabled. I said to<br />
myself to bite the bullet and upgraded his kernel to<br />
the testing version as well. Kernel 3.2.16bfs was<br />
installed without the tiniest hiccup.<br />
So did you fully reboot? Check for updates using<br />
Synaptic as you normally would. In the future, don’t<br />
f<strong>org</strong>et to upgrade at least every 2 weeks and<br />
periodically check the forum for any important<br />
announcements for your distro.<br />
F<strong>org</strong>ot To Run aptupgrade? Don't Panic!<br />
Answers to Mark Szorady's Double Take:<br />
(1) “OF” smaller; (2) Ant's antenna shorter; (3) Ant's<br />
hand holding rocket; (4) Hat moved; (5) Rocket<br />
added; (6) Bug's nose shorter; (7) Cloud moved<br />
Screenshot Showcase<br />
Posted by gandy, June 1, 2012, running KDE4.<br />
<strong>PCLinuxOS</strong> <strong>Magazine</strong> Page 10
y Paul Arnote (parnote)<br />
KompoZer: Let's Get Acquainted<br />
After spending some time on the web, there are<br />
many users who may wish to create their own<br />
personal web page. <strong>The</strong>re are many ways to do it.<br />
First, you can use a web interface to create a bare<br />
bones web page. Some web interfaces at least allow<br />
you a few customization options, like different<br />
backgrounds, text sizes, layouts, etc. But they all<br />
look like “cookie cutter” pages with their similar<br />
appearance.<br />
Second, you can create a personal blog. Most of<br />
these use a web interface to allow the blogger to<br />
update the content of their site. Most useful for<br />
espousing your opinion, blogs typically don’t allow<br />
for the downloading of additional files, unless you<br />
use cloud storage or some other offsite storage<br />
solution. Many of these also have a “cookie cutter”<br />
appearance.<br />
Another way you can create a web site is to hand<br />
code your HTML. You can do this in a simple text<br />
editor, or in a special HTML editor that helps write<br />
the raw HTML code. <strong>The</strong>re are many who subscribe<br />
to and like using this method. Many view it as a “rite<br />
of passage,” and proclaim it to be the “only way to<br />
code HTML like a man.” Without a doubt, this is the<br />
best way to create a custom web page, but it’s also<br />
the easiest to get wrong.<br />
Fortunately, for the rest of us wimps, there are<br />
WYSIWYG (What You See Is What You Get) HTML<br />
editors – like KompoZer. Working a lot like a<br />
WYSIWYG word processor, such as LibreOffice<br />
Writer, you create your web page much as you<br />
would a term paper or typing a letter. You can<br />
position your images and text exactly where you<br />
want them, without having to learn a lot about HTML<br />
coding. Of course, it’s a lot of help to know HTML<br />
coding. <strong>The</strong> more you know, the more you can do<br />
with the generated HTML code to customize it even<br />
further.<br />
Background<br />
Back in February 2004, then Linspire CEO Kevin<br />
Carmony wanted to create a simple, easy to use,<br />
open source WYSIWYG HTML editor, based on the<br />
Mozilla Gecko engine. He hired Daniel Glazman, a<br />
former Netscape employee, as the lead developer to<br />
help create Nvu (pronounced “N view”).<br />
Development on Nvu stopped in 2006, and a<br />
community fork of the Nvu source code continued on<br />
– as KompoZer. <strong>The</strong> current version in the<br />
<strong>PCLinuxOS</strong> repository is 0.8b3, released in<br />
February 2010. It is based on Gecko 1.8.1. <strong>The</strong><br />
Gecko engine is currently at version 11, but the<br />
older version that KompoZer is based on continues<br />
to work well, even in the newer Gecko engine.<br />
Despite the “K” in its name, KompoZer is not a KDE<br />
application, no more than the Linux kernel is.<br />
Instead, KompoZer is a Gtk+ application. Versions<br />
exist for Linux, Windows and OSX, giving it cross<br />
platform support. It is developed by Fabien<br />
Cazenave in his free time.<br />
Meanwhile, Daniel Glazman went on to create<br />
another WYSIWYG HTML editor from scratch,<br />
based on Gecko and XULRunner, and called<br />
BlueGriffon. While the core program is released as<br />
GNU free software, many of the functions, addons<br />
and the manual are available only after paying for<br />
the modules you select. If you were to buy all the<br />
modules, addons and the manual, you could end up<br />
paying around $100. Without the purchase of the<br />
modules, many of the features of BlueGriffon are<br />
crippled and nonfunctioning.<br />
Getting Acquainted<br />
When you first launch KompoZer, you will see the<br />
KompoZer Tip Of <strong>The</strong> Day dialog box (which can be<br />
disabled, if you choose).<br />
After that, you will find the main window displayed,<br />
as below.<br />
<strong>PCLinuxOS</strong> <strong>Magazine</strong> Page 11
So, let’s break down the different areas of the<br />
KompoZer window. Let’s start with the toolbar.<br />
<strong>The</strong> KompoZer toolbar gives you oneclick access to<br />
many tools you will need when creating your HTML<br />
page. <strong>The</strong> first three icons on the toolbar should be<br />
self explanatory to any user. Hovering your mouse<br />
over any of the toolbar icons will get you an<br />
explanation displayed in a tooltip. We’ll discuss the<br />
KompoZer Toolbar<br />
functions of most of these buttons in greater detail in<br />
future articles. Right now, we’re just getting familiar<br />
with them.<br />
Publish enables you to publish the files that make<br />
up your website. Typically, these are all stored in a<br />
directory on your hard drive that mirrors the directory<br />
and file structure on your website.<br />
KompoZer: Let's Get Acquainted<br />
Browse allows you to open the saved version of the<br />
file currently being edited or worked on in your<br />
default web browser. Be sure to save your edits<br />
before using the “Browse” button, or your new edits<br />
won’t appear in your web browser.<br />
Undo allows you to undo your most recent edits.<br />
Redo allows you to put your most recent edits back<br />
in, after you’ve removed them with the “Undo”<br />
action.<br />
Anchor places an anchor tag in your HTML at the<br />
current cursor position. Let’s say you have a rather<br />
long document, and you create an index or table of<br />
contents for that document. By inserting anchor tags<br />
at the appropriate places within that document, you<br />
can link from the index or table of contents directly to<br />
that specific anchor tag, without your user having to<br />
scroll through the entire document to get there.<br />
Anchor tags are typically given a unique name, with<br />
# used as a prefix.<br />
Link allows you to insert a HTML link into your<br />
document. That link can be to a local file, or to a<br />
resource hosted on another site. <strong>The</strong> “Link” button<br />
will bring up the “Link Properties” dialog box, where<br />
you can enter all the pertinent information for your<br />
link.<br />
Image allows you to insert an image into your<br />
document at the current cursor position. KompoZer<br />
will display the “Image Properties” dialog box that<br />
will allow you to enter the necessary information for<br />
your image.<br />
Table allows you to insert a table into your HTML<br />
document. Tables are a very powerful formatting tool<br />
when creating HTML pages. KompoZer will display<br />
the “Insert Table” dialog box, allowing you to define<br />
the initial structure of your table. <strong>The</strong> table will be<br />
immediately placed into your document at the<br />
current cursor position, using your definitions as a<br />
guide. If you double click your mouse cursor on the<br />
table in your document, you can further tune your<br />
table’s appearance to exactly what you want.<br />
<strong>PCLinuxOS</strong> <strong>Magazine</strong> Page 12
Form allows you to insert and set up a form in your<br />
HTML document. We’ve all dealt with forms and<br />
form elements within web pages. You use form<br />
elements to sign into the <strong>PCLinuxOS</strong> forum, when<br />
you insert your username and password to gain<br />
access there.<br />
HTML allows you to open up your HTML code for<br />
editing in an external editor, if you have one set up.<br />
CSS Editor allows you to edit the CSS (Cascading<br />
Style Sheet) for your HTML document, which applies<br />
a style sheet to your HTML document. <strong>The</strong> default<br />
with KompoZer is to embed the style definitions into<br />
the HTML header. It is possible to import an external<br />
*.css file to control the styles of a group of pages.<br />
Finally, at the far right of the toolbar is the KompoZer<br />
logo. Mouse over the logo and a tooltip will appear,<br />
declaring “This is KompoZer.” Otherwise, that’s all it<br />
does.<br />
Text Formatting Tools<br />
<strong>The</strong> next two “toolbars” relate to your text formatting.<br />
<strong>The</strong>y appear like in the image below.<br />
Starting with the top row, let’s review the text<br />
formatting features. At the top left is the formatting<br />
style of the text. <strong>The</strong> default is for body text. <strong>The</strong><br />
other choices are paragraph, headings one through<br />
six, address, preformatted, or create an generic<br />
division.<br />
Working left to right, the next control allows you to<br />
apply a class to either the text being entered, or the<br />
selected text. <strong>The</strong> ! applies emphasis to the text,<br />
while the !! applies strong emphasis. Basically,<br />
applying emphasis to text is akin to making the text<br />
KompoZer's Text Formatting Tools<br />
italic, while strong emphasis is similar to making the<br />
text bold. Selecting them both makes the text bold<br />
italic.<br />
<strong>The</strong> next control formats the text as a numbered list,<br />
while the next one formats the text as a bulleted list.<br />
Next are the controls to indent and outdent text. <strong>The</strong><br />
outdent control is disabled, unless you are dealing<br />
with text that has previously been indented.<br />
<strong>The</strong> next two controls don’t make a lot of sense to<br />
me, as they are implemented in KompoZer. <strong>The</strong>y are<br />
called “Definition Term” and “Definition Description.”<br />
I’m unable to find any documentation about them,<br />
and in playing around with them, I can find no<br />
rational use for them.<br />
<strong>The</strong> last three controls on the top row of the text<br />
formatting toolbar deals with layers. With KompoZer,<br />
you can design layers into your web page. Briefly,<br />
the use of layers allows precise positioning of an<br />
element within your layout.<br />
On the second row of text formatting controls,<br />
starting from the left, the first control allows you to<br />
select the font to use. <strong>The</strong> default is “Variable<br />
Width,” but I usually prefer to select a specific font to<br />
use for my web pages. It boils down to personal<br />
preference of how you want your page to appear.<br />
My personal preference is for a sans serif font, such<br />
as Helvetica, Arial or Liberation Sans.<br />
<strong>The</strong> next control sets the font color and the text<br />
background color. Clicking on them allows you to<br />
bring up a color selection dialog box where you can<br />
define or select the colors of each. Right next to<br />
those controls are the two controls to allow you to<br />
make the text larger or smaller.<br />
KompoZer: Let's Get Acquainted<br />
Next are the controls to determine whether your text<br />
is bold, italic or underlined, just as you would find in<br />
a word processing program.<br />
<strong>The</strong> last controls determine the alignment of the text<br />
in your HTML document. You can choose left<br />
aligned, centered, right aligned, or justified. Again,<br />
these controls work pretty much as they would in a<br />
word processing program.<br />
Site Manager<br />
One of the neat functions of KompoZer is that it<br />
allows you to manage your web site. Typically, when<br />
you are creating or working on your site, there are a<br />
number of files that comprise the whole. You would<br />
normally store a copy of things to your hard drive,<br />
arranged as they would be on your website. With<br />
KompoZer, you can upload your all of the elements<br />
of your site or just the changed pages to your web<br />
host.<br />
<strong>PCLinuxOS</strong> <strong>Magazine</strong> Page 13
Page Layout Area<br />
<strong>The</strong> largest element of your KompoZer window is the<br />
area where you enter and arrange the elements of<br />
your HTML page. Think of it as your canvas. Or think<br />
of it as your blank page as you might have in a word<br />
processing program. Just as you might do typing out<br />
a letter or a term paper, you enter the information for<br />
your web page exactly the same way.<br />
At the bottom of the page layout area, you see three<br />
“tabs” on the left. <strong>The</strong> “Design” tab is the default<br />
KompoZer Status Bar<br />
KompoZer Text Input, below<br />
view, and displays the information you are entering<br />
in a WYSIWYG manner. That is, how it appears on<br />
your screen is pretty close to how it will appear when<br />
a visitor to your website might see it in their browser.<br />
<strong>The</strong> “Source” tab allows you to view and edit the<br />
generated HTML code, something you might want to<br />
do when you use or add elements to your web page<br />
that aren’t supported by KompoZer. <strong>The</strong> “Split” tab<br />
allows you to have a WYSIWYG display of your<br />
page content in the top part of the window, while<br />
KompoZer: Let's Get Acquainted<br />
displaying the generated HTML code in the bottom<br />
part of the window – in a split view.<br />
At the bottom right of the page layout section of the<br />
Kompozer window is a control that determines how<br />
your page layout window appears. <strong>The</strong> default is the<br />
“Normal” setting. You can also set it to the “Preview”<br />
setting, (although I can’t see any difference between<br />
the normal and preview settings). You can also set it<br />
to the “HTML Tags” setting, which displays the<br />
HTML tags for each element of your page in your<br />
WYSIWYG page layout window, right next to each<br />
individual element of your page. To be perfectly<br />
honest, I never alter the view. I choose, instead, to<br />
switch between the design tab and the source tab<br />
when working on my pages.<br />
Status Bar<br />
At the bottom of the KompoZer window is the status<br />
bar. <strong>The</strong> status bar will display the general HTML<br />
tags of the current section of your HTML page.<br />
Summary<br />
Now that you’ve gotten a quick overview of some of<br />
the features of the KompoZer window, you should<br />
be better able to find your way around KompoZer.<br />
Don’t worry – there’s lots more that we haven’t even<br />
touched on yet. Next time, we’ll talk about setting up<br />
your site, and get started creating your first HTML<br />
page.<br />
<strong>PCLinuxOS</strong> <strong>Magazine</strong> Page 14
Mounting A Floppy Under <strong>PCLinuxOS</strong><br />
by Darrel Johnston (djohnston)<br />
I cringe when I read an article about someone who<br />
is running Linux on an “old” computer from 2005.<br />
Old? That’s not old. I’m still using a Dell Pentium III<br />
from 1999. I’ll bet most of the personal computers<br />
made in 2005 did not come with floppy drives. My<br />
Dell did. And, unlike USB devices, the floppy drive is<br />
not polled by the hardware or the software to see if a<br />
volume has been inserted or removed. <strong>The</strong> user<br />
must manually mount and unmount each floppy disk<br />
inserted into the drive.<br />
Fortunately, it is fairly easy to use GUI tools to<br />
enable the floppy drive for easy use. We can also<br />
create GUI tools to mount and unmount floppy disks,<br />
and to read and copy the contents of floppy disks.<br />
We must begin the setup in PCC, the <strong>PCLinuxOS</strong><br />
Control Center. Click Local disks in the left pane of<br />
the window.<br />
If the Floppy drive icon option is not showing in the<br />
right pane, the system is not reading the hardware<br />
device. Check the computer’s BIOS settings and all<br />
drive cables. Click the Floppy drive icon in the right<br />
pane.<br />
<strong>The</strong> default options presented should be the correct<br />
ones. <strong>The</strong> image above is difficult to read. <strong>The</strong><br />
options are:<br />
Mount point: /media/floppy<br />
Device: fd0<br />
Name: H1440<br />
Type: auto<br />
Options:<br />
umask=0,users,iocharset=utf8,noauto,flush,exec<br />
Click the OK button.<br />
Click the Yes button to save the /etc/fstab<br />
modifications. Close the PCC window. Your<br />
/etc/fstab file should contain a new line:<br />
/dev/fd0 /media/floppy auto<br />
umask=0,users,iocharset=utf8,noauto,fl<br />
ush,exec 0 0<br />
It would be handy to have a standard place to<br />
access the contents of a floppy disk. We can create<br />
a shortcut to the floppy in our favorite file browser. I<br />
am using PCManFM in the illustration. <strong>The</strong><br />
instructions presented will also work in Thunar,<br />
Nautilus and Dolphin. Open the file browser and<br />
navigate to the /media directory (next page, top).<br />
Drag and drop the floppy folder icon from the right<br />
pane to the bottom of the left pane (next page, left<br />
center).<br />
We now have a shortcut, or link, in the left pane of<br />
the file manager window we can click on to access<br />
the contents of a mounted floppy disk. At this point,<br />
<strong>PCLinuxOS</strong> <strong>Magazine</strong> Page 15
we can manually mount and unmount a floppy disk<br />
that is inserted into the drive. We can do both from a<br />
terminal as a regular user. Insert a floppy disk into<br />
the drive and open a terminal. To mount the floppy<br />
for use, enter the command:<br />
mount /dev/fd0<br />
To unmount a floppy, enter the command:<br />
umount /media/floppy<br />
Once mounted, the contents of the floppy disk can<br />
be accessed in the file manager by clicking the<br />
floppy disk icon in the left pane.<br />
But, we still have to manually mount and unmount<br />
the floppies from a terminal using the command line.<br />
That, too, is easily overcome. We will create two<br />
desktop files, one for mounting a floppy and one for<br />
unmounting. Open a text editor. Enter the following<br />
text:<br />
[Desktop Entry]<br />
Type=Application<br />
Icon=/usr/share/icons/gnome/48x48/devi<br />
ces/mediafloppy.png<br />
Name=MountFloppy<br />
Comment=Mount a floppy disk<br />
Categories=FileManager;X<br />
MandrivaLinuxSystemFileTools;<br />
Exec=mount /dev/fd0<br />
StartupNotify=true<br />
Terminal=false<br />
MimeType=xdirectory/normal;inode/directory;<br />
XDesktopFileInstallVersion=0.18<br />
Save the file as floppy_mount.desktop. In the same<br />
text editor, enter the following text as a new file:<br />
Mounting A Floppy Under <strong>PCLinuxOS</strong><br />
[Desktop Entry]<br />
Type=Application<br />
Icon=/usr/share/icons/gnome/48x48/devi<br />
ces/mediaflash.png<br />
Name=UnmountFloppy<br />
Comment=Unmount a floppy disk<br />
Categories=FileManager;X<br />
MandrivaLinuxSystemFileTools;<br />
Exec=umount /media/floppy<br />
StartupNotify=true<br />
Terminal=false<br />
MimeType=xdirectory/normal;inode/directory;<br />
XDesktopFileInstallVersion=0.18<br />
Save the file as floppy_unmount.desktop. We have<br />
now created two desktop files that can be used to<br />
mount and unmount floppy disks. <strong>The</strong> files can be<br />
copied to your desktop or to any folder owned by<br />
you. For convenience, we also want the entries to<br />
show up in the <strong>PCLinuxOS</strong> menu. <strong>The</strong> system wide<br />
menu entries can be found in<br />
/usr/share/applications. However, the two desktop<br />
files are not provided by any installed package, and<br />
we don’t want to go to the extra effort of creating<br />
them again, should we reinstall the operating system<br />
at some point. For that reason, copy both<br />
floppy_mount.desktop and floppy_unmount.desktop<br />
files to ~/.local/share/applications. That is, copy the<br />
desktop files the the .local/share/applications folder<br />
in your home directory. <strong>The</strong> .local folder is hidden,<br />
so set your file browser to show hidden files before<br />
copying. Once copied, you will see two new entries:<br />
MountFloppy and UnmountFloppy<br />
in the File Tools section of the <strong>PCLinuxOS</strong> menu. I<br />
chose two standard icons that should be installed by<br />
default on any <strong>PCLinuxOS</strong> version. Change the<br />
Icon= line in the desktop files to choose any other<br />
icon you wish.<br />
<strong>PCLinuxOS</strong> <strong>Magazine</strong> Page 16
Reach Us On <strong>The</strong> Web<br />
<strong>PCLinuxOS</strong> <strong>Magazine</strong> Mailing List:<br />
http://groups.google.com/group/pclinuxosmagazine<br />
<strong>PCLinuxOS</strong> <strong>Magazine</strong> Web Site:<br />
http://pclosmag.com/<br />
<strong>PCLinuxOS</strong> <strong>Magazine</strong> Forums:<br />
http://www.pclinuxos.com/forum/index.php?board=34.0<br />
Visit Us On IRC<br />
• Launch your favorite IRC Chat Client software<br />
(xchat, pidgin, kopete, etc.)<br />
• Go to freenode.net<br />
• Type "/join #pclosmag"<br />
(without the quotes)<br />
Want To Help?<br />
Would you like to help with the <strong>PCLinuxOS</strong><br />
<strong>Magazine</strong>? Opportunities abound. So get<br />
involved!<br />
You can write articles, help edit articles, serve<br />
as a "technical advisor" to insure articles are<br />
correct, create artwork, or help with the<br />
magazine's layout.<br />
Join us on our Google Group mailing list.<br />
LinPC. us<br />
Screenshot Showcase<br />
Posted by cstrike77, June 4, 2012, running KDE4.<br />
<strong>PCLinuxOS</strong> <strong>Magazine</strong> Page 17
Use LibreOffice Writer, Abiword To Fill Out Forms<br />
by Paul Arnote (parnote)<br />
Lordy, lordy. I love that I subscribe to Windows tips<br />
and news email lists. Often times, it’s like that quote<br />
from Forrest Gump: “Momma always said life is like<br />
a box of chocolates. You never know what you’re<br />
gonna get.”<br />
What’s that? You’re surprised that the editor of a<br />
Linux magazine would subscribe to and read such<br />
things? Don’t be, because it’s resulted in quite a few<br />
articles of how to do things in Linux. If nothing else,<br />
those Windows articles get the gears turning. I<br />
always read those articles with the thought of “how<br />
is this of interest to Linux users?” Plus, it’s helpful to<br />
stay informed on what the Evil Empire and Darth<br />
Ballmer are up to.<br />
Such was the case once again on May 23, 2012,<br />
when I received the Windows Desktop newsletter<br />
from TechRepublic. Featured in there was a tip on<br />
how to use Microsoft Word to fill out forms. I got to<br />
thinking, “I can do that in LibreOffice.”<br />
To prove that I could, I downloaded the 2011 Form<br />
1040EZ tax form from the IRS web site. Sure<br />
enough, you can do it in LibreOffice and AbiWord.<br />
Not only can you do it in either of those two<br />
applications, but you can do it much easier. Take<br />
that Microsoft Word!<br />
What follows is an explanation on how to do it. We’ll<br />
start with the Microsoft Word method, which can<br />
easily be replicated in LibreOffice. It’s a bit involved,<br />
but it’s easier than it sounds. You just got to know<br />
which hoops to jump through. <strong>The</strong>n, I’ll show you the<br />
much simpler ways, in both LibreOffice Writer and<br />
AbiWord.<br />
Step One: Obtain & Convert <strong>The</strong> Form<br />
This step is common between all three methods I’ll<br />
show you, so I’ve separated this step to stand alone.<br />
Obtaining the IRS Form 1040EZ to use as an<br />
example was easy enough. I simply went to their<br />
website and downloaded the latest version available,<br />
snagging the PDF of the form for 2011.<br />
Next, open the PDF file in Gimp. Yes, Gimp will<br />
open PDF files, in case you didn’t know. Just right<br />
click on a PDF file and select “Open With...” then<br />
Gimp. You will get this window:<br />
Click on the page you want to import. In the example<br />
above, it’s only the first page of the single page tax<br />
form. <strong>The</strong> second page contains only the<br />
instructions for filling out the form. Click the “Import”<br />
button in the bottom right corner of the window.<br />
Once the form opens in Gimp, save it as a PNG file.<br />
You could save it as a JPG file, but I chose the PNG<br />
format because of its lossless compression and<br />
better results.<br />
<strong>The</strong> Microsoft Word Way, In LibreOffice Writer<br />
Using the same method as described for Microsoft<br />
Word, we can achieve the same result from<br />
LibreOffice Writer. Only the terminology is different,<br />
since Word and Writer call the same functions by<br />
different names.<br />
Step Two: Set Your Document Background<br />
Actually, this is where the bulk of the “trick” lies.<br />
Open a new LibreOffice Writer document, move your<br />
caret cursor into the header area and click on the<br />
blue tab to enable editing of the header.<br />
With the header now selected for editing, go to the<br />
“Insert > Picture > <strong>From</strong> File...” menu item and insert<br />
<strong>PCLinuxOS</strong> <strong>Magazine</strong> Page 18
the PNG file we made in Step One. Double click on<br />
the image after you have it placed in the header.<br />
On the left side of the dialog box that appears, select<br />
“Original Size.” We don’t want the image of our form<br />
to fit neatly within the margins of our document.<br />
Being a PDF form, it was intended for users to print<br />
out, then fill out manually. Thus, our form already<br />
has “margins” included (just not OUR margins). Your<br />
LibreOffice Writer window should look something like<br />
this:<br />
Step Three: Set Up Text Wrap<br />
With the background image of your form still<br />
selected (as denoted by the small green resizing<br />
marks around its edge), select the “Format > Wrap ><br />
In Background” menu item. This moves your image<br />
to the background of the document, and allows you<br />
to enter text over the top of it. Using this method to<br />
send your image to the background of your<br />
document is a key step in getting this to work.<br />
Step Four: Fill Out Your Form<br />
To deselect the background image, click your mouse<br />
in the gray area surrounding the document display.<br />
Now, you should have your normal text entry caret<br />
cursor flashing, awaiting your input. Using tabs and<br />
Use LibreOffice Writer, Abiword To Fill Out Forms<br />
spaces, move the caret to the locations where you<br />
need to enter data on the form.<br />
Note that you may need to modify your margins to<br />
be able to “reach” all the areas of your form. You<br />
may also have to play around a bit with fonts and<br />
font sizes to get the proper line spacing for your<br />
entered text. For me, I found that 10 point Liberation<br />
Sans worked well, and gave me fairly good line<br />
spacing that matched up with the line spacing on my<br />
form. Here’s an example of the tax form filled out in<br />
LibreOffice Writer (with fake information, of course):<br />
<strong>PCLinuxOS</strong> <strong>Magazine</strong> Page 19
<strong>The</strong> Simpler LibreOffice Writer Way<br />
Leave it to the folks who produce FOSS to find a<br />
easier way to do things. LibreOffice Writer is no<br />
exception. <strong>The</strong> instructions that follow presume that<br />
you have already completed Step One and made a<br />
PNG file of your PDF form.<br />
Step Two: Set Your Document Background<br />
Select the “Format > Page...” menu item. Navigate<br />
to the “Background” tab. In the upper left corner of<br />
that tab is the “As” drop down. It defaults to Colors.<br />
Click it and choose “Graphic” from the drop down<br />
list. <strong>The</strong>n, click on the “Browse” button and select<br />
the PNG file you made from the PDF in Step One.<br />
Don’t close this dialog box out – yet. Click on the<br />
“Apply” button.<br />
Step Three: Set Your Margins<br />
<strong>The</strong>n, select the “Page” tab, and set all of your<br />
margins to 0.00 inches (or whatever other<br />
measuring units you are using). Remember, our<br />
form graphic already has margins included, so we<br />
really don’t need to worry about margins.<br />
Click on the “OK” button to accept your changes and<br />
close out the dialog box. You will get the following<br />
message box displayed:<br />
Select “Yes” to dismiss the warning box.<br />
Step Four: Fill Out Your Form<br />
Voila! Your blank form should now appear as the<br />
background graphic in your LibreOffice Writer<br />
document, similar to that pictured above. Just as<br />
with the previous method, you will have to mess<br />
around with the choice of font and font size to get a<br />
line spacing that matches up with that of the form.<br />
Again, 10 point Liberation Sans seems to work fine<br />
for me with this particular form. As you enter your<br />
data, it will appear over the top of your background<br />
image. Once more, use a combination of tabs and<br />
spaces to move the caret to the positions on the<br />
form where you need to enter text.<br />
Use LibreOffice Writer, Abiword To Fill Out Forms<br />
<strong>The</strong> UltraEasy AbiWord Method<br />
Sometimes, it seems downright criminal that<br />
AbiWord is as often overlooked as it is. In case<br />
you’re not familiar with it, it’s a small, but powerful,<br />
crossplatform word processor. In keeping true to its<br />
FOSS origins, it does one thing, and does it well –<br />
word processing.<br />
Using AbiWord to fill out forms is the easiest of all<br />
the methods described here.<br />
Step Two: Set Your Document Background<br />
Select the “Format > Page Background > Page<br />
Image” menu item, then select the PNG file you<br />
created from the PDF in Step One.<br />
That’s it. It’s very, very easy.<br />
<strong>PCLinuxOS</strong> <strong>Magazine</strong> Page 20
Step Three: Set Your Margins<br />
Since Form 1040EZ already uses 0.5 inch margins,<br />
I set the margins in AbiWord to match.<br />
Step Four: Fill Out Your Form<br />
Voila! Just type in the information for your form. Just<br />
as with the previous methods, you will most likely<br />
have to play with the font and font size combination<br />
to achieve proper alignment with your form. Once<br />
again, I found that 10 point Liberation Sans seemed<br />
to fill the bill quite nicely. As with the previous two<br />
methods, use a combination of tabs and spaces to<br />
move the text entry caret to where you need to enter<br />
data on the form.<br />
Summary<br />
Without a doubt, we can do many of the same things<br />
that Microsoft Word does. In many cases, as<br />
illustrated here, we can do it much easier, thanks to<br />
the FOSS developers keeping things simple. <strong>The</strong>re<br />
may be easier ways to do this in Microsoft Word, but<br />
to be honest, I wouldn’t know. I haven’t (thankfully)<br />
used Microsoft Word in years. I did go back and<br />
review the comments to the original TechRepublic<br />
Use LibreOffice Writer, Abiword To Fill Out Forms<br />
article, and no one else had mentioned anything<br />
about an easier way to do it in Word, either.<br />
It just goes to show you that expensive commercial<br />
software is not always better. It’s just … well … more<br />
expensive!<br />
<strong>PCLinuxOS</strong> <strong>Magazine</strong> Page 21
Forum Foibles:<br />
ms_meme's Forum ABC BOOK<br />
A is for Archie from China he hails<br />
Giving fun and help he never fails<br />
B is for Bald Brick an old blackbird<br />
His posts in the forum are never absurd<br />
C is for chilly do you smell all those fumes<br />
Racing his car through the forum he zooms<br />
D is for djohnston he does succeed<br />
Writing magazine articles for us to read<br />
E is for exploder he's like dynamite<br />
Posts what he thinks and is always forthright<br />
F is for frazelle09 friendly and fair<br />
He is an asset anytime anywhere<br />
G is for Ge<strong>org</strong>etoon a comical chap<br />
Can draw a cartoon in less than a snap<br />
H is for horusfalcon he plays a mean bass<br />
In the <strong>PCLinuxOS</strong> Band he has earned a place<br />
I is for I that must mean ms_meme<br />
Without a rhyme I never shall be<br />
J is for jaydot a sensible guy<br />
He is a mod so with him comply<br />
K is for ka9yhd what does that signify<br />
Perhaps a code name for a private eye<br />
L is for Leiche he really works hard<br />
He is held in the Forum with high regard<br />
M is for MeeMaw always has time for a friend<br />
In any forum she will easily blend<br />
N is for nok his posts are amusing<br />
Right to the point and never confusing<br />
<strong>PCLinuxOS</strong> <strong>Magazine</strong> Page 22
Forum Foibles:<br />
ms_meme's Forum ABC BOOK<br />
O is for OMSkates thru the forum he does cruise<br />
Read his topics for the latest news<br />
P is for parnote his talents are many<br />
In the <strong>Magazine</strong> you'll find them a plenty<br />
Q is for question I ask you with sense<br />
Why use Windows there is no defense<br />
R is for Rudge a dog's life he leads<br />
And to the forum he's the best of the breeds<br />
S is for smileeb always posting with ease<br />
Whatever he writes it is certain to please<br />
T is for timeth our resident artist<br />
With Gimp and Inkscape he is the smartest<br />
U is for U the <strong>PCLinuxOS</strong> Users<br />
All forum members are very wise choosers<br />
V is for Vortex friendly and fun<br />
Amusing and humorous he's next to none<br />
W is for weirdwolf none can exceed<br />
He thinks he is strange and we are agreed<br />
X is for Xenaflux so willing to teach us<br />
His explanations never fail to reach us<br />
Y is for YouCanToo writes Knowledge Base<br />
He puts all the info in the right place<br />
Z is for zillions of posts I read daily<br />
As I sing and play songs on my ukulele<br />
<strong>PCLinuxOS</strong> <strong>Magazine</strong> Page 23
y AndrzejL<br />
Eliminate Annoying Messages in KDE4<br />
I had to move from a Packard Bell EasyNote W3301<br />
laptop to my Acer Travelmate 2420 due to a<br />
hardware failure. I moved the hard drive from one<br />
lappy to another. This was a little “hacky,, but it<br />
worked.<br />
<strong>The</strong> first thing I noticed was a “Battery broken”<br />
annoyance each time my machine would boot to<br />
KDE4. Yes, thank you, I know the battery sucks and<br />
that I cannot afford a new one. Now please bugger<br />
off and stop rubbing the fact in.<br />
I finally got rid of it. Here is how.<br />
Open konsole and type in:<br />
systemsettings followed by the key.<br />
<strong>The</strong> KDE4 Control Center will pop up. Now go to<br />
Hardware > Power Management > Global<br />
Settings.<br />
Now click on the Configure Notifications button. A<br />
new window will pop up. Look for a Broken battery<br />
notification entry and click on it.<br />
Now uncheck the Play a sound and Show a<br />
message in a popup boxes. Click on the OK button<br />
to close the window, then close KCC and Konsole.<br />
On next reboot/log in, the annoying message won’t<br />
bother you any more.<br />
<strong>PCLinuxOS</strong> <strong>Magazine</strong> Page 24
y Meemaw<br />
Linux Financial Programs: GnuCash<br />
<strong>The</strong> fourth installment of our series is GnuCash<br />
http://www.gnucash.<strong>org</strong>/, which is available for<br />
Linux, Mac and Windows. <strong>The</strong> User Guide is at<br />
http://www.gnucash.<strong>org</strong>/docs.phtml. GnuCash is in<br />
the <strong>PCLinuxOS</strong> Repository.<br />
Starting the program for the first time, the following<br />
window appears:<br />
If for some reason you already have a set of<br />
accounts saved, you can click Cancel and open<br />
them from the main window. Instead, we will create<br />
a new set of accounts, so click OK. You will be<br />
presented with a series of windows that will help you<br />
create your set of accounts.<br />
GnuCash has several ‘premade’ sets of categories,<br />
or account types, as shown in the left side of the<br />
window below. You may add as many as you wish.<br />
I have added the “Common Accounts” set. If<br />
you find that you need a category you don’t<br />
have, it can be added by hand, and any of the<br />
existing categories can be edited to your<br />
preference.<br />
While you have your category list open, you can edit<br />
any of them. Click on each Asset account (at least<br />
the Checking and Savings) and enter an Opening<br />
Balance (bottom left).<br />
When you finish, you will have a window like the one<br />
below. Equity is Assets minus Expenses. Since<br />
there have been no expenses entered yet, Equity is<br />
the total of the asset accounts.<br />
If you remember, iFreeBudget’s left side tree looks<br />
pretty much the same. GnuCash also uses doubleentry<br />
bookkeeping, which means that everything is<br />
an account, even the categories. It also means that<br />
each transaction is entered twice, once as a debit<br />
from an account, and once as a credit to another<br />
account. When you enter a transaction into your<br />
checkbook, the transaction’s corresponding entry to<br />
a category is made automatically. After you add your<br />
transactions, you will find that the categories also<br />
have balance amounts in them as well.<br />
<strong>PCLinuxOS</strong> <strong>Magazine</strong> Page 25
Doubleclick on the Checking Account to open it. We<br />
will enter our transactions here. <strong>From</strong> the View<br />
menu, you can set your register to be single or<br />
doubleline display, and choose a basic ledger, autosplit<br />
ledger, or a transaction journal. <strong>The</strong> ledgers<br />
aren’t that much different, but the transaction journal<br />
shows both entries for each transaction (doubleentry<br />
bookkeeping), and unless you are used to it, it<br />
may confuse you a bit. I chose the basic ledger.<br />
<strong>The</strong> two lines colored yellow at the bottom of the<br />
display are for entering your transaction. All you<br />
really have to enter is the date, check number,<br />
payee, category and amount. In the doubleline<br />
display, you have a line in which to add notes about<br />
a payment. (Prom dress for daughter?) GnuCash<br />
memorizes your transactions and payees, so if you<br />
start to enter a payee you already have, it will be<br />
filled in for you. All you will then have to do is tab<br />
over to the amount and change it if it’s different.<br />
Notice also that each account you open is a tab at<br />
the top, so if you want, you may have your checking<br />
and savings accounts open at the same time and<br />
just alternate between tabs.<br />
When you save and close the accounts, you will see<br />
your main screen again. Notice that the Expenses<br />
categories now have amounts in them (top right).<br />
<strong>The</strong> Reports menu has many reports that can<br />
be viewed, and you can customize your own<br />
report if you wish.<br />
GnuCash does Scheduled transactions two different<br />
ways. <strong>The</strong> first way is from the check register. If the<br />
transaction you have been adding is supposed to<br />
happen on a regular basis, you can go to the toolbar<br />
and click on the<br />
button that looks<br />
like a calendar with<br />
a plus sign.<br />
Linux Financial Programs: GnuCash<br />
Scheduled transactions can also be<br />
created from clicking on the Actions<br />
menu.<br />
You will see several items in the Tools<br />
menu. You can set up Online Banking<br />
from here. I don’t do online banking from<br />
any financial program, but it looks pretty<br />
straightforward, as long as you have all the required<br />
information.<br />
<strong>The</strong> Price & Security Editors are for your<br />
investment accounts.<br />
<strong>The</strong> Loan Repayment Calculator (above) is quick<br />
& handy to figure out your payment if you are<br />
borrowing money. Just clear all the options, then<br />
<strong>PCLinuxOS</strong> <strong>Magazine</strong> Page 26
enter your loan amount, interest rate, future value<br />
and number of payments. Click “Calculate” and the<br />
payment amount will be calculated. In the example<br />
below, I set the amount I want to borrow as the<br />
Present Value, and zero as the Future Value<br />
(because I want the loan to be paid off). I put in the<br />
interest rate and number of payments, leaving the<br />
Periodic payment blank. Clicking “Calculate”, we see<br />
that the monthly payment is now filled in.<br />
<strong>The</strong> Close Book item is for an account you are<br />
closing.<br />
You can pull up a General Ledger for your accounts<br />
as well.<br />
Notice that you have a menu item called Business.<br />
If you want to manage your business accounts, you<br />
can use GnuCash. You can use the business<br />
categories rather than the standard set, and the<br />
program includes menu items to create Vendors,<br />
Customers, Employees, Payment Vouchers,<br />
Jobs and Invoices. In addition, the accounts you<br />
use include Accounts Receivable and Accounts<br />
Payable. If you have a business, this may be a good<br />
program to manage it.<br />
I have found GnuCash to be a good program that<br />
works well. <strong>The</strong> only problem I see is that it saves<br />
two files in addition to the data file every time it<br />
saves. Again, this is my personal opinion. However,<br />
if you set the program to autosave every ten<br />
minutes and you work with it for an hour, you will<br />
have a file list in your save location that looks<br />
something like this:<br />
My main file is the first in the list, but you will see<br />
several sets of files that include a log and an<br />
application file. If you open the program every day,<br />
this can fill up your /home folder pretty fast. <strong>The</strong><br />
Preferences can be set to solve some of that, as<br />
you see here:<br />
You can set to save every 30 minutes or hour, and<br />
only save the log files for 5 days or less. Set it<br />
however it works best for you.<br />
Next month we will look at KMyMoney.<br />
Linux Financial Programs: GnuCash<br />
Support <strong>PCLinuxOS</strong>! Get Your Official<br />
<strong>PCLinuxOS</strong><br />
Merchandise Today!<br />
<strong>PCLinuxOS</strong> <strong>Magazine</strong> Page 27
Available in the following desktops:<br />
KDE LXDE Xfce<br />
Gnome Enlightenment e17<br />
<strong>The</strong> place where breaking news,<br />
BitTorrent and copyright collide<br />
Screenshot Showcase<br />
Posted by ff103, June 1, 2012, running KDE4.<br />
<strong>PCLinuxOS</strong> <strong>Magazine</strong> Page 28
QEMU, <strong>The</strong> Other Virtual Machine, Part Two<br />
by Patrick G Horneker (phorneker)<br />
In the last article, we installed FreeDOS on a virtual<br />
machine with QEMU, and placed the disk image in<br />
the ~/vm directory.<br />
We already learned some parameters that we used<br />
when invoking qemu, namely hda to specify the<br />
hard disk image to use, cdrom for the CD image we<br />
used to install FreeDOS, boot d to tell QEMU to<br />
start using the CD/DVD image, and m 32 to tell<br />
QEMU to allocate 32MB of memory to FreeDOS.<br />
QEMU comes with many more parameters than this,<br />
as we are using QEMU to emulate a old school PC.<br />
So far, we typed the following to start QEMU:<br />
qemu hda freedos.img cdrom<br />
iso/fd11src.iso boot d m 32<br />
Once installed, we will need to launch QEMU and<br />
have it boot from the emulated hard disk. For this,<br />
we only need the name of the hard disk image.<br />
Hence, we can start QEMU with the following:<br />
qemu hda freedos.img boot c m 32<br />
This will launch QEMU and give us the following (top<br />
right):<br />
<strong>The</strong> virtual CDROM drive is present, but there is no<br />
virtual CD in the drive. If we supplied a CD image<br />
with the command, then you will be able to access<br />
the CDROM from drive D on FreeDOS. However,<br />
notice there is no floppy drive available. When<br />
we try to access the floppy on FreeDOS, we get the<br />
following (right, center):<br />
We could add a floppy drive to our QEMU command<br />
line. <strong>The</strong>re are two ways to do this, and it depends<br />
upon the physical hardware available on your<br />
machine. Older machines come with internal floppy<br />
drives, and they can be used directly within QEMU.<br />
Over the past few years, desktops do not come with<br />
internal floppy drives, and to use floppies on these,<br />
you will need an external floppy drive (these should<br />
be very inexpensive by now, if you can find them in<br />
the first place).<br />
To use a floppy disk image, you supply fda to<br />
represent the first floppy drive, and fdb to represent<br />
the second floppy drive. Back in the day, internal<br />
floppy diskette controllers could only support up to<br />
two floppy drives. This was always the case for<br />
every PC built.<br />
QEMU supports either a disk image or a physical<br />
device (internal floppy drives only).<br />
fda /dev/fd0 tells QEMU to use the first physical<br />
floppy drive on your machine for floppy access.<br />
fda /dev/fd1 tells QEMU to use the second physical<br />
floppy drive on your machine. Note: This parameter<br />
is not valid if your machine has only one floppy<br />
drive.<br />
External Floppy Drives<br />
External floppy drives can be used to create floppy<br />
images for use on QEMU. On QEMU, floppy images<br />
are mounted the same as physical floppies that are<br />
inserted in a internal floppy drive. Since external<br />
floppy drives are USB mass storage drives, they<br />
have device names such as /dev/sdb, /dev/sdc,<br />
/dev/sdd. <strong>The</strong> USB mass storage driver uses SCSI<br />
emulation for disk operations, and hence must be<br />
explicitly mounted before reading and writing to the<br />
disk. This is not the case with internal floppy drives.<br />
To create a disk image from a floppy inserted into an<br />
external floppy drive, we need to find the device<br />
name for the external floppy drive. First, insert the<br />
floppy you want to use in the external drive. On<br />
most <strong>PCLinuxOS</strong> desktops, an icon should appear<br />
representing the floppy. Open a terminal window<br />
and type in ls /dev/sd* to get a list of disk devices.<br />
<strong>PCLinuxOS</strong> <strong>Magazine</strong> Page 29
dev/sda /dev/sda1 /dev/sda2 /dev/sda3<br />
/dev/sda5 /dev/sdb /dev/sdc /dev/sdd<br />
/dev/sdd1<br />
On my laptop, when docked, the external floppy has<br />
a device name of /dev/sdd. /dev/sdd1 refers to the<br />
FAT16 partition on the floppy. /dev/sdd refers to the<br />
disk drive and the unformatted (raw) disk inserted<br />
into the drive. <strong>The</strong> latter is what we want to use to<br />
create the disk image.<br />
(/dev/sdb refers to the builtin memory card reader<br />
and /dev/sdc refers to the card reader built into my<br />
Epson Stylus NX415 allinone device.)<br />
With the terminal window open, go to an empty<br />
directory (I use ~/vm/floppies to store floppy disk<br />
images) and use the dd command as follows:<br />
dd if=/dev/sdd of=.img bs=512<br />
where name of disk image is the name you assign to<br />
the disk image. <strong>The</strong> bs=512 tells dd that each block<br />
size on the disk image is 512 bytes in length.<br />
Creating Blank Floppy Images<br />
Just as we can create<br />
hard disk images with<br />
qemuimg, we can<br />
create floppy disk<br />
images the same way.<br />
In a terminal window,<br />
we just type the<br />
following: ><br />
We now have a blank<br />
floppy disk image to use<br />
with QEMU. On<br />
<strong>PCLinuxOS</strong>, there is no<br />
need to run sudo or su to accomplish this as<br />
mkdosfs formats a disk image (or physical disk)<br />
with the FAT16 filesystem.<br />
To use this disk image, we need to supply fda<br />
floppies/blankfloppy.img to the command line,<br />
preferably before the hda parameter. So now, our<br />
command line to invoke QEMU looks like this:<br />
qemu fda floppies/blankfloppy.img<br />
hda freedos.img boot c m 32<br />
Now, when we access the floppy drive (by typing a:),<br />
we get what we expected: A:>_ .<br />
QEMU, <strong>The</strong> Other Virtual Machine, Part Two<br />
By supplying the<br />
fda parameter,<br />
we tell QEMU<br />
that there is a<br />
floppy drive<br />
available on the<br />
emulated<br />
machine, and<br />
there is a floppy<br />
in the drive.<br />
<strong>The</strong> CD/DVDROM Drive<br />
We already know that we can use CD/DVD images<br />
on QEMU. <strong>The</strong> cdrom parameter supplies QEMU<br />
with a CD/DVD disk image to use for the emulated<br />
CD/DVD ROM drive. <strong>The</strong> hdb parameter is the<br />
same as cdrom as it represents the same device.<br />
However, images and physical devices supplied with<br />
cdrom are used as read only devices, where<br />
devices supplied with the hdb parameter are<br />
available for reading and writing.<br />
We already used cdrom for installation of<br />
FreeDOS. We can use cdrom for CD/DVD images<br />
we want to use with FreeDOS.<br />
FreeDOS comes with a DOS ATAPI driver which<br />
was installed with the distribution. <strong>The</strong> ATAPI driver<br />
does not support writing to blank CD or DVD discs.<br />
But then, CD or DVD writing was never supported<br />
under DOS.<br />
We can use cdrom for production use of QEMU.<br />
To use it, we need a CD/DVD image, or we can<br />
supply a physical CD/DVD device.<br />
On my laptop, the DVD burner has a device name of<br />
/dev/sr0, which could be used. If you are using an<br />
external drive, your device name will vary (such as<br />
/dev/sdb).<br />
While you may use a physical CD/DVD drive, it is<br />
more efficient, performance wise, to use CD/DVD<br />
ISO images on QEMU because of the overhead<br />
needed to access the physical drive on QEMU.<br />
For purposes of this article, let us use the original<br />
cdrom parameter. Our command line now looks<br />
like this:<br />
qemu fda floppies/blankfloppy.img<br />
hda freedos.img cdrom<br />
iso/fdsrc11.iso boot c m 32<br />
<strong>PCLinuxOS</strong> <strong>Magazine</strong> Page 30
Serial and Parallel Ports<br />
Just as old school PCs have serial and parallel ports<br />
to communicate with devices such as printers and<br />
(landline) modems, QEMU can emulate these ports<br />
using the serial and parallel parameters.<br />
QEMU can emulate four serial and three parallel<br />
ports. (For FreeDOS, these are devices named<br />
COM1: through COM4: for the serial ports, and<br />
LPT1:, LPT2: and LPT3: for the parallel ports.)<br />
For each emulated port, we need to supply either a<br />
serial or parallel parameter with the name of the<br />
physical device or file to be used. <strong>The</strong> order of the<br />
parameters matters here.<br />
When you supply the parameters, the first serial<br />
parameter supplied emulates the first serial port, the<br />
second serial port emulates the second serial port,<br />
and so forth. <strong>The</strong> same is true for the parallel ports.<br />
I recommend physical devices for emulaton of serial<br />
ports as they are devices that can read AND write<br />
data. <strong>The</strong> parallel port emulation can be either a<br />
physical device or a file. I recommend a file for this<br />
parameter. QEMU does not recognize the CUPS<br />
system for printing, and the use of physical devices<br />
for parallel emulation could interfere with the<br />
opeation of CUPS as QEMU bypasses the CUPS<br />
system to write directly to the physical port.<br />
What to use for serial ports<br />
serial /dev/ttySx: This uses a physical serial port<br />
on your machine. Usually, this port can be found on<br />
legacy machines.<br />
serial /dev/ttyACMx: This appears when you wish<br />
to use a cellular phone (not a smartphone) as a<br />
modem, or have a USB landline modem plugged in.<br />
serial /dev/ttyUSBx: This appears when you have<br />
a serial to USB adapter plugged in. This device also<br />
appears when you begin to synchronize older<br />
PalmOS devices using a cradle or direct connection<br />
to the device. However, I do not recommend USB<br />
cradles for such devices being used because the<br />
device does not appear until the device is ready to<br />
be synced. For older PalmOS devices, I<br />
recommend using a serial cradle attached to a serial<br />
to USB cable instead. This way, the device name is<br />
always available which is what QEMU expects for<br />
serial device access.<br />
What to use for parallel ports<br />
parallel /dev/lpx: This uses a physical parallel port<br />
on your machine. This parameter is invalid for<br />
machines without parallel ports, such as netbooks,<br />
Ultrabooks, intelbased Macs, and newer desktops<br />
and laptops. If your machine has a parallel port, by<br />
all means use it. QEMU bypasses CUPS and sends<br />
output directly to the parallel port.<br />
parallel file:filename: I recommend this parameter<br />
for emulation of the parallel port. QEMU will write<br />
any output for the emulated parallel port to filename.<br />
When you exit a QEMU session, filename will be<br />
available on the directory where you launched<br />
QEMU, and contains raw output that would have<br />
gone to a physical printer.<br />
I recommend you make filename a PostScript file,<br />
i.e. give the filename a .ps extension. For example,<br />
we could use parallel file:printer0.ps to emulate a<br />
PostScriptenabled printer connected to a parallel<br />
port. <strong>The</strong>n, configure DOS applications to output<br />
PostScript. After you leave QEMU, you can then<br />
view printer0.ps with Evince, Okular, or gv, or send<br />
it directly to a printer with the lpr command.<br />
If you have an Epson printer (allinone or stand<br />
alone), you can configure DOS applications to print<br />
to an Epson printer (any model). In this case, you<br />
can give filename whatever you want. Why?<br />
Epson’s ESC/PR is an object oriented superset of<br />
QEMU, <strong>The</strong> Other Virtual Machine, Part Two<br />
the ESC/P and ESC/P2 printer control languages,<br />
and hence newer Epson printers are backwards<br />
compatible with even the oldest Epson printers.<br />
Many HewlettPackard printers still use the PCL 6<br />
control language. In this case, you may configure<br />
DOS applications to print to most Deskjet and<br />
LaserJet models. You may give filename a .pcl<br />
extension so you know this file contains PCL coding.<br />
If you configure filename to output to Epson or HP<br />
control languages, you will need to print the file<br />
using lpr r command where r tells lpr to send the<br />
data asis (the r stands for raw output).<br />
Even then, output to PostScript guarantees that<br />
output from DOS applications will print correctly after<br />
the QEMU session using the lpr command.<br />
Building the Command Line<br />
For purposes of this article, we shall configure<br />
FreeDOS to use a 56K modem and a PostScript<br />
printer. This was a typical configuration for an old<br />
school PC.<br />
For actual hardware, I shall be using a Zoom 56K<br />
USB Modem for the serial port. This modem is<br />
Linux compatible and provides the /dev/ttyACM0<br />
name we need for serial.<br />
If you wish to use a cellular phone (not a<br />
smartphone) as a modem, be sure to check your<br />
carrier’s Terms of Service to see if such usage is<br />
allowed before connecting your cell phone.<br />
For the parallel port, let us configure parallel<br />
file:printer0.ps. All output to LPT1: from FreeDOS<br />
will be written to printer0.ps. DOS applications<br />
running on FreeDOS need to be configured to write<br />
PostScript output. I recommend using any of the<br />
Apple Laserwriter drivers or Generic PostScript<br />
drivers.<br />
<strong>PCLinuxOS</strong> <strong>Magazine</strong> Page 31
Using this hardware, our QEMU command line now<br />
looks like this:<br />
qemu fda floppies/blankfloppy.img<br />
hda freedos.img cdrom<br />
iso/fdsrc11.iso boot c m 32 serial<br />
/dev/ttyACM0 parallel<br />
file:printer0.ps<br />
Be sure to plug in the USB modem before<br />
invoking QEMU with the above command line.<br />
Mounting QEMU disk images<br />
Under <strong>PCLinuxOS</strong> (and other Linux systems), you<br />
can mount a QEMU image and access it like any<br />
other directory. This is useful for installation of DOS<br />
drivers without having to access a floppy drive.<br />
Open a terminal window and login as root, then type<br />
in the following (lines separated for clarity):<br />
mkdir p /mnt/freedos<br />
mount o loop,offset=32256<br />
/home/patrick/vm/freedos.img<br />
/mnt/freedos<br />
cp /home/patrick/<br />
/mnt/freedos<br />
umount /mnt/freedos<br />
For QEMU images, you need to mount the image<br />
using the o loop,offset=32256 parameter. This is<br />
where the filesystem created by FreeDOS starts on<br />
the QEMU disk image.<br />
This section is important as the next hardware<br />
components to be configured require DOS drivers to<br />
function. We need a way to get the drivers into<br />
FreeDOS.<br />
Besides the above, we could download the required<br />
DOS drivers, and transfer them to a memory card, or<br />
burn them to a CDR/DVDR, then mount that for a<br />
hard drive and transfer the files that way.<br />
Audio Hardware<br />
QEMU emulates some audio hardware. Typing<br />
qemu soundhw ? (Yes, type the question mark to<br />
get information on all sound cards supported by<br />
QEMU.)<br />
For FreeDOS, we can configure the Sound Blaster<br />
16 device. We will need to download DOS drivers<br />
for these devices. Drivers for these devices can be<br />
downloaded from<br />
http://support.creative.com<br />
To download, click on Sound Blaster, then scroll to<br />
the bottom of the next page. Where it says “If your<br />
Product is not Listed above”, click on the text link<br />
labelled “Please click here”.<br />
Go to the list that appears and select Others. <strong>The</strong>n,<br />
under Archived Products, click on Sound Blaster 16.<br />
<strong>The</strong>n, click on Next. Scroll to the bottom of the next<br />
page. Under All Downloads, click where it says<br />
Windows NT 4.0, then select DOS from the popup<br />
menu. Click on Submit, the link to the DOS driver<br />
will appear in the results. <strong>The</strong> file is 1.15MB in size.<br />
On this page is the link to the driver download. Click<br />
QEMU, <strong>The</strong> Other Virtual Machine, Part Two<br />
on Download and agree to the end user license.<br />
<strong>The</strong> file will download to the Downloads directory on<br />
your user space, and is called sbbasic.exe, which is<br />
a self extracting DOS executable.<br />
Now, let us add the audio support to the<br />
command line<br />
Since we are going to use the Sound Blaster 16 for<br />
audio support, we need to add soundhw sb16 to<br />
the command line. We shall insert this parameter<br />
before the serial and parallel parameters. So far,<br />
the following is our QEMU command line to invoke<br />
the emulator:<br />
qemu fda floppies/blankfloppy.img<br />
hda freedos.img cdrom<br />
iso/fdsrc11.iso boot c m 32 soundhw<br />
sb16 serial /dev/ttyACM0 parallel<br />
file:printer0.ps<br />
All of this is actually one line of code. We have<br />
what we need so far to emulate a old school PC as a<br />
standalone machine. Since this is a large one line<br />
command, it would be a good idea to create a shell<br />
script to run this emulator without having to type all<br />
of this code.<br />
Shell Scripts to make QEMU launch easier<br />
<strong>The</strong> first thing we should do is create a bin directory<br />
in your userspace (if you do not already have one).<br />
Having a bin directory here allows you to run shell<br />
scripts from your home directory simply by typing the<br />
name of the script. ~/bin has already been<br />
configured with your <strong>PCLinuxOS</strong> installation as part<br />
of the listing of directories to search for programs to<br />
run, so you do not have to configure anything else.<br />
Open your favorite editor (e.g. kate, gedit, emacs,<br />
or vim) and type in the following (next page):<br />
<strong>PCLinuxOS</strong> <strong>Magazine</strong> Page 32
#!/bin/bash<br />
qemu fda floppies/blankfloppy.img<br />
hda freedos.img cdrom<br />
iso/fdsrc11.iso boot c m 32 soundhw<br />
sb16 serial /dev/ttyACM0 parallel<br />
file:printer0.ps<br />
<strong>The</strong> last five lines are actually one line of code.<br />
Save the file to whatever you want to your ~/bin<br />
directory (for example freedos) and exit the editor.<br />
<strong>The</strong>n, open a terminal and type the following:<br />
chmod a+x ~/bin/freedos<br />
Now, typing freedos will launch QEMU with the<br />
command line options we created. Since this is a<br />
text file, we can change any parameters we want<br />
when we need to.<br />
Does your computer run slow?<br />
Are you tired of all the "Blue Screens<br />
of Death" computer crashes?<br />
Are viruses,<br />
adware, malware &<br />
spyware slowing<br />
you down?<br />
Get your PC back<br />
to good health<br />
TODAY!<br />
Get<br />
QEMU, <strong>The</strong> Other Virtual Machine, Part Two<br />
Screenshot Showcase<br />
Download your copy today! FREE! Posted by parnote, June 1, 2012, running Xfce.<br />
<strong>PCLinuxOS</strong> <strong>Magazine</strong> Page 33
Forum Foibles:<br />
Featuring Family Foibler longtomjr<br />
longtom jr invites all to the<br />
<strong>PCLinuxOS</strong> Kid's Forum<br />
When jr misbehaves<br />
he has to sit in the corner<br />
longtom jr shares his<br />
playthings in the Kid's Forum<br />
longtom jr has other interests<br />
besides computers<br />
jr loves making wallpaper jr designs the May <strong>PCLinuxOS</strong><br />
<strong>Magazine</strong> Cover<br />
<strong>PCLinuxOS</strong> <strong>Magazine</strong> Page 34
Thunar Custom Action For Dropbox Public URL<br />
by Paul Arnote (parnote)<br />
Dropbox users on KDE can right click on a file in<br />
their Dropbox/Public folder in Dolphin or Konqueror<br />
and get the URL of the file to share with others.<br />
Dropbox users on Gnome can right click on a file in<br />
their Dropbox/Public folder in Nautilus and get the<br />
file to share with others. However, users of Xfce’s<br />
Thunar file manager had to resort to logging into<br />
their Dropbox account, via their web browser, and<br />
obtaining the URL of a file in their Dropbox/Public<br />
folder by right clicking on the file, then selecting to<br />
copy the URL to their clipboard. In fact, any user can<br />
do that on any desktop, but it’s a much slower<br />
process with many more steps.<br />
Until now.<br />
I recently made a Package Request in the<br />
<strong>PCLinuxOS</strong> forum for a command line utility we<br />
didn’t have in the <strong>PCLinuxOS</strong> repository. Now that<br />
the new command line utility has been graciously<br />
provided by our packagers, it’s possible to create a<br />
Custom Action in Thunar that gives Xfce users the<br />
same ability as their KDE and Gnome brethren. <strong>The</strong><br />
packager who packaged the utility seemed to be a<br />
bit puzzled by my request, and about why I wanted<br />
it. Now that the cat is out of the bag, let me show<br />
you how to do it.<br />
Step One<br />
Open Synaptic, and make sure you are fully<br />
updated. <strong>The</strong>n, search for and install the “xclip”<br />
command line utility. Don’t worry. It’s a relatively<br />
small utility and it won’t take up much space on your<br />
system. <strong>The</strong> xclip utility copies information from the<br />
command line to your desktop clipboard. That<br />
information can be whatever textual data you obtain<br />
from the command line, or it could be entire files. It’s<br />
a handy little utility that I’m sure you can find other<br />
uses for. Check out the xclip man page for a full<br />
description of its capabilities.<br />
Step Two<br />
Now, you will need to install the Dropbox command<br />
line utility, called simply dropbox.py. Being a Python<br />
script with no external dependencies, it won’t mess<br />
up your system. Follow this link and download it to<br />
the Downloads folder on your computer. <strong>The</strong> file is<br />
only 91 KiB in size.<br />
On my computer, I went to the hidden .local folder in<br />
my /home directory, and created a new folder there<br />
called “dropboxscript.” I placed a copy of<br />
dropbox.py inside that new directory. I then set the<br />
file as executable in the “Permissions” tab of the<br />
file’s property settings (see the graphic on the right).<br />
Step Three<br />
Next, we’ll make a small custom bash script to<br />
handle the calls to the dropbox.py script. Here’s the<br />
bash script that I wrote:<br />
#! /bin/bash<br />
s=`~/.local/dropboxscript/dropbox.py<br />
puburl "$1"`<br />
zenity info text="$s" && echo "$s" |<br />
xclip selection c<br />
I got my inspiration for this script from a Nautilus<br />
script that I found. As far as I know, Thunar can’t just<br />
use Nautilus scripts without alteration. So, I set out<br />
to alter the original Nautilus script so that I could use<br />
it with Thunar.<br />
Of course, the first line identifies the script as a bash<br />
file. <strong>The</strong> second line feeds the results of the call to<br />
dropbox.py into the variable named “s.” Notice that I<br />
have pointed the bash script to the folder where I<br />
stored a copy of dropbox.py. <strong>The</strong> third line displays<br />
the result of the call to dropbox.py in a Zenity dialog<br />
box, and then uses xclip to copy that result to your<br />
desktop clipboard.<br />
I stored the bash script as puburl.sh in my /usr/bin<br />
directory. Don’t f<strong>org</strong>et that you can only write files to<br />
the /usr/bin directory as the root user. (Hint: save a<br />
copy somewhere in your /home directory, then copy<br />
the file to your /usr/bin directory as root). Don’t f<strong>org</strong>et<br />
<strong>PCLinuxOS</strong> <strong>Magazine</strong> Page 35
to set the file as executable in the “Permissions” tab<br />
of the file’s property settings.<br />
Step Four<br />
Now we need to set up the Thunar custom action. If<br />
you’ve never created a Custom Action in Thunar,<br />
never fear – it’s relatively easy. Here’s a quick<br />
review. First, select the “Edit > Configure custom<br />
actions...” menu in Thunar. This will display the<br />
dialog box below.<br />
Of course, you can see that I already have the<br />
Dropbox URL custom action set up. You will need to<br />
select the “+” button at the top of the row of buttons<br />
on the right to create a new custom action in Thunar.<br />
This will bring up a dialog box similar to the one at<br />
the top of the next column.<br />
Fill in the fields as I have done in the image above.<br />
On the top line, type in a brief name for your new<br />
custom action. This is the text that will show up in<br />
the Thunar context menu. On the second line, type<br />
in a more descriptive phrase for your custom action.<br />
On the third line, type in the command you want to<br />
run. Notice that we are passing the Thunar<br />
command parameter “%f” as part of the command<br />
we want to run. <strong>The</strong> parameters are listed in the<br />
bottom half of the dialog box. Finally, click on the<br />
icon and select your own custom icon for the new<br />
custom action. DO NOT click on OK – yet. You now<br />
need to click on the “Appearance Conditions” tab at<br />
the top of the dialog box.<br />
In the “File Pattern” line, type a single asterisk (“*”).<br />
<strong>The</strong>n, click on each of the check boxes to place a<br />
checkmark in every one of the appearance<br />
conditions. NOW you can click on the “OK” button.<br />
You will be taken back to the first dialog box. Select<br />
the “Close” button. Your new custom action will now<br />
appear at the bottom of the context menu when you<br />
right click on a file in Thunar.<br />
Putting It To Use<br />
Thanks to the dropbox.py script, it knows if you are<br />
in Dropbox’s Public folder or not. If you click on a file<br />
Thunar Custom Action For Dropbox Public URL<br />
NOT in your Dropbox/Public folder, you will receive<br />
the Zenity dialog box below.<br />
However, if you click on a file that IS in your<br />
Dropbox/Public folder, the public URL for that file will<br />
be displayed in the Zenity dialog box (image, top of<br />
next page).<br />
<strong>PCLinuxOS</strong> <strong>Magazine</strong> Page 36
In either case, the text displayed in the Zenity dialog<br />
box is copied to your desktop clipboard when you<br />
select the “OK” button. I suppose the script could be<br />
enhanced to not copy the error message to the<br />
clipboard, but it works well enough for me, as is. I<br />
tend to subscribe to the K.I.S.S. principle – Keep It<br />
Super Simple.<br />
Now, all that’s left is to paste the URL to your file in<br />
the Dropbox/Public directory from your clipboard into<br />
your email, chat client or instant messenger window<br />
to share the file.<br />
Too Good To Be True?<br />
Unfortunately, it was recently announced that new<br />
accounts created after July 31, 2012 will no longer<br />
have a “Public” folder. While you could create a new<br />
folder in your Dropbox folder called “Public,” it won’t<br />
have the same functionality as the Public folder<br />
created by the Dropbox installation. I first discovered<br />
this news from this entry on the Scripting News<br />
website. I confirmed it by checking at the Dropbox<br />
help site. No reasons or explanation for the change<br />
has been offered, and there’s only speculation as to<br />
the reason for the change at the Scripting News<br />
website. Current users will be allowed to retain their<br />
“Public” folders and all the functionality it now<br />
possesses – for now.<br />
<strong>The</strong> resulting change will allow users to share links<br />
to any file in any of your Dropbox folders – even<br />
links to entire folders. However, the dropbox.py<br />
script, as it’s currently written, will only work with the<br />
Dropbox/Public folder as it is created by and setup<br />
by the current Dropbox installation.<br />
Hopefully, someone will update the dropbox.py<br />
script to support the new change that allows users to<br />
obtain a link to any file in any of your Dropbox<br />
folders. Once that happens, the dropbox.py script<br />
will have even greater appeal and functionality. Until<br />
then, you can still use the laborious method of<br />
logging into the Dropbox website and right clicking<br />
on files in “other” directories to obtain the URL of a<br />
particular file or directory to share with others. It may<br />
take a while for the dropbox.py to be updated, since<br />
someone will have to figure out how to calculate the<br />
hash values that Dropbox applies to the files and<br />
folders when creating the link URLs.<br />
Fortunately, this custom action – as well as the right<br />
click context menu items in KDE and Gnome – will<br />
continue to work with the Dropbox/Public folder, just<br />
so long as you are either a current Dropbox user, or<br />
just so long as you sign up for your Dropbox account<br />
before July 31, 2012. Again, for the time being, the<br />
functionality of the Dropbox/Public folder will remain<br />
intact for the aforementioned users.<br />
Summary<br />
Now, thanks to this relatively simple Thunar custom<br />
action addition, Xfce users can enjoy the same<br />
convenience feature as their KDE and Gnome<br />
cousins. Of course, the whole thing is possible,<br />
thanks to the xclip utility. It allows us an<br />
exceptionally easy way to get the necessary<br />
information to our desktop clipboard.<br />
Summer Fairy<br />
Edition<br />
Black Myst<br />
Edition<br />
Thunar Custom Action For Dropbox Public URL<br />
Barebones<br />
Laptop Edition<br />
Disclaimer<br />
1. All the contents of <strong>The</strong> <strong>PCLinuxOS</strong> <strong>Magazine</strong> are only for general<br />
information and/or use. Such contents do not constitute advice<br />
and should not be relied upon in making (or refraining from<br />
making) any decision. Any specific advice or replies to queries in<br />
any part of the magazine is/are the person opinion of such<br />
experts/consultants/persons and are not subscribed to by <strong>The</strong><br />
<strong>PCLinuxOS</strong> <strong>Magazine</strong>.<br />
2. <strong>The</strong> information in <strong>The</strong> <strong>PCLinuxOS</strong> <strong>Magazine</strong> is provided on an<br />
"AS IS" basis, and all warranties, expressed or implied of any<br />
kind, regarding any matter pertaining to any information, advice<br />
or replies are disclaimed and excluded.<br />
3. <strong>The</strong> <strong>PCLinuxOS</strong> <strong>Magazine</strong> and its associates shall not be liable,<br />
at any time, for damages (including, but not limited to, without<br />
limitation, damages of any kind) arising in contract, rot or<br />
otherwise, from the use of or inability to use the magazine, or any<br />
of its contents, or from any action taken (or refrained from being<br />
taken) as a result of using the magazine or any such contents or<br />
for any failure of performance, error, omission, interruption,<br />
deletion, defect, delay in operation or transmission, computer<br />
virus, communications line failure, theft or destruction or<br />
unauthorized access to, alteration of, or use of information<br />
contained on the magazine.<br />
4. No representations, warranties or guarantees whatsoever are<br />
made as to the accuracy, adequacy, reliability, completeness,<br />
suitability, or applicability of the information to a particular<br />
situation. All trademarks are the property of their respective<br />
owners.<br />
5. Certain links on the magazine lead to resources located on<br />
servers maintained by third parties over whom <strong>The</strong> <strong>PCLinuxOS</strong><br />
<strong>Magazine</strong> has no control or connection, business or otherwise.<br />
<strong>The</strong>se sites are external to <strong>The</strong> <strong>PCLinuxOS</strong> <strong>Magazine</strong> and by<br />
visiting these, you are doing so of your own accord and assume<br />
all responsibility and liability for such action.<br />
Material Submitted by Users<br />
A majority of sections in the magazine contain materials submitted by<br />
users. <strong>The</strong> <strong>PCLinuxOS</strong> <strong>Magazine</strong> accepts no responsibility for the<br />
content, accuracy, conformity to applicable laws of such material.<br />
Entire Agreement<br />
<strong>The</strong>se terms constitute the entire agreement between the parties with<br />
respect to the subject matter hereof and supersedes and replaces all<br />
prior or contemporaneous understandings or agreements, written or<br />
oral, regarding such subject matter.<br />
<strong>PCLinuxOS</strong> <strong>Magazine</strong> Page 37
y Meemaw<br />
So, I’m at work, creating mailing labels for some<br />
postcards, using LibreOffice. It’s giving me trouble,<br />
too, kicking out a blank label sheet after every sheet<br />
printed. I find myself wishing I had gLabels on my<br />
Windows7 computer, because the process is easier<br />
in gLabels. I actually have VirtualBox installed at<br />
work and have two or three virtual desktops of<br />
<strong>PCLinuxOS</strong>. However, if I enable the printer in<br />
VBox, it is disabled and won’t work in Win7.<br />
I end up using LibreOffice in Win7 and putting up<br />
with the extra pages. If you don’t do many labels,<br />
this is the procedure in LibreOffice. After you have<br />
your label information in a spreadsheet, you save it<br />
and create a new database in LO, designating your<br />
spreadsheet as a database. Second, create a new<br />
document (choose New > Labels) in LO, and<br />
arrange the fields you need from your designated<br />
database. Next, choosing Tools > Mail Merge<br />
Wizard, proceed through the steps to merge your<br />
database into your label pages. After you merge and<br />
save, then you print your labels. This is when LO<br />
doubles the number of pages needed and kicks out<br />
a blank page after every printed one. <strong>The</strong>re’s got to<br />
be a better way!!!<br />
In gLabels, you save your spreadsheet as a .csv file<br />
to use. After designating your .csv file in gLabels,<br />
you add merge fields, arrange the fields where you<br />
want them, and print the labels.<br />
It would have been nice to do that, but I still have the<br />
printer problem I mentioned above.<br />
While I’m ranting about it in IRC, it is suggested to<br />
me that a pdf would be a much easier document to<br />
print...<br />
Labels, Anyone?<br />
Wow!!! I can do that!<br />
In LibreOffice, I save my merged labels, but instead<br />
of printing them from there, I choose “Export Directly<br />
as PDF” from the toolbar. When I pull up the<br />
document, it is the correct number of pages and can<br />
be printed from my pdf reader. (<strong>The</strong> example is only<br />
2 pages.)<br />
In gLabels, I save my labels,<br />
and choose “Print”.<br />
However, it is possible to<br />
“Print to File”, so I choose<br />
that instead, designate I<br />
want the file to be a pdf and<br />
name the file. When I click<br />
“Print” the pdf is created.<br />
This can be done with personal address labels as<br />
well.<br />
I have several mailing locations that I use all the<br />
time and I have sheets of identical labels for them.<br />
I have now saved each sheet of labels as a pdf so<br />
I can print it any time I need a new sheet.<br />
<strong>PCLinuxOS</strong> <strong>Magazine</strong> Page 38
Looking for an old article?<br />
Can't find what you want? Try the<br />
<strong>PCLinuxOS</strong> <strong>Magazine</strong>'s<br />
searchable index!<br />
A magazine just isn't a magazine<br />
without articles to fill the pages.<br />
If you have article ideas, or if you<br />
would like to contribute articles to the<br />
<strong>PCLinuxOS</strong> <strong>Magazine</strong>,<br />
send an email to:<br />
pclinuxos.mag@gmail.com<br />
We are interested in general articles<br />
about Linux, and (of course), articles<br />
specific to <strong>PCLinuxOS</strong>.<br />
Screenshot Showcase<br />
Posted by ferry_th, June 4, 2012, running Openbox.<br />
<strong>PCLinuxOS</strong> <strong>Magazine</strong> Page 39
y AndrzejL<br />
Yes, yes, yes. I know … Linux does not need<br />
antivirus software. True. BUT then – if you are dual<br />
booting with Windows, you may want to be able to<br />
check the other OS once in a while for<br />
rootkits/malware/spyware/rougeware/viruses and so<br />
on and so forth. Even if you are not dual booting,<br />
another way of using this would be to use your<br />
remaster to check your computers at home that are<br />
using Windows from the LiveCD/LiveDVD level.<br />
Seems useful, right? You can access the Windows<br />
partitions with read/write permissions under your<br />
<strong>PCLinuxOS</strong>. Nastiness cannot hide itself from the<br />
antivirus with a few entries in the registry. Sounds<br />
really good. So how does one install Avast on the<br />
<strong>PCLinuxOS</strong>?<br />
First, we need to download a copy of it. It’s legal and<br />
free, if you are using it at home on noncommercial<br />
machines. For more info read the Terms and<br />
Conditions.<br />
Open your favorite terminal and issue this command<br />
(all on one line):<br />
wget c<br />
http://files.avast.com/files/linux/ava<br />
st4workstation1.3.01.i586.rpm<br />
Now wait for it to finish downloading.<br />
Installing Avast Antivirus<br />
Home Edition on <strong>PCLinuxOS</strong><br />
Done, right?<br />
Now, you need to gain root privileges. Issue this<br />
command:<br />
su<br />
Enter the root password when asked.<br />
Now, for the installation part issue this command:<br />
aptget install avast4workstation<br />
1.3.01.i586.rpm<br />
and wait for it to finish.<br />
<strong>PCLinuxOS</strong> <strong>Magazine</strong> Page 40<br />
Done?<br />
Great. Now issue those two commands:<br />
echo '' >> /etc/rc.local
echo 'echo 128000000<br />
>/proc/sys/kernel/shmmax' >><br />
/etc/rc.local<br />
Done?<br />
Close the Konsole<br />
window and go to<br />
Kmenu. (Ed. Note: If<br />
you are using<br />
something other than<br />
KDE, you can search<br />
for applications.) Type<br />
ava in the search box.<br />
<strong>The</strong>re you go. That’s your Avast Antivirus. Click in it.<br />
<strong>The</strong> registration box will popup.<br />
Click on the “Click here to obtain registration key”<br />
link. You can choose what browser you want to use.<br />
Fill out registration form correctly and wait for the email<br />
from Avast with your product key.<br />
Installing Avast Antivirus Home Edition on <strong>PCLinuxOS</strong><br />
Copy and paste the registration key into the<br />
Registration window and click OK.<br />
You have just installed Avast Home Edition for Linux<br />
workstations.<br />
Close the avast window and reboot your machine.<br />
When it’s fully rebooted open Avast and<br />
upgrade/configure it to your liking.<br />
<strong>PCLinuxOS</strong> <strong>Magazine</strong> Page 41
Avast does not have to be installed on KDE4. It can<br />
be installed on any other DE available with<br />
<strong>PCLinuxOS</strong>. If you want to, you can scan the files<br />
from the command line. Type in<br />
avast help<br />
for more details and the command syntax.<br />
Avast configuration files and viruses database are<br />
stored in the ~/.avast folder.<br />
If the menu entry was not created and you are<br />
planning on creating your own launcher use:<br />
avastgui<br />
in the command box.<br />
Icons are available here:<br />
/usr/lib/avast4workstation/share/avast<br />
/icons/<br />
<strong>The</strong>n, look for the file<br />
.bashrc, and open it<br />
with kwrite. Look for<br />
this line:<br />
alias su='su '<br />
If you follow this howto and you get<br />
E: Couldn't find package<br />
avast4workstation1.3.01. i586.rpm<br />
error, then open Dolphin in your<br />
/home/login directory. Go to View ><br />
Show Hidden Files (make sure it’s<br />
ticked),<br />
Put a comment in front of that line # so it looks<br />
somewhat like this:<br />
# alias su='su '<br />
Save the file.<br />
Reboot. Redo the howto from step one. It should<br />
work without problem for you now.<br />
Special thanks for this solution by OldPolack..<br />
Installing Avast Antivirus Home Edition on <strong>PCLinuxOS</strong><br />
Want to keep up on the latest that's<br />
going on with <strong>PCLinuxOS</strong>?<br />
Follow <strong>PCLinuxOS</strong> on Twitter!<br />
http://twitter.com/iluvpclinuxos<br />
It's easier than E=mc2<br />
It's elemental<br />
It's light years ahead<br />
It's a wise choice<br />
It's Radically Simple<br />
It's ...<br />
<strong>PCLinuxOS</strong> <strong>Magazine</strong> Page 42
Install & Configure ProFTPD On <strong>PCLinuxOS</strong><br />
by D. Moore (YouCanToo)<br />
This howto focuses on how to setup and configure<br />
a ProFTPD server on your <strong>PCLinuxOS</strong> based<br />
computer. <strong>The</strong> ProFTPD stands for “Professional<br />
FTP Daemon”.<br />
Installing ProFTPD on <strong>PCLinuxOS</strong><br />
Open the Synaptic Package Manager and do a<br />
search for proftpd.<br />
Mark it for installation.<br />
NOTE: If you have any other ftpd service installed, it<br />
will be removed.<br />
Click apply, and then click apply again. Now<br />
Synaptic will install ProFTPD. When finished click<br />
"Close" and then close Synaptic.<br />
How to configure ProFTPD<br />
We need to edit the proftpd config file. In your<br />
favorite text editor as the root user, open the<br />
/etc/proftpd.conf file.<br />
We need to change the following options.<br />
We should change the ftp server display name.<br />
ServerName "ProFTPD Default Installation"<br />
Example:<br />
ServerName "brainiac"<br />
Make sure all ftp users are "jailed" within their own<br />
directory. No snooping allowed!<br />
#DefaultRoot ~<br />
Uncomment this line and change to to read:<br />
DefaultRoot ~<br />
Now save your configuration file and exit your text<br />
editor.<br />
Our basic configuration is now complete<br />
Now we need to start our proftpd service. In a<br />
console window as root, enter the following<br />
command:<br />
service proftpd start<br />
You should see something like this:<br />
[root@laptop etc]# service proftpd start<br />
Starting proftpd [ OK ]<br />
[root@laptop etc]#<br />
If you see [ FAILED ], go back and double check your<br />
work, and try again.<br />
Congratulations if you got the "OK.” Your ftp server<br />
is up and running.<br />
Adding a new ftpuser<br />
By default, the proftpd daemon reads the host's<br />
/etc/passwd file for logging in users. This means that<br />
to add FTP users, you simply need to create new<br />
system accounts for those users in your /etc/passwd<br />
file.<br />
In a console window as root enter in the following<br />
(all on one line):<br />
adduser d<br />
/path/to/the/ftpuser/home/directory s<br />
/usr/bin/bash ftpuser*<br />
where *ftpuser is the ftpusers name.<br />
EXAMPLE: <br />
[root@laptop etc]# adduser d<br />
/home/mastermid s /usr/bin/bash mastermind<br />
[root@laptop etc]#<br />
Setup a password for the ftpuser:<br />
passwd ftpuser*<br />
where *ftpuser is the name of the user.<br />
<strong>PCLinuxOS</strong> <strong>Magazine</strong> Page 43
EXAMPLE: <br />
[root@laptop etc]# passwd mastermind<br />
Changing password for user mastermind.<br />
New password:<br />
Retype new password:<br />
passwd: all authentication tokens updated<br />
successfully.<br />
[root@laptop etc]#<br />
NOTE: the password is not echoed to the screen.<br />
That's it folks. Your new ftp server awaits your every<br />
command.<br />
For those using Webmin, you will need to download<br />
and install the proftpd module. Log into your webmin<br />
admin page and click on the "webmin" tab and then<br />
select "Webmin Configuration."<br />
In the main screen click on "Webmin Modules."<br />
Now, mark the “Standard module from” and enter<br />
proftpd. <strong>The</strong>n click the “Install Module” button.<br />
Webmin will now download and install the ProFTPD<br />
module for you.<br />
Install & Configure ProFTPD On <strong>PCLinuxOS</strong><br />
Now in the left hand pane, click on the "Unused"<br />
Modules and then click on "ProFTPD Server"<br />
Webmin will tell you that it can not be loaded, click<br />
on "Module Config"<br />
You will need to make the following changes to the<br />
configuration.<br />
Test config file after manual changes? Select<br />
YES<br />
Path to ProFTPD config file /etc/proftpd.conf<br />
Path to ProFTPD executable /usr/sbin/proftpd<br />
Path to ProFTPD PID file /usr/var/proftpd.pid<br />
Now click on save and you should see the global<br />
configuration GUI.<br />
<strong>PCLinuxOS</strong> <strong>Magazine</strong> Page 44
If you did not make the changes to the ProFTPD<br />
config file earlier in this HowTo, you can make them<br />
by clicking on the "Edit Config Files" icon. You can<br />
start and stop the ftp server by scrolling to the<br />
bottom of the window and clicking on the "Start<br />
Server" or "Stop Server" button.<br />
For more detailed information about ProFTPD or<br />
different ProFTPD server configurations, visit their<br />
website at http://www.proftpd.<strong>org</strong>/.<br />
Install & Configure ProFTPD On <strong>PCLinuxOS</strong><br />
Screenshot Showcase<br />
Posted by T6, June 3, 2012, running KDE4.<br />
<strong>PCLinuxOS</strong> <strong>Magazine</strong> Page 45
ms_meme's Nook: Tra La La PCLOS<br />
It's early in the morning from my bed I flop<br />
And boot up my 'puter to see my desktop<br />
<strong>The</strong>n my screen fills with color a beautiful blue<br />
And Dobie the bull is waiting there too<br />
It's late in the evening and I never stop<br />
<strong>From</strong> gidgets to gadgets I hip and I hop<br />
I look in the menu for all that is new<br />
I never am lacking for something to do<br />
Tralala tweedlee dee dee<br />
Oh I have been blessed<br />
With an OS that gives me such finesse<br />
Tralala tweedlee dee dee<br />
I'm here to profess<br />
I run the best system<br />
It's PCLOS<br />
MP3 OGG<br />
It's fun to use Gimp my pictures to crop<br />
Never out of space 'cause I have dear swap<br />
<strong>The</strong>n on to Synaptic when I am through<br />
To get all the updates oops I'm overdue<br />
It's made by Texstar he is the top<br />
Always is free I never had to shop<br />
I go to the forum and meet all the crew<br />
And for all their help I say a big thank you<br />
<strong>PCLinuxOS</strong> <strong>Magazine</strong> Page 46
y AndrzejL<br />
Create ISO from a DVD or CD Drive<br />
Sometime ago I created a slideshow video from a<br />
collection of wedding photos for a friendly couple. I<br />
made DVD video with nice background music out of<br />
it and gave it to them as an anniversary gift. I used<br />
xsane/Imagination/mencoder/avidemuxqt/devede/K3B<br />
to accomplish this – all of which are<br />
available in <strong>PCLinuxOS</strong> repositories, just in case<br />
you wondered. I wanted to keep a backup of this<br />
DVD on my HDD in a ISO file format, just in case<br />
they asked for another copy.<br />
How would I create ISO file from a CD/DVD media?<br />
Its VERY simple. Use the dd command. This is how<br />
it’s done:<br />
Assuming that:<br />
A) Your system identifies the CD/DVD drive as<br />
/dev/sr0.<br />
B) Your destination folder is based in your home<br />
folder.<br />
C) <strong>The</strong> filename you want to use is file.iso.<br />
Open a terminal and issue this command, followed<br />
by [ENTER] key:<br />
dd if=/dev/sr0 of=~/file.iso<br />
Where:<br />
if=/dev/sr0 means read from /dev/sr0 (raw format)<br />
of=~/file.iso means copy the media to a file named<br />
file.iso located in your /home/user/ folder i.e. backup<br />
media to ISO image.<br />
Now you can, for example:<br />
A) Burn the ISO to a CD/DVD to make extra copies,<br />
using K3B/Brasero/SimpleBurn, or any other optical<br />
disc writing application.<br />
B) If it’s, let’s say a Linux LiveCD, you can use ISO<br />
to boot it in VirtualBox (also available in <strong>PCLinuxOS</strong><br />
repositories).<br />
C) Do many other things with it.<br />
I hope this helps.<br />
Connect<br />
All your<br />
<strong>PCLinuxOS</strong><br />
connections in one<br />
convenient location!<br />
<strong>PCLinuxOS</strong> <strong>Magazine</strong> Page 47
Top: Posted by LKJ, June 11, 2012, running Gnome.<br />
Bottom: Posted by GermanTux, June 3, 2012, running Xfce.<br />
More Screenshot Showcase<br />
Top: Posted by Ramchu, June 9, 2012, running KDE4.<br />
Bottom: Posted by Crow, June 18, 2012, running KDE4.<br />
<strong>PCLinuxOS</strong> <strong>Magazine</strong> Page 48