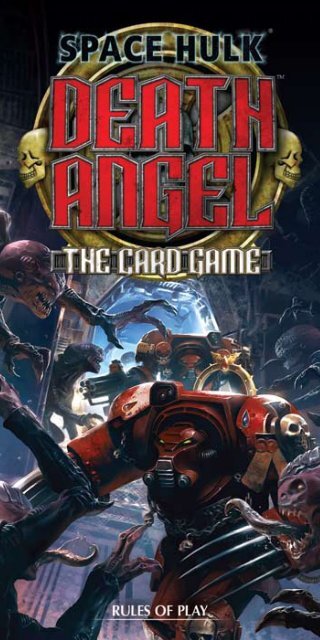
rules for Space Hulk: Death Angel - The Card - Fantasy Flight Games
rules for Space Hulk: Death Angel - The Card - Fantasy Flight Games
rules for Space Hulk: Death Angel - The Card - Fantasy Flight Games

Create successful ePaper yourself
Turn your PDF publications into a flip-book with our unique Google optimized e-Paper software.
2<br />
Enter the <strong>Space</strong> <strong>Hulk</strong><br />
++In c o m I n g TransmIssIon LeveL Red ++<br />
Bl o o d An g e l s Mission Briefing 7362-1<br />
Br o t h e r se r g e A n t lo r e n z o:<br />
AsseMBle yo u r te r M i nAt o r s q u A d A n d AssAult s pA c e h u l k ++sin<br />
o f dA M n At i o n++ v i A B o A r d i n g t o r p e d o. ex t r e M e genesteAler<br />
infestAtion A B oA r d. yo u r o B j e c t i v e is to destroy t h e f o r w A r d<br />
l A u n c h c o n t r o l r o o M s. ex p e c t h e Av y resistAnce.<br />
estiMAtes: 44% c h A n c e o f Mission success w i t h 86% s q u A d<br />
cA s u A lt i e s<br />
++En d TransmIssIon++<br />
“Fifty metres down this corridor to the launch control<br />
ante-chamber, Brother Sergeant. We should be able<br />
to reach the control rooms through there. No signs of<br />
hostiles detected.” Brother Omnio’s auspex retracted<br />
into his power fist as he finished his scan.<br />
“Very well,” Sergeant Lorenzo nodded. “Brothers, we<br />
advance. I shall take point, Brother Goriel is rearguard.”<br />
<strong>The</strong> squad moved without hesitation, massive sets<br />
of Tactical Dreadnought Armour filling the narrow<br />
passageway. <strong>The</strong> Terminators’ size <strong>for</strong>ced them to<br />
proceed single-file down the corridor. Lorenzo led, his<br />
crackling power sword held ready while he quickly and<br />
methodically checked each side passage <strong>for</strong> signs of<br />
the foe.<br />
“I am suspicious, Brother Sergeant,” Brother Zael spoke<br />
quietly over his auspex. “<strong>The</strong>re should be xenos here.<br />
Why leave a vital location without defences?”<br />
“Who can understand a beastial xenos mind?” Lorenzo<br />
responded. “Beware the thoughts of the alien, Brother.”<br />
<strong>The</strong>y had almost reached the ante-chamber when<br />
Brother Omnio’s auspex began pinging. <strong>The</strong> squad<br />
immediately froze. “One contact, unclear signal<br />
strength. Ten metres and closing.”<br />
“Direction?” Lorenzo’s eyes narrowed and he raised his<br />
storm bolter to cover the empty corridor in front of him.<br />
“...directly in front of us,” Omnio said slowly as he<br />
checked his auspex. “Five metres.”<br />
“I see nothing,” Brother Deino growled, his weapon’s<br />
optical sight probing a side passage.
“One metre...”<br />
“<strong>The</strong>y are beneath us!” Lorenzo yelled.<br />
Without hesitating, he levelled his storm bolter. <strong>The</strong> deck<br />
exploded and shattered as he pulled the trigger, revealing<br />
dozens of blood thirsty Genestealers scrambling towards<br />
him from the dark passageway below.<br />
Lorenzo held the trigger down, scything the bolts back<br />
and <strong>for</strong>th as the deck plating gave away below him and<br />
he tumbled <strong>for</strong>ward. He sank into the crawlspace up to<br />
his waist, clutched at by alien talons. Even as his sword<br />
hewed through the genestealers in a blizzard of limbs<br />
and ichor, their claws lashed out, drawing deep gouges<br />
through his armour.<br />
He lifted his sword, and his voice roared over the<br />
constant thunder of the storm bolters. “By our fury, they<br />
shall know the Emperor’s name! Forward, <strong>for</strong> Sanguinius<br />
and the Red Grail!”<br />
3
4<br />
Introduction<br />
In <strong>Space</strong> <strong>Hulk</strong>: <strong>Death</strong> <strong>Angel</strong> – the <strong>Card</strong> Game,<br />
one to six players take control of a squad of Blood<br />
<strong>Angel</strong>s <strong>Space</strong> Marines and venture deep into a<br />
massive <strong>Space</strong> <strong>Hulk</strong> to eliminate the Genestealer<br />
threat. <strong>Death</strong> <strong>Angel</strong> is unique in the fact that it is a<br />
co-operative game, that is, all players win or lose<br />
the game together!<br />
Unless stated otherwise, this rulebook assumes that<br />
you are playing with four or more players. Rules<br />
<strong>for</strong> one to three players are slightly different and<br />
described on page 30.<br />
Component List<br />
• This Rulebook<br />
• 128 cards consisting of:<br />
- 18 Action <strong>Card</strong>s<br />
- 2 Brood Lord <strong>Card</strong>s<br />
- 30 Event <strong>Card</strong>s<br />
- 36 Genestealer <strong>Card</strong>s<br />
- 22 Location <strong>Card</strong>s<br />
- 12 <strong>Space</strong> Marine <strong>Card</strong>s<br />
- 8 Terrain <strong>Card</strong>s<br />
• 12 Support Tokens<br />
• 6 Combat Team Markers<br />
•<br />
1 Combat Die
Component<br />
Breakdown<br />
Action <strong>Card</strong>s<br />
<strong>The</strong>se cards are used by players<br />
to per<strong>for</strong>m a number of activities<br />
with their <strong>Space</strong> Marines. This<br />
includes attacking Genestealers,<br />
moving to more strategic positions,<br />
and supporting their battle-brothers<br />
in combat. <strong>The</strong>se cards are colour<br />
coded, with three cards matching the colour of each<br />
combat team.<br />
Brood Lord <strong>Card</strong>s<br />
<strong>The</strong>se Genestealers are deadlier<br />
than normal Genestealers.<br />
<strong>The</strong>y are never shuffled into the<br />
Genestealer deck and are only<br />
used when instructed by a special<br />
Location card.<br />
Event <strong>Card</strong>s<br />
One of these cards is drawn<br />
each game round, and<br />
represents thematic effects that<br />
can benefit or harm the <strong>Space</strong><br />
Marines. <strong>The</strong> in<strong>for</strong>mation on the<br />
bottom of these cards is used to<br />
move Genestealers and spawn new<br />
ones into play.<br />
Genestealer <strong>Card</strong>s<br />
<strong>The</strong>se cards are used to represent<br />
hostile creatures that want nothing<br />
more than to rip <strong>Space</strong> Marines<br />
into tiny bits. <strong>The</strong>y can be placed<br />
face down in a blip pile, or face up<br />
engaged with a <strong>Space</strong> Marine card.<br />
5
6<br />
Location <strong>Card</strong>s<br />
<strong>The</strong>se cards represent the different<br />
places within the <strong>Space</strong> <strong>Hulk</strong> that<br />
<strong>Space</strong> Marines can travel to. Each<br />
Location has different effects and<br />
terrain which greatly changes the<br />
feel of the game. Three of these cards are destinations<br />
which the <strong>Space</strong> Marines need to reach in order to win<br />
the game while four others are used during setup.<br />
<strong>Space</strong> Marine <strong>Card</strong>s<br />
<strong>The</strong>se cards represent an elite<br />
squad of <strong>Space</strong> Marines which<br />
players control throughout the<br />
game. <strong>The</strong> coloured background<br />
of each of these cards is used to<br />
identify which combat team it belongs to.<br />
Terrain <strong>Card</strong>s<br />
<strong>The</strong>se cards are placed next to<br />
<strong>Space</strong> Marine cards as instructed<br />
by Location cards. <strong>The</strong>y mark<br />
the specific positions where<br />
Genestealers may spawn, and<br />
may have specific abilities listed on them.<br />
Support Tokens<br />
<strong>The</strong>se tokens represent the combined fire<br />
and aid that <strong>Space</strong> Marines provide <strong>for</strong><br />
each other, and are used to reroll a die<br />
when attacking or defending.<br />
Combat Team Markers<br />
<strong>The</strong>se markers are chosen by each player<br />
at the start of the game to show which<br />
colour(s) of <strong>Space</strong> Marines are under his control.<br />
Combat Die<br />
This die is mainly used to determine the result<br />
of <strong>Space</strong> Marine and Genestealer attacks.
Setup<br />
Be<strong>for</strong>e playing a game of <strong>Death</strong> <strong>Angel</strong>, players must<br />
per<strong>for</strong>m the following steps in order:<br />
1. Setup decks: Shuffle the Genestealer deck and<br />
Event deck separately, and place them at the top of<br />
the play area within easy reach of all players.<br />
2. Setup Starting Location: Find the Setup<br />
Location card <strong>for</strong> the appropriate number of<br />
players (printed on the card), and place it in the<br />
centre of the play area.<br />
3. Setup Location deck: Shuffle each numbered<br />
deck of Location cards separately. <strong>The</strong>n create a<br />
deck of random face down Location cards based<br />
upon the instructions on the “Setup” Location<br />
card. For example, if the card lists “1C 2<br />
3 4”, the players would create a deck of four<br />
Location cards, with a random “4” Location card<br />
on the bottom and a random “1C” Location card<br />
on the top. This deck will be used when players<br />
travel to new locations (see page 25).<br />
4. Choose Combat Teams: Starting with a<br />
random player and proceeding clockwise, each<br />
player chooses a Combat Team Marker. If playing<br />
with three or less players, proceed around the<br />
table more than once (see page 30).<br />
Each player keeps his chosen Combat Team<br />
Marker(s) face up in front of himself to in<strong>for</strong>m all<br />
players which colour <strong>Space</strong> Marines are under his<br />
control. Each player then gains all Action cards<br />
matching his combat team(s) to <strong>for</strong>m his hand of<br />
Action cards.<br />
Return all unused Combat Team Markers to the<br />
game box along with each <strong>Space</strong> Marine and<br />
Action card matching its colour. <strong>The</strong>se markers<br />
and cards will not be used during this game.<br />
7
8<br />
5. Setup Formation: Take all <strong>Space</strong> Marine cards<br />
matching all players’ Combat Team Markers and<br />
shuffle them thoroughly. Since these cards show<br />
in<strong>for</strong>mation on both sides, they should be shuffled<br />
under the table or cut by one player after shuffling.<br />
<strong>The</strong>n deal out one <strong>Space</strong> Marine card at a time,<br />
starting just below the Setup Location card, to<br />
<strong>for</strong>m a vertical line of <strong>Space</strong> Marine cards (see<br />
diagram on page 9). This line of cards is known as<br />
the f o r m a T I o n.<br />
<strong>The</strong> cards on the top half of the <strong>for</strong>mation are<br />
flipped so that they are fa c In g left (see “Facing and<br />
Range” on page 19), while the other half are flipped<br />
to face to the right. <strong>The</strong>re<strong>for</strong>e in a four player game,<br />
the top four <strong>Space</strong> Marine cards are flipped to face<br />
towards the left, while the bottom four are flipped<br />
to face towards the right (see diagram on page 9).<br />
6. Place Support Tokens: Place all Support<br />
Tokens and in a common pile easy reach of<br />
all players.<br />
7. Setup Terrain <strong>Card</strong>s and Blip Piles: Terrain<br />
cards are set up according to the Setup Location<br />
card (see “Place Terrain <strong>Card</strong>s” on page 26).<br />
<strong>The</strong>n place a number of Genestealer cards face<br />
down in each blip pile adjacent to the Setup<br />
Location card (as listed on the Setup Location card<br />
– see “Blip Piles” on page 20).<br />
8. Spawn Starting Genestealers: Draw the top<br />
card of the Event deck, and spawn Genestealers<br />
as listed on the activation area of the card (see<br />
“Spawning Genestealers” on page 21). All other<br />
in<strong>for</strong>mation on this card is ignored. <strong>The</strong>n discard<br />
this card.<br />
After each player has drawn his Action cards, players<br />
begin the game by proceeding to the first game round.
Setup Diagram<br />
(4 player game)<br />
9<br />
10<br />
1<br />
4<br />
7<br />
7<br />
11<br />
1. Genestealer Deck<br />
2. Location Deck<br />
3. Event Deck<br />
4. Left Blip Pile<br />
5. Setup Location <strong>Card</strong><br />
6. Right Blip Pile<br />
7. Terrain <strong>Card</strong>s<br />
8. Pile of Unused Support Tokens<br />
9. Swarms of Genestealers<br />
10. A Player’s Combat Team Marker and Hand<br />
of Action <strong>Card</strong>s<br />
11. <strong>Space</strong> Marine <strong>Card</strong>s in the Formation<br />
2<br />
5<br />
3<br />
6<br />
8<br />
7<br />
7<br />
9<br />
9
10<br />
Object of the Game<br />
<strong>The</strong> object of the game is <strong>for</strong> the <strong>Space</strong> Marines<br />
to travel to the final Location card in the deck and<br />
fulfil the winning condition listed on the card.<br />
Players can also win by eliminating all Genestealers<br />
in the <strong>for</strong>mation and in both blip piles while at the<br />
final Location. As soon as they fulfil one of these<br />
conditions, all players win the game.<br />
If all <strong>Space</strong> Marines are slain be<strong>for</strong>e attaining<br />
victory, all players lose the game. In the odd<br />
circumstance that the last <strong>Space</strong> Marine is slain at<br />
the exact same time that the players fulfil <strong>Space</strong><br />
Marine victory, the players win!<br />
Playing the Game<br />
This section describes the basic <strong>rules</strong> <strong>for</strong> playing<br />
<strong>Death</strong> <strong>Angel</strong>, mostly focusing on the phases of a<br />
game round.<br />
A Game Round<br />
<strong>Death</strong> <strong>Angel</strong> is played over a number of game<br />
rounds until either all <strong>Space</strong> Marines have been<br />
slain or they have won the game. During each game<br />
round, players per<strong>for</strong>m the following phases in order:<br />
1. Choose Actions Phase: Each player secretly<br />
chooses which Action card he would like to<br />
resolve this round.<br />
2. Resolve Actions Phase: Each player resolves<br />
the Action card that he chose during phase 1.<br />
<strong>The</strong>se cards are resolved in ascending order<br />
starting with the lowest numbered card.<br />
3. Genestealer Attack Phase: Each s w a r m of<br />
Genestealers in play attacks the <strong>Space</strong> Marine<br />
that it is E n g a g E d with.<br />
event Phase:<br />
4. <strong>The</strong> c u r r E n T p l ay E r draws the top<br />
card of the Event deck and resolves it.
After resolving the “Event Phase”, players proceed<br />
to resolve a new “Choose Actions Phase”. This<br />
process continues until either all <strong>Space</strong> Marines are<br />
slain or the <strong>Space</strong> Marines have won the game.<br />
1. Choose Actions Phase<br />
During this phase, each player simultaneously<br />
chooses one Action card from his hand and places<br />
it face down in front of himself. If playing with three<br />
or fewer players, each player chooses more than one<br />
card (see page 30).<br />
A player may not choose an Action card that he<br />
resolved during the previous game round. To help<br />
remember this, players should keep chosen Action<br />
cards on the table until the end of the Choose<br />
Actions Phase of the next game round.<br />
<strong>The</strong> chosen Action card determines not only which<br />
type of Action his <strong>Space</strong> Marines will be per<strong>for</strong>ming<br />
during this round, but also the order in which<br />
players will resolve their Action cards.<br />
Players may share any in<strong>for</strong>mation they wish about<br />
the Action cards in their hand but may not show<br />
cards in their hand to other players.<br />
Example: During the Choose Actions Phase Joe<br />
tells his team mates that he would like to attack<br />
some Genestealers. However, he will only choose<br />
an Attack Action card if another player plans on<br />
supporting his <strong>Space</strong> Marine that is engaged with a<br />
swarm of Genestealers.<br />
11
12<br />
2. Resolve Actions Phase<br />
Once all players have chosen Action cards, all<br />
chosen cards are simultaneously turned face up.<br />
Each Action card is resolved once, starting with<br />
the lowest numbered card (listed in the upper<br />
left corner of the card) and proceeding upwards.<br />
<strong>The</strong>re<strong>for</strong>e, the card with the lowest number is<br />
always resolved first, followed by the card with<br />
the next highest number and so on.<br />
Action cards come in three types: su p p o r T, aT Ta c k<br />
and mo v E + ac T I vaT E. Each of the three Action card<br />
types is described in detail on pages 15–20.<br />
Action <strong>Card</strong> Special Abilities<br />
In addition to a type, each Action card has a unique<br />
special ability (listed below the type). Each special<br />
ability specifies when, during this game round, the<br />
ability may be resolved.<br />
Special abilities may be used regardless of a <strong>Space</strong><br />
Marine’s facing except when attacking or spending<br />
a Support Token to reroll a die (see “Facing and<br />
Range” on page 19). For example, the “Block”<br />
Action card’s ability may be used even when the<br />
<strong>Space</strong> Marine is attacked from behind.<br />
Special abilities that use the term “Each time” may<br />
be resolved multiple times during the game round.<br />
3. Genestealer Attack Phase<br />
After each player has resolved his Action card, each<br />
s w a r m of Genestealers attacks the <strong>Space</strong> Marine it is<br />
E n g a g E d with.<br />
A s w a r m of Genestealers is defined as all face up<br />
Genestealer cards on the same side and position of<br />
the <strong>for</strong>mation. A swarm is considered E n g a g E d with<br />
a <strong>Space</strong> Marine if it is in the same p o s I T Io n of the<br />
<strong>for</strong>mation (directly to the left or right of the <strong>Space</strong><br />
Marine card – see “<strong>The</strong> Formation” on page 15).
Starting with the swarm closest to the top of the<br />
<strong>for</strong>mation, each swarm attacks. If two swarms are in<br />
the same position, the swarm on the left side of the<br />
<strong>for</strong>mation attacks first.<br />
When a swarm attacks a <strong>Space</strong> Marine, the <strong>Space</strong><br />
Marine’s owner rolls the combat die. If he rolls a<br />
number higher than the number of Genestealer<br />
cards in the swarm, then the attack is a miss, and<br />
the <strong>Space</strong> Marine is not slain.<br />
If he rolls a number equal to or less than the<br />
number of Genestealer cards in the swarm, the<br />
<strong>Space</strong> Marine is immediately slain and the <strong>Space</strong><br />
Marine card is removed from the game (see “Slain<br />
<strong>Space</strong> Marines” on page 27).<br />
4. Event Phase<br />
After each swarm of Genestealers has attacked, the<br />
c u r r E n T p l ay E r (the player who played the lowest<br />
numbered Action card this round) draws the top<br />
card of the Event deck and resolves it.<br />
It is important that he reads this card to himself and<br />
does not show it to other players.<br />
<strong>The</strong> player then resolves the two steps of this phase<br />
in order.<br />
a. Resolve Event Special Ability<br />
<strong>The</strong> first thing the player does is resolve the special<br />
ability on the card (printed directly below the<br />
artwork). This ability often has some effect on<br />
<strong>Space</strong> Marines, Genestealers or Support Tokens.<br />
Some Event cards have the keyword InsTIncT at<br />
the top of their ability. <strong>The</strong> choice on these cards<br />
must be made be<strong>for</strong>e showing or reading the card<br />
to other players. This means that players may not<br />
discuss the options presented on this card, and<br />
whatever decision made by the current player must<br />
be resolved.<br />
13
14<br />
After declaring his decision on the card, the Event<br />
card is revealed to all players and resolved (see<br />
example below).<br />
Special Ability Area of an event <strong>Card</strong><br />
Example: <strong>The</strong> current player draws the Event card<br />
shown above. Be<strong>for</strong>e showing the Event card to the<br />
other players, he chooses Brother Omnio (a <strong>Space</strong><br />
Marine card controlled by another player). He then<br />
reveals the card to all the other players, and spawns<br />
2 Genestealers behind Brother Omnio.<br />
Note that a player must always choose a valid<br />
target <strong>for</strong> Event card abilities (if able). In the above<br />
example, the current player must choose a <strong>Space</strong><br />
Marine that would result in the most Genestealers<br />
being spawned (two if possible).<br />
b. Resolve Genestealer Activations<br />
After resolving the Event card’s ability, each of the<br />
boxes on the bottom of the Event card are resolved.<br />
<strong>The</strong> boxes are resolved from left to right and either<br />
s p a w n new Genestealers (see page 21), or move<br />
existing swarms of Genestealers (see page 22) .<br />
Genestealer Activation Area of an event <strong>Card</strong><br />
Major Minor Move<br />
Spawn Icon Spawn Icon Icon
Other Rules<br />
This section describes additional specific <strong>rules</strong> that<br />
were not covered in the “Playing the Game” section.<br />
<strong>The</strong> Formation<br />
<strong>The</strong> central line of <strong>Space</strong> Marine cards is known as<br />
the f o r m aT Io n. <strong>Space</strong> Marines may only exist in the<br />
<strong>for</strong>mation, and may not move outside of this column.<br />
Each row of the <strong>for</strong>mation is known as a po s I T Io n.<br />
Whenever a <strong>Space</strong> Marine is slain, the <strong>for</strong>mation<br />
will need to s h I f T to fill in his previous position (see<br />
“Shifting the Formation” on pages 28–29).<br />
Action <strong>Card</strong> Types<br />
<strong>The</strong>re are three types of Actions that players can<br />
per<strong>for</strong>m throughout the game. Proper use of these<br />
Actions helps the <strong>Space</strong> Marines survive and<br />
hopefully win the game.<br />
Each type of Action is described in detail below:<br />
Support Action <strong>Card</strong>s<br />
When a player resolves a su p p o r T Action<br />
card, he gains one Support Token (from<br />
the supply of unused tokens) and places it<br />
on any <strong>Space</strong> Marine card. He may even place it on<br />
a <strong>Space</strong> Marine card controlled by another player,<br />
or a card that already has Support Tokens on it.<br />
A player may spend (discard) a Support Token from<br />
one of his <strong>Space</strong> Marines when it is attacking or<br />
defending to reroll a die that was just rolled.<br />
<strong>The</strong> rerolled result must be used instead of the<br />
original roll (unless he rerolls the die again by<br />
spending another Support Token or with an ability).<br />
15
16<br />
Example: A <strong>Space</strong> Marine rolls a 0 while defending<br />
which would result in the <strong>Space</strong> Marine being slain.<br />
<strong>The</strong> player spends a Support Token from the <strong>Space</strong><br />
Marine to reroll the die in the hopes of rolling a<br />
better result.<br />
It is important to note, that Support Tokens can<br />
only be discarded in this way if the <strong>Space</strong> Marine is<br />
fa c I n g the attacking or defending swarm (see “Facing<br />
and Range” on page 19). This means that if a <strong>Space</strong><br />
Marine is slain by a swarm of Genestealers attacking<br />
him from behind, he may not reroll this die.<br />
When a die is rolled <strong>for</strong> a reason other than<br />
attacking or defending, Support Tokens may not<br />
be discarded to reroll die. For example, the die<br />
rolled by the “Heroic Charge” Action card’s special<br />
ability is not an attack and may not be rerolled by<br />
spending a Support Token.<br />
Support Tokens remain on <strong>Space</strong> Marine cards until<br />
discarded by a card effect or spent to reroll a die. A<br />
player may only spend Support Tokens from <strong>Space</strong><br />
Marines he controls.<br />
Move + Activate Action <strong>Card</strong>s<br />
Move + Activate Action cards allow players to move<br />
each <strong>Space</strong> Marine matching the Action card’s<br />
Combat Team (colour). Each of these <strong>Space</strong> Marines<br />
may move to an adjacent position, change facing,<br />
and/or activate a Terrain card he is facing.<br />
When resolving a Move + Activate Action, the player<br />
per<strong>for</strong>ms any or all of the following steps (in order).<br />
Each of these steps is optional (i.e. the player may<br />
activate terrain without moving any <strong>Space</strong> Marines):<br />
a. mo v E To ad j a c E n T po s I T Io n<br />
<strong>The</strong> player may move any <strong>Space</strong> Marines matching<br />
the Action card’s Combat Team one at a time, in<br />
any order.
To move a <strong>Space</strong> Marine to an adjacent position,<br />
he simply picks up the <strong>Space</strong> Marine card, and<br />
switches its position with any adjacent <strong>Space</strong><br />
Marine (see diagram on page 18). <strong>The</strong> <strong>Space</strong> Marine<br />
that he switches position with may belong to any<br />
player. Do not change the facing of either <strong>Space</strong><br />
Marine. Facing is important because a <strong>Space</strong><br />
Marine can only attack and spend Support Tokens<br />
against Genestealers he is facing (see page 19).<br />
Each <strong>Space</strong> Marine of the card’s Combat Team may<br />
only be moved once during each Move Action.<br />
When a <strong>Space</strong> Marine moves, all Terrain cards and<br />
Genestealers remain in his previous position.<br />
B. ch a n g E fa c I n g<br />
After moving any of his <strong>Space</strong> Marines, the player<br />
may change the facing of any <strong>Space</strong> Marine in the<br />
Combat Team (including those who moved). To do<br />
so, he simply flips the card over, so that the facing<br />
indicator (large arrow) on the card is pointing in the<br />
opposite direction (see example on page 18).<br />
Each <strong>Space</strong> Marine card is double sided, with one<br />
side facing the left (arrow pointing left) and the<br />
other side facing the right (arrow pointing right). A<br />
<strong>Space</strong> Marine may only attack swarms on the side<br />
of the <strong>for</strong>mation that he is facing. A <strong>Space</strong> Marine<br />
may also only spend Support Tokens (whether<br />
attacking or defending) on swarms that he is facing<br />
(see “Support Action <strong>Card</strong>s” on page 15).<br />
17
18<br />
c. ac T I vaT E TE r r a I n<br />
After changing the facing of any of his <strong>Space</strong><br />
Marines, the player may activate any Terrain cards<br />
that one of his <strong>Space</strong> Marines is In f r o n T of (facing<br />
and in the same position).<br />
Only Terrain cards with the term ac T IvaT E on them<br />
may be activated. <strong>The</strong> player simply follows the<br />
instructions on the Terrain card, which sometimes<br />
require him to refer to the current Location card’s<br />
ability (see “Follow Location ‘Upon Entering’ Ability”<br />
on page 26).<br />
Important: Each Terrain card may only be activated<br />
once per game round.<br />
1. <strong>The</strong> player is resolving a Move + Activate<br />
Action card <strong>for</strong> the yellow Combat Team.<br />
2<br />
1<br />
2. He moves Brother Claudio to the adjacent<br />
position. Brother Noctis is moved into Brother<br />
Claudio’s previous position. <strong>The</strong> player then<br />
decides to change Brother Claudio’s facing so<br />
that he is facing the Door.<br />
3. <strong>The</strong> player then decides to activate the Door<br />
Terrain card and follows the instructions on the<br />
Terrain card, placing a Support token on it.<br />
3
Attack Action <strong>Card</strong>s<br />
Attack Action cards allow players to attack swarms<br />
of Genestealers with each <strong>Space</strong> Marine matching<br />
the Action card’s Combat Team (colour).<br />
<strong>The</strong> player simply chooses his <strong>Space</strong> Marines one<br />
at a time (in any order), then chooses which swarm<br />
of Genestealers the <strong>Space</strong> Marine is attacking<br />
(following the “Facing and Range” <strong>rules</strong> below).<br />
After choosing the <strong>Space</strong> Marine and swarm, he<br />
rolls the combat die. If he rolls a side that shows a<br />
skull ( ) result, then one of the Genestealer cards<br />
(of his choice) in the swarm is s l a I n (discarded from<br />
play). If he rolls any result that does not have a skull,<br />
it is considered a m Is s, and nothing happens.<br />
Be aware that many Action cards special abilities<br />
affect <strong>Space</strong> Marine combat capabilities.<br />
fa c I n g a n d ra n g E<br />
In order to attack a swarm of Genestealers, the<br />
<strong>Space</strong> Marine card must be f a c I n g the swarm, and<br />
be within r a n g E.<br />
<strong>The</strong> current f a c I n g of a <strong>Space</strong> Marine is defined as<br />
the direction the large arrow on his card is pointing<br />
(either left or right). At the start of the game, the<br />
<strong>Space</strong> Marines on the top half of the <strong>for</strong>mation<br />
are facing left and the other half are facing right<br />
(see “Setup Diagram” on page 9). <strong>Space</strong> Marines<br />
are able to change their facing by using Move +<br />
Activate Action cards.<br />
Each <strong>Space</strong> Marine card lists the maximum ra n g E<br />
(number of positions away) that he may attack. For<br />
example, a <strong>Space</strong> Marine with “Range 1 Attack”<br />
may attack swarms engaged with him and swarms<br />
engaged with adjacent <strong>Space</strong> Marines. A <strong>Space</strong><br />
Marine that has a “Range 0 Attack” may only attack<br />
swarms of Genestealers that he is E n g a g E d with (i.e.<br />
those on his position – see example on page 20).<br />
19
20<br />
1<br />
3<br />
In the above example, Brother Noctis may attack<br />
either swarm #1 or #3, but not #2 as he is not<br />
facing it. Brother Claudio may only attack swarm #3<br />
because he has a Range 0 Attack. Brother Scipio may<br />
attack swarm #2 because it is exactly two positions<br />
away and he has a Range 2 Attack. He may not<br />
attack swarms #1 or #3 because he is not facing to<br />
the left.<br />
Brother Noctis is considered E n g ag E d with swarm<br />
#2 and #1, while Brother Claudio is engaged with<br />
swarm #3.<br />
Genestealers<br />
This section describes <strong>rules</strong> pertaining to<br />
Genestealer cards including spawning, moving,<br />
flanking and being slain.<br />
Blip Piles<br />
At the start of the game (and each time <strong>Space</strong><br />
Marines travel to a new location), two face down<br />
blip piles are <strong>for</strong>med – one on the right, and one<br />
on the left of the Location card. <strong>The</strong> number of<br />
Genestealer cards placed into each pile is listed on<br />
the bottom corners of the current Location card.<br />
When travelled to, the above Location card places 6<br />
cards in the left and 5 cards in the right blip pile.<br />
2
Spawning Genestealers<br />
Whenever a Genestealer is s p a w n E d, the current<br />
player takes the top card of a blip pile and places it<br />
face up in the appropriate position and side of the<br />
<strong>for</strong>mation.<br />
When the activation area of an Event card spawns<br />
Genestealers, a number of Genestealer cards are<br />
spawned on each position of the <strong>for</strong>mation that<br />
contains the appropriate Terrain card type.<br />
A major spawn on each yellow Terrain card and<br />
a minor spawn on each red Terrain card<br />
<strong>The</strong>re are four types of Terrain cards: red, orange,<br />
yellow, and green. <strong>The</strong> number of coloured boxes<br />
on a Terrain card serves as a visual reminder of how<br />
likely Genestealers spawn there from Event cards<br />
(four red boxes being the most frequent).<br />
<strong>The</strong> bottom of each Setup Location card lists how<br />
many Genestealers are spawned by each m a j o r s p a w n<br />
(yellow triangle) and m In o r s p a w n (white triangle). <strong>The</strong><br />
number of Genestealer cards that are placed varies<br />
based upon the Setup Location card.<br />
<strong>The</strong> above Setup Location card has a major spawn<br />
value of 5 and a minor spawn value of 3.<br />
If there are multiple Terrain cards in play of the<br />
same colour, the listed amount of Genestealers are<br />
spawned on each of the Terrain cards.<br />
Note that some card abilities spawn Genestealers.<br />
<strong>The</strong>se abilities may spawn Genestealers in positions<br />
that do not contain Terrain cards.<br />
21
22<br />
Important: Spawning Genestealers are always<br />
drawn from the blip pile on the side on which they<br />
are being spawned. If the blip pile on that side is<br />
empty, then the Genestealer is not spawned.<br />
If there are not enough cards in the blip pile to<br />
spawn the full amount, the current player must<br />
spawn as many as able (of his choice).<br />
Moving Genestealers<br />
Genestealers are most frequently moved during<br />
the Event Phase. <strong>The</strong> current player is instructed to<br />
move specific swarms of Genestealers to adjacent<br />
positions or to have them f l a n k their engaged<br />
<strong>Space</strong> Marine. Regardless of how they move, each<br />
Genestealer card may either move or flank, at<br />
maximum, once during each Event Phase.<br />
mo v In g To ad j a c E n T po s I T Io n s<br />
If the movement icon is arrows pointing up and<br />
down ( ), then every swarm that contains this T y p E<br />
of Genestealer will move to an adjacent position.<br />
A Genestealer’s T y p E is defined as the icon on the<br />
lower left corner of the card.<br />
A swarm moving in this fashion always moves<br />
following the small arrows printed on the swarm’s<br />
side of the engaged <strong>Space</strong> Marine card.<br />
If the moving swarm would move off the top or<br />
bottom of the <strong>for</strong>mation, then the swarm instead<br />
flanks.<br />
fl a n k I n g<br />
If the movement icon is a curved arrow pointing<br />
to the right ( ), then every swarm that contains<br />
this T y p E of Genestealer moves to B E h I n d its <strong>Space</strong><br />
Marine. BE h I n d is defined as the side of the<br />
<strong>for</strong>mation that the <strong>Space</strong> Marine is not facing.<br />
If the swarm is already behind the <strong>Space</strong> Marine,<br />
it does not move.
1 2 3<br />
3<br />
1. During the Event Phase, the first box of the card’s<br />
activation area causes a major spawn on each<br />
yellow Terrain card. <strong>The</strong> current player takes three<br />
cards (as defined by the Setup Location card) from<br />
that side’s blip pile and places them on the position<br />
containing the yellow Terrain card (“Control Panel”).<br />
2. Since there is no red Terrain cards on the right<br />
side of the <strong>for</strong>mation, no Genestealers are spawned<br />
on this side of the <strong>for</strong>mation.<br />
3. Each swarm containing a Genestealer with<br />
the “tail” icon moves to the adjacent position<br />
(following the arrows on the <strong>Space</strong> Marine<br />
card). <strong>The</strong> player first moves the swarm on<br />
Brother Claudio up to Brother Noctis’s position.<br />
4. He then moves the newly spawned Genestealer<br />
cards to Brother Claudio’s position (moving all<br />
Genestealer cards in this swarm). Any swarms not<br />
containing a Genestealer with this Event card’s<br />
movement icon are not moved.<br />
1<br />
4<br />
23
24<br />
Slain Genestealers<br />
If a Genestealer is slain (usually by being attacked<br />
by a <strong>Space</strong> Marine), its card is discarded face up<br />
to a pile adjacent to the Genestealer deck. If the<br />
Genestealer deck ever runs out, this discard pile is<br />
shuffled to create a new Genestealer deck.<br />
Brood Lord <strong>Card</strong>s<br />
Brood Lord cards are treated exactly like<br />
Genestealer cards with the following exceptions:<br />
• Brood Lord cards are never shuffled into the<br />
Genestealer deck or into a blip pile. <strong>The</strong>y only<br />
spawn when specified by a Location card,<br />
and spawn without being in blip piles.<br />
• Brood Lords have two movement icons,<br />
and their swarm will move when either<br />
icon is activated.<br />
• A Brood Lord may not be slain if it would leave<br />
a normal Genestealer card in the swarm. In other<br />
words, the Brood Lord must be the last Genestealer<br />
in the swarm to be slain.<br />
• When a swarm containing a Brood<br />
Lord attacks, subtract 1 from its die roll.<br />
<strong>The</strong>re<strong>for</strong>e, the swarm is more likely to<br />
slay the defending <strong>Space</strong> Marine.
Travel<br />
In order to win the game, players need to T r av E l<br />
to new Locations in the <strong>Space</strong> <strong>Hulk</strong> to eventually<br />
reach the final card in the Location deck that will<br />
allow them to win the game.<br />
Note that Tr avEllIng refers to the entire <strong>for</strong>mation<br />
going to a new Location, while m o v In g is the act<br />
that <strong>Space</strong> Marines and Genestealers do within<br />
the <strong>for</strong>mation.<br />
Travelling automatically occurs whenever there are<br />
0 cards in any blip pile at the end of any phase.<br />
<strong>The</strong> only time when travel does not occur is when<br />
there are no cards remaining in the Location deck,<br />
in which case the <strong>Space</strong> Marines will stay at their<br />
current Location until they win or lose the game.<br />
When travelling, the following steps are per<strong>for</strong>med<br />
in order:<br />
1.<br />
2.<br />
3.<br />
Place New Location <strong>Card</strong><br />
Place Terrain <strong>Card</strong>s<br />
Discard/Refill Blip Piles<br />
4. Follow Location “Upon entering” Ability<br />
(if necessary)<br />
Each of these steps are described in detail on pages<br />
26-27.<br />
Important Note: When travelling, all Genestealers<br />
engaged with <strong>Space</strong> Marines remain in the<br />
<strong>for</strong>mation. Engaged Genestealers only leave play<br />
from the “Door” Terrain card’s ability or if discarded<br />
or slain by a different card or ability.<br />
25
26<br />
Steps of Travel<br />
1. Place New Location <strong>Card</strong>: Take the top card<br />
of the Location deck, and place it face up on<br />
top of the current location card (being sure not<br />
to cover the major and minor spawn numbers at<br />
the bottom of the Setup Location card). This new<br />
card is now the c u r r E n T l o c a T I o n.<br />
2. Place Terrain <strong>Card</strong>s: <strong>The</strong> current player<br />
discards all Terrain cards from the <strong>for</strong>mation.<br />
He then places the appropriate Terrain cards as<br />
listed on the current Location card (the two white<br />
icons listed on the left and the two white icons<br />
on the right of the Location card).<br />
Each terrain icon listed on the Location card<br />
also has a number and an arrow. If the arrow<br />
is pointing down, the matching Terrain card is<br />
placed this number of positions from the top of<br />
the <strong>for</strong>mation. If the arrow is pointing up, then it is<br />
placed this number of positions from the bottom of<br />
the <strong>for</strong>mation (see diagram on following page).<br />
If the number exceeds the number of <strong>Space</strong><br />
Marines remaining in the <strong>for</strong>mation, then the<br />
Terrain card is placed in the last valid position.<br />
3. Discard/Refill Blip Piles: All cards that<br />
remain in the blip pile(s) are discarded. <strong>The</strong>n a<br />
number of cards is added to each blip pile from<br />
the Genestealer deck until each pile contains the<br />
number listed on the Location card (see “Blip<br />
Piles” on page 20).<br />
4. Follow Location “Upon entering” Ability<br />
(if necessary): Each Location card’s ability<br />
contains the phrase “Upon Entering” or “Activate<br />
Control Panel”. If the current Location card has<br />
an “Upon Entering” ability, it is resolved now.<br />
If the card has an “Activate Control Panel” ability,<br />
it is resolved each time a “Control Panel” Terrain<br />
card is used while this is the current location.
Placing Terrain <strong>Card</strong>s Diagram<br />
1<br />
2<br />
1. A player is setting up Terrain cards at the start<br />
of the game. He first looks at the left side of the<br />
Location card and follows the setup instructions.<br />
<strong>The</strong> first icon instructs him to place a “Door” on the<br />
top position of the <strong>for</strong>mation.<br />
2. <strong>The</strong> second icon instructs him to place a “Dark<br />
Corner” on the third position from the top of the<br />
<strong>for</strong>mation. After placing these Terrain cards, the<br />
player follows the placement instructions on the<br />
right hand side of the Location card.<br />
Slain <strong>Space</strong> Marines<br />
If a <strong>Space</strong> Marine is slain (usually by being attacked<br />
by a swarm), his card is removed from the <strong>for</strong>mation<br />
and returned to the game box. <strong>The</strong> <strong>for</strong>mation will<br />
then need to be s h I f T E d (see page 28).<br />
If both <strong>Space</strong> Marines of a combat team are<br />
eliminated, all Action cards <strong>for</strong> that combat team<br />
are removed from the game. Those cards may no<br />
longer be used, but the player may still win if the<br />
remaining <strong>Space</strong> Marines win the game!<br />
If the card of the current player is removed in this way,<br />
the player with the lowest numbered Action card<br />
remaining is now considered the current player.<br />
1<br />
2<br />
27
28<br />
Shifting the Formation<br />
Whenever a <strong>Space</strong> Marine is slain, the <strong>for</strong>mation<br />
will need to s h I f T to fill in his previous position.<br />
Shifting is resolved by taking every Terrain card,<br />
<strong>Space</strong> Marine card, and Genestealer card in the<br />
smaller segment of the <strong>for</strong>mation and moving them<br />
(up or down) to fill in the slain <strong>Space</strong> Marine’s<br />
previous position.<br />
<strong>The</strong> smaller segment is defined as the half of the<br />
<strong>for</strong>mation that contains the least <strong>Space</strong> Marine<br />
cards. If both segments of the <strong>for</strong>mation are even,<br />
the bottom segment is shifted up.<br />
When shifting the <strong>for</strong>mation, it is possible <strong>for</strong> a<br />
swarm of Genestealers to move onto another<br />
swarm. If this happens during the Genestealer<br />
Attack Phase, any swarms that have already<br />
attacked during this phase remain separate from<br />
swarms that have not attacked. At the end of the<br />
Event Phase, all swarms in the same position and<br />
side of the <strong>for</strong>mation merge into one larger swarm.<br />
When shifting, note that it is possible <strong>for</strong> more than<br />
one Terrain card to be in the same position.<br />
If a <strong>Space</strong> Marine is ever able to move to a<br />
non-adjacent position (with a card or ability), he<br />
does not cause the <strong>for</strong>mation to shift. He simply<br />
switches places with the <strong>Space</strong> Marine that<br />
occupied his new position.
1<br />
1. During the Genestealer Attack Phase, Brother<br />
Deino is attacked by a swarm of Genestealers.<br />
Since he did not roll higher than the number of<br />
Genestealer cards in that swarm, he is slain.<br />
2<br />
2. Since the bottom segment of the <strong>for</strong>mation only<br />
contains one <strong>Space</strong> Marine (vs two on the top),<br />
the bottom of the <strong>for</strong>mation shifts up. This causes<br />
the Genestealer that just attacked to be on Brother<br />
Claudio’s position.<br />
<strong>The</strong> swarm containing two Genestealers would<br />
then attack. After all swarms have attacked, all<br />
Genestealer cards in Brother Claudio’s position<br />
merge to <strong>for</strong>m one swarm of three Genestealers.<br />
29
30<br />
Component Limitations<br />
All cards and tokens are limited to those provided in<br />
the game box.<br />
When a Support Token is spent or discarded, it<br />
returns to the pile of unused tokens. If a player is<br />
instructed to place a Support Token when there are<br />
zero tokens in this pile, he loses the ability to place<br />
this Support Token.<br />
When a card is discarded from play, it is placed face<br />
up in a discard pile adjacent to the appropriate deck<br />
of cards. When a deck of cards runs out (excluding<br />
the Location deck) its discard pile is shuffled to <strong>for</strong>m<br />
a new deck.<br />
If there are not enough Genestealer cards in the<br />
deck and discard pile when creating blip piles, the<br />
current player places as many cards as able into<br />
each pile (as equally as possible).<br />
Playing with 1 to 3 players<br />
When playing <strong>Death</strong> <strong>Angel</strong> with less than four<br />
players, all normal <strong>rules</strong> of the game still apply<br />
except <strong>for</strong> the <strong>rules</strong> noted in this section:<br />
If playing with three or less players, each player<br />
chooses more than one Combat Team Marker<br />
during Setup as follows:<br />
• 3 Players: 2 Combat Team Markers per player<br />
• 2 Players: 2 Combat Team Markers per player<br />
• 1 Player: 3 Combat Team Markers<br />
During the Choose Actions Phase, each player<br />
chooses one card matching the colour of each of his<br />
Combat Team Markers.<br />
For example, in a one player game, the player will<br />
choose three cards (each one matching the colour of<br />
a different one of his Combat Team Markers).<br />
He will resolve each chosen card during the Resolve<br />
Actions Phase (in standard ascending order).
Important: <strong>The</strong> term “Your <strong>Space</strong> Marines” on<br />
Action cards only refers to <strong>Space</strong> Marines matching<br />
the card’s Combat Team.<br />
Credits<br />
Game design: Corey Konieczka<br />
Box Artwork: Brad<strong>for</strong>d Rigney<br />
Original <strong>Card</strong> Artwork: Matthew Bradbury, Kevin Chin, Zach<br />
Graves, Nikolaus Ingeneri, Sept13, Hector Ortíz, Daniel Xio,<br />
Victor Corbella, John Gravato<br />
Graphic design: WiL Springer, Brian Schomberg,<br />
and Andrew Navaro<br />
Introductory Fiction: Sam Stewart<br />
Art direction: Zoë Robinson<br />
Art Administration: Kyle J. Hough<br />
editing: Talima Fox<br />
Production Manager: Gabe Laulunen<br />
FFG Lead Producer: Michael Hurley<br />
Publisher: Christian T. Petersen<br />
Playtesting: Jaffer Batica, Harald Bilz, Bryan Bornmueller,<br />
Freekjan Brink, Ed Browne, Jessie Brueske, Daniel Lovat Clark,<br />
Mike David, Oliver Erhardt, William Faciane, Ingrid Garrett,<br />
John Goodenough, JR Goodwin, James Hata, Anita Hilberdink,<br />
Sally Karkula, Shannon Konieczka, Rob Kouba, Ronald Leerink,<br />
Jay Little, Xi-Sheng Luo, Emile de Maat, Andrew Meredith,<br />
Brian Mola, Bart Pardoel, Lisa Poff, Martin van Schaijk, Gerben<br />
Seekles, Marie-Louise Snel, Erik Snippe, Sandra Stadman, Ian S.<br />
Stedman, Sam Stewart, Tim Uren, Wilco van de Camp, Dylan<br />
Vedas, Vera Visscher, Jason Walden, Ross Watson, Jamie Zephyr<br />
ga m E s wo r k s h o p<br />
Licensing Manager: Owen Rees<br />
Head of Licensing: Paul Lyons<br />
Head of Intellectual Property: Alan Merrett<br />
<strong>Space</strong> <strong>Hulk</strong>: <strong>Death</strong> <strong>Angel</strong> – <strong>The</strong> <strong>Card</strong> Game © <strong>Games</strong> Workshop<br />
Limited 2010. <strong>Games</strong> Workshop, <strong>Space</strong> <strong>Hulk</strong>: <strong>Death</strong> <strong>Angel</strong> – <strong>The</strong><br />
<strong>Card</strong> Game, <strong>Space</strong> <strong>Hulk</strong>, Warhammer 40,000 the <strong>for</strong>egoing<br />
marks’ respective logos and all associated marks, logos, characters,<br />
products and illustrations from the <strong>Space</strong> <strong>Hulk</strong>: <strong>Death</strong> <strong>Angel</strong> – <strong>The</strong><br />
<strong>Card</strong> Game game are either ®, TM and/or © <strong>Games</strong> Workshop<br />
Limited 2010, variably registered in the UK and other countries<br />
around the world. Published under license to <strong>Fantasy</strong> <strong>Flight</strong><br />
Publishing Inc. 2010. <strong>Fantasy</strong> <strong>Flight</strong> <strong>Games</strong>, FFG Supply and the<br />
FFG logo are trademarks of <strong>Fantasy</strong> <strong>Flight</strong> Publishing, Inc. All Rights<br />
Reserved to their respective owners.<br />
For additional in<strong>for</strong>mation, please visit us on the web:<br />
w w w.fa n Ta s yfl I g h Tga m E s .c o m<br />
31
32<br />
Quick Reference<br />
A Game Round<br />
Full details on pages 10–14<br />
1.<br />
2.<br />
3.<br />
4.<br />
Choose Actions Phase<br />
Resolve Actions Phase<br />
Genestealer Attack Phase<br />
Event Phase<br />
Steps of Travel<br />
Full details on page 26<br />
1.<br />
2.<br />
3.<br />
Place New Location <strong>Card</strong><br />
Place Terrain <strong>Card</strong>s<br />
Discard/Refill Blip Piles<br />
4. Follow Location “Upon Entering” Ability<br />
(if necessary)<br />
Terminology List<br />
• Behind: In the same position as, but not facing a<br />
<strong>Space</strong> Marine.<br />
• Combat Team: Two <strong>Space</strong> Marines of the same colour.<br />
• engaged: A Genestealer in the same position as a<br />
<strong>Space</strong> Marine.<br />
• Hit: A die result that slays the defending <strong>Space</strong><br />
Marine or Genestealer.<br />
• In Front: In the same position as, and facing a<br />
<strong>Space</strong> Marine.<br />
• Miss: A die result that does not slay the defending<br />
<strong>Space</strong> Marine or Genestealer.<br />
• Position: A row of the <strong>for</strong>mation that includes a<br />
<strong>Space</strong> Marine and all Genestealer and Terrain<br />
cards to the left or right of him.<br />
• Swarm: A group of one or more Genestealers on<br />
the same side and position of the <strong>for</strong>mation.<br />
• Top of Formation: <strong>The</strong> position closest to the<br />
current Location card.