FAX / MODEM - PROLiNK
FAX / MODEM - PROLiNK
FAX / MODEM - PROLiNK
You also want an ePaper? Increase the reach of your titles
YUMPU automatically turns print PDFs into web optimized ePapers that Google loves.
SoftSoft<br />
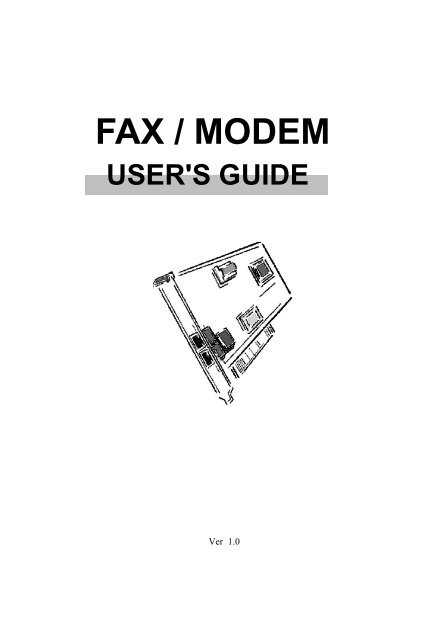
<strong>FAX</strong> / <strong>MODEM</strong><br />
USER'S GUIDE<br />
01010<br />
mOT<br />
Ver 1.0
The information in this document is subject to change without notice and does not represent a commitment on the<br />
part of the vendor.<br />
No warranty of representation, either expressed or implied, is made with respect to the quality, accuracy or fitness<br />
for any particular purpose of this document. The manufacturer reserves the right to make changes to the content<br />
of this document and/or the products associated with it at any time without obligation to notify any person or<br />
organisation of such changes.<br />
In no event will the manufacturer be liable for direct, indirect, special, incidental or consequential damages arising<br />
out of the use or inability to use this product or documentation, even if advised of the possibility of such damages.<br />
Microsoft Windows is a trademark of Microsoft Corporation.<br />
All product names are trademarks or registered trademarks of their respective owners.<br />
FCC Compliance Statement<br />
This device complies with Part 15 and 68 of the FCC Rules. Operation is subject to the following two conditions:<br />
1. this device may not cause harmful interference, and<br />
2. this device must accept any interference received, including interference that may cause undesired<br />
operation.<br />
FCC Warning Statement<br />
This equipment has been tested and found to comply with the limits for a Class B digital device, pursuant to Part<br />
15 and 68 of the FCC Rules. These limits are designed to provide reasonable protection against harmful interference<br />
in a residential installation. This equipment generates, uses and can emit radio frequency energy and, if not installed<br />
or used in accordance with the instructions, may cause interference to radio communications. However, television<br />
reception interference can be determined by turning the equipment off and on, the user is encouraged to correct<br />
the interference by one or more of the following measures:<br />
• Reorient or relocate the receiving antenna<br />
• Increase the separation between the equipment and the receiver<br />
• Connect the equipment into an outlet different from that to which the receiver is connected<br />
• Consult the dealer or an experienced radio/TV technician for help.<br />
F Changes or modifications not expressly approved by the party responsible for compliance could<br />
void the user’s authority to operate the equipment
CTR-21 Compliance Statement<br />
The equipment has been approved in accordance with Council Decision 98/482/EC for pan- European<br />
single terminal connection to the public switched telephone network (PSTN). However, due to differences<br />
between the individual PSTNs provided in different countries, the approval dose not, of itself, give an<br />
unconditional assurance of successful operation on every PSTN network termination point.<br />
In the event of problems, you should contact your equipment supplier in the first instace.<br />
F The manufacturer should ensure that the vendor and user of the equipment is clearly<br />
informed of the above information by means of packaging and /or user manuals or other<br />
forms of user instructions.
The information contained in this manual has been verified at the time of this<br />
manual's printing. The manufacturer reserves the right to make any change and<br />
improvement in the product described in this manual at any time and without<br />
notice.<br />
All registered trademarks are the property of their respective owners.Copyright<br />
©2000 All rights reserved. No reproduction of this document in any form is<br />
permitted without prior written authorization from the manufacturer.<br />
Version 1.0
Table of Contents<br />
Section One - Introduction 7<br />
1.1 System Requirements ..........................................................7<br />
1.2 Modem Compatibility ...........................................................7<br />
Section Two - Installing The Modem 8<br />
2.1 Unpacking Your Modem ......................................................8<br />
2.2 Modem Installation ...............................................................8<br />
2.2.1 Hardware Installation ...............................................8<br />
2.2.2 Setting Up Modem Under Windows .........................9<br />
2.2.3 Checking Modem Functionality ..............................18<br />
2.2.4 Uninstall Your Modem ...........................................21<br />
Section Three - Installing and Configuring<br />
Communication Software 25<br />
3.1 Using Your Modem .......................................................25<br />
3.2 Where To Go From Here ...................................................25<br />
Section Four - Troubleshooting Communication<br />
Software 27<br />
4.1 Modem does not respond to commands.............................27<br />
4.2 Modem dials, but does not connect. ...................................27<br />
4.3 Modem makes a connection, but no data appears on your<br />
screen.................................................................................27
4.4 Modem experiences errors while online with a remote<br />
modem................................................................................28<br />
4.5 Modem exhibits poor voice record or playback. ................28<br />
Section Five - AT Command Set 29<br />
5.1 Executing Commands ........................................................29<br />
5.2 Command Format ..............................................................29<br />
5.3 AT Commands: Basics .......................................................29<br />
5.4 V.25 ter AT commands ......................................................31<br />
Section Six - S Register Summary 33<br />
Section Seven - Event Reporting Word 34
○ ○ ○ ○ ○ ○ ○ ○ ○ ○ ○ ○ ○ ○ ○ ○ ○ ○ ○ ○ ○ ○ ○ ○ ○ ○ ○ ○ ○ ○ ○ ○ ○ ○ ○ ○ ○ ○ ○<br />
7<br />
Section One - Introduction<br />
Your new 56Kbps modem is a high speed PC communication peripheral that<br />
combines Data, Fax and TAM functions into a single device. This high<br />
performance modem connects your computer to all popular modems and fax<br />
machines available today.<br />
This manual provides installation and operating instructions for your<br />
modem. Also included in this manual are listings and descriptions of the<br />
standard AT command set, S-registers, and troubleshooting tips. Be certain to<br />
read Section Two - Installing the Modem thoroughly before performing the<br />
actual installation. Our customer support experience has shown that many<br />
costly and time-consuming calls can be avoided with closer attention to the<br />
installation information provided here.<br />
1.1 System Requirements<br />
n Pentium 166 MHz with MMX<br />
n AMD K6 or K6-2 233 MHz<br />
n Cyrix 6x86MX 266 MHz<br />
n 16MB RAM<br />
n 256K L2 cache<br />
n Windows 95 OSR2, Windows 98, Windows NT 4.0, Windows 2000<br />
1.2 Modem Compatibility<br />
Your modem is compatible with the following standards:<br />
•V.90 (56Kbps down stream only)<br />
•V.34 (33600 bps) • V.32bis (14400 bps)<br />
• V.32 (9600 bps) • V.22bis (2400 bps)<br />
• V.22 (1200 bps) • V.21 (300 bps)<br />
• V.17 (14400 bps <strong>FAX</strong>) • V.29 (9600 bps <strong>FAX</strong>)<br />
• V.27ter (4800 bps <strong>FAX</strong>) • V.21 Channel-2 (300 bps <strong>FAX</strong>)<br />
• V.42bis (data compression) • V.42 (error correction)<br />
• MNP 5 (data compression) • MNP 2-4 (error correction)<br />
• V.80(Video Ready mode)<br />
• TIA/EIA578 Class 1 and Class 2 Fax Command Set
○ ○ ○ ○ ○ ○ ○ ○ ○ ○ ○ ○ ○ ○ ○ ○ ○ ○ ○ ○ ○ ○ ○ ○ ○ ○ ○ ○ ○ ○ ○ ○ ○ ○ ○ ○ ○ ○ ○<br />
8<br />
Section Two - Installing The Modem<br />
This section explains how to connect your modem to your computer.<br />
2.1 Unpacking Your Modem<br />
In addition to this manual, your modem package contains the following<br />
items:<br />
•One modem • Modem software & driver Disc<br />
•manual include in Disc • One telephone cable<br />
NOTE: Contact your dealer if any of the above items are<br />
missing from your package.<br />
2.2 Modem Installation<br />
The following steps provide instructions for installing your modem.<br />
2.2.1 Hardware Installation<br />
CAUTION: Before removing the cover from your<br />
computer, turn off and unplug the computer and all<br />
attached peripherals. Discharge any static electricity<br />
from your body by touching any metal surface before<br />
removing the modem from its antistatic bag.<br />
1. Turn off and unplug your computer from the AC outlet.<br />
2. Remove the computer's cover according to its owner's manual.<br />
3. Select any available PCI bus slot.<br />
4. Remove the bracket and save the screw.<br />
5. Carefully insert the modem into the selected slot. Apply even<br />
pressure until the modem is firmly seated.<br />
6. Secure the bracket with the screw saved earlier. Store the bracket for<br />
future use.
○ ○ ○ ○ ○ ○ ○ ○ ○ ○ ○ ○ ○ ○ ○ ○ ○ ○ ○ ○ ○ ○ ○ ○ ○ ○ ○ ○ ○ ○ ○ ○ ○ ○ ○ ○ ○ ○ ○<br />
9<br />
7. Replace the computer cover<br />
and plug in your computer.<br />
Reconnect all cables.<br />
8. Connect the telephone able<br />
into the modem's " " connector<br />
(see Figure 2-1). Attach<br />
the other end into the telephone<br />
wall jack.<br />
This completes the internal modem installation.<br />
NOTE: The back of your modem should look like Figure<br />
2-1. The picture are just for reference, please<br />
base on the entity.<br />
2.2.2 Setting Up Modem Under Windows<br />
This internal modem supports the Plug and Play feature. It allows your<br />
computer to set the optimal configuration for the modem and communication<br />
software automatically.<br />
Part A Windows 98/95<br />
Figure 2-1<br />
Please follow the procedure below to install the modem driver:<br />
1. Turn ON computer power after completing hardware installation.<br />
2. Windows 98 will automatically detect the Plug and Play modem and<br />
setup a "PCI Communication<br />
device" message<br />
under Add New Hardware Found as shown below.<br />
Auto detect<br />
"PCI Communication<br />
Device"<br />
Click "Next"
○ ○ ○ ○ ○ ○ ○ ○ ○ ○ ○ ○ ○ ○ ○ ○ ○ ○ ○ ○ ○ ○ ○ ○ ○ ○ ○ ○ ○ ○ ○ ○ ○ ○ ○ ○ ○ ○ ○<br />
10<br />
Select<br />
"Search for the best<br />
driver for your device"<br />
Click "Next"<br />
Direct to CD-ROM<br />
(ex. G:\Drivers\W98)<br />
Click "Next"<br />
Search to<br />
"PCI Modem<br />
Enumerator "<br />
Click "Next"
○ ○ ○ ○ ○ ○ ○ ○ ○ ○ ○ ○ ○ ○ ○ ○ ○ ○ ○ ○ ○ ○ ○ ○ ○ ○ ○ ○ ○ ○ ○ ○ ○ ○ ○ ○ ○ ○ ○<br />
11<br />
Click "Finish"<br />
Select country (global version is necessary).<br />
Selecting a country other than the one in which you are currently<br />
located may cause your modem to be configured in a way that<br />
violates the telecommunication regulations/laws of that country.<br />
In addition, your modem may not function properly if the correct<br />
country selection is not made. Only select the country in which you are<br />
located.<br />
a. Click “Start” ⇒ “Settings” ⇒ “Control<br />
Panel” ⇒ “Systems".<br />
b. Click “Modem” ⇒ “SoftV92 Modem<br />
with SoftCP”
○ ○ ○ ○ ○ ○ ○ ○ ○ ○ ○ ○ ○ ○ ○ ○ ○ ○ ○ ○ ○ ○ ○ ○ ○ ○ ○ ○ ○ ○ ○ ○ ○ ○ ○ ○ ○ ○ ○<br />
14<br />
b. Select your country, click "OK"<br />
Part C Windows 2000<br />
Please follow the procedure below to install the modem driver:<br />
1. Turn ON computer power after completing hardware installation.<br />
2. Windows 2000 will automatically detect the Plug and Play modem and<br />
setup a "PCI Simple Communication Controller" message<br />
under Add New Hardware Found as shown below.<br />
Click "Next"
○ ○ ○ ○ ○ ○ ○ ○ ○ ○ ○ ○ ○ ○ ○ ○ ○ ○ ○ ○ ○ ○ ○ ○ ○ ○ ○ ○ ○ ○ ○ ○ ○ ○ ○ ○ ○ ○ ○<br />
15<br />
Select<br />
"Search for a suitable driver<br />
for my device"<br />
Click "Next"<br />
Select<br />
"CD-ROM drives" &<br />
" Specify a location"<br />
Click "Next"<br />
Direct to CD-ROM<br />
(ex. D:\Drivers\W2000)<br />
Click "Next"
○ ○ ○ ○ ○ ○ ○ ○ ○ ○ ○ ○ ○ ○ ○ ○ ○ ○ ○ ○ ○ ○ ○ ○ ○ ○ ○ ○ ○ ○ ○ ○ ○ ○ ○ ○ ○ ○ ○<br />
16<br />
Select<br />
"install one of the other<br />
drivers"<br />
Click "Next"<br />
Select<br />
"PCI Soft Data,<br />
Fax<br />
Modem with SmartCP"<br />
Click "Next"<br />
Click "Next"
○ ○ ○ ○ ○ ○ ○ ○ ○ ○ ○ ○ ○ ○ ○ ○ ○ ○ ○ ○ ○ ○ ○ ○ ○ ○ ○ ○ ○ ○ ○ ○ ○ ○ ○ ○ ○ ○ ○<br />
17<br />
Click "Finish"<br />
Select country (global version is necessary).<br />
Selecting a country other than the one in which you are currently<br />
located may cause your modem to be configured in a way that<br />
violates the telecommunication regulations/laws of that country.<br />
In addition, your modem may not function properly if the correct<br />
country selection is not made. Only select the country in which you are<br />
located.<br />
a. Click “Start” ⇒ “Settings” ⇒ “Control Panel” ⇒ “PCI<br />
Soft Data Fax modem with SmartCP".
○ ○ ○ ○ ○ ○ ○ ○ ○ ○ ○ ○ ○ ○ ○ ○ ○ ○ ○ ○ ○ ○ ○ ○ ○ ○ ○ ○ ○ ○ ○ ○ ○ ○ ○ ○ ○ ○ ○<br />
18<br />
b. Select your country, click "OK"<br />
2.2.3 Checking Modem Functionality<br />
Part A Windows 98<br />
1. Start Windows 98 ⇒ Click “Start”⇒ "Settings” ⇒ “Control Panel” ⇒<br />
“Modems”.
○ ○ ○ ○ ○ ○ ○ ○ ○ ○ ○ ○ ○ ○ ○ ○ ○ ○ ○ ○ ○ ○ ○ ○ ○ ○ ○ ○ ○ ○ ○ ○ ○ ○ ○ ○ ○ ○ ○<br />
19<br />
2. Click “General” and highlight "SoftV92 Modem with SoftCP<br />
" as shown below.<br />
3. Click “Diagnostic” and highlight the designated COM as shown below.<br />
Click “More Info ...” and the system will communicate with the modem.
○ ○ ○ ○ ○ ○ ○ ○ ○ ○ ○ ○ ○ ○ ○ ○ ○ ○ ○ ○ ○ ○ ○ ○ ○ ○ ○ ○ ○ ○ ○ ○ ○ ○ ○ ○ ○ ○ ○<br />
20<br />
Part B Windows 2000<br />
1. Start Windows 2000 ⇒ Click “Start”⇒ "Settings” ⇒ “Control Panel”<br />
⇒ “Phone and Modem Options”.<br />
2. Click “Modems” Folder and highlight "PCI Soft Data,<br />
Fax modem with SmartCP" , click “Properties” as<br />
shown below.
○ ○ ○ ○ ○ ○ ○ ○ ○ ○ ○ ○ ○ ○ ○ ○ ○ ○ ○ ○ ○ ○ ○ ○ ○ ○ ○ ○ ○ ○ ○ ○ ○ ○ ○ ○ ○ ○ ○<br />
21<br />
3. Click "Diagnostic" as shown below.<br />
Click “Query Modem” and the system will communicate with the<br />
modem.<br />
2.2.4 Uninstall Your Modem<br />
Part A Windows 98/NT 4.0<br />
1.Click “Start” ⇒ “Settings” ⇒ “Control Panel” ⇒ “Add/Remove<br />
Programs" .
○ ○ ○ ○ ○ ○ ○ ○ ○ ○ ○ ○ ○ ○ ○ ○ ○ ○ ○ ○ ○ ○ ○ ○ ○ ○ ○ ○ ○ ○ ○ ○ ○ ○ ○ ○ ○ ○ ○<br />
22<br />
2. highlight "Uninstall SoftV92 Modem with SoftCP"<br />
3. click "Add/ Remove" and "OK" to remove the modem.<br />
Part B Windows 2000<br />
1.Click “Start” ⇒ “Settings” ⇒ “Control Panel” ⇒ “Add/Remove<br />
Hardware" .
○ ○ ○ ○ ○ ○ ○ ○ ○ ○ ○ ○ ○ ○ ○ ○ ○ ○ ○ ○ ○ ○ ○ ○ ○ ○ ○ ○ ○ ○ ○ ○ ○ ○ ○ ○ ○ ○ ○<br />
23<br />
Click "Next"<br />
Select<br />
"Uninstall/Unplug a device"<br />
Click "Next"<br />
Click "Next"
○ ○ ○ ○ ○ ○ ○ ○ ○ ○ ○ ○ ○ ○ ○ ○ ○ ○ ○ ○ ○ ○ ○ ○ ○ ○ ○ ○ ○ ○ ○ ○ ○ ○ ○ ○ ○ ○ ○<br />
24<br />
Select<br />
"PCI Soft Data Fax<br />
modem with SmartCP"<br />
Click "Next"<br />
Select<br />
"Yes, I want to uninstall this<br />
device"<br />
Click "Next"<br />
Click "Finish"
○ ○ ○ ○ ○ ○ ○ ○ ○ ○ ○ ○ ○ ○ ○ ○ ○ ○ ○ ○ ○ ○ ○ ○ ○ ○ ○ ○ ○ ○ ○ ○ ○ ○ ○ ○ ○ ○ ○<br />
25<br />
Section Three - Installing and Configuring<br />
Communication Software<br />
NOTE: Install the communication software according<br />
to the software user's manual. Be certain that your<br />
software is configured to communicate with the modem<br />
on the same COM port and IRQ line used by the modem.<br />
You may be prompted by the software to configure certain communication<br />
parameters. We suggest the following settings:<br />
Baud rate: 115,200 bps Data bits: 8<br />
Parity: None Stop bit: 1<br />
Flow Control: RTS/CTS Initialization string: AT&F<br />
The AT commands used by the modem are compatible with the command<br />
set used by Intel modems. Select a Conexant modem type if prompted by your<br />
data communications software. Select Generic Class 1 or Conexant modem type<br />
when prompted by your Fax or Voice software.<br />
3.1 Using Your Modem<br />
Common modem functions (i.e. dialing, file transfer, faxing) are performed<br />
by using communication software in conjunction with the modem.<br />
NOTE: The communication software included with your<br />
modem provides a user friendly interface for all common<br />
modem functions and should be sufficient for all of your<br />
communication needs.<br />
3.2 Where To Go From Here<br />
If you have difficulties getting your modem to work, read Section Four to<br />
find information as well as answers to commonly asked questions and problems<br />
concerning the communication software. Sections Five through Ten contain<br />
reference material (AT commands, S-register, and Result-codes, etc.) and can be<br />
skipped.<br />
NOTE: It is important that you familiarize yourself with<br />
the functions available from the included software by
○ ○ ○ ○ ○ ○ ○ ○ ○ ○ ○ ○ ○ ○ ○ ○ ○ ○ ○ ○ ○ ○ ○ ○ ○ ○ ○ ○ ○ ○ ○ ○ ○ ○ ○ ○ ○ ○ ○<br />
26<br />
coreading its manual (you may also use any other<br />
mmercially available communication software). The<br />
software manual includes detailed information on all<br />
common modem functions.
○ ○ ○ ○ ○ ○ ○ ○ ○ ○ ○ ○ ○ ○ ○ ○ ○ ○ ○ ○ ○ ○ ○ ○ ○ ○ ○ ○ ○ ○ ○ ○ ○ ○ ○ ○ ○ ○ ○<br />
27<br />
Section Four - Troubleshooting Communication<br />
Software<br />
Your modem is designed to provide reliable and trouble-free service. Should<br />
you experience any difficulty, however, the information contained in this section<br />
will assist you in determining and resolving the source of the difficulty. If you<br />
cannot resolve your difficulty after reading this chapter, contact your dealer or<br />
vendor for assistance.<br />
4.1 Modem does not respond to commands.<br />
1. Make sure the modem is not configured with a conflicting COM port and<br />
IRQ setting . If another device in your system is also configured as the<br />
same COM port, it will not work. Similarly, IRQ settings may not overlap.<br />
2. Make sure the communication software is configured with the correct<br />
COM and IRQ settings (same COM port and IRQ line as the modem).<br />
Your communication software will not be able to send-to and receivefrom<br />
your modem any data if it does not have the correct COM and IRQ<br />
settings of the modem.<br />
3. Make sure the modem is properly initialized by the communication<br />
software. Your modem may have been improperly initialized by the<br />
software because you have selected an incorrect modem type. Select<br />
"Rockwell" modem type in your data communication software (select<br />
"Generic class 1" and "Rockwell" in your Fax software, respectively).<br />
You may also be prompted to enter an initialization string by the<br />
software. Use AT&F as your initialization string.<br />
4.2 Modem dials, but does not connect.<br />
1. Make sure the COM port setting is identical on both the system AND<br />
the software.<br />
2. Make sure the phone line is working properly. A noisy line will prevent<br />
proper modem operation.<br />
4.3 Modem makes a connection, but no data appears on your<br />
screen.<br />
1. Make sure all communication parameters (baud rate, data, stop, and<br />
parity bits) are properly configured and identical on both sides. Be<br />
certain hardware flow control (RTS/CTS - default) is enabled in both the
○ ○ ○ ○ ○ ○ ○ ○ ○ ○ ○ ○ ○ ○ ○ ○ ○ ○ ○ ○ ○ ○ ○ ○ ○ ○ ○ ○ ○ ○ ○ ○ ○ ○ ○ ○ ○ ○ ○<br />
28<br />
modem and the communication software.<br />
2. Press the ENTER key several times. The remote system may be waiting<br />
to receive your data before it begins.<br />
3. Make sure the correct terminal emulation mode is being used in the<br />
software (refer to software manual).<br />
4.4 Modem experiences errors while online with a remote<br />
modem.<br />
1. Make sure Call Waiting is turned off.<br />
2. Make sure RTS/CTS hardware flow control is enabled.<br />
Do not use XON/XOFF software flow control when<br />
transferring binary<br />
3. Make sure the data speed is not faster than your computer's capability.<br />
Operating at higher speeds under Windows 95 requires a faster CPU<br />
(Pentium 200MHz or better).<br />
4.5 Modem exhibits poor voice record or playback.<br />
1. Make sure the correct modem type is selected in the Voice/Fax software.<br />
Use "Conexant" or similar selection. Do not select "Cirrus Logic" or<br />
"Lucent".<br />
2. Make sure your computer is fast enough to handle voice operations<br />
(38.4Kbps). Voice operations are CPU intensive and require a Pentium<br />
200MHz MMX or better CPU when running under MS Windows 95.
○ ○ ○ ○ ○ ○ ○ ○ ○ ○ ○ ○ ○ ○ ○ ○ ○ ○ ○ ○ ○ ○ ○ ○ ○ ○ ○ ○ ○ ○ ○ ○ ○ ○ ○ ○ ○ ○ ○<br />
29<br />
Section Five - AT Command Set<br />
5.1 Executing Commands<br />
Your modem is in Command Mode upon power-on and is ready to receive<br />
and execute “AT” commands. The modem remains in Command Mode until it<br />
makes a connection with a remote modem. Commands may be sent to the modem<br />
from an attached terminal or a PC running a communication program.<br />
This modem is designed to operate at common DTE speeds ranging from<br />
115.2Kbps (or 57.6Kbps) to 300bps. All commands and data must be issued to<br />
the modem using one of the valid DTE speeds.<br />
5.2 Command Format<br />
All commands must begin with the AT prefix, followed by the command<br />
letter and ended with the ENTER key. Spaces are allowed in the command string<br />
to increase command line readability, but are ignored by the modem during<br />
command execution. All commands may be typed in either upper or lower case,<br />
but not mixed. A command issued without any parameters is considered as<br />
specifying the same command with a parameter of “0”.<br />
Example: ATL [ENTER]<br />
This command causes your modem to lower its speaker volume.<br />
5.3 AT Commands<br />
All default settings are printed in bold text.<br />
Command Function<br />
A Answer incoming call<br />
A/ Repeat Last command. Do not preceed A/ with<br />
Dn 0 - 9, A-D, # and *<br />
L Redial last number<br />
P Pulse dial<br />
T Tone dial<br />
W Wait fo second dial tone<br />
, Pause<br />
@ wait for 5 seconds of silence<br />
! flash<br />
; return to command mode after dialing<br />
& wait for AT&T bong tone<br />
E0 Command echo disabled<br />
E1 Command echo enabled
○ ○ ○ ○ ○ ○ ○ ○ ○ ○ ○ ○ ○ ○ ○ ○ ○ ○ ○ ○ ○ ○ ○ ○ ○ ○ ○ ○ ○ ○ ○ ○ ○ ○ ○ ○ ○ ○ ○<br />
30<br />
Command Option Function<br />
+++ Escape characters - switch from Data Mode to<br />
Command Mode<br />
H0 Modem on-hook (hang-up)<br />
H1 Modem off-hook (make busy)<br />
In Report Identification information (n=0-7)<br />
L0 Speaker OFF<br />
L1 Low speaker volume<br />
L2 Medium speaker volume<br />
L3 High speaker volume<br />
M0 Speaker always off<br />
M1 Speaker on until carrier detected<br />
M2 Speaker always on<br />
M3 Speaker off during dialing, on until carrier<br />
detected<br />
O0 Return to Data Mode<br />
O1 Initiate a retrain and return to Data Mode<br />
P Pulse dial<br />
Q0 Result code enabled<br />
Q1 Result code disabled<br />
Sr? Read S-register r. Refer to Chapter 7 for details<br />
Sr=n Set S-register r to value n. Refer to Chapter 7 for<br />
details<br />
T Tone dial<br />
V0 Numeric responses<br />
V1 Text responses<br />
X0 Enables CONNECT result code only. Dial tone<br />
and busy detection are disabled<br />
X1 Same as X0 plus all CONNECT responses/blind<br />
dialing<br />
X2 Enables all CONNECT resultcode.Dialtone<br />
detectionis enabled, but busy detection is<br />
disabled<br />
X3 Enables all CONNECT result code. Dial<br />
tone detection<br />
is disabled. but busy detection is enabled<br />
X4 EnablesallCONNECT result code.<br />
Dial tone and busy detection are both<br />
enabled<br />
Z Reset and recall configuration profile<br />
&C0 Carrier detect always ON<br />
&C1 Turn on CD when remote carrier is present<br />
&D0 DTR signal ignored<br />
&D1 Modem return to Command Mode after DTR<br />
toggle<br />
&D2 Modem hangs up and return to Command<br />
Mode after DTR toggle<br />
&F Loadfactorydefault configuration profile<br />
&G0 Guard tone disabled<br />
&G1 Guard tone disabled<br />
&G2 1800Hz guard tone enabled<br />
&P0 Set pulse dial to 39%/61% make/break
○ ○ ○ ○ ○ ○ ○ ○ ○ ○ ○ ○ ○ ○ ○ ○ ○ ○ ○ ○ ○ ○ ○ ○ ○ ○ ○ ○ ○ ○ ○ ○ ○ ○ ○ ○ ○ ○ ○<br />
31<br />
Command Option Function<br />
ratio @ 10 pps<br />
&P1 Set pulse dial to 33%/67% make/break ratio @<br />
10 pps<br />
&P2 Set pulse dial to 39%/61% make/break ratio @<br />
20 pps<br />
&P3 Set pulse dial to 33%/67% make/break ratio @<br />
20 pps<br />
&V Report current configuration and stored profile<br />
&W Store current configuration<br />
%E0 Line quality monitor disabled<br />
%E1 Line quality monitor enabled<br />
%L Display line signal level<br />
%Q Dispaly line signal quality<br />
5.4 V.25ter AT commands<br />
Command Function<br />
+GMI Report manufacturer ID<br />
+GMM Report model ID<br />
+GMR Report revision ID<br />
+GSN Report product serial number ID<br />
+GOI Report global object ID<br />
+GCAP Report complete capability list<br />
+IFC=a,b Set DTE-modem local flow control<br />
Parameter a specifies the local flow control<br />
from modem to DTE,where 0=Disabled<br />
1=Enables XON/XOFF<br />
2=Enables RTS<br />
Parameter b specifies the local flow control<br />
from DTE<br />
to modem, where 0=Disabled<br />
1=Enables XON/XOFF<br />
2=Enables CTS<br />
The default is +IFC=2,2<br />
+ILRR=0 Localportrate reporting disabled<br />
+ILRR=1 local port rate reporting enabled<br />
+MS=a,b,c,d,e,f<br />
Select Modulation<br />
Parameter a specifies the modulation protocol<br />
as B103, B212, V21, V22, V22B, V23C, V32,<br />
V32B, V34 or K56FLEX,V90<br />
Parameter b specifies automodeoperation,<br />
where0=autoode disabled,<br />
1=automode enabled.<br />
Parameter c specifies the lowest transmit<br />
speed for connection.<br />
Parameter d specifies the highest transmit speed
○ ○ ○ ○ ○ ○ ○ ○ ○ ○ ○ ○ ○ ○ ○ ○ ○ ○ ○ ○ ○ ○ ○ ○ ○ ○ ○ ○ ○ ○ ○ ○ ○ ○ ○ ○ ○ ○ ○<br />
32<br />
for connection.<br />
Parameter e specifies the lowest receive speed<br />
for connection.<br />
Parameter f specifies the highest receive speed<br />
for connection.<br />
The default is +MS= K56, 1, 75,33600,75,56000<br />
+MR=0 Modulation connection reporting disabled<br />
+MR=1 Modulation connection reporting enabled<br />
+ES=a,b,c<br />
Select error control and synchronous access<br />
mode<br />
Parameter a specifies the initial requested mode<br />
when modem originates a call, where<br />
0=initiate call with direct mode<br />
1=initiate call with normal mode<br />
2=initiate call with V.42 without detection phase<br />
3=initiate call with V.42 withdetection phase<br />
4=initiate call with MNP mode<br />
6=initiate call with V.80 synchronous access<br />
mode<br />
Parameter b specifies the acceptable fallback<br />
mode when modem originates a call, where<br />
0=LAPM,MNP or normal mode<br />
2=LAPM or MNP mode<br />
3=LAPM mode only<br />
4=MNP mode only<br />
Parameter c specifies the acceptable fallback<br />
mode when modem answers a call or specifies<br />
V.80 synchrounous access mode where<br />
1=Normal mode<br />
2=LAPM,MNP or normal mode<br />
4=LAPM or MNP mode<br />
5=LAPM mode only<br />
6=MNP mode only<br />
8=answer call with V.80 synchronous access<br />
mode<br />
The default is +ES=3,0,2<br />
+ER=0 Error control reporting disabled<br />
+ER=1 Error control reporting enabled<br />
+DS=a,b,c,d<br />
Select data compression parameter<br />
Parameter a specifies the desired direction of<br />
data compression, where<br />
0=data compression disabled<br />
1=both direction data compression enabled<br />
Parameter b specifies whether or not the modem<br />
whether or not the modem should continue<br />
to operate if the result is not obtained, where<br />
0=don't disconnect<br />
Parameter c specifies the maximum number<br />
of dictionary entries.
○ ○ ○ ○ ○ ○ ○ ○ ○ ○ ○ ○ ○ ○ ○ ○ ○ ○ ○ ○ ○ ○ ○ ○ ○ ○ ○ ○ ○ ○ ○ ○ ○ ○ ○ ○ ○ ○ ○<br />
33<br />
Section Six - S Register Summary<br />
Your modem has 16 registers, designated S0 through S89. Table 6-1 shows<br />
the registers, their functions, and their default values. Some registers can have<br />
their values changed by commands. If you use a command to change a register<br />
value, the command remains in effect until you turn off or reset your modem. Your<br />
modem then reverts to the operating characteristics specified in its nonvolatile<br />
memory. Refer to Section Five for information on how to use the AT commands<br />
to manipulate the S registers.<br />
NOTE: The default value and range of some S-registers<br />
listed below could vary with country.<br />
Register Function<br />
Table 6-1 S - Registers<br />
Range/units Default<br />
S0 Auto-answer Ring 0-255 /rings 0<br />
S1 Ring counter 0-255 /rings 0<br />
S2 Escape code character 0-255 /ASCII 43<br />
S3 Carriage return character 0-127 /ASCII 13<br />
S4 Line feed character 0-127 /ASCII 10<br />
S5 Backspace character 0-32,127 /ASCII 8<br />
S6 Dial tone wait time 2-255 /seconds 2<br />
S7 Remote carrier wait time 1-255 /seconds 50<br />
S8 Comma pause time 0-255 /seconds 2<br />
S10 Carrier loss time 1-255/0.1 second 14<br />
S11 Touch-tone dialing speed 50-255 /milliseconds 95<br />
S12 Escape character guard time 0-255 /0.02 second 50
○ ○ ○ ○ ○ ○ ○ ○ ○ ○ ○ ○ ○ ○ ○ ○ ○ ○ ○ ○ ○ ○ ○ ○ ○ ○ ○ ○ ○ ○ ○ ○ ○ ○ ○ ○ ○ ○ ○<br />
34<br />
Section Seven - Event Reporting Word<br />
Your can use the AT+VEM command to define events on which to report.<br />
The list is encoded as a word composed of the following bits.<br />
A 1 in a position indicates an enent is reported.<br />
A 0 in a bit- position indicates an enent is not reported.<br />
NOTE: Read bits from right to left..<br />
Bit Event Description<br />
Section Seven - Result Code Summary<br />
OK 0 CONNECT 1<br />
RING 2 NO CARRIER 3<br />
ERROR 4 CONNECT 1200 E 5<br />
NO DIALTONE 6 BUSY 7<br />
NO ANSWER 8 CONNECT xxxxx* 10<br />
DELAYED 24 BLACKLISTED 32<br />
<strong>FAX</strong> 33 DATA 35<br />
+FCERROR +F4<br />
NOTE: For x1, x2 , x3 and x4 the modem send this result<br />
code when the DTE speed is xxxxx bps


