Create successful ePaper yourself
Turn your PDF publications into a flip-book with our unique Google optimized e-Paper software.
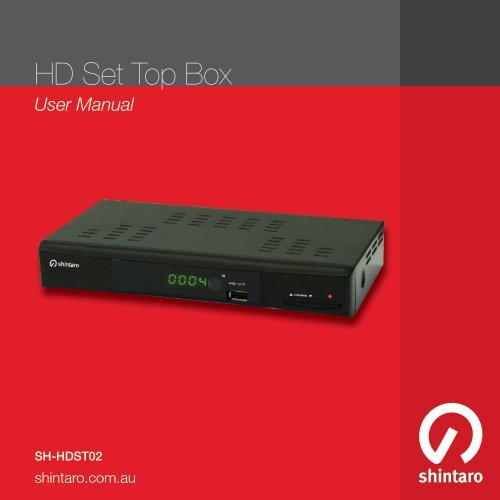
<strong>HD</strong> <strong>Set</strong> <strong>Top</strong> <strong>Box</strong><br />
User Manual<br />
SH-<strong>HD</strong>ST02<br />
shintaro.com.au
<strong>HD</strong> <strong>Set</strong> <strong>Top</strong> <strong>Box</strong><br />
Contents<br />
Safety Information 4<br />
Introduction 8<br />
System Connection 10<br />
Getting Started 12<br />
Operation 14<br />
Edit Channel 15<br />
System <strong>Set</strong>up 17<br />
Tools 20<br />
Games 22<br />
Record & Media 22<br />
Timeshift/Record 24<br />
Troubleshooting 27<br />
Specifications 29<br />
shintaro.com.au
Safety Information<br />
CAUTION:<br />
To reduce the risk of fire and electric shock, do not remove the cover (or<br />
back) of the unit. Refer servicing only to qualified service personnel.<br />
The lightning flash with arrowhead symbol, within an equilateral triangle, is<br />
intended to alert the user to the presence of uninsulated “dangerous voltage” the within<br />
product’s enclosure that may be of sufficient magnitude to constitute a risk of electric shock.<br />
The exclamation point within an equilateral triangle is intended to alert the user<br />
to the presence of important operation and servicing instructions in the literature<br />
accompanying the appliance.<br />
WARNING: TO REDUCE THE RISK OF FIRE OR ELECTRIC SHOCK, DO NOT EXPOSE THIS<br />
APPLIANCE TO RAIN OR MOISTURE<br />
The apparatus should not be exposed to dripping or splashing, and no objects filled with liquids,<br />
such as vases, should be placed on the apparatus. Batteries should not be exposed to excessive<br />
heat such as sunshine, fire or the like.<br />
CAUTION: Danger of explosion if battery is incorrectly replaced. Replace only with the same or<br />
equivalent type.<br />
IMPORTANT SAFEGUARDS:<br />
In addition to the careful attention devoted to quality standards in the manufacture of your<br />
video product, safety is a major factor in the design of every instrument. However, safety is your<br />
responsibility, too. This sheet lists important information that will help to assure your enjoyment<br />
and proper use of the video product and accessory equipment. Please read them carefully before<br />
operation and using your video product.<br />
INSTALLATION:<br />
Read and Follow Instructions. All the safety and operation instructions should be read before the<br />
video product is operated. Follow all operating instructions.<br />
4
Retain Instructions - The safety and operating instructions should be retained for future reference.<br />
Comply with all warnings on the video product and in the operating instructions.<br />
Polarization - To prevent electric shock, do not use this polarized plug with an extension cord,<br />
receptacle, or other outlet unless the blades can be fully inserted without blade exposure. If you<br />
need an extension cord, use a polarized cord.<br />
Power Sources - This video product should be operated only from the type of power source<br />
indicated on the marking label. If you are not sure of the type of power supply to your home,<br />
consult your video dealer or local power company. For video products intended to operate from<br />
battery power, or other sources, refer to the operating instructions.<br />
Overloading - Do not overload wall outlets or extension cords as this can result in a risk of fire or<br />
electric shock. Overloaded AC outlets, extension cords, frayed power cords, damaged or cracked<br />
wire insulation, and broken plugs are dangerous, They may result in a shock or fire hazard.<br />
Periodically examine the cord, and if its appearance indicates damage or deteriorated insulation,<br />
have it replaced by your service technician.<br />
Power-Cord Protection - Power-supply cords should be routed so that they are not likely to be<br />
walked on or pinched by items placed upon or against them, paying particular attention to cords<br />
where they exit from the product.<br />
Ventilation - Slots and openings in the case are provided for ventilation to ensure reliable<br />
operation of the video product and to protect it from overheating. These openings must not<br />
the blocked or covered. The openings should never be blocked by placing the video product<br />
on a bed, sofa, rug, or heat register. This video product should not be placed in a built-in<br />
installation such as a book case or rack, unless proper ventilation is provided or the video product<br />
manufacturer’s instructions have been followed.<br />
Attachments - Do not use attachments unless recommended by the video product manufacturer<br />
as they may cause hazards.<br />
Water and Moisture - do not use this video product near water for example, near a bath tub,<br />
washbowl, kitchen sink or laundry tub, in a wet basement, or near a swimming pool and the like.<br />
Caution: Maintain electrical safety. Powerline operated equipment or accessories connected to<br />
this unit should bear safety certification mark on the accessory itself and should not be modified<br />
so as to defeat the safety features. This will help avoid any potential hazard from electrical shock or<br />
fire. If in doubt, contact qualified service personnel.<br />
5
Accessories - Do not place this video product on an unstable cart, stand, tripod, bracket, or<br />
table. The video product may fall, causing serious injury to a child or adult as well as serious<br />
damage to the video product. Use this video product only with a cart, stand, tripod, bracket,<br />
or table recommended by the manufacturer or sold with the video product. Any mounting of<br />
the product should follow the manufacturer’s instructions and use of a mounting accessory<br />
recommended by the manufacturer. A video product and cart combination should be moved with<br />
care. Quick stops, excessive force, and uneven surfaces may cause the video product and cart<br />
combination to overturn.<br />
Power Lines - An outside antenna system should not be located in the vicinity of overhead power<br />
lines, other electric light or power circuits, or where it can fall into such power lines or circuits.<br />
When installing an outside antenna system, extreme care should be taken to keep from touching<br />
or approaching such power lines or circuits, as contact with them might be fatal. Installing an<br />
outdoor antenna can be hazardous and should be left to a professional antenna installer.<br />
USE:<br />
Cleaning - Unplug this video product from the wall outlet before cleaning. Do not use liquid<br />
cleaners or aerosol cleaners. Use a damp cloth for cleaning.<br />
Objects that may touch dangerous voltage points or “short-out” parts could result in a fire or<br />
electric shock. Never spill liquid of any kind on the video product.<br />
Lightning - For added protection for this video product during a lightning storm, or when it is left<br />
unattended and unused for long periods of time, unplug it from the wall outlet and disconnect<br />
the antenna or cable system. This will prevent damage to the video product due to lightning and<br />
power line surges.<br />
SERVICE:<br />
Servicing - Do not attempt to service this video product yourself, as opening or removing covers<br />
may expose you to dangerous voltage or other hazards. Refer all servicing to qualified service<br />
personnel.<br />
6
Conditions Requiring Service - Unplug this video product from the wall outlet and refer servicing<br />
to qualified service personnel under the following conditions:<br />
A. When the power-supply cord or plug is damaged.<br />
B. If liquid has been spilled, or objects have fallen into the video product.<br />
C. If the video product has been exposed to rain or water.<br />
D. If the video does not operate normally by following the operating instructions.<br />
Adjust only those controls that are covered by operating instructions. Improper adjustment<br />
of other controls may result in damage and will often require extensive work by a qualified<br />
technician to restore the video product to its normal operation.<br />
E. If the video product has been dropped or cabinet has been damaged.<br />
F. When the video product exhibits a distinct change in performance-this indicates a need for<br />
service.<br />
Replacement Parts - When replacement parts are required, have the service technician verify<br />
that the replacements he uses have the same safety characteristics as the original parts. Use of<br />
replacements specified by the video product manufacturer can prevent fire, electric shock, or other<br />
hazards.<br />
Safety Check - Upon completion of any service or repairs to this video product, ask the service<br />
technician to perform safety checks recommended by the manufacturer to determine that the<br />
video product is in safe operating condition.<br />
Wall or Ceiling Mounting - The product should be mounted to a wall or ceiling only as<br />
recommended by the manufacturer.<br />
Heat - The product should be situated away from heat sources such as radiators, heat registers,<br />
stoves, or other products (including amplifiers) that products heat.<br />
7
Introduction<br />
About STB<br />
Front panel<br />
Rear panel<br />
8
Remote control<br />
1<br />
2<br />
3<br />
4<br />
5<br />
6<br />
7<br />
8<br />
9<br />
10<br />
11<br />
12<br />
13<br />
14<br />
1.<br />
2.<br />
3.<br />
STANDBY (switch the STB on and<br />
standby)<br />
INFO (Press for current channel<br />
information/ Operation guide )<br />
PLAY<br />
15<br />
16<br />
17<br />
18<br />
19<br />
20<br />
21<br />
22<br />
23<br />
24<br />
25<br />
26<br />
9<br />
4. PREVIOUS/NEXT<br />
5. PAUSE (Pause/Active timeshift function)<br />
6. MENU (Open and close the menu screen)<br />
7. Cursor/CH+, -/VOL+,- (Cursor: Navigation<br />
buttons used to navigate menu items)<br />
(CH+/-: Channel Up and Down)<br />
(VOL+/-: Volume Up and Down)<br />
8. OK button (Confirm a selection within a<br />
menu)<br />
9. RECORD (Record the TV program)<br />
10. Numeric entry (Enter numeric values and<br />
select the channel directly by entering its<br />
number)<br />
11. USB (Enter File Manager)<br />
12. MEDIA (Enter Recorder menu)<br />
13. TTX (Open interactive service)<br />
14. TIMER (Timer wake-up)<br />
15. MUTE (Turn off/on the volume)<br />
16. SUBTITLE (On/Off Subtitle)<br />
17. Search backward /forward<br />
18. EXIT (Exit from menu)<br />
19. STOP (Stop program playback or<br />
recording)<br />
20. EPG (Open up Electronic Program Guide<br />
Menu)<br />
21. BACK (Switch to previous channel)<br />
22. TV/RADIO (Switch between TV and Radio)<br />
23. AUDIO (Select audio mode and audio<br />
track)<br />
24. RES (Switch <strong>HD</strong>MI resolution)<br />
25. FAV (Open the Favorite list)<br />
26. RED/GREEN/YELLOW/BLUE Buttons<br />
(For interactive function/Submenu function<br />
buttons)
System Connection<br />
General<br />
There are many different types of TV and other equipment that you can<br />
connect to the STB. In this manual you will see some of the most common<br />
ways to connect your equipment.<br />
Connection to the TV and video recorder<br />
10
Connecting a HiFi system<br />
11
Getting Started<br />
Welcome<br />
If you use the STB for the first time,<br />
the “Welcome” menu appears.<br />
Press cursor button to setup the<br />
Region, Language, Display Mode<br />
and Aspect Mode.<br />
Highlight “OK” and press the “OK”<br />
button to start channel search.<br />
Installation<br />
1. Press the “MENU” button to enter main menu.<br />
2. Press “UP”or “ DOWN “ button to highlight<br />
“Installation”, press<br />
3. “RIGHT” button to enter the Installation menu.<br />
4. Press “UP” or “DOWN” cursor button<br />
to highlight the desired item and press<br />
“OK”button to enter the sub-menu .<br />
5. Press “EXIT” button to exit.<br />
Auto Scan<br />
1. Select the “Auto Scan”, press “OK” button<br />
to enter the Auto Scan menu.<br />
2. Press the cursor button to set “FTA Only”,<br />
then highlight “Search”, press the “OK”<br />
button to start auto scan .<br />
12
Channel Scan<br />
1. Select “Channel Scan”, press the “OK”<br />
button to enter the Channel.<br />
2. Scan menu.<br />
3. Press cursor button to set Scan mode,<br />
Scan Band,<br />
4. Channel No, Frequency and Bandwidth,<br />
then highlight “Search”, press “OK” button<br />
to start channel scan .<br />
Aerial Adjustment<br />
1. Select the “Aerial Adjustment”, press”OK”<br />
to enter the Aerial.<br />
2. Adjustment.<br />
3. Press the cursor button to set the desired<br />
setting.<br />
4. When “Tuner Power” is selected “On”, the<br />
STB will provide 5V power to antenna.<br />
5. It will not provide when selected “Off”.<br />
LCN<br />
If LCN (Logical Channel Number) Select function is activated, you can’t change<br />
the original number of TV channels by scanning. You can activate/disactivate<br />
the LCN function by setting the “LCN Mode” to on/off.<br />
13<br />
Channel Scan mode:<br />
By channel<br />
By frequency<br />
Ch No.<br />
Tuner Power<br />
Aerial Adjustment<br />
Signal Intens ity<br />
Signal Quality<br />
CH37(666000KHz)<br />
Off<br />
81%<br />
97%
Operation<br />
Changing Channels<br />
There are three ways of channel selection - stepping through the channel list,<br />
selection by number and from the on-screen channel list.<br />
1.<br />
2.<br />
3.<br />
Stepping through the channel list:<br />
To move through the channel list, press the upward arrow or downward<br />
arrow key on the remote control.<br />
Selected by number:<br />
Enter the channel number directly by pressing numeric buttons ,and press<br />
the “OK” button to select desired channel.<br />
Selected by on-screen channels list:<br />
You can also select the required channel directly from on-screen channel<br />
list. This is displayed using the STB’s main menu. See “Edit Channel” in<br />
this manual for operation detail.<br />
Accessing the Electronic Program Guide (EPG)<br />
1.<br />
2.<br />
3.<br />
4.<br />
Press “EPG” button to enter EPG menu.<br />
Press cursor button to switch between<br />
channel list, events schedule of the<br />
selected channel and now/next events.<br />
Press “Green” button to Timer<br />
the events.<br />
Press “Red” button to display<br />
“ Time Bar” menu.<br />
14
Edit Channel<br />
1. Press the “MENU” button to enter<br />
main menu.<br />
2. Press “UP” or “DOWN “ button to highlight<br />
“Edit Channel”, press “RIGHT” button to<br />
enter the Edit Channel menu.<br />
3. Press “UP” or “DOWN” cursor button to<br />
highlight the desired item and press “OK”<br />
button to enter the sub-menu .<br />
4. Press “EXIT” button to exit.<br />
TV Channel list<br />
1.<br />
2.<br />
In the Edit Channel menu, select “TV<br />
Channel List”, press “OK” button to enter<br />
TV channel list menu.<br />
Press “UP” or “DOWN” button to highlight<br />
channel, press the “OK” button to preview<br />
the desired TV channel.<br />
Use this menu to favor, lock, skip, move, sort,<br />
delete and rename channel.<br />
• Press “FAV” button, then press “OK”<br />
button to edit the FAV function.<br />
• Press “color” button, then press “OK”<br />
button to edit the corresponding function.<br />
15
Radio Channel list<br />
1.<br />
2.<br />
In the Edit Channel menu, select “Radio Channel List”, press “OK” button<br />
to enter the Radio Channel list menu.<br />
Press “UP” or “DOWN” button to highlight channel press the “OK” button<br />
to listen the desired TV channel.<br />
NOTE: Basically, the operation of “Radio Channel List” is the same as “TV Channel List” but there<br />
is one difference: In “ Radio Channel mode, there is no video information. So it will always display<br />
the Radio logo in the right side preview window.<br />
Delete All /Delete All Favorites<br />
1. In the Edit Channel menu, select “Delete All”, press “OK” button.<br />
2. A warning window appears.<br />
Select “Yes”, press “OK” button to delete all channels<br />
Select “No”, Press “OK” button to cancel deleting<br />
The operation of “Delete All Favorites” is the same as “Delete All”.<br />
16
System <strong>Set</strong>up<br />
System setup menu allows you to set Language,<br />
TV System, Local Time <strong>Set</strong>ting, Timer <strong>Set</strong>ting,<br />
Parental Lock, OSD <strong>Set</strong>ting, Favorite and Auto<br />
Standby.<br />
1. Press the “MENU” button to enter main menu.<br />
2. Press “UP” or “DOWN” button to highlight<br />
“System <strong>Set</strong>up”.<br />
3. Press “RIGHT” button to enter the System <strong>Set</strong>up menu.<br />
4. Press “UP” or “DOWN” cursor button to highlight the desired.<br />
5. item and press “OK” button to enter the sub-menu.<br />
6. Press “EXIT” button to exit.<br />
Language<br />
This menu allows you to set Language.<br />
TV System<br />
This menu allows you to set Video Resolution,<br />
Aspect Mode, Video Output and Digital<br />
Audio Output<br />
Video Resolution:<br />
480i/480p/576i/576p/720p/1080i/1080p<br />
Aspect Mode: Auto/4:3PS/4:3LB/16:9<br />
Video Output: CVBS/RGB<br />
Digital Audio Output: LPCM Out/ BS Out<br />
17
Local Time <strong>Set</strong>ting<br />
This menu allows you to set the region and time.<br />
Region: This menu is used for changing<br />
the region setting.<br />
Gmt Usage: This menu is used to open the<br />
usage of GMT. The options<br />
are : Off / On<br />
Gmt Offset: This menu is valid only when<br />
selected Uesr Define is in GMT<br />
Usage menu . The GMT offset<br />
range is “-11:30 ~ +12:00”,<br />
increasing half hour progressively.<br />
Date: “Date” and “Time” menus are valid<br />
only when selected “Off” in GMT Usage menu.<br />
Time: Press numeric buttons to input the time.<br />
Timer <strong>Set</strong>ting<br />
This menu allows you to set the program timer.<br />
You can set 8 timers.<br />
Timer Mode: Off/Once/Daily<br />
Timer Service: Channel/Record<br />
Wakeup Channel: You can select a desired<br />
channel as the wakeup channel<br />
Wakeup Date: Press numeric button to input date.<br />
Wakeup Time: Press numeric button to input the time.<br />
Duration: Press numeric button to input the duration time.<br />
18
Parental Lock<br />
This menu allows you to protect the menu and<br />
channels , and change the Password.<br />
1.<br />
2.<br />
In “System <strong>Set</strong>up” menu, select “Parental<br />
Lock” and press “OK” button. You are asked<br />
to input a password (the default password<br />
is”0000”).<br />
After inputting the correct password by<br />
pressing the numeric buttons, the parental<br />
lock menu appears.<br />
Menu Lock: To lock the Edit channel/installation/System setup/Tools/<br />
REC menu. When you want to enter these menus, you must<br />
input the password. You can set menu lock to on/off.<br />
Channel Lock: Off/ AGE 10/AGE 12/AGE 16/AGE 18<br />
New Password: To change the password<br />
Confirm Password: To confirm the new password<br />
OSD (On Screen Display) <strong>Set</strong>ting<br />
This menu allows you to set OSD Timeout, OSD<br />
Transparency and load default OSD setting.<br />
OSD Timeout: 1-10<br />
OSD Transparency: To set the OSD transparency<br />
to Off/10%/20%/30%/40%.<br />
Load Default OSD <strong>Set</strong>ting: To clear all OSD<br />
setting and reset parameters as default value.<br />
19
Favorite main menu<br />
This menu allows you to rename the favorite group.<br />
1. In Channel menu, select “Favorite”, press “OK”<br />
button to enter Favorite menu.<br />
2. Select desired group, press “OK” button to open<br />
the digital keypad. Input letter and numeric one by<br />
one by pressing the cursor button and press “OK”<br />
button to confirm. After finishing input, highlight<br />
“OK” on digital keypad to confirm that you have<br />
changed the Favorite group name successfully.<br />
3. Press “EXIT” button to quit the group rename menu.<br />
Auto Standby<br />
On - No command to STB on front panel or remote<br />
in 3 hours and no timer event, the STB will enter<br />
standby mode automatically.<br />
Off - The STB can’t enter standby mode<br />
automatically.<br />
TOOLS<br />
Tools main menu<br />
1. Press the “MENU” button to enter main menu.<br />
2. Press “UP” or “ DOWN “ button to highlight “Tools”,<br />
press “RIGHT” button to enter the Tools menu.<br />
3. Press “UP” or “DOWN” cursor button to highlight<br />
the desired item and press “OK” button to enter<br />
the sub-menu.<br />
4.<br />
Press “EXIT” button to exit.<br />
20
Information<br />
This menu can display some parameters of bootloader,<br />
<strong>HD</strong>CP Key, maincode, radioback, countryband and user<br />
information in this STB.<br />
1.<br />
2.<br />
In “Tools” menu, select “Receiver Information”, press<br />
“OK” button to open receiver information window.<br />
Press “EXIT” button to exit.<br />
Load Factory <strong>Set</strong>ting<br />
This menu allows you to re-set the STB back to factory<br />
settings, leaving all existing channels.<br />
1.<br />
2.<br />
3.<br />
In the “Tools” menu, select “Load Factory Default”,<br />
press “OK” button. You are asked to input a<br />
password (the default password is”0000”).<br />
A confirmation window is displayed. Select “Yes” to<br />
return back to factory settings and clear all channels.<br />
Select “No” to cancel back to factory settings.<br />
Press “EXIT” button to exit.<br />
Software Upgrade<br />
You can choose to upgrade the software version by<br />
OTA or by USB.<br />
1.<br />
2.<br />
3.<br />
Enter “Tools” menu, select “S/W Upgrade by OTA”<br />
or “Upgrade by USB”, press “OK” button, Software<br />
Upgrade menu is shown.<br />
Press cursor button to select the desired item, then<br />
highlight “Start” and press “OK” button to start upgrade.<br />
Press “EXIT” button to exit.<br />
21
Remove USB device safely<br />
In “Tools” menu, select “Remove USB device safely”,<br />
Press “OK” button to confirm. Then a window is<br />
displayed. Press “OK” button again.<br />
GAMES<br />
Games<br />
This menu allows you to play games.<br />
1. Press the “MENU” button to enter main menu.<br />
2. Press “UP” or “DOWN” button to highlight “Game”,<br />
press “RIGHT” button to enter the Game menu.<br />
3. Press “UP” or “DOWN” cursor button to<br />
highlight the desired item and press “OK” button<br />
to enter the game.<br />
4. Press “EXIT” button to exit.<br />
REC & MEDIA<br />
REC main menu<br />
1. Press the “MENU” button to enter main menu.<br />
2. Press “UP”or “DOWN” button to highlight “REC”,<br />
press “RIGHT” button to enter the REC menu.<br />
3. Press “UP” or “DOWN” cursor button to highlight<br />
the desired item and press “OK”button to enter<br />
the sub-menu.<br />
4.<br />
Press “EXIT” button to exit.<br />
22
USB Device<br />
This function allows you to play files from USB port .<br />
1. In “Tools” menu, select “USB Device”, press “OK”<br />
button to enter Media Player menu.<br />
2. Press “UP” or “DOWN” cursor button to select a<br />
desired item, and press “OK” button to play the<br />
desired files.<br />
3. Press “EXIT” button to exit.<br />
Record Manager<br />
This menu allows you to play the record files.<br />
1. In “REC” menu, select “Record Manage”, press<br />
“OK” button to enter Record Manage menu.<br />
2. Press “UP” or “DOWN” cursor button to select a<br />
desired item, and press “OK” button to play the<br />
desired files.<br />
3. Press “EXIT” button to exit.<br />
DVR <strong>HD</strong>D Information<br />
This menu can display some parameters of<br />
Removable Disk.<br />
1.<br />
2.<br />
In “REC” menu, select “DVR <strong>HD</strong>D Information”,<br />
press “OK” button to open DVR <strong>HD</strong>D<br />
information window.<br />
Press “EXIT” button to exit.<br />
23
<strong>HD</strong>D Format<br />
This menu allows you to format the disk.<br />
1. In “REC” menu, select “<strong>HD</strong>D Format”, press “OK”<br />
button to open <strong>HD</strong>D Format menu.<br />
2. Highlight “Storage Partition”, press “LEFT” or<br />
“RIGHT” cursor button to change Partition.<br />
3. Highlight “Format”, press “OK” button. A window<br />
appears. Select FAT/NTFS, press “OK” button<br />
to format. Select “Cancel”, Press “OK” button to cancel.<br />
DVR Configuration<br />
This menu allows you to set the DVR Configuration.<br />
Press “UP” or “DOWN” cursor button to select<br />
desired item, press “LEFT” or “RIGHT” cursor<br />
button to change the setting.<br />
• TimeShift<br />
On/Off<br />
• Timeshift to Record On/Off<br />
• Record Type TS/PS<br />
TS: Transportation stream which includes information like<br />
teletext, subtitle, epg etc.<br />
PS: Program stream which will be packeted with the file format<br />
of *.mpg and be also played backed by PC or other devices.<br />
• Record Selection You can press “LEFT”or “RIGHT” cursor button to<br />
change Selection.<br />
• Standby after record On/Off<br />
24
TIMESHIFT/RECORD<br />
Plugging an external Mass Storage Device into the USB port gives you access<br />
to Time Shift/Record a broadcast programme.<br />
• Pause a broadcast programme and continue watching it later (Time Shift)<br />
• Record a broadcast programme.<br />
• When the space available on the Mass Storage Device runs out, recording<br />
operation of broadcast will stop.<br />
NOTE: Please use a flash drive or <strong>HD</strong>D>2GB for recording.<br />
Timeshift<br />
Initiate<br />
• Time Shift can be done in viewing<br />
mode by pressing the “PAUSE” button.<br />
• Press “RIGHT” or “LEFT” button to<br />
move the cursor to the time you wish to<br />
view.<br />
• Press “OK” button to confirm.<br />
Trickmodes<br />
During the playback, it is possible to perform the following actions:<br />
• Press “PAUSE” button to pause the playback<br />
• Press “FORWARD” button to fast forward the playback<br />
• Press “BACKWARD” button to rewind the playback<br />
Stop the Time Shift<br />
Press “STOP” button to stop TimeShift.<br />
25
Record<br />
Instant record<br />
• In viewing mode, press “RECORD” button to instantaneously start a<br />
record on the current channel.<br />
• If “RECORD” button is pressed again, the instant record switches<br />
to duration mode. Press “STOP” button to stop recording, then a<br />
confirmation window appears.<br />
• Select “Yes” to stop recording. Select “No” to continue recording.<br />
NOTE: Please use USB 2.0 USB <strong>HD</strong>D or Flash drive for recording and timeshift. Due to the wide<br />
variety of such devices available, compatibility with all devices cannot be guaranteed.<br />
26
TROUBLESHOOTING<br />
In some regions, the digital terrestrial signal may be weak. Ensure you use a<br />
quality antenna to maximise reception.<br />
Problem Possible cause What to do<br />
Standby light not lit Mains lead unplugged<br />
Mains fuse blown<br />
No signal found Aerial is disconnected<br />
Aerial is damaged/<br />
misaligned<br />
Out of digital signal area<br />
Scrambled channel<br />
message<br />
No response to remote<br />
control<br />
Forgotten channel lock<br />
code<br />
Forgotten menu lock<br />
code<br />
27<br />
Check mains lead<br />
Check fuse<br />
Check aerial lead<br />
Check aerial<br />
Check with dealer<br />
Channel is scrambled Select alternative<br />
channel<br />
Receiver off<br />
Handset not aimed<br />
correctly<br />
Front panel obstructed<br />
Hand set batteries<br />
exhausted<br />
Plug in and turn on<br />
Aim handset at front<br />
panel<br />
Check for obstructions<br />
Replace handset<br />
batteries<br />
Re-install channels to<br />
cancel channel lock<br />
Contact help line
Troubleshooting<br />
The remote control will<br />
not operate your STB<br />
After moving the STB to<br />
another room you<br />
find you are no longer<br />
able to receive digital<br />
reception<br />
(1) The batteries in your<br />
remote control need<br />
replacing<br />
(2) There is an<br />
obstruction blocking the<br />
signal path between the<br />
remote control and the<br />
box.<br />
The former aerial feed<br />
point may come through<br />
a distribution system<br />
which may reduce<br />
the digital signal now<br />
received by the box.<br />
For updated Frequently Asked Questions (FAQ)<br />
please refer to www.<strong>Shintaro</strong>.com.au<br />
28<br />
(1) Replace the batteries<br />
(2) Check that there<br />
is nothing in the path<br />
between the remote<br />
control and the<br />
receiver<br />
Try a direct feed from<br />
the antenna
Specifications<br />
Tuner & Channel Rf Input Connector X1<br />
Features<br />
•<br />
•<br />
•<br />
•<br />
•<br />
•<br />
Video Decoder<br />
Audio Decoder<br />
Video Formats<br />
Modulation<br />
Video Output<br />
Modulation<br />
(Iec-Type, Iec169-2, Female)<br />
Rf Output Connector X1<br />
(Iec-Type, Iec169-2, Male (Loopthrough))<br />
Frequency Range:<br />
174mhz~230mhz(Vhf)<br />
470mhz ~862mhz (Uhf)<br />
Signal Level:<br />
-15 ~ -70 Dbm<br />
MP3, JPEG, AVI, MPEG, VOB, TS, TP, MKV,<br />
MP4, MOV, DIVX<br />
MPEG-1 Layer 1,2<br />
PCM/HE-AAC V1.0<br />
4:3/4:3PS/16:9/AUTO<br />
CVBS, RGB<br />
QPSK,16QAM,64QAM<br />
29
Connection<br />
•<br />
•<br />
•<br />
•<br />
•<br />
•<br />
•<br />
Main Power Cable<br />
Tuner<br />
Spdif<br />
Data Port<br />
<strong>HD</strong>MI<br />
Analog Audio<br />
Output<br />
Composite /<br />
Component<br />
Video Output<br />
Power Supply<br />
•<br />
•<br />
Input Voltage<br />
Power<br />
Consumption<br />
Fixed Type<br />
Antenna Input x1, RF Output x1<br />
Coaxial x1<br />
USB slot<br />
<strong>HD</strong>MI Output x1<br />
Down Mix Stereo output (Left and Right) x1<br />
Video (composite) output x1<br />
Y Pb Pr Component Video output x1<br />
AC220~240V, 50/60Hz<br />
MAX. 8W<br />
Note: Design and Specifications are subject to change without notice.<br />
30
support@shintaro.com.au<br />
32


