

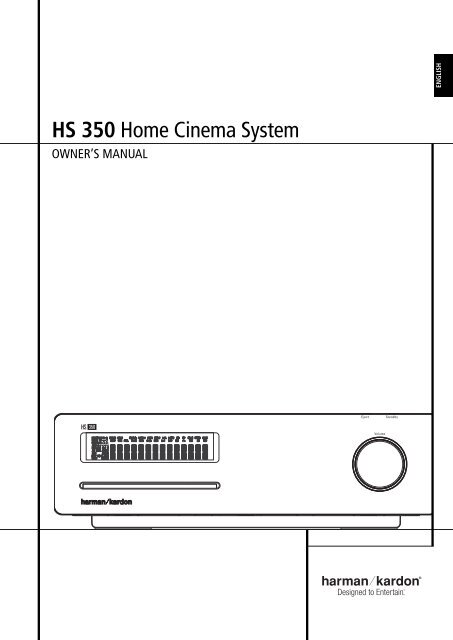
HS 350 Home Cinema System - Harman Kardon
HS 350 Home Cinema System - Harman Kardon
HS 350 Home Cinema System - Harman Kardon

You also want an ePaper? Increase the reach of your titles
YUMPU automatically turns print PDFs into web optimized ePapers that Google loves.
<strong>HS</strong> <strong>350</strong> <strong>Home</strong> <strong>Cinema</strong> <strong>System</strong><br />
OWNER’S MANUAL<br />
ENGLISH
Table of Contents<br />
Page<br />
3 Introduction<br />
4 Safety Information<br />
4 Unpacking<br />
5 Terminology<br />
6 Features<br />
7 Front Panel Controls<br />
8 Front Panel Display<br />
9 Rear Panel Connections<br />
11 Remote Control<br />
13 Basic Information<br />
13 About This Manual<br />
13 Regional Coding<br />
<strong>System</strong> Connection<br />
14 Installation and Connections<br />
14 Audio Connections<br />
14 Video Connections<br />
15 Optional Audio Connections<br />
15 Speaker Placement<br />
16 Connecting AC Power<br />
16 First Turn On<br />
Playback Basics<br />
16 Basic Playback<br />
16 Disc Playback Features<br />
16 Skipping tracks or titles/chapters<br />
16 Fast Motion Playback/Fast Search<br />
16 Freeze Frame and Frame Advance<br />
(with DVD only)<br />
17 Slow Motion Playback (with DVD only)<br />
17 About DivX Movie Files<br />
17 Surround Mode<br />
<strong>System</strong> Setup<br />
18 <strong>System</strong> Defaults<br />
18 Setup Menu<br />
18 <strong>System</strong> Settings<br />
18 Display Language<br />
18 Preferred Subtitle Language<br />
18 Panel Time-Out<br />
18 Status Bar Time-Out<br />
18 Parental Control<br />
18 Disc Recognition<br />
19 PBC Support<br />
19 Screen Saver<br />
19 Show Angle Icon<br />
19 Audio Settings<br />
19 Preferred Audio Language<br />
19 Dynamic Range<br />
19 Delay Unit<br />
19 Tone Control<br />
19 Bass Level<br />
19 Treble Level<br />
19 DVD Sound Mode<br />
19 Audio Adjustment<br />
19 Automated Speaker Setup Using EzSet/EQ<br />
21 Manual Setup<br />
21 Delay<br />
21 Output Level Adjustment<br />
21 Video Settings<br />
21 Aspect Ratio<br />
21 TV Standard<br />
21 Scan Type<br />
21 Video Output<br />
21 Scart Output<br />
21 Video Mode<br />
21 Video Resolution<br />
21 Video Adjustment<br />
Test Screen<br />
23 Test Screen<br />
23 TV Picture Adjustment with Test Screen<br />
Player/Radio Menu<br />
24 Using the Status Bar Menu<br />
24 Player Menu<br />
2 TABLE OF CONTENTS<br />
24 Information Displays<br />
24 Programmed Play<br />
24 Radio Menu<br />
25 Rearranging the station list<br />
25 Selecting presets<br />
25 Removing presets<br />
25 Auto Preset function<br />
25 RDS Station ID<br />
25 Surround Mode for Tuner<br />
TV Menu, AUX Menu, Digital In Menu<br />
26 TV Menu<br />
26 AUX Menu<br />
26 Digital Menu<br />
27 Surround Mode Chart<br />
USB Menu<br />
27 USB Menu<br />
Typographical Conventions<br />
In order to help you use this manual with the remote control, front-panel controls and rear-panel<br />
connections, certain conventions have been used.<br />
EXAMPLE – (bold type) indicates a specific remote control or front-panel button, or rear-panel<br />
connection jack<br />
EXAMPLE – (OCR type) indicates a message that is visible on the front-panel information display<br />
� – (number in a square) indicates a specific front-panel control<br />
� – (number in a circle) indicates a rear-panel connection<br />
Remote Control<br />
29 Learning Codes from a Remote<br />
29 Erasing Learned Codes<br />
29 Macro Programming<br />
DVD Language Codes<br />
31 Language Codes<br />
Troubleshooting<br />
32 Troubleshooting<br />
Glossary<br />
34 Glossary<br />
Specifications<br />
35 Specifications<br />
Declaration of Conformity<br />
We, <strong>Harman</strong> Consumer Group, Inc.<br />
2, route de Tours<br />
72500 Château-du-Loir,<br />
FRANCE<br />
declare in own responsibility, that the product described<br />
in this owner’s manual is in compliance with technical<br />
standards:<br />
EN 55013:2001 + A1:2003<br />
EN 55020:2002 + A1:2003<br />
EN 61000-3-2:2000<br />
EN 61000-3-3:1995 + A1:2001<br />
EN 60065:2002<br />
Jurjen Amsterdam<br />
<strong>Harman</strong> Consumer Group, Inc.<br />
12/08<br />
0 – (number in an oval) indicates a button or indicator on the remote<br />
A – (letter in a square) indicates an indicator on the front panel display<br />
The appearance of the text or cursor for your receiver’s on-screen menus may vary slightly from the<br />
illustrations in this manual. Whether the text appears in all uppercase or upper- and lowercase<br />
characters, performance and operation remain the same.
Introduction<br />
Thank you for choosing <strong>Harman</strong> <strong>Kardon</strong>!<br />
With the purchase of a <strong>Harman</strong> <strong>Kardon</strong> <strong>HS</strong> <strong>350</strong><br />
you are about to begin many years of listening<br />
enjoyment.<br />
Designed to provide all the excitement and detail<br />
of movie soundtracks and every nuance of<br />
musical selections, the <strong>HS</strong> <strong>350</strong> is truly a<br />
multichannel system for the new millennium.<br />
The <strong>HS</strong> <strong>350</strong> has been engineered so that it is<br />
easy to take advantage of all the power of its<br />
digital technology. To obtain the maximum<br />
enjoyment from your new system, we urge you<br />
to read this manual. A few minutes spent<br />
learning the functions of the various controls will<br />
enable you to take advantage of all the power<br />
the <strong>HS</strong> is able to deliver.<br />
If you have any questions about this product, its<br />
installation or its operation, please contact your<br />
retailer or custom installer. They are your best<br />
local sources of information.<br />
Description and Features<br />
The <strong>HS</strong> <strong>350</strong> is among the most versatile home<br />
cinema systems available, incorporating an Audio<br />
Video Controller, a DVD Audio player and a<br />
complete 5.1 loudspeaker system in one complete<br />
system solution. In addition to Dolby Digital<br />
and DTS decoding for digital sources, the Dolby<br />
Pro Logic II mode for Matrix surround-encoded or<br />
Stereo recordings is available for use with<br />
sources such as CD, VCR, TV broadcasts and the<br />
system's own FM tuner as well as the latest 5.1<br />
channel versions of <strong>Harman</strong>'s own Logic 7 ®<br />
technology.<br />
To enable you to get the maximum quality from<br />
DVDs, the <strong>HS</strong> <strong>350</strong> is equipped with the latest in<br />
design techniques, including advanced 10-bit<br />
video digital-to-analog converters (DAC) and<br />
Video (composite), S-Video and RGB video (RGB<br />
via SCART) outputs, to ensure that you get all the<br />
quality inherent in today’s DVD medium. For<br />
optimum playback of NTSC and PAL DVD with<br />
compatible high-definition display devices, the<br />
<strong>HS</strong> <strong>350</strong> is equipped with an HDMI output and<br />
progressive scan component video outputs.<br />
Along with conventional Video and CD audio<br />
discs, the <strong>HS</strong> <strong>350</strong> is also compatible with MP3,<br />
CD-R and CD-RW as well as DivX ® and VCD<br />
discs.<br />
NOTE: This player is designed and manufactured<br />
for compatibility with Region Management<br />
Information that is encoded on most DVD discs.<br />
This player is designed only for playback of discs<br />
2<br />
As portable USB devices increase in popularity,<br />
<strong>Harman</strong> <strong>Kardon</strong>'s <strong>HS</strong> <strong>350</strong> is among the first<br />
integrated home theater system that allows<br />
mobile interconnectivity by playing compatible<br />
music or image files from portable devices via<br />
two USB On-The-Go inputs.<br />
With one simple connection between the<br />
<strong>HS</strong> <strong>350</strong> and the <strong>Harman</strong> <strong>Kardon</strong> , you<br />
are able to listen to audio files stored on your<br />
compatible Apple ® iPod ® **. The Bridge will<br />
even let you charge your iPod.<br />
A wide range of programming features makes it<br />
easy to program an evening’s worth of<br />
entertainment. When playing DVDs, easy-tounderstand<br />
on-screen menus and icons make it<br />
simple to change languages, soundtracks,<br />
subtitles or aspect ratio, while a parental-lock<br />
function enables you to control which discs may<br />
be viewed by younger members of the<br />
household.<br />
An important addition to the <strong>HS</strong> <strong>350</strong>’s impressive<br />
list of features is EzSet/EQ , which automates<br />
the configuration process to make it quicker,<br />
easier and more precise. Using the special microphone<br />
supplied with the unit, EzSet/EQ takes the<br />
guesswork out of entering speaker “size” and<br />
crossover information, delay times for all<br />
channels and output levels. In addition to the<br />
configuration settings, EzSet/EQ also includes<br />
room equalization so that the signals sent to<br />
each speaker are tailored to provide accurate<br />
sonic quality with your specific combination of<br />
speaker type, room size and other factors that<br />
influence room acoustics. With EzSet/EQ, your<br />
system is custom-configured in a few minutes<br />
with accuracy that previously required expensive<br />
and hard-to-use test equipment.<br />
DVD players are among the fastest growing<br />
consumer electronics products ever brought to<br />
market, but this may, nevertheless, be the first<br />
DVD player you’ve owned. Although many of the<br />
features of the DVD resemble those of standard<br />
CD players, there are a number of functions that<br />
you may be unfamiliar with. To ensure that you<br />
are able to take advantage of all the power and<br />
flexibility the DVD has to offer, we encourage you<br />
to review this quick setup manual. That small<br />
investment of your time will pay major dividends<br />
in the enjoyment you will get from proper use of<br />
the DVD.<br />
with Region Code 2, or for discs that do not<br />
contain Region Code infor mation. If there is any<br />
other Region Code on a disc, that disc will not<br />
play on the DVD.<br />
**Compatible with all iPod models equipped<br />
with a dock connector, including thirdgeneration<br />
“Click Wheel” models and newer.<br />
Not compatible with iPod shuffle models.<br />
■ Dolby* Digital and Dolby Pro Logic* II<br />
Decoding, and the full suite of DTS ®<br />
modes<br />
■ <strong>Harman</strong> <strong>Kardon</strong>’s exclusive Logic 7 ®<br />
processing<br />
■ <strong>Harman</strong> <strong>Kardon</strong>’s advanced EzSet/EQ automatically configures speaker<br />
settings and sets room equalization for<br />
quick, easy and accurate system setup<br />
■ Plays a Wide Range of Video and Audio<br />
Formats, Including DVD-Video Discs,<br />
VCD, Standard CD Audio Discs, CD-R/RW,<br />
DVD-R/RW, DVD-+R/RW, Audio Discs and<br />
MP3 Discs<br />
■ DVD-Audio Playback for Richer Detail,<br />
Expanded Dynamic Range and Improved<br />
Realism<br />
■ HDMI Output with Upscaling to 720p<br />
for Digital Audio and Video Connection<br />
to an HD-Ready Screen<br />
■ Extensive Bass Management Options for<br />
DVD-Audio with Speaker Setup, Output<br />
Level Adjustment and Delay Settings<br />
■ High-Quality Video Playback 10-Bit<br />
DACs, Progressive Scan and Component<br />
Video Outputs<br />
■ Easy-to-Use On-Screen Navigation<br />
<strong>System</strong><br />
■ Playback of MP3 and Windows ® WMA<br />
Audio Discs and JPEG image files<br />
■ Simultaneous Playback of MP3 and<br />
JPEG files<br />
■ Side- and rear-panel USB On-The-Go<br />
connections for playing compatible<br />
music or image files from portable<br />
devices.<br />
■ Connects to <strong>Harman</strong> <strong>Kardon</strong>’s<br />
(optional) for charging, playback and<br />
control of a compatible Apple ® iPod ®<br />
device<br />
■ Extensive Programming Capability for<br />
Audio and Video Discs<br />
■ Parental Lock Controls Prevent<br />
Unauthorized Viewing of Restricted<br />
Movies<br />
■ Playback of DivX compressed video files<br />
■ Multiple Options for Language,<br />
Soundtrack and Subtitle Selection<br />
■ Multiple-Angle Capabilities With<br />
Specially Encoded DVD Discs<br />
■ Ergonomically Designed Remote Control<br />
■ Multiple digital inputs and outputs<br />
■ Multiple Analog Inputs and Outputs<br />
■ High Definition On-screen menu and<br />
display system<br />
■ Subwoofer Trigger to Control<br />
Subwoofer On/Off<br />
INTRODUCTION 3<br />
ENGLISH
Introduction / Safety Information<br />
IMPORTANT NOTES:<br />
This manual should be read in conjunction with<br />
the owners manual of the accompanying loudspeaker<br />
system. The instructions found therein<br />
should be followed with respect to loudspeaker<br />
operation and safety.<br />
Only use the <strong>HS</strong> <strong>350</strong> controller with the loudspeaker<br />
system supplied. Failure to do so may<br />
cause damage to either the controller or the<br />
loudspeakers and will invalidate any warranty.<br />
All of the optional system settings have been<br />
pre set at our factory for correct operation of the<br />
system. All you have to do is insert a disc, sit<br />
back, and enjoy a great home theater ex pe ri ence.<br />
You may want to change some of the op tion al<br />
set tings. A description of all the optional set tings<br />
and in struc tions for changing them are found in<br />
the second half of the manual.<br />
This system was designed to provide you with<br />
many years of reliable operation with a minimum<br />
of care and main te nance. Every component in<br />
your system was in perfect working con di tion<br />
when it left our fac to ry. If you ex pe ri ence any<br />
problems with the set-up or operation of this<br />
system, please review the Troubleshooting Guide<br />
at the end of this manual before you con tact<br />
your authorized <strong>Harman</strong> <strong>Kardon</strong> dealer.<br />
Important Safety Information<br />
Verify Line Voltage Before Use<br />
Your <strong>HS</strong> <strong>350</strong> has been designed for use with<br />
220-240-Volt AC current. Connection to a line<br />
voltage other than that for which it is intended<br />
can create a safety and fire hazard and may<br />
damage the unit.<br />
If you have any questions about the voltage<br />
requirements for your specific model, or about<br />
the line voltage in your area, contact your dealer<br />
before plugging the unit into a wall outlet.<br />
Do Not Use Extension Cords<br />
To avoid safety hazards, use only the power cord<br />
attached to your unit. We do not recommend<br />
that extension cords be used with this product.<br />
As with all electrical devices, do not run power<br />
cords under rugs or carpets or place heavy<br />
4 INTRODUCTION / SAFETY INFORMATION<br />
objects on them. Damaged power cords should<br />
be replaced immediately by an authorized service<br />
depot with a cord meeting factory specifications.<br />
Handle the AC Power Cord Gently<br />
When disconnecting the power cord from an AC<br />
outlet, always pull the plug, never pull the cord.<br />
If you do not intend to use the unit for any<br />
considerable length of time, disconnect the plug<br />
from the AC outlet.<br />
Do Not Open the Cabinet<br />
There are no user-serviceable components inside<br />
this product. Opening the cabinet may present a<br />
shock hazard, and any modification to the<br />
product will void your guarantee. If water or any<br />
metal object such as a paper clip, wire or a staple<br />
accidentally falls inside the unit, disconnect it<br />
from the AC power source immediately, and<br />
consult an authorized service station.<br />
Installation Location<br />
■ To assure proper operation and to avoid the<br />
potential for safety hazards, place the unit on<br />
a firm and level surface. When placing the unit<br />
on a shelf, be certain that the shelf and any<br />
mounting hardware can support the weight of<br />
the product.<br />
■ Make certain that proper space is provided<br />
both above and below the unit for ventilation.<br />
If this product will be installed in a cabinet or<br />
other enclosed area, make certain that there is<br />
sufficient air movement within the cabinet.<br />
Under some circumstances a fan may be<br />
required.<br />
■ Do not place the unit directly on a carpeted<br />
surface.<br />
■ Avoid installation in extremely hot or cold<br />
locations, or an area that is exposed to direct<br />
sunlight or heating equipment.<br />
■ Avoid moist or humid locations.<br />
■ Do not obstruct the ventilation slots on the<br />
top of the unit, or place objects directly over<br />
them.<br />
Cleaning<br />
When the unit gets dirty, wipe it with a clean,<br />
soft, dry cloth. If necessary, wipe it with a soft<br />
cloth dampened with mild soapy water, then a<br />
fresh cloth with clean water. Wipe dry<br />
immediately with a dry cloth. NEVER use<br />
benzene, aerosol cleaners, thinner, alcohol or any<br />
other volatile cleaning agent. Do not use<br />
abrasive cleaners, as they may damage the finish<br />
of metal parts. Avoid spraying insecticide near<br />
the unit.<br />
Moving the Unit<br />
Before moving the unit, be certain to disconnect<br />
any interconnection cords with other<br />
components, and make certain that you<br />
disconnect the unit from the AC outlet.<br />
Unpacking<br />
The carton and shipping materials used to<br />
protect your new receiver during shipment were<br />
specially designed to cushion it from shock and<br />
vibration. We suggest that you save the carton<br />
and packing materials for use in shipping if you<br />
move, or should the unit ever need repair.<br />
To minimize the size of the carton in storage, you<br />
may wish to flatten it. This is done by carefully<br />
slitting the tape seams on the bottom and<br />
collapsing the carton. Other cardboard inserts<br />
may be stored in the same manner. Packing<br />
materials that cannot be collapsed should be<br />
saved along with the carton in a plastic bag.<br />
If you do not wish to save the packaging<br />
materials, please note that the carton and other<br />
sections of the shipping protection are recyclable.<br />
Please respect the environment and discard<br />
those materials at a local recycling center.<br />
Copyright<br />
Audio-visual material may consist of copyright<br />
works which must not be recorded without the<br />
permission of the owner of the copyright.<br />
Please refer to relevant laws covering copyright<br />
protection.<br />
Copy protection<br />
This DVD player supports Macro vision copy<br />
protection. On DVD discs that include a copy<br />
protection code, if the contents of the DVD disc<br />
are copied using a VCR, the copy pro tecti on code<br />
prevents the videotape copy from playing<br />
normally.<br />
For Optimum Performance<br />
The controller is a precision device that is<br />
constructed using extremely accurate technology.<br />
Soiling or friction affecting the pickup lens or disc<br />
drive can impair the image quality. In the worst<br />
case, neither video nor audio will be played back.<br />
To obtain optimum picture quality, the player<br />
should be checked (cleaning and replacement of<br />
some parts) every 1,000 hours. Note that this<br />
period varies depending on the environment<br />
(temperature, humidity, dust) in which the player<br />
is used.<br />
Do not attempt to clean the pickup lens<br />
yourself.
Terminology<br />
Terminology<br />
Since they share some of the characteristics and<br />
technology of CD players, many of the terms and<br />
operational concepts used in a DVD player are<br />
similar to what you may be familiar with from CD<br />
players and changers, or older video disc formats<br />
such as Laser Disc. However, if this is your first<br />
DVD product, some of the terms used to describe<br />
the features of a DVD player may be unfamiliar.<br />
The following explanations should solve some of<br />
the mysteries of DVD, and help you to enjoy all<br />
the power and flexibility of the DVD format and<br />
the DVD.<br />
With the arrival of DVD, disc data capacity has<br />
increased dramatically. On a DVD Video disc most<br />
of this capacity is taken up by MPEG 2 video and<br />
the multichannel movie soundtrack in Dolby<br />
Digital and/or DTS. This information is<br />
compressed.<br />
Aspect Ratio: This is a description of the width<br />
of a video image in relation to its height.<br />
A conventional video screen is four units wide for<br />
every three units of height, that’s why the ratio is<br />
called ”4:3”. Newer wide aspect ratio video<br />
displays are 16 units wide for every nine units of<br />
height, making them more like the screen in a<br />
movie theater. The program material on a DVD<br />
may be recorded in either format and, in<br />
addition, you may configure the DVD to play<br />
back in either format, depending on the features<br />
recorded on a disc.<br />
High Definition Multimedia Interface<br />
(HDMI): HDMI has emerged as the digital<br />
standard for connecting High Definition devices,<br />
displays and components, and provides for the<br />
pristine transmission of high-definition digital<br />
video and digital audio via a single cable. HDMI<br />
is the first and only digital interface for<br />
Consumer Electronics devices that can carry<br />
uncompressed high-definition video, compressed<br />
or uncompressed multi-channel audio and<br />
command data, allowing customers to obtain<br />
pure digital picture and sound directly from the<br />
source (as it was meant to be seen and heard).<br />
USB On-The-Go: Due to its widespread<br />
acceptance, USB is becoming the de facto<br />
industry standard for connecting peripherals to<br />
PCs and laptops. Many of the new peripherals<br />
using USB are also portable devices.<br />
As these portable devices increase in popularity,<br />
there is a growing need for them to<br />
communicate directly with each other when a PC<br />
is not available, for instance in consumer<br />
electronics products. The USB On-The-Go<br />
technology addresses this need for mobile<br />
interconnectivity.<br />
Title: For a DVD, a title is defined as an entire<br />
movie or program. There can be as many chapters<br />
within a title as the producers decide to include.<br />
Most discs include only one title, but some may<br />
have more than one, to give you a “Double<br />
Feature” presentation.<br />
Chapter: DVD programs are divided into<br />
chapters and titles. Chapters are the sub-sections<br />
programmed into a single title on a disc.<br />
Chapters may be compared to the individual<br />
tracks on an audio CD.<br />
RGB Video: This is a new form of video signal<br />
that eliminates many of the artifacts of<br />
traditional composite video signals by splitting<br />
the signal into the three fundamental colors Red,<br />
Green and Blue (RGB). With an RGB connection<br />
(via SCART), you will see greater picture<br />
resolution and eliminate many picture<br />
imperfections such as the moiré patterns often<br />
seen on checkered patterned cloths. However, in<br />
order to benefit from RGB video, you must have<br />
a video display with an RGB compatible SCART<br />
input.<br />
Progressive scan: DVD offers progressive scan<br />
video outputs for use with compatible high-resolution<br />
televisions and projectors. Before DVD, no<br />
consumer medium could store, transmit or display<br />
video with full resolution. To conserve bandwidth,<br />
analog compression (interlacing) is employed: first<br />
the odd-numbered lines of a frame are displayed,<br />
followed by the even-numbered lines. The result is<br />
that only half of the video image is drawn at one<br />
time; the viewer's brain must reassemble the<br />
complete image. This is acceptable, if the monitor<br />
is not too large and if there is not too much<br />
motion in the image. Large displays and fast-moving<br />
images reveal the limitations of this system.<br />
Thanks to DVD's immense data capacity, images<br />
are now stored intact (progressively), so that all<br />
the lines in each frame (odd and even) are shown<br />
at the same time. But because most TV's cannot<br />
handle a progressive signal, all current DVD<br />
players generate an interlaced output for<br />
compatibility. Now, the <strong>Harman</strong> <strong>Kardon</strong> DVD is<br />
among the select few DVD players with true<br />
progressive scan video output (NTSC and PAL) for<br />
use with compatible TV's and CRT projectors and<br />
with all plasma, LCD and DLP display devices via<br />
the component video output. The result is 40%<br />
greater light output than a conventional TV and a<br />
stunningly detailed high definition image, along<br />
with an almost complete absence of visible<br />
scanlines and motion artifacts. Of course,<br />
traditional Y/Pr/Pb component video, SCART,<br />
S-Video and composite video outputs are<br />
included for use with conventional televisions and<br />
projectors.<br />
Multiple Angle: DVDs have the capability to<br />
show up to four different views of the same<br />
scene in a program. When a disc is encoded with<br />
multiple-angle information, pressing the Angle<br />
button will enable you to switch between these<br />
different views. Note that at present, few discs<br />
take advantage of this capability and, when they<br />
do, the multiple-angle technology may only be<br />
present for short periods of time within the disc.<br />
Producers will usually insert some sort of icon or<br />
graphic in the picture to alert you to the<br />
availability of multiple viewing angles.<br />
Reading: This is a message that you will see<br />
after you´ve loaded the disc and the tray has<br />
closed. It refers to the fact that the player must<br />
first examine the contents of the disc to see if it<br />
is a CD or DVD, and then extract the information<br />
about the type of material on the disc, such as<br />
languages, aspect ratios, subtitles, number of<br />
titles and more. The slight delay while the<br />
contents of the disc are read is normal.<br />
Resume: The operation of the Stop Button on<br />
the DVD works differently from what you are<br />
used to on CD players. On a traditional CD<br />
player, when you press the Stop button, the unit<br />
does just that: it stops playback. On a CD player,<br />
when you press the start button again, the disc<br />
starts from the beginning. With the DVD,<br />
however, you have two options when playing<br />
DVD discs. Pressing Stop once will stop playback,<br />
but it actually puts the unit in the Resume mode.<br />
This means that you can turn the machine off<br />
and, when you press play the next time, the disc<br />
will resume or continue from the point on the<br />
disc where the Stop button was pressed. This is<br />
helpful if you are watching a movie and must<br />
interrupt your viewing session but wish to pick<br />
up where you left off. Pressing the Stop button<br />
twice will stop the machine in a traditional<br />
manner and, when the disc is played again, it will<br />
start from the beginning.<br />
In resume mode, the cover of the DVD will be<br />
displayed, if available. Otherwise, the<br />
<strong>Harman</strong> <strong>Kardon</strong> screen will appear.<br />
DivX<br />
DivX is the name of a revolutionary new video<br />
codec which is based on the MPEG-4<br />
compression standard for video. This DVD player<br />
will playback discs created with DivX software.<br />
The DVD player’s playback functionalities of DivX<br />
video discs will vary depending on the DivX<br />
software version used for creating your movies.<br />
For more information about the different<br />
software versions of DivX, please go to<br />
www.divx.com.<br />
TERMINOLOGY 5<br />
ENGLISH
Features<br />
High quality video<br />
High Definition Multimedia Interface (HDMI)<br />
for a single wire, digital connection to your<br />
HD-Ready screen.<br />
Advanced sophisticated 10-bit MPEG-2 video<br />
decoding circuits.<br />
Progressive Scan component video ouputs<br />
(NTSC and PAL)<br />
Direct RGB output via SCART (selectable) for<br />
optimum video performance when HDMI or<br />
component video connections are not available.<br />
SCART connector also configurable for<br />
Composite Video output.<br />
Test screen videos available for testing video<br />
performance and setup.<br />
Pure PAL with NTSC disc due to true<br />
NTSC/PAL conversion.<br />
Dual-layer compatibility for extended play<br />
DVD.<br />
Playback of JPEG image files<br />
High quality digital audio<br />
High quality 5.1 digital surround sound from<br />
DVD-Audio, DTS or Dolby Digital discs.<br />
With linear PCM audio at 16-24 bits and<br />
44-96 kHz, audio quality exceeding that of CD<br />
becomes possible.<br />
Coaxial digital audio output.<br />
Many convenient features<br />
On-Screen Menu lcons for disc information or<br />
player information and access to many major<br />
functions of this unit.<br />
Thumbnails for easy search of image files.<br />
Subtitles may be displayed in one of numerous<br />
languages*.<br />
The multi-angle function allows you to choose<br />
the viewing angle of scenes which were shot<br />
from a number of different angles (Limited to<br />
DVD’s recorded with multiple camera angles.)<br />
Multiple options for dialog language and<br />
soundtrack selection (limited to DVD’s<br />
recorded with multiple dialog languages or<br />
soundtracks).<br />
Intuitive menu operating system.<br />
4 step Zoom during play and pause.<br />
Backlit, ergonomically designed remote<br />
control.<br />
Future software upgrades accessible via<br />
Internet. (See information below.)<br />
* The number of languages recorded depends<br />
on the software.<br />
6 FEATURES<br />
Compatible with CD<br />
as well as DVD<br />
The <strong>HS</strong> <strong>350</strong> will play any conventional Audio<br />
CD or recordable (CD-R) or erasable CD<br />
(CD-RW), MP3, WMA (v9) or any DivX or VCD<br />
or DVD-Audio and DVD-Video with the region<br />
code 0 or 2.<br />
Disc formats supported<br />
by this player<br />
The unit can play the following disc formats<br />
(8 cm and 12 cm size):<br />
DVD<br />
DVD-AUDIO<br />
DVD-R<br />
DVD-RW<br />
DVD+R<br />
DVD+RW<br />
CD<br />
CD-R<br />
CD-RW<br />
VCD<br />
S-VCD<br />
WMA (v9)<br />
NOTE: Due to differences in the format of<br />
certain discs, it is possible that some discs may<br />
include a mix of features that are not compatible<br />
with the DVD. Similarly, although the DVD is<br />
capable of a wide range of features, not all discs<br />
include every capability of the DVD system. For<br />
example, although the DVD is compatible with<br />
multi-angle discs, that feature is only possible<br />
when the disc is specially encoded for<br />
multipleangle play. In addition, the DVD is<br />
capable of playing back both Dolby Digital and<br />
DTS soundtracks, but the number and types of<br />
tracks available will vary from disc to disc. To<br />
make certain that a specific feature or<br />
soundtrack option is available, please check the<br />
options noted on the disc jacket.<br />
■ Playback capability for CD-R, CD-RW, WMA,<br />
JPEG, MP3, DivX, VCD/SVCD, DVD-R, DVD+R,<br />
DVD-RW and DVD+RW discs may vary due to<br />
variations in the quality of the disc and the<br />
recorder used to create the disc.<br />
■ The <strong>HS</strong> <strong>350</strong> is compatible with most discs<br />
recorded with files encoded using MP3 or<br />
Windows Media 9, as well as JPEG still<br />
images. However, note that variations in the<br />
encoder or codec used and the bit rate of the<br />
encoding may affect the <strong>HS</strong>'s ability to play<br />
back a specific disc. As a result, we cannot<br />
guarantee complete compatibility with all<br />
encoders and versions of the codecs. For best<br />
results, we recommend that MP3 files be<br />
encoded at bit rates ranging between 32kbps<br />
and 320kbps. WMA files should be encoded<br />
at bit rates between 64kbps and 320kbps.<br />
Although the <strong>HS</strong> systems is capable of playing<br />
some WMA 9 files, not all features of<br />
version 9 are supported. JPEG files should<br />
contain no more than 5 megapixels, and the<br />
file size should be no larger than 5Mb.<br />
Upgradeability via Internet<br />
The ”firmware” controlling the functionality of<br />
the <strong>Harman</strong> <strong>Kardon</strong> <strong>HS</strong> system is fully<br />
upgradeable. In the event of future<br />
improvements to its operations and features, it<br />
will be possible to download firmware upgrades<br />
from www.harmankardon.com/International/<br />
All you have to do is create a CD-R with the<br />
data and insert it in the DVD for an automatic<br />
upgrade.<br />
Packing List<br />
1 <strong>Harman</strong> <strong>Kardon</strong> <strong>HS</strong> <strong>350</strong> DVD Player/Controller<br />
1 <strong>Harman</strong> <strong>Kardon</strong> HKTS 11 <strong>Home</strong> Theater<br />
Speaker <strong>System</strong><br />
1 Remote control<br />
3 AAA batteries<br />
1 A/V cable for stereo analog audio and<br />
composite video<br />
1 S-Video cable<br />
1 remote extension cable<br />
1 owner's manual
Front Panel Controls<br />
� Main Information Display<br />
1 Power On/Off (Standby)<br />
2 Open/Close<br />
� Main Information Display: This display<br />
delivers messages and status indications to help<br />
you operate the <strong>HS</strong> <strong>350</strong> Controller.<br />
1 Power On/Off (Standby): Press the button<br />
once to turn the <strong>HS</strong> <strong>350</strong>Controller on, press it<br />
again to put the unit in the Standby mode.<br />
Note that when the <strong>HS</strong> <strong>350</strong> Controller is<br />
switched on, the Power Indicator around the<br />
button turns white.<br />
2 Eject: Press this button to release a disc<br />
from the loader.<br />
3 USB On-The-Go Input<br />
4 Headphone Jack<br />
5 Volume Control<br />
3 USB On-The-Go Input: This input may be<br />
used to temporarily connect a USB thumb device<br />
or portable hard disk for direct playback of<br />
audio, image of video files or a USB hub. The<br />
USB inputs are designed to power a single USB<br />
device at a time. If additional hard disks are<br />
connected through a hub it is necessary that<br />
additional external power supplies are used to<br />
power the hub and hard disks.<br />
6 Slot Loader<br />
4 Headphone Jack: This jack may be used to<br />
listen to the system's output through a pair of<br />
headphones. Be certain that the headphones<br />
have a standard 3.5 mm stereo phone plug.<br />
Note that the main room speakers will<br />
automatically be turned off when the<br />
headphone jack is in use.<br />
When configuring your system using EzSet/EQ,<br />
the calibration microphone should be plugged<br />
into this jack 4.<br />
5 Volume Control: Turn this knob clockwise<br />
to increase the volume, counterclockwise to<br />
decrease the volume. If the system is muted,<br />
adjusting volume control will automatically<br />
release the unit from the silenced condition.<br />
6 Slot loader: Gently insert a CD or DVD into<br />
this slot, with the printed side of the disc facing<br />
up. Note there is no drawer. Press the Eject<br />
Button 2 to release the disc<br />
FRONT PANEL CONTROLS 7<br />
ENGLISH
Front Panel Display<br />
A Disc Type Indicators<br />
B Playback-Mode Indicators<br />
C Progressive Scan Indicator<br />
D Parental Lock Indicator<br />
E Time Indicators<br />
F Video Format Indicators<br />
A Disc Type Indicators: The CD or DVD<br />
indicator will illuminate to show the type of disc<br />
currently being played.<br />
B Playback-Mode Indicators: These<br />
indicators light to show the current playback<br />
mode:<br />
N Lights when a disc is playing in the normal<br />
mode<br />
H Lights when the disc is in the Fast Search<br />
Forward mode. The on-screen banner display<br />
indicates the selected speed (2x, 8x, 16x, 100x).<br />
1 Lights when the disc is paused.<br />
G Lights when the disc is in the Fast Search<br />
Reverse mode. The on-screen banner display<br />
indicates the selected speed (2x, 8x, 16x, 100x).<br />
C Progressive Scan Indicator: This indicator<br />
lights when the unit sends out a progressive<br />
scan signal.<br />
D Parental Lock Indicator: This indicator<br />
lights when the parental-lock system is engaged<br />
in order to prevent anyone from changing the<br />
rating level without a code.<br />
8 FRONT PANEL DISPLAY<br />
G Source Indicators<br />
H Repeat Indicators<br />
I VCD Playback Control Indicator<br />
J Random Indicator<br />
K A-B Repeat Indicator<br />
L Program Indicator<br />
E Time Indicators: These positions in the<br />
indicator will show the running time of a DVD in<br />
play. When a CD is playing, these indicators will<br />
show the current track time, time remaining in<br />
the current track, or the total remaining time on<br />
the disc. When an iPod is playing, the display<br />
will show the elapsed and remaining time on the<br />
top line. The bottom line will scroll information<br />
about the song, title, album and artist.<br />
NOTE: The Indicators NOE will also display<br />
text messages about the DVD’s status, including<br />
Reading when a disc is loading,<br />
STANDBY when the unit is turned off, and<br />
Disc Error when a disc not compatible<br />
with the DVD is put into the play position.<br />
F Video Format Indicators: These indicators<br />
will represent the video format currently playing.<br />
G Source Indicators: These indicators will<br />
light to show which source is currently selected.<br />
H Repeat Indicators: These indicators light<br />
when any of the Repeat functions are in use.<br />
M Angle Indicator<br />
N Title Indicators<br />
O Chapter/Track Number Indicators<br />
P Video Output Indicators<br />
I VCD Playback Control Indicator: This<br />
indicator lights when the playback control<br />
function is turned on with VCDs.<br />
J Random Indicator: This indicator lights<br />
when the unit is in the Random Play mode.<br />
K A-B Repeat Indicator: This indicator lights<br />
when a specific passage for repeat playback has<br />
been selected.<br />
L Program Indicator: This indicator lights<br />
when the programming functions are in use.<br />
M Angle Indicator: This indicator blinks when<br />
alternative viewing angles are available on the<br />
DVD currently playing.<br />
N Title Indicators: These two positions in the<br />
display will show the current title number when<br />
a DVD disc is playing.<br />
O Chapter/Track Number Indicators: When<br />
a DVD disc is playing, these two positions in the<br />
display will show the current chapter. When a<br />
CD disc is playing they will show the current<br />
track number.<br />
P Video Output Indicators: These indicators<br />
will represent the active video output. .
Rear Panel Connections<br />
� Composite Video Output<br />
� S-Video Output<br />
� Component Video Outputs<br />
� Scart TV Output<br />
� AC Power Cord<br />
� FM Antenna<br />
� Audio In<br />
� Subwoofer Output<br />
� Composite Video Output: Connect this<br />
jack to the video input on a television or video<br />
projector.<br />
� S-Video Output: Connect this jack to the<br />
S-Video input on a television or video projector.<br />
� Component Video Outputs: These outputs<br />
carry the component video signals for connection<br />
to display monitors with component video inputs.<br />
For standard analog TV's or projectors with<br />
inputs marked Y/Pr/Pb or Y/Cr/Cb, connect these<br />
outputs to the corresponding inputs. If you have<br />
a high-definition television or projector that is<br />
compatible with high scan rate progressive video,<br />
connect these jacks to the “HD Component”<br />
inputs. Note that if you are using a progressive<br />
scan display device, then ”Progressive” must be<br />
selected in the Video Set-up Menu in order to<br />
take advantage of the progressive scan circuitry.<br />
See page 22 for more information on progressive<br />
scan video.<br />
IMPORTANT: These jacks should NOT be<br />
connected to standard composite video inputs.<br />
� SCART OUT (TV): If your TV has a SCART<br />
socket, you can connect a SCART cable to your<br />
TV and to your DVD Player for improved video<br />
quality. The SCART cable carries both audio and<br />
video. You can select Composite Video or RGB<br />
video for that SCART connector’s video output<br />
signal.<br />
� Coaxial Digital Input<br />
� Optical Digital Input<br />
� Analog Audio Outputs<br />
� Front Speaker Outputs<br />
� Center Speaker Outputs<br />
� Surround Speaker Outputs<br />
� Coaxial Digital Output<br />
� Subwoofer Trigger Output<br />
� AC Power Cord: Connect this plug to an AC<br />
outlet. If the outlet is controlled by a switch,<br />
make certain that it is in the ON position.<br />
� FM Antenna: Connect to the supplied FM<br />
antenna.<br />
� Audio In: Connect to a line-level analog<br />
audio source: TV, tape player, Minidisc, PC, etc.<br />
� Subwoofer Output: Connect to the<br />
SUB/LFE input on the subwoofer.<br />
� Coaxial Digital Input: Connect the coax<br />
digital output from a DVD player, HDTV receiver,<br />
LD player, MD player, satellite receiver or CD<br />
player to this jack. The signal may be either a<br />
Dolby Digital signal, DTS signal or a standard<br />
PCM digital source. Do not connect the RF digital<br />
output of an LD player to these jacks.<br />
� Optical Digital Input: Connect the optical<br />
digital output from a DVD player, HDTV receiver,<br />
LD player, MD player, satellite receiver or CD<br />
player to this jack. The signal may be either a<br />
Dolby Digital signal, DTS signal or a standard<br />
PCM digital source.<br />
� Analog Audio Outputs: Connect these<br />
jacks to the analog audio input on a TV set or<br />
external audio system for analog audio playback<br />
or to the RECORD/INPUT jacks of an audio<br />
recorder for recording.<br />
� USB On-The-Go Input<br />
� HDMI Output<br />
� Remote IR Output<br />
� Remote IR Input<br />
� TV Audio In<br />
� DMP Connector<br />
� Front Speaker Outputs: Connect these<br />
outputs to the matching + or – terminals on your<br />
left and right speakers. In conformance with the<br />
new CEA color code specification, the White<br />
terminal is the positive, or "+" terminal that<br />
should be connected to the red (+) terminal on<br />
Front Left speaker with the older color coding,<br />
while the Red terminal is the positive, or "+"<br />
terminal that should be connected to the red (+)<br />
terminal on Front Right speaker. Connect the<br />
black (–) terminals on the <strong>HS</strong> to the black (–)<br />
terminals on the speakers. See page 14 for more<br />
information on speaker polarity.<br />
� Center Speaker Outputs: Connect these<br />
outputs to the matching + and – terminals on<br />
your center channel speaker. In conformance with<br />
the new CEA color code specification, the Green<br />
Terminal is the positive, or "+" terminal that<br />
should be connected to the red (+) terminal on<br />
speakers with the older color coding. Connect<br />
the black (–) terminal on the <strong>HS</strong> to the black<br />
negative (–) terminal on your speaker. (See page<br />
14 for more information on speaker polarity.)<br />
REAR PANEL CONNECTIONS 9<br />
ENGLISH
Rear Panel Connections<br />
� Surround Speaker Outputs: Connect<br />
these outputs to the matching + and – terminals<br />
on your surround channel speakers. In conformance<br />
with the new CEA color code specification,<br />
the Blue terminal is the positive, or "+"<br />
terminal that should be connected to the red (+)<br />
terminal on the Surround Left speaker with older<br />
color coding, while the Gray terminal should be<br />
connected to the red (+) terminal on the<br />
Surround Right speaker with the older color<br />
coding. Connect the black (–) terminal on the <strong>HS</strong><br />
to the matching black negative (–) terminals for<br />
each surround speaker. (See page 14 for more<br />
information on speaker polarity.)<br />
Note: You’ll find more details about all<br />
Audio/Video connections under Setup and<br />
Connections on the following pages.<br />
� Coaxial Digital Output: Connect this jack<br />
to the matching digital input connector on a<br />
digital recorder such as a CD-R or MiniDisc<br />
recorder.<br />
� Subwoofer Trigger Output: Connect this<br />
trigger output to the trigger input of the<br />
<strong>Harman</strong> <strong>Kardon</strong> subwoofer, so that the<br />
subwoofer will switch on and off at the same<br />
time as the rest of the system.<br />
10 REAR PANEL CONNECTIONS<br />
� USB On-The-Go Input: This input may be<br />
used to temporarily connect a USB thumb device<br />
or portable hard disk for direct playback of<br />
audio, image of video files, a digital photo<br />
camera or a USB hub.<br />
� HDMI Output: Connect this output to the<br />
HDMI input of high-definition LCD, Plasma or<br />
video projector for the best possible picture<br />
quality.<br />
� Remote IR Output: This connection<br />
permits the IR sensor in the receiver to serve<br />
other remote controlled devices. Connect this<br />
jack to the “IR IN” jack on <strong>Harman</strong> <strong>Kardon</strong> or<br />
other compatible equipment.<br />
� Remote IR Input: If the <strong>HS</strong> <strong>350</strong>’s frontpanel<br />
IR sensor is blocked due to cabinet doors<br />
or other obstructions, an external IR sensor<br />
may be used. Connect the output of the sensor<br />
to this jack.<br />
� TV Audio Input: If your screen is<br />
connected to the <strong>HS</strong> by an HDMI, Component,<br />
S-Video or Composite cable, connect the<br />
analog output of your TV to this input. If you<br />
have your TV connected to the <strong>HS</strong> with a Scart<br />
cable, an audio connection to the TV Input is<br />
not necessary.<br />
� Digital Media Player (DMP)<br />
Connector: With the <strong>HS</strong> <strong>350</strong> turned off,<br />
connect one end of the optional <strong>Harman</strong> <strong>Kardon</strong><br />
to this proprietary connector, and the<br />
other to your compatible Apple iPod. When the<br />
Digital Media Player source is selected, you may<br />
view your iPod’s control and navigation<br />
messages on your video display (if one is<br />
connected to one of the Video Monitor<br />
Outputs �����), and in the Upper<br />
and Lower Display Lines E. You may<br />
navigate the iPod and select tracks for playback<br />
using the ⁄/¤/‹/› Buttons 9 and the<br />
Enter Button 6.
Remote Control<br />
0 Power On/Source Selection Button<br />
1 Power Off Button<br />
2 Subtitle Button<br />
3 Title Button<br />
4 Angle Button<br />
5 Audio Button<br />
6 Enter Button<br />
7 Eject Button<br />
8 Set-Up/OSD Button<br />
9 Arrows Button<br />
A Mute Button<br />
B Menu Button<br />
C Pause Button<br />
D Status Button<br />
E Skip/Step (Previous) Button<br />
F Skip/Step (Next) Button<br />
G Play Button<br />
H Search/Slow Reverse Button<br />
I STOP Button<br />
J Search/Slow Forward Button<br />
K Macro Buttons<br />
L Pic +/Pic - Button<br />
M Zoom Button<br />
N Playlist Button<br />
O Random Button<br />
P A-B Repeat Button<br />
Q Volume up/down Button<br />
� Mode Button<br />
� Numeric Keys Button<br />
� Repeat Button<br />
� Clear Button<br />
� Video output Button<br />
� Video format Button<br />
� Learn Button<br />
� Screen Power Buttons<br />
� Info Button<br />
� Teletext Buttons<br />
� Picture in Picture Button<br />
� Screen Format Button<br />
� IR Transmitter Window<br />
� Program Indicator<br />
�<br />
1<br />
0<br />
�<br />
L<br />
2<br />
8<br />
D<br />
9<br />
O<br />
N<br />
�<br />
K<br />
�<br />
� �<br />
7<br />
H<br />
E<br />
3<br />
I<br />
�<br />
�<br />
�<br />
Q<br />
B<br />
8<br />
�<br />
4<br />
�<br />
P<br />
�<br />
�<br />
A<br />
5<br />
6<br />
M<br />
�<br />
J G<br />
�<br />
F<br />
C<br />
REMOTE CONTROL 11<br />
ENGLISH
Remote Control<br />
0 Power On/Source Selector Buttons:<br />
Pressing one of these buttons will perform three<br />
actions at the same time. First, if the <strong>HS</strong> <strong>System</strong><br />
is not turned on, this will power up the unit.<br />
Next, it will select the source shown on the<br />
button as the input to the <strong>HS</strong> <strong>System</strong>. Finally, it<br />
will change the remote control so that it controls<br />
the device selected.<br />
1 Power Off Button: Turns off the<br />
<strong>HS</strong> system to standby mode.<br />
2 Subtitle Button: When a DVD is playing,<br />
press to select a subtitle language or to turn<br />
subtitles off.<br />
3 Title Button: When a disc is playing, press<br />
to make the player go back to the first section of<br />
the disc.<br />
4 Angle Button: Press to access various<br />
camera angles on a DVD (If the DVD contains<br />
multiple camera angles) or to rotate JPEG<br />
images.<br />
5 Audio Button: Press to access various<br />
audio languages on a DVD (If the DVD contains<br />
multiple audio streams).<br />
6 Enter Button: Press this button to activate<br />
a setting or option.<br />
7 Eject Button: Press to release the disc<br />
from the loader.<br />
8 Set-up/OSD: Press to access the On Screen<br />
Display Menu.<br />
9 Arrow buttons (M / N /K/L) Buttons:<br />
Use to move the cursor in the OSD.<br />
A Mute Button: Mutes the sound.<br />
B Menu Button: Displays the actual DVD<br />
Disc Menu on the TV screen in play mode.<br />
When playing discs with JPEG images, pressing<br />
this button will access the thumbnails.<br />
When playing files from your iPod via ,<br />
pressing this button will call up the iPod's menu.<br />
C Pause Button: Freezes a picture (with<br />
DVD/VCD) and pauses the playback signal (CD)<br />
when a disc is playing. Press again for normal<br />
playback.<br />
D Status Button: Press while a disc is<br />
playing to view banner display. Use the ARROW<br />
buttons to move through the different features in<br />
the Banner Display. When a symbol is<br />
highlighted, press ENTER on the remote to<br />
select it.<br />
12 REMOTE CONTROL<br />
E Skip/Step (Previous) Button: Press to go<br />
to beginning of current track. Press again quickly<br />
to go to beginning of previous track. After<br />
pressing the PAUSE button, each press of this<br />
button will move the image in reverse frame by<br />
frame.<br />
F Skip/Step (Next) Button: Press to go to<br />
beginning of next track. After pressing the PAUSE<br />
button, each press of this button will move the<br />
image forwards frame by frame.<br />
G Play Button: Begins to play disc (closes<br />
disc tray first, if it is open).<br />
H Search/Slow (Rev.) Button: Allows you<br />
to search in reverse through a disc while it is in<br />
play mode. Each time you press this button, the<br />
search speed changes as indicated by a number<br />
of arrows on the right top of your screen.<br />
After pressing the PAUSE button, each press of<br />
this button will change the slow down speed<br />
indicated by a number of arrows in the right top<br />
of the screen.<br />
I Stop Button: Stops playing a disc. When a<br />
disc is playing, if you press STOP and PLAY, the<br />
disc will resume play, i.e. it will start from the<br />
same point on the disc where the unit was<br />
stopped. If you press STOP twice and the PLAY<br />
button, the disc will start play from the<br />
beginning.<br />
J Search/Slow (Fwd.) Button: Allows you<br />
to search forward through a disc while it is in<br />
play mode. Each time you press this button, the<br />
search speed changes as indicated by a number<br />
of arrows on the right top of your screen.<br />
After pressing the PAUSE button, each press of<br />
this button will change the slow down speed as<br />
indicated by a number of arrows in the right top<br />
of the screen.<br />
K Macro Buttons: Press these buttons to<br />
store or recall a “Macro”, which is a pre-programmed<br />
sequence of commands stored in the<br />
remote. (See page 29 for more information on<br />
storing and recalling macros.).<br />
L Pic +/Pic - Button: Pressing these buttons<br />
in JPEG mode will move to the previous or next<br />
image.<br />
M Zoom Button: When a DVD or VCD is<br />
playing, press this button to zoom the picture so<br />
that it is enlarged. There are 4 steps to the zoom<br />
function, each progressively larger. Press through<br />
each of the zoom stages to return to a normal<br />
picture. The Zoom function is not available when<br />
watching High Definition material.<br />
N Playlist Button: Press this button to<br />
change the playback order of the disc.<br />
O Random Button: Press for RANDOM<br />
playback in random order.<br />
P A-B Button: Press to select section A-B and<br />
to play repeatedly.<br />
Q Volume Up/Down: Increase/<br />
decrease the master volume level.<br />
� Mode Button: This button enables you to<br />
switch the remote to another mode so that it<br />
operates another device without selecting it as<br />
the source. Each press of the Mode button<br />
changes the remote’s mode in this order: TV,<br />
DVD, CD, RADIO, AUX, D-IN, USB and DMP, and<br />
then back to TV again. The corresponding Source<br />
Selector will light to indicate the mode.<br />
� Numeric Keys Button: Select numbers by<br />
pressing these buttons.<br />
� Repeat Button: Press to go to the Repeat<br />
menu. You can repeat a chapter, track or the<br />
entire disc.<br />
� Clear Button: Press to remove the Banner<br />
menu from the screen.<br />
� Video output Button: Press to toggle<br />
between the S-Video, Component Video Outputs<br />
and SCART RGB video output of the <strong>HS</strong> Sysrem<br />
player. Note that the Composite and SCART<br />
Composite Video Outputs on the player are<br />
always active, which could help you make your<br />
initial setup.<br />
� Video format Button: Press this button to<br />
change the resolution of the Component Video<br />
Output between standard definition and<br />
progressive definition (PAL interlaced and PAL<br />
progressive; NTSC interlaced and NTSC<br />
progressive).<br />
� Learn Button: Press this button to begin<br />
the process of “learning” the codes from another<br />
product’s remote into the <strong>HS</strong> <strong>System</strong>’s remote.<br />
(See page 29 for more information on using the<br />
remote’s learning function.)<br />
� to � These buttons do not have a direct<br />
function with the <strong>HS</strong> <strong>350</strong>, but can be<br />
programmed to control some of the functions of<br />
your TV using the Learning function of the<br />
remote control.<br />
� IR Transmitter Window: Point this window<br />
towards the <strong>HS</strong> when pressing buttons on the<br />
remote to make certain that infrared commands<br />
are properly received.<br />
� Program Indicator: This three-color<br />
indicator is used to guide you through the<br />
process of learning commands from a remote<br />
into the <strong>HS</strong>’s remote code memory. (See page<br />
29 for more information on programming the<br />
remote.)
Basic Information<br />
About This Manual<br />
The types of functions and operations that can<br />
be used for a particular disc vary depending on<br />
the features of that disc. In some cases, these<br />
functions and operations may differ from the<br />
descriptions given in this manual. In this event,<br />
follow the instructions given on the screen.<br />
This manual only covers basic disc operations.<br />
For some operations, the icon may appear<br />
on the screen. This indicates that the operation<br />
described in this manual is not available on the<br />
disc in the player.<br />
On-screen and front panel display illustrations<br />
in this manual are purely for the purposes of<br />
explanation. The actual displays may differ<br />
slightly from these illustrations.<br />
Disc handling precautions<br />
To keep the disc clean, handle the disc by its<br />
edge. Do not touch the surface.<br />
Do not stick paper or tape on the disc. If there<br />
is glue (or a similar substance) on the disc,<br />
remove the glue completely before using the<br />
disc.<br />
Do not expose the disc to direct sunlight or<br />
sources such as hot air ducts, or leave it in a<br />
car parked in direct sun light as there can be a<br />
considerable rise in temperature in side the car.<br />
After playing, store the disc in its case.<br />
Do not write on the label side with a ball-point<br />
pen or other writing utensils.<br />
Be careful not to drop or bend the disc.<br />
Disc cleaning precautions<br />
Before playing, clean the disc with a cleaning<br />
cloth. Wipe the disc from the center out.<br />
Do not use solvents such as benzine, thinner,<br />
commercially available cleaners or anti-static<br />
spray in tend ed for vinyl LPs.<br />
Disc installing precautions<br />
Do not install more than 1 disc on disc tray.<br />
Do not place the disc on the tray up-side<br />
down.<br />
Do not try to close the disc tray when the disc<br />
is not installed and centered properly.<br />
Regional Coding<br />
DVD players and discs are designed with<br />
regional restrictions which dictate the regions in<br />
which a disc can be played. If the region number<br />
on the disc you want to play does not match the<br />
region number of your DVD player, you will not<br />
be able to play the disc. The message “REGION<br />
ERR” will appear in the front panel display.<br />
The region code of this player is indicated on the<br />
rear and on the external packaging.<br />
BASIC INFORMATION 13<br />
ENGLISH
Installation and Connections<br />
After unpacking the unit, and placing it on a<br />
solid surface capable of supporting its weight,<br />
you will need to make the connections to your<br />
audio and video equipment.<br />
Audio Equipment Connections<br />
We recommend that you use high-quality interconnect<br />
cables when making connections to<br />
source equipment and recorders to preserve the<br />
integrity of the signals.<br />
When making connections to audio source<br />
equipment or speakers it is always a good<br />
practice to unplug the unit from the AC wall<br />
outlet. This prevents any possibility of<br />
accidentally sending audio or transient signals to<br />
the speakers that may damage them.<br />
1. Connect the front, center and surround speaker<br />
outputs ��� to the respective speakers.<br />
Cables that are run inside walls should have the<br />
appropriate markings to indicate listing with any<br />
appropriate testing agency standards. Questions<br />
about running cables inside walls should be<br />
referred to your installer or a licensed electrician<br />
who is familiar with the applicable local building<br />
codes in your area.<br />
When connecting wires to the speakers, be<br />
certain to observe proper polarity. Note that the<br />
positive (+) terminal of each speaker connection<br />
now carries a specific color code. However, most<br />
speakers will still use a red terminal for the<br />
positive (+) connection. Con nect the “negative”<br />
or “black” wire to the same terminal on both the<br />
receiver and the speaker.<br />
We also recommend that the length of cable<br />
used to connect speaker pairs be identical. For<br />
example, use the same length piece of cable to<br />
connect the front-left and front-right or<br />
surround-left and surround-right speakers, even<br />
if the speakers are a different distance from the<br />
<strong>HS</strong> controller.<br />
2. Connections to the subwoofer are made via a<br />
line level audio connection from the Subwoofer<br />
Output � to the line-level SUB input (purple)<br />
of the subwoofer. Connect at the same time the<br />
Subwoofer Trigger Output � to the Trigger<br />
Input of the subwoofer.<br />
3. Connect the supplied FM antenna to the FM<br />
(75 ohm) connection �. The FM antenna may<br />
be an external roof antenna, an inside powered<br />
or wire lead antenna or a connection from a<br />
cable system. Note that if the antenna or<br />
connection uses 300-ohm twin-lead cable, you<br />
should use a 300-ohm-to-75-ohm adapter to<br />
make the connection.<br />
14 INSTALLATION AND CONNECTIONS<br />
Video Equipment Connections<br />
Video equipment is connected in the same<br />
manner as audio components. Again, the use of<br />
highquality interconnect cables is recommended<br />
to preserve signal quality.<br />
Connecting the TV and optional<br />
components<br />
NOTE: To be able to listen to the sound of a live<br />
TV show through the loudspeakers of your <strong>HS</strong><br />
system you need a connection between the audio<br />
output of your TV and the <strong>HS</strong> controller: to<br />
achieve this when using the supplied SCART<br />
cable, you don’t need to connect any additional<br />
wires – the SCART cable transports audio and<br />
video signals in both directions. But when using<br />
the HDMI, Component, S-Video or compo site<br />
jacks you need to connect the audio output of<br />
your TV set with the TV AUDIO IN � on the<br />
back of your <strong>HS</strong> controller. If your TV has a digital<br />
audio output, it is recommended to use that one<br />
over the analog audio output. Connect the digital<br />
output of your TV to the DIGITAL IN �� on<br />
the back of your <strong>HS</strong> Controller.<br />
HDMI Connection<br />
If your TV set is equipped with an HDMI input, we<br />
suggest you use the HDMI connection to connect<br />
your <strong>HS</strong> system and your TV. It will allow you to<br />
watch your DVD's in the best possible picture<br />
quality. Most LCD, Plasma and video projectors<br />
have such an HDMI input nowadays. Connect the<br />
HDMI Output � to the HDMI Input of your<br />
video device.<br />
The HDMI wire does not transport audio signals<br />
from the TV to the <strong>HS</strong>, thus you need an<br />
additional audio connection (see note above).<br />
DIGITAL OUT<br />
AUDIO OUT<br />
HDMI IN<br />
If your TV set does not have an HDMI Input,<br />
please follow one of the steps below to connect it<br />
to your <strong>HS</strong> system or other video components.<br />
TV Connection (method 1)<br />
– using SCART cable (included)<br />
To view the video from DVD discs on your TV set,<br />
connect the SCART TV Out jack � of the <strong>HS</strong><br />
system to the SCART In jack of your TV set.<br />
The audio connection runs through the same cable<br />
(see note above).<br />
TV Connection (method 2) – using S-Video<br />
cable (not included)<br />
If your TV set has an S-Video input jack you can<br />
connect your TV to the S-Video out jack � on the<br />
back of the <strong>HS</strong> controller. S-Video wires don’t<br />
transport audio signals, thus you need an<br />
additional audio connection (see note above).<br />
DIGITAL OUT<br />
AUDIO OUT<br />
TV SET<br />
AUDIO OUT<br />
S-VIDEO IN<br />
TV SET<br />
TV connection (method 3) – using<br />
composite video (cable not included)<br />
If your TV set has neither S-Video nor SCART<br />
input jacks, connect the Video Out jack � of the<br />
<strong>HS</strong> to the Video In jack of your TV set. The<br />
composite wire also doesn’t transport audio<br />
signals, thus you need to make additional<br />
connections (see earlier note).<br />
Component Video Connection (method 4)<br />
If the video display has component video inputs,<br />
connect the Component Video Outputs � on<br />
the <strong>HS</strong> <strong>350</strong> to the cor res ponding input jacks on<br />
your televi sion. If you are using a pro gres sive<br />
scan television or projector, you must also<br />
change the Scan Type in the DVD player's Video<br />
Set-Up Menu from ”Interlaced” to<br />
”Progressive”.<br />
COMPONENTS IN
Installation and Connections<br />
Connecting VCR and Sat Decoder<br />
(method 5 and 6)<br />
Diagrams 5 and 6 show possible con nec tion<br />
methods for common system configurations.<br />
These are intended as guidelines only. Due to differences<br />
in equipment specifi ca tions, the method<br />
of connection of your equipment may be different<br />
to that shown. Please consult the Owner’s<br />
Manual of your equipment for further guidance.<br />
AUDIO OUT AUDIO OUT<br />
TV SET<br />
Connecting Set-top Box or Digital Satellite<br />
Receiver (method 7) - using coaxial digital<br />
cable<br />
To listen to the digital multichannel signal or<br />
downmix from Set-top boxes or digital satellite<br />
receivers, connect the Coaxial Digital Out of your<br />
device to the Coaxial Digital In � on the <strong>HS</strong><br />
controller.<br />
DIGITAL OUT<br />
VCR SATELLITE DECODER<br />
Optional Audio Connections<br />
Aux Input for External Source<br />
You may connect a line-level stereo analog audio<br />
source such as a Sat receiver, tape deck, phono<br />
preamp of a record player, etc. to the controller's<br />
rear panel AUDIO IN Input � sockets to enjoy<br />
the benefits of your <strong>HS</strong> system with other source<br />
components.<br />
VCR Connection-Audio (Cables Not Included).<br />
To listen to the sound from your stereo VCR<br />
through the speakers of this system, connect<br />
the Left/Right audio output jacks of your stereo<br />
VCR to the Left/Right audio input jacks AUDIO<br />
IN � of this system.<br />
Aux Output for Recording<br />
To record the sound of the <strong>HS</strong> system with your<br />
VCR or any audio recording device (tape deck,<br />
MD, CDR and some others.) the Audio Out jacks<br />
� should be connected to the analog Record In<br />
jacks of the appropriate device. They can also be<br />
connected to any audio input on your TV to listen<br />
to the sound of your <strong>HS</strong> controller through the<br />
speakers of your TV only, when the amp in your<br />
subwoofer is turned off and the volume of the <strong>HS</strong><br />
controller has been turned down completely. If<br />
the speakers of your <strong>HS</strong> system are active, the<br />
volume on your TV should be turned down.<br />
Digital In- and Outputs<br />
Connect the digital output of any digital sources<br />
such as an optional CD or DVD changer or player,<br />
advanced video game, a digital satellite receiver,<br />
HDTV tuner or digital cable set-top box or the<br />
output of a compatible computer sound card to<br />
the Optical and Coaxial Digital Inputs ��.<br />
Connect the Coaxial Digital Output � on the<br />
rear panel of the <strong>HS</strong> to the matching digital input<br />
connections on a CD-R or MiniDisc recorder.<br />
Notes when connecting the<br />
optical digital audio cable (optional)<br />
■ Gently push the cable plug through the builtin<br />
shutter that covers the optical digital audio<br />
output and connect the cable firmly so that<br />
the configurations of both the cable and the<br />
connector match.<br />
Speaker Placement<br />
The placement of speakers in a multichannel<br />
home-theater system can have a noticeable<br />
impact on the quality of sound reproduced.<br />
Depending on your viewing device, place the<br />
center speaker either directly above or below<br />
your TV, or in the center behind a perforated<br />
front-projection screen.<br />
Once the center-channel speaker is installed,<br />
position the left-front and right-front speakers so<br />
that they are as far away from one another as<br />
the center-channel speaker is from the preferred<br />
listening position. Ideally, the front-channel<br />
speakers should be placed so that their tweeters<br />
are no more than 60cm above or below the<br />
tweeter in the center-channel speaker.<br />
Depending on the specifics of your room<br />
acoustics, you may find that imaging is improved<br />
by moving the front-left and front-right speakers<br />
slightly forward of the center-channel speaker.<br />
If possible, adjust all front loudspeakers so that<br />
they are aimed at ear height when you are<br />
seated in the listening position.<br />
Using these guidelines, you’ll find that it takes<br />
some experimentation to find the correct location<br />
for the front speakers in your particular<br />
installation. Don’t be afraid to move things<br />
around until the system sounds correct. Optimize<br />
your speakers so that audio transitions across the<br />
front of the room sound smooth.<br />
When the <strong>HS</strong> is used in 5.1-channel operation,<br />
the preferred location for surround speakers is on<br />
the side walls of the room, at or slightly behind<br />
the listening position.<br />
No more than<br />
60cm<br />
Left Front<br />
Speaker<br />
Center Front Speaker<br />
Right Front<br />
Speaker<br />
A) Front Channel Speaker Installation with<br />
Direct-View TV Sets or Rear-Screen Projectors<br />
No more than 2m<br />
when rear-mounted<br />
speakers are used<br />
Left Front<br />
Speaker<br />
TV or Projection Screen<br />
Center Front<br />
Speaker<br />
Optional Rear-Wall Mounting<br />
Right Front<br />
Speaker<br />
B) The distance between the left and right<br />
speakers should be equal to the distance from<br />
the seating position to the viewing screen.<br />
You may also experiment with placing the left<br />
and right speakers slightly forward of the center<br />
speaker.<br />
Rear speaker mounting is an alternate location<br />
for 5.1 systems.<br />
Rear surround speakers may also be used in 5.1<br />
channel mode as an alternative mounting<br />
position when it is not practical to place the<br />
main surround speakers at the sides of the<br />
room. Speakers may be placed on a rear wall,<br />
behind the listening position. As with the side<br />
speakers, the center of the rear surrounds should<br />
face you. The speakers should be no more than<br />
2 meters behind the rear of the seating area.<br />
Subwoofers produce largely nondirectional<br />
sound, so they may be placed almost anywhere<br />
in a room. Actual placement should be based on<br />
room size. One method of finding the optimal<br />
location for a subwoofer is to begin by placing it<br />
in the front of the room, about 15cm from a<br />
wall, or near the front corner of the room.<br />
Another method is to temporarily place the<br />
subwoofer in the spot where you will normally<br />
sit, and then walk around the room until you<br />
find a spot where the subwoofer sounds best.<br />
Place the subwoofer in that spot.<br />
INSTALLATION AND CONNECTIONS 15<br />
ENGLISH
Installation and Connections<br />
Connecting the AC Power<br />
Notes<br />
The Power Requirement is: AC 230V, 50 Hz.<br />
Connecting to power other than the one listed<br />
above may damage the system or cause<br />
abnormal operation.<br />
Before connecting the AC power cord of this<br />
system to a wall outlet, connect the speakers<br />
and other component cables to the system.<br />
Connect the AC power cord of the active<br />
subwoofer.<br />
Connect the AC power cords of your TV and<br />
any optional components to a wall outlet.<br />
Once the speakers have been placed in the room<br />
and connected, the remaining steps are to<br />
program the system configuration memories.<br />
First Turn On<br />
You are now ready to power up the <strong>HS</strong> <strong>350</strong><br />
Controller to begin final adjustments.<br />
1. Plug the Power Cable � into an un switched<br />
AC outlet.<br />
Note that the Power Indicator 1 will turn<br />
orange, indicating that the unit is in the<br />
Standby mode.<br />
2. Remove the protective plastic film from the<br />
main front-panel lens. If left in place, the film<br />
may affect the performance of your remote<br />
control.<br />
3. Install the three supplied AAA batteries in the<br />
remote as shown. Be certain to follow the (+)<br />
and (–) polarity indicators that are on the top<br />
of the battery compartment.<br />
4. Turn the <strong>HS</strong> <strong>350</strong> on either by pressing the<br />
Power On/Off 1 or the Input Source<br />
Selectors 0 on the remote control. The<br />
Power Indicator 1 will turn white to confirm<br />
that the unit is on, and the Main<br />
Information Display � will also light up.<br />
16 INSTALLATION AND CONNECTIONS<br />
Playback Basics<br />
Basic Play<br />
1. Switch the TV ON and select its video input<br />
connected to the <strong>HS</strong> Controller.<br />
2. When you switch on the <strong>HS</strong> system controller,<br />
a <strong>Harman</strong> <strong>Kardon</strong> <strong>HS</strong> welcome image should<br />
appear on the screen. If that screen appears<br />
distorted or without color, change the<br />
appropriate settings at the Video Setting<br />
Submenu according to your TV set and to the<br />
connection used between the <strong>HS</strong> Controller<br />
and your TV.<br />
3. If there is no picture at all, not even the<br />
<strong>Harman</strong> <strong>Kardon</strong> screen, check the setting of<br />
the video input used on your TV (most SCART<br />
inputs on TVs can be configured in the TV´s<br />
menu). If this doesn't work, connect your TV<br />
with different cables to the <strong>HS</strong> Control ler, e.g.<br />
via Composite (yellow jacks) or S-Video cables,<br />
rather than SCART to view the setup menus<br />
until all appropriate ”Video menu” settings<br />
are made properly.<br />
4. Insert a disc into the Slot Loader 6.<br />
Hold the disc without touching either of its<br />
surfaces, position it with the side you wish to<br />
play facing down, align it with the guides, and<br />
place it in its proper position.<br />
3" (8 cm) discs or 5" (12 cm) discs can be<br />
used.<br />
5. After the discs slides into the loader, it will<br />
start playing automatically.<br />
With most DVD’s, a Disc Menu appears on the<br />
screen. Select specific menu item by using<br />
ARROW 9 buttons on the remote, then<br />
press ENTER 6.<br />
Disc Playback Features<br />
Skipping tracks or titles/chapters<br />
To move forward or backward through the tracks<br />
on a CD or the titles or chapters on a DVD, press<br />
Previous/Next EF.<br />
Fast Motion Playback/Fast Search<br />
1. To move forward or backward through the<br />
DVD or CD disc being played at fast speed,<br />
press Search HJ on the remote. Once one<br />
of these buttons is pressed, the fast search will<br />
continue until Play is pressed.<br />
There are four fast-play speeds. Each press of the<br />
Search Buttons will cycle to the next speed in the<br />
following order: 2x, 4x, 16x, 100x, indicated by a<br />
number of arrow indicators on the right top of<br />
the screen.<br />
2. Press PLAY G at any time to resume normal<br />
playback.<br />
Note that there will be no audio playback during<br />
fast-forward or -reverse play of DVD discs. This is<br />
normal for DVD, as surround processors cannot<br />
process the digital audio streams during fast-play<br />
modes; audio will be heard during fast-play of<br />
conventional CD’s.<br />
Freeze Frame and Frame Advance<br />
(with DVD only)<br />
1. Press PAUSE C when a DVD is playing to<br />
freeze the picture.<br />
2. Each time you press one of the STEP (FWD or<br />
REV EF) buttons, the picture advances<br />
one frame in the selected direction.<br />
3. Press PLAY G to resume normal playback.
Installation and Connections<br />
Slow Motion Playback (with DVD only)<br />
1. When a DVD disc is in pause or freeze frame<br />
mode, you may move slowly forward or<br />
backward through the program being played<br />
at one of four speeds by pressing the SEARCH<br />
Buttons HJ on the remote. Each press of<br />
the buttons will move to the next speed,<br />
indicated by a number of arrow indicators on<br />
the right top of the screen.<br />
2. Press PLAY G to resume normal playback.<br />
Note that there will be no audio playback during<br />
slow-forward or -reverse play of DVD discs. This<br />
is normal for DVD, as surround processors<br />
cannot process the digital audio streams during<br />
slow modes. Slow play is not available for CD.<br />
Notes: Playback features may not be available<br />
during the opening credits of a movie. This is<br />
intended by the disc author and is not a failure<br />
of the <strong>HS</strong> Controller.<br />
Playback of a DVD with 96 kHz/24-bit audio<br />
requires the use of circuitry normally used for<br />
other features. Accordingly, Slow Play Reverse<br />
and Step Advance features are not available<br />
with these discs.<br />
Depending on the structure of a VCD disc, the<br />
functions Slow Reverse and Step Reverse may be<br />
prohibited or have no function and Fast Playback<br />
(Search) may not function.<br />
Fast Playback (Search) will not function with<br />
CD's containing MP3 data.<br />
About DivX Movie Files<br />
The DivX disc compatibility of this DVD player is<br />
limited by the following:<br />
the available resolution size of the DivX file<br />
should be below 720x576 (W x H) pixels.<br />
the total number of files and folders on the<br />
disc should be less than 999.<br />
the number of screen frames per second<br />
should be below 29.97 frames per second.<br />
the video and audio structure of recorded file<br />
should be interleaved.<br />
The player is capable of playing DivX files with<br />
the extensions “.avi”.<br />
The player is capable of playing subtitle files<br />
with the extensions “.smi”, “.srt”, “.sub (Micro<br />
DVD format only)” or "ssa". Other subtitle files<br />
won’t be displayed. Subtitle files need to carry<br />
the same name as the movie file (but with either<br />
one of the above extensions) and should be<br />
located in the same directory.<br />
Playing a DivX Movie Disc<br />
Before playing DivX movie discs, please note the<br />
following:<br />
multi session DVD containing Windows Media<br />
Audio files may not be supported.<br />
open session discs are not supported.<br />
the DVD player does not support PC data.<br />
this DVD player does not support an<br />
unfinalized disc with a closed session.<br />
1. Insert a disc into the Slot Loader 6.<br />
2. Press the OSD button of the remote control<br />
and select a folder by pressing the up/down<br />
cursor buttons and press ENTER. A list of files<br />
in the folder appears. If you are in a file list<br />
and want to return to the Folder list, use the<br />
up/down buttons on the remote to highlight<br />
and press ENTER.<br />
3. If you want to view a particular file, press the<br />
up/down buttons to highlight a file and press<br />
PLAY.<br />
When playing back a DivX movie you can use<br />
variable playback functions like fast and slow<br />
backward and forward, as well as step forward<br />
and step backward.<br />
4. Press STOP to stop the playback.<br />
The DVD player’s playback functionalities of DivX<br />
video discs will vary depending on the DivX<br />
version used for creating your movies.<br />
Surround Mode<br />
One of the most important features of the<br />
<strong>HS</strong> <strong>350</strong> Controller is its ability to reproduce a full<br />
multichannel surround sound field from digital<br />
sources, analog matrix surround encoded<br />
programs and standard stereo programs.<br />
Selection of a surround mode is based on<br />
personal taste, as well as the type of program<br />
source material being used. For example, motion<br />
pictures, CD’s or TV programs bearing the logo<br />
of one of the major surround encoding<br />
processes, such as Dolby Surround should be<br />
played in either the Dolby Pro Logic II Movie or<br />
Logic 7 Movie (with movies) or Music (with<br />
music) surround mode.<br />
Surround modes and audio formats are selected<br />
using the remote. Press the AUDIO button 5<br />
to toggle between the surround modes/audio<br />
formats available on the DVD disc. As you press<br />
the button, the Surround mode/ audio format<br />
name will appear on your video display.<br />
When a digital source is present, the <strong>HS</strong><br />
Controller will automatically select and switch to<br />
the correct mode (Dolby Digital or DTS),<br />
regardless of the mode that has been previously<br />
selected.<br />
To listen to a DVD-program in traditional two<br />
channel stereo, using the front left and front<br />
right speakers only (plus the subwoofer if<br />
installed and configured), follow the instructions<br />
shown in the chapter DVD Sound Mode, in the<br />
Audio Settings Menu.<br />
INSTALLATION AND CONNECTIONS 17<br />
ENGLISH
<strong>System</strong> Setup<br />
<strong>System</strong> Defaults<br />
The final step of the installation is to establish<br />
the system’s defaults. It is helpful to take a few<br />
minutes to famili arize yourself with these<br />
settings, as they may require change before the<br />
first use and later from time to time.<br />
General Functionality of the<br />
OSD Menu<br />
The complete setup and control of the <strong>HS</strong> <strong>350</strong><br />
takes place in an advanced user-guided On<br />
Screen Display (OSD) menu system. The OSD can<br />
be acti vated by pressing the OSD button 8 on<br />
the remote control. Pressing this button again<br />
de-activates the OSD.<br />
The main menu consists of a PLAYER Menu,<br />
RADIO Menu, TV Menu, AUX Menu, DIGITAL<br />
Menu, USB Menu and a SET-UP Menu. The<br />
PLAYER Menu will show all infor mation and<br />
options available for the disc currently playing.<br />
The RADIO Menu will show radio and RDS<br />
options. The TV, AUX and DIGITAL Menus show<br />
the surround options for these specific audio<br />
inputs. The USB Menu will show all information<br />
and options available when USB thumb devices<br />
or portable hard disks are connected. The SET-UP<br />
Menu will help you configure all audio and video<br />
settings which are normally only made once.<br />
Depending on how your <strong>HS</strong> system is connected<br />
to your TV set, two different On Screen Displays<br />
are available. When the <strong>HS</strong> is connected via any<br />
of the standard definition connections (SCART,<br />
S-Video, Composite Video or standard<br />
Component Video) the OSD will be icon-based.<br />
When the <strong>HS</strong> is connected via any of the highdefinition<br />
connections (HDMI or high definition<br />
Component Video), the OSD will be text based.<br />
In the next chapters we will show only the high<br />
definition version to make the initial setup as<br />
easy as possible.<br />
Many Menu's contain Submenus or text lines.<br />
These submenus are shown as icons on the left<br />
side of the menu, depending on whether you are<br />
watching the standard definition OSD or highdefinition<br />
OSD. They can be highlighted by a<br />
white square around the icon or text by moving<br />
the cursor with the ARROW 9 buttons. Icons<br />
or text can be activated by pressing ENTER 6<br />
when they are highlighted. When ENTER 6 has<br />
been pressed, the color of the icon or the circle<br />
behind the text will change to dark blue and you<br />
will see that the current settings of this submenu<br />
will appear on the right side of the menu.<br />
Although some Menus have various Submenus<br />
and Settings, they are all navigated in the same<br />
way. All sub menus, settings and options can be<br />
accessed with the help of the ARROW (KLNM<br />
9) and ENTER 6 buttons on the remote<br />
control.<br />
To change a setting, simply move the cursor to<br />
the setting you wish to change. This setting will<br />
be high lighted in a white square, and a brief<br />
expla na tion will appear in the Upper Menu Line<br />
on the bottom of your screen, together with the<br />
18 SYSTEM SETUP<br />
available options for this setting on the Lower<br />
Menu Line.<br />
Once the setting is highlighted, pressing ENTER<br />
will show an M and N icon next to the current<br />
setting to indicate that the setting can be<br />
changed by pressing the left or right ARROW<br />
Button 9. Press the ARROW Buttons 9 until<br />
the requested setting is shown, and confirm this<br />
setting by pressing ENTER 6. Note that when<br />
you cycle though the options for this setting, the<br />
cursor cycles though the options on the Lower<br />
Menu Line, and the rest of the Display fades out.<br />
(B)<br />
(E) (D)<br />
Figure 1 - Menu example in standard definition.<br />
(B)<br />
(A)<br />
(C)<br />
(A)<br />
(C)<br />
(E) (D)<br />
Figure 2 - Menu example in high definition<br />
(720p).<br />
(A) Main Menu Line<br />
(B) Submenus<br />
(C) Current Settings<br />
(D) Upper Menu Line with Brief Explanation<br />
(E) Lower Menu Line with Possible Options<br />
Set Up Menu<br />
The first step in checking or changing the system<br />
defaults is to access the Setup Menu. First, make<br />
certain that the <strong>HS</strong> Controller is properly<br />
connected to a video display, and that power is<br />
connected. For this process, how ever, you do not<br />
need to load a disc into the unit.<br />
During STOP, PAUSE or PLAY mode, if you press<br />
OSD on the remote, the Main Menu appears on<br />
the screen.<br />
This Main Menu and all menus in the following<br />
section may look different, listing the settings<br />
with different languages, depending on the<br />
settings made previously. With the factory default<br />
setting all languages are set to ”English”, that´s<br />
why with all menus the English version is shown<br />
in the manual.<br />
In the SET-UP Menu you will find submenus for<br />
making or changing all settings and adjustments<br />
for both Audio and Video handling of your<br />
<strong>HS</strong> <strong>350</strong>.<br />
To access the SET-UP Menu, press the OSD<br />
button 8, and move the cursor to the right<br />
until SET-UP is highlighted. Press ENTER 6 to<br />
activate the SYSTEM Settings:<br />
<strong>System</strong> Settings<br />
Figure 3<br />
The <strong>System</strong> Setting Submenu contains the<br />
following settings. Follow the explanations in the<br />
Upper Menu Line on the bottom of your screen<br />
to change the settings.<br />
Display Language: Sets the language in which<br />
the OSD menus are shown on your screen.<br />
Preferred Subtitle Language: Defines your<br />
preferred subtitle language. Every time a disc<br />
contains this subtitle language, it will be shown<br />
auto matic ally. If you do not find your preferred<br />
language in the list of options, you can select<br />
your preferred language by selecting OTHER, and<br />
than typing a 4-digit code found in the code list<br />
on page 31. You can also set the preferred<br />
subtitle language to OFF. In that case no subtitles<br />
will be shown.<br />
Panel Time-Out: Sets the time-out interval for<br />
the Front Panel Information Display. After the<br />
selected time, the display will dim completely.<br />
Status Bar Time-Out: Sets the time-out<br />
interval for the Status Bar, after which the Status<br />
Bar will disappear from the screen.<br />
Parental Control: Defines a password used to<br />
control viewing of restricted programs. The<br />
default password is 8888. After pressing the<br />
default password, either the parental control<br />
setting can be chosen, or a new password. The<br />
five standard US rating symbols are ”G”<br />
(General, level 1), ”PG” (Parental Guidance, level<br />
3), ”PG13” (Parental Guidance and 13 years old,<br />
level 4), ”R” (Restricted, level 6) and ”NC 17”<br />
(from 17 years old, level 7). The DVD will accommo<br />
date a total of eight rating steps, as set by the<br />
DVD creators. These additional steps allow for<br />
more critical control of program playback for all<br />
audiences. Level 8: All DVDs can be played.<br />
Levels 7 to 2: DVDs for general audiences/<br />
children can be played. Level 1: DVDs for children<br />
can be played; DVDs for adults/general audiences<br />
are prohibited. Follow the explanations on the<br />
screen to set a new password.<br />
Disc Recognition: When set to on, the next<br />
time a disc is inserted, the <strong>HS</strong> will show a “Disc
<strong>System</strong> Setup<br />
Recognized” message, with the question if you<br />
would like to play the disc from the beginning or<br />
would like to resume from where you last<br />
stopped the disc. The memory can contain information<br />
of the last 100 discs played.<br />
PBC Support: Activates PBC (Play Back Control)<br />
Support for VCD discs.<br />
Screen Saver: Activates a Screen Saver to prevent<br />
image “burn” in a video display device. If<br />
you connect the <strong>HS</strong> Controller to a plasma screen<br />
or video projector, we recommend you activate<br />
the screen saver at all times.<br />
Show Angle Icon: Determines whether the<br />
Angle Icon will appear on the screen when there<br />
are different angles available on a DVD disc.<br />
Audio Settings<br />
Figure 4<br />
The Audio Setting Submenu contains the<br />
following settings. Follow the explanations in the<br />
Upper Menu Line on the bottom of your screen<br />
to change the settings.<br />
Preferred Audio Language: Defines your<br />
preferred audio language. Every time a disc is<br />
played that contains this audio language, it will<br />
be activated automatically. If you do not find<br />
your preferred language in the list of options, you<br />
can select your preferred language by selecting<br />
OTHER, and than typing a 4-digit code found in<br />
the code list on page 31.<br />
Dynamic Range: This setting allows you to take<br />
advantage of the programming present on some<br />
Dolby Digital recordings to reduce the volume of<br />
louder passages while maintaining intelligibility<br />
of quieter passages. This means that you may<br />
listen to programs at a level that allows the full<br />
impact of a soundtrack to be heard at a volume<br />
that is lower than you might otherwise use to<br />
avoid disturbing others. The <strong>HS</strong> <strong>350</strong> accomplishes<br />
this by compressing the audio to a greater or<br />
lesser degree, depending on which setting you<br />
choose. Three options are available:<br />
MINIMUM does not make any changes to<br />
the original playback, and should be used<br />
when the volume setting in the listening room<br />
may be as loud as you desire.<br />
MEDIUM applies a moderate amount of<br />
compression so that louder passages are a<br />
little bit quieter.<br />
MAXIMUM applies more compression so that<br />
louder passages are much softer.<br />
Feel free to experiment with the settings at any<br />
time.<br />
Delay Unit: This setting sets the measuring unit<br />
for Delay in either Feet or Meter.<br />
If you have a digital video source or a digital<br />
video display that causes lack of lip sync you may<br />
use the A/V Sync adjust feature to delay the<br />
audio signal as it is sent to all channels (as<br />
opposed to the individual settings) so that the<br />
picture and sound are brought back together.<br />
Adjustments can be made in steps of 5ms, from<br />
0ms up to 50ms.<br />
Tone Control: Activates or De-acti va tes the<br />
Bass and Treble settings. Once either the Bass or<br />
Treble Settings are changed, the Tone Control<br />
automati cally switches to ON.<br />
Bass Level: Sets the level of low frequencies.<br />
Treble Level: Sets the level of high frequencies.<br />
DVD Sound Mode: Sets the audio format of<br />
the DVD-disc playing (for other sources, see<br />
Surround Mode in each respective chapter). Once<br />
set to stereo, every surround format on a DVD<br />
will be converted to a pure stereo signal. Once<br />
set to DPLII, all stereo signals on a DVD are<br />
forced into 5.1., leaving all multichannel signals<br />
in their original format. This setting is<br />
recommended. Original will follow the surround<br />
format on the disc.<br />
Audio Adjustment<br />
Figure 5<br />
The Audio Adjustment Submenu contains the<br />
access to the manual speaker delay and the output<br />
level adjustment settings of the <strong>HS</strong> <strong>350</strong> as<br />
well as the automated EzSet/EQ setup. Follow<br />
the explanations in the Upper Menu Line on the<br />
bottom of your screen to make adjustments.<br />
Automated Speaker Setup<br />
Using EzSet/EQ<br />
The <strong>HS</strong> <strong>350</strong> is one of the first receivers in its class<br />
to offer automated speaker setup and system<br />
calibration. This process greatly simplifies the<br />
installation of your new receiver by using a series<br />
of test signals and the power of an advanced<br />
digital signal processing system to eliminate the<br />
need for manual adjustment of speaker “size”,<br />
crossover, delay and output level settings, while<br />
adding the power of a multi-band parametric<br />
equalizer to smooth out any peculiarities in<br />
frequency response that may result from the<br />
characteristics of the listening room. With<br />
EzSet/EQ your new receiver even alerts you to<br />
errors in speaker connections that prevent a<br />
speaker from functioning.<br />
With EzSet/EQ you are able to calibrate your<br />
system in a fraction of the time it would take to<br />
enter the settings manually, and with results that<br />
rival those achieved with expensive test equipment<br />
and time-consuming procedures. The end<br />
result is a system calibration profile that enables<br />
your new receiver to deliver the best possible<br />
sound, no matter what type of speakers you have<br />
or what the dimensions of your listening room<br />
are.<br />
We recommend that you take advantage of the<br />
precision of EzSet/EQ to calibrate your system,<br />
but if desired you may also make any of the<br />
configuration settings manually, or trim the<br />
settings provided by EzSet/EQ by following the<br />
instructions on page 21.<br />
If you wish to configure your <strong>HS</strong> manually, or if<br />
for some reason your EzSet/EQ microphone is<br />
unavailable, you may still do so by following the<br />
instructions on page 21.<br />
Step 1: EzSet/EQ requires that your listening<br />
room have as little background noise as possible<br />
to avoid interfering with the measurement of<br />
tones produced by your <strong>HS</strong> <strong>350</strong> during the setup<br />
procedure. Turn off all loud fans, air conditioners<br />
and other equipment, and try to avoid making<br />
any noise during the process.<br />
Step 2: The EzSet/EQ microphone should be<br />
placed in either your usual listening position or, if<br />
there is a large seating area, the center of the<br />
room, at the listeners’ ear level. You may find it<br />
convenient to use a camera tripod for stable<br />
placement of the EzSet/EQ microphone at the<br />
correct height. The microphone includes a threaded<br />
insert on the bottom for tripod mounting.<br />
Step 3: Plug the EzSet/EQ microphone into the<br />
<strong>HS</strong> <strong>350</strong>’s Headphone Jack 4, making certain<br />
that the mini-plug is firmly connected. The microphone<br />
cable is approximately 7 meter long,<br />
which should accommodate most listening room<br />
situations. If required, you may use an optional<br />
extension cable, available at most electronics<br />
stores, for use in larger rooms. However, we recommend<br />
that you avoid using extension cords for<br />
the microphone cable, as they may adversely<br />
affect the test results.<br />
Figure 6<br />
Step 4: Once the microphone is properly positioned<br />
and plugged in, first select the AUX input<br />
by pressing the OSD Button 8, followed by<br />
moving the M/N Navigation Buttons 9 until<br />
SYSTEM SETUP 19<br />
ENGLISH
<strong>System</strong> Setup<br />
the AUX input is highlighted in dark blue. Press<br />
the Enter Button 6 to confirm. Next proceed<br />
to the SET-UP menu, and move the cursor to the<br />
Audio Adjustments line. Press the Enter Button<br />
6 to confirm. Next, press the M/N Navigation<br />
Buttons 9 to move the on-screen cursor to<br />
the EZSET/EQ SETUP menu line. Press<br />
the Enter Button 6 to move to the next<br />
screen.<br />
Figure 6a<br />
Step 5: The first two screens of the EzSet/EQ<br />
system will now appear to remind you to connect<br />
all the loudspeakers and to plug in the microphone.<br />
If you have not already done so, connect<br />
all loudspeakers and plug the microphone into<br />
the Headphone Jack 4 as described in steps<br />
2 and 3. When you are ready to proceed, make<br />
certain that the cursor is pointing to NEXT and<br />
press the Enter Button 6. If you do not wish<br />
to continue with the EzSet/EQ process, press the<br />
‹/› Navigation Buttons 9 to highlight<br />
BACK and then press the ENTER Button 6<br />
to return to the MASTER MENU. Note that if<br />
you attempt to move to the next menu without<br />
plugging in the microphone, a reminder message<br />
will flash at the bottom of the screen.<br />
Figure 6b<br />
IMPORTANT NOTE: Anyone with hearing that is<br />
sensitive to loud noises should leave the room at<br />
this point, or use ear protection sufficient to<br />
reduce the noise level. Inexpensive foam-style ear<br />
plugs, available at most drug stores, may be used<br />
to reduce the sound level to a tolerable level. If<br />
you are uncomfortable with, or cannot tolerate,<br />
loud sounds and do not use some sort of ear<br />
protection, we strongly recommend that you<br />
leave the room and ask someone else to run the<br />
EzSet/EQ process, or that you do not use<br />
EzSet/EQ and enter the configuration settings<br />
manually, as described on page 21.<br />
20 SYSTEM SETUP<br />
Figure 6c<br />
Step 6. At this point you will begin to hear a<br />
series of test tones circulate among all the<br />
speakers in your system. While this is happening,<br />
the <strong>HS</strong> <strong>350</strong> is reading the signal to determine<br />
which speaker positions are active, what type of<br />
speaker is present at each active position, what<br />
the distance is from the listening position to each<br />
speaker, and to begin to build a profile of the<br />
impact of the room’s acoustics on the quality of<br />
audio reproduction. When the test is completed<br />
you will hear the tones stop, and the system will<br />
pause for as long as a minute while the processor<br />
makes its calculations. Do not be alarmed if<br />
the “WARNING” message remains on the screen<br />
after tones stop until a results message is displayed<br />
as shown in Step 6 or 7, below.<br />
NOTE: While these tests detect whether a speaker<br />
is connected to a particular output, they cannot<br />
determine whether the speaker is in the correct<br />
position. (For example, it can tell whether a<br />
speaker is connected to the Surround Right output,<br />
but it cannot tell whether the speaker is on<br />
the right or left side of your listening room.) For<br />
that reason, we strongly recommend that you try<br />
to listen as the tone circulates, around you,<br />
starting at the left front, right front, center, and<br />
finishing at the left surround and right surround.<br />
If a tone is heard from a speaker position that<br />
does not match this order, make a note of the<br />
incorrect speaker connections. When the test<br />
process stops you will see a message indicating<br />
the Far Field measurements are complete, but<br />
since there is a connection error press the ¤<br />
Navigation Button 9 so that the on-screen<br />
cursor in Fig. 7 is pointing to BACK and press<br />
the ENTER Button 6. At this point, exit all<br />
menus and turn the receiver off. Check all speaker<br />
wire connections and then rerun EzSet/EQ.<br />
Step 7. When the Far Field tests are complete a<br />
message screen will appear to confirm if the procedure<br />
was successful or not. In most cases there<br />
will not be any problems and you will see the<br />
message shown in Figure 6d on your screen. If<br />
the speaker positions shown match the actual<br />
speaker layout in your system select NEXT and,<br />
press the ENTER Button 6 to complete<br />
EzSet/EQ by performing the Near Field<br />
Measurements from the front left, center, front<br />
right and surround left and right speakers. By<br />
taking this separate set of measurements, the<br />
<strong>HS</strong> <strong>350</strong> is able to complete its view of the room’s<br />
sonic signature and apply equalization as needed<br />
to correct spikes and dips in the system’s<br />
response. Continue these instructions with<br />
Step 8.<br />
Figure 6d<br />
Step 7a. If the measurements are not successful<br />
due to a missing or malfunctioning speaker, the<br />
message will appear as shown in Figure 6e.<br />
EzSet/EQ is programmed to look for speaker pairs<br />
at the front left/front right, surround<br />
left/surround right and surround back<br />
left/surround back right positions. If the test<br />
results indicate that one, but not both of the<br />
speakers in any of these pairs is present, the<br />
menu will show NO next to the speaker position<br />
where the tests did not report back that a speaker<br />
is present. Should this message appear, make<br />
note of the suspect speaker location, exit all<br />
menus and turn the receiver off. Check all speaker<br />
wire connections and then rerun EzSet/EQ<br />
until all speakers are detected successfully.<br />
Figure 6e<br />
Step 8. When the Far Field measurements are<br />
completed, the system will ask you to take Near<br />
Field measurements, one at each five speaker<br />
position. These measurements enable EzSet/EQ<br />
to produce the most accurate settings for both<br />
high and low frequency equalization. The Near<br />
Field measurements are similar to the Far Field<br />
tests, except that the system will “listen” to only<br />
one speaker at a time, rather than sending the<br />
test signals to all speakers in rotation.<br />
Figure 6f<br />
Step 9. During the Near Field testing, (Figure<br />
6f), you will see an instruction to place the<br />
microphone in a different position than the one<br />
used for the initial Far Field measurements. This
<strong>System</strong> Setup<br />
time, place the microphone close to the speaker<br />
to be measured, at a distance of about 1 meter.<br />
In addition, the top of the microphone should be<br />
pointed towards the speaker, rather than pointing<br />
up as was done for the Far Field tests. For the<br />
first measurement, place the microphone so that<br />
it is close to, and pointing towards, the front left<br />
speaker, and press the ENTER Button 6.<br />
Step 10. One short test signal will be sent to the<br />
speaker position being calibrated and after a<br />
slight pause from the system to calculate the test<br />
results, you will see either the next Near Field<br />
Measurement screen, or a "Testing Error" screen.<br />
In most cases, the “next Near Field<br />
Measurement” message will appear, in which<br />
case you should proceed to Step 11, if an “Error”<br />
message appears, go to Step 12.<br />
Step 11. If the test results were successful, the<br />
next Near Field Measurement screen will appear.<br />
In order to properly calibrate the system, you will<br />
need to run the Near Field tests for all five channel<br />
speakers. Repeat Steps 8 through 11 until all<br />
speakers have been calibrated. When that is<br />
done the Near Field process is complete. With the<br />
cursor highlighting NEXT press the ENTER<br />
Button 6 to continue with the Subwoofer Far<br />
Field measurements.<br />
Figure 6g<br />
Step 12. If a “Near Field Error” message<br />
appears, as shown in Figure 6h, you should check<br />
to make certain that the microphone is about<br />
one meter from the speaker being tested and<br />
that the top of the microphone unit is pointing<br />
towards the speaker. You may also have to raise<br />
or lower the master volume to achieve accurate<br />
readings. After checking these two items, as<br />
needed, make certain that the cursor is pointing<br />
to the RETEST line and press the ENTER<br />
Button 6. This will return you to the NEAR<br />
FIELD EQ SELECT menu (Figure 6h)<br />
where you should repeat Steps 8 through 11,<br />
adjusting the microphone placement and volume<br />
level as needed until all Near Field<br />
Measurements are done.<br />
The next and final step is to have EzSet/EQ run<br />
the Subwoofer measurements. Make sure the<br />
cursor is highlighting NEXT, and press ENTER<br />
Button 6 to start the Far Field Measurement<br />
for the Subwoofer. Note that the measurement<br />
microphone will need to be again at the<br />
preferred listening position, at ear level, as with<br />
previous Far Field measurements.<br />
Figure 6h<br />
When both the Far Field and Near Field measurements<br />
have been successfully completed your<br />
system is ready for use. Move the cursor to<br />
SAVE and press the ENTER Button 6. This<br />
will save your EzSet/EQ settings, and will show<br />
the results of the measurements, similar to the<br />
screen shown in Figure 6g.<br />
Figure 6g<br />
Thanks to EzSet/EQ, the settings for speaker<br />
“size”, speaker crossover, channel output and<br />
individual channel delay time have been automatically<br />
set and require no further adjustment.<br />
In addition, EzSet/EQ has also performed a complete<br />
room equalization that tailors the system’s<br />
performance for the best possible sound with<br />
your combination of speakers, speaker placement<br />
and room acoustics.<br />
Manual Setup<br />
In most cases it is simpler, easier and more accurate<br />
to let EzSet/EQ take care of entering the system<br />
parameters for speaker “size”, speaker<br />
crossover, channel output and individual channel<br />
delay time. However, if you feel that your listening<br />
room or system components are best suited<br />
to manual entry of these settings, the <strong>HS</strong> <strong>350</strong><br />
also allows you to enter or trim any of these traditional<br />
system parameters. Even if you do make<br />
the settings manually, we recommend that you<br />
run the EzSet/EQ tests first so that a baseline setting<br />
is established, and then make your adjustments<br />
from there. Note that once EzSet/EQ has<br />
been run you do not need to adjust all system<br />
settings, only those that you want to adjust.<br />
To view or change the current settings, press the<br />
OSD Button 8 on the remote to bring up the<br />
SET-UP MENU (Figure 1). Next, press the ¤<br />
Navigation Button 9 as needed until the<br />
cursor is on the AUDIO ADJUSTMENTS<br />
line. Press the ENTER Button 6 to view the<br />
AUDIO ADJUSTMENTS menu (Figure 7).<br />
Figure 7<br />
If you have already run the EzSet/EQ calibration<br />
system, the second line of the menu enables you<br />
to hear the difference between the settings<br />
established by EzSet/EQ. The default setting is<br />
ON, which plays the incoming source with the<br />
EzSet/EQ settings. To hear the system in a Bypass<br />
mode, with none of the equalization filters in the<br />
circuit path, press the ‹/ › Navigation Button<br />
9 so that OFF is highlighted. Note that once<br />
changed, this setting will remain until you<br />
change it again in this menu. While you may<br />
want to use this menu option to hear the difference<br />
that EzSet/EQ makes, we recommend that<br />
you leave the setting on to take advantage of the<br />
benefits of EzSet/EQ’s advanced room correction<br />
technology.<br />
The EZSET TILT line on the menu enables<br />
you to set the system’s Tilt, or high-frequency<br />
boost. To make this adjustment, first make sure<br />
that EZSET EQ line is set to ON, as this item is<br />
not available when EzSet EQ is not in the signal<br />
path. When the cursor is on the EZSET TILT<br />
line, press the ENTER Button 6, and then<br />
press the ‹/ › Navigation Button 9 to enter<br />
the desired setting followed by the ENTER<br />
Button 6 to confirm your setting.<br />
Delay<br />
Due to the different distances between the<br />
listening position for the front channel speakers<br />
and the surround speakers, the amount of time it<br />
takes for sound to reach your ears from the front<br />
or surround speakers is different. You may<br />
compensate for this difference through the use of<br />
the delay settings to adjust the timing for the<br />
specific speaker placement and acoustic con -<br />
ditions in your listening room or home theater.<br />
Measure the distance from the listening position<br />
to each of the individual loudspeakers. Once<br />
done, select per loudspeaker the distance that is<br />
closest to the one measured.<br />
Output level adjustment<br />
Output level adjustment is a key part of the<br />
configuration process for any surround sound<br />
pro duct.<br />
NOTE: Listeners are often confused about the<br />
operation of the surround channels. While some<br />
assume that sound should always be coming<br />
from each speaker, most of the time there will be<br />
little or no sound in the surround channels. This is<br />
because they are only used when a movie<br />
director or sound mixer specifically places sound<br />
there to create ambiance, a special effect or to<br />
continue action from the front of the room to the<br />
rear. When the output levels are properly set it is<br />
SYSTEM SETUP 21<br />
ENGLISH
<strong>System</strong> Setup<br />
normal for surround speakers to operate only<br />
occasionally. Artificially increasing the volume to<br />
the rear speakers may destroy the illusion of an<br />
enveloping sound field that duplicates the way<br />
you hear sound in a movie theater or concert<br />
hall.<br />
The default settings of the DVD player is 0 dB for<br />
all channels. In case you feel adjustments are<br />
necessary in your setup, we advise you to make<br />
the adjustments using the internal test tone<br />
generator.<br />
Once the cursor is moved to any of the speaker<br />
level icons, the test noise will be heard from the<br />
corresponding speaker. If this is not the case<br />
please check whether the loudspeaker is connected<br />
to the correct loudspeaker output on the<br />
rear panel. The speaker level can be adjusted by<br />
pressing ENTER and selecting an appropriate<br />
level indicated in the Lower Menu Line. The test<br />
noise will stop as soon as the cursor is moved<br />
away from any speaker level icon.<br />
Video Settings<br />
Figure 8<br />
The Video Setting Submenu contains the<br />
following settings. Follow the explanations in the<br />
Upper Menu Line on the bottom of your screen<br />
to change the settings.<br />
Aspect Ratio: This step selects the TV aspect<br />
ratio, conventional screen shape (4:3) or<br />
widescreen (16:9), according to your TV. If you<br />
have a conventional 4:3 TV that can (automatically)<br />
switch to show a 16:9 format, you should<br />
select 16:9 rather than 4:3.<br />
TV Standard: Sets the output video format i.e.<br />
NTSC or PAL, of the <strong>HS</strong> Controller. If you have a<br />
multi standard TV, we recommend the AUTO<br />
setting for optimal picture quality.<br />
Scan Type: Sets the component video output to<br />
Interlace or Progressive. Before changing the<br />
setting to Pro gressive, make sure that your video<br />
display connected to the component output is<br />
capable of handling pro gressive scan signals. As<br />
soon as you select progressive scan the scan<br />
type, the Video Output will automatically change<br />
to Component. All other out puts, composite<br />
video on cinch, SCART and S-Video, will be kept<br />
Interlaced. The interlaced composite and S-Video<br />
outputs remain active for connection to a second<br />
(interlaced) video display.<br />
Video Output: Sets the video output type to<br />
Scart or Component. Scart will be used for most<br />
TV’s. Component will be used for most LCD,<br />
Plasma and projectors.<br />
22 SYSTEM SETUP<br />
Scart Output: Selects which kind of video output<br />
signals will be routed over the scart. RGB will<br />
be used for most TV’s as it provides the best<br />
picture quality.<br />
Video Mode: This setting affects only the<br />
Component Video Outputs, and it controls how<br />
the video signals are optimized for progressive<br />
scan display. In most cases, the “automatic”<br />
mode is your best choice, as it senses whether<br />
the disc being played was originally recorded on<br />
video or shot on film. However, in some cases<br />
you may wish to compensate for errors in the<br />
disc authoring that occur when the frame rate is<br />
not properly maintained when films are<br />
converted to video. Three choices are available:<br />
Auto: This is the recommended setting, as it<br />
lets the <strong>HS</strong> <strong>System</strong> analyze the signals from the<br />
DVD and adjust the output accordingly.<br />
Movie: Choose this option for optimal playback<br />
of material that was shot on film, even<br />
though you are viewing it on video via a DVD.<br />
Video: Choose this option for optimal playback<br />
of material that was shot directly to video, such<br />
as concerts and sports programming.<br />
Video Resolution: Selects the resolution of the<br />
video output. When the <strong>HS</strong> system is connected<br />
to either one of the Composite, S-Video or SCART<br />
connectors, this setting should be left in<br />
Standard.<br />
When you connect your <strong>HS</strong> system via a digital<br />
HDMI or Component Video connection, the<br />
preferred setting is either 720p (progressive scan<br />
with 720 lines) or 1080i (interlaced with 1080<br />
lines).<br />
If you select any of the 720p or 1080i high<br />
resolution formats, all analog video outputs<br />
(Composite, S-Video and Scart) will become<br />
temporarily in-active.<br />
In order to watch low resolution formats again,<br />
press the Video Output Button � on the<br />
remote control.<br />
Please note that with Component Video nonencrypted<br />
movies will be upscaled to 720p.<br />
Encrypted movies will not play in 720p and will<br />
have to played back on standard progressive<br />
scan component or HDMI.<br />
Video Adjustment<br />
Figure 9<br />
The Video Adjustment Submenu contains access<br />
to the Test Screen. First adjust the video display<br />
device (TV) with the help of the Test Screen. After<br />
that the output settings of the player can be finetuned<br />
with the Color, Contrast, Brightness, Tint<br />
and Black Level settings. In order to change the<br />
settings, move the cursor to the “+“ or “-“ icon<br />
on the same line as the setting. Once one of the<br />
icons is highlighted, pressing ENTER will increase<br />
or decrease the value of the setting, as will be<br />
shown in the bar behind the setting.<br />
To exit the Video Adjustment Menu, move the<br />
cursor to DONE, and press ENTER.<br />
Figure 9a<br />
DivX Video On Demand<br />
This code allows you to rent and purchase videos<br />
using the DivX VOD service. For more infor -<br />
mation, visit www.divx.com/vod. Follow the<br />
instructions and download the video onto a disc<br />
for playback on this unit. Note that all the<br />
downloaded videos from DivX VOD can only be<br />
played back on this unit.<br />
Once the DivX icon is highlighted, press ENTER<br />
to access your personal DivX VOD code.<br />
Figure 9b
Test Screen<br />
Test Screen<br />
When you activate the Test Screen via the OSD<br />
you can activate a still image to test all settings<br />
and the video performance of your TV. Please<br />
note that the test screen is only available in<br />
Standard Definition mode, that is with one of the<br />
analog video outputs ���� connected. If<br />
you have connected the <strong>HS</strong> <strong>350</strong> to the screen via<br />
the HDMI output �, the test screen is not<br />
available. With the vertical color bars you can test<br />
the following:<br />
■ proper color intensity setting on your TV,<br />
■ the proper color of each bar, showing if the<br />
proper video standard is turned on: the colors<br />
should be (left to right): black, white, yellow,<br />
cyan (turquoise), green, magenta (purple), red,<br />
blue, black.<br />
■ proper color transition, seen as sharp<br />
separation of the bars, S-Video will be better<br />
than Video, RGB best of all.<br />
■ the performance of the color filter in your TV<br />
(with ”Video” signals), bar edges should show<br />
no vertical crawling dots. Here S-Video and<br />
RGB formats usually give no problems.<br />
With the grey scale and the black/white fields<br />
below the color bars the brightness and contrast<br />
of your screen can be adjusted optimally, see<br />
chapter ”TV Picture Adjustment” below.<br />
TV Picture Adjustment with<br />
Test Screen<br />
Color Bars<br />
Grey Scale<br />
100%<br />
Black/White<br />
fields<br />
These adjustments may be done now, but you<br />
can also make them after setup has been<br />
finalized.<br />
Brightness adjustment:<br />
1. Turn down the color control on your TV until<br />
the color bars are visible in black and white.<br />
2. Adjust the contrast to the lowest level where<br />
you still can see all bars within the grey scale<br />
in the test picture separately and clearly.<br />
3. Adjust the Brightness so that the bars in the<br />
grey scale are all visible. The bar furtherst to<br />
the left has to be as black as possible rather<br />
than grey but the next aside must clearly be<br />
differable. All the bars in the grey scale have to<br />
be gradually and evenly changing from black<br />
to whiter, going from left to right.<br />
Contrast adjustment:<br />
1. Adjust the contrast on your TV until you see a<br />
bright white bar in the right low corner of the<br />
screen and a deep dark black bar at the left.<br />
The optimal contrast setting will depend from<br />
your preference and the surrounding light in<br />
the TV room.<br />
2. If the brightness of the white bar will no more<br />
increase while turning up the contrast or when<br />
the borders of the white ”harman/kardon” text<br />
letters on top will bloom (overlight) into the<br />
black areas, what drasticly will decrease the<br />
sharpness of the script, then the Contrast has<br />
been turned up too much. Reduce the contrast<br />
until these effects will disappear and the video<br />
still looks realistic.<br />
3. If you are watching TV with a usual surrounding<br />
daylight, adjust the Contrast so that a<br />
normal video picture has about the same<br />
looking as the surroundings in your room. By<br />
that way the eye is relazed when watching the<br />
TV picture. This contrast setting may be<br />
reduced when the surrounding light is<br />
dimmed, usually improving the sharpness of a<br />
video a lot thereby.<br />
4. The grey scale in the middle line needs to have<br />
the same clear difference between each bar as<br />
before the contrast adjustment. If not, go back<br />
to the brightness adjustment and repeat step 3<br />
and then the contrast adjustments, making<br />
only minor adjustments each time for<br />
optimisation.<br />
Color adjustment.<br />
1. When the Brightness and the Contrast are set<br />
optimally, turn up the color control to the level<br />
of your perference. Adjust to the level where<br />
the colors look strong but still natural, not<br />
overdone. If the color level is too high,<br />
depending from the TV used some of the bars<br />
will seem wider or the color intensity will not<br />
increase while the control is turned up. Then<br />
the color control must be reduced again. At the<br />
end you should test the color intensity also<br />
with a video, e.g. pictures of natural faces,<br />
flowers, fruit and vegetables and other well<br />
known natural articles of our life most usefull<br />
for an optimal setting of the color intensity.<br />
2. If your TV has a Tint option (with most<br />
European TVs this is available or effective only<br />
with NTSC signals, not with PAL), use the large<br />
white bar below the Greyscale to tweak the<br />
warmth of the picture. Every viewer has a<br />
difference in preference as how the glow of<br />
the picture should be. Some prefer a little<br />
colder picture, some a warmer glow. The Tint<br />
function on your TV and the white bar can be<br />
used to control this. Adjust the Tint to the level<br />
where you feel the white color has the tone<br />
you prefer.<br />
Sharpness Adjustment<br />
Contrary to intuition, the picture will appear<br />
sharper and clearer with the sharpness, or Edges,<br />
setting backed off from the maximum setting.<br />
Reduce the sharpness setting on your television,<br />
and the Edges setting on the <strong>HS</strong> <strong>350</strong> video<br />
adjustments menu if necessary, to minimize the<br />
appearance of any white lines between the bars<br />
in the gray scale portion of the test screen.<br />
Convergence and Edge Focus<br />
The crosshatch pattern that surrounds the test<br />
screen may be used to evaluate edge focus and<br />
convergence in front- or rear-projection video<br />
displays. However, the controls used to adjust<br />
these parameters are often not user-accessible.<br />
In any event, these adjustments are extremely<br />
complex, and require proper training and<br />
experience to avoid worsening the situation.<br />
Therefore, it is recommended that if you are<br />
unable to improve the picture using the available<br />
controls, contact the video display manufacturer’s<br />
authorized service representative for assistance.<br />
When all desired setup and configuration entries<br />
have been made, use the KL Navigation<br />
Buttons 9 until “Done” is highlighted at the<br />
bottom of the Video Adjustments submenu. Press<br />
the Enter Button 6 to select it to return to<br />
the on-screen menu system. Then, press the<br />
Setup Button 8 to remove the menu displays<br />
from the screen. The unit will return to normal<br />
operation and you are ready to enjoy the finest in<br />
DVD or CD playback!<br />
TEST SCREEN 23<br />
ENGLISH
Player/Radio Menu<br />
Using the Status Bar Menu<br />
The on-screen Status Bar contains many playback<br />
features. To see the Status Banner Menu, press<br />
STATUS D on the remote control while a disc is<br />
playing. Use the ARROW 9 buttons on the<br />
remote to move through the different features in<br />
the Status Bar. When a feature is highlighted, press<br />
ENTER 6 on the remote to select it and to<br />
change it with the help of the options listed on the<br />
screen. Press ENTER 6 to activate the change.<br />
Title: The number shown indicates the number<br />
of the title that is currently playing.<br />
Chapter: The number shown indicates the number<br />
of the chapter that is currently playing on a disc.<br />
Time: This item displays the time in DVD mode. To<br />
change the Time mode, first move the cursor to the<br />
TIME. The current mode will be highlighted.<br />
Press ENTER and the ARROW button to<br />
activate: Title Elapsed, Title Re maining, Chapter<br />
Elapsed, Chapter Remaining. Depending on the<br />
choice made, the bar will show a graphic view on<br />
where the disc is currently playing.<br />
PLAYER Menu<br />
Figure 10<br />
Once all the settings have been made, you are<br />
ready to enjoy your <strong>HS</strong> <strong>350</strong>. Once you have<br />
inserted a disc into the loader you can explore<br />
the PLAYER Menu by pressing the OSD button.<br />
This menu hosts all playback and program features,<br />
as well as all disc information. As you will<br />
see, the layout of this menu is comparable to the<br />
SET-UP Menu. The functionality is the same too.<br />
The Submenus are shown on the left side of the<br />
screen, with INFO activated by default. As in the<br />
SET-UP Menu, settings can be highlighted with<br />
the ARROW 9 buttons and selected with the<br />
ENTER 6 button on the remote control.<br />
Options for the settings are shown in the Lower<br />
Menu Line on the bottom of the screen.<br />
Disc: Shows the type of the disc.<br />
Audio: Shows the audio track that is currently<br />
playing. Options are shown on both Menu Lines<br />
on the bottom of the screen.<br />
Playlist: Sets the order in which the current disc<br />
is played back.<br />
Repeat: Sets the repeat mode.<br />
Random: Activates Random Playback when<br />
possible.<br />
Subtitle: Shows the subtitle of the disc currently<br />
playing.<br />
24 PLAYER/RADIO MENU<br />
If you have selected any of the high resolution<br />
screen formats you will be able to use the<br />
Thumbnail function to quickly and easily search<br />
for image files. Any JPEG image file that has been<br />
created on the computer with a thumbnail image<br />
included will show up on the right top of the<br />
screen when scrolling though the contents list.<br />
In the PLAYER Menu, the chapter, track or picture<br />
currently playing will be marked with an arrow<br />
symbol in front of the Chapter (DVD), Track (CD,<br />
MP3, WMA) or Picture (JPEG). Chapters, tracks<br />
and pictures can be selected from this list at any<br />
time by moving the cursor to the desired chapter<br />
or track and pressing ENTER 6 to confirm.<br />
The top part of this screen can be de-activated to<br />
show the complete Track list on the screen. To<br />
de-activate, move the cursor to the upper INFO<br />
(or i INFO) Submenu on the left side of the<br />
screen. Press ENTER 6 until the icon is<br />
highlighted in light blue and the full Track list is<br />
visible on the screen. In the same way the Disc<br />
list can be removed from the screen by<br />
de-activating the PROGRAM Submenu.<br />
When the <strong>HS</strong> <strong>350</strong> is in play mode, pressing the<br />
PLAY button on the remote control will highlight<br />
the track being played.<br />
Information Displays<br />
Figure 11<br />
In DVD and MP3 mode, activating the DISC INFO<br />
(DVD) or ID3 INFO (MP3) Submenu will show<br />
information about the player and the disc<br />
currently playing. The first lines will show Disc<br />
Type and Disc ID. Below you can compare the<br />
Aspect Ratio, Video Standard and Scan Type<br />
available on the disc with the actual output of<br />
your player or ID3 info for MP3 files.<br />
In the lower part of the screen the Audio<br />
Resolution and Audio Format are shown, (DVD<br />
only) and at the bottom a graphical presentation<br />
of the Video Bit Rate (DVD only) and the Audio<br />
Bit Rate of the disc currently playing.<br />
Programmed Play<br />
In STOP mode, the Disc List can be used to create<br />
your own program list for DVD, CD, MP3, WMA<br />
or JPEG discs. Move the cursor to the right of the<br />
menu, into the Disc List. If the disc list is not<br />
active, move the cursor to the PROGRAM icon on<br />
the left to activate. Move the cursor to the Disc<br />
List, and select Clear Program to clear the current<br />
list. Once the disc list is clear move the cursor up<br />
or down to the first track you would like to<br />
program and press ENTER 6. The cursor will<br />
move to the options in the Lower Menu Line. You<br />
can either add the selected track (or picture) to<br />
the playlist or give it the number you would like<br />
it to have in your playlist, or clear the track from<br />
the list. Move the cursor down to the next track<br />
you would like to program and continue until<br />
your playlist is complete. Once completed press<br />
PLAY on the remote control or, move the cursor<br />
up to the Playlist setting and select Programmed<br />
order from the options and press PLAY to start<br />
the playback.<br />
Figure 12<br />
If you have a disc that contains both MP3 files<br />
and JPEG images, you can choose to run these<br />
simultaneously, mixing the MP3 audio with your<br />
own images. The time interval can be chosen in<br />
the Picture Setting.<br />
Also you can have the image files follow the<br />
audio signal: at the end of each audio track, the<br />
next JPEG image will be shown.<br />
With such discs, you can also either listen to the<br />
MP3 audio or watch the JPEG video files only. In<br />
order to do so, in stop mode, click on the AUDIO<br />
or PICTURE icons on the left part of the screen to<br />
select or deselect the desired format. Once done,<br />
the tracklist will only show the MP3 or JPEG files.<br />
Radio Menu<br />
The FM Tuner in the <strong>HS</strong> <strong>350</strong> can be used to listen<br />
to the Radio. Before listening to the radio<br />
stations, you need to preset your favorite<br />
stations. The easiest way to do so is with the OSD<br />
screen on your monitor.<br />
1. Press the Radio button 0 on the remote<br />
control to turn the DVD Receiver on and select<br />
Radio as the source. Also make sure that your<br />
video monitor connected to the <strong>HS</strong> <strong>350</strong> is<br />
switched on.<br />
2. The TV monitor will show the RADIO Menu, as<br />
shown below. You can also select the RADIO<br />
Menu with the ARROW 9 keys on the<br />
remote control. Once the RADIO tab is highlighted,<br />
press ENTER 6 to access the<br />
RADIO Menu.
Player/Radio Menu<br />
Figure 13<br />
The RADIO Menu shows the selected Audio<br />
mode, the name of a station currently played (as<br />
long as RDS is available) and a Station list listing<br />
the 30 stations with their preset, station name<br />
and frequency.<br />
Note: The stations can be preset auto -<br />
matically or manually. The Manual Preset<br />
mode is described first. The Auto Preset<br />
mode is described later in this manual.<br />
3. The RDS and AUTO Tune functions are<br />
switched on by default, shown by the dark<br />
blue icons, to make the process of tuning your<br />
favorite stations as easy as possible. Move the<br />
cursor to the end of the first station line in the<br />
menu. The fre quency will be highlighted and a<br />
brief explanation will appear in the Upper<br />
Menu Line on the bottom of the menu.<br />
NOTE: Both RDS and AUTO Tune functions can<br />
be switched off by moving the cursor button to<br />
the icon at the left side of the menu and pressing<br />
the Enter Button on the remote control so that it<br />
turns light blue.<br />
4. Pressing the search G / H button HJ<br />
will scan the FM band for the first available<br />
radio station with acceptable reception. The<br />
scan will stop once a station is found and the<br />
name of the station will be displayed (as long<br />
as RDS is transmitted by the station).<br />
The station will be stored automatically on the<br />
current preset.<br />
If you know the frequency of your station, you<br />
can also tune the frequency directly with the help<br />
of the numeric keys of the remote control. Move<br />
the cursor to the end of the station line and press<br />
the frequency with the numeric keys. Press<br />
ENTER 6 twice to store.<br />
5. Move the cursor to the next station line in the<br />
menu. Follow the directions in step 3 and in<br />
the Upper Menu Line to store all your radio<br />
stations in the tuner’s memory.<br />
Rearranging the station list<br />
Once all the stations have been stored in the<br />
memory, you can rearrange the station list,<br />
putting your favorite stations on top of the list.<br />
1. Move the cursor in the left column in the<br />
station list to the first station you would like to<br />
rearrange.<br />
2. Press ENTER 6 to activate the current station.<br />
The cursor will move to the Lower Menu<br />
Line of the screen.<br />
3. Select the desired preset from the list by<br />
moving the cursor right or left. Press ENTER<br />
6 to activate the change. The cursor will<br />
move back to the new station line.<br />
4. Repeat step 3 until all radio stations have<br />
been rearranged according to your<br />
preferences.<br />
Selecting presets<br />
Once rearranged, presets can be chosen at any<br />
time by pressing the numeric key corresponding<br />
to the preset you would like to listen to.<br />
Depending on whether the RDS function is<br />
active, the station name will show on the front<br />
panel Information Display.<br />
Pressing the Previous/Next I/J Button<br />
EF will select the next radio station.<br />
Presets can also be chosen in the Radio Menu.<br />
Move the cursor to the preset you would like to<br />
listen to and press ENTER 6 to activate. An<br />
arrow in front of the preset will light to show the<br />
active radio station. The cursor can be moved<br />
around the menu without changing the current<br />
radio station. Pressing the Previous/Next I/J<br />
Button EF at any position in the menu will<br />
select the next radio station, that is for instance<br />
from preset 3 to preset 4, even if the cursor is<br />
highlighting preset 11. Pressing the Play button<br />
will always return the cursor to the current<br />
station played, no matter were it was previously<br />
(even when another menu is open).<br />
Removing presets<br />
If you wish to remove presets from your preset<br />
list, follow the steps below.<br />
1. Move the cursor in the left column in the<br />
station list to the preset you would like to<br />
remove.<br />
2. Press ENTER 6 to activate the current<br />
station. The cursor will move to the Lower<br />
Menu Line of the screen.<br />
3. Select Remove from the list and press Enter<br />
6. The cursor will move back to the original<br />
station line.<br />
4. Repeat step 3 until all radio stations you<br />
would like to delete have been removed.<br />
Auto Preset function<br />
When the cursor is moved to the " # " icon on<br />
top of the preset numbers you can activate the<br />
Auto Preset function, clear the complete<br />
frequency list or restore all default frequencies<br />
set by the factory.<br />
When the Auto Preset is selected the tuner will<br />
scan the full FM range and store all stations with<br />
acceptable reception one after another on the<br />
presets. The frequency scanned will appear on<br />
the left lower side of the menu while the<br />
frequency of each station stored will be shown<br />
on the right side of the list. When the complete<br />
FM range is scanned or all presets (30) are<br />
loaded with stations the scan will stop and the<br />
first preset be selected.<br />
You also can stop the scan at any time by pressing<br />
the STOP button I. Stations can be rearranged<br />
by following the explanations in the chapter<br />
"Rearranging the station list" on page 25.<br />
RDS Station ID<br />
With the help of RDS (Radio Data <strong>System</strong>) you<br />
can show the name of the station you are<br />
currently listening to as well as the station names<br />
of all other presets.<br />
The RDS function is set to active by default,<br />
shown by the dark blue RDS icon at the left of<br />
the menu. In this mode, all station names will be<br />
visible both on the OSD menu as well as on the<br />
Information Display on the front panel.<br />
If the RDS function on the left side of the menu is<br />
inactive (light blue), you will only see the<br />
frequency of the current preset shown in the menu<br />
and on the front panel display. The Station Name<br />
line on top of the menu will disappear, but the<br />
name of all other stations preset will keep in the<br />
list.<br />
Pressing STATUS D on the remote will change<br />
the front panels display’s indication from the<br />
frequency to the name of an RDS station or vice<br />
versa and will simultaneously turn the RDS<br />
indication in the OSD on or off.<br />
Surround Mode for Tuner<br />
As with all other inputs of the <strong>HS</strong> <strong>350</strong>, you can<br />
also select your preferred surround mode when<br />
listening to the radio. The actual surround mode<br />
is listed on the first line of the tuner menu.<br />
Follow the steps below to change the surround<br />
format:<br />
1. Move the cursor to the AUDIO line on the top<br />
of the tuner menu. The actual surround format<br />
will be highlighted. Press ENTER 6 to activate<br />
the possible surround formats. These will<br />
be shown in the bottom line of the menu.<br />
2. Move the cursor right or left, until the desired<br />
surround format is highlighted.<br />
3. Press ENTER 6 to activate the change. The<br />
setting will apply to all tuner presets.<br />
Note: Like with all other inputs of the <strong>HS</strong> <strong>350</strong><br />
the Audio mode can easily be selected by<br />
pressing the AUDIO button 5 on the remote<br />
repeatedly until the desired surround mode<br />
appears in the first line of the OSD menu.<br />
PLAYER/RADIO MENU 25<br />
ENGLISH
TV Menu, AUX Menu, Digital in Menu<br />
TV MENU<br />
As a Scart audio/video cable contains both audio<br />
and video inputs and outputs in one cable, the<br />
Scart connector between the DVD Receiver and<br />
the TV can also be used to lead the audio output<br />
signals of your TV to the DVD Receiver. In this<br />
way your TV programs can be listened to over<br />
your <strong>HS</strong> sound system.<br />
NOTE: Please make sure that the Scart cable<br />
used has all pins connec ted. If not it could be<br />
that, only the video signal from the DVD Receiver<br />
will be lead to the TV.<br />
1. Press the TV button 0 on the remote control<br />
to turn the DVD Receiver on and select TV as<br />
the source. Also make sure that your video<br />
monitor connected to the <strong>HS</strong> <strong>350</strong> is switched<br />
on.<br />
2. The TV monitor will show the TV Menu, as<br />
shown below. You can also select the TV Menu<br />
with the ARROW keys 9 on the remote<br />
control. Once the TV tab is highlighted, press<br />
ENTER 6 to access it.<br />
If the <strong>HS</strong> controller is already in standby, you can<br />
also switch the unit on by pressing the TV button<br />
on the remote control.<br />
Figure 14<br />
The TV Menu contains the following settings.<br />
Follow the expla nations in the Upper Menu Line<br />
on the bottom of your screen to change the<br />
settings.<br />
Audio: Selects the Surround Mode you would<br />
like to use when listening to your TV or other<br />
video device connected to the Scart input.<br />
TV Audio Input: With television sets having<br />
more and more audio outputs, this setting allows<br />
you to select the way the audio signal is routed<br />
from the TV to the <strong>HS</strong> <strong>350</strong>.<br />
PC Audio Input: In case the video signal of a<br />
PC is connected directly to a TV screen, the audio<br />
signal needs to be routed to the <strong>HS</strong> <strong>350</strong>, to get<br />
the sound match the picture. This setting allows<br />
you to select the audio input to which the audio<br />
from the PC is connected.<br />
Video Audio Input: In case the video signal of<br />
for instance a set top box is connected directly to<br />
a TV screen, the audio signal might need to be<br />
routed to the <strong>HS</strong> <strong>350</strong>, to get the sound match<br />
the picture. This setting allows you to select the<br />
audio input to which the audio from the set top<br />
box is connected.<br />
Note: In case the audio from a PC or set top box<br />
are routed through the TV to the <strong>HS</strong> <strong>350</strong>, all<br />
three settings for TV Audio Input, PC Audio Input<br />
and Video Audio Input need to be identical.<br />
26 TV MENU, AUX MENU, DIGITAL IN MENU<br />
Level adjustment: This setting gives you the<br />
possibility to increase or decrease the input level<br />
of the TV, so that its sound will have the same<br />
level as the radio, the DVD player or the other<br />
audio inputs.<br />
AUX MENU<br />
In addition to the built-in DVD-Audio/Video and<br />
CD player, the built-in radio and Scart audio<br />
input, you can connect one more analog audio<br />
source to the <strong>HS</strong> <strong>350</strong>. The analog source can be<br />
connected to the AUDIO IN input � connectors<br />
on the rear panel.<br />
1. Press the AUX button 0 on the remote control<br />
to turn the DVD Receiver on and select<br />
Aux as the source. Also make sure that your<br />
video monitor connected to the <strong>HS</strong> <strong>350</strong> is<br />
switched on.<br />
2. The TV monitor will show the AUX Menu, as<br />
shown below. You can also select the AUX<br />
Menu with the ARROW keys 9 on the<br />
remote control. Once the AUX tab is<br />
highlighted, press ENTER 6 to access it.<br />
Figure 15<br />
The AUX Menu contains the following settings.<br />
Follow the explanations in the Upper Menu Line<br />
on the bottom of your screen to change the<br />
settings.<br />
Audio: Selects the Surround Mode you would<br />
like to use when listening to your additional analog<br />
audio source.<br />
Level adjustment: This setting gives you the<br />
possibility to increase or decrease the input level<br />
of the analog input, so that its sound will have<br />
the same level as the radio, the DVD player or<br />
the other audio inputs.<br />
DIGITAL IN MENU<br />
In addition to all analog audio and video sources,<br />
the <strong>HS</strong> <strong>350</strong> also gives you the opportunity to<br />
connect two digital audio sources, for instance a<br />
digital set-top box or satellite receiver. Connect<br />
these sources to either the coaxial or optical<br />
digital input connectors on the rear panel.<br />
1. Press the D.IN button 0 on the remote<br />
control to turn the DVD Receiver on and select<br />
Digital In as the source. Also make sure that<br />
your video monitor connected to the <strong>HS</strong> <strong>350</strong> is<br />
switched on.<br />
2. The TV monitor will show the D. IN Menu, as<br />
shown below. You can also select the D. IN<br />
Menu with the ARROW keys 9 on the<br />
remote control. Once the D. IN tab is<br />
highlighted, press ENTER 6 to access it.<br />
Figure 16<br />
The DIGITAL IN Menu contains the following<br />
settings. Follow the expla nations in the Upper<br />
Menu Line on the bottom of your screen to<br />
change the settings.<br />
Digital Input: Selects either the digital source<br />
connected to the coaxial or to the optical digital<br />
input as source to listen to.<br />
Audio: Selects the Surround Mode you would<br />
like to use when listening to one of the digital<br />
audio sources.<br />
Level adjustment: This setting gives you the<br />
possibility to increase or decrease the input level<br />
of the digital input, so that its sound will have<br />
the same level as the radio, the DVD player or<br />
the other audio inputs.<br />
AV Sync Delay: If you have a digital video<br />
source or a digital video display that causes lack<br />
of lip sync you may use the A/V Sync adjust feature<br />
to delay the audio signal as it is sent to all<br />
channels (as opposed to the individual settings)<br />
so that the picture and sound are brought back<br />
together. Adjustments can be made in steps of<br />
5ms, from 0ms up to 50ms.
Surround Mode Chart<br />
Dolby Digital: Available only with digital input<br />
sources encoded with Dolby Digital data. It<br />
provides up to five separate main audio channels<br />
and a special dedicated Low Frequency Effects<br />
channel.<br />
DTS: Available only with digital input sources<br />
encoded with DTS data. Available on special<br />
DVD, LD and audio-only discs, DTS provides up to<br />
five separate main audio channels and a special<br />
dedicated low frequency channel.<br />
Dolby Pro Logic II: Dolby Pro Logic II is the<br />
latest version of Dolby Laboratory's benchmark<br />
surround technology that creates or decodes full<br />
range, discrete left, center, right, right surround<br />
and left surround channels from matrix surround<br />
encoded programs and conventional stereo<br />
sources. The Dolby Pro Logic II Movie mode is<br />
optimized for movie soundtracks that are<br />
recorded with matrix surround, by creating true<br />
rear left, center and right signals. The ProLogic II<br />
Music mode should be used with musical<br />
selections, that are recorded with matrix<br />
surround or with normal stereo mode, creating<br />
discrete rear left and right signals. The Dolby Pro<br />
Logic Game mode ensures that special effects<br />
are routed to the surround channels, while delivering<br />
their full impact using the subwoofer, thus<br />
fully immersing the game player in the universe<br />
of the video game.<br />
Logic 7: Exclusive to <strong>Harman</strong> <strong>Kardon</strong> products,<br />
Logic 7 is an advanced mode that extracts the<br />
maximum surround information from either<br />
surround-encoded programs or conventional<br />
stereo material.<br />
The Logic 7 Movie mode should be used with any<br />
source that contains Dolby Surround or similar<br />
matrix encoding. Logic 7 Movie delivers<br />
increased center-channel intelligibility, and more<br />
accurate placement of sounds with fades and<br />
pans that are much smoother and more realistic<br />
than with former decoding techniques.<br />
The Logic 7 Music mode should be used with<br />
analog or PCM stereo sources. Logic 7 Music<br />
enhances the listening experience by presenting<br />
a wider front soundstage and greater rear<br />
ambience. Both Logic 7 modes also direct lowfrequency<br />
information to the subwoofer (if<br />
installed and configured) to deliver maximum<br />
bass impact.<br />
USB Menu<br />
USB MENU<br />
The <strong>HS</strong> systems are among the first to allow<br />
direct playback of compatible files from portable<br />
USB devices. Two USB On-The-Go inputs are<br />
available, one on the right side of the product<br />
and one on the rear panel.<br />
Connect your USB thumb drive or portable hard<br />
disk, to either of the side or rear panel USB<br />
Inputs 3�. If you have more than two devices<br />
that you would like to connect at the same time,<br />
you can use a standard USB-hub with an external<br />
power supply, to which you can connect up to<br />
16 portable USB devices.<br />
1. Press the USB 0 button on the remote<br />
control to turn the DVD Receiver on. Also<br />
make sure that your video monitor connected<br />
to the <strong>HS</strong> <strong>350</strong> is switched on.<br />
2. The TV monitor will show the below screen,<br />
allowing you to select which of the file types<br />
available on the device you would like to display<br />
and play. Showing different file types at<br />
the same time like MP3 and JPEG is possible.<br />
Figure 17<br />
3. Move the cursor to the buttons on the lower<br />
left side of the screen, and press ENTER to<br />
select or deselect the requested file types.<br />
In case several USB devices are connected, all<br />
will be shown in the same USB Menu.<br />
To differentiate the drives, they will be shown as<br />
1 and 2. USB drives can have more than one<br />
partition. If that is the case, the different<br />
partitions will be shown as 1a, 1b, 1c etc.<br />
The USB Menu contains the following settings or<br />
indications. Follow the explanations in the Upper<br />
Menu Line on the bottom of your screen to<br />
change the settings.<br />
Disc: Shows the type of the disc.<br />
Audio: Shows the audio track that is currently<br />
playing. Options are shown on both menu lines<br />
on the bottom of the screen.<br />
Playlist: Sets the order in which the current disc<br />
is played back.<br />
Repeat: Sets the repeat mode.<br />
(Repeat 1, Repeat Folder).<br />
Random: Activates Random Playback when<br />
possible.<br />
Picture: Selects the interval between the current<br />
picture on the screen and the next one.<br />
In the USB Menu, the chapter, track or picture<br />
currently playing will be marked with an arrow<br />
symbol in front of the Track (MP3, WMA) or<br />
Picture (JPEG). Tracks and pictures can be<br />
selected from this list at any time by moving the<br />
cursor to the desired track or file and pressing<br />
ENTER 6 to confirm.<br />
The top part of this screen can be de-activated to<br />
show the complete Track list on the screen. To<br />
de-activate, move the cursor to the upper INFO<br />
(or i INFO) Submenu on the left side of the<br />
screen. Press ENTER 6 until the icon is<br />
highlighted in light blue and the full Track list is<br />
visible on the screen. In the same way the Disc<br />
list can be removed from the screen by<br />
deactivating the PROGRAM Submenu.<br />
When the <strong>HS</strong> <strong>350</strong> is in play mode, pressing the<br />
PLAY button on the remote control will highlight<br />
the track being played.<br />
If you have a USB device that contains both<br />
music files (MP3, WMA) and JPEG images, you<br />
can choose to run these simultaneously, mixing<br />
the MP3 or WMA audio with your own images.<br />
The time interval can be chosen in the Picture<br />
Setting.<br />
With such devices, you can also either listen to<br />
the MP3 or WMA audio or watch the JPEG video<br />
files only. In order to do so, click in stop mode on<br />
the MUSIC, PICTURE or MOVIE icons on the left<br />
part of the screen to select or deselect the<br />
desired format.<br />
NOTE: The <strong>HS</strong> <strong>350</strong> will not play back any of the<br />
formats SVCD/VCD, MPEG1 (Video), MPEG2<br />
(Video) and audio CD tracks (CDDA) stored on an<br />
external USB hard drive.<br />
You will need a FAT32 pre-formatted external<br />
hard disk drive with USB connector. If your disk<br />
is formatted with another file system (like<br />
NTFS) you will need to re-format it. Please<br />
contact your hard disk supplier for more<br />
information.<br />
We recommend creating folders and sort the<br />
files by file type (movies, pictures or music).<br />
This will allow you to quickly find the file you’re<br />
looking for.<br />
USB MENU 27<br />
ENGLISH
USB Menu<br />
Using<br />
When <strong>Harman</strong> <strong>Kardon</strong>’s is connected<br />
and a compatible Apple ® iPod ® is docked in The<br />
Bridge, press the DMP Selector Button 0 to<br />
choose the iPod as the input source allowing<br />
playback of audio materials on your iPod through<br />
your high-quality audio/video system.<br />
When The Bridge is properly connected and a<br />
compatible iPod is properly docked, the Upper<br />
Display Line � will read DMP IN. Once that<br />
message appears, use the remote to control the<br />
iPod.<br />
Figure 17a<br />
Whether or not an iPod is docked in The Bridge,<br />
the screen shown in the figure above will appear<br />
on a video display connected to the <strong>HS</strong> <strong>350</strong>, but<br />
you will not be able to affect the screen without<br />
an iPod docked in The Bridge. Once an iPod is<br />
docked in The Bridge and selected as a source,<br />
the On Screen Dis play will change to show a<br />
reflection of your iPod menu.<br />
Figure 17b<br />
Navigate The Bridge’s screens by using the<br />
KLAB Buttons 9 to highlight a line and<br />
pressing the Set Button 6 to select the line.<br />
Press the Menu Button B to return to the<br />
previous level of The Bridge’s menu system.<br />
Audio: Shows the audio track that is currently<br />
playing. Options are shown on both menu lines<br />
on the bottom of the screen.<br />
Repeat: Sets the repeat mode.<br />
(Repeat 1, Repeat Folder).<br />
Random: Activates Random Playback when<br />
possible.<br />
Time: Shows the elapsed time and remaining<br />
time of a song currently playing.<br />
NOTE: iTunes allows you to set certain selections<br />
to always or never remember playback position,<br />
or to be skipped in Shuffle mode. The <strong>HS</strong> <strong>350</strong>’s<br />
settings cannot override these iTunes settings.<br />
28 USB MENU<br />
While a selection is playing, the song title, artist<br />
and album name, if available on the iPod, will<br />
scroll across the lower line in the front panel<br />
Message Display �. The upper line will<br />
display the elapsed time of the track on the left,<br />
the play mode icon, and the time remaining on<br />
the right.<br />
Figure 17c<br />
In addition, if a video display is connected to the<br />
<strong>HS</strong> <strong>350</strong>, a screen will appear to display<br />
information about the iPod’s status and the<br />
track. The top line will display the play mode<br />
icon, with the phrase “Now Playing” appearing<br />
to the right to remind you that you are viewing<br />
the status of the current track, as opposed to<br />
another menu screen. Below that the <strong>HS</strong> <strong>350</strong><br />
displays the total number of tracks in the current<br />
play list on the right (all materials on the iPod are<br />
considered one of the play lists) with the number<br />
of the current track on the left. The song title,<br />
artist and album are displayed. At the bottom of<br />
the screen is a graphic bar indicating the current<br />
play position within the track, with the elapsed<br />
and remaining times appearing below the bar.<br />
NOTE: It is strongly recommended that you use a<br />
screen saver built into your video display to avoid<br />
possible damage from “burn-in” that may occur<br />
with plasma and many CRT displays when a still<br />
image, such as a menu screen, remains on<br />
display for an extended period of time.
Remote Control<br />
Learning Codes from a Remote<br />
The <strong>HS</strong> <strong>350</strong> remote is able to “learn” codes from<br />
other remote controls that might be part of your<br />
system setup, like the one from your TV. To learn<br />
or transfer codes from an IR remote to the <strong>HS</strong>’s<br />
remote, follow these steps:<br />
1. Place the front of the original remote with the<br />
code being sent so that it is facing the IR<br />
Transmitter Window � on the <strong>HS</strong> remote<br />
“head-to-head.”The remotes should be between<br />
2 and 4cm apart.<br />
2. Select the button on the remote that you wish<br />
to use as the device selector for the codes about<br />
to be entered. This must be any of the Input<br />
Selectors 0.<br />
3. Press the Input Selector 0 button chosen<br />
and the Learn Button � at the same time.<br />
Hold these buttons until the Program<br />
Indicator � flashes amber and the light<br />
under the device selector button turns red.<br />
Release the buttons. It is important that you<br />
begin the next step within 20 seconds.<br />
4. Press the button on the <strong>HS</strong> remote that you<br />
wish to program. Note that the Program<br />
Indicator � will stop flashing.<br />
Important Note: Codes cannot be taught to<br />
all buttons on the remote. In these cases the<br />
Program Indicator � keeps flashing after<br />
the button was released.<br />
5. As long as the Program Indicator � is on<br />
steadily (for five seconds), press and hold the<br />
button on the original remote that you wish to<br />
“teach” into the <strong>HS</strong> remote. If you pressed the<br />
button too late or no command was received<br />
within five seconds, the Program Indicator<br />
� will flash red three times and then amber,<br />
then simply repeat step four. When the<br />
Program Indicator � turns green, release<br />
the button on the original remote. Note that the<br />
Program Indicator will then begin to flash amber<br />
again.<br />
NOTE: If the Program Indicator � turns red<br />
steadily during Step 5, the programming was not<br />
successful. Repeat the steps to see if the code<br />
will “take.”If the indicator keeps flashing red in<br />
step 5, this code cannot be taught.<br />
6. Repeat steps 4 though 5 for each button on<br />
the source remote that you wish to transfer to<br />
the <strong>HS</strong> remote.<br />
7. Once all codes have been transferred from the<br />
original source remote to the <strong>HS</strong> remote, press<br />
the Learn button �. This will turn off all LEDs<br />
and turn off the learning mode.<br />
8. Repeat Steps 1 through 7 for any additional<br />
remotes you wish to “teach” into the <strong>HS</strong><br />
Remote.<br />
Erasing Learned Codes<br />
The <strong>HS</strong>’s remote allows you to remove or erase<br />
the code learned into a single button for a single<br />
device, to remove or erase all the codes that<br />
have been learned for a single device, or to<br />
erase all commands that have been learned to<br />
all devices.<br />
To erase a single learned code from within a<br />
single device’s settings, follow these steps:<br />
1. Press and hold both the Input Selector 0<br />
within which the individual button to be erased<br />
has been programmed and the<br />
Learn button �.<br />
2. When the red LED under the Input Selector<br />
turns red and the Program Indicator �<br />
flashes amber, release the buttons.<br />
3. Press and release the Input Selector 0<br />
again for the device within which the individual<br />
button to be erased has been programmed.<br />
4. Press the 7 button � three times.<br />
5. Press and release the individual button for<br />
which the code is to be erased. The Program<br />
Indicator � will blink green two times and<br />
then return to amber.<br />
6. To erase other buttons within the same<br />
device, press them as noted in Step 5.<br />
7. When all buttons to be erased have been<br />
pressed, press the Learn button � to<br />
complete the process.<br />
To erase all codes within a single device, follow<br />
these steps:<br />
1. Press and hold both the Input Selector 0<br />
for which you wish to erase the codes and the<br />
Learn button �.<br />
2. When the red LED under the Input Selector<br />
turns red and the Program Indicator �<br />
flashes amber, release the buttons.<br />
Macro Programming<br />
Macros enable you to easily repeat frequently<br />
used combinations of commands with the press<br />
of a single button on the <strong>HS</strong>’s remote control.<br />
Once programmed, a macro will send out up to<br />
19 different remote codes in a pre-determined<br />
sequential order enabling you to automate the<br />
process of turning on your system, changing<br />
devices, or other common tasks. The <strong>HS</strong>’s remote<br />
can store up to four separate macro command<br />
sequences, that are accessed by pressing the<br />
Macro buttons K.<br />
1. To start programming a macro, press the<br />
Mute button A and the Macro button K<br />
to be programmed at the same time. Note that<br />
the latest selected Input Selector will light red,<br />
and the Program Indicator � will flash<br />
amber.<br />
2. Enter the steps for the macro sequence by<br />
pressing the button for the actual command<br />
step. Although the macro may contain up to 19<br />
steps, each button press, including those used to<br />
change devices, counts as a step.<br />
The Program Indicator � will flash green<br />
twice to confirm each button press as you enter<br />
commands.<br />
NOTE: While entering commands for Power On<br />
of any device during a macro sequence, press<br />
the Mute button A. DO NOT press the<br />
Power ON button 0.<br />
Remember to press the appropriate Input<br />
Selector button 0 before functions are<br />
changed to another device.<br />
3. When all the steps have been entered, press<br />
the Preset Up / PIC+ button L to enter the<br />
commands. The red light under the Input<br />
Selector 0 will blink and then turn off and<br />
the Program Indicator � will flash green<br />
twice to confirm the macro to be programmed.<br />
REMOTE CONTROL 29<br />
ENGLISH
Remote Control<br />
Example: To program the Macro 1 K button<br />
so that it turns on the <strong>HS</strong> <strong>350</strong> and your TV,<br />
follow these steps:<br />
Press the Macro 1 button K and Mute<br />
A buttons at the same time and then release<br />
them.<br />
Note that the Program Indicator will flash<br />
amber.<br />
Press the TV Selector 0.<br />
Press the Mute A button to store the <strong>HS</strong>’s<br />
power on command.<br />
Press the Screen Power On button �<br />
button to store the TV Power On Command.<br />
Press the MNKLbutton 9 to complete<br />
the process and store the macro sequence.<br />
After following these steps, each time you press<br />
the Macro 1 button K, the remote will send<br />
all Power On commands.<br />
30 REMOTE CONTROL<br />
Erasing Macro Commands<br />
To remove the commands that have been<br />
programmed into one of the Macro buttons,<br />
follow these steps:<br />
1. Press the Mute button A and the Macro<br />
button K that contains the commands you<br />
wish to erase.<br />
2. Note that the Program Indicator � will<br />
flash amber, and the red LED under the Input<br />
Selector 0 last used will turn on.<br />
3. Within ten seconds, press the Mute button<br />
A.<br />
4. The red LED under the Selector will go out,<br />
and the Program Indicator � will turn<br />
green and flash three times before it goes out.<br />
5. When the Program Indicator � goes out,<br />
the Macro has been erased.
DVD Language Codes<br />
The availability of specific languages for the main audio track or subtitles is dependent on the choices made by a disc’s producer. You should always consult<br />
the disc’s jacket for information on languages for any disc. In the case of some languages, you may be required to enter a code from the list below to access<br />
that language.<br />
Language Code<br />
Abkhazian 6566<br />
Afar 6565<br />
Afrikaans 6570<br />
Albanian 8381<br />
Ameharic 6577<br />
Arabic 6582<br />
Armenian 7289<br />
Assamese 6583<br />
Aymara 6588<br />
Azerbaijani 6590<br />
Bashkir 6665<br />
Basque 6985<br />
Bengali; Bangla 6678<br />
Bhutani 6890<br />
Bihari 6672<br />
Bislama 6673<br />
Breton 6682<br />
Bulgarian 6671<br />
Burmese 7789<br />
Byelorussian 6669<br />
Cambodian 7577<br />
Catalan 6765<br />
Chinese 9072<br />
Corsican 6779<br />
Croatian 7282<br />
Czech 6783<br />
Danish 6865<br />
Dutch 7876<br />
English 6978<br />
Esperanto 6979<br />
Estonian 6984<br />
Faroese 7079<br />
Fiji 7074<br />
Finnish 7073<br />
French 7082<br />
Frisian 7089<br />
Galician 7176<br />
Georgian 7565<br />
German 6869<br />
Greek 6976<br />
Greenlandic 7576<br />
Guarani 7178<br />
Gujarati 7185<br />
Language Code<br />
Hausa 7265<br />
Hebrew 7387<br />
Hindi 7273<br />
Hungarian 7285<br />
Icelandic 7383<br />
Indonesian 7378<br />
Interlingua 7365<br />
Interlingue 7369<br />
Iunpiak 7375<br />
Irish 7165<br />
Italian 7384<br />
Japanese 7465<br />
Javanese 7487<br />
Kannada 7578<br />
Kashmiri 7583<br />
Kazakh 7575<br />
Kinyarwanda 8287<br />
Kirghiz 7589<br />
Kirundi 8278<br />
Korean 7579<br />
Kurdish 7585<br />
Laothian 7679<br />
Latin 7665<br />
Latvian, Lettish 7686<br />
Lingala 7678<br />
Lithuanian 7684<br />
Macedonian 7775<br />
Malagsy 7771<br />
Malay 7783<br />
Malayalam 7776<br />
Maltese 7784<br />
Maori 7773<br />
Marathi 7782<br />
Moldavian 7779<br />
Mongolian 7778<br />
Naru 7865<br />
Nepali 7869<br />
Norwegian 7879<br />
Occitan 7967<br />
Oriya 7982<br />
Oromo (Afan) 7977<br />
Panjabi 8065<br />
Pashto, Pushto 8083<br />
Persian 7065<br />
Polish 8076<br />
Portuguese 8084<br />
Quechua 8185<br />
Rhaero-Romance 8277<br />
Romanian 8279<br />
Russian 8285<br />
Language Code<br />
Samoan 8377<br />
Sangho 8371<br />
Sanskrit 8365<br />
Scots Gaelic 7168<br />
Serbian 8382<br />
Servo-Groatian 8372<br />
Sesotho 8384<br />
Setswana 8478<br />
Shona 8378<br />
Sindhi 8368<br />
Singhalese 8373<br />
Siswati 8383<br />
Slovak 8375<br />
Slovenian 8376<br />
Somali 8379<br />
Spanish 6983<br />
Sundanese 8385<br />
Swahili 8387<br />
Swedish 8386<br />
Tagalog 8476<br />
Tajik 8471<br />
Tamil 8465<br />
Tatar 8484<br />
Telugu 8469<br />
Thai 8472<br />
Tibetan 6679<br />
Tigrinya 8473<br />
Tonga 8479<br />
Tsonga 8483<br />
Turkish 8482<br />
Turkmen 8475<br />
Twi 8487<br />
Ukrainian 8575<br />
Urdu 8582<br />
Uzbek 8590<br />
Vietnamese 8673<br />
Volapuk 8679<br />
Welsh 6789<br />
Wolof 8779<br />
Xhosa 8872<br />
Yiddish 7473<br />
Yoruba 8979<br />
Zulu 9085<br />
DVD LANGUAGE CODES 31<br />
ENGLISH
Troubleshooting<br />
If you experience any of the following difficulties<br />
while using the system, use this troubleshooting<br />
guide to help you remedy the problem.<br />
Should any problem persist, consult your<br />
authorized <strong>Harman</strong> <strong>Kardon</strong> dealer.<br />
No power.<br />
Is the power cord firmly plugged into the<br />
power outlet?<br />
One of the safety mechanisms may be<br />
operating. In this event, unplug the player from<br />
the power outlet briefly and then plug it in<br />
again.<br />
No picture.<br />
Check that the system is connected correctly<br />
and securely.<br />
The video cable may be damaged. Replace it<br />
with a new one.<br />
Make sure the system is connected to a video<br />
input on the TV (see page 14).<br />
Make sure the TV is turned on.<br />
Make sure the correct video input on the TV is<br />
selected for viewing with this system.<br />
Noise (interference) appears in the<br />
picture.<br />
Clean the disc.<br />
If video from this system has to go through<br />
your VCR to get to your TV, the copy-protection<br />
applied to some DVD programs could affect<br />
picture quality. If you still experience pro blems<br />
after checking your connecti ons, please try<br />
connecting your DVD system directly to your<br />
TV’s S-Video input, if your TV is equipped with<br />
this input (see page 14).<br />
The aspect ratio of the screen is wrong<br />
(picture vertically expanded) when you<br />
play a wide picture even though you set<br />
“TV DISPLAY” in the SETUP menu to<br />
"16:9".<br />
If you connect the system with the SCART<br />
cable, connect directly to the TV. Otherwise the<br />
autoswitch function of the aspect ratio for the<br />
TV may not work.<br />
If the TV is not connected with a SCART cable<br />
to the <strong>HS</strong>, or if the autoswitch function does<br />
not work you should turn the TV to "16:9" (if<br />
possible with your TV).<br />
Depending on the TV, you may not be able to<br />
change the aspect ratio. In that case (TV not<br />
adjustable to 16:9) do not select "16:9" in the<br />
TV Display. Then, no change of the aspect ratio<br />
is needed.<br />
32 TROUBLESHOOTING<br />
There is no sound or volume is very low.<br />
Check that the speakers and components are<br />
connected correctly and securely.<br />
Make sure that you have selected the correct<br />
source on the system.<br />
Press MUTE on the remote control, if the<br />
words MUTE ON are blinking on the front<br />
panel display.<br />
The protective circuitry has been activated<br />
because of a short circuit. Turn off the system,<br />
eliminate the short circuit problem and turn on<br />
the power again.<br />
The audio interconnect is damaged. Replace it<br />
with a new one.<br />
The system is in pause mode or in slow-motion<br />
play mode, or fast forward or fast reverse.<br />
Press N to return to normal play mode.<br />
Check the speaker settings (see page 20).<br />
The left and right channels are unbalanced<br />
or reversed.<br />
Check that the speakers and components are<br />
connected correctly and securely.<br />
Severe hum or noise is heard.<br />
Check that the speakers and components are<br />
connected securely.<br />
Check that the connecting cords are away from<br />
a transformer or motor and at least 3 meters<br />
away from fluorescent light.<br />
Move your TV away from the audio components.<br />
The plugs and jacks are dirty. Wipe them with a<br />
cloth slightly moistened with alcohol.<br />
Clean the disc.<br />
The surround effect is difficult to hear<br />
when you are playing a Dolby Digital<br />
sound track.<br />
Check to see if the Dolby Digital mode is<br />
turned on properly, other wise unload and load<br />
the disc again.<br />
Check the speaker connections.<br />
Depending on the DVD disc, the output signal<br />
may at times be mono or stereo even if the<br />
soundtrack is recorded in Dolby Digital format.<br />
The sound comes from the center speaker<br />
only.<br />
Depending on the disc, sound may sometimes<br />
come from the center speaker only. This also<br />
applies to mono recordings (from disc or any<br />
analog source), when Pro Logic mode is<br />
selected. This is normal.<br />
No sound is heard from the center speaker.<br />
Adjust center speaker volume (see pages 20).<br />
No sound or only very low volume from<br />
the rear speakers.<br />
Adjust the rear speaker volume (see page 20).<br />
The volume goes down automatically<br />
and can not be increased.<br />
The internal temperature is too high. Wait<br />
approximately one minute for the amplifier to<br />
reach normal working temperature.<br />
Radio stations cannot be tuned in.<br />
Check that the antenna is connected correctly.<br />
Adjust the antenna and connect an external<br />
antenna if necessary.<br />
The signal strength of the stations is too weak<br />
for automatic tuning. Use manual tuning.<br />
No stations have been preset.<br />
The tuner mode is not selected, select the<br />
Radio mode.<br />
The remote does not function.<br />
Remove any obstacles between the remote<br />
control and the system.<br />
Move the remote control closer to the system.<br />
Point the remote control at the remote sensor<br />
on the front panel.<br />
Replace all the batteries in the remote control<br />
with new ones if they are weak.<br />
Check that the batteries are loaded correctly.<br />
The disc does not play.<br />
There is no disc inside. (“NO DISC” appears on<br />
the front panel display and the TV screen.)<br />
Insert a disc.<br />
Insert the disc correctly with the playback side<br />
facing down on the disc tray.<br />
Clean the disc.<br />
The system cannot play CD-ROM's, etc.<br />
(see page 3).<br />
DVD with wrong region code<br />
(see page 13).<br />
The system starts playing the DVD<br />
automatically.<br />
The DVD features the auto playback function.<br />
Playback stops automatically.<br />
Some discs include an auto pause signal. When<br />
playing such a disc, the system stops playback<br />
at the signal.
Troubleshooting<br />
Track Skip or direct select with numeric<br />
buttons, Search, Slow-motion play, repeat<br />
play or Program play, etc., cannot be done.<br />
Depending on the DVD or VCD, some of the<br />
above operations may not be available<br />
(Playback control).<br />
Messages do not appear on the TV screen<br />
in the language you want.<br />
Select the language for Display and Preferred<br />
Subtitle in the SETUP menu (see page 18).<br />
For all messages from the DVD (DVD menu,<br />
subtitles) in the proper language the disc must<br />
have the language you selected, if not, another<br />
language will be selected.<br />
The audio language cannot be changed<br />
when you play a DVD.<br />
Multilingual sound is not recorded on the DVD.<br />
Changing the language for the sound by the<br />
Audio button on the remote or the Audio line<br />
in the Player Menu is prohibited on the DVD. In<br />
that case the audio language must be selected<br />
by the main menu on the DVD.<br />
The subtitle language cannot be changed<br />
when you play a DVD.<br />
Multilingual subtitles are not recorded on the<br />
DVD.<br />
Changing the language for the subtitles by the<br />
Subtitle button on the remote or the Subtitle<br />
line in the Player Menu is prohibited on the<br />
DVD. In that case the subtitle language must<br />
be selected by the main menu on the DVD.<br />
The subtitles cannot be turned off when<br />
you play a DVD.<br />
Depending on the DVD, you may not be able to<br />
turn the subtitles off.<br />
The angles cannot be changed when you<br />
play a DVD.<br />
Multi-angles are not recorded on most DVDs.<br />
Change the angles when the angle mark<br />
appears on the TV screen.<br />
Changing the angles is prohibited on some<br />
DVDs.<br />
The system does not operate properly.<br />
Static electricity, etc., may affect the system’s<br />
operation.<br />
Disconnect the AC power cord, then connect it<br />
again.<br />
Please also refer to the Trouble shooting<br />
guide contained in your loudspeaker<br />
Owners Manual.<br />
TROUBLESHOOTING 33<br />
ENGLISH
Glossary<br />
Bit rate<br />
Value indicating the amount of video data compressed<br />
in a DVD per second. The unit is Mbps<br />
(megabit per second). 1 Mbps indicates that the<br />
data per second is 1,000,000 bits. The higher the<br />
bit rate, the larger the amount of data. However,<br />
this does not always mean higher quality<br />
pictures.<br />
Chapter<br />
Sections of a picture or a music piece on a DVD<br />
that are smaller than titles. Many titles are composed<br />
of several chapters, but many others are<br />
not. Each chapter is assigned a chapter number<br />
enabling you to locate the chapter you want.<br />
Dolby Digital (“5.1”, “AC-3”)<br />
This sound format for movie theaters is more<br />
advanced than Dolby Pro Logic Surround. In this<br />
format, the rear speakers output stereo sound<br />
with an expanded frequency range and a subwoofer<br />
channel for deep bass is independently<br />
provided. This format is also called “5.1” because<br />
the subwoofer channel is counted as 0.1 channel<br />
(since it functions only when a deep bass effect is<br />
needed). All six channels in this format are<br />
recorded separately for superior channel<br />
separation. Furthermore, since all the signals are<br />
processed digitally, less signal degradation<br />
occurs. The name “AC-3” comes from the fact<br />
that it is the third audio coding method to be<br />
developed by the Dolby Laboratories Licensing<br />
Corporation.<br />
Manufactured under license from Dolby<br />
Laboratories. "Dolby", "AC-3", "Pro Logic" and<br />
the Double-D symbol are trademarks of Dolby<br />
Laboratories. Confidential Unpublished Works.<br />
© 1992.1997 Dolby Laboratories, Inc. All rights<br />
reserved.<br />
Dolby Pro Logic II Surround<br />
This is a method of decoding stereo or surround<br />
recordings that produces five channels from twochannel<br />
sound. Compared with the former Dolby<br />
Surround system, Dolby Pro Logic II Surround<br />
reproduces left-to-right panning more naturally<br />
and localizes sounds more precisely. To take full<br />
advantage of Dolby Pro Logic II Surround, you<br />
should have a pair of rear speakers and a center<br />
speaker. The rear speakers output stereo sound.<br />
DTS<br />
Digital audio compression technology developed<br />
by Digital Theater <strong>System</strong>s, Inc. This technology<br />
conforms to 5.1-channel surround. The rear<br />
channels are stereo and there is a discrete subwoofer<br />
channel in this format. DTS provides 5.1<br />
discrete channels of high quality digital audio.<br />
Good channel separation is realized, because all<br />
channels are recorded discretely and processed<br />
digitally.<br />
34 GLOSSARY<br />
Manufactured under license from Digital Theater<br />
<strong>System</strong>s, Inc. US Pat. No. 5,451,942 and other<br />
worldwide patents issued and pending. "DTS"<br />
and "DTS Digital Surround" are trademarks of<br />
Digital Theater <strong>System</strong>s, Inc.<br />
© 1996 Digital Theater <strong>System</strong>s, Inc. All rights<br />
reserved.<br />
MPEG AUDIO<br />
International standard coding system to compress<br />
audio digital signals authorized by ISO/IEC.<br />
MPEG 1 conforms to up to 2-channel stereo,<br />
used on some DVD’s as alternate (other language)<br />
track.<br />
DVD<br />
A disc that contains up to 8 hours of moving<br />
pictures even though its diameter is the same as<br />
a CD. The data capacity of a single-layer and<br />
single-sided DVD, at 4.7 GB (Giga Byte), is 7<br />
times that of a CD. Furthermore, the data<br />
capacity of a dual-layer and single-sided DVD is<br />
8.5 GB, a single-layer and double-sided<br />
DVD 9.4 GB, and a dual-layer and double-sided<br />
DVD 17 GB. The picture data uses the MPEG 2<br />
format, one of the worldwide standards of digital<br />
compression technology. The picture data is<br />
compressed to about 1/40 of its original size.<br />
The DVD also uses the variable rate coding<br />
technology that changes the data to be allocated<br />
according to the status of the picture. The audio<br />
data is recorded in Dolby Digital, DTS and/or<br />
PCM, allowing you to enjoy more natural audio<br />
presence. Furthermore, various advanced<br />
functions such as multi-angle, multilingual, and<br />
subtitles may be provided with the DVD.<br />
Multi-angle function<br />
Various angles or viewpoints of the video camera<br />
for a scene are recorded on some DVDs.<br />
Multilingual function<br />
Several languages for the sound or subtitles in a<br />
picture are recorded on some DVDs.<br />
Parental Control<br />
A function of some (particulary US) DVD’s to limit<br />
playback of the disc by the age of the users. The<br />
limitation varies from disc to disc. When it is<br />
activated, playback is completely prohibited,<br />
violent scenes are skipped or replaced with other<br />
scenes and so on.<br />
Title<br />
The longest sections of a picture or a music piece<br />
on a DVD; a movie, etc., for a picture piece on<br />
video software; or an album, etc., for a music<br />
piece on an audio software. Each title is assigned<br />
a title number enabling you to locate the title<br />
you want.<br />
Track<br />
Sections of a music piece on a CD. Each track is<br />
assigned a track number enabling you to locate<br />
the track you want.<br />
PCM<br />
Pulse code modulation, an uncompressed data<br />
formation.<br />
NTSC<br />
National TV <strong>System</strong>s Committee: a video<br />
standard used in USA.<br />
PAL<br />
Phase Alternation Line: a video standard used in<br />
many European countries.
<strong>HS</strong> <strong>350</strong> Controller Specifications<br />
DVD player<br />
FM Tuner<br />
Pickup: Semiconductor laser, wavelength 650nm<br />
Signal system: NTSC / PAL<br />
Video signal horizontal resolution: More than 480 lines (DVD)<br />
Video signal-to-noise ratio: More than 60 dB (DVD)<br />
Audio frequency response: DVD (PCM): 20Hz ~ 22kHz (+/- 1.0dB)<br />
(Stereo) CD (PCM): 20Hz ~ 20kHz (+/- 1.0dB)<br />
Audio signal-to-noise ratio: More than 80 dB (PCM)<br />
Total harmonic distortion:: Less than 0.01% (PCM)<br />
Dynamic range: DVD (PCM): More than 85 dB (EIAJ, 2kHz)<br />
CD: More than 85 dB (EIAJ)<br />
<strong>System</strong>: PLL quartz-locked digital synthesizer system<br />
Tuning range: 87.50 ~ 108.00 MHz<br />
Antenna terminals: 75 Ohms, unbalanced<br />
Intermediate frequency: 10.7 MHz<br />
Video Outputs HDMI:<br />
Component Video Output: Y: 1 Vp-p/75 Ohms, sync negative polarity<br />
Cr: 0.7 Vp-p/75 Ohms<br />
Cb: 0.7 Vp-p/75 Ohms<br />
CVBS Video: 1 Vp-p 75 Ohms<br />
S-video: Y: 1 Vp-p 75 Ohms<br />
C: PAL 0.3 Vp-p 75 Ohms / NTSC 0.286 Vp-p 75 Ohms<br />
Audio line Outputs<br />
Audio L/R: 2 Vrms, 1 kilohms<br />
General<br />
Power requirements: AC 230 V, 50 Hz<br />
Max power consumption: 400 W<br />
Idle power consumption: Less than 2 W<br />
Dimensions (WxHxD): 357mm x 105mm x 293mm<br />
Weight: 7.5 kg<br />
* Designs and specifications are subject to change without notice.<br />
Depth measurement includes knobs, buttons and terminal connections. Height measurement includes feet and chassis.<br />
All features and specifications are subject to change without notice.<br />
<strong>Harman</strong> <strong>Kardon</strong>, The Bridge and Logic 7 are registered trademarks of <strong>Harman</strong> International Industries, Incorporated.<br />
Dolby, Pro Logic and the double-D symbol are trademarks of Dolby Laboratories, registered in the United States and/or other countries. All rights reserved.<br />
DTS is a trademark of Digital Theater <strong>System</strong>s, Inc.<br />
Windows Media ® Audio (WMA) is a proprietary file format developed by Microsoft.<br />
DivX is a registered trademark of DivX, Inc.<br />
HDMI, the HDMI logo and High-Definition Multimedia Interface are trademarks or registered trademarks of HDMI Licensing LLC.<br />
Apple and iPod are registered trademarks of Apple Computer, Inc.<br />
<strong>HS</strong> <strong>350</strong> CONTROLLER SPECIFICATIONS 35<br />
ENGLISH
250 Crossways Park Drive, Woodbury, New York 11797<br />
516.422.HKHK (4545) Fax: 516.682.3523 (USA only)<br />
www.harmankardon.com<br />
<strong>Harman</strong> Consumer Group, Inc.:<br />
2, route de Tours, 72500 Château-du-Loir, France<br />
© 2008 <strong>Harman</strong> <strong>Kardon</strong>, Incorporated<br />
Part No.: 01.00.YS.SM1.E1553


