2005 Front drive system service manual E.indd
2005 Front drive system service manual E.indd
2005 Front drive system service manual E.indd

Create successful ePaper yourself
Turn your PDF publications into a flip-book with our unique Google optimized e-Paper software.
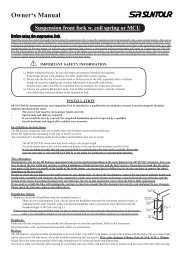
Replacing the inner cable<br />
1. Return the control to stopper position.<br />
2. Open the indicator window by a fi nger or a screw <strong>drive</strong>r (-).<br />
(For TS type: Loosen the cap screw counter-clockwise with a<br />
2.5mm allen wrench.)<br />
3. Push out the old inner cable, and install the new inner cable.<br />
At this time, check to see if the control is at the stopper position.<br />
4. Close the indicator window. (For TS type: Tighten the cap<br />
screw clockwise with a 2.5mm allen wrench.<br />
Suggested tightening torque is 0.05Nm. Then close the cable<br />
replacement port.)<br />
Stopper position<br />
2.5 Allen key<br />
LIMITED WARRANTY<br />
SR SUNTOUR warrants the <strong>drive</strong> train to be free from defects in materials and workmanship under normal use for a period of<br />
two years from the date of purchase. In no event shall this limited warranty apply to any defect of the <strong>drive</strong> train caused by: improper<br />
installation, disassembly, reassembly, intentional breakage or damage, alterations or modifi cations to the <strong>drive</strong> train by the<br />
user or other party or any unreasonable use or abuse of the product or any use for which this product was not intended.<br />
The obligation of this limited warranty shall be limited to repairing or replacing the <strong>drive</strong> train or any part for which there is a<br />
defect in materials or workmanship during the two years following the date of purchase. To validate this limited warranty the<br />
purchaser must submit this warranty card to SR SUNTOUR within 30 days after purchase of the <strong>drive</strong> train. Any alteration of, or<br />
tampering with the warranty card automatically terminates this limited warranty.<br />
SR SUNTOUR makes no express or implied warranties of fi tness or merchatability of any kind, except as set forth above. SR<br />
SUNTOUR’s liability hereunder is expressly limited to repair or replacement of the product. Under no circumstances will SR<br />
SUNTOUR be liable for incidental or consequential damages. Some jurisdictions do not allow the exclusion or limitation of liability<br />
of incidental or consequential damages, so the above exclusion may not apply to you. This warranty gives you specifi c rights<br />
and you may have other rights which vary from jurisdiction to jurisdiction.<br />
Drive Train Warranty Card:<br />
Date of purchase: Model name<br />
Term of limited warranty: Two years from the date of purchase<br />
Dealer Name: Phone#:<br />
Address:<br />
Purchaser Name: Phone#:<br />
Address:<br />
CABLE NIPPLE<br />
This warranty is void without proof of purchase.<br />
SR SUNTOUR INC.<br />
No.7 Hsing Yeh Road, Fu Hsing Industrial Zone.Changhua.50606. Taiwan, R.O.C.<br />
Tel:00886-4-7695115 / Fax: 00886-4-769 4028 / E-mail: orders@srsuntour.com.tw<br />
SR SUNTOUR USA<br />
P.O. Box 61988 Vancouver WA 98666<br />
Tel: 1- 360 737 6450 / Fax: 1 360 737 6452 /<br />
E-mail: <strong>service</strong>@usulcorp.com<br />
5<br />
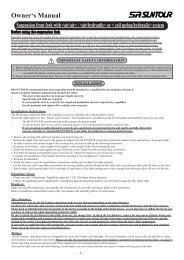
SLOT<br />
NIPPLE STOPPER<br />
5th step: Push down the nipple<br />
stopper, in order to release the cable<br />
nipple - take out the old cable.<br />
1<br />
2<br />
3<br />
1<br />
1st step: Return the lever to the<br />
stopper position<br />
2nd step: Open the indicator window,<br />
using a fl at screw<strong>drive</strong>r.<br />
6 7<br />
3<br />
3rd step: Open the indicator window,<br />
SR SUNTOUR EUROPE S.A.<br />
Chaussee de Tervueren,43,1410 Waterloo. Belgium<br />
Tel: 0032-2-3544676 / Fax: 0032-2-354 7835 /<br />
E-mail: <strong>service</strong>@srsuntoureurope.com<br />
SR SUNTOUR INC.<br />
Specifi cations are subject to change without notice.<br />
Printed in TAIWAN.<br />
4<br />
������������<br />
4th step: Take out the cable nipple.