Line 6 Pod Studio GX Manual - American Musical Supply
Line 6 Pod Studio GX Manual - American Musical Supply
Line 6 Pod Studio GX Manual - American Musical Supply

Create successful ePaper yourself
Turn your PDF publications into a flip-book with our unique Google optimized e-Paper software.
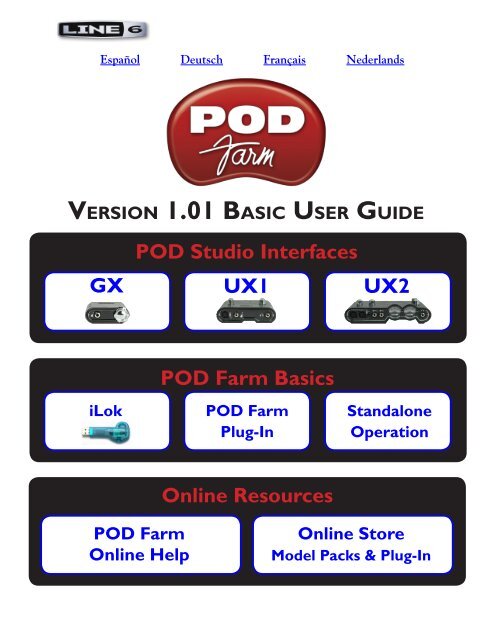
Español Deutsch Français Nederlands<br />
Ve r s i o n 1.01 Ba s i c Us e r GU i d e<br />
POD <strong>Studio</strong> Interfaces<br />
<strong>GX</strong> UX1 UX2<br />
iLok<br />
POD Farm<br />
Online Help<br />
POD Farm Basics<br />
POD Farm<br />
Plug-In<br />
Online Resources<br />
Standalone<br />
Operation<br />
Online Store<br />
Model Packs & Plug-In
Table of Contents<br />
Start Here ................................................................................................1•1<br />
System Requirements - POD Farm Plug-In & Standalone Operation .......................... 1•1<br />
Updating & Registering with <strong>Line</strong> 6 Monkey ................................................................ 1•2<br />
Product Activation & Authorization ............................................................................. 1•2<br />
POD Farm Plug-In for iLok ............................................................................................ 1•4<br />
Using Your <strong>Line</strong> 6 Hardware ...................................................................2•1<br />
Making the Connection ................................................................................................. 2•1<br />
<strong>GX</strong> ................................................................................................................................... 2•2<br />
UX1 ................................................................................................................................. 2•3<br />
UX2 ................................................................................................................................. 2•4<br />
POD Farm Plug-In ...................................................................................3•1<br />
A Quickie Plug-In Primer ............................................................................................... 3•1<br />
Plug-In Parameter Automation ...................................................................................... 3•1<br />
Supported Plug-In Formats ............................................................................................. 3•2<br />
Activating the Plug-In .................................................................................................... 3•2<br />
Plug-In User Interface Overview .................................................................................... 3•3<br />
Main Control Bar ........................................................................................................... 3•3<br />
View Selection Buttons .................................................................................................. 3•4<br />
Gear View ....................................................................................................................... 3•5<br />
Panel View ...................................................................................................................... 3•5<br />
Presets View .................................................................................................................... 3•9<br />
Signal Flow View .......................................................................................................... 3•10<br />
POD Farm - Standalone Operation .......................................................4•1<br />
ToneDirect Monitoring .............................................................................................. 4•1<br />
Input Source Select & Input Metering .......................................................................... 4•1<br />
Tuner View ...................................................................................................................... 4•2<br />
Mixer View ..................................................................................................................... 4•3<br />
<strong>Line</strong> 6, POD Farm, POD Farm Plug-In, POD, POD X3, POD X3 Live, PODxt, PODxt Pro, TonePort,<br />
GearBox, GearBox Plug-In, <strong>Line</strong> 6 Monkey, ToneDirect Monitoring, GuitarPort, FBV, Variax, <strong>Line</strong> 6 Edit<br />
and Custom Tone are trademarks of <strong>Line</strong> 6, Inc. All other product names, trademarks, and artists’ names are the<br />
property of their respective owners, which are in no way associated or affiliated with <strong>Line</strong> 6.<br />
Copyright © 2008 <strong>Line</strong> 6, Inc.<br />
ii
Sta r t He r e<br />
1•1<br />
<strong>Line</strong> 6 POD Farm 1.01 – Start Here<br />
System Requirements - POD Farm Plug-In & Standalone Operation<br />
Windows ®<br />
•<br />
•<br />
•<br />
•<br />
•<br />
•<br />
•<br />
•<br />
•<br />
•<br />
Mac ®<br />
•<br />
•<br />
•<br />
•<br />
•<br />
•<br />
•<br />
•<br />
•<br />
•<br />
Pentium 4 -1.2GHz or better (2.5 GHz or better, or multi-core CPU recommended)<br />
® ® ® ® ® ® Windows XP (with SP2 or SP3), Windows XP X64, Windows Vista (including SP1),<br />
Windows ® Vista ® X64 ®<br />
512 MB RAM minimum (1 GB or more recommended)<br />
1 GB free hard disk space minimum (10 GB or more recommended for recording)<br />
Drive speed 5400 rpm minimum (7200 rpm or faster recommended)<br />
1024 x 768 minimum screen display resolution<br />
CD-ROM drive (if installing from POD Farm CD)<br />
One free USB 1.1 or 2.0 compatible port on computer (USB hubs are not supported for <strong>Line</strong> 6<br />
devices)<br />
Internet connection for online features<br />
Compatible <strong>Line</strong> 6 USB hardware or iLok (device must be connected to computer & authorized<br />
to use POD Farm):<br />
• POD Farm Plug-In - POD <strong>Studio</strong>, TonePort, GuitarPort, POD X3, PODxt, or iLok<br />
• POD Farm Standalone Operation - POD <strong>Studio</strong>, TonePort & GuitarPort<br />
Intel or Power PC based G4 1.5 GHz or better (G4 1.67 or better, or multi-core CPU<br />
recommended)<br />
OS X 10.4 or later<br />
512 MB RAM minimum (1 GB or more recommended)<br />
1GB free hard disk space minimum (10GB or more recommended for recording)<br />
Drive speed 5400 rpm minimum (7200 rpm or faster recommended)<br />
1024 x 768 minimum screen display resolution<br />
CD-ROM drive (if installing from POD Farm CD)<br />
One free USB 1.1 or 2.0 compatible port on computer (USB hubs are not supported for <strong>Line</strong> 6<br />
devices)<br />
Internet connection for online features<br />
Compatible <strong>Line</strong> 6 USB hardware or iLok (device must be connected to computer & authorized<br />
to use POD Farm):<br />
• POD Farm Plug-In - POD <strong>Studio</strong>, TonePort, GuitarPort, POD X3, PODxt, or iLok<br />
• POD Farm Standalone Operation - POD <strong>Studio</strong>, TonePort & GuitarPort
Updating & Registering with <strong>Line</strong> 6 Monkey<br />
1•2<br />
<strong>Line</strong> 6 POD Farm 1.01 – Start Here<br />
Attention iLok users... You won’t need to run <strong>Line</strong> 6 Monkey. Obtaining and authorizing the POD Farm<br />
Plug-In license for an iLok USB key has its own simple, online process that you can perform on any<br />
Internet-connected computer. Please skip ahead to the POD Farm for iLok section for details.<br />
<strong>Line</strong> 6 Monkey is the intelligent updater utility automatically installed with your POD Farm application.<br />
It’s a great idea to run <strong>Line</strong> 6 Monkey immediately after POD Farm installation, and to do so often, to<br />
be sure you have the latest updates for all your <strong>Line</strong> 6 software and hardware products. Registering your<br />
<strong>Line</strong> 6 hardware is also very important because it ensures that you’re dialed in for warranty service and<br />
makes it possible for us to contact you if new software versions or other cool enhancements are offered<br />
- cutting edge technology and such! So don’t put this off any longer. Connect your <strong>Line</strong> 6 hardware to<br />
your computer and follow these steps to launch <strong>Line</strong> 6 Monkey...<br />
• On Windows ® - Go to Start - Programs - <strong>Line</strong> 6 - Tools.<br />
• On Mac ® - Go to Applications - <strong>Line</strong> 6.<br />
Login Account<br />
You’ll need to Login so that <strong>Line</strong> 6 Monkey can communicate with the online <strong>Line</strong> 6 Server and<br />
provide you with exactly what you need. It’s just a few clicks, and it’s free!<br />
•<br />
•<br />
If you have a <strong>Line</strong> 6 account, then type in your User Name and Password at the top of the<br />
Monkey dialog.<br />
If you have not yet created an account, click the New User button and you’ll be walked right<br />
through the steps.<br />
Register Your Hardware<br />
If you have not already done so, you’ll be prompted to Register your connected <strong>Line</strong> 6 hardware. It’s a<br />
painless process really, so click that Register Now button and fill in the blanks on the Web page.<br />
Grab Those Updates<br />
Go to the Updates tab in <strong>Line</strong> 6 Monkey. If you see any items where a newer, updated version is<br />
available, then you should click on that item and let the little monkey fellow walk you through the<br />
installation steps. This is the easiest way to stay current on the latest POD Farm software updates, as<br />
well as drivers and firmware updates. You can also check the Optional Add-Ons* tab to see what other<br />
goodies might be available for your specific <strong>Line</strong> 6 device here too!<br />
Note - All POD <strong>Studio</strong> family devices already include the POD Farm Plug-In, and UX1 & UX2 devices<br />
additionally include the FX Junkie Model Pack for free! You’ll need to “activate” these items by running<br />
<strong>Line</strong> 6 Monkey - see the following section.<br />
Product Activation & Authorization<br />
Some features of POD Farm and your <strong>Line</strong> 6 hardware require “Activation” using <strong>Line</strong> 6 Monkey and<br />
a live Internet connection. As mentioned above, POD <strong>Studio</strong> <strong>GX</strong>, UX1 and UX2 devices include<br />
one or more Add-Ons already “installed” on the hardware device itself. When you connect your POD
1•3<br />
<strong>Line</strong> 6 POD Farm 1.01 – Start Here<br />
<strong>Studio</strong> device and launch <strong>Line</strong> 6 Monkey for the first time, if you are prompted to press the “Activate<br />
Features” button, then go ahead and do so to activate the included Add-On(s).<br />
If you’ve purchased additional Add-Ons for your <strong>Line</strong> 6 device, you will have received a License Key<br />
for each Add-On. Launch <strong>Line</strong> 6 Monkey, go to the Optional Add-Ons tab, and then follow these<br />
steps...<br />
• You can find all Add-On license keys you’ve purchased by logging into the <strong>Line</strong> 6 - My Account<br />
online page, and looking in the License Keys page.<br />
•<br />
Copy the numerical License key code that appears on this page.<br />
• Go back to the <strong>Line</strong> 6 Monkey screen and click on the Activate Purchase button. A window<br />
will pop up, prompting you to enter the activation key you just received.<br />
•<br />
Activation turns the Add-On features “on” in your POD Farm-compatible hardware, so they can<br />
operate in the POD Farm stand-alone application and/or POD Farm Plug-in.<br />
When using your <strong>Line</strong> 6 USB hardware on a new or different computer for the first time, you may also<br />
see the following message at the top of the Add-Ons tab - just click the Authorize button to finish<br />
configuring your computer to use your new hardware and Add-Ons.
That’s it, you’re done! You are now ready to use POD Farm and your Add-Ons.<br />
1•4<br />
<strong>Line</strong> 6 POD Farm 1.01 – Start Here<br />
For info about Add-Ons, transferring activations between different <strong>Line</strong> 6 devices, <strong>Line</strong> 6 Monkey and<br />
more, please see the additional documentation on the <strong>Line</strong> 6 site’s POD Farm Online Help page.<br />
POD Farm Plug-In for iLok<br />
POD Farm Plug-In is a protected software and requires an authorized license to run on your computer.<br />
The POD Farm Plug-In license comes with, or can be added to, all the <strong>Line</strong> 6 USB audio interfaces,<br />
as discussed in the <strong>Line</strong> 6 Monkey and Hardware sections of this User Guide. And now, <strong>Line</strong> 6 also<br />
offers the POD Farm Plug-In license to be purchased specifically for your iLok USB “smart key”! If you<br />
don’t already have an iLok key, you can purchase one at most stores where audio software is sold, or<br />
directly from iLok.com. To follow are the steps for purchasing and configuring POD Farm Plug-In and<br />
your iLok.<br />
What is an iLok?<br />
The iLok key is a proprietary USB hardware dongle that holds licenses for software protected by PACE<br />
Anti-Piracy’s Interlok ® system.<br />
The iLok USB Key<br />
If you own an iLok and purchase the POD Farm Plug-In for iLok, you can use the iLok USB key to<br />
store your POD Farm Plug-In license, as well as any other Mac ® and Windows ® iLok-enabled software<br />
licenses, all on the one iLok USB key. The iLok is portable and allows you to run POD Farm Plug-In<br />
on any computer. It is also easy to manage all your iLok software licenses with iLok.com - where you<br />
can set up a secure account, view all licenses on your iLok key, take delivery of new licenses, and even<br />
move them between multiple iLok keys!<br />
Create an iLok Account<br />
If you’ve just purchased a new iLok USB key, your first step is to go to the iLok.com site to set up an<br />
account. Note that it is important you set up only ONE account, even if you own multiple iLok keys!<br />
Create your account here. If you already have an iLok account, then you’ll use it for the following<br />
steps.
1•5<br />
<strong>Line</strong> 6 POD Farm 1.01 – Start Here<br />
Next, for a new iLok key, you’ll need to download the iLok Client Software and the iLok Driver and<br />
install them. There are a few different options here, depending if you want to manage your iLok on the<br />
same computer as you plan on actually using POD Farm Plug-in on or not. Please see the steps outlined<br />
on the iLok.com Help page for the complete instructions.<br />
Purchasing POD Farm Plug-In for iLok<br />
If you don’t already have one, create a <strong>Line</strong> 6 account now. It is free and is necessary for activating<br />
and retrieving your POD Farm Plug-In license. To create your account, go here.<br />
To purchase the POD Farm Plug-In license for iLok, you can go the <strong>Line</strong> 6 Online Store and select<br />
the iLok hardware option, or visit your favorite music gear retailer and pick up the boxed version.<br />
(Note that the iLok USB software key is sold separately, and not part of the <strong>Line</strong> 6 POD Farm Plug-In<br />
purchase). There are a few options for the purchase of POD Farm Plug-In for iLok...<br />
• POD Farm - Includes the same great set of guitar & bass amps, mic preamps and effects that<br />
come with our POD <strong>Studio</strong> devices.<br />
• POD Farm Platinum - Includes all the models of the POD Farm product, and additionally<br />
includes all the optional Model Pack Add-Ons we make!<br />
• POD Farm Platinum Upgrade - For owners of the POD Farm iLok version that want to step up<br />
to the Platinum, you can purchase this upgrade.<br />
All POD Farm Plug-In versions include RTAS/VST/AU support for Mac ® and RTAS/VST support for<br />
Windows ® . See the info on the Online Store pages for more details.<br />
If you’ve purchased the POD Farm iLok license from the <strong>Line</strong> 6 Online Store, please skip ahead to<br />
the following iLok Deposit section, since your purchase does not require the “Activation” steps.<br />
Note: You can perform the following Online Purchase, Activation and iLok licensing processes on any<br />
computer that has Internet access - These steps do not necessarily need to be performed on the computer<br />
on which you plan to use POD Farm Plug-In.<br />
Product Activation (Retail boxed version only)<br />
For your purchase of the boxed POD Farm license for iLok, you’ll find an Activation Code printed<br />
on a card within the box. With this card in hand, go to the <strong>Line</strong> 6 Online iLok Activation page,<br />
read through the steps in the Product Activation section, and enter your Activation Code and click<br />
Submit:<br />
Next you’ll be prompted for the iLok User ID for your iLok.com account...
1•6<br />
<strong>Line</strong> 6 POD Farm 1.01 – Start Here<br />
Enter your iLok User ID - This is the Username you use to login to your account at iLok.com. Type<br />
it in and click Continue.<br />
Next you are prompted to verify that your iLok User ID is entered correctly - Please be sure it is to<br />
avoid the added task of contacting iLok to fix it! Click Confirm & Submit if all is correct. Once the<br />
process completes, a POD Farm license is “Deposited” in your iLok.com account. Proceed to the iLok.<br />
com website to download the license to your iLok USB key.<br />
Please skip ahead to the iLok License section.<br />
iLok Deposit (<strong>Line</strong> 6 Online Store purchase)<br />
If you’ve purchased POD Farm Plug-In for iLok directly from the <strong>Line</strong> 6 Online Store... Once your<br />
transaction is complete, log into your <strong>Line</strong>6.com account and go to the iLok Deposits page. Here you<br />
can check the Status of your iLok License.<br />
Initially, following your Online Store transaction, you should see the Status listed here as “inserted”,<br />
as shown above. Click the Deposit button to proceed.
1•7<br />
<strong>Line</strong> 6 POD Farm 1.01 – Start Here<br />
Next you are prompted to enter your iLok User ID - This is the Username you use to login to your<br />
account at iLok.com. Type it in and click Continue.<br />
You are then asked to verify the iLok User ID is entered correctly - Please be sure it is to avoid the<br />
added task of contacting iLok to fix it! Click Confirm & Submit if all is correct. You should next see<br />
confirmation that your iLok Deposit was successful and your license sent to iLok.com. Head on over<br />
to the iLok.com website and log into your account there to download your license. If any error was<br />
encountered, you can return to the iLok Deposits page and repeat the process.<br />
iLok License<br />
Once logged in to your iLok.com account, you should find your “pending” POD Farm license waiting<br />
for you in the Download Licenses section.<br />
Connect your iLok to your USB port and follow the instructions on the iLok site to Synchronize your<br />
iLok key.<br />
Allow the Synchronize process to complete, and you’ll then be able to select your POD Farm license<br />
for download.
1•8<br />
<strong>Line</strong> 6 POD Farm 1.01 – Start Here<br />
Follow the steps listed on the iLok.com page to Download the POD Farm License to your iLok key...<br />
And you’re done! Now that your iLok USB key is all configured, you can log out and exit the iLok<br />
web site. Your next step is to download the POD Farm application installer and run it on any Mac ®<br />
or Windows ® computer where you want to run POD Farm Plug-In! Remember, you need to have the<br />
iLok key connected to the computer for POD Farm Plug-In to run in its “authorized” state within your<br />
host software.<br />
In the event that your POD Farm license does not appear on your iLok.com account, you can check<br />
the status of the deposit on the iLok Deposits page of your <strong>Line</strong> 6 account.<br />
Note that the Status may initially appear as “queued” for a short time until accepted by iLok.com<br />
for processing. Once it appears as “deposited”, as shown above, then this means your new POD Farm<br />
license asset has been sent to your iLok.com account.<br />
Download and POD Farm Application Installer<br />
We always have the latest POD Farm installer available for free download on the <strong>Line</strong> 6 Downloads<br />
page. On the Downloads page, select “iLok” as the Product, “POD Farm” as the Software, and then<br />
select your computer’s Operating System (Mac ® OS X, Windows ® XP ® or Vista ® ), as shown here:<br />
Then press the “Go” button and the correct installer will be displayed for your system so that you can<br />
download it to your computer. Once the download of the installer file completes, run the installer file<br />
following its step-by-step instructions.<br />
Windows ® XP ® and Vista ® users... When you see the Choose Hardware Type screen during the<br />
POD Farm installation, be sure to check the box for “POD Farm iLok”, as shown here:<br />
If you are also going to be using any <strong>Line</strong> 6 USB audio device (POD <strong>Studio</strong>, TonePort, POD X3,<br />
PODxt or GuitarPort) then you’ll want to check the “POD Farm for <strong>Line</strong> 6 Devices” box as well.
1•9<br />
<strong>Line</strong> 6 POD Farm 1.01 – Start Here<br />
Mac ® Users... The POD Farm installer’s default settings will install the necessary files for your<br />
iLok, as well as the audio drivers for any <strong>Line</strong> 6 USB audio devices automatically. If desired, you<br />
can uncheck any individual POD Farm Plug-In formats and/or <strong>Line</strong> 6 Device Drivers that you may<br />
not need. But you will need to install at least one POD Farm Plug-In format supported by your host<br />
audio software so that you will be able to use POD Farm Plug-In with your iLok:<br />
For further assistance with POD Farm installation, check out the Installation Guide document available<br />
at POD Farm Online Help. With the above steps completed, you’ll be able to access and utilize POD<br />
Farm Plug-In in your host audio software! You are, of course, free to use any audio type of audio<br />
interface with your DAW configuration. Please see the POD Farm Plug-In chapter for more info.<br />
Note that POD Farm cannot be run in Standalone Operation with the iLok alone, since this requires the<br />
use of a <strong>Line</strong> 6 POD <strong>Studio</strong>, TonePort or GuitarPort USB audio interface.
US i n g Yo U r Li n e 6 Ha r d wa r e<br />
<strong>Line</strong> 6 POD Farm 1.01 – Using Your <strong>Line</strong> 6 Hardware<br />
The POD Farm software is designed to work with the new <strong>Line</strong> 6 POD <strong>Studio</strong> family of USB audio<br />
interfaces. Additionally, a POD Farm Plug-In license can purchased for an iLok USB “smart key”. This<br />
Basic User Guide walks you through getting up and running with POD Farm, POD Farm Plug-In and<br />
your POD <strong>Studio</strong> or iLok USB device. POD Farm also supports all <strong>Line</strong> 6 TonePort (models <strong>GX</strong>, UX1,<br />
UX2, UX8, D.I. & KB37) and GuitarPort USB audio interfaces. All <strong>Line</strong> 6 POD X3 and PODxt family<br />
devices can be used with the POD Farm Plug-In Add-On as well! For more details on using POD Farm<br />
with all <strong>Line</strong> 6 USB hardware, as well as some handy tips on recording, optimizing your computer and<br />
more, please be sure to see the additional documentation on the POD Farm Online Help site.<br />
All <strong>Line</strong> 6 USB audio interfaces utilize the high-performance <strong>Line</strong> 6 audio drivers, and, therefore,<br />
are easily configured to work as your computer’s sound card. This means that you can access all your<br />
POD Tones directly from most any audio recording application, all at the highest quality. But you are<br />
of course not just limited to using your <strong>Line</strong> 6 hardware to record into your computer – the outputs<br />
provided on the back of your device additionally allow you to feed your POD Farm signal to external<br />
tape machines, DAT recorders, PA systems, or any other external audio hardware!<br />
If you are using an iLok USB smart key to run POD Farm Plug-In, then you are, of course, free to use<br />
any audio interface with your computer and audio software. Once you have your POD Farm license<br />
successfully added to your iLok key, just keep the iLok in your USB port and you can skip ahead to the<br />
POD Farm Plug-In chapter.<br />
Making the Connection<br />
You need to connect your <strong>Line</strong> 6 hardware to your computer via USB cable to utilize POD Farm, POD<br />
Farm Plug-In and/or to use your POD <strong>Studio</strong> hardware as your computer’s sound card device. Note<br />
that you should always connect to a separate USB controller channel from other USB audio or MIDI<br />
interfaces to provide your device with the full USB bandwidth. You should also always connect directly<br />
to a USB 1.1 or 2.0 USB port on your computer and not into a USB hub.<br />
Note - Be sure to always power off or mute your speakers or monitoring setup before connecting and<br />
disconnecting the USB cable between your <strong>Line</strong> 6 device and computer, as well as before booting up or<br />
shutting down your computer if the device is already connected. The best practice is to always power on<br />
your speakers last, and power them off first when connected to other audio gear to avoid a “pop” which<br />
could be damaging to your speakers (or to your ears!)<br />
There are some differences in the setup and functionality between the POD <strong>Studio</strong> interface models,<br />
so be sure to look for the instructions in the following sections for your specific device. Use the handy<br />
links here to jump directly to the section on your POD <strong>Studio</strong> device...<br />
<strong>GX</strong> UX1 UX2<br />
2•1
<strong>GX</strong><br />
Connect your electric<br />
Guitar or Bass<br />
<strong>Line</strong> 6 POD Farm 1.01 – Using Your <strong>Line</strong> 6 Hardware<br />
Instrument Input - Plug in your electric guitar or bass here to feed the instrument’s signal into POD<br />
Farm where you can then choose your tone and route the processed signal both to the Record Sends<br />
(to your audio software) and directly to the hardware outputs.<br />
Connect your stereo<br />
Headphones/<strong>Line</strong> Out Cable<br />
Connect USB cable from here<br />
to your computer<br />
USB - This is where you connect the USB cable from <strong>GX</strong> to your computer’s USB 1.1 or 2.0 port.<br />
<strong>Line</strong> Out/Phones - When connecting <strong>GX</strong> as the primary audio interface on your computer, this<br />
output carries the Master stereo mix from your DAW software, as well as anything plugged into the<br />
Instrument input. If you ‘re using a 3rd-party audio interface, these outputs supply the ToneDirect<br />
magic to your interface when using the POD Farm Standalone application alongside the Plug-In. See<br />
the ToneDirect Monitoring section for more details.<br />
If you want to listen to the audio directly from <strong>GX</strong> using stereo headphones, you can also plug them<br />
into this 1/8-inch stereo jack.<br />
2•2
UX1<br />
<strong>Line</strong> 6 POD Farm 1.01 – Using Your <strong>Line</strong> 6 Hardware<br />
Connect your electric guitar or bass<br />
Connect a microphone<br />
Connect your stereo headphones<br />
Mic Input - Connect a microphone here using an XLR cable. This inputs the microphone signal into<br />
POD Farm where you can choose your tone, and then feed the processed signal both to the Record<br />
Sends (to your audio software) and directly to the hardware outputs.<br />
Instrument Input - Plug in your electric guitar or bass here to feed the instrument’s signal into POD<br />
Farm where you can then choose your tone and route the processed signal both to the Record Sends<br />
(to your audio software) and directly to the hardware outputs.<br />
Phones - To listen using stereo headphones, plug them into this 1/4-inch stereo jack. This headphone<br />
jack outputs the same signal fed to the Analog Outs; the audio from your audio software on the<br />
computer, as well as anything plugged into any UX1 input.<br />
Connect a USB cable from here to<br />
your computer’s USB port<br />
Connect the Analog Outs<br />
to your audio monitors<br />
Connect any line level input<br />
source for monitoring to the Stereo<br />
Monitor In<br />
2•3<br />
Connect any line level input<br />
source that you want to record<br />
into the <strong>Line</strong> Inputs<br />
<strong>Line</strong> Inputs - To record the signal from a line level source, such as a keyboard, your stereo receiver, the<br />
line out from a mixing console, etc., connect them to these Left and Right inputs.<br />
Monitor In - If you want to hear the signal from a line level source along with all the other audio<br />
coming from your computer, but do not want this audio recorded, then plug the source in here (this<br />
Monitor In signal is not fed to the Record Sends). Note that this is a stereo jack, so you should use a<br />
stereo, 1/4-inch TRS audio cable for this connection.
<strong>Line</strong> 6 POD Farm 1.01 – Using Your <strong>Line</strong> 6 Hardware<br />
USB - This of course is where you connect the supplied USB cable to UX1, with the other end going<br />
to your computer’s USB port.<br />
Analog Outs - These Left and Right unbalanced jacks are your main outputs and carry all the audio<br />
from UX1; the audio from your audio software on the computer, and anything plugged into any UX1<br />
input. These are what you want to connect to your powered speakers or monitoring system for a<br />
recording setup.<br />
UX2<br />
Connect up to two<br />
Microphones<br />
Connect your electric Guitar or Bass<br />
2•4<br />
Connect your stereo<br />
Headphones<br />
Microphone Inputs - You can receive input from one or two mics at the same time using these ins<br />
using XLR mic cables. There is also a +48V Phantom Power switch that you should toggle to “on” if<br />
your mic requires phantom power (most condenser type mics do, but check the documentation for your<br />
mic if you are not sure). This inputs each microphone signal independently into POD Farm where you<br />
can choose your tone, and then route the processed signal both to the Record Sends (to your audio<br />
software) and directly to the hardware outputs.<br />
Instrument Input -To input your electric guitar or bass, plug it into one of these inputs. Either of these<br />
feeds the instrument’s signal into POD Farm where you can choose your tone and route the processed<br />
signal both to the Record Sends (to your audio software) and directly to the hardware outputs.<br />
• Norm – This input is for a standard instrument level output.<br />
• Pad - This input is designed for high output level basses and guitars, especially those with active<br />
pickups. Plug your high output instrument into here.<br />
Phones - To listen using stereo headphones, plug them into this 1/4-inch stereo jack. This headphone<br />
jack outputs the same signal fed to the Analog Outs; the audio from your audio software on the<br />
computer, as well as anything plugged into any UX2 input.
Connect to the S/PDIF input of an<br />
external device to send UX2’s output<br />
digitally<br />
Connect any line level input<br />
source for monitoring to the<br />
Stereo Monitor In<br />
Connect the Analog<br />
Outs to your audio<br />
monitors<br />
<strong>Line</strong> 6 POD Farm 1.01 – Using Your <strong>Line</strong> 6 Hardware<br />
2•5<br />
Connect your USB cable from<br />
your computer’s USB port<br />
Connect any line level<br />
input source that you want<br />
to record into the <strong>Line</strong><br />
Inputs<br />
<strong>Line</strong> Inputs - If you want to record the signal from a line level source, such as a keyboard, your stereo<br />
receiver, the line out from a mixing console, etc., connect them to these Left and Right inputs.<br />
USB - This of course is where you connect the supplied USB cable to UX2, with the other end going<br />
to your computer’s USB 1.1 or 2.0 port.<br />
S/PDIF Digital Out - To send the output of UX2 to an external device digitally, connect a 75-Ohm<br />
coaxial cable into this RCA jack and then into the S/PDIF digital input on the external device. This<br />
is the best choice for connecting to digital recording devices, such as a DAT recorder. This S/PDIF<br />
output sends the same audio as is sent to UX2’s Analog Outs (with the exception that any audio<br />
coming into the Monitor In jack is not routed to the S/PDIF output). The digital signal is always sent<br />
at 24-bit resolution.<br />
Monitor In - If you want to hear the signal from a line level source mixed with all the other audio<br />
coming from your computer, but do not want this audio recorded, then plug the source in here (this<br />
Monitor in signal is not fed to the Record Sends). Note that this is a stereo jack, so you should use a<br />
stereo 1/4-inch TRS audio cable for this connection.<br />
Analog Outs - These Left and Right unbalanced jacks are your main outputs and carry all the audio<br />
from UX2; the audio from your audio software on the computer, and anything plugged into any UX2<br />
input. These are what you want to connect to your powered speakers or monitoring system for a<br />
recording setup.
<strong>Pod</strong> Fa r m PL U g-in<br />
3•1<br />
<strong>Line</strong> 6 POD Farm 1.01 - POD Farm Plug-In<br />
Welcome to the wonderful world of POD Farm Plug-In, where legendary, studio-standard tone and<br />
classic vintage effects are all available to you within your favorite Windows ® or Mac ® DAW (Digital<br />
Audio Workstation) software, in a flexible native software Plug-In format! Note that most features<br />
described in this chapter are also the same for POD Farm when in Standalone operation. For details<br />
covering the additional features unique to Standalone operation, please see the following POD Farm<br />
Standalone Operation chapter.<br />
A Quickie Plug-In Primer<br />
There are many types of “Plug-Ins” in the world of software. Plug-Ins are relatively small applications<br />
that can only run when loaded inside a compatible “host” software application. Plug-Ins operate within<br />
the host application to extend the capabilities of the host. In the world of music software, audio Plug-<br />
Ins find frequent use inside audio/MIDI host recording & sequencing programs, commonly referred to<br />
as DAW (Digital Audio Workstation) applications. Audio Plug-Ins provide signal processing for your<br />
audio tracks or live audio input.<br />
A helpful analogy for Plug-Ins is to think of them as effects pedals. Effects pedals change the Tone<br />
of your bass or guitar before the signal reaches your amplifier. As with pedals, rack effects units, or<br />
any other conventional piece of outboard gear, Plug-Ins provide familiar knobs, sliders & buttons for<br />
tweaking their parameters. For example, a distortion Plug-In will most likely have similar controls to<br />
a typical distortion pedal (such as drive, gain and tone). Visually, Plug-Ins often resemble the physical<br />
gear they emulate.<br />
When working with DAW software, using Plug-Ins provides some great benefits over using outboard<br />
effects like pedals or rack processors, such as:<br />
• Plug-Ins are “non-destructive” to your audio track. This means that you can add or remove effects<br />
and tweak their settings as often as you like without permanently affecting the original audio<br />
recording. If any processing (such as an effect or amp tone) is added before the signal is recorded<br />
into your DAW, it is permanent and cannot be changed without recording another pass.<br />
• Plug-Ins sound the same way twice. Because you can store Plug-In settings as presets, precise<br />
settings can be recalled easily and loaded reliably. Every time you go back to work on a specific<br />
song, you can rest assured that your Tones will be identical to the last session.<br />
• Plug-Ins are automatable. Host applications provide easy ways to create and manipulate parameter<br />
automation, giving you surgical precision of your Tone without having to “ride the faders” of<br />
external gear during a record pass.<br />
•<br />
Plug-Ins don’t break, corrode, use up batteries, or take up space on your floor!<br />
Plug-In Parameter Automation<br />
Most audio Plug-Ins are “automatable” from within your audio host software - meaning, you can<br />
tweak the Plug-In’s parameters (e.g. - wah pedal position, delay mix level, stomp on/off, etc.) and your<br />
adjustments will be recorded by the DAW in real-time and recreated during playback.<br />
All major DAW host applications, such as Steinberg Cubase ® , Digidesign Pro Tools ® , and Cakewalk<br />
SONAR ® , provide Plug-In parameter automation capabilities. Each host software offers parameter<br />
automation options slightly differently, so it is recommended you consult your host software’s<br />
documentation for their specific instructions. In all host audio software, you’ll be able to access a menu
3•2<br />
<strong>Line</strong> 6 POD Farm 1.01 - POD Farm Plug-In<br />
of POD Farm Plug-In’s parameters so that you can choose exactly which Amp and Effects models’<br />
parameter(s) you want to automate. POD Farm Plug-In presents its list of parameters with their names<br />
in abbreviated form in order to accommodate length limitations of the host software. Also note that<br />
you’ll see two menu items for each parameter, labeled with “1” and “2” at the start of their names.<br />
These numeric labels indicate whether the parameter is for Tone 1 or Tone 2. For example, “1 Wah-<br />
Pos” and “2 Wah-Pos” are the abbreviated names that appear in the host automation menu for the<br />
Tone 1 Wah Position and the Tone 2 Wah Position parameters, respectively.<br />
Supported Plug-In Formats<br />
The POD Farm Plug-In comes in the following formats, making it compatible with just about every<br />
major audio “host” software on the planet:<br />
•<br />
•<br />
•<br />
® ® ® VST (Virtual <strong>Studio</strong> Technology) format for Windows and Mac recording environments<br />
® ® AU (Audio Units) format on the Mac platform<br />
® ®<br />
RTAS (Real Time Audio Suite for Digidesign Pro Tools and Pro Tools LE) for both Windows<br />
and Mac ®<br />
Activating the Plug-In<br />
POD <strong>Studio</strong> and Other <strong>Line</strong> 6 Hardware: POD Farm Plug-In is included free on all POD <strong>Studio</strong><br />
family devices! You will need to first launch <strong>Line</strong> 6 Monkey and “activate” POD Farm Plug-In, as well<br />
as activate any additional Add-Ons for your device before you’ll be able to use them. You can do all<br />
this quite simply with the <strong>Line</strong> 6 Monkey application that is automatically installed along with your<br />
POD Farm software. Please see the Product Activation instructions in the Getting Started chapter.<br />
iLok USB Smart Key: If you’ve purchased the POD Farm Plug-In license for your iLok key, then you’ll<br />
need to configure your iLok key to add the POD Farm Plug-In license. Note that you do not run <strong>Line</strong><br />
6 Monkey for this process - Please see the iLok section in the Start Here chapter.<br />
Where Can I Find the POD Farm Plug-In On My Computer?<br />
Most DAW “host” applications will scan and find your POD Farm Plug-In automatically on launch. But<br />
if you don’t see POD Farm in your host’s Plug-In menus, then you’ll need to configure your host’s Plug-<br />
In options to find it (such options are typically found in the host’s Preferences). You have some options<br />
during POD Farm installation to tell POD Farm Plug-In where to install, but if you did not define a<br />
custom location, here is the default install location for each of the POD Farm Plug-In formats...<br />
• On Mac ®<br />
•<br />
•<br />
•<br />
® Audio Units is installed in Library/Audio/Plug-Ins/ Components.<br />
® VST is installed to /Library/Audio/Plug-Ins/VST/<strong>Line</strong> 6<br />
® RTAS is installed to Library/Application Support/ Digidesign/Plug-Ins/<strong>Line</strong> 6<br />
• On Windows ®<br />
•<br />
•<br />
® VST is installed to \Program Files\<strong>Line</strong>6\POD Farm\VST\<strong>Line</strong> 6<br />
® RTAS is installed to \Program Files\Common Files\Digidesign\DAE\Plug-Ins\<strong>Line</strong> 6.<br />
For detailed help on using the POD Farm Plug-In with today’s most popular audio recording<br />
software applications, please see the additional info found on the POD Farm Online Help page.
Plug-In User Interface Overview<br />
1<br />
2<br />
1 - Main Control Bar<br />
Main Control Bar<br />
2 - View Selection Buttons<br />
Input Gain Control & Meter<br />
3•3<br />
<strong>Line</strong> 6 POD Farm 1.01 - POD Farm Plug-In<br />
3 - Gear View/Panel View/Presets View<br />
4 - Signal Flow View<br />
Preset Name Display & Menu Output Level Control & Meter<br />
Next/Previous Preset Control Preset View Shortcut Dual Tone Control<br />
Input Gain Control - Sets the input gain fed into the Plug-In.<br />
Input Meter - Meter displays input signal level.<br />
Tone New/Open/Save Options<br />
Next/Previous Preset Control - Next/Previous buttons let you navigate sequentially through the<br />
presets in the currently selected folder. You can select different preset folders in the Presets View.<br />
Preset View Shortcut Control - Provides a shortcut to Preset View.<br />
3<br />
4
3•4<br />
<strong>Line</strong> 6 POD Farm 1.01 - POD Farm Plug-In<br />
Preset Name Display & Menu - Indicates the currently selected preset name. When a preset parameter<br />
has changed, an asterisk appears at the end of the name to indicate the preset is in a “tweaked”<br />
(unsaved) state.<br />
Tone New/Open/Save options - Click on this folder icon to choose the following Tone commands:<br />
• New - Creates a new, empty Tone preset.<br />
• Open - Allows you to browse your computer to open a specific .l6t Tone Preset file directly. (Note<br />
that this includes .l6t Tone files you may have created with <strong>Line</strong> 6 Edit, GearBox or GuitarPort<br />
applications too!)<br />
• Save - Saves the currently loaded tone, if it is in a “tweaked” state.<br />
• Save As - Creates a copy of the current Tone settings as a new .l6t Tone Preset File wherever you<br />
like on your computer.<br />
Dual Tone Control<br />
POD Farm’s Dual Tone feature allows you to create two different Tones in the Plug-In using one<br />
common input signal. You have the option of running one tone (single tone), or two tones (dual<br />
tone).<br />
• The Dual Tone button lets you choose between running in “Dual Tone” versus “Single Tone”<br />
mode. If only one Tone is in the Signal Flow View, the Dual Tone button state appears ‘off’ and<br />
is not lit. If you click the Dual Tone button on, it adds the Default Tone settings to Tone 2.<br />
• When two Tones are in the Signal Flow View (SFV), the Dual Tone button state appears ‘on’.<br />
If you then click the Dual Tone button when it is on, a menu drops from the button, listing two<br />
functions Remove Tone 1 or Remove Tone 2.<br />
•<br />
Selecting either above options removes that corresponding Tone from the SFV, which then<br />
shows only a single Tone.<br />
• If you remove Tone 1, Tone 2 becomes the single Tone, and is now considered “Tone 1”;<br />
its input setting will be the same as the previous Tone 1 prior to its removal. If you discard<br />
Tone 2, Tone 1 becomes the single Tone.<br />
Output Level Control and Meters<br />
•<br />
•<br />
Output level control adjusts the monitor level, which is the total mix of Tones 1 & 2.<br />
Stereo meters provide peak display with clip indicators. If there’s a mono input source, then<br />
only one meter is shown.<br />
View Selection Buttons<br />
These buttons located along the upper left side of the application window allow you to the select: Gear,<br />
Panel, or Presets Views.
Gear View<br />
Selected Gear Category Model Categories<br />
Selecting Gear Categories<br />
•<br />
•<br />
3•5<br />
<strong>Line</strong> 6 POD Farm 1.01 - POD Farm Plug-In<br />
Selected Model Scroll Bar Peripheral Models<br />
Press the Gear button once to access Amp and Effect Models.<br />
Model categories are listed horizontally along the top of the Gear view (e.g. - Guitar Amps,<br />
Bass Amps, Preamps, etc.)<br />
• The currently selected category is lit amber. To select a different category, simply click on<br />
the model category name. The first model in the category will appear in the Gear view<br />
window. Use the scroll bar (or your mouse wheel) to view other models in that category.<br />
Selecting a Model<br />
Scroll Bar<br />
• When you hover over a model category, a rectangle box is displayed and a downward arrow<br />
shows to the right of the category name. Pressing on the downward arrow displays a dropdown<br />
list of available models within that category. Select a model by clicking on the model<br />
name in the list.<br />
• Double-click on the centered model and it is then placed in a default location within the<br />
currently selected Tone signal flow. Alternatively, you can drag the center model into either<br />
Tone below and place it within the signal flow.<br />
•<br />
•<br />
Panel View<br />
Click and drag left or right to browse through models.<br />
Alternatively, use your mouse wheel to scroll through the models.<br />
Panel View provides a close-up view of the selected model and control over all it’s available parameters.<br />
To access Panel View for any Amp, Cab or Effect model, click the Panel View button, then click on<br />
the desired item within the Signal Flow View.
Amp View<br />
3•6<br />
<strong>Line</strong> 6 POD Farm 1.01 - POD Farm Plug-In<br />
Once you’ve selected a guitar amp, bass amp or preamp within the Signal Flow View, click on its<br />
icon in the SFV to display it’s controls in the Panel View. Here you can choose to display the Amp or<br />
Cabinet/Mic options.<br />
Amp Bypass Button Amp Model Menu Amp/Cab View Buttons<br />
Amp Bypass Button - Press to bypass the Amp model processing and hear the dry, unprocessed<br />
sound.<br />
Amp Model Menu - The current model name is displayed. Click the downward arrow to display and<br />
select from a list of available amp models, or to swap out the current amp model with another one.<br />
Amp/Cab View Buttons - Press to toggle between displaying the Amp or the Cab View. (If you have<br />
a preamp in use, rather than a guitar or bass amp, you won’t see these Amp/Cab buttons.)<br />
Cab View<br />
From the Amp View, pressing the Cab button displays the Cabinet View. Here you can select different<br />
guitar or bass speaker cabinets, change the positioning of the cabinet in the room, and select from<br />
among four different microphone emulations.<br />
Cabinet Model Menu Room (Early Reflections) Value Mic Model Menu Cab View<br />
Amp Bypass Button Amp Model Menu<br />
Cabinet Model Menu - The currently selected Cabinet model name is displayed. Click the down<br />
arrow to switch to a different Cab.<br />
Tip - To configure your Tone without speaker cabinet or mic simulation added, select “no<br />
Cabinet” in the Cabinet menu.
Room (Early Reflections) Value<br />
•<br />
•<br />
3•7<br />
<strong>Line</strong> 6 POD Farm 1.01 - POD Farm Plug-In<br />
Drag the cabinet toward the back of the room for more ambient room tone, or toward the front<br />
for less.<br />
Alternatively, you can click the up/down arrows to adjust the amount of “room” sound (or “early<br />
reflections” in recording lingo).<br />
Mic Model Menu<br />
•<br />
•<br />
The currently selected microphone model name is displayed.<br />
Press the downward arrow, to the right of the microphone name, to select one of several<br />
microphone models.<br />
•<br />
•<br />
Effects View<br />
If you have a guitar cabinet in use, you’ll be able to select from 57 On Axis, 57 Off Axis, 421<br />
Dynamic, and 67 Condenser.<br />
If you have a bass cabinet in use, you’ll be able to select from 20 Dynamic, 112 Dynamic,<br />
Tube 47 Close, and Tube 47 Far.<br />
Effect Bypass Button Effect Model Menu Pre/Post Toggle Host Sync/Tap Tempo Options<br />
FX Time/FX Speed Controls<br />
Effect Bypass Button - Bypasses the effect without removing it from the signal path<br />
Effect Model Menu - Displays the current effect model. Click on the downward arrow next to the<br />
name to select another model from within the current effect model category.<br />
Pre and Post Toggle Buttons - With these buttons you can move the effect’s position within the signal<br />
chain.<br />
•<br />
•<br />
Click the Pre button to place the effect before the Amp*.<br />
Click Post to place the effect after the Amp, and near the end of the signal chain.<br />
*Note - Placing effects that offer stereo output (most Modulation and Delay effects are stereo<br />
effects, for example) in the Pre position will change their output to mono, so that it can be<br />
routed into the Amp as a single, mono input.
3•8<br />
<strong>Line</strong> 6 POD Farm 1.01 - POD Farm Plug-In<br />
Host Sync and Tap Tempo Options (Master Tempo) - For Delay and Modulation category effects,<br />
you’ll see these options available at the top right of the Panel View. These controls allow you to<br />
set a “Master Tempo” that all time-based effects in the Plug-In can automatically follow. (Note that<br />
individual effects can alternatively have their tempo set independently - see the following FX Time/<br />
FX Speed controls description). For this Master Tempo, there are two “modes” of operation - sync to<br />
the DAW host versus setting a BPM manually:<br />
Host Sync On Host Sync Off<br />
Host Sync - Click the Host Sync button to activate this feature. This sets the POD Farm Plug-In<br />
Master tempo to follow the current project tempo of the VST/AU/RTAS host software. Note that<br />
even if your host project includes tempo changes, POD Farm Plug-In will follow those changes as<br />
well when Host Sync is active! To have a Modulation or Delay effect utilize this Host Sync, you<br />
additionally need to set the effect’s FX Tempo - Sync On/Off button to “On”.<br />
BPM Tempo Field /Tap Tempo Button - Click the Host Sync button to toggle the Host Sync mode<br />
“off” and you can then use these options to manually set a Master Tempo for POD Farm Plug-In.<br />
To set a specific BPM, click directly on the BPM value and drag up/down. Or, “tap” in the desired<br />
tempo by clicking directly on the Tap button - you’ll see the BPM field then display the actual<br />
tempo you tapped in. For best results, click several times at a steady rate for it to determine your<br />
desired tap tempo. To have a Modulation or Delay effect utilize this BPM value, you additionally<br />
need to set the effect’s FX Tempo - Sync On/Off button to “On”.<br />
FX Time/FX Speed Controls - Within “time-based” effects’ Effect View panel, you’ll see this set<br />
of controls. These modify the Master Tempo behavior, or allow you to set the effect’s delay time/<br />
modulation speed parameter independently of the current POD Farm BPM setting.<br />
Note Value Display Sync On/Off Button<br />
Time/Speed Knob Tempo Display<br />
Sync On/Off Button - Click to toggle FX Tempo On/Off.<br />
• When FX Time/FX Speed Sync is OFF,<br />
the effect’s time/speed parameter follows the time/<br />
speed setting shown in this field (displayed in milliseconds for delay effects, and Hertz for<br />
modulation effects). The Sync button also determines the behavior of the Time/Speed<br />
knob.<br />
When FX Time/FX Speed Sync is ON<br />
• , the effect’s time/speed parameter follows the BPM<br />
“Master Tempo” (see previous section). With Sync on, you’ll also be able to modify the<br />
effect tempo by a note value (see the Time/Speed knob description below).
Time Knob (Delay effects) / Speed Knob (Modulation effects)<br />
3•9<br />
<strong>Line</strong> 6 POD Farm 1.01 - POD Farm Plug-In<br />
• When FX Time/FX Speed Sync is OFF,<br />
the Time/Speed knob adjusts the Delay Time<br />
parameter from 20 - 2000 ms (for Delay effects) or the Speed knob adjusts the parameter<br />
from 0.10 - 15.0 Hz (for Modulation effects). You’ll see the tempo in the numerical field to<br />
the right of the speed knob - alternatively, you can double-click directly in this numerical<br />
field to type in an exact value. In this OFF mode, the effect is not following the Master<br />
Tempo (see Sync On/Off descriptions above).<br />
• When FX Time/FX Speed Sync is ON,<br />
the effect follows the Master Tempo of the Plug-In<br />
(see Sync On/Off descriptions above). The Time/Speed knob selects a note length division<br />
of the current Master Tempo value - from a whole note to a sixteenth note triplet, indicated<br />
by the Note Value Display.<br />
Presets View<br />
Presets View provides a convenient way to browse and load Tones from your local Tone library into<br />
POD Farm. Just double-click any preset to load it into POD Farm.<br />
Source Contents Preset List Pane Search Field Clear Button Refresh Button<br />
Source Folder Config Button Tone Info Button Selected Preset<br />
Source Contents - The contents of the POD Farm “Tone Folder” is listed here. POD Farm creates<br />
its own Tone Folder on your computer and fills it with preset Tone files during installation in \My<br />
Documents\<strong>Line</strong> 6\Tones\POD Farm (on Windows ® ), or Documents/<strong>Line</strong> 6/Tones/POD Farm on<br />
Mac ® .<br />
Preset List Pane - This multi-column list displays the contents of the sub-directory selected in the<br />
left Source pane. Click on any preset to select it. Note that you can sort this list in different ways by<br />
clicking directly on a column heading (Name, Date Modified, etc).<br />
Search Field/Clear Button - Type in the Search field to locate a Tone - this performs a search based<br />
on keywords in <strong>Line</strong> 6 Tone metadata, such as name, amp, artists, notes about the Tone, etc. Press the<br />
Clear button to clear any text in the Search field and reset to Preset List display.<br />
Refresh Button - If you’ve modified Tones, such as by doing a Save As, created New Tones, or made<br />
changes to the Source Folder configuration, you may need to click this Refresh button to update the<br />
Preset List to show them all.
3•10<br />
<strong>Line</strong> 6 POD Farm 1.01 - POD Farm Plug-In<br />
Info Button - When a Tone preset is selected, you’ll see the Info button to the left of its name. Click<br />
this button to launch the Edit Tone Info dialog, where you can enter and edit information that is saved<br />
with the Tone. Anything you enter in the dialog’s Notes field of the dialog will then appear in the<br />
Preset List’s Notes column.<br />
Source Folder Configure Button - If you want to configure the Source Folder contents, so that the<br />
Presets View can display other sets of presets you have stored on your computer (such as .l6t preset files<br />
you may have created with other <strong>Line</strong> 6 applications, such as GuitarPort ® , <strong>Line</strong> 6 Edit ® , or GearBox ® )<br />
press this button. This displays a configuration view:<br />
Preset View Add Tone Folder Remove Tone Folder<br />
List of Current Tone Folders<br />
Saving a Preset<br />
To save the currently loaded Tone Preset, click on the folder button to the right of the Preset menu on<br />
the Main Control Bar.<br />
Signal Flow View<br />
The bottom of the application window is the Signal Flow View (SFV) which displays the chain of<br />
models making up the current Single or Dual Tone paths. To edit any model’s settings, just doubleclick<br />
directly on the model within the SFV and its editable controls will be displayed in the upper<br />
window (see the Panel View section).
Selected Model Bypass & Close Controls<br />
Signal Flow View - Single Tone Mode<br />
3•11<br />
<strong>Line</strong> 6 POD Farm 1.01 - POD Farm Plug-In<br />
Tone Mute Button Tone Preset Menu Pan Knob<br />
Tone 1<br />
Input Source Selector<br />
Tone Mute Button Tone Preset Menu Pan Knob<br />
Tone 1<br />
Tone 2<br />
Input Source Selector<br />
Selected Model Bypass & Close Controls<br />
Signal Flow View - Dual Tone Mode<br />
Output Level Knob & Meter<br />
Output Level Knob & Meter<br />
Tone Mute - Click this button to mute a Tone - Tones 1 or 2 can be muted individually in Dual Tone<br />
mode. When muted, the Tone path is displayed dimmed and the signal is silenced. All models remain<br />
visible within the Signal Flow View and still fully editable.<br />
Tone Input Source Selector - Depending on your DAW host software, you can select the input source<br />
(left channel, right channel, both channels) of the track’s audio that is fed into each of the Plug-In’s<br />
Tone Paths.
3•12<br />
<strong>Line</strong> 6 POD Farm 1.01 - POD Farm Plug-In<br />
Tone Preset Name and Menu Display - Each Tone has a Preset Menu, which makes it easy to select<br />
individual Tones, and to create new Dual Tone configurations. The Menu control displays the currently<br />
loaded preset. Click the downward arrow at the right of the Tone name to display a list of available<br />
Tones. The Menu displays presets within current folder only.<br />
Pan Knob, Output Level Knob & Meter - Each Tone offers these controls to pan its output left/right<br />
and accurately set its level. Try panning and adjusting the levels differently on Dual Tones for spacious,<br />
interesting sounds!<br />
Model Bypass & Delete Controls - Hovering over or selecting a model with the cursor illuminates<br />
that model and a set of controls is displayed. Use these options to bypass the model, or to remove it<br />
completely from the Tone path.<br />
Moving Effects Models<br />
Bypass Button Delete Button<br />
Model Name<br />
Many POD Farm Effects models offer the ability to be placed either “Pre” or “Post” within the signal<br />
chain (before or after the Amp model within the Tone path), which can offer slightly different sonic<br />
results, depending on the effect and amp settings in use. To move an effect, simply click and drag it<br />
left or right and you’ll see white arrows indicating the Pre and Post positions into which the effect can<br />
be dropped. When in Dual Tone mode, note that you can also drag any model between Tones to copy<br />
the selected model into the other Tone path! For example, in the screen below, the Tone 1 Analog<br />
Chorus modulation effect is being dragged from its original Tone 1 “Post” position to the Tone 2 “Pre”<br />
position - this will copy the Analog Chorus, along with its current parameter settings, into the Tone<br />
2 signal path.<br />
Dragging an effect to copy it from Tone 1 to Tone 2
4•1<br />
<strong>Line</strong> 6 POD Farm 1.01 - Standalone Operation<br />
<strong>Pod</strong> Fa r m - Sta n d a L o n e oP e r a t i o n<br />
This chapter covers features which are unique to POD Farm Standalone operation. To run POD Farm<br />
in Standalone operation, it is required to have a <strong>Line</strong> 6 POD <strong>Studio</strong>, TonePort or GuitarPort USB<br />
audio interface connected to your computer. Note that all other features are identical in operation to<br />
those of the Plug-In, so please review the POD Farm Plug-In chapter for details on other features.<br />
ToneDirect Monitoring<br />
ToneDirect Monitoring is a unique feature of your <strong>Line</strong> 6 hardware that provides an extremely low<br />
latency monitor signal of your POD Farm Tones through your device directly to your Main/Analog<br />
Outputs, while your Source signal is simultaneously fed out the Record Sends to your DAW software for<br />
recording. This allows you to configure your Tones in POD Farm while in Standalone mode however<br />
you want to hear them for your performance, and then choose to feed either this “processed” signal, or<br />
a “dry”, unprocessed signal to your DAW. Recording a dry signal in your DAW software allows you to<br />
then use POD Farm Plug-In on the DAW track to “non-destructively” make changes to your recorded<br />
track’s Tone any time up until your final mix. Or, you can choose to feed the fully processed Tone from<br />
POD Farm’s Standalone mode to the Record Sends, and record your POD Farm Tones exactly as you<br />
hear them! Please see the Mixer View section for details on configuring the Record Sends.<br />
Also, since ToneDirect handles all the monitoring completely through your <strong>Line</strong> 6 hardware rather<br />
than through your DAW software, you won’t need to use your DAW’s “software monitoring” features.<br />
This means you can keep the DAW software’s buffers at higher settings for greater stability and better<br />
CPU performance!<br />
Input Source Select & Input Metering<br />
POD Farm Standalone operation offers the following Input Source Controls, which differ from those<br />
in POD Farm Plug-In...<br />
Input Source Select Menu Input Meter<br />
POD Farm’s Input Source selectors are found at the top of the each Signal Flow when in Dual Tone configuration<br />
*Note - When <strong>GX</strong> is the device in use, no Input Menus nor Input Meters are displayed since this hardware<br />
offers a “fixed” Instrument Input.
4•2<br />
<strong>Line</strong> 6 POD Farm 1.01 - Standalone Operation<br />
• The Input Source Select menu allows you to choose which of your <strong>Line</strong> 6 hardware’s inputs is<br />
routed to a given Tone path, (e.g. - Instrument, Mic 1, <strong>Line</strong> Stereo, etc.) Note that the options<br />
available in the menu differ depending on the connected <strong>Line</strong> 6 hardware*, and for Single versus<br />
Dual Tone modes.<br />
The Tone 1 Input Source Select menu with UX2 device, Single Tone Mode (left) Dual Tone mode (right)<br />
•<br />
In Single Tone mode, the Source menu lists each of the Mono & Stereo Input Sources your<br />
specific <strong>Line</strong> 6 device offers.<br />
• In Dual Tone mode, there is a Source menu provided for each Tone (as in the above screen<br />
example). The Source menu for Tone 1 lists each of the Mono inputs your device offers, The<br />
Source menu for Tone 2 is dynamic and contingent upon the source selected for Tone 1.<br />
• You’ll see an Input Meter at the top left of the Tone Signal Path panel for each Tone 1 and Tone<br />
2, whenever that Tone’s Input is set to a Mic, <strong>Line</strong> or digital input (no meter appears if the Tone<br />
Input is set to an Instrument input).<br />
• Unlike the Plug-In interface, there is no Input knob or meter at the top left of the Standalone<br />
application. To adjust input levels, use your guitar’s volume, the Mic Gain knobs on your <strong>Line</strong> 6<br />
hardware, or the output controls on any source device that is feeding into your <strong>Line</strong> 6 hardware<br />
to adjust the level coming into POD Farm - clipping should always be avoided.<br />
Tuner View<br />
Click the Tuner button at the left to display the Tuner View and pluck an open single string on your<br />
guitar (or bass guitar). Use the indictors and controls to get in tune!<br />
Pitch Indicator “Flat” Indicator Arrow Note Display<br />
Reference Control Mute/Bypass Buttons<br />
The Tuner receives input from the Instrument input of your hardware, so if you are using a device other<br />
than a <strong>GX</strong>, D.I. or GuitarPort, be sure to select “Instrument” in the Tone 1 Source Select menu.
Tuning Indicators<br />
4•3<br />
<strong>Line</strong> 6 POD Farm 1.01 - Standalone Operation<br />
The Note Display in the center of the tuner will tell you the note you plucked, while the Pitch<br />
Indicator appears within the meter to show you if your tuning is flat (left of the center of the meter) or<br />
sharp (right of the center). You’ll see a right-pointing, green arrow appear (as pictured above) if your<br />
tuning is flat, or a left-pointing arrow if sharp. Additionally, you’ll see the Pitch Indicator turn green<br />
when your plucked string is in tune.<br />
Reference Control<br />
The Tuner’s Reference Control tells the Tuner what to use as the base tuning reference note. 440Hz<br />
is the standard reference value for A and is generally used for tuning reference. Unless you have a<br />
particular need to adjust the Tuner’s reference, you probably want to stick with the standard 440Hz<br />
setting for this control. To adjust the reference, either click on the number and drag up/down, or<br />
double click and enter the desired reference frequency.<br />
Mute/Bypass Switches<br />
The Mute and Bypass switches let you choose whether your guitar input signal will be muted while<br />
tuning, or if you will hear it (with amp/cab/effect processing bypassed).<br />
Mixer View<br />
Device Send Name Source Menu Preferences and Driver Console Buttons<br />
Mute Main Outs<br />
Mute Main Outs<br />
Send Level Meter Send Level Fader +18 dB Button<br />
The Mute button silences POD Farm’s signal that is fed to your hardware’s Main Outputs.<br />
•<br />
The POD Farm Tone 1 and Tone 2 signals are still fed to the Headphone outs and Record<br />
Sends.<br />
• This feature facilitates recording with microphones, (e.g. recording vocals, in the same room as<br />
the monitor speaker system). Simply, press the Mute <strong>Line</strong> Out button and listen via Headphones<br />
while recording vocals in the same room.
Record Send Controls<br />
4•4<br />
<strong>Line</strong> 6 POD Farm 1.01 - Standalone Operation<br />
The controls in this section allow you to select the type of signal routed to POD Farm’s Record Sends*<br />
1-2 & 3-4 (or Sends 9-10 & 11-12 for UX8 devices), and adjust their levels. You can think of the two<br />
Record Sends as “virtual pipelines” that each carry a stereo output signal from POD Farm, allowing<br />
you to select these POD Farm signals within your recording software as Input sources for recording into<br />
audio tracks.<br />
*Note that the Record Send Level controls do not affect the POD Farm Monitoring signal. These affect<br />
strictly the POD Farm signal fed to your Record Sends, allowing you independent control over your<br />
software recording levels versus your Monitoring signals!<br />
Audio Source Selection Menus<br />
•<br />
Select the audio Source you want fed independently to each Record Send.<br />
• If POD Farm is in Single Tone mode, the options available in the Source menus are<br />
Processed, Semi-Processed (Amp, Cab, Comp, EQ and “Pre” positioned effects only), and<br />
Dry Inputs. (The Dry Inputs option feeds a stereo signal, with the same signal on both the<br />
left and right channels).<br />
• If POD Farm is in Dual Tone mode, the Source menu options are Tone 1, Tone 2, Mix<br />
(Tone 1 & 2)*, and Dry Inputs.<br />
*Note that when either Send Source is set for “Mix Tone (1 & 2)”, that the Tone 1 & 2 Mute, Pan and<br />
Volume controls within the Signal Flow View affect the Tone levels fed to that Record Send. For all other<br />
Send Source options, the Tone Pan and Volume knobs affect only the Monitoring signal.<br />
Level Controls<br />
• Use the Level Slider to adjust the level of the signal fed to the Record Send. This is how you<br />
adjust the level of the signal that gets recorded into your audio software.<br />
• Use the Level Meter to gauge your levels. The red clip indicator will light up if your level is too<br />
high - clipping should always be avoided to produce good quality recordings!<br />
• Use the +18 dB button if your signal is not hot enough. When this button is lit, an 18 dB “boost”<br />
is applied to the Record Send signal. Watch the meters and adjust the Level Slider for nice, hot<br />
signal.<br />
Preferences and Driver Console Buttons<br />
• The Preferences button provides shortcut access to the POD Farm Preferences dialog, where you<br />
can configure various POD Farm applications settings.<br />
• The Driver Console button provides shortcut access to the Driver Console (<strong>Line</strong> 6 Audio-MIDI<br />
Devices) dialog, where you can configure ASIO, WDM (Windows ® ) or Core Audio (Mac ® )<br />
audio driver settings.<br />
Hungry for more info? Please visit the POD Farm Online Help page on the <strong>Line</strong> 6 site for additional<br />
documentation covering the use of <strong>Line</strong> 6 POD Farm and USB devices!