Download e-Magazine (PDF File)
Download e-Magazine (PDF File)
Download e-Magazine (PDF File)

Create successful ePaper yourself
Turn your PDF publications into a flip-book with our unique Google optimized e-Paper software.
12<br />
Installation of the VÖGELE 3D Machine Control System.<br />
How to Install<br />
NAVITRONIC Plus ®<br />
in 10 Easy Steps<br />
Even a modern 3D Machine Control System can be<br />
installed easily. This is what VÖGELE want to<br />
demonstrate in the following for NAVITRONIC Plus ® .<br />
The system installs as easily as it operates. RoadNews<br />
shows in 10 steps how to fit the system to the paver<br />
and how to prepare it for paving.<br />
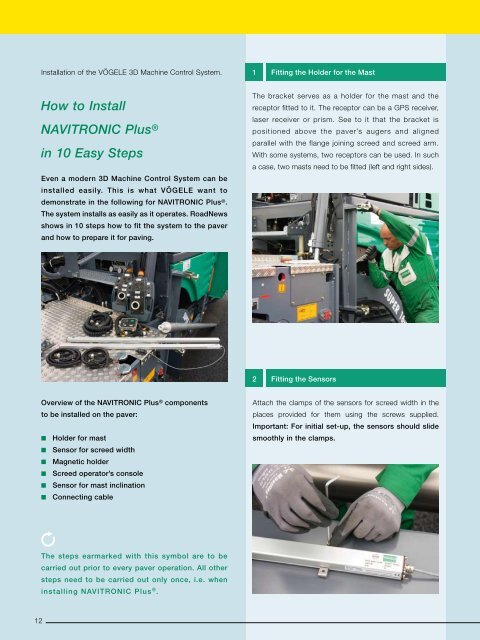
Overview of the NAVITRONIC Plus ® components<br />
to be installed on the paver:<br />
n Holder for mast<br />
n Sensor for screed width<br />
n Magnetic holder<br />
n Screed operator’s console<br />
n Sensor for mast inclination<br />
n Connecting cable<br />
The steps earmarked with this symbol are to be<br />
carried out prior to every paver operation. All other<br />
steps need to be carried out only once, i.e. when<br />
installing NAVITRONIC Plus ® .<br />
1 Fitting the Holder for the Mast<br />
The bracket serves as a holder for the mast and the<br />
receptor fitted to it. The receptor can be a GPS receiver,<br />
laser receiver or prism. See to it that the bracket is<br />
positioned above the paver’s augers and aligned<br />
parallel with the flange joining screed and screed arm.<br />
With some systems, two receptors can be used. In such<br />
a case, two masts need to be fitted (left and right sides).<br />
2 Fitting the Sensors<br />
Attach the clamps of the sensors for screed width in the<br />
places provided for them using the screws supplied.<br />
Important: For initial set-up, the sensors should slide<br />
smoothly in the clamps.