Tips & Tricks for impression taking, 2011 (PDF - Heraeus Dental
Tips & Tricks for impression taking, 2011 (PDF - Heraeus Dental
Tips & Tricks for impression taking, 2011 (PDF - Heraeus Dental

You also want an ePaper? Increase the reach of your titles
YUMPU automatically turns print PDFs into web optimized ePapers that Google loves.
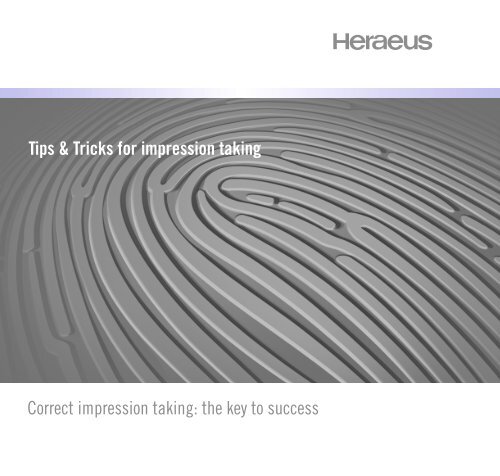
<strong>Tips</strong> & <strong>Tricks</strong> <strong>for</strong> <strong>impression</strong> <strong>taking</strong><br />
Correct <strong>impression</strong> <strong>taking</strong>: the key to success
Contents<br />
Introduction 5<br />
Basic recommendations 6<br />
Voids on buccal and lingual surfaces 9<br />
Voids on mesial and distal surfaces 10<br />
Multiple voids scattered throughout the <strong>impression</strong> 11<br />
Voids in the sulcus area 12<br />
Voids at a line angle 13<br />
Ledges 15<br />
Tooth-tray contact 16<br />
Tearing 17<br />
Delamination 18
Introduction<br />
A good <strong>impression</strong> is not only the fi rst stage in the fabrication<br />
process but also the prerequisite <strong>for</strong> a high-quality prosthetic<br />
restoration. The precision and accuracy of detail of the <strong>impression</strong><br />
are crucial in determining the accuracy of fi t and aesthetic quality<br />
of a fi xed restoration.<br />
These <strong>Tips</strong> are <strong>Heraeus</strong>’ many years of experience in <strong>impression</strong><br />
technology and the practical experience of leading universities and<br />
innumerable dental practitioners worldwide.<br />
We especially wish to thank Mark L. Pitel, DMD <strong>for</strong> his generosity in<br />
allowing us to use contents from his 2005 textbook “Successful<br />
Impression Taking, First Time. Every Time.” Dr. Mark Pitel is currently<br />
an Associate Clinical Professor and Director of Predoctoral Esthetic<br />
Studies at the Columbia University College of <strong>Dental</strong> Medicine.<br />
He also maintains a private clinical practice in Poughkeepsie,<br />
New York. Dr. Pitel is an internationally recognized expert and lecturer<br />
on topics such as adhesive, cosmetic and laser dentistry,<br />
anterior and posterior esthetic restorations and of course <strong>impression</strong><br />
materials. He has authored or co-authored numerous scientifi c<br />
abstracts and technical papers.<br />
5
Basic recommendations<br />
There are a few typical causes <strong>for</strong> most of the problems that occur during <strong>impression</strong> <strong>taking</strong>. If dentists are aware of these causes and<br />
their effect on the <strong>impression</strong> and know how to avoid them, they will attain superior results as well as save themselves and their patients<br />
time and money. The following basic recommendations <strong>for</strong> attaining good results should simply be regarded as a checklist that you can<br />
go through be<strong>for</strong>e <strong>taking</strong> an <strong>impression</strong>.<br />
Read the manufacturer’s instructions in the instructions <strong>for</strong> use<br />
It may sound obvious, but some materials require special preparation,<br />
handling or conditioning that you may not be familiar<br />
with or aware of; this applies in particular if you are using a<br />
material <strong>for</strong> the fi rst time. Incorrect mixing, removal or storage<br />
of the materials can impair the dimensional stability, alter<br />
the setting time and chemical structure of the material and<br />
generally result in an unsatisfactory <strong>impression</strong>.<br />
Gebrauchsanweisung ................................. 5<br />
Instructions <strong>for</strong> use .................................. 13<br />
Mode d’emploi ......................................... 21<br />
Instrucciones de uso ................................. 29<br />
Istruzioni per l’uso .................................... 37<br />
Instruções de utilização ............................ 45<br />
Gebruiksaanwijzing ................................... 53<br />
Bruksanvisning ......................................... 61<br />
Brugervejledning ...................................... 69<br />
Bruksanvisning ......................................... 77<br />
Käyttöohjeet ............................................. 85<br />
Οδηγίες χρήσης ........................................ 93<br />
Návod k použití ......................................... 101<br />
Használati utasítás ................................... 109<br />
Lietošanas instrukcija ................................ 117<br />
Naudojimo instrukcija ................................ 125<br />
Instrukcja obsugi ..................................... 133<br />
28308_GBA_Flexitime_105x74.indd 1 10.04.2008 15:51:45 Uhr<br />
6<br />
Adhere to the use-by-date<br />
After the use-by-date, materials may no longer react in accor -<br />
d ance with the manufacturer’s instructions.<br />
Avoid contaminating the material<br />
All <strong>impression</strong> materials are sensitive to contamination. This<br />
can be caused by a biological source like blood or saliva or other<br />
dental materials and products. A-silicones have a highly sensitive<br />
reaction to sulphur compounds. These are frequently present<br />
in latex gloves and some haemostatic agents. The powder<br />
used in powdered gloves contains sulphur. Just tiny amounts<br />
can cause a lot of damage. Even inadvertently touching a tooth<br />
or preparation or rolling a retraction cord with latex gloves can<br />
transfer chemicals that contain sulphur and this can adversely<br />
affect the setting properties of the material.<br />
Basic recommendations<br />
Moisture and blood can negatively affect both hydrophilic and hydrophobic materials. If moisture comes into contact with hydrophobic<br />
materials, it can repel the <strong>impression</strong> material and cause voids or inaccuracies. Intrinsically hydrophilic materials can absorb water and<br />
fl uids. This may impair physical properties like tear resistance and also have a detrimental effect on the precision of the fi nished<br />
<strong>impression</strong>.<br />
Use the correct type of <strong>impression</strong> tray and a correctly fi tting tray<br />
If the tray is too small, it may come into contact with the patient’s<br />
teeth or oral tissue during insertion or withdrawal. This results<br />
in tears, voids or inaccuracies in the <strong>impression</strong>. Problems can<br />
also arise if the tray is too soft to support the type of material<br />
selected.<br />
1 2<br />
Some materials, e.g. A-silicone<br />
putty, should be manually<br />
mixed without latex<br />
gloves (powdered) to avoid<br />
contamination.<br />
Use the appropriate tray adhesive<br />
Maximum precision can only be attained by using a tray adhesive.<br />
This ensures that the <strong>impression</strong> material is retained on<br />
the tray during setting and removal from the patient’s mouth.<br />
This also applies to <strong>impression</strong> trays with retention aids like per<strong>for</strong>ation.<br />
Using the incorrect type of adhesive, too much or too<br />
little adhesive or <strong>taking</strong> the <strong>impression</strong> be<strong>for</strong>e the adhesive has<br />
fully set can also distort the <strong>impression</strong> or result in the material<br />
loosening from the tray.<br />
Adhesive should also be used<br />
<strong>for</strong> trays with retention aids.<br />
7
Basic recommendations<br />
Adhere to the manufacturer’s recommended working and setting<br />
times<br />
There are recommended working and setting times <strong>for</strong> all types<br />
of <strong>impression</strong> materials. A precise <strong>impression</strong> can only be<br />
attained if all the material has been syringed and the <strong>impression</strong><br />
tray inserted be<strong>for</strong>e the end of the working time. The <strong>impression</strong><br />
must then be held securely in the same position and stabilized<br />
until the material sets. Only then can it be safely removed from<br />
the mouth. Premature removal would have a detrimental effect<br />
on the result. This also applies when partially set material is<br />
inserted in the mouth. This can cause defects like voids, separations,<br />
fl ash and distortions. If different materials are used <strong>for</strong><br />
<strong>taking</strong> the <strong>impression</strong>, the working and setting times of all the<br />
materials should be correctly coordinated. This avoids poor<br />
blending or separation of the materials.<br />
3<br />
A poor adhesive bond can<br />
result in the material loosening<br />
from the tray and distortion of<br />
the <strong>impression</strong>.<br />
Voids<br />
Voids are probably the most frequent type of defi ciency in<br />
dental <strong>impression</strong>s. They generally occur as small or moderately<br />
large recesses in the <strong>impression</strong>. The main causes of<br />
voids are:<br />
Incorrect syringe technique, which causes air bubbles or<br />
breaks in continuity<br />
Air entrapment in the material during mixing<br />
Contamination of the preparation with blood or saliva<br />
Contamination caused by latex gloves<br />
Contamination caused by dental products, e.g. from the<br />
oxygen inhibition layer in composites<br />
Insuffi cient sulcus retraction<br />
Voids and other types of defi ciencies can occur in any section<br />
of an <strong>impression</strong>. If they repeatedly occur at certain sections,<br />
there is usually an obvious cause and a way to avoid the problem.<br />
Voids on buccal and lingual surfaces<br />
Voids on buccal and lingual surfaces often occur at the junction between the tray and wash material.<br />
Causes:<br />
Not enough wash material in the <strong>impression</strong>: in this case the<br />
wash material cannot bond correctly with the higher viscosity<br />
tray material and leaves a small gap.<br />
Exceptionally high ambient temperatures: these can cause<br />
premature setting of the wash and/or tray material.<br />
Shortened working and setting times: this can cause the<br />
materials to lose some of their fl ow properties and render<br />
them incapable of bonding together. A typical consequence<br />
of this is a small void at the junction of the two layers of<br />
material.<br />
Solutions:<br />
Use adequate wash material during syringing. Ensure that<br />
the wash material fl ows completely around the prepared<br />
region so that it reproduces very fi ne detail.<br />
On hot days, keep the material cool until it is required <strong>for</strong><br />
use to ensure the correct working and setting times and viscosity<br />
are maintained.<br />
Completely fi ll the sulcus and cover the preparation with<br />
wash material in a single, continuous working step. When<br />
syringing, always keep the intraoral tip in the material to<br />
avoid air bubbles.<br />
8 9<br />
4<br />
Voids at the junction between<br />
the tray and wash<br />
material can be caused by<br />
poor coordination of the<br />
setting times.
Voids on mesial and distal surfaces<br />
5<br />
Voids on mesial and distal surfaces, mainly at the junction between the tray material and wash material, occur in particular when the<br />
preparation is adjacent to an edentulous section of the jaw.<br />
Cause:<br />
There may not be enough hydraulic pressure to adapt the<br />
tray material or wash material adequately or bring it into<br />
contact with the proximal surfaces of the preparation or<br />
tissue. This results in a void at these surfaces.<br />
A void on mesial or distal<br />
surface frequently occurs<br />
adjacent to an edentulous<br />
section of the jaw.<br />
Solutions:<br />
Use a custom tray to confi ne the material and ensure a more<br />
precise shape to fi t the mouth.<br />
Use the sandwich or two-step putty-wash <strong>impression</strong> technique<br />
to ensure correct hydraulic pressure.<br />
Use an air syringe to adapt the <strong>impression</strong> material to the<br />
proximal surfaces and cover them completely.<br />
Multiple voids scattered throughout the <strong>impression</strong><br />
6<br />
A small, localized void can occur due to the causes mentioned above or <strong>for</strong> some inexplicable reason. Multiple voids in a single<br />
<strong>impression</strong>, on the other hand, indicate an error when mixing or handling the <strong>impression</strong> material.<br />
Causes:<br />
The material was not mixed or handled according to the instructions<br />
<strong>for</strong> use:<br />
When loading the <strong>impression</strong> tray, the mixer was held over<br />
it and the material allowed to drop from the syringe into the<br />
tray. This can result in air entrapment in several locations.<br />
Air became trapped during manual mixing of paste-paste<br />
material. (Dynamic mixing increases the quality of the mixture<br />
and minimizes the risk of air entrapment.)<br />
Multiple voids throughout the <strong>impression</strong><br />
indicate incorrectly mixed<br />
<strong>impression</strong> material.<br />
Solutions:<br />
Multiple voids are easily prevented:<br />
Always keep the static mixer of the automix cartridge in<br />
the dispensed material until the preparation is completely<br />
covered or the <strong>impression</strong> tray is fully loaded.<br />
When using a dynamic mixer, always keep the dynamic<br />
mixer in the tray material when loading the <strong>impression</strong> tray.<br />
If possible, fi ll the <strong>impression</strong> syringe from a mixing tip<br />
from the front with the syringe plunger inserted. This avoids<br />
trapping air in the inside of the syringe or between the<br />
plunger and <strong>impression</strong> material. Expel the air from the front<br />
of the syringe barrel after attaching the syringe tip.<br />
10 11
Voids in the sulcus area<br />
7<br />
Fortunately there are only a few causes of voids frequently occurring in the sulcus or at the preparation margins of <strong>impression</strong>s.<br />
Causes:<br />
Contamination by moisture or medication<br />
Inadequate haematosis<br />
Localized bubbles at the<br />
margin of the sulcus are an<br />
indication of contamination.<br />
Solutions:<br />
Use the double cord technique <strong>for</strong> improved retraction and<br />
absorption of moisture.<br />
Rinse off the retraction agent thoroughly and dry the prepared<br />
areas fully.<br />
Voids at a line angle<br />
8<br />
Voids often occur directly over the edge of a tooth in the <strong>for</strong>m of a line disrupting the continuity of the <strong>impression</strong>; this virtually always<br />
occurs in the wash material. Finning is often produced on the die model when this type of <strong>impression</strong> is poured.<br />
Causes:<br />
Incorrect syringe technique: if you start syringing the wash<br />
material in the sulcus of an edge, it is diffi cult to attain a<br />
seamless junction when syringing is complete. If a seamless<br />
junction is not attained, a void is produced at the edge in<br />
the <strong>impression</strong> that causes fi nning on the model. If the two<br />
ends of the syringe material do not merge properly, a gap is<br />
created instead of a seamless junction.<br />
A fi n defect can result from<br />
a void occurring on a line<br />
angle.<br />
Solutions:<br />
Always keep the intraoral tip immersed in the material<br />
during syringing of the wash material. Apply material liberally<br />
at the start of syringing.<br />
Ensure that the <strong>impression</strong> is taken quickly in complex<br />
cases.<br />
12 13
Voids at a line angle<br />
9<br />
Causes:<br />
Different setting times at the start and fi nish of syringing:<br />
once the initially syringed <strong>impression</strong> material comes into<br />
contact with the naturally warm temperature of the intraoral<br />
cavity, it can set more rapidly, particularly on warm days.<br />
In complex cases, e.g. with multiple abutment teeth, the<br />
initially syringed material may already be partially set be<strong>for</strong>e<br />
it comes into contact with the material at the fi nish of syringing.<br />
In this case the portions do not merge properly.<br />
Discontinuity defects, such<br />
as line angle voids and fi ns,<br />
can be caused by failure to<br />
syringe completely around<br />
the circumference of the<br />
tooth.<br />
Solutions:<br />
Use slow-setting tray material and wash material with large<br />
<strong>impression</strong>s.<br />
Cool the <strong>impression</strong> material be<strong>for</strong>e use. This extends the<br />
working and setting time.<br />
Ledges<br />
10<br />
Ledges, or horizontal fi ns on the <strong>impression</strong> are the exact opposite of voids: ledge is a positive projection from the surface of the<br />
<strong>impression</strong> into the tooth cavity. This type of <strong>impression</strong> produces void-like defects in the model. It should be noted that defects<br />
resembling ledges can also be the reproduction of actual surface defects, e.g. a gap between the tooth structure and core build-up<br />
or post and core.<br />
Causes:<br />
The <strong>impression</strong> tray was moved or slipped be<strong>for</strong>e the material<br />
had completely set: this is the most common cause of<br />
fl ash. This can cause partially set material to overlap and<br />
protrude from the surface.<br />
The set putty <strong>impression</strong> was incorrectly positioned when the<br />
wash <strong>impression</strong> was taken.<br />
Ledges can be created if the<br />
<strong>impression</strong> is moved be<strong>for</strong>e<br />
the material is fully set.<br />
Solutions:<br />
Block out any actual defect and take the <strong>impression</strong> again.<br />
Create more space in the putty <strong>for</strong> the wash material.<br />
Prevent movement of the tray while the material is setting.<br />
14 15
Tooth-tray contact<br />
Choosing the correct size and fi t of the <strong>impression</strong> tray is just as important <strong>for</strong> successful <strong>impression</strong> <strong>taking</strong> as using the correct type<br />
of tray. If the patient’s teeth or mucosal tissue comes directly into contact with an <strong>impression</strong> tray, it can impair the overall accuracy<br />
of the <strong>impression</strong>. This also applies to contact with the set putty in the case of a two-step putty-wash <strong>impression</strong>.<br />
Causes:<br />
Incorrect size or shape of tray <strong>for</strong> the relevant jaw<br />
Incorrect positioning or insertion of the tray<br />
Tray inserted too far<br />
Patient biting on the tray<br />
Unsuitable tray <strong>impression</strong> material<br />
Inadequate cutting back of the putty <strong>impression</strong> <strong>for</strong> the wash<br />
material<br />
11 12<br />
Excessive contact with the<br />
wall of the tray results in<br />
poorly fi tting restorations.<br />
Solutions:<br />
Use custom trays to fi t the shape and size of the jaw exactly.<br />
Select stock trays prior to <strong>impression</strong> <strong>taking</strong> and fi t these<br />
carefully to ensure they seat passively.<br />
Practise inserting the tray with the patient be<strong>for</strong>e fi nally<br />
<strong>taking</strong> the <strong>impression</strong>.<br />
Use an open mouth <strong>impression</strong> technique to avoid the<br />
patient biting on the tray and inserting the tray too far.<br />
Obvious tooth contact with<br />
stock trays should be avoided.<br />
Tearing<br />
Tearing or breaking off of the <strong>impression</strong> material results in inaccurate reproduction of the sulcus and surface of the tooth or preparation<br />
in the same way as voids and ledges.<br />
Causes:<br />
The tray was removed be<strong>for</strong>e the material had fully set.<br />
Deep undercuts<br />
Inadequate retraction: this results in thin margins with low<br />
tear resistance.<br />
Inadequate tooth preparation: this results in thin margins in<br />
the <strong>impression</strong>.<br />
Contamination by latex gloves or composites<br />
A material with a low tear resistance was used in a clinical<br />
situation that requires a high tear resistance, e.g. in a case<br />
with deep undercuts.<br />
13 14<br />
This <strong>impression</strong> shows obvious<br />
signs of tearing on the<br />
proximal margin.<br />
Solutions:<br />
Careful, thorough preparation can avoid tearing in the majority<br />
of cases:<br />
Use the double cord technique to improve retraction and<br />
absorb moisture more thoroughly.<br />
Prepare the tooth adequately.<br />
Block out deep undercuts.<br />
Check the use-by-date and setting times of the <strong>impression</strong><br />
material.<br />
Do not touch the preparation or materials with latex gloves.<br />
Use a material with a higher tear resistance.<br />
The tear in the interproximal<br />
region probably does not<br />
affect the <strong>impression</strong>. The<br />
tear on the facial margin,<br />
however, impairs the quality<br />
of the <strong>impression</strong>.<br />
16 17
Delamination<br />
15<br />
The wash material and the tray material do not bond adequately with one another and separate when removing the <strong>impression</strong>.<br />
Causes:<br />
The working and setting times of the wash material and tray<br />
material were not properly coordinated.<br />
The wash material had already partially set be<strong>for</strong>e the tray<br />
was inserted.<br />
Contamination between the layers, e.g. by blood, saliva or<br />
moisture.<br />
High oral or ambient temperatures: this can accelerate the<br />
setting time of a layer.<br />
Poor bonding or delamination<br />
is virtually always the<br />
result of a lack of coordination<br />
between the setting<br />
times of the tray material<br />
and wash material.<br />
Solutions:<br />
Wait until the tray is fully loaded and ready to insert be<strong>for</strong>e<br />
syringing with intraoral wash material.<br />
Cool the materials or take the <strong>impression</strong> at a lower ambient<br />
temperature.<br />
Avoid contamination between the layers.<br />
Adhere to the recommended working time.<br />
Keep to the manufacturer’s recommended setting time,<br />
even though the material feels fi rm to the touch.<br />
18 19<br />
Notes
Contact in Germany<br />
<strong>Heraeus</strong> Kulzer GmbH<br />
Grüner Weg 11<br />
63450 Hanau<br />
info.dent@heraeus.com<br />
www.heraeus-kulzer.com<br />
Contact in the United Kingdom<br />
<strong>Heraeus</strong> Kulzer Ltd.<br />
<strong>Heraeus</strong> House, Albert Road<br />
Northbrook Street, Newbury<br />
Berkshire, RG14 1DL<br />
Phone +44 1635.30-500<br />
Fax +44 1635.30-606<br />
sales@kulzer.uk<br />
www.heraeus-kulzer.com<br />
Contact in Australia<br />
<strong>Heraeus</strong> Kulzer Australia Pty. Ltd.<br />
Locked Bag 750<br />
Roseville NSW 2069<br />
Phone +61 29.417-8411<br />
Fax +61 29.417-5093<br />
sales@heraeus.com.au<br />
www.heraeus-kulzer.com<br />
66037815 12.11