MR-420C-A - B.d.t.
MR-420C-A - B.d.t.
MR-420C-A - B.d.t.
You also want an ePaper? Increase the reach of your titles
YUMPU automatically turns print PDFs into web optimized ePapers that Google loves.
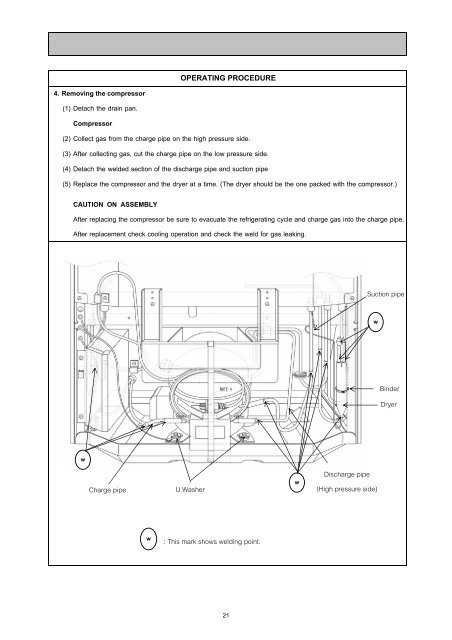
4. Removing the compressor<br />
(1) Detach the drain pan.<br />
Compressor<br />
(2) Collect gas from the charge pipe on the high pressure side.<br />
(3) After collecting gas, cut the charge pipe on the low pressure side.<br />
(4) Detach the welded section of the discharge pipe and suction pipe<br />
(5) Replace the compressor and the dryer at a time. (The dryer should be the one packed with the compressor.)<br />
CAUTION ON ASSEMBLY<br />
OPERATING PROCEDURE<br />
After replacing the compressor be sure to evacuate the refrigerating cycle and charge gas into the charge pipe.<br />
After replacement check cooling operation and check the weld for gas leaking.<br />
w<br />
Charge pipe<br />
w<br />
U Washer<br />
: This mark shows welding point.<br />
21<br />
w<br />
Discharge pipe<br />
(High pressure side)<br />
Suction pipe<br />
w<br />
Binder<br />
Dryer


