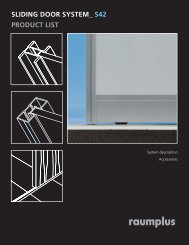
SLIDING DOOR SYSTEM: INSTALLATION ... - Raumplus
SLIDING DOOR SYSTEM: INSTALLATION ... - Raumplus
SLIDING DOOR SYSTEM: INSTALLATION ... - Raumplus

Create successful ePaper yourself
Turn your PDF publications into a flip-book with our unique Google optimized e-Paper software.
<strong>SLIDING</strong> <strong>DOOR</strong> <strong>SYSTEM</strong>:<br />
<strong>INSTALLATION</strong> INSTRUCTIONS<br />
HOW TO INSTALL A <strong>SLIDING</strong> <strong>DOOR</strong> (S34 + S42)<br />
V2011.1<br />
1<br />
USA 1 866 580 0112 raumplusna.com<br />
CAN 1 866 999 3949
CONTENTS<br />
2<br />
General information and tools_ page 03<br />
Tracks_ page 04<br />
Installation_ page 05 – 09<br />
Assembly_ page 10<br />
Detail drawings_ page 11 – 14<br />
USA 1 866 580 0112 raumplusna.com<br />
CAN 1 866 999 3949
GENERAL INFORMATION / TOOLS<br />
GENERAL INFORMATION:<br />
TOOLS:<br />
Preparation:<br />
We recommend reading these instructions before starting.<br />
Carefully unpack and check all items before beginning assembly.<br />
When transporting assembled doors; always lift at corners and lean doors on their side – never stand<br />
them upright as this may damage the bottom roller.<br />
The high quality raumplus family of sliding door systems offers a wide range of possibilities. Systems<br />
with or without bottom track, ceiling or wall mounted systems, corner solutions, locks, applied and true<br />
divided panels.<br />
The “HOW TO INSTALL A <strong>SLIDING</strong> <strong>DOOR</strong> (S34 + S42)” describes the process of installing an S34 or S42<br />
bottom rolling system.<br />
For other instructions, please see:<br />
HOW TO ASSEMBLE A <strong>SLIDING</strong> <strong>DOOR</strong> (S34 + S42)<br />
<strong>INSTALLATION</strong> INSTRUCTIONS_S34/S42 WALL-MOUNT END CAPS + L-BRACKET<br />
<strong>INSTALLATION</strong> INSTRUCTIONS_S34/S42 TOP TRACK POSITIONING<br />
<strong>INSTALLATION</strong> INSTRUCTIONS_S34/S42 TOP AND BOTTOM TRACK CONNECTORS<br />
ASSEMBLY INSTRUCTIONS_S34/S42 STOPPER FOR TOP TRACK + END CAP<br />
HOW TO ASSEMBLE A <strong>SLIDING</strong> <strong>DOOR</strong> (AIR)<br />
HOW TO INSTALL A <strong>SLIDING</strong> <strong>DOOR</strong> (AIR)<br />
For additional instructions see website www.raumplusna.com<br />
Technical details are subject to change.<br />
INFORMATION:<br />
It is assumed that you have exactly identifi ed all cutting dimensions according to<br />
the measurement instruction for raumplus-products.<br />
max. door weight: 180 kg [390 lbs]<br />
pencil and masking tape<br />
drill and drill bits<br />
screwdriver (phillips)<br />
metric allen-key set<br />
level<br />
white rubber mallet<br />
metal saw<br />
plumb-line (optional)<br />
USA 1 866 580 0112 raumplusna.com<br />
CAN 1 866 999 3949<br />
3
TRACKS_S34/S42<br />
1_ 4_<br />
2_ 3_<br />
1_ Bottom track_supplied with double sided adhesive tape (if applicable). Bottom tracks ships 50mm [2”] over-sized to ensure tight<br />
fi t, unless otherwise requested. (fi g.1,Double surface track).<br />
2_ Top Track_to be mounted to ceiling. Top tracks ships 50mm [2”] over-sized to ensure tight fi t unless otherwise requested. (fi g.2,<br />
Double top track).<br />
3_ Brush gasket_provides a dust seal between wall and door when applied to door stile. Optional rubber gasket may be specifi ed<br />
instead of brush gasket.<br />
4_ Plugs_adhesive plugs to cover frame and wheel-adjustment holes.<br />
Note: Top and bottom tracks are available in many variations, please consult your product guide for details.<br />
4<br />
USA 1 866 580 0112 raumplusna.com<br />
CAN 1 866 999 3949
<strong>INSTALLATION</strong>_S34/S42<br />
PREPARE / MOUNT TOP TRACK:<br />
102mm 100 mm [4“]<br />
.05mm<br />
�5<br />
1_ cut top track to fi nal dimension and drill holes.<br />
wall<br />
Choose appropriate fastener<br />
2_ drill holes and mount top track (fi g.2 without ceiling)<br />
drill hole<br />
drill hole approx. every 1016mm 1000 mm[36“] 102mm 100 mm[4“]<br />
USA 1 866 580 0112 raumplusna.com<br />
CAN 1 866 999 3949<br />
5
<strong>INSTALLATION</strong>_S34/S42<br />
SHORTEN BOTTOM TRACK / MARK POSITION:<br />
6<br />
Do not affi x<br />
bottom track on<br />
the fl oor yet!<br />
3_ cut bottom track to fi nal dimension and position it nearly under the top track<br />
When inserting<br />
the sliding door<br />
push up<br />
bottom rollers!<br />
USA 1 866 580 0112 raumplusna.com<br />
CAN 1 866 999 3949<br />
1.<br />
water level<br />
4_ insert sliding door, align perpendicular by moving bottom track, mark position with masking tape<br />
If using an insert track or<br />
tile channel the position is to be<br />
located by plumb line.<br />
top track double<br />
bottom track double
<strong>INSTALLATION</strong>_S34/S42<br />
AFFIX BOTTOM TRACK / INSERT <strong>DOOR</strong>:<br />
5_ remove sliding door, clean fl oor surface and install bottom track at marked position<br />
6_ install sliding door<br />
When inserting<br />
the sliding door<br />
push up<br />
bottom rollers!<br />
1.<br />
If using carpet track, insert track<br />
or tile channel; the carpet, wood<br />
fl oor or tiles must be cut-to<br />
bottom track.<br />
USA 1 866 580 0112 raumplusna.com<br />
CAN 1 866 999 3949<br />
7
<strong>INSTALLATION</strong>_S34/S42<br />
ADJUST <strong>DOOR</strong> / APPLY BRUSH GASEKET:<br />
8<br />
Adjust door up or down with<br />
allen wrench<br />
7_ level sliding door<br />
8_ install plugs for punch holes and brush gasket (details see page 09)<br />
USA 1 866 580 0112 raumplusna.com<br />
CAN 1 866 999 3949
<strong>INSTALLATION</strong>_S34/S42<br />
POSITION FOR BRUSH GASKET:<br />
clip<br />
Clip<br />
15_ positions of brush gasket<br />
Apply brush gasket<br />
and fi x it with clip on top<br />
and bottom.<br />
For the remaining sides, plugs<br />
have to applied at the top and<br />
bottom over drill holes.<br />
1. Example<br />
Example<br />
2. Example<br />
stile reversed<br />
3. Example<br />
stiles mixed stiles mixed<br />
USA 1 866 580 0112 raumplusna.com<br />
CAN 1 866 999 3949<br />
9
ASSEMBLY_S34/S42<br />
90°- / 135°-CORNER SOLUTION:<br />
10<br />
x<br />
2_ 90°-corner solution (S1500 shown) 3_ 135°-corner solution (S1500 shown)<br />
USA 1 866 580 0112 raumplusna.com<br />
CAN 1 866 999 3949<br />
x<br />
INFORMATION: The corner profi les are to be applied to the vertical profi les with double-sided adhesive tape. (fi g.2 and 3).<br />
At the 135°-corner solution only one corner profi le is required.<br />
x
DETAIL DRAWING_S34/S42<br />
POSTIONS OF BOTTOM TRACKS S34:<br />
120 [4 3/4“] 120<br />
81 [3 3/16“] 81<br />
41[1 5/8“] 41<br />
40 or 60<br />
40/60<br />
[1 9/16“] [2 3/8“]<br />
9 [3/8“] 9<br />
11 [7/16“] 11<br />
17 [11/16“]<br />
17<br />
10 [3/8“] 10<br />
6 [1/4“] 6<br />
15 [9/16“] 15<br />
21 [13/16“] 21<br />
60 [2 3/8“] 60<br />
98 [3 7/8“] 98<br />
37<br />
[1 7/16“]<br />
38 [1 38,5 1/2“]<br />
9<br />
[3/8“]<br />
30 30<br />
10/12<br />
[1 3/16“]<br />
S300, S640, S653, S650, S720, S653, S753 S720, S731,<br />
S750a, S750s, S753, S791, S800<br />
10<br />
[3/8“]<br />
1 [0“] 1<br />
2 [1/16“] 2<br />
8 [5/16“]<br />
8<br />
2 [1/16“]<br />
2<br />
2 [1/16“] 2<br />
6 [1/4“] 6<br />
13 [1/2“] 13<br />
51 [2“] 51<br />
90 [3 9/16“] 90<br />
S751S710,<br />
S751, S752<br />
USA 1 866 580 0112 raumplusna.com<br />
CAN 1 866 999 3949<br />
11
DETAIL DRAWING_S34/S42<br />
OVERVIEW OF BOTTOM TRACKS S34:<br />
12<br />
A) Bottom bottom track track double, double surface surface S34<br />
B) bottom track double, surface, closed S34<br />
item-no.: 15.05.020<br />
63 [2 1/2“]<br />
[2 1/2"] 63<br />
item-no.: 15.08.020<br />
[2 3/8"] 60<br />
6 [1/4"] [1/4“] 6 [1/4"] 6<br />
6 [1/4"] [1/4“] 6<br />
6 [1/4"] [1/4“] 6<br />
E) Bottom E) bottom track double double, insert S34 S34<br />
item-no.: 15.06.020<br />
60 [2 [ 3/8"] 2 3/8“] 60<br />
6 [1/4"] [1/4“] 6<br />
[1 48 15/16"] [1 7/8“] 48<br />
G) bottom track triple, surface S34<br />
G) Bottom item-no.: track triple 15.33.020 surface S34<br />
102 [4"] [4“] 102<br />
J) Bottom J) bottom Track track single, single insert, 15/25mm 25mm<br />
item-no.: 14.76.020 (15mm)<br />
15 [9/16"] [9/16“] 15 / 25 [1"] [1“] 25 14.49.020 (25mm)<br />
10 *10<br />
USA 1 866 580 0112 raumplusna.com<br />
CAN 1 866 999 3949<br />
.<br />
5 [3/16"] [3/16“] 5<br />
D) Inset cover for bottom track S34<br />
D) insert for bottom track S34<br />
item-no.: 15.16.020<br />
29 [1 1/8"] [1 1/8“] 29<br />
F) F) Bottom bottom track single, single surface<br />
item-no.: 14.56.020<br />
5 [3/16“] [3/16"] 25 [1"] [1“] 25<br />
6 [1/4"] [1/4“] 6<br />
6 [1/4"] [1/4“] 6<br />
L) L) Tile tile channel<br />
item-no.: 14.77.010 (10mm)<br />
5 [3/16“] [3/16"] Add masking tape as<br />
needed with single<br />
insert Add masking track tape if needed.<br />
* *Use Use 10mm router bit<br />
bit to to ensure ensure tight tight fit. fi t.<br />
H) H) Bottom bottom track single, single insert carpet<br />
item-no.: 14.46.020<br />
30 [1 3/16"] [1 3/16“] 30<br />
[3/8"] 9 [3/8“] 9.6<br />
30 30 [1 [1 3/16“] 3/16"]<br />
10 [3/8"] [3/8“]<br />
10
DETAIL DRAWING_S34/S42<br />
POSITIONS OF BOTTOM TRACK S42:<br />
144 [5 11/16“] 144<br />
97 [3 13/16“] 97<br />
50 [2“] 50<br />
40 or 60<br />
40/60<br />
[1 9/16“] [2 3/8“]<br />
13 [1/2“] 13<br />
21 [13/16“] 21<br />
15 [9/16“] 15<br />
11 [7/16“] 11<br />
19 [3/4“]<br />
19<br />
25 [1“] 25<br />
72 [2 7/8“] 72<br />
118 [4 5/8“] 118<br />
45<br />
[1 3/4“]<br />
46 [1 46,5 13 16“]<br />
17<br />
30<br />
[11/16“] [1 3/16“]<br />
10 [3/8“]<br />
10/12<br />
S1500, S3000<br />
S1001, S1500 (only asym. bott. ho<br />
2<br />
1<br />
8<br />
3<br />
13<br />
6<br />
59<br />
103<br />
USA 1 866 580 0112 raumplusna.com<br />
CAN 1 866 999 3949<br />
13
DETAIL DRAWING_S34/S42<br />
OVERVIEW OF BOTTOM TRACKS S42<br />
14<br />
[1/4"] 6 6<br />
[1/4“]<br />
[1/4"] 6 6<br />
[1/4“]<br />
6<br />
[1/4"] 6 6<br />
[1/4“]<br />
A) A) Bottom bottom track double, double surface S42 S42<br />
B) bottom track double, surface, closed S42<br />
item-no.: 14.06.020<br />
item-no.: 14.08.0xx<br />
[2 71 13/16"] [2 13/16“] 71 72<br />
C) C) Bottom bottom track track double, double insert insert S42 S42<br />
item-no.: 14.06.020<br />
56 [2 3/16"] [2 3/16“] 56<br />
E) bottom track double, insert, closed S42*<br />
item-no.: 14.09.0xx<br />
67<br />
Settle measure deviation on site.<br />
G) Bottom track triple surface S42<br />
G) bottom track triple, surface S42<br />
item-no.: 14.33.020<br />
118 [4 [4 5/8"] 5/8“] 118<br />
I) bottom track triple, insert S42<br />
item-no.: 14.33.0xx<br />
103<br />
J) J) Bottom bottom track track single, single insert, inert, 15/25mm 25mm<br />
item-no.: 14.76.020 (15mm)<br />
15 [9/16"] / 25 [1"] 14.49.020 (25mm)<br />
[1/4"] 6 6<br />
[1/4“]<br />
*10 10<br />
5 [3/16“] [3/16"]<br />
* *Use Use 10mm router bit<br />
bit to to ensure ensure tight tight fit. fi t.<br />
L) Tile channel<br />
L) tile channel<br />
Add masking<br />
item-no.: 14.77.010<br />
tape<br />
(10mm)<br />
with single insert, if<br />
needed<br />
Add masking tape if needed.<br />
USA 1 866 580 0112 raumplusna.com<br />
CAN 1 866 999 3949<br />
5<br />
6<br />
4 [3/16"] [3/16“] 5<br />
D) Insert D) insert cover for bottom for bottom track S42 track S42<br />
item-no.: 14.16.020<br />
[1 37 7/16"] [1 7/16“] 37<br />
F) Bottom F) bottom track single single, surface<br />
item-no.: 14.56.020<br />
25 [1"] [1“] 25<br />
[1/4"] 6 6<br />
[1/4“]<br />
[1/4"] 6 6<br />
[1/4“]<br />
A) H) Bottom bottom track track single, double insert surface S42<br />
item-no.: 14.46.020<br />
[1 3/16"] 30<br />
[3/8"] 7 [1/4“] 9.6<br />
30 [1 30 3/16"] 3/16“]<br />
12<br />
[3/8"] 10<br />
[3/8“] 10