iii. virtual tape machines - Slate Digital
iii. virtual tape machines - Slate Digital
iii. virtual tape machines - Slate Digital

You also want an ePaper? Increase the reach of your titles
YUMPU automatically turns print PDFs into web optimized ePapers that Google loves.
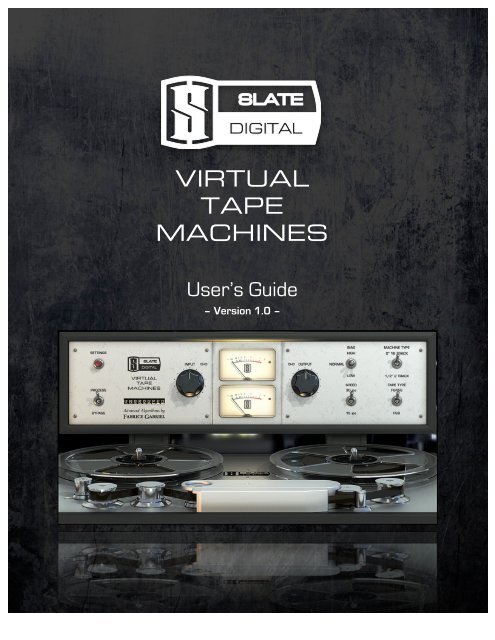
<strong>Slate</strong> <strong>Digital</strong> – Virtual Tape Machines<br />
VIRTUAL<br />
TAPE<br />
MACHINES<br />
User’s Guide<br />
– Version 1.0 –<br />
1
<strong>Slate</strong> <strong>Digital</strong> – Virtual Tape Machines<br />
<strong>Slate</strong> <strong>Digital</strong> Virtual Tape Machines<br />
Version 1.0<br />
Advanced Algorithms TM by Fabrice Gabriel<br />
Fabrice Gabriel:<br />
Steven <strong>Slate</strong>:<br />
Vincent Travaglini:<br />
François Best:<br />
Anthony Taglianetti:<br />
Yannick Bonnefoy:<br />
Algorithm Design & Tuning<br />
Plugin Design & Tuning<br />
DSP Development<br />
Architecture & GUI Development<br />
Beta Testing & Validation<br />
GUI Design & Rendering<br />
<strong>Slate</strong> <strong>Digital</strong> Thanks: the amazing designers who made these legendary <strong>machines</strong>, Deborah<br />
Lintz, Howie Weinberg, Wade Norton, Ross Hogarth, and our “fifth Beatle” Jay Baumgardner.<br />
User Manual by Anthony Taglianetti, Steven <strong>Slate</strong>, & Fabrice Gabriel<br />
© <strong>Slate</strong> <strong>Digital</strong> LLC. All rights reserved.<br />
2
<strong>Slate</strong> <strong>Digital</strong> – Virtual Tape Machines<br />
TABLE OF CONTENTS<br />
I. Introduction ..................................................................................................................... 4<br />
By Steven <strong>Slate</strong> ............................................................................................................................ 4<br />
II. Virtual Tape Machines..................................................................................................... 6<br />
THE MACHINES.......................................................................................................................... 6<br />
2-‐Inch 16-‐Track............................................................................................................................ 6<br />
½ Inch 2 Track.............................................................................................................................. 6<br />
THE TAPES................................................................................................................................. 6<br />
FG456 .......................................................................................................................................... 6<br />
FG9 .............................................................................................................................................. 6<br />
TAPE SPEED............................................................................................................................... 7<br />
30ips ............................................................................................................................................ 7<br />
15ips ............................................................................................................................................ 7<br />
BIAS .......................................................................................................................................... 7<br />
III. VIRTUAL TAPE MACHINES – Overview ............................................................................. 8<br />
FRONT PANEL............................................................................................................................ 8<br />
SETTINGS PANELS...................................................................................................................... 9<br />
IV. VTM QUICKSTART.......................................................................................................... 10<br />
V. GROUPING..................................................................................................................... 11<br />
USING GROUPS ....................................................................................................................... 11<br />
DEFAULT GROUP ....................................................................................................................... 11<br />
PROCESS/ BYPASS...................................................................................................................... 11<br />
ISOLATING THE GAIN STAGE FROM A GROUP........................................................................... 12<br />
AUTOMATING VTM GROUPS................................................................................................... 12<br />
VI. Common Mixing Questions............................................................................................ 13<br />
VII. ADVANCED SETTINGS .................................................................................................... 15<br />
CALIBRATION LEVELS............................................................................................................... 15<br />
DEFAULT CALIBRATION ........................................................................................................... 15<br />
VU AVERAGE POSITION & SOUND ........................................................................................... 16<br />
NOISE REDUCTION .................................................................................................................. 17<br />
BASS ALIGNMENT.................................................................................................................... 17<br />
WOW & FLUTTER .................................................................................................................... 17<br />
HISS AUTOMUTE ..................................................................................................................... 18<br />
VIII. System Requirements & Installation.............................................................................. 19<br />
INSTALLATION INSTRUCTIONS................................................................................................. 19<br />
iLok License Downloading ......................................................................................................... 19<br />
Installing the VTM...................................................................................................................... 19<br />
User Manual .............................................................................................................................. 19<br />
IX. 3RD PARTY ILOK LICENSE TRANSFER FEE ........................................................................ 20<br />
X. Conclusion ..................................................................................................................... 21<br />
3
<strong>Slate</strong> <strong>Digital</strong> – Virtual Tape Machines<br />
I. INTRODUCTION<br />
By Steven <strong>Slate</strong><br />
The first time I put a reel of <strong>tape</strong> on a <strong>tape</strong> machine, I was a fifteen-‐year-‐old coffee boy,<br />
interning at a northern New Jersey recording studio. Even though placing the reel on the<br />
machine was similar to letting your kids push the floor button on an elevator, I remember<br />
being ecstatic that I was given the opportunity to perform this crucial role. Playing back<br />
in my brain was a montage of Kirk, the head engineer, showing me how to properly wrap<br />
the <strong>tape</strong> around the heads. With my heart beating fast, I followed his tutorial with exact<br />
precision. Once the session began, I felt a great sense of accomplishment as I watched<br />
the reels spinning.<br />
I grew up in the industry listening to <strong>tape</strong> <strong>machines</strong>.<br />
Back then it was not clear how magical these <strong>machines</strong> were. In fact, I recall when the<br />
first ADAT digital <strong>machines</strong> became available. One day, the head engineer at the studio<br />
where I was working at came into the control room with a confident grin and announced<br />
to us all “Say goodbye to that noisy hiss truck and get ready for the future… digital!” He<br />
set up the 16bit VHS recording machine next to the Studer i 2-‐inch machine, and we<br />
tracked 8 mics of drums into it. His smile quickly faded. “Something must be wrong, this<br />
doesn’t sound good at all,” he said, as the lifeless and somewhat harsh digital tracks<br />
played back. And I realized back then that digital was likely going to solve a lot of<br />
problems for this industry… but one thing that it was not going to do, was sound like<br />
<strong>tape</strong>.<br />
<strong>Digital</strong> has come a long way since the first 16bit VHS recorders. Using a nice converter<br />
and clock, you can record an extremely detailed and high bandwidth sound with great<br />
resolution and dynamic range. There is surely nothing “wrong” with digital. And perhaps<br />
that’s the problem.<br />
Two years ago we released a plugin called the Virtual Console Collection, which<br />
replicated the signal path of an analog desk. We did this because it was clear that many<br />
pro engineers still preferred the sound of old vintage analog desks. And we soon<br />
discovered why:<br />
The nonlinear artifacts of analog are pleasing to the human ear.<br />
And just as it is with the circuit of a console, the <strong>tape</strong> machine has a very unique set of<br />
dynamic, nonlinear traits that cause our ears to hear warmth, glue, depth, space, and<br />
width. So just as we did with the VCC, we sought to make the absolute most authentic<br />
replication of the analog <strong>tape</strong> machine that the industry has ever heard. And I think we<br />
have succeeded.<br />
4
<strong>Slate</strong> <strong>Digital</strong> – Virtual Tape Machines<br />
After more than a year of scientific research and algorithm development, <strong>Slate</strong> <strong>Digital</strong>,<br />
led by our Chief Technical Officer and head algorithm developer Fabrice Gabriel, have<br />
created the Virtual Tape Machines digital audio plugin. Using this plugin, you can have<br />
the sound of both, a 2inch 16 track analog deck or a ½” 2 track analog deck… right in your<br />
DAW.<br />
Your mixes will come to life. Things will be easier to balance. Tracks will need less EQ<br />
and compression. Depth, space, and warmth will be achieved like you’ve never heard<br />
before.<br />
Welcome to the sound of Analog Tape. Your music deserves it.<br />
5
<strong>Slate</strong> <strong>Digital</strong> – Virtual Tape Machines<br />
II. VIRTUAL TAPE MACHINES<br />
Many of you out there are familiar with the physics of <strong>tape</strong> machine, it’s speeds, and the<br />
various <strong>tape</strong> formulas that have been introduced over the last few decades. For those of<br />
you who are not, here is a crash course.<br />
THE MACHINES<br />
2-‐Inch 16-‐Track<br />
This is the 2-‐inch Studer i A827 with 16-‐track headstock from NRG Recording Studios.<br />
This machine has recorded some of the biggest albums in the world. It has a fat,<br />
punchy, thick sound with a very detailed top end. This is the ultimate tracking<br />
machine.<br />
½ Inch 2 Track<br />
This is the 2-‐track Studer i A80 RC with ½-‐inch headstock from Howie Weinberg<br />
Mastering. Many recordings have been mastered onto this deck, and it’s obvious<br />
why! It has a thick low end, nice rich midrange, and a smooth top that perfectly takes<br />
away the digital edge in the most natural way.<br />
THE TAPES<br />
The <strong>tape</strong> formulations that we modeled are two of my favorites, the classic 456 and the<br />
more modern GP9. I picked these <strong>tape</strong>s based on my years of using both, and my<br />
knowledge that these represent two very unique sounds.<br />
FG456<br />
456 was introduced in 1975 as a “high output” <strong>tape</strong> formula that was needed since<br />
new <strong>tape</strong> decks at the time were able to handle higher headroom signals in their<br />
electronics. 456 is known as a “+6” <strong>tape</strong>, which means it’s +6dB over the 185 nWb/m<br />
standard… which means you have an additional 6dB of headroom before <strong>tape</strong><br />
saturation occurs.<br />
FG9<br />
GP9 is a more modern <strong>tape</strong> that has an even thicker layer of oxide and is known as a<br />
“+9” <strong>tape</strong> (570 nWb/m). GP9 became very popular because you could record at<br />
hotter levels and not have the same introduction of saturation and distortion.<br />
While the sound of these <strong>tape</strong>s is subjective, what we notice is that 456 is a bit more<br />
colorful with slightly thicker lows. Switching to GP9, you’ll notice more punch, due to the<br />
fact that you have 3db more headroom before saturation. You may also notice more<br />
definition throughout the frequency spectrum, and a slightly more forward sound. Both<br />
of these <strong>tape</strong> types sound really good, and we suggest to experiment with both of them.<br />
6
<strong>Slate</strong> <strong>Digital</strong> – Virtual Tape Machines<br />
TAPE SPEED<br />
“IPS” means inches per second, as in the number of inches of <strong>tape</strong> that spin around the<br />
heads per second. The two professional recording <strong>tape</strong> speeds are 15ips and 30ips, which<br />
were the speeds that we modeled on both of our 2-‐inch and ½-‐inch decks.<br />
So what are the sonic differences between these speeds? This is a question that is based<br />
on many factors including the machine type, the way it is aligned, and the <strong>tape</strong> formula.<br />
BIAS<br />
30ips<br />
The faster speed setting, 30ips, has less noise, an overall flatter frequency response,<br />
and a slightly extended high-‐end. On both of our machine models, 30ips is relatively<br />
flat above 200Hz, and then has some emphasis in the higher portion of the low-‐end.<br />
This is a great speed setting for a pristine sounding high-‐end with smooth saturation<br />
on peaks, and a nice thickening of the upper low-‐end.<br />
15ips<br />
15ips has a higher noise floor, and a more non-‐linear frequency response. First you’ll<br />
notice that the low-‐end extension is driven down to the sub-‐lows, below 100Hz. This<br />
is one of the reasons why 15ips is often said to be “fatter” sounding. The midrange of<br />
both of the <strong>machines</strong> is a bit extended, which adds a nice presence and bite.<br />
Overall, the 15ips Speed setting on both models is definitely great when you want to<br />
add more attitude and flavor to your recordings. And the best part is that you can<br />
overcome the extra noise by reducing it with the Noise Reduction slider in the<br />
“Settings” panel!<br />
The recommended Bias (Normal) is dependent on the Tape Type, Tape Speed, and<br />
Record Head Gap length. When you switch Machines, Tape Types or Tape Speeds, the<br />
Bias is automatically adjusted to the recommended value, internally.<br />
We also modeled two additional Bias settings above and below the recommended Bias<br />
value. These additional settings change the frequency response and saturation for each<br />
Machine, Tape, and Speed configuration.<br />
With the Bias set to High, High Frequencies will saturate earlier. When set to Low, High<br />
Frequencies will saturate later, with increased dynamics.<br />
7
<strong>Slate</strong> <strong>Digital</strong> – Virtual Tape Machines<br />
III. VIRTUAL TAPE MACHINES – OVERVIEW<br />
FRONT PANEL<br />
Process/ Bypass<br />
Bypasses plugin processing.<br />
Settings<br />
Opens the Settings Panel.<br />
VU Meters<br />
Displays the signal level, post<br />
the Input control.<br />
<strong>Slate</strong> <strong>Digital</strong> Logo<br />
Opens the Info Panel, which<br />
contains the version number<br />
Input/ Output<br />
Use the Input level to adjust the level going to <strong>tape</strong>.<br />
The hotter the signal, the more <strong>tape</strong> saturation and<br />
compression will occur. Use Output Level to adjust the<br />
level coming off <strong>tape</strong>.<br />
Input/ Output Link<br />
When activated, this option allows for Constant Gain<br />
Monitoring, making it easy to quickly reference the<br />
Processed and Bypassed signal, without any difference<br />
in volume.<br />
Group Assignment Selector<br />
Assigns the plugin to one of VTMs eight Groups. See<br />
the section on Grouping for more details.<br />
Machine Type<br />
Selects between the 2-‐inch 16-‐track (A827); or the<br />
1/2-‐inch 2-‐track (A80RC) <strong>tape</strong> <strong>machines</strong>.<br />
Tape Type<br />
Selects between the vintage FG456 <strong>tape</strong>, and the<br />
modern FG9 <strong>tape</strong>.<br />
Tape Speed<br />
Selects between 30ips and 15ips.<br />
Bias<br />
Selects a High, Normal, or Low Bias.<br />
8
<strong>Slate</strong> <strong>Digital</strong> – Virtual Tape Machines<br />
SETTINGS PANELS *<br />
All of the settings in the VTM Settings Panels (with the exception of Group Calibration<br />
Levels) are GLOBAL. Noise Reduction, Wow & Flutter, Bass Alignment, Hiss Automute, VU<br />
Ballistics and Default Group Settings will affect EVERY instance of VTM in your session.<br />
Noise Reduction<br />
We’ve taken great care to model the noise<br />
characteristics of each machine, <strong>tape</strong> type<br />
and speed. This may be undesirable in some<br />
situations. This slider allows you to fine tune<br />
the amount of <strong>tape</strong> hiss in your mix.<br />
Dragging this slider to the far left will remove<br />
noise entirely.<br />
Wow & Flutter<br />
The subtle pitch and amplitude variations<br />
inherent in <strong>tape</strong> <strong>machines</strong> have been<br />
faithfully reproduced with VTM as well. The<br />
effect intensifies as the slider is dragged to<br />
the right.<br />
Hiss Automute<br />
Automatically mutes the <strong>tape</strong> hiss when no<br />
signal is present at input.<br />
Bass Alignment: Allows for fine control over<br />
the low-‐end response of each <strong>tape</strong> machine.<br />
VU Ballistics: Adjusts the VU Needle Response to either Fast, Mid, or Slow.<br />
Default Group: Determines which Group the VTM is assigned to upon instantiation. This is<br />
very useful for setting up groups quickly!<br />
* Unlike VCC, Settings are stored in the Session File and not a separate settings file on your hard drive. If you<br />
wish to have your own default settings, we recommend saving VTM presets for recall in your DAW. Please<br />
consult your DAW’s user manual for instructions on saving presets, and setting a User Default preset.<br />
9
<strong>Slate</strong> <strong>Digital</strong> – Virtual Tape Machines<br />
IV. VTM QUICKSTART<br />
1. Place the Virtual Tape Machines plugin on the first insert of one of your tracks.<br />
2. Assign VTM to Group 1.<br />
3. Copy this instance to the other tracks in your mixer.<br />
4. Using any of the VTM instances, select a Tape Machine, Tape Type, Tape Speed,<br />
and Bias. All instances of VTM will slave to these changes!<br />
5. Start playback. Depending on your material, you may need to boost or attenuate<br />
the input level of each track to achieve the desired level of <strong>tape</strong> saturation.<br />
6. Finally, insert VTM across your stereo buss. You can assign it to the same group,<br />
or leave it ungrouped to emulate printing your mix to a ½-‐inch machine!<br />
7. Mix your song!<br />
10
<strong>Slate</strong> <strong>Digital</strong> – Virtual Tape Machines<br />
V. GROUPING<br />
USING GROUPS<br />
Groups make using the Virtual Tape Machines plugin very simple, quick, and intuitive. At<br />
its most basic use, you can set all instances to the same group and use the Virtual Tape<br />
Machines to emulate mixing off a single <strong>tape</strong> machine.<br />
VTM Group Assign Menu<br />
You could also use several groups and make your own hybrid <strong>tape</strong><br />
machine. You can mix and match <strong>machines</strong>, <strong>tape</strong> types, speeds,<br />
and even bias!<br />
The Virtual Tape Machines has 8 Groups that enable you to slave<br />
multiple Tape Channels together. This means that from a single<br />
instance, you can control the Bias, Machine Type, Tape Speed,<br />
Tape Type, Process/ Bypass, and Input/ Output for every Tape<br />
Channel in the Group.<br />
To assign a Tape Channel to a group, click the Group Assign pull-‐<br />
down menu and choose one of VTM’s 8 Groups. VTM is now<br />
assigned to that group. †‡<br />
DEFAULT GROUP<br />
You can quickly assign multiple Tape Channels to a group by using<br />
the Default Group feature in the Settings Panel. Click “Settings”<br />
and change the Default Group to the VTM Group of your choice.<br />
All new instances of Virtual Tape Machines will be assigned to this<br />
group by default. This makes group setup quick and easy!<br />
VTM Default Group Setting<br />
PROCESS/ BYPASS<br />
You can bypass the Tape Channel processing for an entire Group by hitting the<br />
Process/ Bypass switch on the front panel. This switch also disables processing<br />
for a single Tape Channel if it is ungrouped.<br />
†<br />
When assigning a Tape Channel to a Group, all parameters will be initialized. We recommend assigning the<br />
Tape Channel to a group BEFORE adjusting any parameters.<br />
‡<br />
Pro Tools Multi-‐Mono: Due to the nature of our grouping system, the Group Assign parameter will not Link to<br />
other Multi-‐Mono Channels. It is recommended that you use the Link function, instead of our grouping system<br />
in this configuration. VTM’s front panel parameters will link correctly across all channels.<br />
11
<strong>Slate</strong> <strong>Digital</strong> – Virtual Tape Machines<br />
ISOLATING THE GAIN STAGE FROM A GROUP<br />
Sometimes you will want to customize the Input or Output of a particular track within a<br />
group. For instance, you may have your drums in a group with your Input at +2dB.<br />
However, you want to add more saturation to only your snare.<br />
The Group Isolate toggle, highlighted in red.<br />
To isolate the gain stage from the group, simply<br />
click the “Link” symbol between the Group Assign<br />
menu and the Input value display. The symbol will<br />
dim to show the change. Now, you can adjust the<br />
gain section of this channel independently from<br />
the group. To add it back to the group, simply<br />
click the “Link” symbol again!<br />
The isolated Input and Output value is not cumulative to the group value; it is absolute.<br />
AUTOMATING VTM GROUPS<br />
It is possible to automate every parameter of the Virtual Tape Machines plugin. When an<br />
instance is grouped, you may automate any of its parameters on any track. This allows for<br />
ultimate ease of use and flexibility.<br />
However, it is up to you to ensure there are no automation conflicts across multiple<br />
instances of a group – otherwise, your automation will not be written/ read correctly.<br />
12
<strong>Slate</strong> <strong>Digital</strong> – Virtual Tape Machines<br />
VI. COMMON MIXING QUESTIONS<br />
How hard should <strong>tape</strong> be hit?<br />
This depends on what you want to achieve and what is your mix.<br />
If you have a lot of bass in a Hip Hop mix, you can try to saturate the <strong>tape</strong> a lot. For a clean<br />
sound, you don't want too much saturation. Slowly raise the Input of your track until you<br />
begin to hear distortion (this level will depend on the content of your mix or tracks). Then<br />
back off on the input by .5dB.<br />
Hitting 0dB VU is the best way to maximize the <strong>tape</strong> sound, i.e. the best noise/saturation<br />
ratio. As always, experiment and use your ears!<br />
What is the preferred order of processing?<br />
To simulate the typical signal flow when mixing a multi-‐track session recorded to <strong>tape</strong>, we<br />
recommend the following:<br />
1. VTM as the first insert on every track in your mix, set to the 2” 16-‐Track Machine.<br />
a. Tape Type, Speed, and Bias to taste.<br />
2. VCC Channel as the second insert on every tack in your mix.<br />
3. VCC Mixbuss as the first insert on your Master Fader.<br />
4. VTM as the last insert on your Master Fader (but before any limiting), set to the ½”<br />
2-‐Track Machine.<br />
a. Tape Type, Speed, and Bias to taste.<br />
This effectively reproduces the signal flow of mixing off a 2” 16-‐Track <strong>tape</strong> machine, into<br />
console channels, through it’s mixbuss, and printing the mix to a ½” 2-‐Track <strong>tape</strong> machine.<br />
Of course this all depends on what you want to achieve for the order of processing. What is<br />
cool with plugins is that you can do whatever you want. It’s totally up to you!<br />
For instance, I used to stack up several instances of the VCC Mixbuss with different consoles<br />
to obtain the color I wanted. It's pretty amazing what it can do this way. So here, like all<br />
plugins, the more creative you are, the better.<br />
Personally I'd use a different order of plugins depending on my track. For instance on a<br />
vocal track, I'd use the following chain:<br />
Deesser VTM EQ VCC<br />
I want to use the deesser with the more pronounced sibilants possible, and fix them as soon<br />
as possible in the processing chain with both the deesser and the Virtual Tape Machines. If<br />
you push the VTM, it acts as a vocal smoother and a kind of deesser, very complimentary<br />
from a regular deesser.<br />
13
<strong>Slate</strong> <strong>Digital</strong> – Virtual Tape Machines<br />
In this scenario, I want to take advantage of the Virtual Tape Machines harmonics,<br />
smoothing, and distortion to warm it up, and to even attenuate/boost them with the EQ. I<br />
want to take also advantage of the compression aspect of the VTM to feed the VCC, where I<br />
can add some final subtle flavor.<br />
I'd try several bias settings depending on the high frequency reduction behavior I want<br />
(which are all far different from a simple EQ). So for instance, I'd use the 2" with FG456,<br />
30ips High Bias, and play with the IN/OUT linked levels to have the highs I want.<br />
For a piano track, I would use a different configuration:<br />
VCC EQ VTM<br />
For the piano, I'd use the VCC Mixbuss to get some cool stereo and harmonic effects, then<br />
EQ, then VTM with not too much noise and just a little bit of flutter. Here, I just would like<br />
to add to the sound. A little bit of smoothness for high amplitudes, but I don't want to use<br />
the VTM as the same high frequency reduction tool than for the vocals. I just want to warm<br />
up the sound a little and make it less sterile.<br />
Here I'd use the 1/2" FG9 15 ips with Normal Bias.<br />
14
<strong>Slate</strong> <strong>Digital</strong> – Virtual Tape Machines<br />
VII. ADVANCED SETTINGS<br />
CALIBRATION LEVELS<br />
The VTM Calibration Settings are useful to quickly set up the processing of the <strong>tape</strong>, to get it<br />
hotter (more saturation, better signal-‐to-‐noise ratio), or quieter (less saturation, more<br />
noise).<br />
In order to be properly calibrated, the VU<br />
meters need to display 0dB with a 1kHz sine<br />
wave is played at -‐18dBFS, with an -‐18dB<br />
Calibration Level.<br />
15<br />
To get the signal hotter, you have to<br />
decrease the calibration level. If you process<br />
a -‐18dBFS peak sine wave, and change the<br />
calibration level to -‐24dB, the VU meter will<br />
show +6 dB VU, thus the <strong>tape</strong> processing will<br />
be hotter, i.e. with more saturation.<br />
Increasing the calibration will yield less<br />
saturation, with a higher noise floor.<br />
The VU meter level is “linked” to the saturation level of the <strong>tape</strong>, so whatever the<br />
calibration, the same VU meter display should give the same amount of saturation.<br />
DEFAULT CALIBRATION<br />
We wanted the needle to not be too hot by default, because we wanted the user to use the<br />
Virtual Tape Machines at the right calibration, preferably with the needle around 0dB VU.<br />
I also wanted the VU Calibration and the Model Calibration to be coherent with what I<br />
measured with the real <strong>tape</strong>, knowing that there is no "right" calibration with real <strong>tape</strong>, for<br />
several reasons:<br />
• Calibration, i.e. relation between Input/ Output/ Saturation levels, depends on<br />
the technician who set up the machine, on the <strong>tape</strong>, etc.<br />
• The same <strong>tape</strong> formula could be calibrated in several ways, i.e. the GP9 has more<br />
headroom, but some engineers chose to have the same headroom with a lower<br />
noise floor, which, at the end, is the same thing on the <strong>tape</strong> itself, but regarding<br />
the input/output, is not the same.<br />
• Calibration also depends on the machine maintenance, model, etc.<br />
What I did for the algorithm was achieve coherence between all Tape Type/Machine Type/<br />
Tape Speed variations. For instance, the FG9 has more headroom and less noise than<br />
FG456; the ½" Machine has more headroom than 2" machine, etc.
<strong>Slate</strong> <strong>Digital</strong> – Virtual Tape Machines<br />
This is representative of the fact that when two <strong>tape</strong> <strong>machines</strong> are calibrated the same way<br />
with same Input/ Output gains, but which may not be the case with far different calibrations<br />
or configurations.<br />
That's why after discussing with many <strong>tape</strong> technicians, we found it very useful to feature<br />
calibration settings, which are representative of reality.<br />
We set the Virtual Tape Machines default calibration to -‐15dB because we thought it was<br />
more representative to the default saturation level a real <strong>tape</strong> machine would exhibit, with<br />
typical RMS levels of digital files. In other words, we wanted the user to load the VTM and<br />
to have the "typical" <strong>tape</strong> sound with the most common digital files.<br />
Wade Norton (NRG Recording Studios), who is one of the best <strong>tape</strong> technicians in Los<br />
Angeles, calibrated the <strong>tape</strong> <strong>machines</strong> for testing. We also hired several other <strong>tape</strong> techs,<br />
and it was very interesting to see that the calibration and the SOUND was different with<br />
the same <strong>tape</strong> machine, according to the calibration which was done by different techs.<br />
The best sound we got from the <strong>tape</strong> <strong>machines</strong> was from Wade's calibration.<br />
VU AVERAGE POSITION & SOUND<br />
One common mistake is to believe that the VU Meter is dependent on the Calibration Level,<br />
when it is not. The VU meter reflects the saturation level of the <strong>tape</strong>, so whatever the<br />
Calibration Level, a 0dB VU will always have the same effect on the sound. For instance, if<br />
you have an input averaging at –18dBFS and a –18dB Calibration Level, the VU will show<br />
0dB VU. If you change the calibration to say, -‐15dB, the VU will then show –3dB, but also<br />
the algorithm saturation will be changed. To get the same saturation level, you'll have to<br />
raise the input by 3dB, thus raising the level of the VU back to 0dB.<br />
The best approach is indeed to start with the level at 0dB VU, and then<br />
increase or decrease the IN/OUT linked level to change the saturation<br />
behavior. On some tracks, I want to push the saturation as far as I can<br />
before there is too much audible saturation; on other tracks I just want<br />
a subtle effect. The good thing is that each <strong>tape</strong>/speed/machine has a<br />
different behavior, so by changing the IN/OUT levels, I can tailor how<br />
the processing will react!<br />
16
<strong>Slate</strong> <strong>Digital</strong> – Virtual Tape Machines<br />
NOISE REDUCTION<br />
We believe that Tape Hiss is an important component in the sound of <strong>tape</strong>. We have<br />
meticulously modeled the noise characteristics for each Machine, Tape, Speed, and Bias<br />
configuration. The “noise” you are hearing is not the product of a noise generator. It is a<br />
faithful replication of Tape Hiss.<br />
By default, Noise Reduction is set to -‐3dB. You may find the <strong>tape</strong> hiss to be too much,<br />
especially if you have multiple instances spread across an entire mix! Luckily, you can dial in<br />
the perfect amount of <strong>tape</strong> hiss using the Noise Reduction slider, located in the Settings<br />
Panel.<br />
BASS ALIGNMENT<br />
In a real <strong>tape</strong> machine, the Bass Alignment would be dependent on the tech's calibration.<br />
The bass alignment setting is not a simple EQ that modifies bass roll off. It takes care of the<br />
bass behavior of the <strong>tape</strong>, and then enhances or reduces it. The Bass Alignment slider<br />
influences bass and sub-‐bass frequencies.<br />
Thus, it’s different for each <strong>tape</strong> model, <strong>tape</strong> machine and speed since the calibration made<br />
by a tech on a real <strong>tape</strong> machine would be dependent on these parameters as well.<br />
It could be very useful in different mixing situations, similar to the changes a tech would<br />
make according to a mixing engineers request. For example, one may want to add some<br />
typical bass from a <strong>tape</strong>, especially for Hip Hop, RnB, etc. It may be easier using the Bass<br />
Alignment to get the right amount of bass in your mix.<br />
For mastering purposes, it may be useful to lower the Bass Alignment to have a more<br />
neutral behavior in the bass and the way that <strong>tape</strong> processes the bass frequencies will help<br />
that, while still keeping the typical <strong>tape</strong> bass sound.<br />
WOW & FLUTTER<br />
Wow & Flutter is intended to precisely emulate what happens in a real <strong>tape</strong> machine. The<br />
subtle pitch and amplitude variations inherent in <strong>tape</strong> <strong>machines</strong> have been faithfully<br />
reproduced with VTM. The effect intensifies as the slider is dragged to the right.<br />
Our measurements show that a precisely tuned and carefully maintained <strong>tape</strong> machine had<br />
a flutter which corresponds to the 25% Setting.<br />
Most <strong>tape</strong> <strong>machines</strong> are around the 50% setting, and not very well maintained <strong>tape</strong><br />
machine is at 100%, which can be still interesting. While this may be undesirable in some<br />
circumstances, it would have been completely unrealistic to omit this aspect of analog <strong>tape</strong><br />
from the VTM.<br />
17
<strong>Slate</strong> <strong>Digital</strong> – Virtual Tape Machines<br />
You can turn off the Wow & Flutter effect by setting the slider to 0%.<br />
HISS AUTOMUTE<br />
Automatically mutes the modeled Tape Hiss when there is no audio present at the input.<br />
VU BALLISTICS<br />
Chooses the speed of the VU Meter needles. The Fast mode will react very quickly and<br />
precisely to oncoming audio, where the Slow mode will react less precisely to individual<br />
audio pieces.<br />
18
<strong>Slate</strong> <strong>Digital</strong> – Virtual Tape Machines<br />
VIII. SYSTEM REQUIREMENTS & INSTALLATION<br />
PC Requirements (RTAS, VST)<br />
• Hardware: Dual Core Intel or AMD Processor (Quad-‐Core Recommended),<br />
2GB RAM, iLok2.<br />
• Operating System: Windows® XP, Windows Vista® (32/64 Bit), Windows 7®<br />
(32/64 Bit)<br />
Mac Requirements (AU, RTAS, VST)<br />
• Hardware: Dual Core Intel Processor (Quad-‐Core Recommended), 2GB of<br />
RAM, iLok2.<br />
• Operating System: Mac OS® X 10.5 or later<br />
INSTALLATION INSTRUCTIONS<br />
iLok License Downloading<br />
Before downloading the iLok license for VTM, make sure you have installed the latest<br />
iLok drivers for your system. You can download the latest installers here:<br />
o iLok drivers for Mac OS: http://sw.ilok.com/macextsx.dmg<br />
o iLok drivers for Windows: http://sw.ilok.com/DriverSetup.exe<br />
In order to download your iLok license to your iLok 2 dongle, please visit the link that was<br />
given to you in your email receipt and enter the required info including the issued pass<br />
code. This will unlock your iLok redemption code. Use this code via your iLok account's<br />
"Redeem License Code". Enter the iLok code, and then download the license on your iLok<br />
2 dongle.<br />
Installing the VTM<br />
Click on the INSTALL icon. Choose your designated VST, AU, or RTAS folder (usually the<br />
default location that the installer insists will be best).<br />
User Manual<br />
The Virtual Tape Machines User Manual will be installed in the following location:<br />
Windows 7: C:\ProgramData\<strong>Slate</strong> <strong>Digital</strong>\Virtual Tape Machines<br />
OS X: /Applications/<strong>Slate</strong> <strong>Digital</strong>/Virtual Tape Machines<br />
19<br />
You can also access the User Manual<br />
by clicking the text “Virtual Tape<br />
Machines” from the Info Panel<br />
(Accessed by clicking the <strong>Slate</strong> <strong>Digital</strong><br />
Logo).
<strong>Slate</strong> <strong>Digital</strong> – Virtual Tape Machines<br />
IX. 3RD PARTY ILOK LICENSE TRANSFER FEE<br />
When reselling any <strong>Slate</strong> software product, there will be a $30 License Transfer Fee in<br />
order for us to process the new customer into our user database. It is the responsibility<br />
of the seller to inform the buyer of this fee at the time of sale.<br />
20
<strong>Slate</strong> <strong>Digital</strong> – Virtual Tape Machines<br />
X. CONCLUSION<br />
MAKING THE VIRTUAL TAPE MACHINES<br />
By Fabrice Gabriel<br />
After the success of the Virtual Console Collection, Steven and I were convinced that the<br />
sound of <strong>tape</strong> was still not authentically modeled in the digital domain. In fact, it didn’t<br />
seem that anyone had accurately captured the essence and feeling of a real <strong>tape</strong> machine.<br />
We wanted to change that.<br />
I was convinced that I could design an algorithm that would be so close to the <strong>tape</strong> sound,<br />
that you could not distinguish a track recorded to the real <strong>tape</strong> machine versus the same<br />
track processed with the algorithm.<br />
The most important thing for us is to have the most absolute authentic sound. At <strong>Slate</strong><br />
<strong>Digital</strong>, our mission is for people to not be able to differentiate from the real thing, so it's<br />
really important to reproduce faithfully and accurately the exact sound and behavior of a<br />
real <strong>tape</strong> machine, and here are the reasons.<br />
First, our purpose is to make sound replicas, not average sound imitations. For years, there<br />
have been a lot of companies who advertise that they "precisely model" certain pieces of<br />
analog hardware, and still today, there are a lot of products which "imitates" the analog<br />
sound, rather than accurately replicating it.<br />
For me, it's really easy to see in their algorithm what they did and how they did it, what<br />
they missed and where technical issues are. Some people who are not familiar with the<br />
original hardware may not be able to tell the difference. But any professional who has used<br />
the real hardware certainly can.<br />
In order to be authentic, an algorithm must be faithful to every aspect of the original gear it<br />
is intended to replicate. It means that both the original and the model should produce the<br />
same output waveform with the same input waveform, with any kind of waveform. It also<br />
means that the frequency response should be the same in every situation, every amplitude.<br />
But there are a lot of other aspects, which need to be reproduced, like the dynamics, the<br />
harmonic behavior, the saturation characteristics, and so on.<br />
Most importantly, the scientific tests are nothing without real life listening tests. That’s why<br />
Steven and I compare and test the algorithms against the real thing, and then several<br />
experienced mixing and mastering engineers validate them.<br />
We stop refining the algorithms when we can’t tell the difference between the original and<br />
the algorithm in a blind listening test.<br />
21
<strong>Slate</strong> <strong>Digital</strong> – Virtual Tape Machines<br />
We chose to offer a <strong>tape</strong> replication because it was clear that <strong>tape</strong> had not properly been<br />
represented in the digital domain yet.<br />
I guarantee that I took care of being very faithful to every aspect of the original <strong>tape</strong> sound<br />
and behavior, that is our mission at <strong>Slate</strong> <strong>Digital</strong>, and this is the reason why we say<br />
“Advanced Algorithms.”<br />
Steven and I are so involved in making the best replications on the market, we hope that<br />
people enjoy our products, appreciate their authenticity, and overall, make great music!<br />
Thanks for reading!<br />
-‐ Fabrice Gabriel<br />
i Studer is a registered trademark of Harmon, and is not affiliated with <strong>Slate</strong> <strong>Digital</strong>. Machine<br />
names used in this manual are meant solely to explain which <strong>tape</strong> decks were used in the <strong>Slate</strong><br />
<strong>Digital</strong> Modeling process.<br />
22