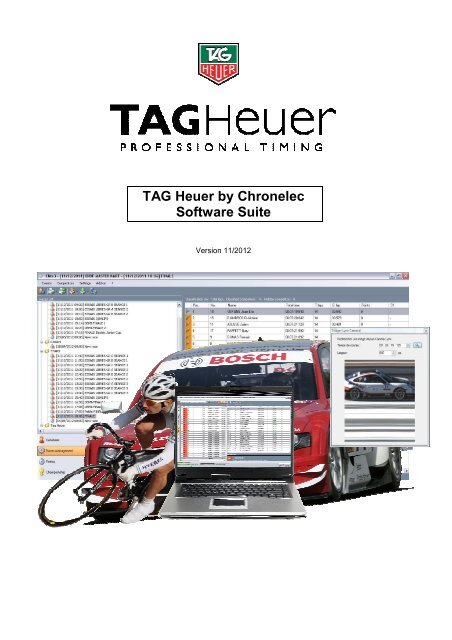
TAG Heuer by Chronelec Software Suite - Event Timing
TAG Heuer by Chronelec Software Suite - Event Timing
TAG Heuer by Chronelec Software Suite - Event Timing

You also want an ePaper? Increase the reach of your titles
YUMPU automatically turns print PDFs into web optimized ePapers that Google loves.
<strong>TAG</strong> <strong>Heuer</strong> <strong>by</strong> <strong>Chronelec</strong><br />
<strong>Software</strong> <strong>Suite</strong><br />
Version 11/2012
1. SYSTEM REQUIREMENTS 5<br />
2. NETWORK REQUIREMENTS 5<br />
2.1.1. Share data directory: ...................................................................................................................... 5<br />
2.1.2. Connecting to the network drive ................................................................................................... 6<br />
3. HARDWARE SETTING 6<br />
3.1.1. Protocol selection ........................................................................................................................... 6<br />
3.1.1. Loop setting (Start – Finish – Split times) .................................................................................... 9<br />
4. CREATE A NETWORK IN ORDER TO WORK ON MASTER / SLAVE BASIS 10<br />
4.1.1. Change TCP/IP Settings ............................................................................................................... 10<br />
4.1.2. Create a homegroup ..................................................................................................................... 10<br />
4.1.3. Share folders (C:\<strong>Chronelec</strong>\Elite v3\Data) ................................................................................ 10<br />
5. GETTING STARTED 12<br />
6. INTERFACE DESCRIPTION 13<br />
6.1.1. <strong>Event</strong>s ............................................................................................................................................ 14<br />
6.1.2. Competitors ................................................................................................................................... 14<br />
6.1.3. Settings .......................................................................................................................................... 14<br />
6.1.4. Help ................................................................................................................................................ 15<br />
7. DATABASE 15<br />
8. RACES MANAGEMENT 17<br />
9. TIMING 18<br />
9.1.1. Import events or championchip .................................................................................................. 19<br />
10. TRACK INSTALLATION EXAMPLE 21<br />
10.1.1. Start at the Time of Day (TOD Start) ........................................................................................... 21<br />
10.1.2. Race start at 00:00:00 ................................................................................................................... 22<br />
11. PRINT SETTINGS 23<br />
12. REMOTE DISPLAY 25<br />
13. TRACKING 27<br />
www.tagheuer-timing.com written <strong>by</strong> Marcus MAIERHOFER Page 2
14. LIVE TIMING 30<br />
14.1.1. Expert mode: ................................................................................................................................. 34<br />
15. <strong>TAG</strong> HEUER BY LYNX PHOTO-FINISH CAMERA 38<br />
15.1.1. <strong>TAG</strong> <strong>Heuer</strong> <strong>by</strong> Lynx settings ........................................................................................................ 38<br />
15.1.2. Elite V3 settings for <strong>TAG</strong> <strong>Heuer</strong> <strong>by</strong> Lynx camera ...................................................................... 39<br />
16. OLED MESSENGER 41<br />
16.1. OLED Messenger.exe settings .................................................................................................... 41<br />
16.2. Elite.exe settings........................................................................................................................... 44<br />
17. DECODER SETTING 45<br />
17.1. <strong>Software</strong> “Decoder Setting” ........................................................................................................ 45<br />
17.2. Elite Decoder ................................................................................................................................. 45<br />
18. “DECODER SETTING” – COMMANDS 46<br />
18.1. Menu Option .................................................................................................................................. 46<br />
18.2. Decoder .......................................................................................................................................... 46<br />
18.3. Commands .................................................................................................................................... 46<br />
18.4. Decoder Time ................................................................................................................................ 47<br />
18.5. Decoder Date ................................................................................................................................. 47<br />
18.6. Distant decoder ............................................................................................................................. 48<br />
18.7. Noise level ..................................................................................................................................... 48<br />
19. “DECODER SETTING” – SETTINGS 49<br />
19.1. IP Settings ..................................................................................................................................... 51<br />
20. THE DECODER 53<br />
20.1. General information ...................................................................................................................... 53<br />
20.1.1. Noise .............................................................................................................................................. 53<br />
20.1.2. Level of detection ......................................................................................................................... 53<br />
20.2. Front panel of the Elite decoder ................................................................................................. 54<br />
20.3. Rear panel of the Elite decoder .................................................................................................. 56<br />
20.4. Pin-out DB15 ................................................................................................................................. 56<br />
21. DECODER TECHNICAL SPECIFICATION 57<br />
www.tagheuer-timing.com written <strong>by</strong> Marcus MAIERHOFER Page 3
22. TRANSPONDERS 57<br />
22.1. RK, LS, Elite, Elite Pro installation .............................................................................................. 57<br />
22.2. Passive Transponder (RCS and RC) ........................................................................................... 58<br />
23. LOOP INSTALLATION 59<br />
23.1. Passive loops (LS, Elite Transponder) ....................................................................................... 59<br />
23.2. Active Loops (RCS, RC, RCT and RK Transponder) ................................................................. 60<br />
QUESTION / ANSWER 61<br />
<strong>TAG</strong> HEUER 62<br />
www.tagheuer-timing.com written <strong>by</strong> Marcus MAIERHOFER Page 4
1. System requirements<br />
To use the software your computer must be equipped with:<br />
Operating system: Windows 2000, Windows XP, Windows Vista, Windows 7<br />
RAM: 1GB recommended<br />
Microsoft .NET Framework 2.0<br />
Hardlock Dongle installed (Note that the Master Key is blue and the « Slave » Red)<br />
2. Network requirements<br />
The Elite v3 software uses Windows file sharing to import data network.<br />
You must have file sharing enabled to use this feature.<br />
By default, the software is installed in the directory C:\<strong>Chronelec</strong>\Elite v3\.<br />
The Data folder contains all events and championships. To import data network, you have to share this<br />
directory.<br />
Activate network shares:<br />
Click on Control Panel and then click Network Connections. Make a right click on your card and then select<br />
Properties.<br />
2.1.1. Share data directory:<br />
Share Data folder<br />
and select<br />
authorizations<br />
reading for<br />
everyone.<br />
Check that file sharing is<br />
activated.<br />
Make a right click<br />
on the Data folder<br />
and select<br />
Sharing.<br />
www.tagheuer-timing.com written <strong>by</strong> Marcus MAIERHOFER Page 5
2.1.2. Connecting to the network drive<br />
Go to the workstation and select the Tools menu, then connect a network drive.<br />
Select a letter available and enter the network path of Data directory..<br />
For Example:<br />
You want to connect to Data directory of PC with the IP address 192.168.0.100:<br />
Enter \\192.168.0.100\Data. If the connection is successful, another letter will appear in the workstation and<br />
you have to view files in the Data directory.<br />
3. Hardware setting<br />
3.1.1. Protocol selection<br />
Firstly, you have to set the communication port of your computer.<br />
You may use a serial cable (with or without USB Adapter) or over Ethernet.<br />
COM Port: Set the right com port used. In order to find the COM Port number you may refere to your<br />
Operating system manager.<br />
Select the COM Port attributed <strong>by</strong> your computer.<br />
Open up Device Manager. Right click on "My Computer"<br />
and select properties (at the bottom of the list that pops up).<br />
In the software, simply specify the<br />
letter of your choice (Z for example)<br />
to import data from the network.<br />
www.tagheuer-timing.com written <strong>by</strong> Marcus MAIERHOFER Page 6
Click on the "Hardware" tab.<br />
Click on the "Device Manager" button and a something similiar to this picture should appear.<br />
Click on the '+' sign on the left of the "Ports (COM & LPT) to expand it.<br />
The list of printers and Serial ports available will be shown.<br />
Make a note of those.<br />
IP Address: The default IP address of the decoder is 192.168.000.010<br />
In order to communicate with the decoder, the computer should be on the same Network and subnet<br />
mask.<br />
How to set your Computer IP:<br />
• Select the program Network<br />
connection<br />
(Start � Setting � Control Panel)<br />
We suggest that you create a short cut<br />
from your desk top to simplify the<br />
access to the LAN.<br />
• Select Local Area Connection<br />
• Select Properties<br />
www.tagheuer-timing.com written <strong>by</strong> Marcus MAIERHOFER Page 7
• Choose Internet Protocol TCP/IP<br />
• Again, select Properties<br />
• Select Use the following IP address<br />
• Enter the correct IP address<br />
Example: 192.168.000.001<br />
The Subnet mask will come<br />
automatically (255.255.255.0)<br />
Note<br />
The IP addresses should be similar on<br />
the first 3 groups of the 3 numbers<br />
(example : 192.168.000.xxx)<br />
The last groups of 3 numbers should be<br />
different<br />
Example:<br />
Decoder IP = 192.168.0.10<br />
PC IP = 192.168.0.03<br />
If your PC is never connected to a LAN,<br />
you can make this address permanent.<br />
If not, to retrieve to the original setting,<br />
please select Obtain an IP address<br />
automatically<br />
In order to test the communication between the decoder and your computer you may do a brief<br />
test. Data frames should come into the communication window.<br />
Note that this test mode don’t work with the Chronoprinter 540.<br />
www.tagheuer-timing.com written <strong>by</strong> Marcus MAIERHOFER Page 8
3.1.1. Loop setting (Start – Finish – Split times)<br />
If you have to use the same settings several times, don’t hesitate to tick those options below.<br />
This window allows you to set all timing loop and/or Timer Channels.<br />
On the below example, we have:<br />
- 1 Start / Finish loop (STA)<br />
- 1 Pit entry (BOX)<br />
- 2 Distant decoder (B01 and B04)<br />
- 1 Distant Speed, Speed measuring on 30 meters (B02 + B03)<br />
If you set a distance, Elite will automatically consider it as a speed measuring zone and calculate the average<br />
speed. The “speetrap” should always have more than 10 meters for speeds over 100km/h (60mph) in order to<br />
get a reliable measure.<br />
IMPORTANT<br />
Note that “passive” Transponder like the RC or RK, after each ID transmission goes into a sleep mode<br />
for 5 seconds, no second transmission is possible whitin this moment.<br />
www.tagheuer-timing.com written <strong>by</strong> Marcus MAIERHOFER Page 9
4. Create a Network in order to work on Master / Slave basis<br />
NOTE:<br />
4.1.1. Change TCP/IP Settings<br />
TCP/IP defines the language that your computer uses to communicate with other computers. In our<br />
application we do not recommend using automated Dynamic Host Configuration Protocol (DHCP) to<br />
automatically assign Internet Protocol (IP)<br />
Open Network Connections <strong>by</strong> clicking the Start button , clicking Control Panel, clicking Network and<br />
Internet, clicking Network and Sharing Center, and then clicking Manage network connections.<br />
1. Right-click the connection that you want to change, and then click Properties. If you are prompted<br />
for an administrator password or confirmation, type the password or provide confirmation.<br />
2. Click the Networking tab. Under This connection uses the following items, click either Internet Protocol<br />
Version 4 (TCP/IPv4) To specify IPv4 IP address settings, do one of the following:<br />
o To obtain IP settings automatically, click Obtain an IP address automatically, and then click<br />
OK.<br />
o To specify an IP address, click Use the following IP address, and then, in the IP address,<br />
Subnet mask, and Default gateway boxes, type the IP address settings.<br />
4.1.2. Create a homegroup<br />
Open HomeGroup <strong>by</strong> clicking the Start button , clicking Control Panel, typing homegroupe in the<br />
search box and then clicking HomeGroup.<br />
On the Share with other home computers running Windows 7 page, click Create a homegroup, and<br />
then follow the instructions.<br />
• If a homegroup already exists on your network, Windows will ask if you would like to join it instead of<br />
creating a new one.<br />
• If you don't have a home network, you'll need to set one up before creating a homegroup.<br />
• If your computer belongs to a domain, you can join a homegroup but you can't create one. You can<br />
access files and resources on other homegroup computers, but you can't share your own files and<br />
resources with the homegroup.<br />
Computers must be running Windows 7 to participate in a homegroup. HomeGroup is<br />
available in all editions of Windows 7. In Windows 7 Starter and Windows 7 Home Basic,<br />
you can join a homegroup, but you can’t create one.<br />
4.1.3. Share folders (C:\<strong>Chronelec</strong>\Elite v3\Data)<br />
Right-click a drive or folder, click Share with and then click Advanced sharing<br />
1. In the dialog box that appears, click Advanced Sharing. If you're prompted for an administrator<br />
password or confirmation, type the password or provide confirmation.<br />
2. In the Advanced Sharing dialog box, select the Share this folder check box.<br />
3. To specify users or change permissions, click Permissions.<br />
www.tagheuer-timing.com written <strong>by</strong> Marcus MAIERHOFER Page 10
4. Click Add or Remove to add or remove users or groups.<br />
5. Select each user or group, select the check boxes for the permissions you want to assign for that user<br />
or group, and then click OK.<br />
6. When you've finished, click OK.<br />
NOTE that you can't share the root of a drive with a dollar sign following the drive letter as in versions<br />
of Windows earlier than Windows Vista. For example, you can't share the root of your C drive as "C$,"<br />
but you can share it as "C" or any other name.<br />
On Elite V3 SLAVE<br />
Import the current race edited on the Master<br />
Point directly on the “Master” folder over the network and import<br />
www.tagheuer-timing.com written <strong>by</strong> Marcus MAIERHOFER Page 11
5. Getting Started<br />
Elite v3 includes 4 main sections:<br />
Database:<br />
Allows saving your competitors to copy them more easily in future events. There is no requirement to copy<br />
your competitors in the database. You can easily import competitors in the software without going through the<br />
database.<br />
Races management:<br />
Allows you to manage races of the event. You can print the results, calculating merges of races, apply<br />
penalties.<br />
<strong>Timing</strong>:<br />
Allows you the timing races of the event. The passing of competitors are displayed on the left and the<br />
classification is displayed on the right.<br />
Championship:<br />
Allows you to manage a championship, to combine several different event results.<br />
The menus at the top may change depending on the section, and you must use the right click of the mouse to<br />
show some options.<br />
www.tagheuer-timing.com written <strong>by</strong> Marcus MAIERHOFER Page 12
6. Interface description<br />
Main Database<br />
<strong>Event</strong> A<br />
Database of <strong>Event</strong> A<br />
Category X<br />
Race 1<br />
Race 2<br />
Merge 1<br />
Category Y<br />
Championship<br />
Copy competitors 1<br />
Race 1<br />
Race 2<br />
Merge 1<br />
Category X<br />
Category Y<br />
Principle of software:<br />
Copy competitors 1<br />
<strong>Event</strong> B<br />
Database of <strong>Event</strong> B<br />
Category X<br />
Race 1<br />
Race 2<br />
Merge 1<br />
Category Y<br />
Copy competitors 1<br />
Race 1<br />
Race 2<br />
Merge 1<br />
Copy competitors 1<br />
Create an event. The event gathers together all races of all categories.<br />
Create folders. In general, it creates a folder <strong>by</strong> category.<br />
For example, if 4 different categories in the event and that these categories are not timed at the same time, we<br />
will create 4 folders.<br />
Create races merges and competitors copy for each folder.<br />
Races allow to timing competitors, merges allow to merge races or other merges and competitors copy allow<br />
to copy competitors in races automatically.<br />
Import competitors in the folder from a text file, Excel or database. Then copy them in the races.<br />
www.tagheuer-timing.com written <strong>by</strong> Marcus MAIERHOFER Page 13
6.1.1. <strong>Event</strong>s<br />
To create a new event or open a recent event.<br />
In the <strong>Event</strong> Settings information you may find all setting such as:<br />
- Track Name / length<br />
- Date<br />
- Hardware Setting<br />
- Print and results settings<br />
- Web / Server broadcasting settings<br />
Import and Export events or championship from or to another Elite <strong>Software</strong>.<br />
6.1.2. Competitors<br />
Here you can manage, edit all competitors information.<br />
Copy/Paste function is active in Elite v3 in order to add, remove or edit all information.<br />
Double click on the selected competitor opens up automatically the information board.<br />
6.1.3. Settings<br />
Stopwatches : Hardware setting.<br />
www.tagheuer-timing.com written <strong>by</strong> Marcus MAIERHOFER Page 14
You can enable up to 9 Stopwatches connected over serial com port or Ethernet.<br />
Decoder or other compatible <strong>TAG</strong> <strong>Heuer</strong> <strong>Timing</strong> system.<br />
6.1.4. Help<br />
7. Database<br />
We recommend that check for updates is selected (needs an internet acces).<br />
Repair Elite files. Restore all files if you encounter some troubles after update or operating system<br />
change.<br />
Shortcut: CTRL+1<br />
The Database conteins all competitors from all events.<br />
Until you have all competitors in your database, it will be easy to import them (with filter or copy paste<br />
function) in your race.<br />
Filter function : This function allows you to show only requested competitors.<br />
Sorting possibilities are listed in the window<br />
Here is an example, filter selection : Category, available and selected field : STAR<br />
Only 20 competitors on 44 are displayed in the main window.<br />
www.tagheuer-timing.com written <strong>by</strong> Marcus MAIERHOFER Page 15
Printer function: to print competitors list:<br />
Import/Export funciton : With this function you can either import from a text file or .csv database or paste<br />
from your excel clipboard.<br />
www.tagheuer-timing.com written <strong>by</strong> Marcus MAIERHOFER Page 16
8. Races Management<br />
Shortcut: CTRL + F2<br />
In order to create a new folder, right click inside the race list on the left. A new windows will appear.<br />
In our example, we have one <strong>Event</strong> (EDRF Master Kart of Bercy).<br />
An individual folder has been created for each category (Junior, Stars and <strong>TAG</strong> <strong>Heuer</strong>).<br />
In each folder you’ll find all concerned races set as Qualifiying, Race or Final.<br />
www.tagheuer-timing.com written <strong>by</strong> Marcus MAIERHOFER Page 17
9. <strong>Timing</strong><br />
This is the <strong>Timing</strong> windows is visible during a race.<br />
All passings are listed in the left window (1). Live classification on the right window (2)<br />
On the example below, we started the decoder at 0, race of 14 laps.<br />
Remaining laps, race time and best lap are show in the bottom window (3).<br />
In the “<strong>Timing</strong>” window, you have several options:<br />
Race selection<br />
On the left you have little icons which helps you to recognize the race « status »<br />
Stopped Race<br />
Running Race (note that you cannot start a new race if another is still running)<br />
New (blank) Race<br />
1<br />
www.tagheuer-timing.com written <strong>by</strong> Marcus MAIERHOFER Page 18<br />
2<br />
3
Green Flag : Start Race / Start decoder (no passings are recorded if the Race is not started)<br />
Yellow Flag : Safety Car out<br />
Red Flag: Race stopped <strong>by</strong> race direction, passings are still recorded<br />
Checkered Flag: Manual Race finish (note that this option won’t be available if you set laps or maximum<br />
race time)<br />
Stop Race / Stop decoder. A warning window will appear.<br />
All informations will be listed in the passing list with race time or time of day:<br />
9.1.1. Import events or championchip<br />
You can import events or<br />
championships easily from Elite<br />
file or Data networking folder.<br />
The drop-down list shows all the<br />
events found in the source data.<br />
Import all events:<br />
All events from the drop-down<br />
list will be imported.<br />
You can also import only a race for example, in this case, just select the race.<br />
Import database:<br />
Allow importing the database, competitors with the same ID will be overwritten.<br />
If data to import already exist on your PC, it will<br />
be replaced.<br />
www.tagheuer-timing.com written <strong>by</strong> Marcus MAIERHOFER Page 19
Export events or championship<br />
You can export events or<br />
championships easily.<br />
Exporter all events:<br />
All events from the drop-down list will<br />
be exported to a Elite file.<br />
Export selected events:<br />
Exports selected event from the dropdown<br />
list. You can export several<br />
different events at the same time.<br />
You can also export only a race for<br />
example. In this case, just check the<br />
race<br />
www.tagheuer-timing.com written <strong>by</strong> Marcus MAIERHOFER Page 20
10. Track installation example<br />
10.1.1. Start at the Time of Day (TOD Start)<br />
Start/Finish with Elite decoder or Chronoprinter 540 (Starting schedule)<br />
IMPORTANT<br />
Note that if you use Distant decoder for Splits, the distant decode should be GPS synced (optional).<br />
Normal distant decoder starts at 00:00:00 when they get the synchro signal from the Elite Decoder<br />
over RS485. For settings, please refer to “decoder settings software” (Chapt.15).<br />
Go into the Race management<br />
Double click or right click on your race folder<br />
Parameters<br />
For the « Start loop » leave the stopwatch option empty and select « Starting schedule »<br />
Then you’ll have to assign starting schedules to all competitors (competitors / Assign starting<br />
schedule)<br />
Select all competitors and enter an approximate Start Time (this will be corrected afterwards<br />
when we get the TOD from the Chronoprinter).<br />
www.tagheuer-timing.com written <strong>by</strong> Marcus MAIERHOFER Page 21
Apply. You’ll see that the Start Time column is updated.<br />
Then go to timing<br />
Green Flag and wait the CP540s signal. Pass (assign no competitor).<br />
Copy Start time and select all competitors in the right window.<br />
Click right…. And select Start Time.<br />
Finally Set the start time you get<br />
When Competitors cross the finish line (with a Photocell passing) so you’ll have to set the ID<br />
number manually as you are not using Transponder.<br />
Elite will automatically consider that the competitors ended the race (checkered flag) and display<br />
race time.<br />
10.1.2. Race start at 00:00:00<br />
Lap <strong>Timing</strong> with 2 splits and speed measuring loops<br />
Same Start – Finish loop connected to STA<br />
Distant 2 loops connected over RS485<br />
Loop setting B01 (second loop is automatically incremented +1, so in our example B02)<br />
www.tagheuer-timing.com written <strong>by</strong> Marcus MAIERHOFER Page 22
11. Print Settings<br />
You can set all list of officials:<br />
Sharing the “Config” folder on the network allows you to share all templates also<br />
Print the classification: During an endurance race, you can make timeslot rankings<br />
www.tagheuer-timing.com written <strong>by</strong> Marcus MAIERHOFER Page 23
Starting Grid<br />
Print Lap <strong>by</strong> Lap:<br />
TV Broadcasting<br />
www.tagheuer-timing.com written <strong>by</strong> Marcus MAIERHOFER Page 24
Example of Race incidents:<br />
Print lap Chart:<br />
12. Remote Display<br />
Start Remote display on the concerned laptop.<br />
You can even run remote display on the same computer if a second display is connected for<br />
example. In this case, use the loopback Network address 127.0.0.1<br />
The Channel correspond to your setting in Elite v3. Different display settings can be set on each<br />
channel.<br />
www.tagheuer-timing.com written <strong>by</strong> Marcus MAIERHOFER Page 25
You may select the information to be broadcasted on each channel and display only information<br />
required on each remote screen.<br />
Default Port number is Port 14000. You’ll have to change those settings if other network software<br />
are using the same one.<br />
The TV Settings are available for each Race folder<br />
or double clic on the folder and go into Option<br />
You may change all fields. In order to get all available fields you’ll have to click on each columns setting<br />
www.tagheuer-timing.com written <strong>by</strong> Marcus MAIERHOFER Page 26
13. Tracking<br />
need a special add-on on the Main “master” hardlock dongle)<br />
In order to design your track, ensure that you are in Design mode.<br />
Import a Picture (ex. Google earth or Google images)<br />
Select in order to start trace with straight line or curves.<br />
Same procedure for the Pit lane<br />
Select the track way (clockwise or counterclockwise)<br />
Then select each loop point even for Pit in, Pit out, Start/Finish line and Splits<br />
www.tagheuer-timing.com written <strong>by</strong> Marcus MAIERHOFER Page 27
Don’t forget to save your racetrack and note the log directories for Elite software.<br />
You may start the vehicle tracking mode for the race direction for example.<br />
They may follow all cars on track and even set a Yellow flag on a sector, full yello or Red flag is necessary)<br />
This information will appear directly in the timing screen and all remote displays.<br />
Settings are available in the same window as the Display Settings<br />
You have to select the right directory were the designed tracks have been saved.<br />
Tracking as standalone software<br />
Tracking with Remote Display<br />
Activate the tracking in the display settings and select<br />
www.tagheuer-timing.com written <strong>by</strong> Marcus MAIERHOFER Page 28
In the display settings (Folder settings / Options)<br />
Enable the display TV output.<br />
In options you may activate the tracking on the remote display (note that all settings may be different for each<br />
chanel)<br />
Finally enable the tracking, set size and zoom factor<br />
www.tagheuer-timing.com written <strong>by</strong> Marcus MAIERHOFER Page 29
14. Live <strong>Timing</strong><br />
The live Internet can send the race in timing on the Internet.<br />
The software uses a FTP connection to send the file. You must have an FTP server visible on the Internet to<br />
see the result.<br />
You can customize the file of live Internet using the expert mode.<br />
You will find all settings in Options / Default event settings or set all parameters for each race folder:<br />
Complete all requested fields:<br />
Host: url of your ftp server (in our example: www.tagheuer-timing.net)<br />
www.tagheuer-timing.com written <strong>by</strong> Marcus MAIERHOFER Page 30
Port: port listening of your server (default setting is usually 21)<br />
Passive mode: « Yes » The passive mode is recommended when the client is located<br />
behind a firewall or a Network address translator (NAT). In this mode, all TCP sessions a<br />
created directly from the client.<br />
User: user name or account name<br />
Password : user or account password<br />
Remote folder: Remote folder is the basic root folder on the hosting server where you<br />
Publish your site's files. Usually called public_html. After connecting to server, you may not<br />
see this folder so you must expand the directories.<br />
Timeout: The TCP port usually used for FTP connection is port 21. Most often the reason<br />
for FTP time out is that your firewall or Internet service provider blocks this port or because<br />
your FTP client is NOT set to use Passive mode. First of all you should make sure that you<br />
use Passive mode with your FTP client. Then, if the problem persists, you should run a<br />
check of the connection between your computer and the port 21. If there is a problem with<br />
the connectivity you should try disabling your local firewall, or, if this does not help, you<br />
should contact your Internet Service Provider.<br />
Remote file: html page name (where the live timing is generated)<br />
(in our example : test.html)<br />
Upload frequency: updated information in second<br />
With you can test the connection to<br />
your server.<br />
In the toolbar on the bottom you can check if the information is being sent.<br />
The live timing window can be modified, you may add or remove columns depending on the<br />
race you are timing.<br />
www.tagheuer-timing.com written <strong>by</strong> Marcus MAIERHOFER Page 31
If you want show the Flags and images, you’ll need to create an “image” folder on your ftp.<br />
You can find those images in the root folder of “remote display”. Upload a copy of this<br />
folder.<br />
The live <strong>Timing</strong> can even be displayed on smartphones with an Internet Navigator:<br />
www.tagheuer-timing.com written <strong>by</strong> Marcus MAIERHOFER Page 32
Until Elite v3 version 3.1.29 you are able to display pictures in normal mode on your pages<br />
and enhance those pictures on mouse over.<br />
Those picture should be in the “image” folder on your ftp.<br />
Example: You want to display the picture of GT Car Nr. 32<br />
Upload your picture (im .png format) on your ftp (drop it inside the “image” folder).<br />
Ensure that the name is not used <strong>by</strong> another picture or category.<br />
In our example, the picture name will be GT32.png<br />
Then set in a available custom field of the competitor the picture name (without file<br />
extension). Here custom3.<br />
In order to change the field name (see Settings / Options / Text of the fields )<br />
and then edit :<br />
www.tagheuer-timing.com written <strong>by</strong> Marcus MAIERHOFER Page 33
Editable Custom fields are located in the general fields’ information:<br />
Finally, in the classification, add the new field you created (Add/Remove columns)<br />
Check the Image field in order to activate image (if you don’t do it, only image name will be<br />
displayed)<br />
14.1.1. Expert mode:<br />
Firstly, you have to enable this mode.<br />
After each modification:<br />
Don’t forget to save your template<br />
After first upload in normal mode, open your browser (right click « show source code ») or<br />
open the html file with notepad.<br />
www.tagheuer-timing.com written <strong>by</strong> Marcus MAIERHOFER Page 34
Copy the marked text and paste it in « code before classification »<br />
and tag should be paste in « code after classification »<br />
Now you maye edit and create your own page.<br />
www.tagheuer-timing.com written <strong>by</strong> Marcus MAIERHOFER Page 35
<strong>TAG</strong> <strong>Heuer</strong> Professional <strong>Timing</strong><br />
<br />
<br />
<br />
<br />
#menu a{margin: 0 10px; font-size: 1.4em; color: #0000FF;}<br />
h1 {font-size: 1.6em; text-align: left; font-weight: bold; color: #000000; margin: 1em 0<br />
1em 0;}<br />
img {border:0;}<br />
table {background-color: #BBBBBB;}<br />
td {vertical-align: middle;}<br />
.logo {float: right;}<br />
<br />
.HeaderRow {font-weight: bold; background-color: #0046D5; color: #FFFFFF;}<br />
<br />
.OddRow {background-color: #FFFFFF;}<br />
<br />
.EvenRow {background-color: #DDDDDD;}<br />
<br />
.BestOverall {color: #800080; font-weight: bold;}<br />
<br />
.Best {color: #008000; font-weight: bold;}<br />
<br />
7.3 Netmessage<br />
This software is a network messenger. Language is automatically set as your Computer OS.<br />
Should run on each computer on the same LAN.<br />
Computer ID will appear automatically in the main Window<br />
Double click on the Computer of your choice open the chat window.<br />
www.tagheuer-timing.com written <strong>by</strong> Marcus MAIERHOFER Page 36
Note that an option « SEND TV » is available. This feature sends your texte message on all remote<br />
display connected on your network.<br />
Some standard and redundant message can be saved inside the message.txt file.<br />
This file should be saved on the root file were Netmessage is fired up.<br />
In order to get the setting window: right click on the Netmessage icon in the taskbar<br />
and select « Options »<br />
Message settings for TV can be edited (font color, background, size etc..)<br />
www.tagheuer-timing.com written <strong>by</strong> Marcus MAIERHOFER Page 37
15. <strong>TAG</strong> <strong>Heuer</strong> <strong>by</strong> LYNX Photo-Finish Camera<br />
This feature able you to get <strong>TAG</strong> <strong>Heuer</strong> <strong>by</strong> Lynx Photo-Finish Camera pictures directly into Elite V3.<br />
Both devices should run on the Network and should be synchronised.<br />
Install the special script on the Lynx Root file (eg. C:/Lynx….),<br />
this script is available on: www.tagheuer-timing.net/script/THbL_EliteV3.zip<br />
15.1.1. <strong>TAG</strong> <strong>Heuer</strong> <strong>by</strong> Lynx settings<br />
Activate the dedicated module in “Image/Options/General”<br />
Set Remote control on “Network listening” on port 13000<br />
Then activate the Scoreboard module in the same window.<br />
- Select the script you saved inside the Lynx install file.<br />
- Set the serial port on Network listening on Port 13001<br />
- Precision on a thousandths of a second.<br />
The Image module allows you to get the pictures into Elite<br />
The Scoreboard module helps you to get all frames identified manually <strong>by</strong> the Camera operator<br />
www.tagheuer-timing.com written <strong>by</strong> Marcus MAIERHOFER Page 38
15.1.2. Elite V3 settings for <strong>TAG</strong> <strong>Heuer</strong> <strong>by</strong> Lynx camera<br />
All camera settings are available in the Main settings.<br />
- Select “Lynx Camera” and enable both options<br />
-<br />
The Lynx directory should be the same as the Computer were the camera is connected and running on the<br />
same network. Please refer to chapter 2.1.1 in order to share directories.<br />
At any moment you may request the picture directly from the timing window.<br />
Enter the race time and click on « search ».<br />
This window will automatically appear if you plugged a photocell on the decoder and set a<br />
Transponder/Photocell signal delta time (in milliseconds)<br />
Settings / Options / <strong>Timing</strong><br />
www.tagheuer-timing.com written <strong>by</strong> Marcus MAIERHOFER Page 39
If the Camera operator identifies a passing on the Lynx <strong>Software</strong> manually a pop up will ask you to add a Lynx<br />
dataframe in Elite V3<br />
IMPORTANT NOTE :<br />
The script sends the complete ranking at every export.<br />
Only Elite V3 detects if a passing is missing or not.<br />
If you leave Elite V3 where 5 competitors have been identified, Elite V3 will propose you to save those 5<br />
competitors again on next Lynx export.<br />
www.tagheuer-timing.com written <strong>by</strong> Marcus MAIERHOFER Page 40
16. OLED Messenger<br />
(note that the language will set automatically on the same language as your computer OS )<br />
For Hardware (Onboard display) instruction please refer to it’s user manual<br />
16.1. OLED Messenger.exe settings<br />
Select the COM port of the transmitter (tool)<br />
A radio and network Spy is available (there you can check what's happening on the network and what the<br />
transmitter sends/receives)<br />
Network settings are available in order to connect to Elite <strong>Software</strong> and even OLED Messenger (Remote).exe<br />
installed in the race direction. All port should correspond to each software in order to interact.<br />
www.tagheuer-timing.com written <strong>by</strong> Marcus MAIERHOFER Page 41
Oled messenger software can send a global message to all “connected” Oled Messengers<br />
There you can select different message to send and even change the colour.<br />
MAIN MENU:<br />
STOP : This button will stop any transmission<br />
GREEN FLAG : Sends a general Green Flag to all competitors. Note that even Tracking, Oled remote<br />
and Elite may send the general green flag<br />
YELLOW FLAG : Sends a general Yellow Flag to all competitors. Note that even Tracking, Oled remote<br />
and Elite may send the general yellow flag<br />
SAFETY CAR : Sends a general « SC » information. Note that even Tracking, Oled remote and Elite<br />
may send the general SC information.<br />
RED FLAG : Sends a general Red Flag to all competitors. Note that even Tracking, Oled remote and<br />
Elite may send the general Red flag.<br />
STOP and GO : Sends the Stop and Go order to one Oled. Set the competitor number and click OK<br />
DRIVE THROUGH : Sends the drive through order to one Oled. Select the competitor number and click<br />
OK<br />
CANCEL : Cancel last information sent. Select the competitor number of which the message should be<br />
deleted.<br />
SEND MESSAGE : Sends a personnal message on the bottom of one Oled Messenger. Select<br />
competitor number and click OK.<br />
CANCEL MESSAGE : Cancel last message sent. Select the competitor number of which the message<br />
should be deleted.<br />
In the main window you’ll get all information regarding the connected Oled Messenger.<br />
- Nr. : Competitor number<br />
- OLED: Oled Messenger serial number<br />
www.tagheuer-timing.com written <strong>by</strong> Marcus MAIERHOFER Page 42
- Pos.: Competitors position<br />
- Lap: Number of laps<br />
- Lap Time: Last Lap time<br />
- Gap: Difference<br />
- Penality:<br />
- Message: Message sent<br />
- ACK: Acknowledge<br />
- Time:<br />
On the bottom you’ll find how many Oled Messenger are detected.<br />
Your IP address, connected clients, the time of day and the General Message displayed.<br />
In the main Window you’ll see all connected Oled Messenger and miscellaneous information as:<br />
- Vehicle number<br />
- Oled Serial number<br />
- Position<br />
- Laps<br />
- Gap (previous car or between it’s best lap in Qualifying)<br />
- Penalties (if applied)<br />
- Message (last message sent)<br />
- Acknowledge signal (reception confirmation of all broadcasted messages/information)<br />
- Time of last information received<br />
www.tagheuer-timing.com written <strong>by</strong> Marcus MAIERHOFER Page 43
16.2. Elite.exe settings<br />
Enable the OLED Transmission on Elite and set the IP address of the computer were the Oled Messenger<br />
software is running. Remote port should be the same on OLED Messenger.exe<br />
Note that all computer should be on same network and gateway.<br />
If you are using the same computer (Elite V3 and Oled Messenger running on same computer) you should use<br />
the loopback address 127.0.0.1<br />
www.tagheuer-timing.com written <strong>by</strong> Marcus MAIERHOFER Page 44
17. Decoder Setting<br />
17.1. <strong>Software</strong> “Decoder Setting”<br />
This application allows you to set different parameters of the new decoder Elite “<strong>TAG</strong> <strong>Heuer</strong> <strong>by</strong><br />
<strong>Chronelec</strong>”.<br />
It allows you also to test communication (Ethernet, RS232),<br />
”New feature”<br />
It replaces the previous software “Test Decoder” provided <strong>by</strong> <strong>Chronelec</strong>.<br />
IMPORTANT<br />
Only with new generation of Decoder you can change the setting with the software.<br />
For Decoder Elite since serial number 968<br />
For Decoder Protime since serial number 2072<br />
For Decoder Distant since serial number 3049<br />
17.2. Elite Decoder<br />
The Decoder is a highly precise timing device which allows you to:<br />
- Identify the passing of transponders and associate with a passing time<br />
- The Elite decoder allows the management of speed and intermediate loops via RS485 or RF<br />
modem.<br />
- The Elite decoder memorize the transponder passing information internal memory<br />
- Sends passing information to a computer using our Elite V2 software or third party software.<br />
- The Elite decoder is equipped with an internal battery with autonomy up to 2 hours, operational<br />
with passive loops only.<br />
- The Elite decoder is specifically used in races that require a resolution of 1/1000th of a<br />
second.<br />
- The decoder has an Ethernet and RS232 interface for communication with the computer.<br />
www.tagheuer-timing.com written <strong>by</strong> Marcus MAIERHOFER Page 45
18. “Decoder Setting” – Commands<br />
18.1. Menu Option<br />
On the top – left, you find a menu “Option” which allow you to<br />
• Update the Decoder with a new Firmware<br />
1. You have to switch OFF the Decoder<br />
2. Press button ENTER and maintain it and Switch ON the Decoder<br />
3. Go into the Menu Option – Update, Select the file and press OK<br />
4. After the update, you have to switch OFF / ON the decoder<br />
• Change the language<br />
18.2. Decoder<br />
You have the possibility to communicate with the new decoder via<br />
• Ethernet protocol (IP Address)<br />
• RS232 (19200 bds)<br />
• Protocol: should be <strong>Chronelec</strong> v3 (2009)<br />
For the IP address, please refer to the chapter below (chapter 3.2)<br />
18.3. Commands<br />
You have the possibility to visualize the frames send <strong>by</strong> the decoder<br />
“STA” + Transponder ID = Loop STA<br />
“BOX” + Transponder ID = Loop BOX<br />
“STA 000255” = Input 1<br />
“BOX 000255” = Input 2<br />
www.tagheuer-timing.com written <strong>by</strong> Marcus MAIERHOFER Page 46
Several commands are available<br />
Start: Allows you to start decoder as during a race.<br />
This start could be done also with the small button “Enter” situate to the front face of<br />
the decoder.<br />
Stop: Allows you to stop decoder<br />
Status: Will display the status of the decoder<br />
The frame : [00:00'00" 43 02 25 05]<br />
00:00'00" Time<br />
42 Noise on STA loop<br />
02 Noise on BOX loop<br />
25 Level of detection STA<br />
15 Level of detection BOX<br />
Acknowledge On each passing frame you have can acknowledge it manually.<br />
Without this function, the frame will be resent automatically.<br />
Repeat Allows you to repeat the last frame<br />
Clear Clear the windows<br />
You have the possibility to change the level of detection STA and BOX<br />
To check your setting, press “Status”<br />
Important<br />
You have the possibility to see the setting and Status directly to the small LCD of<br />
the decoder<br />
Please refer to the chapter 4 of this document.<br />
18.4. Decoder Time<br />
This setting allows you to modify the time of the decoder.<br />
You can change manually the time <strong>by</strong> using<br />
• Time of your computer<br />
• Selected time<br />
To see result of this setting, use the button “Status”<br />
Important<br />
It is necessary to Stop / Start the decoder to take the Time set into the data frame.<br />
Note that you can also (in the Setting) get the GPS time (chapter 3.1)<br />
18.5. Decoder Date<br />
This setting allows you to modify the Date of the decoder.<br />
You can change manually the time <strong>by</strong> using<br />
• Date of your computer<br />
• Selected date<br />
www.tagheuer-timing.com written <strong>by</strong> Marcus MAIERHOFER Page 47
Note that you can also (in the Setting) get the GPS time (chapter 3.1)<br />
18.6. Distant decoder<br />
With this setting, you have the possibility to set the loop of the distant decoder.<br />
The loop of all distant decoder could be defined with this software.<br />
!! Coming soon!!<br />
18.7. Noise level<br />
Noise (STA) / (BOX) will show you on the value of the noise detected to each loop, without using the<br />
button “Status”.<br />
It is possible for any reason to send the “Status” automatically every 5 sec. It is very useful to check<br />
and visualize the noise level.<br />
www.tagheuer-timing.com written <strong>by</strong> Marcus MAIERHOFER Page 48
19. “Decoder Setting” – Settings<br />
This menu allows you to configure all available setting.<br />
Running Time to Time of the decoder<br />
ON: the decoder will be sending the frame with the time of the day.<br />
OFF: the decoder will send the frame with Start at Zero<br />
It is important to set this correctly. If your decoder is connected to some other timing devices<br />
(Chronoprinter for example) we are recommend to running with “Time of the Day” ON.<br />
Detect transponders on the maximum level of detection<br />
ON: the system will search the maximum of detection from the loop. It is specially used for<br />
the race where transponders are not in a fix position (example: roller, running, where<br />
RC transponder is located to the ankle.<br />
The system will wait that the transponder has passed completely the loop to calculate<br />
the maximum before to time the result.<br />
OFF: on all other case, where the transponders are in a fixe position (bike, MotorSport,<br />
Karting). In this setting, you have to adjust the level of detection (see chapter 2.2)<br />
This setting give higher precision if the level of detection is correctly set.<br />
GPS Synchronizsation<br />
You have the possibility to connect your decoder to a GPS antenna.<br />
Set the Time Zone before to Save value.<br />
You have the possibility to visualize on the Decoder, the status of the GPS (see chapter 4)<br />
www.tagheuer-timing.com written <strong>by</strong> Marcus MAIERHOFER Page 49
Print passing on the serial printer ”New feature”<br />
You have the possibility to print the passing frame directly from the Decoder.<br />
The connexion is<br />
GND : pin 10 of the SubD-15P<br />
Tx pin 3 of the SubD-15P<br />
Rx pin 4 of the SubD-15P<br />
Hence to our Multi-box decoder, you can connect directly our HL200 Serial printer directly to<br />
the Decoder<br />
WARNING<br />
You cannot get in same time the Printer ON and the Distant Decoder.<br />
We recommend to change the setting of the Serial Printer HL200<br />
SW 1 : OFF (UP) – 48 character per line<br />
Distants decoders connected with RS485 / RS232<br />
In standard, the communication between Elite Decoder and Distant Decoder is in RS485<br />
Hence, you have the possibility with option to communicate in RS232<br />
WARING<br />
You cannot get in same time the Distant Decoder and Printer ON set<br />
Distants decoders connected with fiber optic ”New feature”<br />
This new item is avalaible only in option (hardware option on the decoder)<br />
Generate a synchronization signal at each interval (min)<br />
You have the possibility to send a synchronize signal from the Decoder.<br />
The Pin 5 and 7 of the SubD-15p are using for that.<br />
!! Coming soon !!<br />
Synchronize running time at cells signal<br />
Language<br />
It is possible to synchronize decoder with other timing device with an external Impulse<br />
(Input 2) from Sub-D15P.<br />
You have to set the time you want to make a synchro signal, and connect a Manual Contactor<br />
on the Input 2.<br />
Once you have saved the configuration, you have to stop the decoder.<br />
On the next Impulse on Input 2, you will start the decoder and it will synchronize.<br />
Warning:<br />
If you stop the decoder and restart it without any change of the setting, you will<br />
synchronize the Decoder.<br />
www.tagheuer-timing.com written <strong>by</strong> Marcus MAIERHOFER Page 50
Allow the possibility to change language (in French and English only)<br />
Two language are available:English and French<br />
Tone loops<br />
Allows you change the tonality of the beep for each loop.<br />
Use the connector Audio on the front face of the decoder<br />
Read<br />
It allows you to read the setting of your decoder.<br />
Save<br />
It allows you to save the setting from “Decoder Setting” software to the Decoder.<br />
You have to use this, after changing setting.<br />
19.1. IP Settings<br />
You have the possibility to change the setting of IP Address of your decoder.<br />
For that you have to insure that your PC has a fix IP address.<br />
IP Address: The first 3 blocks (in my example: “169.254.031”) has to be similar between your PC<br />
and your decoder.<br />
The last block “200” has to be different between your PC and your decoder.<br />
Insure that no other material (Chronoprinter, Photo-finish) are connected to the LAN<br />
with the same IP addres.<br />
Mark: Should be always “255.255.255.000”<br />
Gateway: Allow to specify your router address<br />
Not useful if your computer is connected to a switch with the decoder.<br />
If not use, select:: “000.000.000.000”<br />
Remote host: Allow to specify your router address. It is the remote IP address which receives<br />
passing’s from decoder. You can specify a unique computer or a broadcast address. If<br />
you specify a broadcast address, all computers in the same network address will<br />
receive passing’s. For example if your network is 192.168.0.0 and your subnet is<br />
255.255.255.0, the broadcast address is 192.168.0.255<br />
www.tagheuer-timing.com written <strong>by</strong> Marcus MAIERHOFER Page 51
”New feature”<br />
Thanks to the new Decoder, it is today possible to receive on the SubD-15p connector, two inputs<br />
signal from Photocells, Start Gate or other detection devices.<br />
<strong>TAG</strong> <strong>Heuer</strong> <strong>Timing</strong> provide to simplify connection our “Multibox decoder” TCD-COM.<br />
Font:<br />
Back<br />
Input 1: Photocells<br />
Input 2: Photocells<br />
RS485 : communication with Distant Decoder<br />
Black: RS485 A<br />
Green: RS485 B<br />
SubD-9P: Pin 1: NC<br />
Pin 2: Tx RS232<br />
Pin 3: NC<br />
Pin 4: RS485 A<br />
Pin 5: GND<br />
Pin 6: NC<br />
Pin 7: RS485 B<br />
Pin 8: NC<br />
Pin 9: NC<br />
SubD-15P<br />
Copy of the SubD-15P of the Decoder<br />
www.tagheuer-timing.com written <strong>by</strong> Marcus MAIERHOFER Page 52
20. The decoder<br />
The new decoder has not the possibility to change setting directly from the Decoder.<br />
You have to use “Decoder Setting” software to change.<br />
20.1. General information<br />
20.1.1. Noise<br />
The noise is an indication of a higher interference level received <strong>by</strong> the system.<br />
- A loop with a noise level of 0 corresponds to perfect so the decoder will detect the<br />
transponders at the highest.<br />
- A loop with a noise level between 0 and 35 allows the decoder to detect the transponder<br />
in normal use without problems.<br />
- A loop with a noise level between 35 and 45: there is a risk that the decoder will fail to<br />
detect a transponder.<br />
- A loop with a noise level of over 45: there is very little chance that the decoder will detect<br />
the transponder on the loop.<br />
If the noise level is higher than 45, it is necessary to check all the of the system cables<br />
including (loop wire, resistance of the passive loop, coaxial cable, BNC connectors…) and<br />
make sure there is no electronic equipment within 2 meters of the loop ( LAN and printer<br />
cables, short-wave radio station, electricity or generator near any of the cables or timing<br />
loops., …) which may be the cause of increased noise.<br />
Note:<br />
20.1.2. Level of detection<br />
A decoder, without connected loop can already show a noise level between 2<br />
and 8 points.<br />
The important thing is to check the detection range of the transponder directly<br />
over the loop.<br />
You can change this parameter in the setting page of the decoder to increase the accuracy.<br />
- 0 is the maximum sensitivity of loop / transponder detection<br />
- 95 is the minimum sensitivity of loop / transponder detection (usually with this setting, you<br />
will no longer detect the transponder).<br />
By default the decoder is already programmed with a level of detection of 10.<br />
www.tagheuer-timing.com written <strong>by</strong> Marcus MAIERHOFER Page 53
20.2. Front panel of the Elite decoder<br />
Jack plug: MAN<br />
Used to connect a Manual Contactor (HL18) to give impulses manually.<br />
Warning: this input could be not use as precise input (only for manual purpose).<br />
Received frame with ID Nr. 255<br />
Jack plug Audio<br />
Allows you to connect computer speakers or headset in order to listen the beeps emitted at<br />
each transponder passing.<br />
You can set the beeps frequency in the menu “TONALITY BEEPS” (setting from “Decoder<br />
Setting”)<br />
LED STA Flashes red when a passage of a transponder is identified <strong>by</strong> the “STA” loop.<br />
Box Flashes red when a passage of a transponder is identified <strong>by</strong> the “BOX” loop”.<br />
Tx Flashes red every 10 seconds. It is to confirm that the decoder sent the<br />
synchronization to the distant decoder (only with Elite decoder) Led Indicator “Tx” will<br />
flash red when a passage of a transponder is identified <strong>by</strong> the intermediate loops. This<br />
led indicator also allows you to visualize the number of intermediate loops connected<br />
to the decoder.<br />
ON Indicated that your Decoder is ON (on battery or on the sector)<br />
”New feature”<br />
LCD Two lines display allows you to get the setting of your decoder (without “Decoder Setting”<br />
connected.<br />
Main Menu<br />
A B<br />
C D<br />
A: Race Time information<br />
B: Time of the day<br />
C: Status: Loop / Level of reception (last passing)<br />
D: Transponder serial number (last passing)<br />
www.tagheuer-timing.com written <strong>by</strong> Marcus MAIERHOFER Page 54
Menu button<br />
This button allows you to navigate into the different setting information.<br />
It automatically comes back to the main display after couple of second.<br />
Main menu:<br />
Each time you press the Menu button, you change as follow<br />
1. Loops Noise (value BOX / STA)<br />
2. Loops Level (value BOX / STA)<br />
3. Detect Max (Yes / No)<br />
Prot. (protocols of the decoder)<br />
4. GPS Sync (Yes / No)<br />
Time of Day (Yes / No)<br />
5. Time Zone (value)<br />
GPS Status (Wait / OK)<br />
6. IP Address (value)<br />
7. Subnet (value)<br />
8. Gateway (value)<br />
9. Remote Host (value)<br />
10. Print (Yes / No)<br />
Ext. Sync (Yes / No)<br />
11. In Sec (Yes / No)<br />
Time Sync (value)<br />
12. RS Inte. (Yes / No)<br />
Opto Into (Yes / No)<br />
13. STA Tone (value)<br />
BOX Tone (value)<br />
14. MAN Tone (value)<br />
Cell Tone (value)<br />
15. BXX Tone (value)<br />
16. ID / Version<br />
Power (ON / OFF) – if the decoder work on battery or on sector<br />
Button Enter<br />
Allows you to Start the decoder manually<br />
Internal Memory<br />
---------------------------- coming soon------------------------------<br />
www.tagheuer-timing.com written <strong>by</strong> Marcus MAIERHOFER Page 55
20.3. Rear panel of the Elite decoder<br />
A : 12Vdc Power supply connection<br />
B : RJ45 connection (192.168.0.10 default address) to computer. Cannot be used at the same time<br />
as the RS232<br />
C : RS232 connection (19200,N,8,1) Cannot be used at the same time as the RJ45!<br />
D : DB 15 Auxiliary connection (Pinout available upon request)<br />
E : BOX input loop (Option : Often used for Pit In/Split timing)<br />
F : STA input loop (often used for Start/finish line)<br />
G : GPS connection<br />
20.4. Pin-out DB15<br />
1 : Input Cells 1 +<br />
2 : Input Cells 2 +<br />
3 : TX RS232<br />
4 : RX RS232<br />
5 : +12 V<br />
6 : Resitance RS485<br />
7 : Output 1<br />
8 : Output 2<br />
9 : Input Cells 1 -<br />
10 : 0 V<br />
11 : 0 V<br />
12 : Input Cells 2 -<br />
13 : +12 V<br />
14 : RS485 A<br />
15 : RS485 B<br />
www.tagheuer-timing.com written <strong>by</strong> Marcus MAIERHOFER Page 56<br />
1<br />
Pin-out for input cells<br />
12V<br />
Input 1<br />
Input 2
21. Decoder technical specification<br />
Specification:<br />
� GPS Synchronization<br />
� Intermediate loops (up to 10) – option up to 32 loops<br />
� Clock stability : Oscillator TCXO 0.5 ppm<br />
� Power : 12 VDC via adapter<br />
� Temperature range : -20 à 55 °C (-4 à 131 °F)<br />
� Dimensions : 160 x 100 x 52 mm (6.3 x 3.9 x 2 in)<br />
� Resolution : 0.001 s<br />
Detection loop :<br />
� Maximum width of the track (passive loop) : 25 m (82 ft)<br />
� Maximum width of the track (active loop) : 10 m (33 ft) I throught this was 15 meters<br />
� Maximum length of the coaxial cable (passive loop) : 100 m (330 ft)<br />
� Maximum length of the coaxial cable (active loop) : 50 m (164 ft)<br />
Over those distances, use Distant Decoder to insure good timing<br />
22. Transponders<br />
22.1. RK, LS, Elite, Elite Pro installation<br />
• The position of the rechargeable transponder or a wire transponder is the same<br />
• The transponder must be place in the same position in all vehicles<br />
• The transponder must be perpendicular to the circuit, because it uses a directional transmission<br />
To ensure the proper functioning of the transponder, no metal or carbon part should be place between<br />
the transponder and the track<br />
Wired Transponder as LS Wire or Elite Wire should be powered on +12V continuous power<br />
Red or brown wire: + 12V<br />
Black or Blue wire: 0V<br />
www.tagheuer-timing.com written <strong>by</strong> Marcus MAIERHOFER Page 57
22.2. Passive Transponder (RCS and RC)<br />
<strong>TAG</strong> <strong>Heuer</strong> provides two type of brackets:<br />
The Neoprene strap and the Bike bracket<br />
As the Active tranponder, the beam of the<br />
www.tagheuer-timing.com written <strong>by</strong> Marcus MAIERHOFER Page 58
23. Loop Installation<br />
23.1. Passive loops (LS, Elite Transponder)<br />
ELITE PROTIME<br />
or<br />
or<br />
BNC<br />
Connector<br />
RS232 or TCP/IP connection<br />
Max. width : 25 m (82 ft)<br />
Cable 1 conductor minimum<br />
0.75 mm²<br />
TRACK<br />
<strong>Timing</strong> Center<br />
TIMING PC<br />
65 cm (25 in) for<br />
asphalt track<br />
80 cm (32 in) for<br />
dirt track<br />
Resistance : 470 Ohms<br />
www.tagheuer-timing.com written <strong>by</strong> Marcus MAIERHOFER Page 59
23.2. Active Loops (RCS, RC, RCT and RK Transponder)<br />
ELITE PROTIME<br />
STA<br />
or<br />
or<br />
BNC<br />
connector<br />
STA<br />
Black Box<br />
Led flashes to confirm that<br />
the loop is connected and<br />
powered <strong>by</strong> the decoder<br />
RS232 or TCP/IP connection<br />
Max. width : 25 m (82 ft)<br />
Wire loop<br />
Cable 1 conductor minimum 0.75 mm²<br />
<strong>Timing</strong> Center<br />
TIMING PC<br />
In some case, depending the speed, transponder position etc. you may set the loop width at 1 meter<br />
www.tagheuer-timing.com written <strong>by</strong> Marcus MAIERHOFER Page 60<br />
80 cm (32 in)
Question / Answer<br />
I can not detect the decoder.<br />
Check the COM port or IP address of the decoder. Check the protocol selected.<br />
If you have a red dongle, you can not detect the decoder. One possible remedy is to click on test button at the<br />
same time that the PC has the blue dongle.<br />
What does STA and BOX mean at bottom left ?<br />
STA means noise (disturbances) on the main loop (START) and BOX means noise on the pit lane loop.<br />
I receive BOX passings.<br />
You probably have an inverted loops decoder. The BOX loop is normally used for the pit lane.<br />
My classification is false.<br />
Check the type of classification of the race. You may have selected classification on best lap, instead of being<br />
on the total laps (or vice versa).<br />
You may have to check whether you have staggered start enabled, if your race is not a staggered race.<br />
All passings are orange and I have no classification.<br />
The minimum lap time for passings is not respected. Edit the race settings to change the minimum time and<br />
confirm all orange passings.<br />
Laps of the 1st passings are not calculated.<br />
Edit the race settings to consider the 1st first passing as full lap. To recalculate the classification, click on race<br />
menu and then Recalculate Classification.<br />
There is no display on the TV monitor.<br />
Check the display settings for the graphics card in Windows; you must activate the option to extend the<br />
Windows desktop.<br />
Check that you have turned the channel onto TV display settings in the software.<br />
Distant decoders are recognized <strong>by</strong> the Elite decoder but get no passings on intermediates into Elite<br />
v3<br />
Communication is working, check that the option « Display intermediates » is activated in the timing window<br />
« Display intermediates and photocells passing »<br />
www.tagheuer-timing.com written <strong>by</strong> Marcus MAIERHOFER Page 61
<strong>TAG</strong> <strong>Heuer</strong><br />
PROFESSIONAL TIMING<br />
6A Louis-Joseph Chevrolet<br />
2300 la Chaux-de-Fonds<br />
Switzerland<br />
Tel : 032 919 8000<br />
Fax : 032 919 9026<br />
E-mail: info@tagheuer-timing.com<br />
Http: //www.tagheuer-timing.com<br />
www.tagheuer-timing.com written <strong>by</strong> Marcus MAIERHOFER Page 62