OPERATING MANUAL - Bauer
OPERATING MANUAL - Bauer
OPERATING MANUAL - Bauer

You also want an ePaper? Increase the reach of your titles
YUMPU automatically turns print PDFs into web optimized ePapers that Google loves.
Version: X / 2005<br />
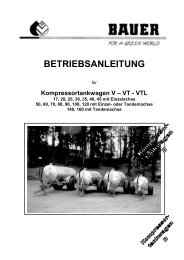
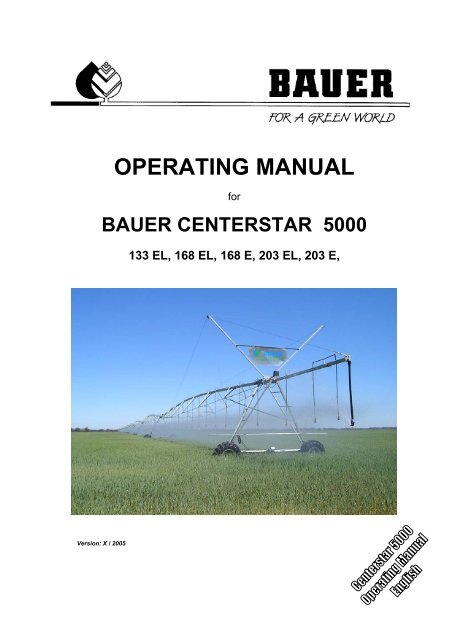
<strong>OPERATING</strong> <strong>MANUAL</strong><br />
for<br />
BAUER CENTERSTAR 5000<br />
133 EL, 168 EL, 168 E, 203 EL, 203 E,
Introduction<br />
Thank you for buying BAUER CENTERSTAR 5000 !<br />
The present manual is a very important document that describes how to operate and service BAUER<br />
CENTERSTAR 5000.<br />
This manual describes the system as detailed as possible. If you need still more information, please contact your<br />
dealer or turn directly to BAUER in Voitsberg.<br />
Please note that the content of this manual neither constitutes part of nor alters in any way any previous or<br />
existing agreement, promise or legal relationship. BAUER’s commitment is based solely on the respective<br />
purchase contract which also contains the complete and only valid warranty agreement. Said contractual<br />
warranty is neither extended nor limited by the content of this manual.<br />
All information contained in the present manual is based on the latest product details available at the time of<br />
printing.<br />
BAUER reserves the right to change without notice without assuming any liability!<br />
BAUER CENTERSTAR 5000 is designed for highest performance safety and reliability provided it is operated in<br />
accordance with the present operating instructions.<br />
Therefore you should study this manual thoroughly before starting your BAUER CENTERSTAR 5000 !<br />
Strictly observe all instructions pertaining to system handling, operation and service!<br />
On this condition, BAUER CENTERSTAR 5000 will operate to your satisfaction for many years!<br />
Non-observance of this manual may cause personal injury or damage the equipment!<br />
This manual is to be considered an integral part of BAUER CENTERSTAR 5000. Suppliers of both new and used<br />
systems are advised to put down in writing that they delivered the manual together with the system.<br />
Please make this manual available to your staff. State the pump type and serial number of your<br />
BAUER CENTERSTAR 5000 in all inquiries, correspondence, warranty problems, or parts orders.<br />
We wish you a lot of success with BAUER CENTERSTAR 5000 !<br />
Operating Manual for BAUER CENTERSTAR 5000 II
Owner of the machine<br />
This machine with the serial number<br />
Belongs to<br />
Name<br />
Address<br />
residence<br />
Telephone number<br />
Dealer<br />
Service – technician<br />
Telephone number<br />
Operating Manual for BAUER CENTERSTAR 5000<br />
<strong>Bauer</strong> dealer<br />
III
Handing over record<br />
A duly test run has been done in the presence of the client or a nominated agent of the client.<br />
The client confirms by signing that the machine has been test run before taken over. A copy pf<br />
the handing over record needs to be sent back to the company BAUER Ges.m.b.H.<br />
Comments:<br />
For the client For the company BAUER GMBH<br />
______________________________ ______________________________<br />
Operating Manual for BAUER CENTERSTAR 5000 IV
Product details<br />
Date of delivery .......................................................................................<br />
Date of initial operation .......................................................................................<br />
Type BAUER CENTERSTAR 5000 ....................................................................<br />
Serial number ..............................................................................................................................<br />
Central tower fixed .............................. towable ...............................<br />
Configuation of span ..........................................................................................................................<br />
Spans fixed ..................................... towable...............................<br />
Booster pump yes .......................................... no ....................................<br />
End rain gun yes.......................................... no ....................................<br />
Equipment .........................................................................................................<br />
Comments .........................................................................................................<br />
Operating Manual for BAUER CENTERSTAR 5000<br />
.........................................................................................................<br />
.........................................................................................................<br />
.........................................................................................................<br />
Producer of the machine: Röhren- und Pumpenwerk BAUER Ges.m.b.H.<br />
Kowaldstrasse 2<br />
A – 8570 Voitsberg<br />
Tel.: +43 3142 200 – 0<br />
Fax: +43 3142 200–320 / -340<br />
e-mail: sales@bauer-at.com<br />
www.bauer-at.com<br />
Dealer: Name: ………………………………………………………………….<br />
Address: ………………………………………………………………….<br />
………………………………………………………………….<br />
Tel. / Fax: ………………………………………………………………….<br />
V
Index<br />
1 GENERAL INSTRUCTIONS........................................................................................................................................ 1<br />
2 WARNING SYMBOLS.................................................................................................................................................. 2<br />
3 GENERAL....................................................................................................................................................................... 4<br />
4 GENERAL INSTRUCTIONS FOR SAFETY AND ACCIDENT PREVENTION .................................................. 4<br />
5 SAFETY PRECAUTIONS FOR CENTERSTAR 5000 .............................................................................................. 5<br />
5.1 GROUNDING .......................................................................................................................................................... 5<br />
5.2 ELECTRICAL SYSTEM.......................................................................................................................................... 5<br />
5.3 MECHANICAL SYSTEM ....................................................................................................................................... 5<br />
6. TECHNICAL DESCRIPTION...................................................................................................................................... 6<br />
7 PIVOT PANEL ............................................................................................................................................................... 8<br />
7.1 STANDARD BUILT-IN COMPONENTS............................................................................................................... 8<br />
7.2 TOWER BOX ......................................................................................................................................................... 11<br />
7.2.1 MICROSWITCH ADJUSTMENT.................................................................................................................... 11<br />
1. Loosen the screws ................................................................................................................................................... 11<br />
2. To set the control switch, rotate the switching cam until the roller rests in the notch “A”. Adjust the switch in the<br />
boltholes towards the switching cam until the control switch (microswitch) actuates (clicks). Thereby the bracket of the<br />
switch lies near the switch housing................................................................................................................................. 11<br />
To set the safety switch, rotate the switching cam until the roller rests in notch “B”. Move the switch to the cam until<br />
you hear the switching actuating (click). ........................................................................................................................ 11<br />
3. Tighten the screws................................................................................................................................................... 12<br />
4. Check the switching points, repeat the setting procedure, as needed..................................................................... 12<br />
7.3 TERMS ................................................................................................................................................................... 12<br />
7.4 ALIGNMENT OF TOWERS ................................................................................................................................. 13<br />
7.5 TOWER BOX ADJUSTMENT.............................................................................................................................. 14<br />
7.6 ALIGNMENT CHECK-UP .................................................................................................................................... 15<br />
7.7 INSTRUCTIONS FOR DETERMINING TRACKS .............................................................................................................. 16<br />
8 INITIAL START-UP.................................................................................................................................................... 17<br />
8.1 START-UP.............................................................................................................................................................. 17<br />
8.2 SHUT-OFF PROCEDURE..................................................................................................................................... 18<br />
9 MAINTENANCE INSTRUCTIONS........................................................................................................................... 19<br />
9.1 SERVICE-RANGES..................................................................................................................................................... 19<br />
9.1.1 Service plan..................................................................................................................................................... 20<br />
9.1.2 Post-season maintenance ................................................................................................................................ 21<br />
9.1.3 Pre-season maintenance ................................................................................................................................. 21<br />
9.1.4 Pretensioning forces and tightening values of bolts ....................................................................................... 22<br />
10 TROUBLESHOOTING ........................................................................................................................................... 23<br />
10.1 RESTART AFTER DOGLEGGING – WITH TOWER ALIGNMENT SWITCH ............................................... 24<br />
10.2 RESTART AFTER DOGLEGGING – WITHOUT TOWER ALIGNMENT SWITCH ....................................... 25<br />
11 TECHNICAL DATA ................................................................................................................................................ 27<br />
11.1 DIMENSIONS OF BAUER CENTERSTAR......................................................................................................... 27<br />
11.2 GEARBOX AND DRIVE MOTORS................................................................................................................................. 29<br />
11.2.1 Gearbox........................................................................................................................................................... 29<br />
11.2.2 Drive motor ..................................................................................................................................................... 29<br />
12 OPTIONAL FEATURES ......................................................................................................................................... 30<br />
12.1 AUTOMATIC CIRCLE STOP............................................................................................................................... 30<br />
12.2 SECTOR CONTROL WITH AUTOMATIC REVERSE – AUTOMATIC SECTOR STOP ................................................ 30<br />
Operating Manual for BAUER CENTERSTAR 5000 VI
12.3 END STOP OR AUTOMATIC REVERSE ............................................................................................................30<br />
12.4 LOW-PRESSURE SHUT-OFF...............................................................................................................................31<br />
12.5 AUTOMATIC PUMP UNIT SHUT-OFF...............................................................................................................31<br />
12.6 AUTOMATIC ELECTRIC SHUT-OFF VALVE CONTROL..............................................................................31<br />
12.7 FERTILISER INJECTION PUMP..........................................................................................................................31<br />
12.8 ENDGUN WITH BOOSTER PUMP......................................................................................................................31<br />
12.9 END GUN SECTOR SHUT-OFF ...........................................................................................................................32<br />
12.10 RUNNING CONTROL.......................................................................................................................................32<br />
12.11 TOWER ALIGNMENT SWITCH ......................................................................................................................32<br />
12.12 RUNNING LIGHT..............................................................................................................................................32<br />
13 REPOSITIONING OF CENTER STAR.................................................................................................................32<br />
GENERAL INSTRUCTIONS ...........................................................................................................................................32<br />
13.1. TOWING THE CENTERSTAR ON THE PIVOT SIDE - FORWARD TOW .................................................33<br />
13.1.1. Turning the tower wheels.................................................................................................................................33<br />
13.1.2. Mounting the tow cable on pivot with skids.....................................................................................................34<br />
13.1.3. Mounting the tow cables on 4-wheel pivot ......................................................................................................35<br />
13.2. TOWING THE CENTERSTAR ON THE END TOWER – REVERSWE TOW ..............................................36<br />
13.2.1. Turning the tower wheels.................................................................................................................................36<br />
14 ELECTRICAL WIRING DIAGRAMS...................................................................................................................38<br />
14.1. PIVOT PANEL ........................................................................................................................................................38<br />
14.1.1. Pivot panel Universal - infeed ........................................................................................................................38<br />
14.1.2. Pivot panel Universal - control ......................................................................................................................38<br />
14.1.3. Pivot panel Universal – wiring diagram ........................................................................................................38<br />
14.1.4. Pivot panel – Universal Pro– infeed................................................................................................................38<br />
14.1.5. Pivot panel - Universal Pro - control ..............................................................................................................38<br />
14.1.6. Pivot panel - Universal Pro – wiring diagram ................................................................................................38<br />
14.1.7 Control centre - Universal - Autoreverse – feeding.........................................................................................38<br />
14.1.8 Control centre - Universal - Autoreverse – control.........................................................................................38<br />
14.1.9 Control centre - Universal - Autoreverse – connecting diagram .........................................................................38<br />
14.2. BOOSTER PUMP FOR ENDGUN................................................................................................................................38<br />
14.3. TOWER BOX..........................................................................................................................................................38<br />
14.3.1. Tower box standard .........................................................................................................................................38<br />
14.3.2. Tower box with tower alignment switch ..........................................................................................................38<br />
14.3.3. Alignment control with end tower monitoring.................................................................................................38<br />
14.3.4. Alignment control with tower alignment switch and end tower monitor.........................................................38<br />
14.3.5. End control standard .......................................................................................................................................38<br />
14.3.6. End control with tower alignment switch ........................................................................................................38<br />
14.3.7. End control standard with EMERGENCY STOP ............................................................................................38<br />
14.3.8. End control with EMERGENCY STOP and tower alignment switch ..............................................................38<br />
14.3.9. End control standard with Autoreverse ...........................................................................................................38<br />
14.3.10. End control with Autoreverse and alignment control switch.......................................................................38<br />
14.1.1.Standard UNIVERSAL– infeed.............................................................................................................................39<br />
14.1.2 - Standard UNIVERSAL – control........................................................................................................................40<br />
14.1.3 - Standard UNIVERSAL– wiring diagram ...........................................................................................................41<br />
14.1.4 - Pivot panel – Universal Pro – infeed .................................................................................................................42<br />
14.1.5 -Pivot panel – Universal Pro - control................................................................................................................43<br />
14.1.6 -Pivot panel -Universal Pro – wiring diagram....................................................................................................44<br />
14.1.7 –Control centre – Universal Autoreverse - feeding..............................................................................................45<br />
14.1.8 Control centre – Universal Autoreverse – control ...............................................................................................46<br />
14.1.9 Control centre – Universal Autoreverse – connecting diagram...........................................................................47<br />
14.2 - Booster pump for endgun ..................................................................................................................................48<br />
15 SERVICE – PROOF .................................................................................................................................................59<br />
16 CONFORMITY CERTIFICATE ............................................................................................................................63<br />
Operating Manual for BAUER CENTERSTAR 5000<br />
VII
1 GENERAL INSTRUCTIONS<br />
CE SYMBOL<br />
NOTE!<br />
The CE symbol that has to be affixed on the machine by the manufacturer outwardly demonstrates<br />
compliance of the machine with the directives for machines and other relevant EU directives.<br />
EU conformity certificate (see Annex)<br />
WARNING !<br />
CAUTION !<br />
This “Warning” symbol refers to important safety instructions in this manual.<br />
Whenever you see this symbol be aware of possible injury hazards. Read the note<br />
following the symbol very carefully and inform the other operators accordingly.<br />
Non-observance of this instruction may damage or destroy the machine or<br />
individual components.<br />
It is very important to observe this note or instruction carefully!<br />
Qualified operators<br />
These are persons who on behalf of their training, experience and instruction as well as their knowledge of relevant<br />
standards, rules, precautions to be taken for accident prevention, and prevailing operating conditions, have been<br />
authorised by the person in charge of plant safety to perform the respective tasks required, and in doing so are<br />
able to recognise and avoid potential hazards. Among other things, knowledge of first-aid procedures is also<br />
required.<br />
Product liability<br />
According to the product liability law every farmer is an entrepreneur!<br />
According to §9 PHG (Product Liability Law), liability for damage to corporeal things caused by defective products<br />
is expressly excluded. This exclusion of liability also applies to parts not manufactured by BAUER itself but<br />
purchased from external suppliers.<br />
Duty to furnish information<br />
Even if he passes on the machine to a new owner later-on, the customer is obliged to hand on the operating<br />
manual to the new owner, too. The receiver of the machine must be instructed with reference to the mentioned<br />
regulations.<br />
Intended use<br />
• BAUER CENTERSTAR 5000 has been constructed exclusively for use in normal irrigation (intended use).<br />
• Any employment beyond this normal use is considered non-conforming. The manufacturer is not liable for<br />
damage resulting from such non-conforming use, the sole liability for damage from non-conforming use is with<br />
the user.<br />
• Intended use also includes compliance with manufacturer’s operating, maintenance and service instructions.<br />
• BAUER CENTERSTAR 5000 may be used and operated only by persons who are familiar with the system and<br />
aware of the hazards involved.<br />
• Al l relevant rules for accident prevention as well as any other generally accepted specifications and regulations<br />
relating to safety, work medicine and traffic law must be strictly observed.<br />
• Unauthorised modifications on the machine release the manufacturer from liability for damage resulting<br />
therefrom.<br />
Operating Manual for BAUER CENTERSTAR 5000 1
2 WARNING SYMBOLS<br />
Danger points on the pivot system are specifically marked by safety stickers. These stickers must be affixed at the<br />
mentioned points clearly visible and serve for protection of persons working on or near the system.<br />
1.<br />
2.<br />
3.<br />
4.<br />
WARNING !<br />
Study and observe the manual and all safety instruction carefully before you put the system<br />
into operation.<br />
WARNING !<br />
Before maintenance and repair work, always stop the system, disconnect all power, and read<br />
the operating manual.<br />
WARNING !<br />
1. This system is powered by 400 Volts!<br />
Danger of electrical shock / injury hazard !<br />
2. Do not attempt to check any components while the system is live!<br />
3. Open the inner pivot panel door only when main disconnect is OFF.<br />
WARNING !<br />
1. The working range of the pivot must always be at a safe distance from electrical power<br />
lines.<br />
2. Pull towable systems only at a safe distance from electrical power lines.<br />
Make sure that the water jet from spray nozzles and endgun does not hit electrical lines.<br />
Operating Manual for BAUER CENTERSTAR 5000<br />
2
5.<br />
6.<br />
WARNING !<br />
The system can start automatically. Always keep a safe distance from the towers.<br />
WARNING !<br />
1. Do not remove shaft guards.<br />
2. When repair work is performed on the system, make sure that system cannot start<br />
running automatically. Disconnect the complete system from power.<br />
Operating Manual for BAUER CENTERSTAR 5000<br />
3<br />
4,5,6<br />
3<br />
2<br />
4<br />
1<br />
3<br />
3
3 GENERAL<br />
BAUER CENTERSTAR 5000 is an irrigation system rotating around a fixed centre (pivot tower) and thereby<br />
irrigating a full circle or a part circle.<br />
The boom elements (towers, spans) are driven electrically.<br />
The joints (tower couplings) mounted between the spans allow horizontal and vertical angular deviation between<br />
the individual boom elements so that the system can adjust perfectly to existing site conditions.<br />
Electric alignment controls between the spans control the horizontal angular deviation and ensure that the system<br />
runs in a straight line.<br />
Through varying spray nozzle set-ups and system speeds it is possible to tailor the water application exactly to all<br />
possible plant and soil requirements.<br />
4 GENERAL INSTRUCTIONS FOR SAFETY AND ACCIDENT<br />
PREVENTION<br />
Check the operational safety of the machine before every star.<br />
1. In addition to the instructions in this manual, be sure to observe all specifications generally valid for safety and<br />
accident prevention!<br />
2. The warning signs and notes affixed to the machine contain information essential to safe operation. Observing<br />
them serves your own personal safety!<br />
3. Do not start the machine unless all guards and safety devices are mounted completely and in proper working<br />
position!<br />
4. Acquaint yourself with all system components and controls as well as their respective functions, before you start<br />
to work. It is too late for this when the system is already running!<br />
5. Check the vicinity of the system before start-up (children!). Make sure that sight is unobstructed!<br />
6. For towing, couple the device according to the instructions and fix it only at the prescribed devices!<br />
Electrical system check-up<br />
1. Before the first start-up, check the electrical system and ensure that the installation complies with the safety<br />
requirements.<br />
2. Check the electrical system visually before every start-up.<br />
3. All work beyond normal maintenance of the system is to be performed by a qualified service person only!<br />
4. Never repair or service any part of the before all power has been disconnected!<br />
Maintenance<br />
- As a rule, maintenance and cleaning work as well as repairs of malfunctions may be done only with the drive<br />
and the motor turned off!<br />
- Check proper seat of nuts and screws regularly, and tighten them, if needed!<br />
- Dispose of oil, grease, and filters in accordance with regulations.<br />
- Always disconnect system frompower before starting any work on the electrical system!<br />
- Before electrical welding on the system itself or built-on components, disconnect the mains or generator supply<br />
cable!<br />
- Spare parts must meet minimum technical requirements by the manufacturer of the device.! This is guaranteed<br />
by original equipment parts!<br />
Operating Manual for BAUER CENTERSTAR 5000<br />
4
5 SAFETY PRECAUTIONS FOR CENTERSTAR 5000<br />
In addition to the GENERAL INSTRUCTIONS FOR SAFETY AND ACCIDENT PREVENTION, the following safety<br />
principles must be observed for operating BAUER CENTERSTAR 5000.<br />
5.1 GROUNDING<br />
WARNING !<br />
THE PIVOT SYSTEM MUST BE GROUNDED COMPLETELY!<br />
1. All metal parts of the system must be connected with each other, all tower couplings must be bridged with a<br />
cable.<br />
2. The entire metal structure of the Pivot must be connected and grounded at the pivot tower with an earthing rod<br />
or earthing bar in such a manner that the grounding resistance according to the legal code is reached.<br />
3. In addition, the yellow-green protective conductor lead along with the power supply must be connected to the<br />
grounding terminal in the control panel and therefore grounded properly.<br />
4. Dimensioning of grounding, grounding nail or grounding bar must be executed by a qualified electrical<br />
contractor.<br />
5. For towable systems, suitable grounding connection must be provided at every pivot centre. In every new<br />
system setting the grounding must be connected firmly with the pivot tower.<br />
5.2 ELECTRICAL SYSTEM<br />
WARNING !<br />
Since system is powered by 400V, always practice extreme caution when dealing with the electrical system<br />
and the electric drive !<br />
1. Before working on system electrical components, make sure the system is disconnected from all poles and<br />
sources.<br />
2. Provide a lock-out at the main disconnect to protect yourself against unintentional reclosing.<br />
3. Verify safe isolation from supply.<br />
4. Never repair or short-circuit a fuse by means of a wire or any other item.<br />
5. Immediately replace all wires with defective insulation.<br />
6. Short-circuiting of system safety circuit is to be done only by a qualified person and only for the purpose of<br />
realigning a span.<br />
5.3 MECHANICAL SYSTEM<br />
WARNING !<br />
1. Never service or repair any part or system component while the plant is operating.<br />
2. Always disconnect the system from power before starting any maintenance work. Turn the main disconnect to<br />
“0” and lock the switch to prevent unintentional reclosing. Do not depend on others to disconnect the power –<br />
do it yourself!<br />
3. Before you start, make sure that all persons have left the operating range of the system !<br />
4. Make sure that no objects or vehicles are in or near the system tracks when system is running/starting to<br />
operate.<br />
5. When the system is operating the towers come on and off automatically, therefore keep a safe distance from<br />
the towers.<br />
Operating Manual for BAUER CENTERSTAR 5000<br />
5
6. Never step on the system while it is running.<br />
7. Utmost care is required by the operator when spans are aligned.<br />
8. Always turn off the system and the water supply before working on sprinklers or spray nozzles.<br />
9. Use adequate means of access (ladder, elevating platform) for work on sprinklers or spray nozzles.<br />
10. Proceed with the utmost caution when system is working near or under electric power lines. Make sure that<br />
neither the pivot system nor the water jets get in contact with live wires.<br />
11. When towing movable systems you have to make sure that the system does not get in contact with a power<br />
line.<br />
12. Make sure that no neighbouring plots or roads are wetted by the endgun. This could cause damage or<br />
accidents.<br />
13. If fertilisers or other chemicals are added to the irrigation water, avoid the mist and do not inhale it.<br />
6. TECHNICAL DESCRIPTION<br />
1 Slipring collector<br />
2 Tower coupling<br />
3 Pivot panel<br />
4 Truss rod<br />
5 Bracing angle<br />
6 Pipe<br />
7 Tower brace<br />
8 Wheel base<br />
9 Driving motor<br />
10 Drive shaft<br />
11 Tower box<br />
12 End control<br />
13 Drive tower coupling<br />
14 Transmission device<br />
Operating Manual for BAUER CENTERSTAR 5000<br />
6
PIVOT COMPONENTS<br />
PIVOT<br />
Fixed centre of the system around which CENTERSTAR 5000 rotates.<br />
PIVOT PANEL<br />
System controlling and monitoring device<br />
COLLECTOR<br />
Electrical connection by means of slip rings between the fixed pivot and the mobile spans.<br />
PIVOT COUPLING<br />
Vertically movable joint between pivot and first span.<br />
SPAN<br />
Arc-shaped truss structure consisting of pipes, truss rods and bracing angles.<br />
PIPE<br />
Water-conducting part of the machine.<br />
TRUSS ROD<br />
Round stock – connects the bracing angles.<br />
BRACING ANGLES<br />
Angle section – connects pipe and truss rods.<br />
TOWER<br />
Provides the electromechanical drive of the system and carries the span weight.<br />
WHEEL BASE<br />
Tower base with driving motor and gearbox.<br />
TOWER BRACING ANGLE<br />
Angle section – connects span and wheel base.<br />
DRIVE MOTOR<br />
Electric motor with reducing gear.<br />
DRIVE SHAFT<br />
Cardan joint between drive motor and gearbox with flexible intermediate element.<br />
GEARBOX<br />
Transmits the torque of the drive motor onto the wheels.<br />
TOWER COUPLING<br />
Joint between the spans. Possible articulation: up to 30 %.<br />
ALIGNMENT CONTROL<br />
Tower control system that monitors horizontal angular deviation between the spans and switches the drive motors.<br />
OVERHANG<br />
Overhanging part from last tower to system end.<br />
ENDGUN<br />
Wide-range sprinkler at the end of the overhang serves for extra spraying system spraying range.<br />
BOOSTER PUMP<br />
Electric pump on the last tower for increase of pressure to endgun.<br />
Operating Manual for BAUER CENTERSTAR 5000<br />
7
7 PIVOT PANEL<br />
Design and materials according to ÖVE and VDE standard, built-in components correspond with IEC standard as<br />
well as VDE specifications.<br />
7.1 STANDARD BUILT-IN COMPONENTS<br />
Operating Manual for BAUER CENTERSTAR 5000<br />
• Water-tight sheet steel cabinet (protection IP 54) with lockable front door and<br />
corrosion-resistant coating.<br />
• Hinged control panel, can only be opened when main disconnect is switched<br />
off.<br />
• High-voltage connection: 3 x 400 V/50 Hz + PEN, power source with grounded<br />
neutral conductor.<br />
• Control voltage: 220 V single-phase<br />
• Isolating transformer for control voltage<br />
• Commercia-type industrial switching devices<br />
• Cable connections with terminal ends<br />
• Hinged control panel which can only be opened when main disconnect is off.<br />
Q 2 Main disconnect<br />
Power infeed to the machine in position "1" .<br />
For safety reasons the hinged control panel is locked.<br />
Q 2 Main disconnect<br />
In position "O" the main disconnect is fitted with a lock-out against unintentional<br />
reclosing.<br />
The hinged control panel can only be opened in this switch position<br />
8
P 1 Voltmeter<br />
Operating Manual for BAUER CENTERSTAR 5000<br />
Indicates the voltage between the phases L1 and L2.<br />
P 2 Hourmeter<br />
Shows the total hours the system has operated.<br />
S 1 CENTER STAR OFF/ON switch<br />
When turned to "ON" position, the system can be started by pushing the<br />
buttons S2 or S3. If turned to “OFF” the system stops.<br />
S 2 Illuminated "FORWARD START" pushbutton<br />
Push this button to start the system in forward direction. The button is<br />
illuminated as long as the system is operating in forward run (clockwise).<br />
S 3 Illuminated „REVERSE START“ pushbutton<br />
Push this button to start the system in reverse direction. The button is<br />
illuminated as long as the system is operating in reverse run (counterclockwise)<br />
9
NOTE!<br />
NOTE!<br />
Operating Manual for BAUER CENTERSTAR 5000<br />
S 4 „SAFETY CIRCUIT ON-OFF“ switch<br />
When turned “ON“, malfunction (e.g. doglegging) will shut off the entire system.<br />
The “OFF” position serves exclusively for system alignment.<br />
This switch MUST always be turned to “ON” while system is operating!<br />
This is the only way to guarantee safety when system is operating unattended.<br />
S 5 “WET-DRY“ switch<br />
In the “WET” position, the system is shut down by means of a pressure switch<br />
mounted on the infeed water pipe (optional) when pressure drops below the<br />
limit. The “DRY” position allows to run the system dry (e.g. if the<br />
CENTERSTART has to be returned to its parking position dry without<br />
irrigating).<br />
This switch is effective in combination with the pressure switch option only !<br />
S 6 “STOP IN SLOT ON-OFF“ switch<br />
In “ON“ position, the system stops in the desired parking position. The parking<br />
position can be adjusted by shifting the momentary-contact limit switch on the infeed<br />
water pipe.<br />
This switch is only effective in combination with the FULL-IRCLE AUTOMATIC STOP<br />
option!<br />
K 4 Percentage timer "SPEED"<br />
Speed adjustment.<br />
The percentage timer is used to define the end tower run time per minute and thus<br />
control the rotating speed of the pivot.<br />
Setting the rotary button at 50 % therefore means that the end tower will run for 30<br />
seconds and stand still for 30 seconds in one minute. This setting can be corrected<br />
any time during the run.<br />
10
7.2 TOWER BOX<br />
Operating Manual for BAUER CENTERSTAR 5000<br />
• The alignment control guarantees that the pivot runs in as<br />
straight a line as possible. .<br />
• Therefore it is of utmost importance to set and maintain the<br />
switching elements properly.<br />
• In addition to the microswitches, an RC safety element is<br />
mounted which compensates peak voltages and protects the<br />
switchgear<br />
• Operating voltage 400 V, control voltage 220 V / 50Hz<br />
7.2.1 MICROSWITCH ADJUSTMENT<br />
If a new microswitch (control or safety switch) is mounted in a tower box, it must be set precisely at the correct<br />
working position.<br />
Disconnect the entire system from power before starting the installation. Disconnect the electrical connections,<br />
remove the defective switch and replace it by a new one. Connect electrical cables again. Set the microswitches<br />
according to the instructions below:<br />
1. Loosen the screws<br />
2. To set the control switch, rotate the switching cam until the roller rests in the notch “A”. Adjust the switch<br />
in the boltholes towards the switching cam until the control switch (microswitch) actuates (clicks). Thereby the<br />
bracket of the switch lies near the switch housing.<br />
To set the safety switch, rotate the switching cam until the roller rests in notch “B”. Move the switch to the cam<br />
until you hear the switching actuating (click).<br />
11
3. Tighten the screws.<br />
4. Check the switching points, repeat the setting procedure, as needed.<br />
7.3 TERMS<br />
Forward<br />
Seen from above the CENTERSTAR is travelling clockwise.<br />
Reverse<br />
Seen from above the CENTERSTAR is travelling counter-clockwise.<br />
Inward<br />
towards the pivot.<br />
Outward<br />
towards the end tower<br />
Leading or positive bow<br />
When the middle towers are located before an assumed straight line between pivot and end tower.<br />
Trailing or negative bow<br />
When the middle towers are behind an assumed straight line between pivot and end tower.<br />
Doglegging<br />
Occurs when one tower slows down or stands still or travels ahead of the other towers.<br />
Operating Manual for BAUER CENTERSTAR 5000<br />
negativ<br />
bent<br />
positiv<br />
dog-legged<br />
12
7.4 ALIGNMENT OF TOWERS<br />
If the system is not exactly aligned after installation – that means the assumed connecting line of all driving motors<br />
with the pivot centre is not a perfectly straight line - then the system must be realigned according to the instructions<br />
below.<br />
CAUTION!<br />
CAUTION!<br />
Operating Manual for BAUER CENTERSTAR 5000<br />
1. Turn "SAFETY CIRCUIT" switch to "OFF".<br />
In “OFF” position, the "SAFETY CIRCUIT" switch deactivates the safety system. If this<br />
switch is “OFF” during pivot operation, the system may get damaged.<br />
2. Turn main disconnect to "1".<br />
3. Use the tower alignment switches to arrange the towers flush with the<br />
centre of the pivot (take aim on driving motors).<br />
In order to avoid mechanical overload on the trussing, align the system step by step<br />
from the system end. In the end, the assumed connecting line between all tower motors<br />
and the pivot centre must be perfectly straight.<br />
13
7.5 TOWER BOX ADJUSTMENT<br />
WARNING!<br />
Make sure yourself that the main disconnect Q2 is set at “0”. Secure the switch against<br />
reclosing with a padlock on the switch or lock the control box door against unintentional<br />
reclosing.<br />
Before this adjustment can be done, the spans must be aligned in a straight line.<br />
If this is the case, use the bolts on the threaded rod to adjust the operating cam until the roller of the control switch<br />
is positioned exactly in the middle between switching point (notch A) and reversing point (between the two clicks).<br />
This guarantees the same control angle both in FORWARD and REVERSE run.<br />
The microswitches are adjusted according to the instructions below.<br />
1. Rotate the operating cam by turning the hex. nut on the threaded rod until the control switch lies in the notch “A”<br />
and actuates.<br />
2. Rotate the operating cam clockwise to the reversing point of the control switch, counting the number of<br />
rotations of the hex. nut or wrench turns.<br />
3. Turn back the operating cam by half of the nut or wrench rotations counted under point 2 above - the roller is<br />
positioned exactly in the middle between switching and reversing point of the control switch.<br />
4. Secure the set nut on the threaded rod with the locknut. Adjust both other nuts in such a way that the spring is<br />
pretensioned about 10 mm.<br />
Operating Manual for BAUER CENTERSTAR 5000<br />
14
7.6 ALIGNMENT CHECK-UP<br />
The CENTERSTAR is properly aligned if a positive bow of the same size forms in both directions of rotation.<br />
Forward travel<br />
Reverse travel<br />
If this is not the case, realign the system as follows:<br />
1. Turn main disconnect Q2 to "1".<br />
Operating Manual for BAUER CENTERSTAR 5000<br />
2. Turn "SAFETY CIRCUIT" switch "ON".<br />
This switch MUST always be “ON” while system is operating.<br />
This is the only way to guarantee safety during unattended operation!<br />
3. Set the rotary percentage timer at the desired value.<br />
The speed and the appropriate precipitation can be taken from the charts<br />
supplied with the pivot system.<br />
15
Operating Manual for BAUER CENTERSTAR 5000<br />
4. Turn "CENTERSTAR ON - OFF" switch to "ON".<br />
5. Press the green "FORWARD START” or “REVERSE START" pushbutton<br />
and hold it depressed until the electric switch audibly actuates and the<br />
towers start moving.<br />
6.<br />
a) Check, if the driving motor of the first tower is located in front of an assumed connecting line between the<br />
drive motor of the second tower and the pivot centre. If this is not the case, the tower box on the first tower<br />
must be readjsuted as follows: Loosen the hex. nuts and turn the threaded rod until the above requirement is<br />
fulfilled.<br />
b) The next step is to check if the drive motor of the second tower is positioned in front of an assumed<br />
connecting line between the drive motor on the third tower and the pivot centre. If this is not the case correct<br />
the tower box on the second tower.<br />
c) Now check all towers step by step as described under a) and b) above. Re-adjust tower boxes, as needed. At<br />
the end of this procedure the CENTERSTAR should form a positive bow, which means that the middle towers<br />
must be positioned in front of an assumed connecting line between end tower and pivot centre.<br />
7. Turn "CENTERSTAR OFF - ON" switch to “OFF".<br />
8. Turn main disconnect switch to "O".<br />
7.7 Instructions for determining tracks<br />
1. Run once "dry" with timer setting of 100 % over the entire field.<br />
2. A second time run "wet" with timer setting 80 - 90 % over the entire field.<br />
Subsequent operation of the system as desired.<br />
If the tracks become too deep, these need to be levelled out or filled up. Then run the system dry with timer setting<br />
100 % over the entire field. The reverse run „wet“ with the same timer setting.<br />
16
8 INITIAL START-UP<br />
After the system has been completely assembled and installed and successfully put into operation for the first time<br />
by the supplier’s specialist, the CENTERSTAR irrigation system is released for operation and start-up by the<br />
customer!<br />
Being powered by 400 as well as 460 volts, all control system components and electrical service must always be<br />
handled with utmost care! All repair or maintenance work on this equipment to be performed by qualified<br />
electricians only!<br />
Before starting up the system, all auxiliary units (generator, pump) should also be checked for proper functioning.<br />
It is absolutely necessary to have all defects repaired by the competent service department before starting to<br />
irrigate. In doing so, special attention should be given to all current-bearing components.<br />
The following start-up procedure applies to BAUER CENTERSTAR 5000 in standard design without optional<br />
equipment. If your system is equipped with different options (refer to Optional Features ), they must be adjusted or<br />
turned on before the system is put into operation.<br />
8.1 START-UP<br />
Operating Manual for BAUER CENTERSTAR 5000<br />
1. Turn the main disconnect to position "1".<br />
2. Turn the "SAFETY CIRCUIT" switch to "ON" or leave it in that position.<br />
This switch MUST always be “ON” while system is operating”!!<br />
This is the only way to guarantee safety in unattended operation.<br />
3. Turn the rotary SPEED knob (percentage timer) to the desired position.<br />
Please take from the charts supplied with the pivot system, which<br />
percentage to set for the desired watering height.<br />
17
Operating Manual for BAUER CENTERSTAR 5000<br />
4. Turn "CENTER STAR OFF - ON " switch to "ON".<br />
5. Press the green "FORWARD START" or "REVERSE START " button and<br />
hold it depressed until the towers start moving.<br />
6. Connect water infeed by starting the pumping unit or opening the stop valve.<br />
7. With the system running, check pipeline tightness, operating pressure stability, and power supply.<br />
8.2 SHUT-OFF PROCEDURE<br />
NOTE!<br />
CAUTION!<br />
The control panel should be closed during the run in order to protect it against dirt and<br />
splashes.<br />
Systems without optional equipment can be shut off by hand only.<br />
Exception: The system is stopped automatically through the safety system only in<br />
case of malfunction such as doglegging or drive unit failure.<br />
1. Close water infeed by turning off the pumping unit or closing the stop valve.<br />
2. Turn "CENTER STAR OFF - ON" switch to "OFF".<br />
3. Turn main disconnect to "O".<br />
18
9 MAINTENANCE INSTRUCTIONS<br />
Notice<br />
In case of warranties they will only be accepted if rules of handling and maintenance (according to service plan)<br />
has been followed. Service should be done by an authorised dealer and confirmed in the service plan. The service<br />
plan is considered as evidence for warranties.<br />
The meaning of service plan<br />
The service plan suggests when to do a service and what kind of service should be done. In the fields that provides<br />
evidence we confirm the carrying out of the service. This services can be a condition for possible warranty claims.<br />
We kindly ask you to understand that wasting and damages due to inroad, improper handling or changes are not<br />
included in the warranty.<br />
Always disconnect the system from all power before starting any maintenance work. Turn the main disconnect to<br />
“0“ and activate the safety lock-out to prevent unauthorised or unintentional re-closing of the system. Always<br />
disconnect the system yourself - do not depend on other persons.<br />
Always re-mount all protective devices dismantled during maintenance.<br />
9.1 Service-ranges<br />
- Monthly service<br />
- Annual service<br />
Operating Manual for BAUER CENTERSTAR 5000<br />
19
9.1.1 Service plan<br />
Central tower<br />
Extent of Service<br />
- Check all screwed joints as well as the pivot hold down X<br />
- Controlling the sealing ring in the feeding pipe on leckage (replace if necessary) X<br />
- Lubricate the infeed pipe rotating in the supporting angle. X X<br />
- Check the stuffing box packings of the cable conduit X<br />
- Check if electric cable entries into the pivot panel are tight X<br />
- Check full-surface contact of brushes with rings in the slipring collector X<br />
- Check collector brushes and sliprings for signs of wear X<br />
- Check condition of all electric connections as well as tightness of the collector housing X<br />
- Check smooth running of collector bearing and verify that the driver is isolated from power X<br />
- Check operation function of switch for endstop, automatic reverse and end gun sector<br />
control<br />
X X<br />
Trussing, overhang, coupling<br />
- Check all screwings on flanges, truss rods, braces, on towers and on overhang X<br />
- Check tightness of the flexible hose of tower couplings. X<br />
- Lubricate ball joint of the drive tower coupling X X<br />
- Empty sand trap X X<br />
- Booster pump – turning of the shaft between engine and pump – check if runner of the<br />
pump pivotes without problems.<br />
X<br />
- Check end gun (if existent) X<br />
Alignment control, transmission device<br />
- Check and adjust (if necessary) the switch cam X<br />
- Check shifting travel of the micro switch X X<br />
- Check function of micro switch (operation switch and safety switch) X<br />
- Check all electric connections on safe contact X<br />
- Check tightness of all cable entries into the tower box X<br />
- Check tightness of alignment control cover X<br />
- Lubricate the ball joints of the transmission devices X X<br />
- Exact control – Check tightness of guiding cables X<br />
- Sight control of alignment of the spans X X<br />
Operating Manual for BAUER CENTERSTAR 5000<br />
Monthly Service<br />
Annual-Servie<br />
20
Drive unit<br />
Extent of Service<br />
- Check oil level of gearbox and drive motor X<br />
- Change oil after first irrigation season, then after every third irrigation season X<br />
- Gearbox: Make sure that drainage holes on the bearing covers and the hole for ventilation<br />
on the expansion chamber are not blocked.<br />
X<br />
- Drive motor: Make sure that the drainage hole at the bottom of the motor is not blocked. X<br />
- Gearbox, drive motor - check tightness of shaft sealing ring X X<br />
- Lubricate outside hubs of towable gearboxes X<br />
- Check screw connections of the driveline coupler X<br />
- Check if rubber packages of driveline coupler are damaged. Replace worn out and broken<br />
rubber packages.<br />
X X<br />
- Check wheel nuts X X<br />
- Check tire pressure:<br />
1,1 bar with tires 14,9 – 24<br />
2,1 bar with tires 11,2 – 24<br />
0,8 bar with tires 16,9 – 24<br />
X X<br />
- Make sure that tires are not damaged X<br />
- Check anti twist device of axle drive shaft cover X X<br />
9.1.2 Post-season maintenance<br />
1. Remove the drain valves and plugs in the pipeline.<br />
2. Open sand trap stop valve.<br />
3. Flush the pipelines.<br />
4. Mount the drain valves and plugs again and close the sand trap stop valve again.<br />
9.1.3 Pre-season maintenance<br />
1. Check pivot panel and tower boxes for damage by oxidation<br />
or rodents and insects.<br />
2. Open sand trap stop valve and flush the pipelines.<br />
3. Check tightness of flange seals and connecting hoses.<br />
4. Close sand trap stop valve again.<br />
5. Further checks => CHECKLIST<br />
Operating Manual for BAUER CENTERSTAR 5000<br />
Monthly Service<br />
21<br />
Annual-Servie
9.1.4 Pretensioning forces and tightening values of bolts<br />
The listed pretensioning forces and turning moments are guiding values for standard metric thread<br />
per DIN 13 and head requirements per DIN 912, 931, 934, 6912, 7984,and 7990 as well as thread<br />
measured in inches rough ( UNC ) and smooth ( UNF ). They result in a bolt utilisation - limit of<br />
90°.<br />
It was based on a friction factor of 0,14 (new bolt without after treatment, unlubricated)<br />
Screws standard metric thread DIN 13<br />
dimension quality<br />
Operating Manual for BAUER CENTERSTAR 5000<br />
turning pretensioning<br />
moment force<br />
Nm N<br />
M 8 8.8 25,5 16230<br />
M 10 8.8 50 25791<br />
M 12 8.8 87,3 37657<br />
M 14 8.8 138,3 51681<br />
M 16 8.8 210,8 71196<br />
M 20 8.8 411,9 111305<br />
M 24 8.8 711 160338<br />
Screws UNC standard thread<br />
dimension quality<br />
turning pretensioning<br />
moment force<br />
Nm N<br />
1/4" S 12,5 10080<br />
5/16" S 21,3 13954<br />
1/2" S 92,7 38463<br />
dimension quality<br />
Screws UNF standard thread<br />
turning pretensioning<br />
moment force<br />
Nm N<br />
9/16" S 150 57143<br />
Don´t fasten the bolts 1/2" UNC for tightening the wheel gears with a power screwdriver.<br />
There may be a danger in damaging the winding in the gear casing. festziehen.<br />
22
10 TROUBLESHOOTING<br />
Leakage:<br />
- stuffing box<br />
- infeed pipe 2<br />
- pivot or tower coupling<br />
FAULT POSSIBLE CAUSE REMEDY<br />
Operating Manual for BAUER CENTERSTAR 5000<br />
- loose packing gland<br />
- lip of seal ring damaged<br />
- O-ring not inserted properly<br />
- loose hose clamp<br />
Slipring collector does not rotate - collector is not moved along by the<br />
driver<br />
Momentary-contact limit switch not<br />
actuated<br />
Abnormal motor or gearbox noise<br />
System does not start up<br />
A certain tower always runs in the<br />
safety circuit<br />
- the holding ring on infeed pipe 2 is not<br />
tight enough – as a result it is lifted up<br />
by the water pressure<br />
- low oil level<br />
- oil worn<br />
- defective bearing<br />
- main disconnect turned off<br />
- safety disconnect Q1 turned off<br />
- fuses of fuse switch disconnector<br />
defective<br />
- fuses F1, F2, F3, F4 defective<br />
- safety circuit interrupted because<br />
system flex larger than maximum<br />
permissible bending angle<br />
- no water pressure<br />
(only with low-pressure shut-off option)<br />
- system in parking position<br />
(only with FULL-CIRCLE AUTOMATIC<br />
STOP option)<br />
- Wrong microswitch setting in the tower<br />
box<br />
- microswitch defective<br />
- contactor defective<br />
- cable loose<br />
- tower slips<br />
- thermal protection (built into the motor)<br />
triggered because of:<br />
- obstacle in the track<br />
- deep soil<br />
- low oil in gearbox<br />
- tighten screw<br />
- exchange sealring<br />
- insert O-ring properly<br />
- tighten hose clamp<br />
- ensure precise guidance in<br />
the driver<br />
- tighten the holding ring<br />
halves<br />
- top up oil<br />
- exchange the oil<br />
- exchange bearing<br />
- turn it on<br />
- turn it on<br />
- replace defective fuses<br />
- replace defective fuses<br />
- see “Restart after<br />
doglegging”<br />
- check water supply<br />
- readjust pressure switch<br />
- STOP IN SLOT ON-OFF<br />
switch to OFF<br />
- start the system<br />
when the switching bracket<br />
has left the limit switch, turn<br />
the STOP IN SLOT ON-OFF<br />
switch to "ON"<br />
- readjust the microswitch<br />
- replace the microswitch<br />
- replace the contactor<br />
- check connections and<br />
tighten,<br />
if required<br />
- level the track<br />
- remove obstacle<br />
- fill up and level the track<br />
- refill oil<br />
23
10.1 RESTART AFTER DOGLEGGING – WITH TOWER ALIGNMENT SWITCH<br />
NOTE!<br />
WARNING!<br />
Operating Manual for BAUER CENTERSTAR 5000<br />
Before you follow the instructions below, the cause that led to doglegging must be<br />
located and eliminated (see Troubleshooting)<br />
1. Turn "SAFETY CIRCUIT" switch "OFF".<br />
In the “OFF” position, the "SAFETY CIRCUIT" switch deactivates the safety system.<br />
2. Turn main disconnect to “1".<br />
3. Turn "CENTERSTAR ON-OFF" switch to "ON".<br />
4. Return the “doglegging” towers into a straight line with the other towers and the pivot again with the help of the<br />
tower alignment switch.<br />
24
Operating Manual for BAUER CENTERSTAR 5000<br />
5. Turn the "SAFETY CIRCUIT" switch “ON".<br />
6. Check correct start-up of CENTERSTAR by a test start (starting button "FORWARD START" and<br />
"REVERSE START".<br />
10.2 RESTART AFTER DOGLEGGING – WITHOUT TOWER ALIGNMENT SWITCH<br />
1. Set SPEED" at 100 %.<br />
WARNING!<br />
2. Turn the “SAFETY CIRCUIT" switch to "OFF".<br />
In “OFF” position, the "SAFETY CIRCUIT" switch deactivates the safety system.<br />
3. Set proper running direction. Select that direction that brings the outermost<br />
system end into radial alignment.<br />
This means, if the outer, doglegged tower column is pointing “FORWARD”, you<br />
have to push the REVERSE START button; if the outer doglegged tower<br />
column is pointing in “REVERSE” direction, push “FORWARD”.<br />
Press the green "FORWARD START" or "REVERSE START" button and check<br />
the running direction when the outer, misaligned towers start moving.<br />
25
NOTE!<br />
CAUTION!<br />
CAUTION!<br />
CAUTION!<br />
CAUTION!<br />
Operating Manual for BAUER CENTERSTAR 5000<br />
Selecting the proper running direction ensures that only the outer misaligned towers<br />
start moving when the drive is turned on.<br />
The wrong running direction will cause impermissibly high stresses on the trussing.<br />
The towers only run as long as you hold the "FORWARD START or "REVERSE<br />
START" button depressed.<br />
The inward towers may start running for a short time after the start-up<br />
Continuously check tower movement after the start in order to be able to stop the<br />
system again immediately should the doglegging continue (Let go the “FORWARD<br />
START" or "REVERSE START" button).<br />
5. As soon as the towers are aligned again (in radial alignment) and the<br />
inward towers start to move, too, the green "FORWARD START" or<br />
"REVERSE START" button should be no longer depressed.<br />
6. Turn the "SAFETY CIRCUIT” switch to “ON”.<br />
Running BAUER CENTERSTAR with "SAFETY CIRCUIT OFF" is only permitted for<br />
system alignment .<br />
7. Check proper CENTERSTAR start-up by a test start (shortly depress the<br />
"FORWARD START" and "REVERSE START" buttons). The pushbutton<br />
lights up if the system is operating correctly.<br />
26
11 TECHNICAL DATA<br />
11.1 DIMENSIONS OF BAUER CENTERSTAR<br />
Operating Manual for BAUER CENTERSTAR 5000<br />
27
DIMENSIONS OF BAUER CENTERSTAR<br />
Operating Manual for BAUER CENTERSTAR 5000<br />
28
11.2 Gearbox and drive motors<br />
11.2.1 Gearbox<br />
Worm gear with 50:1 reduction ratio.<br />
Execution: For stationary systems.<br />
For towable systems with freely rotating hub.<br />
Type of oil: SAE 85W-140, multigrade oil<br />
Oil quantity approx. 3.8 litres up to lower edge of filling hole<br />
Oil expansion is compensated by expansion membrane.<br />
11.2.2 Drive motor<br />
Spur gearing with 40:1 reduction ration, optional 30:1 reduction.<br />
Standard motor output: 0.55 kW; optional 1.1 kW<br />
Driving speed with tires 14.9-24 reduction 40:1 = 144 m/h<br />
reduction 30:1 = 193 m/h<br />
Type of oil: : SAE 50W or SAE 20W-50 multigrade motor oil<br />
Amount of oil approx. 3.8 litres up to lower edge of filling hole<br />
Operating Manual for BAUER CENTERSTAR 5000<br />
29
12 OPTIONAL FEATURES<br />
12.1 AUTOMATIC CIRCLE STOP<br />
Operating Manual for BAUER CENTERSTAR 5000<br />
A switching bracket mounted on the pivot operates a momentary-contact limit<br />
switch that automatically stops the system in a certain position (parking<br />
position).<br />
Turning the "STOP IN SLOT ON-OFF" switch to "OFF" makes it possible to<br />
irrigated in full circles.<br />
For restart after automatic stop, turn the switch “OFF” and push the start<br />
button. When the switching bracket has left the momentary-contact limit<br />
switch, turn the switch to “ON”.<br />
12.2 SECTOR CONTROL with automatic reverse – AUTOMATIC sector stop<br />
12.3 END STOP OR AUTOMATIC REVERSE<br />
Two momentary-contact limit switches are mounted on the pivot, which can be<br />
fixed at the desired position for setting the sector. The limit switches are<br />
actuated by a switching bracket mounted on the pivot infeed elbow.<br />
The "AUTO REVERSE OFF-ON" switch is built into the pivot panel. In “OFF”<br />
position the system shuts off automatically when the sector limit is reached.<br />
The “ON" setting makes it possible to irrigate the sector defined by the limit<br />
switches without interruptions, as needed. After the number of irrigation runs<br />
is finished the system must be shut off by hand.<br />
If it is necessary to Stopp or switch over the<br />
system precisely when the sector boundaries<br />
are reached, the system shuts off at the<br />
system end. A contact limit switch mounted on<br />
the end tower is actuated by a shut-off bar<br />
which touches the shut-off frame that is<br />
positioned in the track of the end tower. This<br />
way the machine stops or changes to the<br />
opposite driving direction.<br />
30
12.4 LOW-PRESSURE SHUT-OFF<br />
The pivot supply pressure is monitored by a flow control on the pivot infeed pipe. If the supply pressure is lower<br />
than the minimum pressure set on the flow control, the CENTERSTAR is shut off.<br />
CAUTION!<br />
Operating Manual for BAUER CENTERSTAR 5000<br />
For this purpose the "WET-DRY" switch must be set at "WET".<br />
In the "DRY" setting the machine can run without irrigating (dry) (e.g. if CENTERSTAR is to be moved to the<br />
parking position due to natural rainfall).<br />
CAUTION!<br />
When set at “DRY”, the "WET-DRY" switch inactivates the flow control.<br />
12.5 AUTOMATIC PUMP UNIT SHUT-OFF<br />
When the CENTERSTAR is at standstill or when a malfunction occurs, the pumping unit is shut off automatically if<br />
it is wired with the pivot panel<br />
12.6 AUTOMATIC ELECTRIC SHUT-OFF VALVE CONTROL<br />
An electric shut-off valve in the pivot infeed line is closed automatically when the CENTERSTAR is turned off or<br />
stops due to malfunction.<br />
12.7 FERTILISER INJECTION PUMP<br />
A socket on the outside of the pivot panel is provided for connecting an electric fertiliser injection pump. Power<br />
supply to the fertiliser injection pump is interrupted when the CENTERSTAR stops.<br />
12.8 ENDGUN WITH BOOSTER PUMP<br />
To increase the system spraying radius it is possible to mount an endgun at the end of the pivot overhang. A<br />
booster pump is mounted on the last tower. Raingun and pump are connected with a pressure hose.<br />
31
12.9 END GUN SECTOR SHUT-OFF<br />
The endgun can be switched on and off in up to 4 sectors within a full circle.<br />
Switching segments mounted on the pivot are infinitely adjustable. A momentary-contact limit switch controls a<br />
solenoid valve which closes the water supply to the booster pump and thus also to the endgun. The pump motor is<br />
shut off simultaneously.<br />
12.10 RUNNING CONTROL<br />
If the wheels on the last tower start slipping, the entire system is shut off automatically after a certain time<br />
(adjustable on the time relay of the next-to-the-last tower box) in order to avoid overwatering.<br />
12.11 TOWER ALIGNMENT SWITCH<br />
This switch is mounted outside on the base plate of the tower box. With this switch the individual towers can be<br />
moved forward or back without having to open the tower control box. This feature makes it easy to align the<br />
system for the initial start-up. The same applies to realignment of towable systems in their new position.<br />
12.12 RUNNING LIGHT<br />
Mounted on the end tower or on the pivot. The light burns as long as the CENTERSTAR is operating.<br />
13 REPOSITIONING OF CENTER STAR<br />
GENERAL INSTRUCTIONS<br />
• System should be towed on a level and preferably on a paved road (width 7 m).<br />
• The track must be level and free from ruts, grooves, and furrows.<br />
• If there are ruts in the lane they have to be levelled<br />
• Towing of the system in the field (off the road) should be avoided.<br />
• If the system has to be towed in the field, the travelling lane must be levelled first and any obstacles removed in<br />
order that the rolling resistance is not minimised.<br />
• Max. “towing speed”: 4 km/h<br />
• Min. tire pressure: 1 – 1.1 bar<br />
Operating Manual for BAUER CENTERSTAR 5000<br />
32
13.1. TOWING THE CENTERSTAR ON THE PIVOT SIDE - FORWARD TOW<br />
When towing the system on the pivot side, a cable bracing must be provided from the pivot to the<br />
first tower.<br />
13.1.1. Turning the tower wheels<br />
- Loosen and push back the drive shaft covers of the gearboxes<br />
- Loosen the driver on the wheel hub. Disengage gearboxes with lever.<br />
- Loosen fastening of gearbox support.<br />
- Turn gearbox support and wheel. The coupling parts with the rubber packages have to stay at the gearbox. If<br />
necessary lift wheel base with jack or tractor´s hydraulic.<br />
- Deposit the drive shft with the coupling halfs at the fastener that is mounted at the support angels of the drive<br />
tower.<br />
- support of the gearbox with connecting brace ( 90 ° twisted).<br />
Operating Manual for BAUER CENTERSTAR 5000<br />
33
13.1.2. Mounting the tow cable on pivot with skids<br />
• Turn the pivot into the towing direction.<br />
• Mount the clamp (A) on the end pipe of the first tower.<br />
• Fasten the tow cable (C) on clamp (A).<br />
• Fasten the pivot tow cables (D) on the pivot.<br />
• Fasten the tow cables (D) on the tow cable (C) with a cable clip according to the drawing.<br />
• The pulling force indicated by the arrows (1 and 2) should be adjusted in such a way that the front ends of the<br />
pivot skids are elevated about 100 to 200 mm in order to avoid “digging in” during the towing procedure. The<br />
ropes (arrows 3 and 4) must be tightly stretched, too, to avoid a “rolling” movement of the pivot. .<br />
NOTE !<br />
Operating Manual for BAUER CENTERSTAR 5000<br />
The pivot braces (F and G) are decisive for the pulling force of the pivot. Tow the<br />
machine only if the pivot is equipped with these braces (F and G).<br />
34
13.1.3. Mounting the tow cables on 4-wheel pivot<br />
• Turn pivot into the driving direction, if necessary. For this purpose position the wheels tangentially to the pivot<br />
point and fix them with the braces.<br />
• Fasten the clamp on the end pipe of the first tower.<br />
• Mount and adjust cable with tightener (the first time)<br />
• Mount the drawbar (the first time)<br />
Operating Manual for BAUER CENTERSTAR 5000<br />
35
13.2. TOWING THE CENTERSTAR ON THE END TOWER – REVERSWE TOW<br />
NOTE ! Towing of CENTERSTAR on the overhang side is possible only with<br />
3-wheel pivot and 4-wheel pivot !<br />
Towing the CENTERSTAR on the overhang side requires a cable bracing on all spans.<br />
13.2.1. Turning the tower wheels<br />
- Loosen and push back the drive shaft covers of the gearboxes<br />
- Loosen the driver on the wheel hub. Disengage gearboxes with lever.<br />
- Loosen fastening of gearbox support.<br />
- Turn gearbox support and wheel. The coupling parts with the rubber packages have to stay at the gearbox If<br />
necessary lift wheel base with jack or tractor´s hydraulic.<br />
- Deposit the drive shft with the coupling halfs at the fastener that is mounted at the support angels of the drive<br />
tower.<br />
- support of the gearbox with steering brace “A” ( 90 ° twisted).<br />
Mount the steering device “B” on all towers except for end tower (on overhang).<br />
Operating Manual for BAUER CENTERSTAR 5000<br />
36
13.2.2. Bracing the end tower<br />
• The end tower (on the overhang) is braced with 2 cables on the span.<br />
• A drawbar is attached on the wheel base.<br />
13.2.3. Bracing the 4-wheel pivot<br />
As mentioned under item 13.1.3 the center tower is fixed with 2 cables at the end pipe of the first span.<br />
Operating Manual for BAUER CENTERSTAR 5000<br />
37
14 ELECTRICAL WIRING DIAGRAMS<br />
14.1. Pivot panel<br />
14.1.1. Pivot panel Universal - infeed<br />
14.1.2. Pivot panel Universal - control<br />
14.1.3. Pivot panel Universal – wiring diagram<br />
14.1.4. Pivot panel – Universal Pro– infeed<br />
14.1.5. Pivot panel - Universal Pro - control<br />
14.1.6. Pivot panel - Universal Pro – wiring diagram<br />
14.1.7 Control centre - Universal - Autoreverse – feeding<br />
14.1.8 Control centre - Universal - Autoreverse – control<br />
14.1.9 Control centre - Universal - Autoreverse – connecting diagram<br />
14.2. Booster pump for endgun<br />
14.3. Tower box<br />
14.3.1. Tower box standard<br />
14.3.2. Tower box with tower alignment switch<br />
14.3.3. Alignment control with end tower monitoring<br />
14.3.4. Alignment control with tower alignment switch and end tower monitor<br />
14.3.5. End control standard<br />
14.3.6. End control with tower alignment switch<br />
14.3.7. End control standard with EMERGENCY STOP<br />
14.3.8. End control with EMERGENCY STOP and tower alignment switch<br />
14.3.9. End control standard with Autoreverse<br />
14.3.10. End control with Autoreverse and alignment control switch<br />
Operating Manual for BAUER CENTERSTAR 5000<br />
38
14.1.1.Standard UNIVERSAL– infeed<br />
Operating Manual for BAUER CENTERSTAR 5000<br />
39
14.1.2 - Standard UNIVERSAL – control<br />
Operating Manual for BAUER CENTERSTAR 5000<br />
40
14.1.3 - Standard UNIVERSAL– wiring diagram<br />
Operating Manual for BAUER CENTERSTAR 5000<br />
41
14.1.4 - Pivot panel – Universal Pro – infeed<br />
Operating Manual for BAUER CENTERSTAR 5000<br />
42
14.1.5 -Pivot panel – Universal Pro - control<br />
Operating Manual for BAUER CENTERSTAR 5000<br />
43
14.1.6 -Pivot panel -Universal Pro – wiring diagram<br />
Operating Manual for BAUER CENTERSTAR 5000<br />
44
14.1.7 –Control centre – Universal Autoreverse - feeding<br />
Operating Manual for BAUER CENTERSTAR 5000<br />
45
14.1.8 Control centre – Universal Autoreverse – control<br />
Operating Manual for BAUER CENTERSTAR 5000<br />
46
14.1.9 Control centre – Universal Autoreverse – connecting diagram<br />
Operating Manual for BAUER CENTERSTAR 5000<br />
47
14.2 - Booster pump for endgun<br />
Operating Manual for BAUER CENTERSTAR 5000<br />
48
14.3.1 - Standard tower box<br />
Operating Manual for BAUER CENTERSTAR 5000<br />
49
14.3.2 - Tower box with tower alignment switch<br />
Operating Manual for BAUER CENTERSTAR 5000<br />
50
14.3.3 - Alignment control with end tower monitoring<br />
Operating Manual for BAUER CENTERSTAR 5000<br />
51
14.3.4 - Alignment control with tower alignment switch and end tower monitor<br />
Operating Manual for BAUER CENTERSTAR 5000<br />
52
14.3.5 - Standard end control 018 2489<br />
Operating Manual for BAUER CENTERSTAR 5000<br />
53
14.3.6 - End control with tower alignment switch 018 2491<br />
Operating Manual for BAUER CENTERSTAR 5000<br />
54
14.3.7 - End control standard with EMERGENCY STOP<br />
Operating Manual for BAUER CENTERSTAR 5000<br />
55
14.3.8 End control with EMERGENCY STOP and tower alignment switch<br />
Operating Manual for BAUER CENTERSTAR 5000<br />
56
14.3.9 - End control Standard with Autoreverse<br />
Operating Manual for BAUER CENTERSTAR 5000<br />
57
14.3.10 - End control with Autoreverse and alignment control switch<br />
Operating Manual for BAUER CENTERSTAR 5000<br />
58
15 Service – Proof<br />
Has been done<br />
Part -Service<br />
Part -Service<br />
Part -Service<br />
Part -Service<br />
Part -Service<br />
Part -Service<br />
Part -Service<br />
Part -Service<br />
Part -Service<br />
Part -Service<br />
Part-Service<br />
Oil change-Service<br />
Annual-Service<br />
Has been done<br />
Part -Service<br />
Part -Service<br />
Part -Service<br />
Part -Service<br />
Part -Service<br />
Part -Service<br />
Part -Service<br />
Part -Service<br />
Part -Service<br />
Part -Service<br />
Part -Service<br />
Oil change-Service<br />
Annual Service<br />
Operating Manual for BAUER CENTERSTAR 5000<br />
Yes No Date Operating hours<br />
Yes No Date Operating hours<br />
Proof for the<br />
accomplished service<br />
Proof for the<br />
accomplished service<br />
59
Has been done<br />
Part -Service<br />
Part -Service<br />
Part -Service<br />
Part -Service<br />
Part -Service<br />
Part -Service<br />
Part -Service<br />
Part -Service<br />
Part -Service<br />
Part -Service<br />
Part-Service<br />
Oil change-Service<br />
Annual-Service<br />
Has been done<br />
Part -Service<br />
Part -Service<br />
Part -Service<br />
Part -Service<br />
Part -Service<br />
Part -Service<br />
Part -Service<br />
Part -Service<br />
Part -Service<br />
Part -Service<br />
Part -Service<br />
Oil change-Service<br />
Annual Service<br />
Operating Manual for BAUER CENTERSTAR 5000<br />
Yes No Date Operating hours<br />
Yes No Date Operating hours<br />
Proof for the<br />
accomplished service<br />
Proof for the<br />
accomplished service<br />
60
Has been done<br />
Part -Service<br />
Part -Service<br />
Part -Service<br />
Part -Service<br />
Part -Service<br />
Part -Service<br />
Part -Service<br />
Part -Service<br />
Part -Service<br />
Part -Service<br />
Part-Service<br />
Oil change-Service<br />
Annual-Service<br />
Has been done<br />
Part -Service<br />
Part -Service<br />
Part -Service<br />
Part -Service<br />
Part -Service<br />
Part -Service<br />
Part -Service<br />
Part -Service<br />
Part -Service<br />
Part -Service<br />
Part -Service<br />
Oil change-Service<br />
Annual Service<br />
Operating Manual for BAUER CENTERSTAR 5000<br />
Yes No Date Operating hours<br />
Yes No Date Operating hours<br />
Proof for the<br />
accomplished service<br />
Proof for the<br />
accomplished service<br />
61
Has been done<br />
Part -Service<br />
Part -Service<br />
Part -Service<br />
Part -Service<br />
Part -Service<br />
Part -Service<br />
Part -Service<br />
Part -Service<br />
Part -Service<br />
Part -Service<br />
Part-Service<br />
Oil change-Service<br />
Annual-Service<br />
Has been done<br />
Part -Service<br />
Part -Service<br />
Part -Service<br />
Part -Service<br />
Part -Service<br />
Part -Service<br />
Part -Service<br />
Part -Service<br />
Part -Service<br />
Part -Service<br />
Part -Service<br />
Oil change-Service<br />
Annual Service<br />
Operating Manual for BAUER CENTERSTAR 5000<br />
Yes No Date Operating hours<br />
Yes No Date Operating hours<br />
Proof for the<br />
accomplished service<br />
Proof for the<br />
accomplished service<br />
62
16 CONFORMITY CERTIFICATE<br />
We,<br />
EU Conformity Certificate<br />
according to the EU Directive for Machines 98/37/EU, Annex II A<br />
Operating Manual for BAUER CENTERSTAR 5000<br />
Röhren- und Pumpenwerk BAUER Gesellschaft m.b.H.<br />
Kowaldstraße 2, A - 8570 Voitsberg - Austria<br />
Tel. +43 / 3142 / 200 - 0, Telefax: +43 / 3142 / 23 0 95<br />
herewith declare that in respect of its conception and construction and in the types and styles marketed by our<br />
company, the machine mentioned below fully complies with the relevant fundamental provisions for safety and<br />
health as stipulated in the EU directives.<br />
Any modification of this machine without our prior express consent render this certificate invalid.<br />
Designation of the machine: BAUER CENTERSTAR 5000<br />
Basic models : 133 EL, 168 EL/E, 203 EL/E<br />
This range of machines has been designed and built in compliance with the standard:<br />
EN 909<br />
including also the normative references to EN 292-1 - 1991, EN 292-2 – 1991, EN 294 – 1992.<br />
Voitsberg, July 2003<br />
Manager development & construction<br />
63