TankRadar Rex Service Manual - Emerson Process Management
TankRadar Rex Service Manual - Emerson Process Management
TankRadar Rex Service Manual - Emerson Process Management

You also want an ePaper? Increase the reach of your titles
YUMPU automatically turns print PDFs into web optimized ePapers that Google loves.
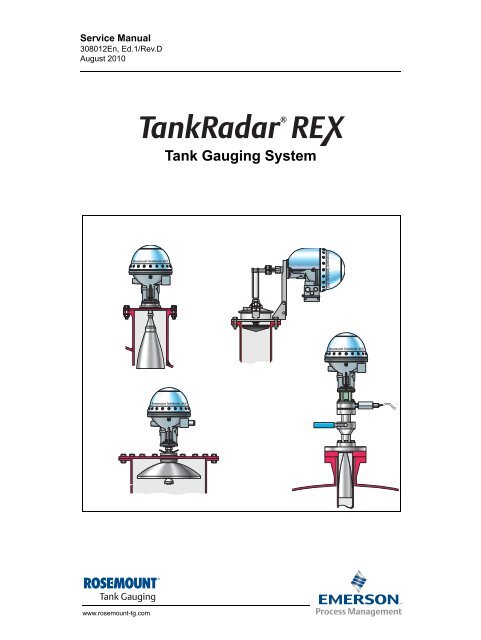
<strong>Service</strong> <strong>Manual</strong><br />
308012En, Ed.1/Rev.D<br />
August 2010<br />
www.rosemount-tg.com<br />
Tank Gauging System
www.rosemount-tg.com<br />
<strong>Service</strong> manual<br />
First edition/Rev.D<br />
Copyright © August 2010<br />
Rosemount Tank Radar AB
www.rosemount-tg.com<br />
Copyright © August 2010<br />
Rosemount Tank Radar AB<br />
The contents, descriptions and specifications within this manual is<br />
subject to change without notice. Rosemount Tank Radar AB accepts no<br />
responsibility for any errors that may appear in this manual.<br />
Trademarks<br />
Rosemount, and the Rosemount logotype are trademarks of Rosemount<br />
Inc.<br />
<strong>TankRadar</strong> is a trademark of Rosemount Tank Radar AB.<br />
HART is a trademark of HART Communication Foundation.<br />
Modbus is a trademark of Modicon.<br />
Pentium is a trademark of Intel Corporation.<br />
Windows NT is a trademark of Microsoft Corporation.<br />
Viton is a trademark of Du Pont Performance Elastomers.<br />
Spare Parts<br />
Any substitution of non-recognized spare parts may jeopardize safety.<br />
Repair, e.g. substitution of components etc., may also jeopardize safety<br />
and is under no circumstances allowed.<br />
Rosemount Tank Radar AB will not take any responsibility for faults,<br />
accidents, etc. caused by non-recognized spare parts or any repair<br />
which is not made by Rosemount Tank Radar AB.<br />
Specific FCC Requirements (USA only)<br />
Rosemount <strong>TankRadar</strong> <strong>Rex</strong> generates and uses radio frequency energy.<br />
If it is not installed and used properly, that is, in strict accordance with the<br />
manufacturer´s instructions, it may violate FCC regulations on radio<br />
frequency emission.<br />
Rosemount <strong>TankRadar</strong> <strong>Rex</strong> has been FCC certified under test conditions<br />
which assume a metallic tank. Installation on a non-metallic tank is not<br />
certified, and is not allowed.<br />
The FCC certificate for Rosemount <strong>TankRadar</strong> <strong>Rex</strong> requires that the tank<br />
is closed as far as emitted radio energy is concerned. Tanks with open<br />
manholes, external-floating-roof tanks without still pipes etc. are not<br />
covered by the certificate.
<strong>Service</strong> <strong>Manual</strong><br />
308012En, Ed.1/Rev.C<br />
August 2010<br />
Contents<br />
Rosemount <strong>TankRadar</strong> <strong>Rex</strong><br />
Contents<br />
1. SYSTEM DESCRIPTION . . . . . . . . . . . . . . . . . . . . . . . . . . 1-1<br />
2. SAFETY . . . . . . . . . . . . . . . . . . . . . . . . . . . . . . . . . . . . . 2-1<br />
2.1 INTRINSIC SAFETY . . . . . . . . . . . . . . . . . . . . . . . . . . . . . . . . . . . . . . .2-1<br />
2.2 EXPLOSION PROOF . . . . . . . . . . . . . . . . . . . . . . . . . . . . . . . . . . . . . .2-2<br />
3. DEVICE DESCRIPTION . . . . . . . . . . . . . . . . . . . . . . . . . . . 3-1<br />
3.1 REX RTG . . . . . . . . . . . . . . . . . . . . . . . . . . . . . . . . . . . . . . . . . . . . . . .3-1<br />
3.1.1 Overview . . . . . . . . . . . . . . . . . . . . . . . . . . . . . . . . . . . . .3-1<br />
3.1.2 Antenna types . . . . . . . . . . . . . . . . . . . . . . . . . . . . . . . . .3-2<br />
3.1.3 Measurement principle . . . . . . . . . . . . . . . . . . . . . . . . . . .3-5<br />
3.1.4 Transmitter Head Electronics . . . . . . . . . . . . . . . . . . . . . .3-7<br />
3.1.5 Write protection (Metrological Seal) . . . . . . . . . . . . . . . . .3-9<br />
3.1.6 Internal calculations . . . . . . . . . . . . . . . . . . . . . . . . . . . .3-10<br />
3.1.7 Inputs and Outputs . . . . . . . . . . . . . . . . . . . . . . . . . . . . . 3-11<br />
3.1.8 Database Registers . . . . . . . . . . . . . . . . . . . . . . . . . . . .3-13<br />
3.1.9 Tank Geometry . . . . . . . . . . . . . . . . . . . . . . . . . . . . . . . .3-16<br />
3.1.10 Software Description . . . . . . . . . . . . . . . . . . . . . . . . . . .3-17<br />
3.2 FIELD COMMUNICATION UNIT (FCU) . . . . . . . . . . . . . . . . . . . . . . .3-18<br />
3.2.1 Field Bus and Group Bus Communication . . . . . . . . . . .3-19<br />
3.2.2 Input and Database Registers . . . . . . . . . . . . . . . . . . . .3-19<br />
3.2.3 Software . . . . . . . . . . . . . . . . . . . . . . . . . . . . . . . . . . . . .3-20<br />
3.2.4 Redundancy . . . . . . . . . . . . . . . . . . . . . . . . . . . . . . . . . .3-20<br />
3.2.5 Connection to a PC . . . . . . . . . . . . . . . . . . . . . . . . . . . .3-21<br />
3.3 DATA ACQUISITION UNIT (DAU) . . . . . . . . . . . . . . . . . . . . . . . . . . .3-22<br />
3.3.1 Overview . . . . . . . . . . . . . . . . . . . . . . . . . . . . . . . . . . . .3-22<br />
3.3.2 Data Acquisition Unit (DAU) . . . . . . . . . . . . . . . . . . . . . .3-22<br />
3.3.3 Electronics . . . . . . . . . . . . . . . . . . . . . . . . . . . . . . . . . . .3-23<br />
3.3.4 Temperature Measurement . . . . . . . . . . . . . . . . . . . . . .3-24<br />
3.3.5 RTD Multiplexer . . . . . . . . . . . . . . . . . . . . . . . . . . . . . . .3-25<br />
3.3.6 DAU Software . . . . . . . . . . . . . . . . . . . . . . . . . . . . . . . . .3-26<br />
3.3.7 Database Registers . . . . . . . . . . . . . . . . . . . . . . . . . . . .3-27<br />
3.3.8 Local Display . . . . . . . . . . . . . . . . . . . . . . . . . . . . . . . . .3-27<br />
3.3.9 Level value pick-up . . . . . . . . . . . . . . . . . . . . . . . . . . . . .3-28<br />
3.3.10 Automatic test of temperature references . . . . . . . . . . .3-29<br />
3.4 REMOTE DISPLAY UNIT 40 (RDU 40) . . . . . . . . . . . . . . . . . . . . . . .3-29<br />
TOC-1
Rosemount <strong>TankRadar</strong> <strong>Rex</strong><br />
Contents<br />
TOC-2<br />
<strong>Service</strong> <strong>Manual</strong><br />
308012En, Ed.1/Rev.C<br />
August 2010<br />
4. SERVICE. . . . . . . . . . . . . . . . . . . . . . . . . . . . . . . . . . . . . 4-1<br />
4.1 REX RTG . . . . . . . . . . . . . . . . . . . . . . . . . . . . . . . . . . . . . . . . . . . . . . .4-1<br />
4.1.1 How to initiate an echo search . . . . . . . . . . . . . . . . . . . . .4-1<br />
4.1.2 Viewing and Editing database registers . . . . . . . . . . . . . .4-2<br />
4.1.3 Loading and Saving a device database . . . . . . . . . . . . . .4-3<br />
4.1.4 Loading the default database . . . . . . . . . . . . . . . . . . . . . .4-4<br />
4.1.5 Installing new Transmitter Software . . . . . . . . . . . . . . . . .4-5<br />
4.1.6 Exchanging the Transmitter Head Electronics . . . . . . . .4-10<br />
4.1.7 Write protection (Metrological Seal) . . . . . . . . . . . . . . . .4-13<br />
4.1.8 Temperature measurement . . . . . . . . . . . . . . . . . . . . . .4-15<br />
4.1.9 Analog inputs . . . . . . . . . . . . . . . . . . . . . . . . . . . . . . . . .4-21<br />
4.1.10 Analog outputs . . . . . . . . . . . . . . . . . . . . . . . . . . . . . . . .4-24<br />
4.1.11 HART Input . . . . . . . . . . . . . . . . . . . . . . . . . . . . . . . . . . .4-33<br />
4.1.12 Relay Output . . . . . . . . . . . . . . . . . . . . . . . . . . . . . . . . .4-35<br />
4.2 FCU . . . . . . . . . . . . . . . . . . . . . . . . . . . . . . . . . . . . . . . . . . . . . . . . . .4-41<br />
4.2.1 Default database loading . . . . . . . . . . . . . . . . . . . . . . . .4-41<br />
4.2.2 Group and Field Bus Ports . . . . . . . . . . . . . . . . . . . . . . .4-43<br />
4.2.3 Power Supply . . . . . . . . . . . . . . . . . . . . . . . . . . . . . . . . .4-44<br />
4.2.4 Fuses . . . . . . . . . . . . . . . . . . . . . . . . . . . . . . . . . . . . . . .4-44<br />
4.2.5 Write protection and Reset . . . . . . . . . . . . . . . . . . . . . . .4-45<br />
4.2.6 Electronics . . . . . . . . . . . . . . . . . . . . . . . . . . . . . . . . . . .4-46<br />
4.2.7 Redundancy (option) . . . . . . . . . . . . . . . . . . . . . . . . . . .4-49<br />
4.3 DAU . . . . . . . . . . . . . . . . . . . . . . . . . . . . . . . . . . . . . . . . . . . . . . . . . .4-54<br />
4.3.1 Setting the temperature measurement range . . . . . . . . .4-54<br />
4.3.2 Checking the Resistance Temperature Detectors . . . . .4-56<br />
4.3.3 Exchanging the External Reference Resistor . . . . . . . . .4-57<br />
4.3.4 Suppressing error indication... . . . . . . . . . . . . . . . . . . . .4-58<br />
4.3.5 DAU Reset . . . . . . . . . . . . . . . . . . . . . . . . . . . . . . . . . . .4-58<br />
4.3.6 Write Protection . . . . . . . . . . . . . . . . . . . . . . . . . . . . . . .4-59<br />
4.3.7 Default database reload . . . . . . . . . . . . . . . . . . . . . . . . .4-60<br />
4.3.8 Local Display modes . . . . . . . . . . . . . . . . . . . . . . . . . . .4-61<br />
4.3.9 Local Display Error codes . . . . . . . . . . . . . . . . . . . . . . .4-65<br />
4.3.10 Time-out settings . . . . . . . . . . . . . . . . . . . . . . . . . . . . . .4-66<br />
4.4 FBM . . . . . . . . . . . . . . . . . . . . . . . . . . . . . . . . . . . . . . . . . . . . . . . . . .4-67<br />
4.4.1 Power Supply . . . . . . . . . . . . . . . . . . . . . . . . . . . . . . . . .4-67<br />
4.4.2 Operation - front panel . . . . . . . . . . . . . . . . . . . . . . . . . .4-67<br />
4.4.3 FBM instead of FCU for small systems . . . . . . . . . . . . .4-68<br />
4.5 RDU 40 . . . . . . . . . . . . . . . . . . . . . . . . . . . . . . . . . . . . . . . . . . . . . . . .4-69<br />
4.5.1 Installation . . . . . . . . . . . . . . . . . . . . . . . . . . . . . . . . . . .4-69<br />
4.5.2 Two RDU 40 connected to the same <strong>Rex</strong> . . . . . . . . . . .4-71<br />
4.5.3 Data items . . . . . . . . . . . . . . . . . . . . . . . . . . . . . . . . . . .4-71
<strong>Service</strong> <strong>Manual</strong><br />
308012En, Ed.1/Rev.C<br />
August 2010<br />
Rosemount <strong>TankRadar</strong> <strong>Rex</strong><br />
Contents<br />
5. CALIBRATION . . . . . . . . . . . . . . . . . . . . . . . . . . . . . . . . . 5-1<br />
5.1 INTRODUCTION . . . . . . . . . . . . . . . . . . . . . . . . . . . . . . . . . . . . . . . . .5-1<br />
5.2 MANUALLY ADJUSTING THE CALIBRATION DISTANCE . . . . . . . . .5-1<br />
5.3 USING THE WINSETUP CALIBRATE FUNCTION . . . . . . . . . . . . . . .5-3<br />
5.3.1 Required information . . . . . . . . . . . . . . . . . . . . . . . . . . . .5-3<br />
5.3.2 Hand dipping . . . . . . . . . . . . . . . . . . . . . . . . . . . . . . . . . .5-4<br />
5.3.3 Entering calibration data . . . . . . . . . . . . . . . . . . . . . . . . . .5-5<br />
6. TROUBLESHOOTING . . . . . . . . . . . . . . . . . . . . . . . . . . . . 6-1<br />
7. SPARE PARTS . . . . . . . . . . . . . . . . . . . . . . . . . . . . . . . . 7-1<br />
8. LIST OF DRAWINGS. . . . . . . . . . . . . . . . . . . . . . . . . . . . . 8-1<br />
9. TECHNICAL DATA . . . . . . . . . . . . . . . . . . . . . . . . . . . . . . 9-1<br />
9.1 RTG 3900 . . . . . . . . . . . . . . . . . . . . . . . . . . . . . . . . . . . . . . . . . . . . . . .9-1<br />
9.2 RTG 3920 . . . . . . . . . . . . . . . . . . . . . . . . . . . . . . . . . . . . . . . . . . . . . .9-2<br />
9.3 RTG 3930 . . . . . . . . . . . . . . . . . . . . . . . . . . . . . . . . . . . . . . . . . . . . . .9-3<br />
9.4 RTG 3950 . . . . . . . . . . . . . . . . . . . . . . . . . . . . . . . . . . . . . . . . . . . . . . .9-4<br />
9.5 RTG 3960 . . . . . . . . . . . . . . . . . . . . . . . . . . . . . . . . . . . . . . . . . . . . . .9-5<br />
9.6 FCU 2160 . . . . . . . . . . . . . . . . . . . . . . . . . . . . . . . . . . . . . . . . . . . . . . .9-6<br />
9.7 DAU 2100 . . . . . . . . . . . . . . . . . . . . . . . . . . . . . . . . . . . . . . . . . . . . . . .9-7<br />
9.8 RDU 40 . . . . . . . . . . . . . . . . . . . . . . . . . . . . . . . . . . . . . . . . . . . . . . . . .9-8<br />
9.9 FBM 2180 . . . . . . . . . . . . . . . . . . . . . . . . . . . . . . . . . . . . . . . . . . . . . . .9-9<br />
INDEX . . . . . . . . . . . . . . . . . . . . . . . . . . . . . . . . . . . . . . . .INDEX-1<br />
TOC-3
Rosemount <strong>TankRadar</strong> <strong>Rex</strong><br />
Contents<br />
TOC-4<br />
<strong>Service</strong> <strong>Manual</strong><br />
308012En, Ed.1/Rev.C<br />
August 2010
<strong>Service</strong> <strong>Manual</strong><br />
308012En, Ed.1/Rev.D<br />
August 2010<br />
1. System Description<br />
Rosemount Tank Radar <strong>Rex</strong><br />
Chapter 1 System Description<br />
The <strong>TankRadar</strong> <strong>Rex</strong> System is a monitoring and control system for tank<br />
level gauging. The system can interface various sensors, such as<br />
temperature and pressure sensors, for complete inventory control.<br />
There is a distributed intelligence in the various units of the system. The<br />
units continuously collect and process information. When a request for<br />
information is received an immediate response is sent with updated<br />
information. The units communicate with each other on a field bus, the<br />
TRL/2 Bus.<br />
No part of the equipment is in actual contact with the product in the tank<br />
and the antenna is the only part of the gauge that is exposed to the tank<br />
atmosphere. The Radar Tank Gauge sends microwaves towards the<br />
surface of the product in the tank. The level is calculated based on the<br />
echo from the surface.<br />
<strong>TankRadar</strong> <strong>Rex</strong> can measure the level of almost any product, including<br />
bitumen, crude oil, refined products, aggressive chemicals, LPG and<br />
LNG, etc. Using a suitable Tank Connection Unit, the <strong>TankRadar</strong> <strong>Rex</strong><br />
System can gauge any type of tank<br />
Optional Host Computer<br />
or Slave PC<br />
<strong>Rex</strong><br />
TankMaster<br />
RS232<br />
FBM<br />
Modbus<br />
protocol<br />
Field Bus<br />
Figure 1-1. Example of a small <strong>TankRadar</strong> <strong>Rex</strong> System<br />
Optional Second<br />
Tank Group<br />
Control Room Level<br />
<strong>Rex</strong> <strong>Rex</strong> <strong>Rex</strong> <strong>Rex</strong><br />
DAU<br />
Temp.<br />
sensors<br />
DAU DAU<br />
Temp.<br />
sensors<br />
Field Level<br />
Analog In<br />
Analog out<br />
Temperature<br />
Relay Out HART<br />
1-1
Rosemount Tank Radar <strong>Rex</strong><br />
Chapter 1 System Description<br />
1-2<br />
Tank1<br />
Value Hi Lim Lo Lim HH Lim LL Lim<br />
Level Auto 18.000 2.000 20.000 1.000<br />
Temp Avg Auto 120.0 80.0<br />
Pressure Auto 2.0 0.0<br />
Delay Hyst<br />
Level<br />
0 0.200<br />
Leak Limit 0.200<br />
Temp Avg 0 5.0<br />
Enable<br />
Pressure 0 0.5<br />
Enter Cancel New Tank<br />
Value Entry<br />
<strong>Service</strong> <strong>Manual</strong><br />
308012En, Ed.1/Rev.D<br />
August 2010<br />
Figure 1-2 Example of a general configuration of a <strong>TankRadar</strong> <strong>Rex</strong><br />
System<br />
All the measured data is presented to the operator by TankMaster<br />
WinOpi, which in its complete version contains inventory functions. A<br />
plant host computer can be connected for further processing of data.<br />
All Rosemount Tank Control supplied parts for tank top mounting weigh<br />
less than 25 kg (55 lb) (except for pressure flange etc. for the LPG/LNG<br />
Gauge). This makes it possible for one man to carry the various<br />
<strong>TankRadar</strong> parts to the tank top for installation.<br />
Please read the Technical Description for a more detailed description<br />
of the Rosemount <strong>TankRadar</strong> <strong>Rex</strong> system.
<strong>Service</strong> <strong>Manual</strong><br />
308012En, Ed.1/Rev.D<br />
August 2010<br />
The basic parts of the <strong>TankRadar</strong> <strong>Rex</strong> system are:<br />
Rosemount Tank Radar <strong>Rex</strong><br />
Chapter 1 System Description<br />
• The Radar Tank Gauge, RTG, is an intelligent explosion protected<br />
instrument for measuring the level of a product inside a tank. Four<br />
different Tank Connection Units can be attached in order to satisfy<br />
a variety of different applications.<br />
• The Data Acquisition Unit, DAU, is a local readout/connection<br />
unit for use with the <strong>TankRadar</strong> <strong>Rex</strong> tank gauging system. The<br />
DAU is used for connection of temperature sensors when more<br />
inputs/outputs are required than is available in the <strong>Rex</strong> Gauge.<br />
• The Field Communication Unit, FCU, acts as a gateway and<br />
data concentrator between the Group Bus and the Field Bus. Each<br />
FCU can have a total of 32 RTGs and 32 DAUs connected to it.<br />
• The Field Bus Modem, FBM, acts as a converter between USB<br />
or RS-232C and the TRL/2 Bus. It is used for connecting a PC with<br />
TankMaster to the TRL/2 Bus.<br />
• The Remote Display Unit, RDU 40, is a display unit for presenting<br />
calculated and measured data from the <strong>Rex</strong> gauge such as<br />
level, average temperature, volume, signal strength etc.<br />
• The TankMaster is a software package for installation and configuration<br />
of level gauging equipment manufactured by Rosemount.<br />
The TankMaster program package provides powerful and easy-touse<br />
tools for installation and configuration of level gauging<br />
devices.<br />
1-3
Rosemount Tank Radar <strong>Rex</strong><br />
Chapter 1 System Description<br />
1-4<br />
<strong>Service</strong> <strong>Manual</strong><br />
308012En, Ed.1/Rev.D<br />
August 2010
<strong>Service</strong> <strong>Manual</strong><br />
308012En, Ed.1/Rev.D<br />
August 2010<br />
2. Safety<br />
2.1 Intrinsic safety<br />
Rosemount Tank Radar <strong>Rex</strong><br />
Chapter 2 Safety<br />
<strong>TankRadar</strong> <strong>Rex</strong> equipment is often used in areas where flammable<br />
materials are handled and where an explosive atmosphere may be<br />
present. To protect both the plant and the staff, precautions must be<br />
taken to ensure that this atmosphere cannot be ignited. These areas are<br />
called hazardous areas and equipment within these areas are explosion<br />
protected.<br />
A number of different explosion protection techniques have been<br />
developed over the years. Intrinsic safety and explosion proof (or flame<br />
proof) safety are two techniques.<br />
Intrinsic safety, IS, is based on the principle of restricting electrical<br />
energy available in hazardous-area circuits such that any sparks or hot<br />
surfaces, that may occur as a result of up to two electrical faults in<br />
components, are too weak to cause ignition. Intrinsic safety is the only<br />
technique accepted for Zone 0 (high risk) hazardous areas. It is also safe<br />
for personnel and allows equipment to be maintained without the need<br />
for a gas-free certificate.<br />
The basic principles of intrinsic safety are:<br />
• All flammable materials are grouped according to the energy<br />
needed to ignite them.<br />
• Equipment located in hazardous areas are classified according to<br />
the maximum surface temperature that it can produce and this<br />
must be safe with the flammable gases that may be present.<br />
• Hazardous areas are classified according to the probability that an<br />
explosive atmosphere is present, and this dictates whether or not<br />
a particular explosion protection technique may be used.<br />
2-1
Rosemount Tank Radar <strong>Rex</strong><br />
Chapter 2 Safety<br />
2-2<br />
IMPORTANT!<br />
2.2 Explosion Proof<br />
<strong>Service</strong> <strong>Manual</strong><br />
308012En, Ed.1/Rev.D<br />
August 2010<br />
For trouble shooting and repair work of components in or in<br />
connection to intrinsically safe equipment, strict observance<br />
of the following rules is necessary:<br />
• Disconnect the power supply to the<br />
Radar Tank Gauges and Field Communication<br />
Units.<br />
• Use a certified battery operated instrument<br />
only.<br />
• Use Rosemount original spare parts only.<br />
Replacement with non-original spare<br />
parts may jeopardize the intrinsic safety.<br />
Explosion proof enclosures can be used when an explosion can be<br />
allowed as long as it does not spread outside the enclosure. The<br />
enclosure must be strong enough to withstand the pressure and must<br />
have narrow gaps to allow the pressure to escape without igniting the<br />
atmosphere outside the equipment.<br />
IMPORTANT!<br />
Any substitution to non-recognized parts may impair<br />
intrinsic safety.<br />
The explosion-proof (flame-proof) enclosures of the Radar<br />
Tank Gauge and the Data Acquisition Unit must not be<br />
opened while the units are powered.
<strong>Service</strong> <strong>Manual</strong><br />
308012En, Ed.1/Rev.D<br />
August 2010<br />
3. Device Description<br />
3.1 <strong>Rex</strong> RTG<br />
3.1.1 Overview<br />
Rosemount Tank Radar <strong>Rex</strong><br />
Chapter 3 Device Description<br />
The Radar Tank Gauge <strong>Rex</strong>, RTG <strong>Rex</strong>, is an autonomous distance<br />
measuring device. The distance and level calculations are continuously<br />
carried out in the Radar Tank Gauge. Upon request from a master the<br />
RTG can send the level information, status and other information on the<br />
Field Bus.<br />
All <strong>Rex</strong> gauges consist of two main parts; the Transmitter Head (TH) and<br />
a Tank Connection Unit. A number of different Tank Connection Units<br />
(Antennas) can be attached in order to satisfy a variety of different<br />
applications.<br />
There are different types of Radar Tank Gauges:<br />
• The Horn Antenna Gauge RTG 3920, for fixed roof installation<br />
without still pipe.<br />
• The Parabolic Antenna Gauge RTG 3930, for demanding environments<br />
without still pipe.<br />
• The Still Pipe Gauge RTG 3950, for measuring in still pipes.<br />
• The LPG/LNG Gauge RTG 3960, for liquid gas, LPG and LNG.<br />
All antenna types use the same kind of Transmitter Head Electronics.<br />
3-1
Rosemount Tank Radar <strong>Rex</strong><br />
Chapter 3 Device Description<br />
3-2<br />
3.1.2 Antenna types<br />
The Horn Antenna Gauge, RTG 3920<br />
The Horn Antenna Gauge is designed<br />
for an 8 in. antenna to be used in small<br />
size openings on tanks with fixed roofs.<br />
The RTG 3920 is designed for<br />
measurement of a variety of oil<br />
products and chemicals. However, for<br />
bitumen/asphalt and similar products<br />
the Parabolic antenna is<br />
recommended.<br />
The Parabolic Antenna Gauge, RTG<br />
3930<br />
The Parabolic Antenna Gauge RTG<br />
3930 measures level of all types of<br />
liquids, from light products to bitumen/<br />
asphalt. The gauge is designed for<br />
mounting on tanks with fixed roofs and<br />
has custody transfer accuracy.<br />
The design of the parabolic antenna<br />
provides extreme tolerance against<br />
sticky and condensing products. The<br />
narrow beam of this antenna makes it<br />
very suitable in narrow tanks with<br />
internal structures.<br />
<strong>Service</strong> <strong>Manual</strong><br />
308012En, Ed.1/Rev.D<br />
August 2010<br />
Figure 3-1. RTG 3920<br />
Figure 3-2. RTG 3930
<strong>Service</strong> <strong>Manual</strong><br />
308012En, Ed.1/Rev.D<br />
August 2010<br />
The Still Pipe Gauge, RTG 3950<br />
The Still Pipe Gauge is used on tanks<br />
with still pipes and with all products<br />
suited for still pipes.<br />
The gauge uses a low-loss radar<br />
propagation mode which virtually<br />
eliminates the influence of the still pipe<br />
condition. Measurements is made with<br />
highest accuracy even when the pipe<br />
is old, rusty and covered with deposits.<br />
The Still Pipe Gauge fits 5”, 6”, 8”, 10”<br />
and 12” pipes. It can be mounted on an<br />
existing still pipe and there is no need<br />
to take the tank out of operation during<br />
installation.<br />
Rosemount Tank Radar <strong>Rex</strong><br />
Chapter 3 Device Description<br />
There are two versions of RTG 3950:<br />
fixed and inclined. The inclined version<br />
has a hinged hatch, enabling full pipe<br />
size product sampling or verification<br />
hand-dips. Figure 3-3. RTG 3950<br />
3-3
Rosemount Tank Radar <strong>Rex</strong><br />
Chapter 3 Device Description<br />
3-4<br />
LPN/LNG Gauge, RTG 3960<br />
The RTG 3960 is designed for level<br />
measurement in LPG and LNG tanks.<br />
A 4 in. still pipe is used as a wave<br />
guide for the measurement. It prevents<br />
a wavy or boiling surface from<br />
disturbing the measurement. Radar<br />
signals are transmitted inside the pipe<br />
towards the surface.<br />
The pressure sealing is a quarts<br />
window approved for use in pressure<br />
vessels. As option the gauge can also<br />
be equipped with a fire-proof block<br />
valve and a vapor space pressure<br />
sensor.<br />
The LPG/LNG Gauge is available in<br />
three different versions, a 150 PSI<br />
version, a 300 PSI version and a 600<br />
PSI version.<br />
The reference pin function enables<br />
verification of measurement without<br />
opening the tank. There is a reference<br />
pin at the top of the still pipe and a<br />
calibration ring at the bottom. By<br />
setting the gauge into “test mode” it<br />
measures against the reference pin<br />
and the calibration ring and compares<br />
with the actual distances stored during<br />
the transmitter configuration.<br />
<strong>Service</strong> <strong>Manual</strong><br />
308012En, Ed.1/Rev.D<br />
August 2010<br />
Figure 3-4. RTG 3960
<strong>Service</strong> <strong>Manual</strong><br />
308012En, Ed.1/Rev.D<br />
August 2010<br />
3.1.3 Measurement principle<br />
Rosemount Tank Radar <strong>Rex</strong><br />
Chapter 3 Device Description<br />
By using FMCW (Frequency Modulated Continuous Wave) method, <strong>Rex</strong><br />
transmits a microwave signal with a continuously varying frequency<br />
towards the liquid surface. When the reflected signal returns to the<br />
antenna, it is mixed with the outgoing signal.<br />
�f {<br />
Frequency, f, (GHz)<br />
f0<br />
f1<br />
Figure 3-5. The FMCW method: The distance (d) is calculated my measuring<br />
the frequency distance (Df) between the transmitted<br />
frequency (f1) and the reflected frequency (f0).<br />
Since the transmitter continuously changes the frequency of the<br />
transmitted signal, there will be a difference in frequency between the<br />
transmitted and the reflected signals.<br />
The gauge mixes the two signals, resulting in a low frequency signal<br />
which is proportional to the distance to the liquid surface. This signal can<br />
be measured very accurately allowing fast, reliable and accurate level<br />
measurements.<br />
<strong>Rex</strong> uses an optimum microwave frequency, which reduces sensitivity to<br />
vapor, foam and contamination of the antenna, and keeps the radar<br />
beam narrow in order to minimize influence from walls and disturbing<br />
objects.<br />
Fast Fourier Transformation - FFT<br />
<strong>Rex</strong> uses FFT, which is a well established signal processing technique,<br />
to obtain a frequency spectrum of all echoes in the tank. From this<br />
frequency spectrum the surface level is extracted. In combination with<br />
Rosemount’s Echofixer, FFT allows measurements in tanks with<br />
agitators, mixers and other disturbing objects.<br />
Echofixer<br />
t0 �f~d Time, t<br />
Rosemount’s Echofixer provides a technique to adapt measurements to<br />
various situations, by using information from previous measurements.<br />
3-5
Rosemount Tank Radar <strong>Rex</strong><br />
Chapter 3 Device Description<br />
3-6<br />
Fast High Accuracy Signal Technique - FHAST TM<br />
<strong>Service</strong> <strong>Manual</strong><br />
308012En, Ed.1/Rev.D<br />
August 2010<br />
To further improve measurement accuracy, <strong>Rex</strong> can utilize the benefits of<br />
Rosemount’s Fast High Accuracy Signal Technique��<br />
Multiple Echo Tracking - MET TM<br />
Multiple Echo Tracking is another advanced feature, which provides<br />
increased resolution in tanks with disturbing objects. MET facilitates the<br />
separation of disturbances from the actual product surface echo.<br />
Programmable<br />
Memory<br />
Echofixer<br />
Dynamic<br />
Memory<br />
Signal<br />
Digital Signal <strong>Process</strong>or<br />
FFT<br />
Product Level<br />
FHAST<br />
Filter<br />
Figure 3-6. Signal processing schedule<br />
Real Time<br />
Memory<br />
Multiple Echo<br />
Tracking<br />
High Accuracy<br />
Disturbance Echo<br />
Handling
<strong>Service</strong> <strong>Manual</strong><br />
308012En, Ed.1/Rev.D<br />
August 2010<br />
3.1.4 Transmitter Head Electronics<br />
Rosemount Tank Radar <strong>Rex</strong><br />
Chapter 3 Device Description<br />
The electronics is mounted in an exchangeable unit in the explosion<br />
proof Transmitter Head. A high measurement accuracy is achieved by<br />
using digital reference circuitry, and by controlling the internal<br />
temperature by an internal heater.<br />
The 3900 transmitter head can be used on all types of <strong>Rex</strong> antennas.<br />
A metrological seal is available to prevent unauthorized changes of<br />
database settings.<br />
Note! Some of the electronic cards shown below are optional and may not be<br />
installed in your transmitter<br />
.<br />
Transformer<br />
Rectifier Card<br />
(TRC)<br />
Field Communication<br />
Card (FCC)<br />
Relay Output Card (ROC)<br />
Signal <strong>Process</strong>ing Card (SPC)<br />
Figure 3-7. <strong>Rex</strong> Transmitter Head Electronics<br />
Analog <strong>Process</strong>ing Card (APC)<br />
Transmitter Interface<br />
Card (TIC)<br />
Temperature Multiplexing<br />
Card (TMC)<br />
Motherboard<br />
3-7
Rosemount Tank Radar <strong>Rex</strong><br />
Chapter 3 Device Description<br />
3-8<br />
Signal <strong>Process</strong>ing Card (SPC)<br />
<strong>Service</strong> <strong>Manual</strong><br />
308012En, Ed.1/Rev.D<br />
August 2010<br />
The SPC is mainly a digital processor card for advanced signal and<br />
communication processing as well as handling of auxiliary functions.<br />
Analog <strong>Process</strong>ing Card (APC)<br />
The APC is used for filtering and multiplexing of analog input signals. By<br />
keeping the analog circuitry on a separate card a high Signal to Noise<br />
Ratio is achieved.<br />
Field Communication Card (FCC)<br />
The FCC handles communication with external devices. There are<br />
different versions of the FCC card allowing you to use various types of<br />
communication protocols and even emulate other types of gauges.<br />
Relay Output Card (ROC), optional<br />
The Relay Output Card (ROC) contains two relays. It allows controlling<br />
external devices such as valves, pumps, heating coils etc.<br />
Transmitter Interface Card (TIC, optional)<br />
The Transmitter Interface Card (TIC) is required for intrinsically safe<br />
auxiliary inputs. The TIC includes:<br />
• Two supply barriers and two input/return barriers for 4-20 mA current<br />
loops.<br />
• One supply barrier for a DAU or a local display unit.<br />
• One signal barrier for communication with the DAU or local display<br />
unit.<br />
• Signal/supply connection for optional TMC.<br />
Temperature Multiplexer Card (TMC), optional<br />
The Temperature Multiplexer Card (TMC) is an optional add-on board<br />
which is mounted on the back of TIC. TMC is used to connect up to 6<br />
temperature sensors. Both spot and average sensors are supported.
<strong>Service</strong> <strong>Manual</strong><br />
308012En, Ed.1/Rev.D<br />
August 2010<br />
3.1.5 Write protection (Metrological Seal)<br />
Metrological seal<br />
Rosemount Tank Radar <strong>Rex</strong><br />
Chapter 3 Device Description<br />
Part of the memory space in the Electronic Unit is of EEPROM type<br />
(Electrically Erasable Programmable Read Only Memory). Program and<br />
database updates are possible to perform over the Field Bus without<br />
opening the Safety Enclosure.<br />
A switch on the FCC board can be used to prevent unauthorized<br />
changes in the RTG database. The switch can be sealed in the writeinhibit<br />
position by using a special plastic cover.<br />
For further information see 4.1.7<br />
Figure 3-8. Metrological seal<br />
As an option <strong>Rex</strong> can be equipped with the TRL/2 Metrological Seal.<br />
consisting of a connection rod that activates the write protection switch.<br />
Rod<br />
Write enable<br />
Write inhibit<br />
Figure 3-9. Optional version of Metrological Seal.<br />
3-9
Rosemount Tank Radar <strong>Rex</strong><br />
Chapter 3 Device Description<br />
3-10<br />
3.1.6 Internal calculations<br />
<strong>Service</strong> <strong>Manual</strong><br />
308012En, Ed.1/Rev.D<br />
August 2010<br />
<strong>TankRadar</strong> <strong>Rex</strong> is designed to make inventory calculations directly in the<br />
gauge to be used by a DCS system, or give precise inputs for tank<br />
calculations in another computer. The gauge can receive and process<br />
signals from analog and digital pressure transmitters, water bottom<br />
sensors etc. All measured data are transmitted on the field bus and can<br />
be further processed in the control room by the TankMaster PC software<br />
or by the plants host computer/DCS system. Due to the high processing<br />
capacity, inventory calculations can be made by the signal processor in<br />
the gauge without any separate field computer.<br />
Figure 3-10. Hybrid tank gauging combines radar and pressure measurement<br />
to get density and mass information online.<br />
The gauge calculates:<br />
• Total observed volume using the tank strapping table<br />
• Mass (if pressure sensor connected)<br />
• Observed density (if pressure sensor connected)<br />
• Level (corrected for thermal tank wall expansion)<br />
• Temperature<br />
• Oil/Water interface level<br />
Strapping table data downloaded from the Rosemount TankMaster PC<br />
software are resident in the gauge.<br />
All data is calculated according to updated API and ISO standards. The<br />
temperature calculations include API algorithms to handle elements<br />
close to the bottom.<br />
The level value is software corrected for changes in tank reference<br />
height.<br />
Both metric and USA/UK units are supported.
<strong>Service</strong> <strong>Manual</strong><br />
308012En, Ed.1/Rev.D<br />
August 2010<br />
3.1.7 Inputs and Outputs<br />
Inputs<br />
The gauge has:<br />
• up to 6 temperature inputs directly into the gauge.<br />
Rosemount Tank Radar <strong>Rex</strong><br />
Chapter 3 Device Description<br />
• up to 14 temperature inputs to each gauge via separate Data<br />
Acquisition Unit.<br />
• two 18 bits high accuracy analog inputs for e.g. pressure transmitters<br />
or water bottom sensors. The gauge can act as a single<br />
HART master using one analog input to interface intrinsically safe<br />
digital HART inputs from up to 3 HART based sensors.<br />
Technical Data, Analog inputs<br />
Outputs<br />
Accuracy ±20 �A<br />
Input range 4-20 mA<br />
Update range 0.5 Hz<br />
Low alarm level < 3.8 mA, configurable<br />
High alarm level > 20.7 mA, configurable<br />
U max from TIC 25.2 V<br />
I max from TIC 96 mA<br />
P max from TIC 0.6 W<br />
Available voltage 13.7 V (at 20 mA)<br />
The gauge has:<br />
• two relay outputs (non-intrinsically safe) to be used for level, temperature<br />
or other alarms (250 VAC, 4 A). The relays are approved<br />
for overfill safety by TÜV and have function feedback. Operation is<br />
selectable as “normally open” or “normally closed”.<br />
• one optional non-intrinsically safe Analog output. The Analog output<br />
replaces the second Relay output.<br />
Technical Data, Relay outputs<br />
Contact rating (resistive<br />
load)<br />
250 V, 4A<br />
Contact life 100 000 op<br />
3-11
Rosemount Tank Radar <strong>Rex</strong><br />
Chapter 3 Device Description<br />
3-12<br />
Technical Data, Analog output<br />
<strong>Service</strong> <strong>Manual</strong><br />
308012En, Ed.1/Rev.D<br />
August 2010<br />
Type Analog 4-20 mA current loop, passive<br />
or active output (external or internal<br />
loop supply)<br />
Galvanic isolation >1500 V RMS or DC<br />
Range 4-20 mA<br />
Alarm level 3.8 mA, 22 mA, “freeze current”, Binary<br />
High or Binary Low; software selectable<br />
Resolution 0.5 mA (0.003%)<br />
Linearity ± 0.01%<br />
Temperature drift ± 50 ppm/C°<br />
Output impedance >10 MW<br />
Voltage compliance 7-30 V<br />
External loop resistance<br />
<strong>Service</strong> <strong>Manual</strong><br />
308012En, Ed.1/Rev.D<br />
August 2010<br />
3.1.8 Database Registers<br />
Holding Register<br />
Rosemount Tank Radar <strong>Rex</strong><br />
Chapter 3 Device Description<br />
The Holding registers store various transmitter parameters used to<br />
control the measurement performance.<br />
The database is stored in the non volatile EEPROM memory. It contains<br />
tank constants and data controlling the RTG performance. These data is<br />
used by the Application Software in order to calculate product level and<br />
other values of interest. Since the RTG measures the distance from the<br />
RTG to the product surface, the dimensions of the tank are needed in<br />
order to calculate the actual product level. The information needed to<br />
transform the measured distance into level values is stored in the<br />
database registers.<br />
Ullage<br />
Input<br />
Register<br />
Ullage<br />
TankMaster<br />
Measured<br />
Holding<br />
Register<br />
Tank Data<br />
Figure 3-11. Using information from the database the<br />
measured ullage is converted to tank level.<br />
The database contains other values than tank dimensions as well.<br />
Several registers are used for controlling the RTG gauging process. For<br />
example, there are registers which specify the measurement range, and<br />
registers which determine the lowest amplitude to be considered as a<br />
valid radar echo.<br />
3-13
Rosemount Tank Radar <strong>Rex</strong><br />
Chapter 3 Device Description<br />
3-14<br />
Input Register<br />
<strong>Service</strong> <strong>Manual</strong><br />
308012En, Ed.1/Rev.D<br />
August 2010<br />
Measured data is continuously stored in the Input registers of DAUs,<br />
RTGs and FCUs. By viewing the contents of device input registers you<br />
can check that the device works properly.<br />
The following summary lists some frequently referred database registers:<br />
Correction values<br />
Unit ID Every RTG, DAU and FCU has a unique Unit ID<br />
which is used to identify the unit when installing a<br />
<strong>Rex</strong> system.<br />
System configuration<br />
RTG address The assigned Modbus slave address for the RTG.<br />
Default value: 246.<br />
DAU address The assigned Modbus slave address for the associated<br />
DAU. Default value: 247.<br />
FCU address The assigned Modbus slave address for the associated<br />
FCU. Default value: 245.<br />
Tank Connection<br />
Length,<br />
TCL<br />
Tank Dimensions<br />
Tank Reference<br />
Height (R)<br />
RTG Reference<br />
Distance (G)<br />
The electrical distance from the Transmitter Head<br />
Electronics to the RTG Reference Point (the electrical<br />
distance is not equal to the physical distance).<br />
The TCL value is different for different gauge types/<br />
antennas. When configuring a <strong>Rex</strong> transmitter in<br />
TankMaster WinSetup you can choose between<br />
predefined or user-defined antennas (see TankMaster<br />
WinSetup Reference <strong>Manual</strong>). For a userdefined<br />
antenna TCL must be manually entered.<br />
For predefined antennas TCL is automatically set.<br />
The Tank Reference Height (R) is the distance<br />
between the Tank Reference Point and the Zero<br />
Level (Dipping Datum Point) at the bottom of the<br />
tank.<br />
The RTG Reference Distance (G) is the distance<br />
between the Tank Reference Point and the RTG<br />
Reference Point. The RTG Reference Point is<br />
located at the top surface of the customer’s flange<br />
or manhole cover on which the gauge is mounted<br />
as illustrated in Figure 3-12. For Still Pipe Gauges<br />
the RTG Reference point is located at the hand-dip<br />
mark on the Still Pipe Gauge Stand.<br />
G is positive if the Tank Reference Point is located<br />
above the RTG Ref Point. Otherwise G is negative.
<strong>Service</strong> <strong>Manual</strong><br />
308012En, Ed.1/Rev.D<br />
August 2010<br />
Minimum level<br />
distance (C)<br />
Calibration Distance<br />
Hold Off<br />
Distance (UFM)<br />
Rosemount Tank Radar <strong>Rex</strong><br />
Chapter 3 Device Description<br />
The Minimum Level Distance (C) is defined as the<br />
distance between the Zero Level (Dipping Datum<br />
Point) and Minimum Level of the product surface<br />
(tank bottom). By specifying a C-distance, the measuring<br />
range can be extended to the bottom of the<br />
tank. If C>0, negative level values will be displayed<br />
when the product surface is below the Zero Level.<br />
Select the Show negative level values as zero<br />
check box if you want levels below the Zero Level to<br />
be displayed as Level=0.<br />
If you set the C-distance =0, measurements below<br />
the Zero Level will not be approved, i.e. the RTG will<br />
report an invalid level.<br />
Calibration Distance is used for calibration of the<br />
RTG.<br />
The Hold Off Distance (also referred to as Upper Filter<br />
Margin) defines how close to the RTG Reference<br />
Point measurements are accepted. Normally this<br />
parameter should not be changed. The Hold Off<br />
Distance may be increased, if for example, there<br />
are disturbing echoes from the tank nozzle.<br />
3-15
Rosemount Tank Radar <strong>Rex</strong><br />
Chapter 3 Device Description<br />
RTG Ref<br />
Distance (G)<br />
3-16<br />
Tank<br />
Reference<br />
Height (R)<br />
Min. Level<br />
Distance (C)<br />
3.1.9 Tank Geometry<br />
<strong>Service</strong> <strong>Manual</strong><br />
308012En, Ed.1/Rev.D<br />
August 2010<br />
The following parameters are used for tank geometry configuration of a<br />
<strong>Rex</strong> transmitter:<br />
Tank Reference Point<br />
RTG Reference<br />
Point RTG Reference Point<br />
Tank Ullage<br />
Dipping Datum Point<br />
(Zero Level)<br />
Level<br />
Figure 3-12. Tank geometry<br />
RTG Ullage<br />
See chapter 3.1.8 for information on the various tank geometry<br />
parameters. See also the TankMaster WinSetup Reference<br />
<strong>Manual</strong> for information on how to configure a <strong>Rex</strong> level gauge.<br />
Hold Off<br />
distance<br />
RTG Reference<br />
Point
<strong>Service</strong> <strong>Manual</strong><br />
308012En, Ed.1/Rev.D<br />
August 2010<br />
3.1.10 Software Description<br />
Rosemount Tank Radar <strong>Rex</strong><br />
Chapter 3 Device Description<br />
The <strong>Rex</strong> transmitter contains software which controls measurement,<br />
communication etc. Each program can be changed by either replacing<br />
an EEPROM or by downloading through the TRL/2 bus. Both programs<br />
must be changed simultaneously. The EEPROM contains both the Boot<br />
and the Application programs.<br />
The transmitter software performs actions as:<br />
• Internal initialization<br />
• Communication handling<br />
• Implementing measurement features<br />
• Internal checks<br />
For further information, see Chapter 4.1.5.<br />
3-17
Rosemount Tank Radar <strong>Rex</strong><br />
Chapter 3 Device Description<br />
3.2 Field Communication Unit (FCU)<br />
3-18<br />
<strong>Service</strong> <strong>Manual</strong><br />
308012En, Ed.1/Rev.D<br />
August 2010<br />
The Field Communication Unit, FCU acts as a master of communications<br />
on the Field Bus and as a slave on the Group Bus. The FCU is an<br />
intelligent data concentrator that continuously collects input data from a<br />
group of Radar Tank Gauges and Data Acquisition Units and stores it in<br />
a buffer memory.<br />
The heart of the FCU is a microprocessor with RAM and EEPROM for<br />
data and program storage.<br />
The FCU is delivered in an IP-65 weather protected, wall-mounted box of<br />
the same type as for the Data Acquisition Unit. See Figure 3-13.<br />
Ground<br />
Connection<br />
Figure 3-13. Field Communication Unit FCU 2160<br />
Cable Outputs<br />
Note! No explosion protection is provided so the Field Communication Unit<br />
must be installed in a non-hazardous area.
<strong>Service</strong> <strong>Manual</strong><br />
308012En, Ed.1/Rev.D<br />
August 2010<br />
3.2.1 Field Bus and Group Bus Communication<br />
Rosemount Tank Radar <strong>Rex</strong><br />
Chapter 3 Device Description<br />
The Field Communication Unit has six communication ports, X1 to X6.<br />
The standard configuration is six TCM interface boards with four<br />
TRL/2 Field Bus (FB) ports and two TRL/2 Group Bus (GB) ports. As an<br />
alternative, the FCM boards at the Group and Field Bus ports can be<br />
replaced with FCI boards for RS-485 communication. The FCU<br />
communication ports can be configured according to the following table:<br />
X1 X2 X3 X4 X5 X6<br />
FB FB FB FB GB GB<br />
FB FB FB GB GB GB<br />
FB FB GB GB GB GB<br />
The Field Communication Unit has six communication ports for the Field<br />
bus and Group bus communication. The Group Bus ports can be used<br />
independently of each other. For example, one Group Bus can be<br />
connected to a PC with OPI software, and at the same time another<br />
Group Bus may be connected to a plant host computer.<br />
There are four Field Bus ports each of which can connect up to eight<br />
units. A unit may consist of a <strong>Rex</strong> gauge, or a <strong>Rex</strong> gauge connected to a<br />
DAU.<br />
If the number of cables to a Field Communication Unit is higher than the<br />
capacity of the connectors then standard Junction Boxes (fitted for use in<br />
the environment in question) can be used to split the connections.<br />
There is a steel plate to shield the bus ports from the rest of the<br />
electronics in the FCU.<br />
3.2.2 Input and Database Registers<br />
The input register is a dynamic register which holds the values that the<br />
FCU receives over the TRL/2 bus from connected slave units (RTGs,<br />
DAUs). Level, temperature and other measured data is stored in the<br />
input register, and are sent to the master on request.<br />
The database contains information on program version, communication<br />
protocol values, slave configuration, memory configuration etc. It is<br />
divided into one write protected and one unprotected part. See Chapter<br />
4.1.7 on how to remove the write protection.<br />
3-19
Rosemount Tank Radar <strong>Rex</strong><br />
Chapter 3 Device Description<br />
3-20<br />
3.2.3 Software<br />
The FCU software controls the<br />
collection of data from the units<br />
connected to the Field Bus, and<br />
handles the distribution of data<br />
to the TankMaster PC on the<br />
Group Bus.<br />
The Group Bus <strong>Process</strong> and the<br />
Field Bus <strong>Process</strong> work as<br />
interfaces to the serial<br />
communication control, SCC.<br />
The EEPROM switch is used by<br />
the program to determine if it is<br />
allowed to write to the<br />
EEPROM. The watch dog has<br />
to be gritted at least every tenth<br />
second or else a reset is<br />
performed. Direct Memory<br />
Access (DMA) channels in the<br />
FCU microprocessor are used<br />
to write to the SCC.<br />
<strong>Service</strong> <strong>Manual</strong><br />
308012En, Ed.1/Rev.D<br />
August 2010<br />
When the Group Bus <strong>Process</strong> receives a query from the master on the<br />
Group Bus, it will translate the query into the MODBUS format if<br />
necessary. The query is processed, translated back to the original format<br />
and the response is sent back to the master. The processing of the query<br />
could be done in the Field Communication Unit or it could request further<br />
processing in the slave units (RTGs and DAUs) connected to the Field<br />
Communication Unit.<br />
The Field Bus <strong>Process</strong> scans the slave units as a master. The result of<br />
the queries is stored in the standard data registers. It could also get<br />
queries from the Group Bus, via the Special Command <strong>Process</strong>, to be<br />
sent out on the Field Bus. The results of those queries are stored in the<br />
Special Data Buffer.<br />
3.2.4 Redundancy<br />
Group<br />
Bus<br />
Field<br />
Bus<br />
Tank-<br />
Master<br />
FCU<br />
RTG/DAU<br />
Master<br />
Slave<br />
Master<br />
Slave<br />
Figure 3-14. Group and Field bus<br />
communication<br />
In order to reduce the risk of communication failure between the<br />
TankMaster and the units connected to the TRL/2 field bus, two FCUs<br />
can be connected to run in parallel. If one FCU fails, the other one<br />
automatically takes over without any action from the operator. The FCUs<br />
are connected with an extra cable allowing them to communicate. The<br />
inactive FCU constantly checks if the connected FCU is active. If the<br />
active FCU fails, it signals to the backup FCU to take over. Then the<br />
backup FCU immediately switches to an active state.
<strong>Service</strong> <strong>Manual</strong><br />
308012En, Ed.1/Rev.D<br />
August 2010<br />
3.2.5 Connection to a PC<br />
Rosemount Tank Radar <strong>Rex</strong><br />
Chapter 3 Device Description<br />
The FCU can be connected to the PC either directly via a TRL/2 Group<br />
Bus or via the RS-232C interface.<br />
The RS-232C connection can be made with 3 wires from the PC to the<br />
Field Communication Unit. The cross sectional area must be at least<br />
0.25 mm² (AWG 24 or similar). The maximum length of the RS-232C<br />
connection is 15 m.<br />
The TRL/2 bus requires a twisted and shielded pair cable with a cross<br />
sectional area of min. 0.50 mm² (AWG 20 or similar).<br />
3-21
Rosemount Tank Radar <strong>Rex</strong><br />
Chapter 3 Device Description<br />
3.3 Data Acquisition Unit (DAU)<br />
3-22<br />
3.3.1 Overview<br />
<strong>Service</strong> <strong>Manual</strong><br />
308012En, Ed.1/Rev.D<br />
August 2010<br />
The Data Acquisition Unit, DAU, is a complement to the Radar Tank<br />
Gauge.<br />
Figure 3-15. The DAU.<br />
The DAU is equipped with an interface for temperature measurement.<br />
3.3.2 Data Acquisition Unit (DAU)<br />
The DAU is intrinsically safe and is connected to the Radar Tank Gauge<br />
on the same tank. It receives its power supply and communicates via the<br />
Barrier Unit Card in the Radar Tank Gauge.<br />
Figure 3-16. DAU<br />
Cable inlets
<strong>Service</strong> <strong>Manual</strong><br />
308012En, Ed.1/Rev.D<br />
August 2010<br />
3.3.3 Electronics<br />
Rosemount Tank Radar <strong>Rex</strong><br />
Chapter 3 Device Description<br />
The DAU's main circuit board is called DMB, DAU Minimum Board.<br />
In Figure 3-17 the block diagram of the DAU is shown.<br />
Figure 3-17. Block diagram of the Data Acquisition Unit.<br />
RTG<br />
(power supply<br />
for DAU)<br />
3-23
Rosemount Tank Radar <strong>Rex</strong><br />
Chapter 3 Device Description<br />
3-24<br />
3.3.4 Temperature Measurement<br />
Temperature sensors<br />
<strong>Service</strong> <strong>Manual</strong><br />
308012En, Ed.1/Rev.D<br />
August 2010<br />
Measuring the product temperature is necessary for correct inventory<br />
calculations. Up to 14 temperature sensors can be connected to each<br />
Data Acquisition Unit. The temperature elements are placed in a tube<br />
which is anchored to the bottom of the tank. Either Pt 100 (spot element)<br />
or Cu90 (average sensor) temperature sensors can be used. By using<br />
the Pt100 spot sensors, a profile of the temperature at various tank<br />
levels is obtained, as well as the average temperature of the liquid. The<br />
Cu90 sensors measures the average temperature measured from the<br />
tank bottom to the product surface.<br />
Reference resistors<br />
There are two reference resistors connected which are used to calibrate<br />
the voltage to frequency converter (VCF) feeding the DAU's<br />
microprocessor with data from the temperature sensors. The internal 100<br />
W precision reference resistor is connected to channel 0 of the RTD<br />
multiplexer. The external reference resistor is connected to channel 15.<br />
In some cases there is a third reference resistor connected to the first<br />
free temperature sensor input. Using this sensor enables the accuracy to<br />
be increased even more.<br />
Database<br />
The DAU's database contains several registers for temperature<br />
measurements. Temperature range and sensor type may need to be<br />
checked before operation. The ratio between the two reference<br />
resistances is measured, and the tolerance of the deviation from the<br />
nominal value is also stored in the database.
<strong>Service</strong> <strong>Manual</strong><br />
308012En, Ed.1/Rev.D<br />
August 2010<br />
3.3.5 RTD Multiplexer<br />
Rosemount Tank Radar <strong>Rex</strong><br />
Chapter 3 Device Description<br />
There is an RTD multiplexer for the multiplexing of signals from the<br />
Resistance Temperature Detectors (RTDs). See Figure 3-18. Channel 0<br />
is connected to a 100 W precision reference resistor (0.01% accuracy)<br />
located on the DMB.<br />
Channel 15 is also connected to an externalreference resistor. It is<br />
connected to positions 43-45 on the X21 terminal, see chapter 10.5.<br />
Depending on which temperature range that has been selected, one out<br />
of three reference resistors must be chosen and connected. See also the<br />
list “Spare Parts” on page 7-1.<br />
Pt 100<br />
sensor<br />
Figure 3-18. RTD Multiplexer<br />
2 x 16 channel<br />
demultiplexer*<br />
Current<br />
Source 1<br />
Current<br />
Source 2<br />
Channel Select<br />
2 x 16 channel<br />
demultiplexer*<br />
Differential<br />
Amplifier<br />
* Channel 0 is used with an<br />
internal reference resistor<br />
Channel 15 is used with an<br />
external reference resistor<br />
Current<br />
Source 3<br />
Ground<br />
3-25
Rosemount Tank Radar <strong>Rex</strong><br />
Chapter 3 Device Description<br />
3-26<br />
3.3.6 DAU Software<br />
<strong>Service</strong> <strong>Manual</strong><br />
308012En, Ed.1/Rev.D<br />
August 2010<br />
The software in the DAU operates in the context shown in Figure 3-19.<br />
The software is made up of various modules called tasks. The tasks are<br />
running with the following priorities:<br />
Task 1: Timer<br />
Task 2: External communication<br />
Task 3. Internal communication<br />
Task 4: Commands decoding and handling<br />
Task 5: Background tasks<br />
The TIMER task is running at the highest priority so that the<br />
communication cannot interfere with the measuring of a sensor.<br />
The DAU controls the installed hardware based on the information stored<br />
in the database, and sends error reports if requested data is not available<br />
due to hardware failure.<br />
Temperature<br />
Sensors<br />
Temperature<br />
Current inputs<br />
Read<br />
Status<br />
Digital Status<br />
Choose<br />
sensor<br />
Choose<br />
current inputs<br />
Current data<br />
Status<br />
Serial<br />
out<br />
Choose<br />
frequency<br />
inputs<br />
Field Bus<br />
Serial<br />
in<br />
DAU<br />
Software<br />
Frequency<br />
Inputs<br />
Read<br />
configuration<br />
Display data<br />
Control<br />
data<br />
Frequency<br />
EEPROM<br />
Store<br />
configuration<br />
Figure 3-19. The DAU software handles several processes<br />
EEPROM<br />
Programming<br />
Switch<br />
Write enable/inhibit<br />
Relay<br />
Local display<br />
Relay status
<strong>Service</strong> <strong>Manual</strong><br />
308012En, Ed.1/Rev.D<br />
August 2010<br />
3.3.7 Database Registers<br />
Rosemount Tank Radar <strong>Rex</strong><br />
Chapter 3 Device Description<br />
The DAU’s database is stored in a nonvolatile memory (it will retain its<br />
contents even if the power is turned off), a serial EEPROM. The<br />
database is copied to a part of RAM that acts as a Shadow RAM in order<br />
to increase performance when accessing the database. The database<br />
contains tank specific values like the height of the temperature sensors.<br />
At start up the software determines whether it was a power on or a reset<br />
from the Watchdog. At power on it tests the checksum of the program<br />
stored in the EPROM, and runs a test of the entire RAM. If any faults are<br />
found, these are flagged in status registers. Then the checksum in the<br />
database is tested. If it is OK, the data base is loaded into the shadow<br />
RAM. If it is not OK, this is indicated in status registers, and a default<br />
database is restored in the EEPROM and RAM.<br />
The program will also conduct memory tests during the usual chores.<br />
The RAM test is run approximately every 20:th second. The EPROM and<br />
EEPROM tests are run at intervals of 80 minutes separated by 40<br />
minutes. It takes two consecutive errors to be detected before the error is<br />
signaled to the bus-master.<br />
3.3.8 Local Display<br />
The DAU is equipped with an LCD-display as a Local Readout function.<br />
The display shows the level of the associated RTG, values measured by<br />
the DAU itself and error codes.<br />
<strong>TankRadar</strong> L/2<br />
Data Acquisition Unit Type DAU 2130<br />
EEx C T4<br />
Hazardous Location Class<br />
Group C<br />
T amb =-40° to +65°C and D. Temperature Code T4. The device<br />
Ex<br />
Figure 3-20. DAU LCD-display<br />
UL<br />
3-27
Rosemount Tank Radar <strong>Rex</strong><br />
Chapter 3 Device Description<br />
3-28<br />
3.3.9 Level value pick-up<br />
<strong>Service</strong> <strong>Manual</strong><br />
308012En, Ed.1/Rev.D<br />
August 2010<br />
There are several DAU functions which require level data from the<br />
associated RTG:<br />
• The optional DAU local display can show tank level measured by<br />
the associated RTG.<br />
• In order to calculate a correct product temperature, it is necessary<br />
to exclude the temperature sensors above the product surface<br />
from the calculations.<br />
The DAU constantly listens to the communication that takes place on the<br />
TRL/2 Field Bus. The DAU is able to detect a query for level data to its<br />
associated RTG.<br />
The following process takes place when a master sends a query for a<br />
level value to an RTG connected to the TRL/2 bus:<br />
1 The Field Communication Unit (FCU) acting as a master on the<br />
TRL/2 Field Bus, sends a query for level data to the RTG.<br />
2 The RTG and its<br />
associated DAU<br />
detect the query for<br />
level data.<br />
3 The RTG, acting as a<br />
slave, replies with<br />
the current level<br />
value.<br />
4 The associated DAU<br />
picks up the level<br />
value that is sent by<br />
the associated RTG<br />
to the FCU.<br />
Figure 3-21. DAU level pick up<br />
Note! A prerequisite for the DAU to correctly pick-up level data from the<br />
associated RTG is that the address of the RTG is known by the DAU.
<strong>Service</strong> <strong>Manual</strong><br />
308012En, Ed.1/Rev.D<br />
August 2010<br />
3.3.10 Automatic test of temperature references<br />
Rosemount Tank Radar <strong>Rex</strong><br />
Chapter 3 Device Description<br />
The reference resistors are automatically tested by calculating the ratio<br />
between the temperature references,<br />
Hi<br />
ref<br />
--------------<br />
Lo<br />
ref<br />
This value is put into Input register 10. The ratio is compared with a<br />
nominal value which depends on the selected temperature range. The<br />
tolerance of the value is set in Database registers 307-310.<br />
3.4 Remote Display Unit 40 (RDU 40)<br />
The RDU 40 is a display unit for use with Rosemount <strong>TankRadar</strong> <strong>Rex</strong><br />
and Rosemount <strong>TankRadar</strong> Pro. The display functions are controlled by<br />
the software of the connected <strong>TankRadar</strong> gauge.<br />
Level<br />
6.767m<br />
Figure 3-22. RDU 40 can be configured to show various measurement<br />
variables such as Level, Temperature, Volume etc.<br />
For installation instructions see section “RDU 40” on page 4-69.<br />
The RDU40 is used for monitoring measured data. To configure a<br />
<strong>TankRadar</strong> <strong>Rex</strong> gauge use the TankMaster Winsetup configuration<br />
software.<br />
Configuration and installation of the RDU40 is described in the Display<br />
Unit RDU 40, User’s Guide (Ref. no. 308010EN).<br />
Note! Check that the <strong>Rex</strong> Software version is 1.D2 or later, and that the RDU<br />
40 Software version is 1.B1 or later.<br />
3-29
Rosemount Tank Radar <strong>Rex</strong><br />
Chapter 3 Device Description<br />
3-30<br />
<strong>Service</strong> <strong>Manual</strong><br />
308012En, Ed.1/Rev.D<br />
August 2010
<strong>Service</strong> <strong>Manual</strong><br />
308012En, Ed.1/Rev.D<br />
August 2010<br />
4. <strong>Service</strong><br />
4.1 <strong>Rex</strong> RTG<br />
4.1.1 How to initiate an echo search<br />
Rosemount Tank Radar <strong>Rex</strong><br />
Chapter 4 <strong>Service</strong><br />
There are several ways that an echo search can be initiated:<br />
• Switch power supply off and on. A search is automatically performed.<br />
• Restart the RTG:<br />
1 Select the transmitter icon in the TankMaster WinSetup<br />
workspace window.<br />
2 Click the right mouse button and choose the Restart option<br />
orfrom<br />
the <strong>Service</strong> menu choose Devices/Restart.<br />
What happens after a power on?<br />
1 An internal check of software version and memory status is done.<br />
2 The communication is enabled.<br />
3 The sweep generation is started. A “dummy” sweep is generated until<br />
the sweep is linear (warm-up mode).<br />
4 The level gauging starts with a search through the tank to find the level of<br />
the product.<br />
5 When the level is found, the normal gauging procedure starts.<br />
What happens during a search?<br />
A microwave signal is sent towards the product surface with a<br />
continuously varying frequency. The reflected signal is mixed with the<br />
outgoing signal, resulting in a low-frequency signal which is proportional<br />
to the distance to the liquid surface. By using a signal processing<br />
technique based on Fast Fourier Transformation (FFT), a frequency<br />
spectrum of all echoes in the tank is obtained. From this spectrum the<br />
surface level is extracted with high accuracy.<br />
4-1
Rosemount Tank Radar <strong>Rex</strong><br />
Chapter 4 <strong>Service</strong><br />
4-2<br />
4.1.2 Viewing and Editing database registers<br />
<strong>Service</strong> <strong>Manual</strong><br />
308012En, Ed.1/Rev.D<br />
August 2010<br />
Measured data is continuously stored in the Input registers of DAUs,<br />
RTGs and FCUs. By viewing the contents of device input registers you<br />
can check that the device works properly.<br />
The Holding registers store various transmitter parameters used to<br />
control the measurement performance.<br />
Most Holding registers can be edited by simply typing a new value in<br />
the appropriate Value input field. Some holding registers (marked grey in<br />
the Value input column) can be edited in a separate window. In this case<br />
you can choose from a list of options or you can change separate data<br />
bits.<br />
To view/edit input or holding registers of a certain device:<br />
1 Select the desired device icon in the TankMaster WinSetup workspace<br />
window and click the right mouse button and choose the View Input/<br />
Holding Registers option.<br />
View Input Registers<br />
View Holding Registers<br />
For further information on viewing and editing database registers, see<br />
TankMaster WinSetup Reference <strong>Manual</strong>. See also the <strong>Rex</strong> Input/<br />
Holding Register Descriptions.
<strong>Service</strong> <strong>Manual</strong><br />
308012En, Ed.1/Rev.D<br />
August 2010<br />
4.1.3 Loading and Saving a device database<br />
Rosemount Tank Radar <strong>Rex</strong><br />
Chapter 4 <strong>Service</strong><br />
Each device (RTG, DAU and FCU) is equipped with a database of<br />
parameters used by the Application Software to control the performance<br />
of the device. TankMaster WinSetup offers the option to load a new<br />
database to replace the current one. This can be useful if, for example,<br />
you want to try out new database settings and then want to reload the<br />
original database.<br />
The Save Database to File function in the TankMaster WinSetup is used<br />
to store the registers from FCUs, RTGs and DAUs. The main use of the<br />
Save Database to file function is for service purposes. The registers can<br />
be stored into files on the hard disk of the PC or to a diskette.<br />
To load/save database registers:<br />
1 Select the desired device icon in the TankMaster WinSetup workspace<br />
window and choose the Upload database/Save Database to File option.<br />
Save Database to file...<br />
Upload Database<br />
For further information on how to loading and saving database registers,<br />
see TankMaster WinSetup Reference <strong>Manual</strong>.<br />
4-3
Rosemount Tank Radar <strong>Rex</strong><br />
Chapter 4 <strong>Service</strong><br />
4-4<br />
4.1.4 Loading the default database<br />
<strong>Service</strong> <strong>Manual</strong><br />
308012En, Ed.1/Rev.D<br />
August 2010<br />
The Default Database is the original factory setting for the RTG<br />
Database.<br />
TankMaster WinSetup offers the option to load the Default Database.<br />
This can be useful if, for example, you want to try new database settings<br />
and then want to reload the original factory setting, or when the tank<br />
conditions have been altered. If error messages appear or other<br />
problems occur concerning the Database a troubleshooting is<br />
recommended before loading the Default Database.<br />
Note! The device address remains unaltered when the default database is<br />
loaded.<br />
To load the default database:<br />
1 Select the desired device icon in the TankMaster WinSetup workspace<br />
window.<br />
2 Click the right mouse button and choose the View Holding Register<br />
option.<br />
3 Choose the All option and type 65510 in the Start Register input field.<br />
Type the desired number of registers to be displayed in the Number of<br />
Registers field and click the Read button.<br />
4 Double click in the Value input field.<br />
5 Select Reset_to_factory_setting from the list of options<br />
6 Click the Apply button.
<strong>Service</strong> <strong>Manual</strong><br />
308012En, Ed.1/Rev.D<br />
August 2010<br />
4.1.5 Installing new Transmitter Software<br />
Rosemount Tank Radar <strong>Rex</strong><br />
Chapter 4 <strong>Service</strong><br />
The transmitter software is stored in flash EEPROM. The software<br />
consists of boot software and application software. They are both<br />
placed in the same EEPROM.<br />
There are two different methods to install new Transmitter Software:<br />
• Downloading<br />
• Changing the EEPROM<br />
To download new Transmitter Software:<br />
1 Select the Devices folder in the Workspace window or a single device in<br />
the Devices folder.<br />
2 From the <strong>Service</strong> menu choose Devices/Program All<br />
- or -<br />
click the right mouse button and choose the Devices/Program All<br />
option. For single devices choose the Program option.<br />
3 Select the desired device to be programmed from the Available Devices<br />
pane and click the Move button. Repeat for all devices to be programmed.<br />
If a single device was selected in the workspace window, no<br />
devices are available in the Available Devices pane. In this case the<br />
device appears automatically in the Program these Devices pane.<br />
Use the Remove button if you want to change the list of devices to be<br />
programmed.<br />
4-5
Rosemount Tank Radar <strong>Rex</strong><br />
Chapter 4 <strong>Service</strong><br />
4-6<br />
<strong>Service</strong> <strong>Manual</strong><br />
308012En, Ed.1/Rev.D<br />
August 2010<br />
4 Click the Browse button and locate the flash program file. Use xxxB.cry<br />
file for Boot Software and xxxA.cry file for Application Software. Always<br />
start by downloading the Boot Software.<br />
5 Click the Start Programming button.<br />
Response: the Start Device Programming window is<br />
opened.<br />
6 Make sure the devices are properly prepared for reprogramming and<br />
click the Start Programming button to activate the programming process.<br />
Response: the programming is started.<br />
Comment: It may take up to 2 minutes to download a flash<br />
program.<br />
A maximum of 25 RTGs can be programmed for one FCU. If more RTGs<br />
are connected the programming must be performed in two steps. When<br />
programming is performed via a FCU only one Group Bus port may be<br />
used. The FCU must be restarted prior to the programming of the RTGs.<br />
7 Update the TankMaster installation by copying the <strong>Rex</strong> *.ini-files for<br />
TankMaster that correspond to the new <strong>Rex</strong> software version to the<br />
folder where TankMaster is installed. For example:<br />
The <strong>Rex</strong>.ini file is copied to the */Saab/Server folder. The other *.ini-files,<br />
for example <strong>Rex</strong>_1E4.ini, are copied to the */Saab/Shared folder.<br />
Note! When new application software has been downloaded, the actual<br />
program version does not correspond to the text on the label on top of<br />
the EEPROM.
<strong>Service</strong> <strong>Manual</strong><br />
308012En, Ed.1/Rev.D<br />
August 2010<br />
Changing EEPROM:<br />
Note! Make sure that power is turned off<br />
CS:6175<br />
REX<br />
SPC<br />
PCB locking<br />
Rosemount Tank Radar <strong>Rex</strong><br />
Chapter 4 <strong>Service</strong><br />
1 Check if there is any screw<br />
that is sealed. Contact Rosemount<br />
Tank Gauging before<br />
breaking the seal if warranty is<br />
still valid. Completely remove<br />
the seal so that it does not<br />
damage the threads. Loosen<br />
the screws and remove the<br />
cover.<br />
2 Remove the PCB locking from<br />
the THE and remove the SPC<br />
board.<br />
3 The EEPROM is located on<br />
the SPC board and mounted<br />
in a socket.<br />
4-7
Rosemount Tank Radar <strong>Rex</strong><br />
Chapter 4 <strong>Service</strong><br />
4-8<br />
2<br />
1<br />
Cut off corner<br />
1<br />
2<br />
<strong>Service</strong> <strong>Manual</strong><br />
308012En, Ed.1/Rev.D<br />
August 2010<br />
4 Remove the old EEPROM by<br />
using the IC Extractor tool. Do<br />
not use a screwdriver or similar<br />
tools.<br />
5 Place the new EEPROM into<br />
the socket. Make sure that the<br />
cut off corner is placed in the<br />
right position.<br />
Note! Make sure that necessary<br />
precautions are taken in order to<br />
prevent electrostatic discharge<br />
from damaging the EEPROM.<br />
6 Replace the SPC board, PCB<br />
locking and cover. Check that<br />
contact surfaces on the transmitter<br />
housing and cover are<br />
clean. Tighten the screws.<br />
Turn power on.
<strong>Service</strong> <strong>Manual</strong><br />
308012En, Ed.1/Rev.D<br />
August 2010<br />
7 Check the Software version in TankMaster WinSetup:<br />
Rosemount Tank Radar <strong>Rex</strong><br />
Chapter 4 <strong>Service</strong><br />
1 Select the desired device icon in the workspace window.<br />
2 Click the right mouse button and choose the Properties option.<br />
8 Choose the Communication tab. Now the transmitter software version is<br />
displayed in the Version field.<br />
Software<br />
version<br />
Note! Check that the Software version on the label of the EEPROM correspond<br />
to the version displayed in TankMaster.<br />
4-9
Rosemount Tank Radar <strong>Rex</strong><br />
Chapter 4 <strong>Service</strong><br />
4-10<br />
4.1.6 Exchanging the Transmitter Head Electronics<br />
Note! Make sure that power is turned off<br />
Removing the THE<br />
<strong>Service</strong> <strong>Manual</strong><br />
308012En, Ed.1/Rev.D<br />
August 2010<br />
1 Check if there is any screw that is<br />
sealed. Contact Rosemount Tank<br />
Gauging before breaking the seal if<br />
warranty is still valid. Completely<br />
remove the seal so that it does not<br />
damage the threads. Loosen the<br />
screws and remove the cover.<br />
2 Loosen the two screws which hold<br />
the electronic unit.<br />
3 Carefully lift the Electronic Unit.<br />
Remove the cable connectors. Handle<br />
the Electronic Unit carefully. Be<br />
especially careful with the PTFE<br />
plug at the center of the bottom of<br />
the Electronic Unit.
<strong>Service</strong> <strong>Manual</strong><br />
308012En, Ed.1/Rev.D<br />
August 2010<br />
Replacing the THE<br />
Rosemount Tank Radar <strong>Rex</strong><br />
Chapter 4 <strong>Service</strong><br />
1 Connect the cables to the THE. See Figure 4-1 below. Press firmly so<br />
that the connectors lock into place.<br />
Connection to the TIC and<br />
TMC board, for further information<br />
see “TIC/TMC Configuration”<br />
on page 4-16.<br />
X21<br />
X20<br />
Figure 4-1. Transmitter Head Electronic connections.<br />
Connections to the<br />
ROC board, for further<br />
information see 4.1.12.<br />
Mother Board (MB)<br />
Connection to the MB. The 6-pin connector<br />
cable shall be connected to the X20 on the MB.<br />
The Analog Output function requires the 2-pin<br />
connector cable to be connected to X21 on the<br />
MB, for further information see 4.1.10.<br />
4-11
Rosemount Tank Radar <strong>Rex</strong><br />
Chapter 4 <strong>Service</strong><br />
4-12<br />
<strong>Service</strong> <strong>Manual</strong><br />
308012En, Ed.1/Rev.D<br />
August 2010<br />
2 Make sure that the PTFE plugs are<br />
clean. Lower the THE. Make sure<br />
that the cables are not stuck<br />
between the THE and the base of<br />
the enclosure. The THE must rest<br />
firmly on the base so that there is no<br />
gap for the microwaves to bridge.<br />
3 Tighten screws on the bar to secure<br />
the THE.<br />
4 Replace the cover. Check that contact<br />
surfaces on the transmitter<br />
housing and cover are clean.<br />
Tighten the screws.
<strong>Service</strong> <strong>Manual</strong><br />
308012En, Ed.1/Rev.D<br />
August 2010<br />
4.1.7 Write protection (Metrological Seal)<br />
Rosemount Tank Radar <strong>Rex</strong><br />
Chapter 4 <strong>Service</strong><br />
A switch on the FCC board can be used to prevent unauthorized<br />
changes in the RTG database. The switch can be sealed in the writeinhibit<br />
position by using a special plastic cover.<br />
If there are problems writing to the database EEPROM, then check the<br />
setting of the Metrological Seal.<br />
How to write protect the EEPROM<br />
FCC<br />
PCB locking<br />
1 Check if there is any screw that<br />
is sealed. Contact Rosemount<br />
Tank Gauging before breaking<br />
the seal if warranty is still valid.<br />
Completely remove the seal so<br />
that it does not damage the<br />
threads. Loosen the screws<br />
and remove the cover.<br />
2 Remove the PCB locking from<br />
the Transmitter Head and<br />
remove the FCC board with the<br />
metrological seal.<br />
4-13
Rosemount Tank Radar <strong>Rex</strong><br />
Chapter 4 <strong>Service</strong><br />
4-14<br />
3 Remove the plastic cover and turn the switch to the right.<br />
<strong>Service</strong> <strong>Manual</strong><br />
308012En, Ed.1/Rev.D<br />
August 2010<br />
Write<br />
Enable Protect<br />
4 Replace the plastic cover and seal the switch in the write protect position.<br />
5 Replace the FCC board and<br />
the PCB locking. Check that<br />
contact surfaces on the transmitter<br />
housing and cover are<br />
clean. Replace the cover and<br />
tighten the screws.
<strong>Service</strong> <strong>Manual</strong><br />
308012En, Ed.1/Rev.D<br />
August 2010<br />
4.1.8 Temperature measurement<br />
Rosemount Tank Radar <strong>Rex</strong><br />
Chapter 4 <strong>Service</strong><br />
The <strong>Rex</strong> transmitter can be connected to 1-3 single spot temperature<br />
elements, or to 1-6 multiple spot common return or average elements if<br />
the Temperature Multiplexer Card (TMC) is installed.<br />
Max 6 sensors can be connected to the transmitter (sensor number 1<br />
must have the lowest tank position etc.). The sensors must be of the<br />
same type (average or spot).<br />
The TMC board must be configured in accordance with the type of<br />
sensor that is used, see .<br />
Transmitter Interface<br />
Card, TIC<br />
Temperature<br />
Multiplexing Card,<br />
TMC<br />
Figure 4-2. Transmitter Interface Card (TIC) and Temperature Multiplexing<br />
Card (TMC)<br />
4-15
Rosemount Tank Radar <strong>Rex</strong><br />
Chapter 4 <strong>Service</strong><br />
4-16<br />
TIC/TMC Configuration<br />
<strong>Service</strong> <strong>Manual</strong><br />
308012En, Ed.1/Rev.D<br />
August 2010<br />
The TMC board is configured depending on what type of sensor that is<br />
used. The jumpers are installed at factory and do normally not need to be<br />
changed. If you need to change TMC board configuration, for example if<br />
other sensor types than originally specified will be used, do the following:<br />
Note! Make sure that power is turned off.<br />
TIC<br />
TIC<br />
TMC<br />
PCB locking<br />
TMC<br />
1 Check if there is any screw<br />
that is sealed. Contact Rosemount<br />
Tank Gauging before<br />
breaking the seal if warranty is<br />
still valid. Completely remove<br />
the seal so that it does not<br />
damage the threads. Loosen<br />
the screws and remove the<br />
cover.<br />
2 Remove the PCB locking from<br />
the transmitter head and<br />
remove the TIC/TMC board.<br />
3 Carefully separate the TMC<br />
from the TIC board.
<strong>Service</strong> <strong>Manual</strong><br />
308012En, Ed.1/Rev.D<br />
August 2010<br />
Rosemount Tank Radar <strong>Rex</strong><br />
Chapter 4 <strong>Service</strong><br />
4 Set jumpers on the TMC board to one of the following alternatives:<br />
1-6 multiple spot or average elements<br />
8 pin connector cable<br />
Figure 4-3. TMC board configured for 1-6 multiple spot or average elements<br />
• Set three jumpers in socket X4 and one jumper in socket X5.<br />
• Connect the 8-pin connector cable to the X2 connector on the<br />
TMC board.<br />
• Check that the Temperature sensors are properly connected to<br />
X12, see the Tankadar REX Installation <strong>Manual</strong>.<br />
Connector X12<br />
Figure 4-4. Connector X12<br />
4-17
Rosemount Tank Radar <strong>Rex</strong><br />
Chapter 4 <strong>Service</strong><br />
4-18<br />
1-3 spot elements<br />
Figure 4-5. TMC board configured for 1-3 spot elements<br />
• No jumpers in socket X4 and X5!<br />
<strong>Service</strong> <strong>Manual</strong><br />
308012En, Ed.1/Rev.D<br />
August 2010<br />
• Connect the 8-pin connector cable to the X3 connector on the<br />
TMC board.<br />
• Check that the Temperature sensors are properly connected to<br />
X12, see the <strong>TankRadar</strong> REX Installation <strong>Manual</strong>.<br />
ConnectorX12<br />
Figure 4-6. Connector X12<br />
8 pin connector cable
<strong>Service</strong> <strong>Manual</strong><br />
308012En, Ed.1/Rev.D<br />
August 2010<br />
TIC<br />
TMC<br />
Rosemount Tank Radar <strong>Rex</strong><br />
Chapter 4 <strong>Service</strong><br />
5 Make sure the 10-pin connector<br />
is connected to socket X2<br />
on the TIC board.<br />
6 Carefully attach the TMC on<br />
the back of the TIC.<br />
7 Replace the TIC/TMC board<br />
and the PCB locking. Check<br />
that contact surfaces on the<br />
transmitter housing and cover<br />
are clean. Replace the cover<br />
and tighten the screws.<br />
4-19
Rosemount Tank Radar <strong>Rex</strong><br />
Chapter 4 <strong>Service</strong><br />
4-20<br />
Temperature sensor configuration<br />
<strong>Service</strong> <strong>Manual</strong><br />
308012En, Ed.1/Rev.D<br />
August 2010<br />
By using TankMaster WinSetup you can configure the transmitter by<br />
specifying sensor type, sensor range and sensor positions. See<br />
WinSetup Reference <strong>Manual</strong> for further information on how to configure<br />
the temperature sensors.<br />
Following options are available in TankMaster WinSetup:<br />
• Spot DIN PT100 - for Spot and Multiple Spot sensors.<br />
• Avg. CU90 - for Average Temperature sensors.<br />
• User Defined - The characteristics are specified by a mathematical<br />
formula or a linearization table (see WinSetup menu option<br />
<strong>Service</strong>>Devices>User Defined Linearization Table/Formula)<br />
Troubleshooting<br />
If the temperature values are incorrect or are not shown check the<br />
following:<br />
• TankMaster WinSetup; click the right mouse button on the <strong>Rex</strong><br />
icon and choose Properties>Configuration>Temp Input. Check<br />
that the Enable/Disable check box is selected. Check the sensor<br />
position.<br />
• The Device Error and Device Warning status in Input Register 2.<br />
• The Temperature sensor status in Input Register 27.<br />
• The Temperature sensor status in Input Registers 4460, 4466,<br />
4472 etc. Double click the Status field for detailed information.<br />
• The temperature values in Input Registers 4462, 4468, 4474 etc.<br />
• The Sensor resistance values in Input Registers 4464, 4470,<br />
4476 etc.<br />
• Jumper settings and cable connections, see “TIC/TMC Configuration”<br />
on page 4-16.<br />
• FCU Slave Database configuration (see WinSetup Reference<br />
<strong>Manual</strong>): check that the right number of temperature sensors are<br />
given. Also check that Interval 2 is set to 10.<br />
See chapter 4.3.2 for information on how to check the temperature<br />
sensors.<br />
For a general overview of status and configuration check Holding<br />
Registers 3300-3542.
<strong>Service</strong> <strong>Manual</strong><br />
308012En, Ed.1/Rev.D<br />
August 2010<br />
4.1.9 Analog inputs<br />
Rosemount Tank Radar <strong>Rex</strong><br />
Chapter 4 <strong>Service</strong><br />
<strong>Rex</strong> supports two high precision 4-20 mA analog inputs. Using the<br />
analog inputs requires that the transmitter is equipped with the<br />
Transmitter Interface Card (TIC).<br />
Analog Input 1 may be used to connect up to 3 HART Slaves (requires<br />
Multi FCC card). See 4.1.11.<br />
X12<br />
1<br />
2<br />
3<br />
4<br />
5<br />
6<br />
7<br />
8<br />
9<br />
10<br />
11<br />
12<br />
13<br />
14<br />
15<br />
Pressure sensor<br />
Water Level sensor<br />
Figure 4-7. Connection of analog input instruments to the <strong>Rex</strong> Junction<br />
Box.<br />
The Analog Inputs are identified automatically by the software. The TIC<br />
board must be detected before this function is enabled.<br />
Analog inputs are connected to socket X12 for intrinsically safe<br />
connections in the <strong>Rex</strong> Junction Box. For further information on how to<br />
connect analog inputs see the <strong>TankRadar</strong> <strong>Rex</strong> Installation <strong>Manual</strong>.<br />
Note! Analog inputs can only be enabled at factory.<br />
4-21
Rosemount Tank Radar <strong>Rex</strong><br />
Chapter 4 <strong>Service</strong><br />
4-22<br />
Software configuration - Analog inputs<br />
To configure the analog input signals, do the following:<br />
<strong>Service</strong> <strong>Manual</strong><br />
308012En, Ed.1/Rev.D<br />
August 2010<br />
1 Select the desired <strong>Rex</strong> transmitter icon in the TankMaster WinSetup<br />
workspace.<br />
2 Click the right mouse button and choose the Properties option, select<br />
the Configuration tab and click the appropriate Analog Input button.<br />
3 Set the following parameters:<br />
HART slaves - up to three HART slaves can be connected to Analog 1<br />
using address 1-3, see the <strong>TankRadar</strong> REX Installation <strong>Manual</strong>. In this<br />
case the current is set to 4 mA.<br />
In Analog Current mode only one HART slave is allowed. In this case<br />
address 0 must be used.<br />
Value range - enter the lower and upper limits corresponding to the 4<br />
mA and 20 mA input currents, respectively.<br />
Error limits - defines the lower and upper limits of the input current.<br />
Outside this range an error will be indicated. Set the lower error limit to 3-<br />
4 mA and the upper error limit to 20-24 mA corresponding to the error<br />
limits of connected instruments. If for an example an instrument sets the<br />
output current in alarm mode to 3.8 mA, you should set the lower error<br />
limit to 3.8 or higher.<br />
Value unit - choose a suitable measurement unit. You can choose<br />
between various units to indicate pressure, product level and current.<br />
Filter factor - set a value between 1 and 200 to suppress spurious<br />
fluctuations in the analog input signal. Default value is 4.<br />
For information on Analog Input configuration see also the WinSetup<br />
Reference <strong>Manual</strong>.
<strong>Service</strong> <strong>Manual</strong><br />
308012En, Ed.1/Rev.D<br />
August 2010<br />
Status information<br />
Rosemount Tank Radar <strong>Rex</strong><br />
Chapter 4 <strong>Service</strong><br />
If the input values are incorrect or are not shown in TankMaster check<br />
the following:<br />
• Analog Input Configuration, see “Software configuration - Analog<br />
inputs” on page 4-22.<br />
• Device Error and Device Warning status in Input register 2.<br />
• Analog Input Status (connection status, calibration mode, above/<br />
under limit etc.) and the Analog Input Value in Input registers<br />
4420-4434.<br />
• Analog Input Value Unit, Filter Factor, Lower/Upper range, High/<br />
Low current limit, Calibration method etc. in Holding registers<br />
3200-3270.<br />
• FCU configuration: check the number of Analog Inputs in the FCU<br />
Slave Database.<br />
4-23
Rosemount Tank Radar <strong>Rex</strong><br />
Chapter 4 <strong>Service</strong><br />
4-24<br />
4.1.10 Analog outputs<br />
<strong>Service</strong> <strong>Manual</strong><br />
308012En, Ed.1/Rev.D<br />
August 2010<br />
Note! The Multi Field Communication Card, version 9150072-673 or later is<br />
required.<br />
<strong>Rex</strong> supports one analog output signal.<br />
The analog output replaces the second relay output. In this case the<br />
Relay 2 cabling is disconnected from the Relay Output Card (ROC) and<br />
connected to the MotherBoard.<br />
The FCC board must be configured for Analog Output. Jumper settings<br />
are required depending on if the Current Loop Output is active (internal<br />
loop supply) or passive (external loop supply).<br />
Figure 4-8. Field Communication Card (FCC)<br />
Field Communication<br />
Card (FCC)
<strong>Service</strong> <strong>Manual</strong><br />
308012En, Ed.1/Rev.D<br />
August 2010<br />
FCC Configuration of Analog Output<br />
Rosemount Tank Radar <strong>Rex</strong><br />
Chapter 4 <strong>Service</strong><br />
In order to use the Analog Output function the cabling must be<br />
disconnected from the ROC board and connected to the Mother Board.<br />
Jumper settings on the FCC are needed in order to configure the card for<br />
Current Loop Output active (internal loop supply) or passive (external<br />
loop supply).<br />
Note! Make sure that power is turned off before opening the cover.<br />
1 Check if there is any<br />
screw that is sealed.<br />
Contact Rosemount<br />
Tank Gauging before<br />
breaking the seal if<br />
warranty is still valid.<br />
Completely remove<br />
the seal so that it does<br />
not damage the<br />
threads. Loosen the<br />
screws and remove<br />
the cover.<br />
2 Loosen the two<br />
screws which hold the<br />
Electronic Unit.<br />
4-25
Rosemount Tank Radar <strong>Rex</strong><br />
Chapter 4 <strong>Service</strong><br />
4-26<br />
ROC<br />
1<br />
X21<br />
2<br />
<strong>Service</strong> <strong>Manual</strong><br />
308012En, Ed.1/Rev.D<br />
August 2010<br />
3 Carefully lift the Electronic<br />
Unit. Handle the<br />
Electronic Unit carefully.<br />
Be especially<br />
careful with the PTFE<br />
plug at the center of<br />
the bottom of the Electronic<br />
Unit.<br />
4 1) Remove the 2-pin<br />
connector from the<br />
ROC board.<br />
2) Plug the 2-pin connector<br />
cable into the<br />
X21-connection on the<br />
Motherboard.<br />
5 Make sure that the<br />
PTFE plugs are clean.<br />
Lower the Electronic<br />
Unit. Check that the<br />
cables are not stuck<br />
between the Electronic<br />
Unit and the<br />
base of the enclosure.<br />
The Electronic<br />
Unit must rest firmly<br />
on the base so that<br />
there is no gap for the<br />
microwaves to bridge.
<strong>Service</strong> <strong>Manual</strong><br />
308012En, Ed.1/Rev.D<br />
August 2010<br />
FCC<br />
PCB locking<br />
Rosemount Tank Radar <strong>Rex</strong><br />
Chapter 4 <strong>Service</strong><br />
6 Tighten the two<br />
screws which hold the<br />
Electronic Unit.<br />
7 Remove the PCB<br />
locking from the Electronic<br />
Unit and remove<br />
the FCC board.<br />
4-27
Rosemount Tank Radar <strong>Rex</strong><br />
Chapter 4 <strong>Service</strong><br />
4-28<br />
8 Check that the Multi FCC card 9150072-673 is used.<br />
<strong>Service</strong> <strong>Manual</strong><br />
308012En, Ed.1/Rev.D<br />
August 2010<br />
Set the jumpers according to Figure 4-9 below for current loop active or<br />
passive.<br />
Figure 4-9. Current Loop Output settings.<br />
Active<br />
Passive<br />
9 Replace the FCC board and PCB locking. Check that contact surfaces<br />
on the transmitter housing and cover are clean. Replace the cover and<br />
tighten the screws.<br />
PCB locking
<strong>Service</strong> <strong>Manual</strong><br />
308012En, Ed.1/Rev.D<br />
August 2010<br />
Software configuration - Analog outputs<br />
Rosemount Tank Radar <strong>Rex</strong><br />
Chapter 4 <strong>Service</strong><br />
You can choose various sources for the Analog Output. The Upper<br />
Range value for the analog output signal is 20mA and the Lower Range<br />
value is 4 mA.<br />
The following Analog Output sources (measuring variables) are<br />
available:<br />
1 Level, Ullage, Level Rate, Amplitude, Volume and Observed<br />
density (the Upper and Lower range can be changed in the<br />
Range Values input field).<br />
2 RTG AvgLiqTemp, RF Head Temp, DAU AvgLiqTemp, Gas-<br />
Pressure, Liquid pressure, Gas Temp, LiquidTemp and Free<br />
Water Level (the Upper and Lower range values can be changed<br />
in Holding Registers 2144 and 2146).<br />
There are five different alarm modes available, for further information<br />
see “Alarm mode settings” on page 4-31.<br />
To configure the Analog Output signal do the following:<br />
1 Select the desired device icon in the WinSetup workspace window.<br />
2 Click the right mouse button, choose the Properties option and select<br />
the Configuration tab.<br />
3 Click the Analog Output button.<br />
4-29
Rosemount Tank Radar <strong>Rex</strong><br />
Chapter 4 <strong>Service</strong><br />
4-30<br />
4 Choose a measuring variable in the AOut Source list.<br />
<strong>Service</strong> <strong>Manual</strong><br />
308012En, Ed.1/Rev.D<br />
August 2010<br />
Set the Upper and Lower Range for the analog output signal in the<br />
Range Values input field. For measuring variables that can not be edited<br />
in the Range Value input field, set the Upper and Lower values in Holding<br />
Registers 2144 and 2146. For further information on how to edit Holding<br />
Registers, see “To view/edit input or holding registers of a certain<br />
device:” on page 4-2.
<strong>Service</strong> <strong>Manual</strong><br />
308012En, Ed.1/Rev.D<br />
August 2010<br />
Alarm mode settings<br />
Level<br />
Upper<br />
Lower<br />
Analog<br />
Output<br />
20 mA<br />
4 mA<br />
3.8 mA<br />
Analog<br />
Output<br />
22 mA<br />
20 mA<br />
4 mA<br />
Analog<br />
Output<br />
20 mA<br />
4 mA<br />
Analog<br />
Output<br />
20 mA<br />
4 mA<br />
Analog<br />
Output<br />
20 mA<br />
4 mA<br />
Rosemount Tank Radar <strong>Rex</strong><br />
Chapter 4 <strong>Service</strong><br />
Analog Output current as a function of product level for different alarm<br />
mode settings. The shaded area indicates analog output in alarm mode.<br />
Time<br />
Time<br />
Time<br />
Time<br />
Time<br />
Time<br />
Product level<br />
Alarm mode<br />
Low Current<br />
Alarm mode<br />
High Current<br />
Alarm mode<br />
Freeze Current<br />
Alarm mode<br />
Binary High<br />
Alarm mode<br />
Binary Low<br />
4-31
Rosemount Tank Radar <strong>Rex</strong><br />
Chapter 4 <strong>Service</strong><br />
4-32<br />
Following alarm modes are supported in <strong>Rex</strong>:<br />
Table 4-1: Alarm Modes<br />
Alarm Mode Current Output<br />
Low Alarm 3.8 mA<br />
High Alarm 22.2 mA<br />
The Analog Output goes into alarm when:<br />
<strong>Service</strong> <strong>Manual</strong><br />
308012En, Ed.1/Rev.D<br />
August 2010<br />
Freeze The current that was output the last valid measurement<br />
Binary Low 20 mA for valid measurements, 4 mA output when in<br />
Alarm Mode<br />
Binary High 4 mA for valid measurements, 20 mA output when in<br />
Alarm Mode<br />
• The measurement value goes outside the approved range.<br />
• Measurements are invalid.<br />
• An error is detected in the gauge.<br />
For an overview on the Analog output signal status, see Holding Register<br />
2000-2146. See also WinSetup Reference <strong>Manual</strong> for further<br />
information on how to configure the analog output.
<strong>Service</strong> <strong>Manual</strong><br />
308012En, Ed.1/Rev.D<br />
August 2010<br />
4.1.11 HART Input<br />
Rosemount Tank Radar <strong>Rex</strong><br />
Chapter 4 <strong>Service</strong><br />
Hart Slaves are connected to Analog input 1. Connection to HART<br />
devices requires a Multi Field Communication Card equipped with<br />
optional HART modem.<br />
X12<br />
1<br />
2<br />
3<br />
4<br />
5<br />
6<br />
7<br />
8<br />
9<br />
10<br />
11<br />
12<br />
13<br />
14<br />
15<br />
Figure 4-10. Connection of HART slaves.<br />
250 �<br />
A maximum of 3 Hart slaves can be connected to the <strong>Rex</strong> gauge in<br />
multidrop configuration.<br />
If only on HART slave is connected, and the short address = 0, current<br />
mode is supported.<br />
With three HART slaves connected, short address 1-3 must be used and<br />
the slave current is parked at 4 mA.<br />
The 250 ��resistance is needed for HART-communication only.<br />
4-33
Rosemount Tank Radar <strong>Rex</strong><br />
Chapter 4 <strong>Service</strong><br />
4-34<br />
Software configuration - HART devices<br />
<strong>Service</strong> <strong>Manual</strong><br />
308012En, Ed.1/Rev.D<br />
August 2010<br />
1 Select the desired <strong>Rex</strong> device icon in the WinSetup workspace window.<br />
2 Click the right mouse button and choose the Properties option.<br />
3 Select the Configuration tab.<br />
4 Click the HART devices button and “configure” the HART slaves. This<br />
window is used only to add a description about the connected HART<br />
slaves.<br />
For further information on how to configure the HART slaves, see<br />
WinSetup Reference <strong>Manual</strong>.
<strong>Service</strong> <strong>Manual</strong><br />
308012En, Ed.1/Rev.D<br />
August 2010<br />
Relay2 NO<br />
Relay1 NO<br />
4.1.12 Relay Output<br />
Rosemount Tank Radar <strong>Rex</strong><br />
Chapter 4 <strong>Service</strong><br />
You can use two relay ports if the optional Relay Output Card (ROC) is<br />
installed. Different transmitter variables can be chosen to trigger the<br />
relay to change state.<br />
Figure 4-11. Connecting the relay ports.<br />
The relay outputs can be configured as Normally Open (NO) or Normally<br />
Closed (NC) depending on the selected connector on the ROC board.<br />
There is also a contact used for internal function monitoring.<br />
Relay Output Card<br />
Relay2 NC<br />
Relay1 NC<br />
NO=Normally Open<br />
NC=Normally Closed<br />
X11<br />
Figure 4-12. The relays can be configured as Normally Open or Normally<br />
Closed.<br />
1<br />
2<br />
3<br />
4<br />
5<br />
6<br />
7<br />
8<br />
Bottom view of<br />
Transmitter Head<br />
Electronic Unit<br />
4-35
Rosemount Tank Radar <strong>Rex</strong><br />
Chapter 4 <strong>Service</strong><br />
4-36<br />
<strong>Service</strong> <strong>Manual</strong><br />
308012En, Ed.1/Rev.D<br />
August 2010<br />
Normally Open/Closed refers to the contact position when a relay is<br />
deenergized. This is also referred to as the Alarm state. The terminology<br />
can be summarized as follows:<br />
Normally Closed Normally Open<br />
Closed Open Open Closed<br />
Deenergized Energized Deenergized Energized<br />
Not active Active Not active Active<br />
Alarm (reset) Normal Alarm (reset) Normal
<strong>Service</strong> <strong>Manual</strong><br />
308012En, Ed.1/Rev.D<br />
August 2010<br />
Software configuration - Relay Outputs<br />
Rosemount Tank Radar <strong>Rex</strong><br />
Chapter 4 <strong>Service</strong><br />
1 Select the desired device icon in the WinSetup workspace window.<br />
2 Click the right mouse button, choose the Properties option and select<br />
the Configuration tab.<br />
3 Click the Relay Output button to configure the Relays.<br />
Response: The <strong>Rex</strong> RTG Relay Output window opens.<br />
4 Set the following parameters:<br />
Using first/both points<br />
To define three relay zones select “Use Both Points”.<br />
To define only two relay zones select “Use Only First Point”.<br />
First and second set points<br />
The first and second set points define the transitions between Zone 1, 2<br />
and 3. You can set different relay states in each of these zones.<br />
Hysteresis<br />
When the source variable passes a set point, the relay switches from<br />
one state to the other. If a hysteresis zone is specified, the relay remains<br />
in the new state even if the source signal returns back to a value within<br />
the previous zone. How far it will remain in the new state is defined by<br />
the value given in the hysteresis input field.<br />
4-37
Rosemount Tank Radar <strong>Rex</strong><br />
Chapter 4 <strong>Service</strong><br />
4-38<br />
Relay states.<br />
Alarm In this state the relay is deenergized.<br />
Normal In this state the relay is energized.<br />
<strong>Service</strong> <strong>Manual</strong><br />
308012En, Ed.1/Rev.D<br />
August 2010<br />
Toggle The relay switches periodically between Normal and Alarm.<br />
Select source<br />
Specifies the transmitter variable that triggers the switching of the relay.<br />
Switch Delay<br />
This is the time delay until the relay switches into alarm state, i.e. the<br />
amount of time it takes for a relay to respond to an alarm. You can use<br />
this to prevent the relay from being activated due to temporary variations<br />
of the source signal.<br />
Toggle Period<br />
When the relay is in Toggle state it switches between On and Off at a<br />
rate defined by the Toggle Period.<br />
Control Mode<br />
<strong>Manual</strong> The relay can be manually controlled by choosing the<br />
<strong>Manual</strong> Control Relay option from the <strong>Service</strong>/Devices<br />
menu.<br />
Auto The relay state is controlled by the transmitter variable<br />
specified in the Select Source field.<br />
Disabled The relay function is turned off.
<strong>Service</strong> <strong>Manual</strong><br />
308012En, Ed.1/Rev.D<br />
August 2010<br />
Variable value<br />
Relay Functions<br />
Rosemount Tank Radar <strong>Rex</strong><br />
Chapter 4 <strong>Service</strong><br />
You can use one or two set points for relays connected to the <strong>Rex</strong><br />
transmitter. Consequently, there are two or three zones in which different<br />
relay states can be specified. For each zone you can set any of the three<br />
available relay states Normal, Alarm, or Toggle.<br />
For each set point you can specify a hysteresis zone which will prevent<br />
the relay from switching back to its previous state, as long as the source<br />
variable is changed only small amounts around a certain set point. The<br />
principle of relay set points and hysteresis zones is shown in the figure<br />
below. Note that in this case only two states are used:<br />
1<br />
2<br />
3<br />
Zone 3<br />
Zone 2<br />
Zone 1<br />
Relay state<br />
1 The source value passes set point one, and the relay state is changed<br />
according to the definition for Zone 1.<br />
2 The relay state is changed back to the Zone 2 state when the source<br />
value passes the set point as given by the hysteresis value.<br />
3 The source value passes set point two and the relay state is changed<br />
according to the definition for Zone 3.<br />
4 The relay switches back to the Zone 2 relay state when the source value<br />
passes set point two as given by the corresponding hysteresis value.<br />
4<br />
4-39
Rosemount Tank Radar <strong>Rex</strong><br />
Chapter 4 <strong>Service</strong><br />
4-40<br />
<strong>Manual</strong> relay control<br />
<strong>Service</strong> <strong>Manual</strong><br />
308012En, Ed.1/Rev.D<br />
August 2010<br />
To manually switch between different relay states do the following:<br />
1 Select a <strong>Rex</strong> gauge in the workspace window.<br />
2 Click the right mouse button and choose the <strong>Manual</strong> Control Relay<br />
option<br />
- or -<br />
from the <strong>Service</strong> menu choose Devices/<strong>Manual</strong> Control Relay.<br />
3 Choose <strong>Manual</strong> in the Control Mode field and click the Switch Mode<br />
button.<br />
4 Choose a new relay state from the Select New State list and click the<br />
Apply or the OK button.<br />
For further information on how to configure the Relay Output, see<br />
WinSetup Reference <strong>Manual</strong>.
<strong>Service</strong> <strong>Manual</strong><br />
308012En, Ed.1/Rev.D<br />
August 2010<br />
4.2 FCU<br />
4.2.1 Default database loading<br />
Rosemount Tank Radar <strong>Rex</strong><br />
Chapter 4 <strong>Service</strong><br />
The default database can be loaded by moving the jumpers on terminals<br />
X14 and X15. The position of X14 and X15 on the FCU board is shown in<br />
Figure 4-13.<br />
Figure 4-13. Terminals X14 and X15 on the FCU board<br />
Watchdog<br />
4-41
Rosemount Tank Radar <strong>Rex</strong><br />
Chapter 4 <strong>Service</strong><br />
4-42<br />
To load the default FCU database:<br />
1 Disconnect power.<br />
2 Move jumpers on socket 14 and 15 to the “upper” position.<br />
3 Connect power.<br />
4 Wait until watchdog lights up, see Figure 4-13.<br />
5 Disconnect power.<br />
6 Replace jumpers to the "lower" position.<br />
7 Connect power.<br />
<strong>Service</strong> <strong>Manual</strong><br />
308012En, Ed.1/Rev.D<br />
August 2010
<strong>Service</strong> <strong>Manual</strong><br />
308012En, Ed.1/Rev.D<br />
August 2010<br />
4.2.2 Group and Field Bus Ports<br />
Rosemount Tank Radar <strong>Rex</strong><br />
Chapter 4 <strong>Service</strong><br />
Inside the FCU box there are two terminals, X10 and X11, which are<br />
used for RS-232C Group Bus communication, see Figure 4-14.<br />
Figure 4-14. RS 232 ports<br />
X6<br />
X5<br />
X4<br />
X3 X2 X1<br />
Figure 4-15. Connect a jumper to the X5 or X6 terminal<br />
when a RS-232 terminal is used.<br />
15 V<br />
1<br />
230 V<br />
TRL/2 Bus<br />
Interface<br />
boards, FCM<br />
boards<br />
Jumpers for<br />
RS-232C<br />
When one of the RS-232C<br />
ports is used a special<br />
jumper must be connected.<br />
Terminal X10: jumper in X5.<br />
Terminal X11: jumper in X6.<br />
On X10 (or X11) the<br />
terminals 1, 4 and 6 have to<br />
be connected, as well as<br />
terminals 7 and 8. See the<br />
instruction inside the box<br />
beside the terminal.<br />
4-43
Rosemount Tank Radar <strong>Rex</strong><br />
Chapter 4 <strong>Service</strong><br />
4-44<br />
4.2.3 Power Supply<br />
4.2.4 Fuses<br />
<strong>Service</strong> <strong>Manual</strong><br />
308012En, Ed.1/Rev.D<br />
August 2010<br />
Power supply can be selected as either 115 V or 230 V with a switch.<br />
See Figure 4-16. If the switch is set to 115 V, the box on the label of the<br />
FCU must be marked.<br />
NOTE! Do not turn the<br />
switch all the way around<br />
as it may damage the<br />
switch.<br />
Figure 4-16. Selection of voltage for power supply on FCU.<br />
There are two 100 mA fuses inside the FCU box. See Figure 4-17.<br />
Fuses: 2x100 mA<br />
Figure 4-17. Location of the two 100 mA fuses inside the FCU box.
<strong>Service</strong> <strong>Manual</strong><br />
308012En, Ed.1/Rev.D<br />
August 2010<br />
4.2.5 Write protection and Reset<br />
Write<br />
Enable<br />
Rosemount Tank Radar <strong>Rex</strong><br />
Chapter 4 <strong>Service</strong><br />
There is a write protection switch in the FCU which is used to prevent<br />
unauthorized changes to the data in the EPROM. The switch can be<br />
locked in the write inhibit position by securing a locking plate with a wire<br />
through the clevis pins, see Figure 4-18.<br />
The reset switch can be used to restart the CPU of the FCU. The<br />
database in the EPROM remains unchanged by a reset. If the watch dog<br />
LED was lit before the reset, it is switched off by the reset.<br />
Write Inhibit<br />
Reset switch<br />
Figure 4-18. Write protection and reset switches in the FCU.<br />
Watch Dog<br />
4-45
Rosemount Tank Radar <strong>Rex</strong><br />
Chapter 4 <strong>Service</strong><br />
Serial<br />
communication<br />
port<br />
Green LED<br />
Serial data<br />
received<br />
Yellow LED<br />
Serial Data<br />
transmitted<br />
4-46<br />
4.2.6 Electronics<br />
<strong>Service</strong> <strong>Manual</strong><br />
308012En, Ed.1/Rev.D<br />
August 2010<br />
The main board of the Field Communication Unit is the FCP-board (Field<br />
Communication <strong>Process</strong>or). See Figure 4-19 and Figure 4-21.<br />
There are a number of LEDs on the FCP board. There are green LEDs<br />
for incoming signals and yellow LEDs for outgoing signals. There is a red<br />
LED indicating watch dog time out and CPU reset. When the watchdog<br />
LED is lit, it indicates that the CPU has been reset due to a watchdog<br />
time-out and not a dip in the supply voltage. There is a green LED to<br />
indicate that there is power on the FCU.<br />
Field<br />
Bus<br />
Figure 4-19. LEDs on the FCP board in the FCU<br />
Table 4-2: Summary of LED indications<br />
Group<br />
Bus 1<br />
Red LED Watchdog time<br />
out/CPU reset<br />
Group<br />
Bus 2<br />
H13 Watchdog<br />
Field<br />
Bus 1<br />
Field<br />
Bus 2<br />
Field<br />
Bus 3<br />
H1 H3 H5 H7 H9 H11<br />
Field<br />
Bus 4<br />
H2 H4 H6 H8 H10 H12<br />
H13<br />
Green LED Power on H14<br />
H14 Power<br />
Group<br />
Bus
<strong>Service</strong> <strong>Manual</strong><br />
308012En, Ed.1/Rev.D<br />
August 2010<br />
Rosemount Tank Radar <strong>Rex</strong><br />
Chapter 4 <strong>Service</strong><br />
The location of the Field bus and Group bus connections are shown in<br />
Figure 4-20.<br />
Field Bus 1<br />
Field Bus 2<br />
Field Bus 3<br />
Field Bus 4<br />
Group Bus 1<br />
Group Bus 2<br />
Figure 4-20. The location of Field and Group bus connections on the<br />
FCP board.<br />
The microprocessor of the FCU is the 80C188. It contains a DMA<br />
controller (Direct Memory Access) which allows the processor to process<br />
other information while the DMA controls data between the RAM<br />
memory and the serial ports.<br />
There is RAM (Random Access Memory) of 32 KB for the data buffer.<br />
The data buffer is used to store the information from the slave units. The<br />
EPROM is used to store the program. When exchanging the EPROM it is<br />
strongly recommended that the FCP board is removed from the FCU box<br />
for better access of the memory chip.<br />
The EEPROM is used to store database registers and can be remotely<br />
reprogrammed (if the write protection switch is in the write enable<br />
position).<br />
There are three dual channel Serial Communication Controllers (SCC)<br />
that control the six serial communication ports for Group Bus and Field<br />
Bus communication.<br />
4-47
Rosemount Tank Radar <strong>Rex</strong><br />
Chapter 4 <strong>Service</strong><br />
4-48<br />
Mains<br />
input<br />
Crystal<br />
16<br />
MHz<br />
Power mon.<br />
>4.5<br />
Watch dog<br />
10 s<br />
Filter Switch<br />
<strong>Process</strong>or<br />
INT<br />
0<br />
1<br />
2<br />
3<br />
DATA<br />
ADDR<br />
BUSREG<br />
DMA<br />
0<br />
1<br />
Memory<br />
EPROM<br />
128 K*8<br />
EEPROM<br />
32 K*8<br />
RAM<br />
32 K*8 DATA<br />
ADDR<br />
DMA Controller<br />
BUSREQ.<br />
INT.<br />
DATA<br />
ADDR<br />
0<br />
1<br />
DMA<br />
2<br />
3<br />
Power supply<br />
Serial Communications Controller<br />
SCC 1<br />
INT<br />
DATA<br />
0<br />
1 DMA<br />
SCC 2<br />
INT<br />
DATA<br />
0<br />
1 DMA<br />
SCC 3<br />
INT<br />
DATA<br />
0<br />
1 DMA<br />
Figure 4-21. FCU block diagram<br />
+ 5 V<br />
+ 12 V<br />
- 12 V<br />
Gnd<br />
CH0<br />
CH1<br />
CH0<br />
CH1<br />
CH0<br />
CH1<br />
Group Bus Interface 1<br />
TRL/2<br />
BUS<br />
RS-232 Interface 1<br />
Group Bus Interface 2<br />
TRL/2<br />
BUS<br />
RS-232 Interface 2<br />
Field Bus Interface 1<br />
TRL/2<br />
BUS<br />
Field Bus Interface 2<br />
TRL/2<br />
BUS<br />
Field Bus Interface 3<br />
TRL/2<br />
BUS<br />
Field Bus Interface 4<br />
TRL/2<br />
BUS<br />
<strong>Service</strong> <strong>Manual</strong><br />
308012En, Ed.1/Rev.D<br />
August 2010
<strong>Service</strong> <strong>Manual</strong><br />
308012En, Ed.1/Rev.D<br />
August 2010<br />
4.2.7 Redundancy (option)<br />
Introduction<br />
Rosemount Tank Radar <strong>Rex</strong><br />
Chapter 4 <strong>Service</strong><br />
In order to reduce the risk of communication failure between the<br />
TankMaster and the units connected to the TRL/2 field bus, two FCUs<br />
can be connected to run in parallel. If one FCU fails, the other one<br />
automatically takes over without any action from the operator. The FCUs<br />
are connected with an extra cable allowing them to communicate. The<br />
inactive FCU constantly checks if the connected FCU is active. If the<br />
active FCU fails, it becomes inactive, and signals to the backup FCU to<br />
take over. Then the backup FCU immediately switches to an active state.<br />
PC<br />
Field Bus 1<br />
Field Bus 2<br />
Redundancy cable<br />
Figure 4-22. Parallel Field Communication Units connected to the TRL/2<br />
bus.<br />
4-49
Rosemount Tank Radar <strong>Rex</strong><br />
Chapter 4 <strong>Service</strong><br />
4-50<br />
Hardware installation<br />
<strong>Service</strong> <strong>Manual</strong><br />
308012En, Ed.1/Rev.D<br />
August 2010<br />
• Connect the special three-wire cable between the RS-232 ports of<br />
the FCUs. The cable shall be connected to the RS-232 port 2 contact.<br />
Figure 4-23. Connecting the RS-232 ports.<br />
• If a TRL/2 bus is connected to GB2, use an FCM board with special<br />
jumper.<br />
Note! The old version of the standard FCM board can not be used at port 1<br />
when redundant FCUs are used.<br />
• If an RS-232 bus is connected to GB2: use separate communication<br />
lines from the workstation to the “primary” and “backup” FCU,<br />
respectively.<br />
Field Bus 1<br />
Field Bus 2<br />
Redundancy cable<br />
Figure 4-24. Using an RS-232 Group Bus connection.
<strong>Service</strong> <strong>Manual</strong><br />
308012En, Ed.1/Rev.D<br />
August 2010<br />
Software configuration<br />
Rosemount Tank Radar <strong>Rex</strong><br />
Chapter 4 <strong>Service</strong><br />
Note! For further information on how to configure/install the FCU see<br />
TankMaster WinSetup Reference <strong>Manual</strong>.<br />
1 Power down both FCUs.<br />
2 Power up one of the FCUs.<br />
3 Select the Devices folder in the TankMaster WinSetup workspace window,<br />
click the right mouse button and choose the Install New option.<br />
4 Choose device type FCU, specify a name in the Tag input field and click<br />
the Next button to continue.<br />
5 Select a communication channel.<br />
6 Set the FCU address:<br />
1 In the FCU Communication window click the Change Address on<br />
Device button.<br />
2 Enter the Unit ID and the Modbus Address and click the OK button.<br />
3 In the FCU Communication window click the Verify Communication<br />
button to make sure that communication is established.<br />
4 Click the Next button to continue.<br />
7 In the FCU Configuration window choose the Redundant, Primary<br />
mode option to set the operation mode.<br />
8 Click the Next button to open the FCU Slave Database window. Configure<br />
the FCU.<br />
9 Click the Next button to open the Summary window and then the Finish<br />
button to finish the FCU installation.<br />
Comment: The standard mode of operation is "normal".<br />
There is no difference in operation between the<br />
FCU designated "primary" and "backup",<br />
respectively. The reason for having different<br />
names is only to be able to distinguish between<br />
the redundant FCUs.<br />
10 Check that holding register 831=7 (only memory tests).<br />
11 Power down the FCU.<br />
4-51
Rosemount Tank Radar <strong>Rex</strong><br />
Chapter 4 <strong>Service</strong><br />
Position 1<br />
4-52<br />
12 Power up the second FCU.<br />
<strong>Service</strong> <strong>Manual</strong><br />
308012En, Ed.1/Rev.D<br />
August 2010<br />
13 Set the second FCU address. It is important that both FCUs are using<br />
the same address.<br />
1 Select the FCU icon in the WinSetup workspace window, click the<br />
right mouse button and choose the Properties option.<br />
2 Select the Communication tab and click the Change button.<br />
3 Enter the Unit ID and the Modbus Address and click the OK button.<br />
4 Click the Verify Communication button to make sure that communication<br />
is established.<br />
5 Click the OK button to continue.<br />
14 Select the Configuration tab and choose the Redundant, Backup<br />
mode option to set the operation mode.<br />
15 Check that holding register 831=7.<br />
16 Power down the FCU.<br />
17 Move switch X14 to position 1 on both FCUs.<br />
18 Power up the "primary" FCU first, and then the "backup" FCU.<br />
Comment: Now the "primary" FCU, which was powered up<br />
first, becomes active.<br />
19 Check that TankMaster reads data from the active FCU. Select the FCU<br />
icon, click the right mouse button and choose the Properties option and<br />
check that the Unit ID corresponds to the active FCU.
<strong>Service</strong> <strong>Manual</strong><br />
308012En, Ed.1/Rev.D<br />
August 2010<br />
Rosemount Tank Radar <strong>Rex</strong><br />
Chapter 4 <strong>Service</strong><br />
20 Check the diagnostics Input Register (Input Register 30689) to verify that<br />
the "primary" FCU is active. This is indicated by status bit 12=0. (If the<br />
"backup" FCU is active status bit 12=1).<br />
21 Power down the active FCU.<br />
Comment: The "backup" FCU switches from inactive to<br />
active.<br />
22 Make sure that the backup FCU is active. This is indicated by status bit<br />
12=1 (see step 20).<br />
23 Power down both FCUs, and then power up the FCUs again starting with<br />
the "primary" FCU as described in step 18.<br />
24 Select the FCU Slave Database tab from the Properties menu, and configure<br />
the FCU pair like you would configure a single non redundant<br />
FCU. Both FCUs will receive the same data. Switch between the FCUs<br />
to make sure that the same data was stored in both FCUs.<br />
For further information on FCU Installation Procedure see WinSetup<br />
Reference <strong>Manual</strong>.<br />
4-53
Rosemount Tank Radar <strong>Rex</strong><br />
Chapter 4 <strong>Service</strong><br />
4.3 DAU<br />
4-54<br />
4.3.1 Setting the temperature measurement range<br />
<strong>Service</strong> <strong>Manual</strong><br />
308012En, Ed.1/Rev.D<br />
August 2010<br />
Do the following to set the measuring range of the temperature sensors:<br />
1 Connect the reference resistor corresponding to the desired measurement<br />
range to channel 15.<br />
The X21 terminal<br />
Connect<br />
temperature<br />
sensors<br />
Figure 4-25. Reference Resistor<br />
2 Set the jumpers X1, X2 and X3 on the DAU's circuit board in the correct<br />
positions for the desired measurement range. The jumpers are set<br />
according to Table 4-3. See also Figure 4-26. The default setting is from -<br />
50°C to 125°C for the Pt 100 sensor.<br />
X1 - OPEN<br />
X2 - OPEN<br />
X3 - CLOSED<br />
Connect Reference<br />
Resistor to terminals<br />
43, 44 and 45.<br />
Figure 4-26. Jumper settings for temperature range -50 to 125°C
<strong>Service</strong> <strong>Manual</strong><br />
308012En, Ed.1/Rev.D<br />
August 2010<br />
Sensor range<br />
Table 4-3: Temperature Range<br />
Temperature<br />
Range<br />
Pt 100 / Cu 90<br />
Rosemount Tank Radar <strong>Rex</strong><br />
Chapter 4 <strong>Service</strong><br />
X1 X2 X3 Reference<br />
Resistor (�)<br />
-50 - +125 °C OPEN OPEN CLOSED 138.50<br />
-50 - +300 °C CLOSED CLOSED CLOSED 175.84<br />
-200 - +150 °C CLOSED CLOSED OPEN 24.90<br />
3 Set the database register that specifies the temperature range to the<br />
value that corresponds to the jumper settings.<br />
In TankMaster WinSetup:<br />
In the DAU configuration window click the Configure button next to the<br />
Number of Temperature Sensors field.<br />
Note! See spare parts list for part number of reference resistors.<br />
4-55
Rosemount Tank Radar <strong>Rex</strong><br />
Chapter 4 <strong>Service</strong><br />
4-56<br />
4.3.2 Checking the Resistance Temperature Detectors<br />
<strong>Service</strong> <strong>Manual</strong><br />
308012En, Ed.1/Rev.D<br />
August 2010<br />
Pt100 sensors (spot measurement) are connected with three wires each.<br />
The Cu90 sensors (average measurement) are connected with a<br />
common ground.<br />
The sensors can be checked by measuring their resistance and the<br />
surrounding temperature. Then check in the tables below. If the<br />
temperature derived from the table does not correspond to the actual<br />
temperature, then the sensor needs to be replaced.<br />
See tables and connection diagrams below. See also Installation<br />
drawings on page 8-1 for connection of the temperature sensors.<br />
Pt100<br />
°C � °C �<br />
-50 80.25 +80 130.89<br />
-40 84.21 +90 134.70<br />
-30 88.17 +100 138.50<br />
-20 92.13 +110 142.28<br />
-10 96.07 +120 146.06<br />
0 100.00 +130 149.82<br />
+10 103.90 +140 153.57<br />
+20 107.79 +150 157.32<br />
+25 109.73 +160 161.04<br />
+30 111.67 +170 164.76<br />
+40 115.54 +180 168.47<br />
+50 119.40 +190 172.16<br />
+60 123.24 +200 175.84<br />
+70 127.07<br />
Figure 4-27. Pt 100 and Cu90 temperature<br />
Cu90<br />
°C � °C �<br />
-50 71.43 +80 120.95<br />
-40 75.24 +90 124.76<br />
-30 79.05 +100 128.57<br />
-20 82.86 +110 132.38<br />
-10 86.67 +120 136.19<br />
0 90.48 +130 140.00<br />
+10 94.29 +140 143.81<br />
+20 98.10 +150 147.62<br />
+25 100.00 +160 151.42<br />
+30 101.91 +170 155.23<br />
+40 105.72 +180 159.04<br />
+50 109.53 +190 162.85<br />
+60 113.33 +200 166.66<br />
+70 117.14<br />
Pink<br />
White<br />
Grey<br />
Violet<br />
Blue<br />
Green<br />
Yellow<br />
Orange<br />
Red<br />
Brown<br />
Cu90 Resistance Elements<br />
Black<br />
Black
<strong>Service</strong> <strong>Manual</strong><br />
308012En, Ed.1/Rev.D<br />
August 2010<br />
4.3.3 Exchanging the External Reference Resistor<br />
Rosemount Tank Radar <strong>Rex</strong><br />
Chapter 4 <strong>Service</strong><br />
The external reference resistor must be changed if a different<br />
temperature measurement range will be used, see 4.3.1. Also, if the local<br />
display shows a reference resistor calibration error, it may be necessary<br />
to replace it. The reference resistor is connected to channel 15 of the<br />
multiplexer.<br />
The reference resistance values corresponding to different temperature<br />
ranges and sensors are given in the table below.<br />
Resistance (�) Temperature range (°C)<br />
138.50 -50 - +125<br />
175.84 -50 - 300<br />
24.90 -200 - +150<br />
Figure 4-28 illustrates how to connect the external reference resistor to<br />
the X21 terminal.<br />
The X21 terminal<br />
Connect<br />
temperature<br />
sensors<br />
Figure 4-28. Connection of reference resistor<br />
Automatic test of reference resistors<br />
Connect Reference<br />
Resistor to terminals<br />
43, 44 and 45.<br />
The internal reference resistor is placed on the Motherboard. The ratio<br />
between the high and low temperature references is calculated as a test<br />
of the reference resistors. This value is compared with a value given for<br />
the current temperature range. The ratio is allowed to deviate a certain<br />
amount from the nominal value. The tolerated deviation can be viewed in<br />
holding registers 307-310.<br />
4-57
Rosemount Tank Radar <strong>Rex</strong><br />
Chapter 4 <strong>Service</strong><br />
4-58<br />
4.3.4 Suppressing error indication...<br />
... when associated RTG is not present.<br />
<strong>Service</strong> <strong>Manual</strong><br />
308012En, Ed.1/Rev.D<br />
August 2010<br />
Normally a DAU receives queries from the bus master (FCU), and picks<br />
up level data from the associated RTG. However, there may be situations<br />
when a DAU is installed without bus master and/or RTG. In this case<br />
error codes indicating external serial communication error will be shown<br />
on the DAU display. These error codes can be suppressed by setting<br />
DAU holding register 313 to the appropriate value:<br />
4.3.5 DAU Reset<br />
Database value Action<br />
The DAU can be reset by switching power off and on with an external<br />
switch. Another way is to open the box and remove connector X20 on the<br />
DMB. When replacing the connector the power-LED will light up for a<br />
short period of time during start up. The (optional) display shows the Unit<br />
Id during start up.<br />
Figure 4-29. Connection X20<br />
0 Normal operation<br />
1 No bus master present<br />
2 No associated RTG<br />
3 No associated bus master or RTG<br />
X20
<strong>Service</strong> <strong>Manual</strong><br />
308012En, Ed.1/Rev.D<br />
August 2010<br />
4.3.6 Write Protection<br />
Rosemount Tank Radar <strong>Rex</strong><br />
Chapter 4 <strong>Service</strong><br />
There is a write protection switch to prevent unauthorized changes in the<br />
EEPROM. The switch can be sealed in the write inhibit position using a<br />
wire through the clevis pins. See Figure 4-30.<br />
Write<br />
Enable<br />
Write Inhibit<br />
Figure 4-30. Write protection switch<br />
4-59
Rosemount Tank Radar <strong>Rex</strong><br />
Chapter 4 <strong>Service</strong><br />
4-60<br />
4.3.7 Default database reload<br />
1 Disconnect the DAU power supply.<br />
<strong>Service</strong> <strong>Manual</strong><br />
308012En, Ed.1/Rev.D<br />
August 2010<br />
2 Remove the program EEPROM from the socket, see Figure 4-31.<br />
Figure 4-31. Database loader<br />
3 Insert the DB-loader EEPROM into the EEPROM socket.<br />
4 Power up and wait for about 30 seconds. When the database loading is<br />
finished, all segments on the local display light up:<br />
Comment: flashing display segments indicate that the database<br />
loading failed.<br />
5 Disconnect the power supply.<br />
6 Remove the DB-loader and reinsert the program EEPROM.<br />
7 Power up.<br />
EEPROM<br />
8 Configure the DAU.
<strong>Service</strong> <strong>Manual</strong><br />
308012En, Ed.1/Rev.D<br />
August 2010<br />
4.3.8 Local Display modes<br />
Rosemount Tank Radar <strong>Rex</strong><br />
Chapter 4 <strong>Service</strong><br />
The display has three different display modes. These modes can be<br />
changed in two ways:<br />
• Press the push button and wait for at least one second.<br />
• Set database register 300. The default setting is 0, which allows<br />
you to change the display mode with the push button. By setting<br />
register 300 to 1, display mode 1 is selected and by setting it to 2<br />
display mode 2 is selected. Reset the DAU to make the change<br />
valid (see section 4.3.5).<br />
Figure 4-32. DAU LCD Display<br />
Error indication<br />
Data Acquisition Unit Type DAU 2130<br />
EEx C T4<br />
Hazardous Location Class<br />
Group C<br />
T amb =-40° to +65°C and D. Temperature Code T4. The device<br />
There are two alternatives to indicate an error:<br />
Alt. 1: the corresponding value is flashing on the screen<br />
Alt. 2: a blinking “Err”<br />
<strong>TankRadar</strong> L/2<br />
Ex<br />
UL<br />
4-61
Rosemount Tank Radar <strong>Rex</strong><br />
Chapter 4 <strong>Service</strong><br />
4-62<br />
Display mode 0:<br />
<strong>Service</strong> <strong>Manual</strong><br />
308012En, Ed.1/Rev.D<br />
August 2010<br />
The following values are shown. Only the values for which the DAU has<br />
been configured, are shown. The sequence is repeated continuously.<br />
If there is an<br />
error:<br />
Level. L for metric: decimal, colons for<br />
feet: inches: inches/17.<br />
Average<br />
temperature.<br />
One current<br />
input<br />
channel.<br />
Digital input<br />
values.<br />
Relay<br />
output<br />
control.<br />
System status<br />
C for Celsius or F for Fahrenheit.<br />
The specific channel is selected in the<br />
database.<br />
The digital input values are shown high<br />
when the connected device is open (not<br />
grounding = 1). They are shown low when<br />
it is closed (grounding = 0). Each vertical<br />
segment corresponds to an input.<br />
The lower segment is shown when the<br />
relay is in its normal position (inactivated).<br />
The upper section is shown when the<br />
relay is in its activated position. If the relay<br />
feedback does not match relay control this<br />
will be shown with a "-" sign like this:<br />
See Chapter Troubleshooting for more<br />
information.
<strong>Service</strong> <strong>Manual</strong><br />
308012En, Ed.1/Rev.D<br />
August 2010<br />
Display mode 1:<br />
Rosemount Tank Radar <strong>Rex</strong><br />
Chapter 4 <strong>Service</strong><br />
The following sequence is shown when the display is in mode 1.<br />
If there is an<br />
error:<br />
Level See display mode<br />
0 for explanation.<br />
Temperature sensor 1.<br />
If the sensor is below the surface.<br />
The temperature value of<br />
sensor 1.<br />
Temperature sensor 2.<br />
The temperature value of<br />
sensor 2.<br />
Pressure sensor 1.<br />
The pressure value of sensor 1.<br />
Pressure sensor 2.<br />
The pressure value of sensor 2.<br />
Digital input values. See display mode<br />
0 for explanation.<br />
Relay output control. See display mode<br />
0 for explanation.<br />
System status. See Chapter Troubleshooting<br />
for<br />
more information.<br />
4-63
Rosemount Tank Radar <strong>Rex</strong><br />
Chapter 4 <strong>Service</strong><br />
4-64<br />
Display mode 2:<br />
<strong>Service</strong> <strong>Manual</strong><br />
308012En, Ed.1/Rev.D<br />
August 2010<br />
This mode locks the display on the value which is on display at the<br />
moment. The value is still sampled at its usual rate (approximately every<br />
15 seconds for a temperature sensor).<br />
Press the button and hold it down. Release the button when the value<br />
before the desired value is displayed. For example, if temperature value<br />
C5 is to be displayed, then release the button when the display is<br />
showing the value of temperature C4.<br />
You can set this display mode remotely via database register 300. The<br />
default reading is level. If you want to remotely change the display to<br />
other variables in display mode 2, please contact <strong>Emerson</strong> <strong>Process</strong><br />
<strong>Management</strong>/Rosemount Tank Gauging for instructions.
<strong>Service</strong> <strong>Manual</strong><br />
308012En, Ed.1/Rev.D<br />
August 2010<br />
4.3.9 Local Display Error codes<br />
Rosemount Tank Radar <strong>Rex</strong><br />
Chapter 4 <strong>Service</strong><br />
The type of errors displayed on the local display can be divided into the<br />
following groups.<br />
• System<br />
• External serial communication<br />
• Internal serial communication<br />
• Temperature measuring error<br />
System Errors indicate that there is an error in one of the memory<br />
circuits.<br />
External serial communication error means that communication with<br />
master or RTG is lost.<br />
Internal serial communication error may indicate that there is an<br />
internal bus failure.<br />
Temperature measuring error may indicate that there is a defect<br />
temperature sensor or a calibration error.<br />
4-65
Rosemount Tank Radar <strong>Rex</strong><br />
Chapter 4 <strong>Service</strong><br />
4-66<br />
4.3.10 Time-out settings<br />
Master communication time-out<br />
<strong>Service</strong> <strong>Manual</strong><br />
308012En, Ed.1/Rev.D<br />
August 2010<br />
The master communication time-out specifies the elapsed time without<br />
contact before communication with the master is considered to be lost.<br />
This value is stored in database register 188. The default value is set to<br />
20 s.<br />
Note! The database value is given in number of "ticks" 255. One tick is equal to<br />
278 �s, and 255 ticks is equal to 71 ms. Thus the value stored in<br />
database register 188 must be multiplied with 71 ms in order to obtain<br />
the time-out value in number of seconds.<br />
RTG Communication time-out<br />
The RTG communication time-out is stored in database register 249.<br />
The default value is set to 60 seconds. This is the value which specifies<br />
the time interval without contact before communication with the RTG is<br />
considered to be lost.
<strong>Service</strong> <strong>Manual</strong><br />
308012En, Ed.1/Rev.D<br />
August 2010<br />
4.4 FBM<br />
Rosemount Tank Radar <strong>Rex</strong><br />
Chapter 4 <strong>Service</strong><br />
The Field Bus Modem acts as a converter between USB or RS-232C<br />
and the TRL/2 Bus. The TRL/2 protocol is used for communication with<br />
Rosemount Tank Gauging equipment.<br />
The Field Bus Modem may also be used to connect foreign units to the<br />
Field Bus.<br />
Connecting a PC with the TankMaster software to the TRL/2 bus requires<br />
a Field Bus Modem model 2180.<br />
4.4.1 Power Supply<br />
Use adapter 90-264 V ac/9 V dc 1.5 A for RS232 communication.<br />
DO NOT use external power supply when the modem is connected to<br />
the USB port. The USB interface itself supports power to the FBM2180<br />
modem.<br />
4.4.2 Operation - front panel<br />
The FBM 2180 front LEDs show information on power supply,<br />
communication status and communication interface.<br />
The Termination switch is used if there are extremely short cables<br />
between the transmitter and the modem.<br />
The Gain switch is set to Lo by default. This setting is sufficient in most<br />
cases. The Hi Gain setting may be used if cable dimensions are<br />
insufficient resulting in a heavily damped communication signal.<br />
LEDs for external power<br />
and communication<br />
External power<br />
RS232<br />
USB<br />
Figure 4-33. The Field Bus Modem<br />
Gain switch Termination switch<br />
Receive<br />
Transmit<br />
4-67
Rosemount Tank Radar <strong>Rex</strong><br />
Chapter 4 <strong>Service</strong><br />
4-68<br />
4.4.3 FBM instead of FCU for small systems<br />
<strong>Service</strong> <strong>Manual</strong><br />
308012En, Ed.1/Rev.D<br />
August 2010<br />
In a small system with a maximum of 16 units (RTGs or DAUs), the Field<br />
Bus Modem can be used instead of an FCU. The Field Bus Modem can<br />
then be connected directly between the TankMaster PC (master) and the<br />
RTGs and the DAUs.<br />
The Field Bus Modem is contained in a small box and must not be used<br />
in a hazardous area.<br />
Optional Host Computer<br />
or Slave PC<br />
<strong>Rex</strong><br />
TankMaster<br />
Temp.<br />
sensors<br />
RS232<br />
FBM<br />
Modbus<br />
protocol<br />
Field Bus<br />
Temp.<br />
sensors<br />
Figure 4-34. Example of a small <strong>TankRadar</strong> <strong>Rex</strong> System<br />
Optional Second<br />
Tank Group<br />
Control Room Level<br />
<strong>Rex</strong> <strong>Rex</strong> <strong>Rex</strong> <strong>Rex</strong><br />
DAU<br />
DAU DAU<br />
Relay Out<br />
Field Level<br />
Analog In<br />
Analog out<br />
Temperature<br />
HART
<strong>Service</strong> <strong>Manual</strong><br />
308012En, Ed.1/Rev.D<br />
August 2010<br />
4.5 RDU 40<br />
4.5.1 Installation<br />
Rosemount Tank Radar <strong>Rex</strong><br />
Chapter 4 <strong>Service</strong><br />
To access the upper screw of the RDU 40 cover remove the rubber plug.<br />
Unscrew and remove all six screws. Remove the cover and take care of<br />
the locking device for the weather protection hatch.<br />
The RDU 40 shall be connected to the <strong>TankRadar</strong> <strong>Rex</strong> junction box for<br />
cable connections.<br />
Figure 4-35. Installation of RDU 40 master and slave<br />
Any of the three cable glands may be used to take the cable into the<br />
RDU40:<br />
2xM20 - Cable diameter: 7 mm - 14 mm<br />
1xM25 - Cable diameter: 9 mm - 18 mm.<br />
External adapters 1/2 NPT and 3/4 NPT are optional.<br />
Connect the RDU 40 to the X12 terminal in the <strong>Rex</strong> junction box as<br />
illustrated in Figure 4-35.<br />
4-69
Rosemount Tank Radar <strong>Rex</strong><br />
Chapter 4 <strong>Service</strong><br />
4-70<br />
<strong>Service</strong> <strong>Manual</strong><br />
308012En, Ed.1/Rev.D<br />
August 2010<br />
In order to allow proper operation and to fulfil EMC requirements, the<br />
cable between the RDU 40 and the <strong>Rex</strong> junction box should meet the<br />
following requirements:<br />
• Shielded cable. Minimum 3 wires. The shield shall be circular connected<br />
inside the cable gland of the RDU 40 and connected to<br />
ground in the <strong>Rex</strong> junction box.<br />
• All wires must have at least 0.25 mm individual insulation.<br />
• Maximum total length of 100 m, both master and slave included.<br />
• Minimum AWG 20 or 0.5 mm² for each wire.<br />
The RDU 40-chassis shall be grounded locally to the tank. Use minimum<br />
4 mm² or AWG 11 wire. Additional protective ground connection to the<br />
power distribution central or the <strong>Rex</strong> junction box is not recommended<br />
except where required according to national code of practice. A ground<br />
loop with circulating current may occur.<br />
Note! It is not possible to use an RDU40 and a DAU simultaneously.<br />
Figure 4-36. Back of RDU40.<br />
If a cable with two shields is used, one shield shall be connected to<br />
ground in the <strong>Rex</strong> junction box and the other shall be circular connected<br />
inside the cable gland of the RDU 40.<br />
Check the gasket and put the locking device for the weather protection<br />
hatch in position when remounting the RDU-cover. Tighten all six screws<br />
firmly.<br />
Mount the RDU 40 with the four M4 screws. Distances between the<br />
screws are 60 mm and 68 mm according to the back of the RDU 40.<br />
See the RDU 40 User´s Guide, Ref. no. 308010E, for further<br />
information on RDU 40 installation.
<strong>Service</strong> <strong>Manual</strong><br />
308012En, Ed.1/Rev.D<br />
August 2010<br />
4.5.2 Two RDU 40 connected to the same <strong>Rex</strong><br />
Rosemount Tank Radar <strong>Rex</strong><br />
Chapter 4 <strong>Service</strong><br />
If two RDU 40 are connected to the same <strong>Rex</strong>, one of them has to be<br />
configured as “slave” while the other is “master”. The slave cannot be<br />
configured or controlled individually but follows the master. Only the<br />
LCD-contrast can be individually controlled on the slave RDU 40.<br />
To make an RDU 40 work as a slave it is necessary to move the jumper<br />
at the RDU 40 cover to position 2 (see Figure 4-35).<br />
4.5.3 Data items<br />
24 items are available, dependent of how the <strong>Rex</strong> gauge is equipped:<br />
• Level<br />
• Ullage<br />
• Level rate<br />
• Signal strength<br />
• Volume<br />
• Average temperature<br />
• Temperature spot 1-6<br />
• Analog input 1-2<br />
• Vapor pressure<br />
• Observed density<br />
• Free water level<br />
• Hart slave 1-3<br />
• Relay 1-2<br />
4-71
Rosemount Tank Radar <strong>Rex</strong><br />
Chapter 4 <strong>Service</strong><br />
4-72<br />
<strong>Service</strong> <strong>Manual</strong><br />
308012En, Ed.1/Rev.D<br />
August 2010
<strong>Service</strong> <strong>Manual</strong><br />
308012En, Ed.1/Rev.D<br />
August 2010<br />
5. Calibration<br />
5.1 Introduction<br />
Rosemount Tank Radar <strong>Rex</strong><br />
Chapter 5 Calibration<br />
Normally a minor adjustment of the Calibration Distance is needed in<br />
order to achieve agreement between measured and actual product level.<br />
(For TRL/2 transmitters the Tank Connection Length (TCL) is adjusted).<br />
A small offset can for example result from deviations between the actual<br />
tank height and the value stored in the transmitter database, or from<br />
differences between various RTG microwave units and antennas.<br />
The calibration should be performed once at the final commissioning,<br />
and does not need to be repeated unless tank conditions are altered.<br />
You can choose to manually adjust the Calibration Distance, or you can<br />
use the Calibrate function in WinSetup for automatic adjustment.<br />
5.2 <strong>Manual</strong>ly adjusting the Calibration Distance<br />
The Calibration Distance can be manually adjusted in order to<br />
compensate for differences between different RTG microwave units and<br />
different antennas. For TRL/2 2900 transmitters the corresponding<br />
adjustment is done by changing the TCL parameter. (For <strong>Rex</strong><br />
transmitters the TCL is never adjusted except when non-standard<br />
antennas are used).<br />
If there is a deviation between hand dipped and measured levels, you<br />
may calculate a new Calibration Distance value according to the formula:<br />
New Calibration Distance = Old Calibration Distance + �L<br />
where �L = observed level (hand dip) - transmitter level reading.<br />
The same formula applies for TRL/2 transmitters if the Calibration<br />
Distance is changed to the TCL parameter.<br />
5-1
Rosemount Tank Radar <strong>Rex</strong><br />
Chapter 5 Calibration<br />
5-2<br />
Calibration<br />
Distance<br />
<strong>Service</strong> <strong>Manual</strong><br />
308012En, Ed.1/Rev.D<br />
August 2010<br />
To change the Calibration Distance value stored in the transmitter<br />
database:<br />
1 Start the TankMaster WinSetup program.<br />
2 Select the transmitter icon in the WinSetup workspace.<br />
3 Click the right mouse-button and choose the Properties option.<br />
4 Select the RTG Geometry tab.<br />
5 Type the Calibration Distance value in the corresponding input field and<br />
click the OK button.
<strong>Service</strong> <strong>Manual</strong><br />
308012En, Ed.1/Rev.D<br />
August 2010<br />
5.3 Using the WinSetup Calibrate function<br />
Rosemount Tank Radar <strong>Rex</strong><br />
Chapter 5 Calibration<br />
The Calibration function is a tool to adjust the RTG in order to minimize<br />
the offset between actual (hand dipped) product levels and the<br />
corresponding values measured by the transmitter. By using the<br />
Calibrate function you can optimize measurement performance over the<br />
whole measurement range from the top to the bottom of the tank.<br />
The Calibration function calculates a new Calibration Distance based on<br />
fitting a straight line to the deviations between hand dipped levels and<br />
levels measured by the transmitter.<br />
For the 3950 still pipe gauge the calibration function is specially suitable<br />
since a minor adjustment of the Scale Factor is often necessary. The<br />
radar propagation velocity is dependent on the inner diameter of the still<br />
pipe, and the Scale Factor parameter is used to adjust the transmitter to<br />
take this effect into account. Since the average diameter is often difficult<br />
to determine accurately a calibration is often needed.<br />
Procedure<br />
The adjustment process includes the following steps:<br />
1 Recording the hand dipped ullage values and the corresponding<br />
RTG level values.<br />
2 Entering the hand dipped levels and the RTG level values into<br />
WinSetup.<br />
3 Inspect the resulting calibration graph and, if necessary, exclude<br />
measurement points which should not be used in the adjustment<br />
calculation.<br />
5.3.1 Required information<br />
Make sure that the following information is available when you intend to<br />
use the RTG Adjustment function in TankMaster WinSetup:<br />
• A list of hand dipped ullage values.<br />
• A list of RTG level values corresponding to the hand dipped<br />
ullage/level values.<br />
5-3
Rosemount Tank Radar <strong>Rex</strong><br />
Chapter 5 Calibration<br />
5-4<br />
5.3.2 Hand dipping<br />
Staff<br />
<strong>Service</strong> <strong>Manual</strong><br />
308012En, Ed.1/Rev.D<br />
August 2010<br />
Only one person should perform the manual ullage measurements in<br />
order to guarantee good repeatability between measurements.<br />
Hand dip tape<br />
Use only one tape for the calibration. The tape should be made of steel<br />
and calibrated by an approved testing institute. It must also be free from<br />
bends and kinks.<br />
The thermal expansion factor and calibration temperature shall also be<br />
provided.<br />
<strong>Manual</strong> dip hatch<br />
A dip hatch should be available close to the level gauge. If the dip hatch<br />
is far away from the level gauge, differences in roof movements may<br />
result in large errors.<br />
Procedure<br />
Follow these instructions when you make hand dip measurements:<br />
• hand dip until you obtain three consecutive readings within 1 mm<br />
• correct the tape according to the calibration record<br />
• note the hand dipped ullage and the RTG level reading simultaneously.<br />
Do not calibrate when<br />
• the tank is emptying or filling<br />
• agitators are running<br />
• when there are windy conditions<br />
• when there is foam on the surface.
<strong>Service</strong> <strong>Manual</strong><br />
308012En, Ed.1/Rev.D<br />
August 2010<br />
Tank Reference<br />
Height<br />
5.3.3 Entering calibration data<br />
Rosemount Tank Radar <strong>Rex</strong><br />
Chapter 5 Calibration<br />
1 Select the transmitter to be calibrated in the workspace window and<br />
choose Calibrate from the <strong>Service</strong>/Devices menu,<br />
- or -<br />
click the right mouse button and choose Calibrate.<br />
Before any data is entered, the Calibrate window is empty. Make sure<br />
that the Tank Reference Height, displayed in the lower left corner, is<br />
correct. To adjust the Tank Reference Height, select the transmitter icon<br />
in the WinSetup workspace, click the right mouse button and choose the<br />
Properties/Tank Distances option.<br />
2 Click the Calibration Data button.<br />
3 Enter hand dipped level values and the corresponding levels measured<br />
by the transmitter. It is recommended that the hand dipped levels are<br />
based on the average value of three consecutive measurements within 1<br />
mm. For further information see 5.3.2 “Hand dipping”.<br />
Note! Measurement unit mm is used in the Calibration Data window.<br />
5-5
Rosemount Tank Radar <strong>Rex</strong><br />
Chapter 5 Calibration<br />
5-6<br />
<strong>Service</strong> <strong>Manual</strong><br />
308012En, Ed.1/Rev.D<br />
August 2010<br />
4 Click the Refresh button. Now WinSetup calculates the deviations<br />
between hand dipped and measured levels.<br />
Click the Save Calibration Data in PC Database button in order to save<br />
the entered values and return to the Calibration window.<br />
5 The Calibration window displays a straight line fitted through measurement<br />
points representing the difference between hand dipped level values,<br />
and values measured by the RTG. For still pipe antennas a sloping<br />
line is displayed, otherwise the line is horizontal. The slope is due to the<br />
linear impact from the still pipe on the microwave velocity of propagation.<br />
Check that the line fits well to the measurement points. If a point deviates<br />
significantly from the line, it can be excluded from the calculations by<br />
opening the Calibration Data window (click the Calibration Data button)<br />
and deselecting the corresponding check box in the Enable column.
<strong>Service</strong> <strong>Manual</strong><br />
308012En, Ed.1/Rev.D<br />
August 2010<br />
Rosemount Tank Radar <strong>Rex</strong><br />
Chapter 5 Calibration<br />
6 Click the Write new calibration data to RTG button in order to save the<br />
current calibration data.<br />
Note! By clicking the Write new calibration data to RTG button, the Rosemount<br />
Level values in the Calibration Data window are recalculated and the old<br />
Calibration Data is replaced.<br />
Now you can check the calibration result by opening the Calibration<br />
window again:<br />
Note that all measured values are adjusted according to the calculated<br />
Calibration Distance. In the Calibration Data window you can also see<br />
that the level values measured by the transmitter are adjusted. Of<br />
course, the hand dipped levels are unaltered.<br />
5-7
Rosemount Tank Radar <strong>Rex</strong><br />
Chapter 5 Calibration<br />
5-8<br />
<strong>Service</strong> <strong>Manual</strong><br />
308012En, Ed.1/Rev.D<br />
August 2010
<strong>Service</strong> <strong>Manual</strong><br />
308012En, Ed.1/Rev.D<br />
August 2010<br />
6. Troubleshooting<br />
SYMPTOM CAUSE ACTION<br />
No contact with<br />
RTG<br />
No contact with<br />
DAU<br />
Not possible to<br />
write to DAU or<br />
FCU<br />
Rosemount Tank Radar <strong>Rex</strong><br />
Chapter 6 Troubleshooting<br />
Faulty TRL/2 bus connection. Check TRL/2 bus wires.<br />
Incorrect address or Unit ID. Check and correct address and<br />
Unit ID in TankMaster.<br />
Analyze communication. Check LEDs in FCU (if a FCU is<br />
included).<br />
Field Bus connected to wrong<br />
communication port on the PC.<br />
Incorrect or faulty cable connection<br />
between PC and FBM.<br />
Unit connected to wrong field bus<br />
port of the FCU (if an FCU is<br />
included).<br />
Group Bus connected to wrong<br />
communication port on the PC (if<br />
an FCU is included).<br />
Faulty FCM card (if an FCU is<br />
included).<br />
Faulty Field Bus Modem, FBM. Replace FBM.<br />
Check address of unit and check<br />
communication port for correlation.<br />
Check that all signals of the RS<br />
232 are connected according to<br />
installation drawing.<br />
Check that unit is connected to the<br />
correct field bus port on the FCU.<br />
Check dress of unit and check<br />
communication port for correlation.<br />
Exchange FCM cards to identify<br />
the faulty card.<br />
Same as above. Check the items above.<br />
No contact with associated RTG. Check the items above.<br />
Incorrect configuration of RTG. Check the RTG configuration in<br />
TankMaster.<br />
Incorrect power supply from RTG Check power supply by measuring<br />
the voltage between pins 6 and 7<br />
on DAU connector. The voltage<br />
should be about 5.5 V. Check Barrier<br />
board in Electronic Unit in<br />
RTG.<br />
No contact with unit Check unit according to the previous<br />
page<br />
Write protection switch in wrong<br />
position<br />
Put switch in write enable position<br />
6-1
Rosemount Tank Radar <strong>Rex</strong><br />
Chapter 6 Troubleshooting<br />
SYMPTOM CAUSE ACTION<br />
Not possible to<br />
write to RTG<br />
Temperature<br />
measurement<br />
incorrect<br />
Incorrect reading<br />
of level<br />
6-2<br />
Metrological Seal in Write inhibit<br />
position.<br />
Temperature sensor incorrectly<br />
connected.<br />
Temperature sensor with ground<br />
failure.<br />
Short circuited temperature sensor.<br />
Measured value outside the measuring<br />
range.<br />
<strong>Service</strong> <strong>Manual</strong><br />
308012En, Ed.1/Rev.D<br />
August 2010<br />
Put switch in write enable position.<br />
Measure resistance on temperature<br />
sensor wires.<br />
Check connection of temperature<br />
sensors to terminal: Lowest sensor<br />
to lowest number on terminal.<br />
Measure resistance between signal<br />
wire and ground, must be > 5<br />
M��<br />
Measure resistance.<br />
Check correspondence between<br />
measuring range and type of sensor.<br />
Check jumpers for temperature<br />
range in DAU.<br />
Faulty configuration. Check configured measuring<br />
range.<br />
Check configured number of temperature<br />
elements.<br />
Check the configured position of<br />
the temperature elements.<br />
Wrong average value but individual<br />
values correct.<br />
Check the position of the temperature<br />
elements.<br />
Check the level of the product in<br />
the tank.<br />
Incorrect database constants. Check tank distances in the RTG<br />
configuration.<br />
Hand dip to verify the level.<br />
RTG locked on disturbing echo. Initiate new echo search.<br />
Look for objects in the tank creating<br />
disturbing echoes.<br />
Metrological Seal in write inhibit<br />
position.<br />
Put switch in write enable position.
<strong>Service</strong> <strong>Manual</strong><br />
308012En, Ed.1/Rev.D<br />
August 2010<br />
SYMPTOM CAUSE ACTION<br />
Downloading of<br />
program to RTG<br />
impossible<br />
Echo amplitude below noise<br />
threshold.<br />
Still Pipe Gauge: Amplitude of<br />
approximately 20 000 mV or more.<br />
Parabolic or Cone Antenna<br />
Gauge: Disturbing echo with<br />
strength above the noise threshold<br />
Rosemount Tank Radar <strong>Rex</strong><br />
Chapter 6 Troubleshooting<br />
Check signal amplitude.<br />
Check for foam on product surface.<br />
Check inclination of RTG, see<br />
“Installation <strong>Manual</strong>”.<br />
Clean antenna.<br />
Check for waves on product surface.<br />
Disturbing echo may be present.<br />
Restart the RTG.<br />
Check if level is near empty tank.<br />
Check the still pipe (drawings).<br />
Check amplitude of echo. Should<br />
be 1000-3000 mV.<br />
Restart the RTG.<br />
Varying amplitudes Check that the surface of the product<br />
is calm (no mixer).<br />
Mechanically incorrect installation Check installation drawings and<br />
Installation <strong>Manual</strong>.<br />
Faulty communication. Check the communication to the<br />
RTG in question.<br />
Wrong file used for programming. Check that correct diskette is<br />
used.<br />
Check that correct disk drive is<br />
used.<br />
Check that correct file is used with<br />
name TH.cry<br />
ComFail occurs TankMaster configuration incorrect.<br />
Check configuration.<br />
Power supply to FBM insufficient. Connect external power supply.<br />
Incorrect cables used. Use a single twisted shielded pair<br />
of wires.<br />
Field Communication Unit faulty. Check LEDs on the field bus ports<br />
and the group bus ports.<br />
Bad connection of cables. Check connection of cables.<br />
Short cables between FBM and<br />
PC.<br />
Check termination switch, see<br />
4.4.2.<br />
Cable dimensions are insufficient Check gain switch, see 4.4.2.<br />
No contact with RTG See previous pages.<br />
6-3
Rosemount Tank Radar <strong>Rex</strong><br />
Chapter 6 Troubleshooting<br />
SYMPTOM CAUSE ACTION<br />
Current input reading<br />
incorrect<br />
6-4<br />
Connected device faulty. Check device.<br />
<strong>Service</strong> <strong>Manual</strong><br />
308012En, Ed.1/Rev.D<br />
August 2010<br />
Power supply faulty. Connect a resistance and check<br />
the measured value.<br />
Measure current. If there is more<br />
than one current input then the<br />
power supply is multiplexed.<br />
There is no continuous current in<br />
that case.<br />
Incorrect correspondence<br />
between current and displayed<br />
value<br />
Check scaling configuration of<br />
inputs.
<strong>Service</strong> <strong>Manual</strong><br />
308012En, Ed.1/Rev.D<br />
August 2010<br />
DAU Display CAUSE ACTION<br />
System:<br />
0 - No detected error<br />
System:<br />
1 - EEPROM (program) error<br />
System:<br />
2 - EEPROM (database) error<br />
System:<br />
4 - RAM error<br />
System:<br />
3, 5, 6 or 7 - combinations of<br />
errors above. Codes added<br />
together.<br />
External serial communication<br />
error:<br />
0 - No detected error<br />
External serial communication:<br />
1 - Communication with master<br />
lost<br />
External serial communication<br />
error:<br />
2 - Communication with RTG lost<br />
External serial communication<br />
error:<br />
3 - Combination of the errors<br />
above<br />
Rosemount Tank Radar <strong>Rex</strong><br />
Chapter 6 Troubleshooting<br />
No action required<br />
Restart the DAU.<br />
Exchange the EEPROM.<br />
Restart the DAU.<br />
Exchange PCB: DMB for Slave<br />
DAU or DXB for Independent<br />
DAU.<br />
Restart the DAU.<br />
Exchange PCB: DMB for Slave<br />
DAU or DXB for Independent<br />
DAU.<br />
See the items above.<br />
No action required.<br />
Restart the DAU. See items<br />
under “No contact with RTG or<br />
DAU”.<br />
Restart the DAU. See items<br />
under “No contact with RTG or<br />
DAU”.<br />
See the items above.<br />
6-5
Rosemount Tank Radar <strong>Rex</strong><br />
Chapter 6 Troubleshooting<br />
DAU Display CAUSE ACTION<br />
6-6<br />
Internal serial communication<br />
error:<br />
0 - No detected error<br />
Internal serial communication<br />
error:<br />
1- Error detected<br />
Internal serial communication<br />
error:<br />
3 - Internal bus failure.<br />
Temperature measuring error:<br />
0 - No detected error<br />
Temperature measuring error:<br />
1- Error in at least one sensor<br />
Temperature measuring error:<br />
2 - Calibration error<br />
Reference signals out of range<br />
Temperature measuring error:<br />
3 - Average error<br />
Not any functioning non-blocked<br />
sensor is within the product.<br />
Current input error (p for pressure):<br />
0 - No detected error<br />
Current input error (p for pressure):<br />
1- Error in at least one sensor<br />
<strong>Service</strong> <strong>Manual</strong><br />
308012En, Ed.1/Rev.D<br />
August 2010<br />
No action required.<br />
Restart the DAU. Exchange<br />
PCB: DMB for Slave DAU or<br />
DXB for Independent DAU.<br />
Restart the DAU. Exchange<br />
PCB: DMB for Slave DAU or<br />
DXB for Independent DAU.<br />
No action required.<br />
Watch display in mode 1 (if display<br />
is included) for blinking<br />
value of the faulty sensor.<br />
Exchange the precision reference<br />
resistance. If problem persists,<br />
then exchange PCB: DMB<br />
for Slave DAU or DXB for Independent<br />
DAU.<br />
Check if product level is below<br />
the lowest functioning nonblocked<br />
sensor.<br />
Check that DAU receives a level<br />
from the associated RTG.<br />
No action required.<br />
See items under “Current input<br />
reading incorrect”.
<strong>Service</strong> <strong>Manual</strong><br />
308012En, Ed.1/Rev.D<br />
August 2010<br />
DAU Display CAUSE ACTION<br />
Current input error (p for pressure):<br />
2 - Internal calibration error<br />
Current input error (p for pressure):<br />
3 - Old value in at least one value.<br />
Same cause as 1 above.<br />
Output error (Independent DAU)<br />
Relay feedback does not match<br />
relay control.<br />
Rosemount Tank Radar <strong>Rex</strong><br />
Chapter 6 Troubleshooting<br />
Exchange PCB: DMB for Slave<br />
DAU or DXB for Independent<br />
DAU.<br />
See items under “Current input<br />
reading incorrect”.<br />
Exchange relay card, DRM.<br />
6-7
Rosemount Tank Radar <strong>Rex</strong><br />
Chapter 6 Troubleshooting<br />
6-8<br />
<strong>Service</strong> <strong>Manual</strong><br />
308012En, Ed.1/Rev.D<br />
August 2010
<strong>Service</strong> <strong>Manual</strong><br />
308012En, Ed.1/Rev.D<br />
August 2010<br />
7. Spare Parts<br />
Radar Tank Gauge<br />
Rosemount Tank Radar <strong>Rex</strong><br />
Chapter 7 Spare Parts<br />
Transmitter Interface Card, TIC 9150072-551<br />
Temperature Multiplexing Card, TMC 9150072-561<br />
Relay Output Card, ROC 9150072-591<br />
Data Acquisition Unit, DAU<br />
DAU - DMB board 9240002-512<br />
Display board 9240002-541<br />
Precision Reference Resistors<br />
Hi Reference Adapter 1<br />
138.50 ��for temperature range -50 to 125 °C<br />
Hi Reference Adapter 2<br />
175.84 ��for temperature range -50 to 300 °C<br />
Hi Reference Adapter 3<br />
24.90 ��for temperature range -200 to 150 °C<br />
Field Communication Unit, FCU<br />
Field Bus Modem, FCBM<br />
Fuses<br />
9240003-721<br />
9240003-722<br />
9240003-723<br />
FCU - PC board 9240002-574<br />
FCM board 9240002-701<br />
FBM 2171 9240002-633<br />
FBM cable 6853442-682<br />
FBM DC power supply 6853496-240<br />
Fuse THE (5 pcs.) 0980240-013<br />
Fuse FCU (5 pcs.) 6853472-017<br />
Fuse FBM 6853389-084<br />
7-1
Rosemount Tank Radar <strong>Rex</strong><br />
Chapter 7 Spare Parts<br />
7-2<br />
<strong>Service</strong> <strong>Manual</strong><br />
308012En, Ed.1/Rev.D<br />
August 2010
<strong>Service</strong> <strong>Manual</strong><br />
308012En, Ed.1/Rev.D<br />
August 2010<br />
8. List of Drawings<br />
Mechanical Installation<br />
Rosemount Tank Radar <strong>Rex</strong><br />
Chapter 8 List of Drawings<br />
Horn Antenna Gauge RTG 3920 9150 072-980<br />
Parabolic Antenna Gauge RTG 3930 9150 072-981<br />
Parabolic Antenna Gauge RTG 3930 (P440) 9150 072-982<br />
Welding of T38-W 9240 003-944<br />
Flange Ball T30 9240 003-947<br />
RTG 3935/EES 9150 072-983<br />
Still-pipe Array Antenna RTG 3950 fixed 9150 070-941<br />
Still-pipe Array Antenna RTG 3950 inclined 9150 070-943<br />
LPG/LNG Gauge 3960 9150 072-986<br />
Reference pin to still pipe 9150 072-922<br />
Reflector kit LPG still pipe 9150 071-651<br />
Reflector kit LPG still pipe (Alt. B) 9150 072-924<br />
Reflector kit LPG still pipe (Alt. A) 9150 072-925<br />
Recommended still pipes for Rosemount Radar 9240 003-987<br />
Installation Drawing FBM 2180 sheet 3 DIN-rail 9150 070-972<br />
Installation Drawing FBM 2180 sheet 4 wall mounting 9150 070-972<br />
Dimensional drawing FCU 2160 9240 002-914<br />
Mechanical Installation Sun Shelter 9240 003-930<br />
Dimensional drawing DAU 2100 9240 002-913<br />
Electrical Installation<br />
RTG (DAU-AIN, Relay) 9150 072-913<br />
RTG (AIN-Temp, Relay) 9150 072-914<br />
RTG/JBi (DAU-AIN, Relay) 9150 072-911<br />
RTG/JBi (AIN-Temp, Relay) 9150 072-912<br />
Power - TRL/2 Bus Connection RTG (W11/X11) 9150 072-930<br />
Relay 1+2 connection RTG (W11/X11) 9150 072-932<br />
Relay 1 connection RTG (W11/X11) 9150 072-933<br />
Analog Output Connection RTG (W11/X11) 9150 072-934<br />
8-1
Rosemount Tank Radar <strong>Rex</strong><br />
Chapter 8 List of Drawings<br />
8-2<br />
<strong>Service</strong> <strong>Manual</strong><br />
308012En, Ed.1/Rev.D<br />
August 2010<br />
RDU/DAU and Analog Input RTG (W12/X12) 9150 072-940<br />
Temp sensor connection RTG (W12/X12) 9150 072-941<br />
WBS + temperature connection RTG (W12/X12) 9150 072-943<br />
Installation Drawing FBM 2180 sheet 2 USB 9150 070-972<br />
PC-FBM 2180-JB/RTG 9240 002-968<br />
PC-FBM 2180-FCU 9240 002-959<br />
FCU 2160 9240 002-914<br />
PC-FCU-RS232 9240 002-905<br />
FCU in PU2 9240 002-931<br />
PC-FCU-RS485 9240 002-936<br />
PC-RS232/485-FCU 9240 003-931<br />
FCU-PS12-LABKO 2000 9240 003-933<br />
PC-Fibre Modem-FCU 9240 007-987<br />
Redundant FCU connection 9240 007-988<br />
PC-Host-FCU 9240 007-989<br />
DU620-FCU 9244 000-904<br />
DAU-Cu90 9240 002-909<br />
DAU-Pt100 3-wire 9240 002-910<br />
DAU - Pt100 with common returns 9240 003-912<br />
DAU - Pt100 3-wire - WBSi w/RTD 9240 003-940<br />
DAU - Pt100 3-wire -WBSi w.out/RTD 9240 003-941
<strong>Service</strong> <strong>Manual</strong><br />
308012En, Ed.1/Rev.D<br />
August 2010<br />
9. Technical Data<br />
9.1 RTG 3900<br />
Rosemount Tank Radar <strong>Rex</strong><br />
Chapter 9 Technical Data<br />
The following specification is valid for RTG 3900 standard version:<br />
Ambient operating temperature -40 °C to +70 °C<br />
(-40 °F to +158 °F).<br />
Hazardous locations certifications II 1/2 G EEx d[ia] IIB T6<br />
(T amb -40 °C to +70 °C) according to<br />
ATEX directive (EN 50014, EN 50018,<br />
EN 50020, EN 50284 Europe) and<br />
Class 1, Div I, Groups C and D according<br />
to UL 1203, UL 913, UL 508 USA.<br />
IECEx d IIB T6 (T amb -40 °C to +60 °C).<br />
Instrument accuracy RTG 3900 ± 0.5 mm ± (5/256 in.)<br />
RTG 3900 L ± 3 mm ± (1/8 in.).<br />
Power Supply 100-240 VAC, 50-60 Hz, average 15 W<br />
(max. 80 W at gauge power up in temperatures<br />
below freezing point)<br />
34-70 VAC (option)<br />
20-28 VDC, max 30 W (option)<br />
48-99 VDC (option)<br />
Field Bus 1) TRL/2 Bus (FSK, half duplex, two<br />
wires, galvanically isolated, 4800 Baud,<br />
Modbus based).<br />
2) RS485 (Modbus based)<br />
9-1
Rosemount Tank Radar <strong>Rex</strong><br />
Chapter 9 Technical Data<br />
9.2 RTG 3920<br />
9-2<br />
Instrument accuracy RTG 3900 ± 0.5 mm ± (5/256 in.)<br />
RTG 3900 L ± 3 mm ± (1/8 in.).<br />
Operating temperature in<br />
tank<br />
Max. +230 °C (+445 °F)<br />
Ambient temperature -40 °C to +70 °C<br />
(-40 °F to +158 °F)<br />
<strong>Service</strong> <strong>Manual</strong><br />
308012En, Ed.1/Rev.D<br />
August 2010<br />
Measuring range 0.8 to 20 m (2.6 to 65 ft) below flange<br />
Can be extended to 0.3 to 30 m<br />
(1 to 100 ft) below flange with reduced accuracy.<br />
Pressure -0.2 to 2 bar (-2.9 to 29 psig)<br />
Material exposed to tank<br />
atmosphere<br />
Antenna: Acid proof steel type EN 1.4436 (AISI<br />
316)<br />
Sealing: PTFE<br />
O-ring: FPM (Viton )<br />
Total weight Approximately 20 kg (44 lbs) excl. flange<br />
Mounting flange 8-in. ANSI B 16.5 150 lbs/DN 200<br />
PN 10 DIN 2632/SS2032
<strong>Service</strong> <strong>Manual</strong><br />
308012En, Ed.1/Rev.D<br />
August 2010<br />
9.3 RTG 3930<br />
Rosemount Tank Radar <strong>Rex</strong><br />
Chapter 9 Technical Data<br />
Instrument accuracy RTG 3900 ± 0.5 mm ± (5/256 in.)<br />
RTG 3900 L ± 3 mm ± (1/8 in.).<br />
Operating temperature in<br />
tank<br />
Max. +230 °C (+445 °F)<br />
Ambient temperature -40 °C to +70 °C<br />
(-40 °F to 158 °F)<br />
Measuring range 0.8 to 40 m (2.6 to 130 ft) below flange<br />
Pressure Clamped: -0.2 to 0.2 bar (-2.9 to 2.9 psig)<br />
Welded: -0.2 to 10 bar (-2.9 to 145 psig)<br />
Material exposed to tank<br />
atmosphere<br />
Antenna: Acid proof steel type EN 1.4436 (AISI<br />
316)<br />
Sealing: PTFE<br />
O-ring: FPM (Viton )<br />
Total weight Appr. 25 kg (55 lbs) excluding flange<br />
Manway size Minimum 20 in.<br />
9-3
Rosemount Tank Radar <strong>Rex</strong><br />
Chapter 9 Technical Data<br />
9.4 RTG 3950<br />
9-4<br />
Instrument accuracy RTG ±0.5 mm + (5/256 in.)<br />
RTG 3950 L ±3 mm ± (1/8 in.)<br />
Operating temperature in<br />
tank<br />
-40 °C to +120 °C (-40 °F to +248 °F)<br />
<strong>Service</strong> <strong>Manual</strong><br />
308012En, Ed.1/Rev.D<br />
August 2010<br />
Measuring range 0.8 to 40 m (2.6 to 130 ft) from antenna end.<br />
Pressure<br />
(two versions available)<br />
Material exposed to tank<br />
atmosphere<br />
Fixed version: -0.2 to 2 bar (-2.9 to 29 psig) at 20°C<br />
Inclined version: 5 to 8 in. pipes, -0.2 to 0.5 bar<br />
(-2.9 to 7.2 psig).<br />
10 and 12 in. pipes, -0.2 to 0.25 bar<br />
(-2.9 to 3.6 psig)<br />
Antenna: Polyphenylensulfid (PPS)<br />
Sealing: PTFE<br />
O-ring: Fluorosilicone<br />
Flange: Acid Proof Steel EN 1.4404 (AISI 316L)<br />
Total weight 21.5-32 kg for fixed version and 28.5-41.5 kg for<br />
inclined version, depending on dimension<br />
Still-pipe dimensions 5-, 6-, 8-, 10- or 12 in.
<strong>Service</strong> <strong>Manual</strong><br />
308012En, Ed.1/Rev.D<br />
August 2010<br />
9.5 RTG 3960<br />
Rosemount Tank Radar <strong>Rex</strong><br />
Chapter 9 Technical Data<br />
Instrument accuracy RTG 3900 ± 0.5 mm ± (5/256 in.)<br />
RTG 3900 L ± 3 mm ± (1/8 in.).<br />
Operating temperature at<br />
ball valve<br />
Operating temperature in<br />
tank<br />
-55 °C to 90 °C (-67 °F to 194 °F)<br />
Ambient temperature -40 °C to +70 °C<br />
(-40 °F to 158 °F)<br />
-170 °C to 90 °C (-274 °F to 194 °F)<br />
Measuring range 0.5 m to 60 m (1.6 ft to 200 ft) from cone end.<br />
Maximum pressure Up to 25 bar (365 psig)<br />
Pressure sensor (option) Druck PTX 621<br />
Material exposed to tank<br />
atmosphere<br />
Antenna: Acid proof steel type EN 1.4436 (AISI<br />
316)<br />
Sealing: Quartz<br />
Total weight 6 in. 150 lbs-appr. 38 kg (84 lbs)<br />
6 in. 300 lbs-appr. 48 kg (106 lbs)<br />
Still-pipe dimensions 4 in. Sch 10 or 100 mm inner diameter.<br />
9-5
Rosemount Tank Radar <strong>Rex</strong><br />
Chapter 9 Technical Data<br />
9.6 FCU 2160<br />
9-6<br />
<strong>Service</strong> <strong>Manual</strong><br />
308012En, Ed.1/Rev.D<br />
August 2010<br />
Ambient operating temperature -40 °C to +70 °C (-40 °F to +158 °F)<br />
Power Supply 115 or 230 VAC, +10% to -15%, 50-60<br />
Hz, max. 10 W<br />
Group bus interface TRL/2 Bus, RS-232 or RS-485,<br />
Modbus based protocol<br />
Field bus interface TRL/2 Bus. Max 8 units on one port<br />
Explosion protection None<br />
Number of tanks per FCU Max 32 (max 8 per field bus is recommended)
<strong>Service</strong> <strong>Manual</strong><br />
308012En, Ed.1/Rev.D<br />
August 2010<br />
9.7 DAU 2100<br />
Rosemount Tank Radar <strong>Rex</strong><br />
Chapter 9 Technical Data<br />
Ambient operating temperature -40 °C to 70 °C (-40 °F to 158 °F)<br />
Sensor elements Pt 100 single or multispot<br />
Number of sensor elements Max. 14 per DAU<br />
Temperature measuring range Range 1: -50 °C to 125 °C (-58 °F to<br />
257 °F)<br />
Range 2: -50 °C to 300 °C (-58 °F to<br />
572 °F)<br />
Range 3: -200 °C to +150 °C (-330<br />
°F to 302 °F)<br />
Explosion<br />
protection<br />
II 1G EEx ia IIB T4 (ATEX) and<br />
Class 1, Div I, Groups C and D<br />
(UL913 USA).<br />
Power Supply Intrinsically safe supply from Radar<br />
Tank Gauge.<br />
Field bus Intrinsically safe local line from<br />
Radar Tank Gauge.<br />
9-7
Rosemount Tank Radar <strong>Rex</strong><br />
Chapter 9 Technical Data<br />
9.8 RDU 40<br />
9-8<br />
Ambient temperature -20 °C to +55 °C (-4 °F to +130 °F)<br />
Hazardous locations<br />
certifications<br />
II 2 G EEx ib IIC T4 (ATEX)<br />
FM Class I Div I Group A, B, C, D<br />
<strong>Service</strong> <strong>Manual</strong><br />
308012En, Ed.1/Rev.D<br />
August 2010<br />
Max cable length 100 m (328 ft) (total length if two units are connected<br />
to the same gauge)<br />
Cable requirement 3-wire, shielded instrument cable<br />
Min 0.5 mm² (AWG 20)<br />
Max 2.5 mm² (AWG 14)<br />
Max Ø14 mm (0.55 inch)<br />
Min insulation thickness for each wire 0.25 mm<br />
(0.00985 inch)<br />
Material housing Die casted aluminium<br />
Dimensions 150 x 120 x 70 mm (6 x 4 x 3 inch)<br />
Weight 1.2 kg (2.6 lbs)<br />
Ingress protection IP 66 & 67
<strong>Service</strong> <strong>Manual</strong><br />
308012En, Ed.1/Rev.D<br />
August 2010<br />
9.9 FBM 2180<br />
Power supply (for RS-<br />
232)<br />
DC 7-12 V, 50 mA<br />
Cable to Host PC RS-232: 3 m (10 ft)<br />
USB: 3 m (10 ft)<br />
Explosion protection None<br />
Field bus over-voltage<br />
protection<br />
Field interface TRL/2<br />
Computer/Host interface<br />
Rosemount Tank Radar <strong>Rex</strong><br />
Chapter 9 Technical Data<br />
Galvanic insulation, and transient suppressors<br />
RS-232 or USB<br />
LED indicators External power, host connection,<br />
TRL/2 transmit and receive<br />
9-9
Rosemount Tank Radar <strong>Rex</strong><br />
Chapter 9 Technical Data<br />
9-10<br />
<strong>Service</strong> <strong>Manual</strong><br />
308012En, Ed.1/Rev.D<br />
August 2010
<strong>Service</strong> <strong>Manual</strong><br />
308012En, Ed.1/Rev.D<br />
August 2010<br />
Index<br />
Rosemount Tank Radar <strong>Rex</strong><br />
Index<br />
A<br />
Alarm mode settings . . . . . . . . . . . . . . . . . . . . . . . . . . . . . . . . . . . . . . . . . . . .4-31<br />
Analog <strong>Process</strong>ing Card . . . . . . . . . . . . . . . . . . . . . . . . . . . . . . . . . . . . . . . . . .3-8<br />
B<br />
Binary High . . . . . . . . . . . . . . . . . . . . . . . . . . . . . . . . . . . . . . . . . . . . . . . . . . .4-31<br />
Binary Low . . . . . . . . . . . . . . . . . . . . . . . . . . . . . . . . . . . . . . . . . . . . . . . . . . . .4-31<br />
C<br />
Calibration . . . . . . . . . . . . . . . . . . . . . . . . . . . . . . . . . . . . . . . . . . . . . . . . . . . . .5-1<br />
Calibration data . . . . . . . . . . . . . . . . . . . . . . . . . . . . . . . . . . . . . . . . . . . . . . . . .5-5<br />
Calibration Distance . . . . . . . . . . . . . . . . . . . . . . . . . . . . . . . . . . . . . . . . . . 5-1, 5-7<br />
Calibration window . . . . . . . . . . . . . . . . . . . . . . . . . . . . . . . . . . . . . . . . . . . . . . .5-6<br />
Changing EEPROM . . . . . . . . . . . . . . . . . . . . . . . . . . . . . . . . . . . . . . . . . . . . . .4-7<br />
Connecting the relay ports . . . . . . . . . . . . . . . . . . . . . . . . . . . . . . . . . . . . . . . .4-35<br />
Connection to a PC . . . . . . . . . . . . . . . . . . . . . . . . . . . . . . . . . . . . . . . . . . . . .3-21<br />
Control Mode . . . . . . . . . . . . . . . . . . . . . . . . . . . . . . . . . . . . . . . . . . . . . . . . . .4-38<br />
Correction values<br />
Unit ID . . . . . . . . . . . . . . . . . . . . . . . . . . . . . . . . . . . . . . . . . . . . . . . . . . . .3-14<br />
D<br />
Database loader . . . . . . . . . . . . . . . . . . . . . . . . . . . . . . . . . . . . . . . . . . . . . . . .4-60<br />
Database Registers<br />
Holding Register . . . . . . . . . . . . . . . . . . . . . . . . . . . . . . . . . . . . . . . . . . . . .3-13<br />
Input Register . . . . . . . . . . . . . . . . . . . . . . . . . . . . . . . . . . . . . . . . . . . . . . .3-14<br />
DAU LCD Display . . . . . . . . . . . . . . . . . . . . . . . . . . . . . . . . . . . . . . . . . . . . . .4-61<br />
DAU level pick up . . . . . . . . . . . . . . . . . . . . . . . . . . . . . . . . . . . . . . . . . . . . . . .3-28<br />
DAU Reset . . . . . . . . . . . . . . . . . . . . . . . . . . . . . . . . . . . . . . . . . . . . . . . . . . . .4-58<br />
DAU Software . . . . . . . . . . . . . . . . . . . . . . . . . . . . . . . . . . . . . . . . . . . . . . . . .3-26<br />
Default Database . . . . . . . . . . . . . . . . . . . . . . . . . . . . . . . . . . . . . . . . . . . . . . . .4-4<br />
Default database loading . . . . . . . . . . . . . . . . . . . . . . . . . . . . . . . . . . . . . . . . .4-41<br />
Default database reload . . . . . . . . . . . . . . . . . . . . . . . . . . . . . . . . . . . . . . . . . .4-60<br />
Device description . . . . . . . . . . . . . . . . . . . . . . . . . . . . . . . . . . . . . . . . . . . . . . .3-1<br />
Data Acqusition Unit . . . . . . . . . . . . . . . . . . . . . . . . . . . . . . . . . . . . . . . . . .3-22<br />
Field Communication Unit . . . . . . . . . . . . . . . . . . . . . . . . . . . . . . . . . . . . .3-18<br />
REX RTG . . . . . . . . . . . . . . . . . . . . . . . . . . . . . . . . . . . . . . . . . . . . . . . . . . .3-1<br />
Display mode 0 . . . . . . . . . . . . . . . . . . . . . . . . . . . . . . . . . . . . . . . . . . . . . . . .4-62<br />
Display mode 1 . . . . . . . . . . . . . . . . . . . . . . . . . . . . . . . . . . . . . . . . . . . . . . . .4-63<br />
Display mode 2 . . . . . . . . . . . . . . . . . . . . . . . . . . . . . . . . . . . . . . . . . . . . . . . .4-64<br />
E<br />
Echo search . . . . . . . . . . . . . . . . . . . . . . . . . . . . . . . . . . . . . . . . . . . . . . . . . . . .4-1<br />
Echofixer . . . . . . . . . . . . . . . . . . . . . . . . . . . . . . . . . . . . . . . . . . . . . . . . . . . . . .3-5<br />
1-1
Rosemount Tank Radar <strong>Rex</strong><br />
Index<br />
1-2<br />
<strong>Service</strong> <strong>Manual</strong><br />
308012En, Ed.1/Rev.D<br />
August 2010<br />
Electronics . . . . . . . . . . . . . . . . . . . . . . . . . . . . . . . . . . . . . . . . . . . . . . . 3-23, 4-46<br />
Exchanging the Transmitter Head Electronics . . . . . . . . . . . . . . . . . . . . . . . . .4-10<br />
Explosion Proof . . . . . . . . . . . . . . . . . . . . . . . . . . . . . . . . . . . . . . . . . . . . . . . . .2-2<br />
External Sensors<br />
Local Display . . . . . . . . . . . . . . . . . . . . . . . . . . . . . . . . . . . . . . . . . . . . . . .3-27<br />
External serial communication error . . . . . . . . . . . . . . . . . . . . . . . . . . . . . . . .4-65<br />
F<br />
Fast High Accuracy Signal Technique . . . . . . . . . . . . . . . . . . . . . . . . . . . . . . . .3-6<br />
FBM . . . . . . . . . . . . . . . . . . . . . . . . . . . . . . . . . . . . . . . . . . . . . . . . . . . . . . . . . .1-3<br />
Operation - front panel . . . . . . . . . . . . . . . . . . . . . . . . . . . . . . . . . . . . . . . .4-67<br />
Power Supply . . . . . . . . . . . . . . . . . . . . . . . . . . . . . . . . . . . . . . . . . . . . . . .4-67<br />
FCC Configuration for Analog Output . . . . . . . . . . . . . . . . . . . . . . . . . . . . . . .4-25<br />
FCI boards . . . . . . . . . . . . . . . . . . . . . . . . . . . . . . . . . . . . . . . . . . . . . . . . . . . .3-19<br />
FCU block diagram . . . . . . . . . . . . . . . . . . . . . . . . . . . . . . . . . . . . . . . . . . . . .4-48<br />
FCU software . . . . . . . . . . . . . . . . . . . . . . . . . . . . . . . . . . . . . . . . . . . . . . . . . .3-20<br />
FFT (Fast Fourier Transformation) . . . . . . . . . . . . . . . . . . . . . . . . . . . . . . . . . . .3-5<br />
Field Communication Card . . . . . . . . . . . . . . . . . . . . . . . . . . . . . . . . . . . . . . . .3-8<br />
Flammable materials . . . . . . . . . . . . . . . . . . . . . . . . . . . . . . . . . . . . . . . . . . . . .2-1<br />
FMCW (Frequency Modulated Continuous Wave) method . . . . . . . . . . . . . . . .3-5<br />
Freeze Current . . . . . . . . . . . . . . . . . . . . . . . . . . . . . . . . . . . . . . . . . . . . . . . . .4-31<br />
Fuses . . . . . . . . . . . . . . . . . . . . . . . . . . . . . . . . . . . . . . . . . . . . . . . . . . . . . . . .4-44<br />
G<br />
Group and Field Bus Ports . . . . . . . . . . . . . . . . . . . . . . . . . . . . . . . . . . . . . . . .4-43<br />
H<br />
Hand dip tape . . . . . . . . . . . . . . . . . . . . . . . . . . . . . . . . . . . . . . . . . . . . . . . . . . .5-4<br />
Hand dipping . . . . . . . . . . . . . . . . . . . . . . . . . . . . . . . . . . . . . . . . . . . . . . . . . . .5-4<br />
Hardware installation . . . . . . . . . . . . . . . . . . . . . . . . . . . . . . . . . . . . . . . . . . . .4-50<br />
Hart Input . . . . . . . . . . . . . . . . . . . . . . . . . . . . . . . . . . . . . . . . . . . . . . . . . . . . .4-33<br />
Hart Slaves . . . . . . . . . . . . . . . . . . . . . . . . . . . . . . . . . . . . . . . . . . . . . . . . . . .4-33<br />
Hazardous areas . . . . . . . . . . . . . . . . . . . . . . . . . . . . . . . . . . . . . . . . . . . . . . . .2-1<br />
High Current . . . . . . . . . . . . . . . . . . . . . . . . . . . . . . . . . . . . . . . . . . . . . . . . . . .4-31<br />
Horn Antenna Gauge . . . . . . . . . . . . . . . . . . . . . . . . . . . . . . . . . . . . . . . . . 3-1, 3-2<br />
Hysteresis . . . . . . . . . . . . . . . . . . . . . . . . . . . . . . . . . . . . . . . . . . . . . . . . . . . .4-37<br />
I<br />
Installing new transmitter software . . . . . . . . . . . . . . . . . . . . . . . . . . . . . . . . . . .4-5<br />
Internal calulations . . . . . . . . . . . . . . . . . . . . . . . . . . . . . . . . . . . . . . . . . . . . . .3-10<br />
Gross volume . . . . . . . . . . . . . . . . . . . . . . . . . . . . . . . . . . . . . . . . . . . . . . .3-10<br />
Level . . . . . . . . . . . . . . . . . . . . . . . . . . . . . . . . . . . . . . . . . . . . . . . . . . . . . .3-10<br />
Mass . . . . . . . . . . . . . . . . . . . . . . . . . . . . . . . . . . . . . . . . . . . . . . . . . . . . . .3-10<br />
Observed density . . . . . . . . . . . . . . . . . . . . . . . . . . . . . . . . . . . . . . . . . . . .3-10<br />
Oil/Water interface level . . . . . . . . . . . . . . . . . . . . . . . . . . . . . . . . . . . . . . .3-10<br />
Temperature . . . . . . . . . . . . . . . . . . . . . . . . . . . . . . . . . . . . . . . . . . . . . . . .3-10
<strong>Service</strong> <strong>Manual</strong><br />
308012En, Ed.1/Rev.D<br />
August 2010<br />
Rosemount Tank Radar <strong>Rex</strong><br />
Index<br />
Internal serial communication error . . . . . . . . . . . . . . . . . . . . . . . . . . . . . . . . .4-65<br />
Intrinsic safety . . . . . . . . . . . . . . . . . . . . . . . . . . . . . . . . . . . . . . . . . . . . . . . . . .2-1<br />
J<br />
Jumper settings . . . . . . . . . . . . . . . . . . . . . . . . . . . . . . . . . . . . . . . . . . . . . . . .4-54<br />
L<br />
List of drawings . . . . . . . . . . . . . . . . . . . . . . . . . . . . . . . . . . . . . . . . . . . . . . . . .8-1<br />
Loading and Saving a device database . . . . . . . . . . . . . . . . . . . . . . . . . . . . . . .4-3<br />
Loading the default database . . . . . . . . . . . . . . . . . . . . . . . . . . . . . . . . . . . . . . .4-4<br />
Local Display Error codes . . . . . . . . . . . . . . . . . . . . . . . . . . . . . . . . . . . . . . . .4-65<br />
Low Current . . . . . . . . . . . . . . . . . . . . . . . . . . . . . . . . . . . . . . . . . . . . . . . . . . .4-31<br />
LPG/LNG Gauge . . . . . . . . . . . . . . . . . . . . . . . . . . . . . . . . . . . . . . . . . . . . . . . .3-1<br />
LPN/LNG Gauge . . . . . . . . . . . . . . . . . . . . . . . . . . . . . . . . . . . . . . . . . . . . . . . .3-4<br />
M<br />
<strong>Manual</strong> dip hatch . . . . . . . . . . . . . . . . . . . . . . . . . . . . . . . . . . . . . . . . . . . . . . . .5-4<br />
<strong>Manual</strong> relay control . . . . . . . . . . . . . . . . . . . . . . . . . . . . . . . . . . . . . . . . . . . . .4-40<br />
Master communication timeout . . . . . . . . . . . . . . . . . . . . . . . . . . . . . . . . . . . .4-66<br />
Multiple Echo Tracking . . . . . . . . . . . . . . . . . . . . . . . . . . . . . . . . . . . . . . . . . . . .3-6<br />
P<br />
Parabolic Antenna Gauge . . . . . . . . . . . . . . . . . . . . . . . . . . . . . . . . . . . . . 3-1, 3-2<br />
Power Supply . . . . . . . . . . . . . . . . . . . . . . . . . . . . . . . . . . . . . . . . . . . . . 4-44, 4-67<br />
Product level . . . . . . . . . . . . . . . . . . . . . . . . . . . . . . . . . . . . . . . . . . . . . . . . . .4-31<br />
Properties/Tank Distances . . . . . . . . . . . . . . . . . . . . . . . . . . . . . . . . . . . . . . . . .5-5<br />
R<br />
RDU 40 . . . . . . . . . . . . . . . . . . . . . . . . . . . . . . . . . . . . . . . . . . . . . . . . . . . . . . .1-3<br />
Redundancy . . . . . . . . . . . . . . . . . . . . . . . . . . . . . . . . . . . . . . . . . . . . . . 3-20, 4-49<br />
Reference resistor . . . . . . . . . . . . . . . . . . . . . . . . . . . . . . . . . . . . . . . . . 3-24, 4-54<br />
Automatic test . . . . . . . . . . . . . . . . . . . . . . . . . . . . . . . . . . . . . . . . . . . . . .4-57<br />
Exchanging . . . . . . . . . . . . . . . . . . . . . . . . . . . . . . . . . . . . . . . . . . . . . . . .4-57<br />
Relay Functions . . . . . . . . . . . . . . . . . . . . . . . . . . . . . . . . . . . . . . . . . . . . . . . .4-39<br />
Relay Output . . . . . . . . . . . . . . . . . . . . . . . . . . . . . . . . . . . . . . . . . . . . . . . . . .4-35<br />
Relay Output Card . . . . . . . . . . . . . . . . . . . . . . . . . . . . . . . . . . . . . . . . . . . . . . .3-8<br />
Relay states . . . . . . . . . . . . . . . . . . . . . . . . . . . . . . . . . . . . . . . . . . . . . . . . . . .4-38<br />
Remote Display Unit 40 . . . . . . . . . . . . . . . . . . . . . . . . . . . . . . . . . . . . . . . . . .3-29<br />
Removing the THE . . . . . . . . . . . . . . . . . . . . . . . . . . . . . . . . . . . . . . . . . . . . . .4-10<br />
Replacing the THE . . . . . . . . . . . . . . . . . . . . . . . . . . . . . . . . . . . . . . . . . . . . . . 4-11<br />
RTD Multiplexer . . . . . . . . . . . . . . . . . . . . . . . . . . . . . . . . . . . . . . . . . . . . . . . .3-25<br />
RTG Communication timeout . . . . . . . . . . . . . . . . . . . . . . . . . . . . . . . . . . . . . .4-66<br />
S<br />
Safety . . . . . . . . . . . . . . . . . . . . . . . . . . . . . . . . . . . . . . . . . . . . . . . . . . . . . . . . .2-1<br />
1-3
Rosemount Tank Radar <strong>Rex</strong><br />
Index<br />
1-4<br />
<strong>Service</strong> <strong>Manual</strong><br />
308012En, Ed.1/Rev.D<br />
August 2010<br />
Select source . . . . . . . . . . . . . . . . . . . . . . . . . . . . . . . . . . . . . . . . . . . . . . . . . .4-38<br />
<strong>Service</strong><br />
DAU . . . . . . . . . . . . . . . . . . . . . . . . . . . . . . . . . . . . . . . . . . . . . . . . . . . . . .4-54<br />
FBM . . . . . . . . . . . . . . . . . . . . . . . . . . . . . . . . . . . . . . . . . . . . . . . . . . . . . .4-67<br />
FCU . . . . . . . . . . . . . . . . . . . . . . . . . . . . . . . . . . . . . . . . . . . . . . . . . . . . . .4-41<br />
RDU 40 . . . . . . . . . . . . . . . . . . . . . . . . . . . . . . . . . . . . . . . . . . . . . . . . . . .4-69<br />
Set points . . . . . . . . . . . . . . . . . . . . . . . . . . . . . . . . . . . . . . . . . . . . . . . . . . . . .4-37<br />
Setting the temperature measurement range . . . . . . . . . . . . . . . . . . . . . . . . .4-54<br />
Signal <strong>Process</strong>ing Card . . . . . . . . . . . . . . . . . . . . . . . . . . . . . . . . . . . . . . . . . . .3-8<br />
Signal to Noise Ratio . . . . . . . . . . . . . . . . . . . . . . . . . . . . . . . . . . . . . . . . . . . . .3-8<br />
Slave Data Acquisition Unit . . . . . . . . . . . . . . . . . . . . . . . . . . . . . . . . . . . . . . .3-22<br />
Software configuration . . . . . . . . . . . . . . . . . . . . . . . . . . . . . . . . . . . . . . . . . . .4-51<br />
Analog inputs . . . . . . . . . . . . . . . . . . . . . . . . . . . . . . . . . . . . . . . . . . . . . . .4-22<br />
Analog outputs . . . . . . . . . . . . . . . . . . . . . . . . . . . . . . . . . . . . . . . . . . . . . .4-29<br />
Relay Outputs . . . . . . . . . . . . . . . . . . . . . . . . . . . . . . . . . . . . . . . . . . . . . .4-37<br />
Spare parts . . . . . . . . . . . . . . . . . . . . . . . . . . . . . . . . . . . . . . . . . . . . . . . . . . . . .7-1<br />
Suppressing error indication . . . . . . . . . . . . . . . . . . . . . . . . . . . . . . . . . . . . . .4-58<br />
Switch Delay . . . . . . . . . . . . . . . . . . . . . . . . . . . . . . . . . . . . . . . . . . . . . . . . . .4-38<br />
System configuration<br />
DAU address . . . . . . . . . . . . . . . . . . . . . . . . . . . . . . . . . . . . . . . . . . . . . . .3-14<br />
RTG address . . . . . . . . . . . . . . . . . . . . . . . . . . . . . . . . . . . . . . . . . . . . . . .3-14<br />
System Description . . . . . . . . . . . . . . . . . . . . . . . . . . . . . . . . . . . . . . . . . . . . . .1-1<br />
Data Acquisition Unit . . . . . . . . . . . . . . . . . . . . . . . . . . . . . . . . . . . . . . . . . .1-3<br />
Field Bus Modem . . . . . . . . . . . . . . . . . . . . . . . . . . . . . . . . . . . . . . . . . . . . .1-3<br />
Field Communication Unit . . . . . . . . . . . . . . . . . . . . . . . . . . . . . . . . . . . . . .1-3<br />
Radar Tank Gauge . . . . . . . . . . . . . . . . . . . . . . . . . . . . . . . . . . . . . . . . . . . .1-3<br />
Remote Display Unit . . . . . . . . . . . . . . . . . . . . . . . . . . . . . . . . . . . . . . . . . .1-3<br />
TankMaster . . . . . . . . . . . . . . . . . . . . . . . . . . . . . . . . . . . . . . . . . . . . . . . . . .1-3<br />
System error . . . . . . . . . . . . . . . . . . . . . . . . . . . . . . . . . . . . . . . . . . . . . . . . . .4-65<br />
T<br />
Tank Connection Unit . . . . . . . . . . . . . . . . . . . . . . . . . . . . . . . . . . . . . . . . . . . . .3-1<br />
Tank Dimensions<br />
Calibration Distance . . . . . . . . . . . . . . . . . . . . . . . . . . . . . . . . . . . . . . . . . .3-15<br />
Hold Off Distance . . . . . . . . . . . . . . . . . . . . . . . . . . . . . . . . . . . . . . . . . . . .3-15<br />
Minimum level distance . . . . . . . . . . . . . . . . . . . . . . . . . . . . . . . . . . . . . . .3-15<br />
RTG Reference Distance . . . . . . . . . . . . . . . . . . . . . . . . . . . . . . . . . . . . . .3-14<br />
Tank Reference Height . . . . . . . . . . . . . . . . . . . . . . . . . . . . . . . . . . . . . . . .3-14<br />
Tank Reference Height . . . . . . . . . . . . . . . . . . . . . . . . . . . . . . . . . . . . . . . . . . .5-5<br />
TCM interface boards . . . . . . . . . . . . . . . . . . . . . . . . . . . . . . . . . . . . . . . . . . .3-19<br />
Technical Data<br />
Analog inputs . . . . . . . . . . . . . . . . . . . . . . . . . . . . . . . . . . . . . . . . . . . . . . . 3-11<br />
Analog outputs . . . . . . . . . . . . . . . . . . . . . . . . . . . . . . . . . . . . . . . . . . . . . .3-12<br />
DAU 2100 . . . . . . . . . . . . . . . . . . . . . . . . . . . . . . . . . . . . . . . . . . . . . . . . . . .9-7<br />
FBM 2180 . . . . . . . . . . . . . . . . . . . . . . . . . . . . . . . . . . . . . . . . . . . . . . . . . . .9-9<br />
FCU 2160 . . . . . . . . . . . . . . . . . . . . . . . . . . . . . . . . . . . . . . . . . . . . . . . . . . .9-6<br />
Relay outputs . . . . . . . . . . . . . . . . . . . . . . . . . . . . . . . . . . . . . . . . . . . . . . . 3-11<br />
RTG 3920 . . . . . . . . . . . . . . . . . . . . . . . . . . . . . . . . . . . . . . . . . . . . . . . . . . .9-2
<strong>Service</strong> <strong>Manual</strong><br />
308012En, Ed.1/Rev.D<br />
August 2010<br />
Rosemount Tank Radar <strong>Rex</strong><br />
Index<br />
RTG 3930 . . . . . . . . . . . . . . . . . . . . . . . . . . . . . . . . . . . . . . . . . . . . . . . . . . .9-3<br />
RTG 3960 . . . . . . . . . . . . . . . . . . . . . . . . . . . . . . . . . . . . . . . . . . . . . . . . . . .9-5<br />
Temperature average measurement . . . . . . . . . . . . . . . . . . . . . . . . . . . . . . . .4-56<br />
Temperature measurement . . . . . . . . . . . . . . . . . . . . . . . . . . . . . . . . . . 3-24, 4-15<br />
Temperature measuring error . . . . . . . . . . . . . . . . . . . . . . . . . . . . . . . . . . . . .4-65<br />
Temperature Multiplexer Card . . . . . . . . . . . . . . . . . . . . . . . . . . . . . . . . . 3-8, 4-15<br />
Temperature references . . . . . . . . . . . . . . . . . . . . . . . . . . . . . . . . . . . . . . . . . .3-29<br />
Temperature sensor . . . . . . . . . . . . . . . . . . . . . . . . . . . . . . . . . . . . . . . . . 3-8, 3-24<br />
Configuration . . . . . . . . . . . . . . . . . . . . . . . . . . . . . . . . . . . . . . . . . . . . . . .4-20<br />
Temperature spot measurement . . . . . . . . . . . . . . . . . . . . . . . . . . . . . . . . . . .4-56<br />
TIC/TMC configuration . . . . . . . . . . . . . . . . . . . . . . . . . . . . . . . . . . . . . . . . . . .4-16<br />
Timeout settings . . . . . . . . . . . . . . . . . . . . . . . . . . . . . . . . . . . . . . . . . . . . . . . .4-66<br />
TMC board . . . . . . . . . . . . . . . . . . . . . . . . . . . . . . . . . . . . . . . . . . . . . . . . . . . .4-16<br />
Toggle Period . . . . . . . . . . . . . . . . . . . . . . . . . . . . . . . . . . . . . . . . . . . . . . . . . .4-38<br />
Transmitter Head . . . . . . . . . . . . . . . . . . . . . . . . . . . . . . . . . . . . . . . . . . . . . . . .3-1<br />
Transmitter Head Electronics . . . . . . . . . . . . . . . . . . . . . . . . . . . . . . . . . . . 3-1, 3-7<br />
Transmitter Interface Card . . . . . . . . . . . . . . . . . . . . . . . . . . . . . . . . . . . . . . . . .3-8<br />
Transmitter software . . . . . . . . . . . . . . . . . . . . . . . . . . . . . . . . . . . . . . . . . . . .3-17<br />
Troubleshooting . . . . . . . . . . . . . . . . . . . . . . . . . . . . . . . . . . . . . . . . . . . . . . . . .6-1<br />
U<br />
Using first/both points . . . . . . . . . . . . . . . . . . . . . . . . . . . . . . . . . . . . . . . . . . .4-37<br />
V<br />
Viewing and Editing database registers . . . . . . . . . . . . . . . . . . . . . . . . . . . . . . .4-2<br />
W<br />
WinSetup . . . . . . . . . . . . . . . . . . . . . . . . . . . . . . . . . . . . . . . . . . . . . . . . . . . . . .5-1<br />
WinSetup Calibrate function . . . . . . . . . . . . . . . . . . . . . . . . . . . . . . . . . . . . . . .5-3<br />
Write protecting the EEPROM . . . . . . . . . . . . . . . . . . . . . . . . . . . . . . . . . . . . .4-13<br />
Write protection . . . . . . . . . . . . . . . . . . . . . . . . . . . . . . . . . . . . . . . . . . . . 3-9, 4-13<br />
Write protection and Reset . . . . . . . . . . . . . . . . . . . . . . . . . . . . . . . . . . . . . . .4-45<br />
Write protection switch . . . . . . . . . . . . . . . . . . . . . . . . . . . . . . . . . . . . . . . . . . .4-59<br />
1-5
Rosemount Tank Radar <strong>Rex</strong><br />
Index<br />
1-6<br />
<strong>Service</strong> <strong>Manual</strong><br />
308012En, Ed.1/Rev.D<br />
August 2010
<strong>Service</strong> <strong>Manual</strong><br />
308012En, Ed.1/Rev.D<br />
August 2010<br />
Rosemount Tank Gauging local representative:<br />
<strong>Emerson</strong> <strong>Process</strong> <strong>Management</strong><br />
Rosemount Tank Gauging<br />
Box 130 45<br />
SE-402 51 Göteborg<br />
SWEDEN<br />
Tel (International): +46 31 337 00 00<br />
Fax (International): +46 31 25 30 22<br />
E-mail: sales.srt@emersonprocess.com<br />
www.rosemount-tg.com<br />
Copyright © Rosemount Tank Radar AB.<br />
Ref. no: 308012En, Ed.1/Rev.D. August 2010.