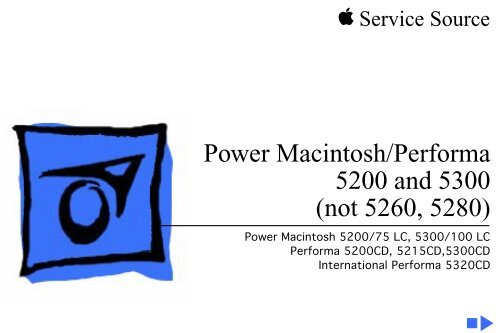
Power Macintosh/Performa 5200 and 5300 (not ... - Retrocomputing
Power Macintosh/Performa 5200 and 5300 (not ... - Retrocomputing
Power Macintosh/Performa 5200 and 5300 (not ... - Retrocomputing

Create successful ePaper yourself
Turn your PDF publications into a flip-book with our unique Google optimized e-Paper software.
K Service Source<br />
<strong>Power</strong> <strong>Macintosh</strong>/<strong>Performa</strong><br />
<strong>5200</strong> <strong>and</strong> <strong>5300</strong><br />
(<strong>not</strong> 5260, 5280)<br />
<strong>Power</strong> <strong>Macintosh</strong> <strong>5200</strong>/75 LC, <strong>5300</strong>/100 LC<br />
<strong>Performa</strong> <strong>5200</strong>CD, 5215CD,<strong>5300</strong>CD<br />
International <strong>Performa</strong> 5320CD
K Service Source<br />
Basics<br />
<strong>Power</strong> <strong>Macintosh</strong>/<strong>Performa</strong> <strong>5200</strong><br />
<strong>and</strong> <strong>5300</strong> (<strong>not</strong> 5260, 5280)
Basics System Overview - 1<br />
System Overview<br />
The <strong>Power</strong> <strong>Macintosh</strong> <strong>5200</strong>/<strong>5300</strong> computer series<br />
combines RISC-based <strong>Power</strong>PC performance, full<br />
multimedia features, <strong>and</strong> low cost in a sleek all-in-one<br />
design.<br />
The design includes expansion slots for 68040 LC<br />
communications <strong>and</strong> PDS cards, as well as other video-in,<br />
video tuner, <strong>and</strong> video-out options. Options include an IDE<br />
hard drive in a variety of capacities <strong>and</strong> a trayloading CD-<br />
ROM drive.
Basics Rev. B, 5000 Series - 2<br />
Rev. B, 5000 Series<br />
Apple introduced an updated 5000 series version several<br />
months after introduction. Referred to in this manual as<br />
“Rev. B,” the updated version incorporates design changes<br />
that are <strong>not</strong> backward-compatible.<br />
To determine which version you are servicing, remove the<br />
front bezel <strong>and</strong> <strong>not</strong>e the location of the speakers. If the<br />
speakers are part of the front bezel, the unit is the original<br />
version. To service the original version, follow the manual<br />
for take-apart procedures <strong>and</strong> parts information, unless the<br />
procedures specify Rev. B.<br />
If the speakers are attached to the sides of the metal chassis,<br />
the unit is Rev. B. To service Rev. B models, follow the<br />
manual, substituting Rev. B procedures <strong>and</strong> parts.
Basics Rev. B, 5000 Series - 3<br />
A<strong>not</strong>her way to identify a <strong>5200</strong> series version A <strong>and</strong> Rev. B<br />
is to look at the back of the computer for the part number<br />
<strong>and</strong> manufacture date. The label with this information is on<br />
the lower part of the plastic case. Version A contains one of<br />
these numbers: 620-0635 or 620-0835. Rev. B contains<br />
one of these numbers: 620-0637 or 620-0837.
Basics <strong>Performa</strong> 5320CD - 4<br />
<strong>Performa</strong> 5320CD<br />
The <strong>Performa</strong> 5320CD supersedes the <strong>5300</strong>CD. It has a<br />
<strong>Power</strong>PC 603e processor running at 120 MHz <strong>and</strong> 16 MB of<br />
RAM on the logic board. All other hardware features are the<br />
same as the <strong>Performa</strong> <strong>5300</strong>CD. This is an international<br />
product <strong>not</strong> sold in the U.S.
Basics Open Transport - 5<br />
Open Transport<br />
Open Transport 1.1 does <strong>not</strong> work on <strong>5200</strong> or <strong>5300</strong> Series<br />
computers. These computers require Open Transport 1.1.1.<br />
When version 1.1.1 is installed on these computers, a dialog<br />
box may appear indicating that a hardware issue was<br />
detected. This message means that Open Transport can’t be<br />
installed until the cache/ROM DIMM is replaced.<br />
The required repairs are covered under the Apple Repair<br />
Extension Program. The models included in this program are<br />
<strong>Power</strong> <strong>Macintosh</strong> <strong>5200</strong>/75 LC <strong>and</strong> <strong>5300</strong>/100 LC,<br />
<strong>Macintosh</strong> <strong>Performa</strong> <strong>5200</strong>, 5215, <strong>and</strong> <strong>5300</strong>. Look for<br />
repair program instructions in the REA Procedures chapter.
Basics Service Strategy - 6<br />
Service Strategy<br />
Service the <strong>Power</strong> <strong>Macintosh</strong>/<strong>Performa</strong> 5000 series<br />
through module exchange <strong>and</strong> parts replacements. Customers<br />
can request on-site service from an Apple Authorized<br />
Service Provider Plus (AASP+) or Apple Assurance. They<br />
can also choose carry-in service from an Apple Authorized<br />
Service Provider (AASP).<br />
Ordering<br />
AASPs planning to support the <strong>Power</strong> <strong>Macintosh</strong>/<strong>Performa</strong><br />
5000 series may purchase service modules <strong>and</strong> parts to<br />
develop servicing capability. To order parts, use the<br />
AppleOrder system, or refer to the “Service Price Pages.”<br />
Large businesses, universities, <strong>and</strong> K-12 accounts must<br />
provide a purchase order (PO) on all transactions, including
Basics Service Strategy - 7<br />
orders placed through the AppleOrder system. Service<br />
Providers <strong>not</strong> enrolled in AppleOrder may fax their orders<br />
to Service Provider Support (512-908-8125) or mail<br />
them to<br />
Apple Computer, Inc.<br />
Service Provider Support<br />
MS 212-SPS<br />
Austin, TX 78714-9125<br />
Warranty <strong>and</strong> AppleCare<br />
These new computers are covered under the Apple One-Year<br />
Limited Warranty. The AppleCare Service Plan is also<br />
available. Service Providers are reimbursed for warranty<br />
<strong>and</strong> AppleCare repairs made to these computers. For pricing<br />
information, refer to the AppleCare section in the “Service<br />
Price Pages.”
Basics Service Strategy - 8<br />
Diagnostics<br />
Use MacTest Pro for <strong>Power</strong> <strong>Macintosh</strong> to perform<br />
diagnostics on the <strong>Power</strong> <strong>Macintosh</strong>/<strong>Performa</strong> 5000 series.<br />
Design for Serviceability<br />
To access the floppy drive, CD-ROM drive, or front panel<br />
control board, remove the drive <strong>and</strong> controls bezel. To<br />
service the logic board, hard drive, or video options, remove<br />
the I/O door. The logic board slides out from a connector<br />
similar to the connector on <strong>Macintosh</strong> LC 630 <strong>and</strong> LC 500.<br />
The CRT <strong>and</strong> degauss frame are matched at the factory <strong>and</strong> are<br />
removed <strong>and</strong> replaced as a unit. The chassis harness is one<br />
service module, including the metal chassis <strong>and</strong> logic board<br />
connector with cables.
Basics User Controls - 9<br />
User Controls<br />
User controls include<br />
• Soft power-on control from keyboard<br />
• Front-panel sound-control pushbuttons<br />
• Front-panel brightness-control pushbuttons<br />
• Optional infrared remote control
Basics Internal Expansion Connections - 10<br />
Internal Expansion Connections<br />
Expansion connections on the logic board include<br />
• 2 DRAM SIMM expansion slots<br />
• LC Processor Direct Slot (PDS)<br />
• Communications slot for modems <strong>and</strong> Ethernet<br />
• Video-in slot for real-time video display, capture, <strong>and</strong><br />
overlay<br />
• External video port<br />
An expansion ribbon connector for an optional TV Tuner card<br />
provides NTSC <strong>and</strong> PAL input from an external TV antenna or<br />
cable.
Basics Intelligent Device Electronics (IDE) Hard Drive - 11<br />
Intelligent Device Electronics (IDE)<br />
Hard Drive<br />
The internal hard drive uses Intelligent Device Electronics<br />
(IDE) technology, commonly used in DOS-compatible<br />
systems. The IDE hard drive functions the same as a typical<br />
SCSI hard drive. You must replace IDE drives like-for-like.<br />
The IDE drive does <strong>not</strong> affect SCSI ID selections or SCSI<br />
termination schemes. Seven external SCSI devices may be<br />
daisy-chained through the external SCSI port.
Basics Processor Direct Slot (PDS) - 12<br />
Processor Direct Slot (PDS)<br />
The LC-PDS is compatible with the PDS in the <strong>Macintosh</strong> LC<br />
family of computers, but it is <strong>not</strong> a true PDS. Like the<br />
expansion slot in the other models in the <strong>Power</strong> <strong>Macintosh</strong><br />
<strong>and</strong> <strong>Performa</strong> 5000 series, this expansion slot supports<br />
many PDS cards designed to operate with the MC68030 bus.<br />
While the I/O expansion slot accepts PDS cards designed for<br />
the <strong>Macintosh</strong> LC family of computers, some of those cards<br />
do <strong>not</strong> work. PDS cards designed to interact with the main<br />
processor—to provide, for example, a RAM cache or an<br />
FPU—will <strong>not</strong> work in the I/O expansion slot.
Basics Video-In Card - 13<br />
Video-In Card<br />
The Video-In Card is an optional card included with the Apple<br />
Video System. It allows users to digitize video from the TV<br />
Tuner, MPEG Card, <strong>and</strong> external composite or S-video<br />
inputs. It accepts NTSC, PAL, or SECAM format video <strong>and</strong><br />
also provides stereo audio inputs.<br />
Install the Video-In Card into the dedicated 60-pin, 1.75-<br />
inch video slot.
Basics MPEG Card - 14<br />
MPEG Card<br />
The MPEG Card is an optional card included with the Apple<br />
MPEG Media System. The MPEG Card requires that the<br />
Video-In Card be installed. It provides hardware<br />
decompression for MPEG movie files, enabling full-screen<br />
(through pixel doubling), 30-frames-per-second, 24-bit<br />
video playback with 16-bit audio. After the MPEG movies<br />
are compressed, they are sent to the Video-In Card, which<br />
converts the data into digital format for output to the screen.<br />
Install the MPEG Card in the processor direct slot.
Basics TV Tuner Module - 15<br />
TV Tuner Module<br />
The TV Tuner, an optional module included with the Apple<br />
TV/Video System, turns the computer into a television<br />
receiver. The TV Tuner requires the Video-In Card, which is<br />
also included with the Apple TV/Video System. The TV Tuner<br />
receives incoming television signals from cable or antenna<br />
television inputs, <strong>and</strong> then sends the information to the<br />
Video-In Card, which converts the data for display on the<br />
screen. In the United States, only NTSC is supported, but<br />
PAL <strong>and</strong> SECAM are available internationally.<br />
Install the TV Tuner in a separate bay at the rear of the<br />
computer, below the logic board.
Basics TV/FM Radio Tuner Card - 16<br />
TV/FM Radio Tuner Card<br />
The TV/FM radio tuner card turns the computer into a<br />
television <strong>and</strong> FM radio receiver, complete with remote<br />
control. An expansion ribbon connector for the optional<br />
TV/FM radio tuner card provides NTSC <strong>and</strong> PAL input from<br />
an external TV antenna or cable. Change channels by typing<br />
the channel number on the keyboard or with the remote<br />
control. Switch between the current <strong>and</strong> previous channel by<br />
pressing the Tab key. The computer displays the userassigned<br />
channel name on the picture in the video window.<br />
Apple Video Player software supports the TV/FM tuner card.<br />
The user can disable channels <strong>and</strong> require a password to<br />
access the disabled channels. Users can also capture or<br />
freeze a single frame of video or record a segment of video as<br />
a QuickTime movie. It isn’t possible to resize the window<br />
while recording a movie.
Basics TV/FM Radio Tuner Card - 17<br />
The TV picture is in its own window on the desktop, <strong>and</strong> the<br />
default size of the window is 320x240 pixels. The picture<br />
can be resized from 160x120 pixels up to 640x480 pixels.<br />
The resolution of the picture does <strong>not</strong> increase at larger<br />
window sizes, but the image is exp<strong>and</strong>ed by doubling the<br />
pixel size or by two-dimensional linear interpolation.<br />
The TV signal is carried in YUV format for improved picture<br />
clarity. The YUV format is 16-bit, with 8 bits for the Y<br />
(luminance) channel <strong>and</strong> 8 bits for the U <strong>and</strong> V<br />
(chrominance) channels to share by multiplexing. The<br />
picture is clearer because the YUV format carries more<br />
levels of luminance information.
Basics TV/FM Radio Tuner Card - 18<br />
The card is available in versions for NTSC, PAL, <strong>and</strong> SECAM<br />
television systems. The features of the TV tuner include the<br />
following:<br />
• Remote tuner for 181 broadcast <strong>and</strong> cable channels (U.S.<br />
version)<br />
• Coaxial connector for TV antenna or cable input (F-type<br />
connector in U.S. <strong>and</strong> Japanese version, IEC-type<br />
connector in Europe)<br />
• TV picture in a resizable <strong>and</strong> movable window<br />
• YUV format for improved clarity<br />
• Closed captioning <strong>and</strong> teletext support<br />
• Software password protection<br />
• Automatic <strong>and</strong> manual channel programming<br />
• Single remote control for TV <strong>and</strong> for playback of audio<br />
CDs
Basics TV/FM Radio Tuner Card - 19<br />
The features of the FM radio tuner include the following:<br />
• FM radio frequencies received <strong>and</strong> displayed<br />
• Stations scanned <strong>and</strong> searched up <strong>and</strong> down the frequency<br />
spectrum<br />
• Step frequency<br />
• DX mode to tune out harmonic spillover from other<br />
stations<br />
• Stereo/mono station indicator<br />
• Preset station programming
Basics External Video Connector - 20<br />
External Video Connector<br />
The External Video Connector is an optional module that<br />
provides the computer with video output (mirroring).<br />
Install the External Video Connector in a dedicated<br />
3/4-inch, 22-pin slot on the logic board.
Basics Apple Presentation System - 21<br />
Apple Presentation System<br />
The Apple Presentation System (APS) is an external module<br />
that uses the 15-pin video output connector on the<br />
computer, <strong>and</strong> then provides a video signal for a separate<br />
television display or for recording on a VCR. The APS<br />
supports video mirror mode, where the image on the<br />
television display is the same as the computer’s primary<br />
video monitor. The APS is required for video mirroring.
Basics CRT <strong>and</strong> Degauss Frame - 22<br />
CRT <strong>and</strong> Degauss Frame<br />
The CRT <strong>and</strong> degauss frames are precisely matched at the<br />
factory <strong>and</strong> must be removed <strong>and</strong> replaced as a unit.
Basics Front View - 23<br />
Built-In Microphone<br />
CD-ROM Drive (optional)<br />
CD-ROM Drive<br />
Screen Control Buttons<br />
Stereo Speakers<br />
Tilt-<strong>and</strong>-Swivel Base<br />
Remote Control Sensor<br />
<strong>Power</strong>-On Light<br />
Front View<br />
Keyboard<br />
Headphone Jack<br />
Color Display<br />
Floppy Disk Drive<br />
Sound Control Buttons<br />
<strong>Power</strong> Key<br />
Mouse
Basics Rear View - 24<br />
Rear<br />
Housing<br />
<strong>Power</strong><br />
Supply<br />
Assembly<br />
CRT Video<br />
Board<br />
Assembly<br />
Floppy<br />
Drive<br />
Hard<br />
Drive<br />
Tilt-Swivel<br />
Assembly<br />
Rear View<br />
TV<br />
Tuner<br />
Board<br />
Microphone<br />
Assembly<br />
Analog<br />
Board<br />
Assembly<br />
CD ROM<br />
Drive<br />
Logic<br />
Board<br />
I/O Panel<br />
Assembly
Basics I/O Panel - 25<br />
ADB<br />
Port<br />
Video Input<br />
Access Cover<br />
Printer<br />
Port<br />
I/O Panel<br />
Modem<br />
Port<br />
External Video<br />
Output<br />
Connector Cover<br />
SCSI<br />
Port<br />
Sound<br />
Input<br />
Port<br />
Sound<br />
Output<br />
Port<br />
Communication<br />
Card Access Cover<br />
PDS<br />
Cover
Basics <strong>5200</strong> Logic Board - 26<br />
Monitor-Out<br />
Slot<br />
Video-In<br />
Slot<br />
ROM<br />
Slot<br />
<strong>5200</strong> Logic Board<br />
DRAM SIMM Slots<br />
Battery<br />
Communications<br />
Card Slot<br />
PDS
Basics <strong>5300</strong> Logic Board - 27<br />
Monitor-Out<br />
Slot<br />
Video-In<br />
Slot<br />
Processor<br />
with<br />
Heatsink<br />
ROM<br />
Slot<br />
<strong>5300</strong> Logic Board<br />
DRAM SIMM Slots<br />
Battery<br />
Communications<br />
Card Slot<br />
PDS
K Service Source<br />
Specifications<br />
<strong>Power</strong> <strong>Macintosh</strong>/<strong>Performa</strong> <strong>5200</strong><br />
<strong>and</strong> <strong>5300</strong> (<strong>not</strong> 5260, 5280)
CPU<br />
Specifications Processor - 1<br />
Processor<br />
<strong>5200</strong> Series <strong>Power</strong>PC 603 processor<br />
75 MHz<br />
<strong>5300</strong> Series<br />
(except 5320)<br />
<strong>Power</strong>PC 603e processor<br />
100 MHz<br />
5320 <strong>Power</strong>PC 603e processor<br />
120 MHz<br />
Addressing 64-bit <strong>Power</strong>PC bus
DRAM<br />
Specifications Memory - 2<br />
<strong>5200</strong> <strong>and</strong> <strong>5300</strong> Series<br />
(except 5320)<br />
Memory<br />
8 MB DRAM, minimum, in one SIMM slot<br />
(No RAM soldered on board)<br />
Exp<strong>and</strong>able to 64 MB in two SIMM slots (72-pin, 80 ns or faster<br />
SIMMs)<br />
5320 16 MB DRAM<br />
Exp<strong>and</strong>able to 64 MB in two SIMM slots (72-pin, 80 ns or faster<br />
SIMMs)
Specifications Memory - 3<br />
Frame Buffer 1 MB DRAM on board, for video support<br />
ROM 4 MB<br />
Cache Memory 256K Level 2
Specifications Disk Storage - 4<br />
Disk Storage<br />
Floppy Drive 1.4 MB Apple SuperDrive Manual Insert<br />
Hard Drive<br />
<strong>5200</strong> Series 500 MB, 700 MB, or 1 GB IDE hard drive<br />
<strong>5300</strong> Series 1.2 GB IDE hard drive<br />
CD-ROM Drive<br />
<strong>5200</strong> Series Optional Apple 300i Plus CD-ROM drive<br />
<strong>5300</strong> Series St<strong>and</strong>ard AppleCD 600i drive
Specifications I/O Interfaces - 5<br />
I/O Interfaces<br />
Serial Two RS-232/422 serial ports for modem <strong>and</strong> printer<br />
(mini DIN-8 connectors) LocalTalk supported<br />
SCSI One external SCSI port (DB-25 connector)<br />
Supports up to seven SCSI devices<br />
Apple Desktop Bus One Apple Desktop Bus (ADB) port (mini DIN-4 connector)<br />
Sound Input Built-in microphone for monaural sound input.<br />
Sound-input port for microphone or line input. The port accepts<br />
stereophonic input, but sound is combined into monophonic<br />
sound for play-through or recording.
Specifications I/O Interfaces - 6<br />
Sound Output Two stereophonic sound output ports, level nominally 0.5 V RMS<br />
into 39 ohms<br />
One front headphone jack, one rear stereo mini phonejack<br />
Internal stereo speakers<br />
External Video<br />
Connector<br />
One DB-15 mirror video out connector using optional video<br />
connector kit. This feature provides “mirroring” (or display<br />
of the system’s monitor’s screen on a presentation screen).<br />
(Note: the external video display is presentation only. It can<strong>not</strong><br />
be manipulated directly by mouse or other input signals.)<br />
Video-in Slot One 60-pin video-in slot for optional expansion card providing<br />
real-time video display, capture, <strong>and</strong> overlay.<br />
TV Tuner One 10-pin port for TV Tuner card
Specifications I/O Interfaces - 7<br />
Communications One 112-pin internal expansion slot for modem or Ethernet card<br />
(68040-bus configuration)<br />
Processor-Direct Slot One 96/114-pin internal expansion slot for LC-compatible<br />
processor-direct card<br />
Controls Soft-power control from keyboard<br />
Front panel pushbutton control for sound volume<br />
Front panel pushbutton control for display brightness<br />
Infrared remote control option
Specifications I/O Devices - 8<br />
I/O Devices<br />
Keyboard AppleDesign Keyboard, Apple Extended Keyboard (other ADB<br />
keyboards supported)<br />
Mouse Apple Desktop Bus Mouse II<br />
Mechanical tracking, optical shaft, or contact encoding<br />
Microphone Integrated microphone for monophonic sound input<br />
Speaker Integrated stereo speakers capable of delivering 8-bit stereo<br />
sound
Specifications Sound <strong>and</strong> Video - 9<br />
Sound <strong>and</strong> Video<br />
Sound Generator Records at 11-kHz or 22-kHz sample rate<br />
Plays back at 22-kHz sample rate<br />
Two speakers with enhanced stereo sound<br />
Allows playback <strong>and</strong> recording of ordinary audio compact discs<br />
(CDs)<br />
16-bit monophonic sound input<br />
16-bit stereophonic sound output (16-bit CD stereophonic<br />
playback), level nominally 0.5 V RMS into 39 ohms<br />
Sound-input port for microphone or line input; accepts<br />
stereophonic input, but sound is combined into monophonic<br />
sound for play-through or recording<br />
Two stereophonic sound output ports, level nominally 0.5 V RMS<br />
into 39 ohms<br />
Internal speaker muted when a plug is inserted into an output jack
Specifications Sound <strong>and</strong> Video - 10<br />
Built-in Video<br />
Display<br />
Dot Pitch: 0.28 mm<br />
Vertical Frequency: 66.7 Hz<br />
Active Raster Size (nominal): 9.5 in. by 7.3 in. (240 mm by 185<br />
mm)<br />
White Point: 9,300° K<br />
Shipping Brightness (nominal): 25-foot lamberts<br />
15-inch Shadow Mask display (12.8-inch viewable image)<br />
Gun Configuration: Horizontal inline<br />
Phosphor (aluminized): P22 derivative<br />
Phosphor CIE Coordinates:<br />
Red x = 0.625 ± 0.020, y = 0.340 ± 0.020<br />
Green x = 0.280 ± 0.020, y = 0.595 ± 0.020<br />
Blue x = 0.155 ± 0.015, y = 0.070 ± 0.015
Specifications Sound <strong>and</strong> Video - 11<br />
Video Modes Support these video modes:<br />
640x480 resolution with 16-bit color<br />
800x600 resolution with 8-bit color<br />
832x624 resolution with 8-bit color (does <strong>not</strong> support video<br />
input)
Specifications Sound <strong>and</strong> Video - 12<br />
Monitor Timings<br />
640x480 Resolution<br />
at 60 Hz<br />
Horizontal Timing Back Porch: 48 dots<br />
H SYNC: 96 dots<br />
Front Porch: 16 dots<br />
1 dot: 39.72 ns<br />
1 H: 31.77 ms<br />
1/dot: 25.175 MHz<br />
Vertical Timing Back Porch: 33 H<br />
V SYNC: 2 H<br />
Front Porch: 10 H<br />
1 H: 31.77 ms<br />
1/H: 31.5 kHz<br />
1V: 16.67 ms<br />
1/V: 59.988 Hz
Specifications Sound <strong>and</strong> Video - 13<br />
Monitor Timings<br />
640x480 Resolution<br />
at 66.67 Hz<br />
Horizontal Timing Back Porch: 96 dots<br />
H SYNC: 64 dots<br />
Front Porch: 64 dots<br />
1 dot: 33.06878 n<br />
1 H: 28.5714 ms<br />
1/dot: 30.24 MHz<br />
Vertical Timing Back Porch: 39 H<br />
V SYNC: 3 H<br />
Front Porch: 3 H<br />
1 H: 28.5714 ms<br />
1/H: 35.000 kHz<br />
1V: 15.000 ms<br />
1/V: 66.666 Hz
Specifications Sound <strong>and</strong> Video - 14<br />
Monitor Timings<br />
800x600 Resolution<br />
at 60 Hz<br />
Horizontal Timing Back Porch: 88 dots<br />
H SYNC: 128 dots<br />
Front Porch: 40 dots<br />
1 dot: 25.000 ns<br />
1 H: 26.4 ms<br />
1/dot: 40.000 MHz<br />
Vertical Timing Back Porch: 23 H<br />
V SYNC: 4 H<br />
Front Porch: 1 H<br />
1 H: 37.879 ms<br />
1/H: 16.58 kHz<br />
1 V: 60.3165 ms<br />
1/V: 60.3165 Hz
Specifications Sound <strong>and</strong> Video - 15<br />
Monitor Timings<br />
800x600 Resolution<br />
at 72 Hz<br />
Horizontal Timing Back Porch: 64 dots<br />
H SYNC: 120 dots<br />
Front Porch: 56 dots<br />
1 dot: 20.000 ns<br />
1 H: 20.800 ms<br />
1/dot: 50.000 MHz<br />
Vertical Timing Back Porch: 23 H<br />
V SYNC: 6 H<br />
Front Porch: 37 H<br />
1 H: 20.800 ms<br />
1/H: 48.077 kHz<br />
1 V: 13.853 ms<br />
1/V: 72.186 Hz
Specifications Sound <strong>and</strong> Video - 16<br />
External Video<br />
Connector<br />
(Optional)<br />
Supports video mirroring on the following external monitors (at<br />
product introduction):<br />
• 640x480 resolution: <strong>Macintosh</strong> 12-inch Color Display, Apple<br />
Color Plus 14-inch Display, Apple <strong>Performa</strong> Plus Display,<br />
Apple Multiple Scan 15 Display, Apple Multiple Scan 17<br />
Display, Apple Multiple Scan 20 Display<br />
• 800x600 resolution: Apple Multiple Scan 15 Display, Apple<br />
Multiple Scan 17 Display, Apple Multiple Scan 20 Display, <strong>and</strong><br />
SVGA monitors
Specifications Electrical - 17<br />
Electrical<br />
Line Voltage 100–240 VAC<br />
Frequency 47–63 Hz<br />
<strong>Power</strong> 125 W<br />
Surge Voltage: 300 V rms for 100 ms<br />
Peak Inrush Current: 40 A pk<br />
Current: 2.5 A maximum for all line <strong>and</strong> load conditions<br />
<strong>Power</strong>: 220 W maximum for all line <strong>and</strong> load conditions
Specifications Physical - 18<br />
Physical<br />
Dimensions Height: 17.5" (445 mm)<br />
Width: 16" (406 mm)<br />
Depth: 15.1" (383 mm)<br />
Weight Without CD-ROM: 17 lb.<br />
With CD-ROM: 19 lb. (21.15 kg)<br />
Weight varies with options
Specifications Environmental - 19<br />
Environmental<br />
Temperature Operating: 50°–104° F (10°–40° C)<br />
Transit (72 hours): –40° F to +149° F (–40° C to +65° C)<br />
Storage (6 months): –40° F to +116° F (–40° C to +47° C)<br />
Humidity Noncondensing, 20–95%<br />
Altitude 0–10,000 ft. (0–3,000 m)
K Service Source<br />
Troubleshooting<br />
<strong>Power</strong> <strong>Macintosh</strong>/<strong>Performa</strong><br />
<strong>5200</strong> <strong>and</strong> <strong>5300</strong> (<strong>not</strong> 5260, 5280)
Troubleshooting General - 1<br />
General<br />
The Symptom Charts included in this chapter will help you<br />
diagnose specific symptoms related to your product. Because cures<br />
are listed on the charts in the order of most likely solution, try<br />
the first cure first. Verify whether the product continues to<br />
exhibit the symptom. If the symptom persists, try the next cure.<br />
( Note: If you have replaced a module, reinstall the original<br />
module before you proceed to the next cure.)<br />
If you are <strong>not</strong> sure what the problem is, or if the Symptom Charts<br />
do <strong>not</strong> resolve the problem, refer to the Flowchart for the product<br />
family.<br />
For additional assistance, contact Apple Technical Support.
Troubleshooting First Checklist - 2<br />
First Checklist<br />
Jitter, faint lines, or screen movement can be caused by external<br />
interference such as electronic devices <strong>and</strong> fluorescent lights.<br />
Move the unit to a<strong>not</strong>her room or building to help determine if<br />
external interference is the source of the problem.<br />
A misadjusted screen can mimic the same symptoms as analog<br />
board or CRT failures. By performing the adjustment procedures,<br />
you might determine if one or more of the adjustments is the cause<br />
of the problem.
Troubleshooting Symptom Charts/System - 3<br />
System<br />
intermittently<br />
crashes or hangs<br />
Symptom Charts<br />
System<br />
1 Verify that system software is version 7.5 or later.<br />
2 Verify that software is compatible with system.<br />
3 If clock chip at U10 is <strong>not</strong> p/n 343S1191 or 343S1121,<br />
replace logic board. (Ignore any letters following part<br />
number.)<br />
4 If ROM DIMM is laid out as shown on next page, <strong>and</strong> doesn’t<br />
have a sticker on center chip, replace DIMM.<br />
5 If Ethernet card is installed, verify that it is fully seated.<br />
6 Check that system has enough memory installed for<br />
application.
Troubleshooting Symptom Charts/System - 4<br />
ROM DIMM<br />
No Sticker<br />
Logic Board<br />
Chip at<br />
U10
Troubleshooting Symptom Charts/System - 5<br />
System does <strong>not</strong> start<br />
up<br />
System will <strong>not</strong> start<br />
up from keyboard,<br />
but will start up from<br />
rear power switch<br />
System continually<br />
restarts after<br />
Shutdown from<br />
Special menu<br />
System<br />
1 Reset logic board. Refer to Additional Procedures.<br />
2 Replace power supply.<br />
3 Check power cord connection.<br />
4 Replace logic board. Retain customer’s SIMMs.<br />
1 Verify keyboard as known-good.<br />
2 Replace analog board.<br />
1 Verify keyboard as known-good.<br />
2 Replace analog board.
Troubleshooting Symptom Charts/System - 6<br />
Flashing “?”<br />
appears at startup in<br />
system with vacant<br />
PDS <strong>and</strong><br />
communications slots<br />
System<br />
1 Diagnose hard drive with Disk First Aid included on <strong>Power</strong><br />
<strong>Macintosh</strong> CD-ROM.<br />
2 Perform repairs, <strong>and</strong> then go to step 4.<br />
3 If repairs are impossible, back up drive, reformat with<br />
Drive Setup 1.0.3, <strong>and</strong> then go to step 4.<br />
4 Update driver using Drive Setup 1.0.3.<br />
5 Perform clean install of system software.
Troubleshooting Symptom Charts/System - 7<br />
Flashing “?”<br />
appears at startup in<br />
system with version<br />
B logic board <strong>and</strong><br />
card in PDS or<br />
communications<br />
slot<br />
System<br />
Note: Version “B” logic boards display a “B” at the end of the<br />
serial number printed on the board near the communications<br />
port. (See figure on the next page.)<br />
1 Verify that system software is version 7.5 or later.<br />
2 If chip at logic board location U6 does <strong>not</strong> include picture of<br />
Texas <strong>and</strong> is p/n 343S0138-a, <strong>and</strong> there is no wire at U27<br />
on underside of board, replace logic board.
Troubleshooting Symptom Charts/System - 8<br />
.<br />
Apple Computer<br />
Inc. @199X<br />
XXX-XXXX-B<br />
No Picture<br />
of Texas<br />
Part No.<br />
343S0138-a<br />
Apple Computer<br />
Inc. @199X<br />
XXX-XXXX-B<br />
U6
Troubleshooting Symptom Charts/System - 9<br />
Menu bar constantly<br />
flashes or system<br />
constantly beeps<br />
System<br />
1 Verify that front-panel control buttons are <strong>not</strong> jammed.<br />
2 Verify “mute” is <strong>not</strong> selected in the Sound control panel.<br />
3 Reseat drive bezel <strong>and</strong> front-panel control board.
Troubleshooting Symptom Charts/Audio - 10<br />
Distorted or garbled<br />
sound from both<br />
speakers<br />
Distorted or garbled<br />
sound from one<br />
speaker<br />
Sound distortion<br />
with MPEG board<br />
installed<br />
Audio<br />
Replace analog/video board assembly.<br />
1 Replace defective speaker.<br />
2 Replace analog/video board assembly.<br />
Replace MPEG board with modified MPEG board. A modified<br />
board should have a jumper present from U5 Pin 2 to D1 Pin 1.
Troubleshooting Symptom Charts/Audio - 11<br />
No sound output from<br />
speakers<br />
Crackling noise is<br />
present when<br />
playing sounds other<br />
than system beeps<br />
<strong>and</strong> <strong>not</strong> in “play<br />
through” mode<br />
Audio<br />
1 Check sound source.<br />
2 Check that speaker cable at connector P803 on analog board<br />
is plugged in <strong>and</strong> <strong>not</strong> defective.<br />
3 Reseat drive bezel <strong>and</strong> front-panel control board.<br />
1 If static noise varies while adjusting volume with Sound<br />
control panel, use Audio Volume Extension 1.1 or later.<br />
Note: Audio Volume Extension is available from st<strong>and</strong>ard<br />
Apple software update sites.<br />
2 Replace logic board.
Troubleshooting Symptom Charts/Video - 12<br />
Screen is black, too<br />
dark, or too bright;<br />
audio <strong>and</strong> drive<br />
operate<br />
Screen is bright <strong>and</strong><br />
audio is present, but<br />
no video information<br />
is visible<br />
Video<br />
1 Adjust contrast button on front bezel.<br />
2 Adjust brightness. Use Screen control panel.<br />
3 Check yoke cable connection.<br />
4 Perform video adjustments. Refer to “Video” in<br />
Adjustments chapter.<br />
5 Replace analog/video board assembly.<br />
6 Replace power supply board.<br />
7 Replace CRT.<br />
1 Perform video adjustments. Refer to “Video” in<br />
Adjustments chapter.<br />
2 Replace analog/video board assembly.
Troubleshooting Symptom Charts/Video - 13<br />
Video will <strong>not</strong> play<br />
or system hangs<br />
when attempting to<br />
run video in units<br />
with MPEG card<br />
Single vertical or<br />
horizontal line is<br />
displayed<br />
Video<br />
1 If chip at location U12 on MPEG card displays number<br />
341SO205, check all connections.<br />
2 If chip at location U12 on MPEG card does <strong>not</strong> display<br />
number 341SO205, replace MPEG card.<br />
1 Replace analog/video board assembly.<br />
2 Replace CRT.
Troubleshooting Symptom Charts/Video - 14<br />
Predominant color<br />
tint or color can<strong>not</strong><br />
be adjusted<br />
Video<br />
1 Verify that video board is securely connected to CRT<br />
socket.<br />
2 Check cable connections to analog/video board.<br />
3 If analog/video board is Rev A, replace internal RGB cable.<br />
4 Replace analog/video board assembly. Perform video<br />
adjustments (refer to “Video” in Adjustments chapter).<br />
5 Replace CRT.
Troubleshooting Symptom Charts/Video - 15<br />
Picture breaks into<br />
diagonal lines, or<br />
picture rolls<br />
vertically or<br />
horizontally<br />
Out of convergence<br />
(color bleeds from<br />
text or lines)<br />
Black screen spots<br />
(burnt phosphors)<br />
Video<br />
1 Perform geometry adjustments. Refer to “Geometry” in<br />
Adjustments chapter.<br />
2 Replace analog/video board assembly.<br />
1 This problem rarely indicates a defective module. Some<br />
misconvergence is normal, especially around edges of screen.<br />
Contact Apple Technical Support if you’re uncertain whether<br />
misconvergence is within specification.<br />
2 Replace analog/video board assembly.<br />
Replace CRT.
Troubleshooting Symptom Charts/Video - 16<br />
Screen jitters or<br />
flashes<br />
Video<br />
1 Refer to “First Checklist” in Troubleshooting chapter. Move<br />
electrical devices (other monitors, scanners, <strong>and</strong> so on)<br />
away from monitor. Temporarily shut off all fluorescent<br />
lights in area.<br />
2 Move unit to a<strong>not</strong>her room or building <strong>and</strong> check if symptom<br />
persists.<br />
3 Replace analog/video board assembly.<br />
Out of focus 1 Perform focus adjustment. Refer to “Focus” in Adjustments<br />
chapter.<br />
2 Check for proper screen luminance. If luminance is off,<br />
perform Cutoff <strong>and</strong> White Balance procedures. Refer to<br />
“Video” in Adjustments chapter.<br />
3 Replace analog/video board assembly.
Troubleshooting Symptom Charts/Video - 17<br />
Raster size too short/<br />
tall or narrow/wide<br />
Linearity bad (size of<br />
text/graphics differs<br />
at top, bottom, or<br />
sides of screen)<br />
Raster tilted or<br />
shifted<br />
Video<br />
Install monitor adjustment cable, <strong>and</strong> set appropriate on-screen<br />
video adjustment controls to vertical height of 185 mm (7.3<br />
inches) <strong>and</strong> to horizontal width of 240 mm (9.5 inches).<br />
Replace analog/video board assembly.<br />
1 Refer to “First Checklist” in Troubleshooting chapter. Move<br />
metal objects away from monitor.<br />
2 Perform appropriate geometric adjustments. Refer to<br />
“Geometry” in Adjustments chapter.<br />
3 Replace analog/video board assembly.
Troubleshooting Symptom Charts/Video - 18<br />
Raster distorted<br />
(barrel-shaped,<br />
corners <strong>not</strong> square,<br />
stretched or<br />
compressed at top of<br />
display, or sides <strong>not</strong><br />
perpendicular)<br />
Video<br />
1 Refer to “First Checklist” in Troubleshooting chapter.<br />
2 Perform appropriate geometric adjustments. Refer to<br />
“Geometry” in Adjustments chapter.<br />
3 Install monitor-adjustment cable <strong>and</strong> use on-screen video<br />
adjustment controls to eliminate distortion. Based on video<br />
tolerances, some distortion is allowed <strong>and</strong> setting need <strong>not</strong> be<br />
perfect. Contact Apple Technical Support if you’re unsure<br />
about tolerance level.<br />
4 Replace analog/video board assembly.
Troubleshooting Symptom Charts/Video - 19<br />
Video<br />
Raster <strong>not</strong> centered 1 Adjust horizontal or vertical shift control. Refer to<br />
Adjustments chapter.<br />
2 Refer to “First Checklist” in Troubleshooting chapter.<br />
3 Install monitor-adjustment cable <strong>and</strong> use on-screen video<br />
adjustment controls to center raster. If centering range is<br />
insufficient, change the setting of switch SW701<br />
(three-position switch).<br />
Screen has white<br />
areas with blotches of<br />
color<br />
1 Refer to “First Checklist” in Troubleshooting chapter.<br />
2 Because this purity problem can be caused by magnetic<br />
fields, move unit to a<strong>not</strong>her location.<br />
3 Degauss display with manual degaussing coil. (Degaussing<br />
coils can be purchased at most major electronic parts<br />
stores.)
Troubleshooting Symptom Charts/Floppy Drive - 20<br />
Audio <strong>and</strong> video are<br />
present, but internal<br />
floppy drive does <strong>not</strong><br />
operate<br />
Disk ejects; display<br />
shows icon with<br />
blinking “X”<br />
Unable to insert disk<br />
all the way<br />
Floppy Drive<br />
1 Replace bad disk with known-good disk.<br />
2 Replace floppy drive.<br />
3 Replace logic board. Retain customer’s SIMMs.<br />
1 Replace bad system disk with known-good system disk.<br />
2 Replace floppy drive.<br />
3 Replace logic board. Retain customer’s SIMMs.<br />
1 To eject previously inserted disk, insert opened paper clip<br />
into hole beside floppy drive.<br />
2 Switch off system <strong>and</strong> hold mouse button down while<br />
switching system on (to complete eject cycle).<br />
3 Replace floppy drive.
Troubleshooting Symptom Charts/Floppy Drive - 21<br />
Floppy Drive<br />
Disk does <strong>not</strong> eject 1 Insert opened paper clip into hole beside floppy drive.<br />
2 Switch off system <strong>and</strong> hold mouse button down while<br />
switching system on (to complete eject cycle).<br />
3 Replace floppy drive.<br />
Internal floppy drive<br />
runs continuously<br />
1 Replace bad disk with known-good disk.<br />
2 Replace floppy drive.<br />
3 Replace logic board. Retain customer’s SIMMs.
Troubleshooting Symptom Charts/Hard Drive - 22<br />
Internal or external<br />
hard drive does <strong>not</strong><br />
operate<br />
Internal hard drive<br />
runs continuously<br />
Hard drive <strong>not</strong> found<br />
when booted from CD-<br />
ROM drive<br />
Hard Drive<br />
1 Verify that all hard drive connections are secure.<br />
2 Verify that external drive is properly terminated.<br />
3 Reseat logic board.<br />
4 Replace internal IDE hard drive.<br />
5 Replace chassis/wiring harness.<br />
6 Replace logic board. Retain customer’s SIMMs.<br />
1 Verify that system software is version 7.5 (or later).<br />
2 Replace hard drive cable.<br />
3 Replace internal hard drive.<br />
4 Replace logic board. Retain customer’s SIMMs.<br />
Use Drive Setup 1.03 to attempt mounting the hard drive.
Troubleshooting Symptom Charts/CD-ROM Drive - 23<br />
CD-ROM drive does<br />
<strong>not</strong> accept disc<br />
Volume control does<br />
<strong>not</strong> operate correctly<br />
CD-ROM Drive<br />
1 Exchange compact disc (if disc is dirty or damaged).<br />
2 Replace CD-ROM drive mechanism.<br />
3 Replace SCSI data cable.<br />
1 Check Sound control panel setting.<br />
2 Check front-panel controls.<br />
3 Reseat the drive <strong>and</strong> control bezel.<br />
4 Verify that the front-panel control board is completely<br />
installed.<br />
5 Reseat CD adapter connector.<br />
6 Replace CD adapter connector.<br />
7 Replace CD-ROM drive.<br />
8 Replace chassis/wiring harness.
Troubleshooting Symptom Charts/CD-ROM Drive - 24<br />
Computer can<strong>not</strong><br />
mount known-good<br />
CD-ROM drive<br />
When an internal <strong>and</strong><br />
external SCSI device<br />
are present, only one<br />
starts up<br />
CD-ROM Drive<br />
1 Reseat CD-ROM drive adapters.<br />
2 Check SCSI ID setting. (Internal CD-ROM drive was<br />
originally set to 3 at factory.)<br />
3 Replace CD-ROM drive.<br />
4 Replace chassis/wiring harness<br />
1 Verify that ID switch setting on external SCSI device is<br />
higher than 0. Verify that ID switch setting on external SCSI<br />
device does <strong>not</strong> duplicate ID switch settings on other external<br />
SCSI devices.<br />
2 Replace terminator on external SCSI device.<br />
3 Replace SCSI select cable.
Troubleshooting Symptom Charts/CD-ROM Drive - 25<br />
CD Plus (CD+)<br />
format CD-ROM disc<br />
causes stuttering<br />
sound, <strong>and</strong> may <strong>not</strong><br />
mount.<br />
CD-ROM Drive<br />
Replace CD-ROM drive.<br />
Eject button sticks. Replace the front bezel (P/N 922-1398 Rev. A or P/N 922-<br />
1857 Rev. B).
Troubleshooting Symptom Charts/Peripheral - 26<br />
Peripheral<br />
Cursor does <strong>not</strong> move 1 Restart system.<br />
2 Check mouse connection.<br />
3 If mouse was connected to keyboard, connect mouse to rear<br />
ADB port <strong>and</strong> disconnect keyboard. If mouse works, replace<br />
keyboard. If mouse does <strong>not</strong> work in ADB port, replace mouse.<br />
4 Reseat logic board.<br />
5 Replace logic board. Retain customer’s SIMMs.<br />
Cursor moves, but<br />
clicking mouse<br />
button has no effect<br />
1 Replace mouse.<br />
2 Reseat logic board.<br />
3 Replace logic board. Retain customer’s SIMMs.
Troubleshooting Symptom Charts/Peripheral - 27<br />
Can<strong>not</strong> double-click<br />
to open application,<br />
disk, or server<br />
No response to any<br />
key on keyboard<br />
Peripheral<br />
1 Remove extra system files on hard drive.<br />
2 Check mouse speed on Control Panel.<br />
3 Unplug 4.5 battery, wait 20 seconds, plug in battery, <strong>and</strong><br />
restart computer.<br />
4 If mouse was connected to keyboard, connect mouse to rear<br />
ADB port <strong>and</strong> disconnect keyboard. If mouse works, replace<br />
keyboard. If mouse does <strong>not</strong> work in ADB port, replace mouse.<br />
5 Replace logic board. Retain customer’s SIMMs.<br />
1 Verify that system software is version 7.5 (or later).<br />
2 Check keyboard connection to ADB port.<br />
3 Replace keyboard.<br />
4 Reseat logic board.<br />
5 Replace logic board. Retain customer’s SIMMs.
Troubleshooting Symptom Charts/Peripheral - 28<br />
Known-good<br />
StyleWriter,<br />
ImageWriter, or<br />
ImageWriter II does<br />
<strong>not</strong> print<br />
Known-good<br />
LaserWriter does <strong>not</strong><br />
print<br />
Peripheral<br />
1 Verify that Chooser <strong>and</strong> Control Panel are set correctly.<br />
2 Verify that printer driver <strong>and</strong> system software are <strong>not</strong><br />
corrupt.<br />
3 Verify system software is version 7.5 (or later).<br />
4 Check printer DIP switches.<br />
5 Replace printer interface cable.<br />
6 Replace logic board. Retain customer’s SIMMs.<br />
1 Verify that Chooser <strong>and</strong> Control Panel are set correctly.<br />
2 Verify that printer driver <strong>and</strong> system software are <strong>not</strong><br />
corrupt.<br />
3 Replace printer interface cable(s).
Troubleshooting Symptom Charts/Peripheral - 29<br />
Doesn’t recognize<br />
SCSI device<br />
Peripheral<br />
1 Check for proper SCSI termination.<br />
2 Check that the SCSI cable is good <strong>and</strong> firmly connected.<br />
3 Check the SCSI device manual for required software.
Troubleshooting Symptom Charts/Miscellaneous - 30<br />
Clicking, chirping,<br />
or thumping sound<br />
Miscellaneous<br />
Smoke/odor Replace analog board.<br />
No video, no audio, <strong>and</strong><br />
no drive operation<br />
1 Replace analog board.<br />
2 Replace logic board. Retain customer’s SIMMs.<br />
1 Connect power cord.<br />
2 Switch power on.<br />
3 Replace power cord.<br />
4 Replace analog board.<br />
5 Replace logic board. Retain customer’s SIMMs.
Troubleshooting Symptom Charts/Miscellaneous - 31<br />
Screen shows “Sad<br />
<strong>Macintosh</strong>” icon <strong>and</strong><br />
black vertical lines;<br />
screeching sound<br />
Rattling sound at<br />
startup in system<br />
with Apple External<br />
Video Connector<br />
Headphone jack does<br />
<strong>not</strong> operate correctly<br />
Miscellaneous<br />
1 Replace RAM SIMMs on logic board.<br />
2 Replace logic board. Retain customer’s SIMMs.<br />
Press or fold Apple External Video cable to prevent it from<br />
contacting fan blades.<br />
1 Verify that headphone jack is seated properly.<br />
2 Replace front panel control board.<br />
3 Replace chassis/wiring harness.
Troubleshooting Symptom Charts/Miscellaneous - 32<br />
Miscellaneous<br />
“Sad <strong>Macintosh</strong>” icon 1 Verify that no disc is in CD-ROM drive.<br />
2 Disconnect all external SCSI devices <strong>and</strong> attempt to restart<br />
computer.<br />
3 Disconnect internal SCSI device <strong>and</strong> attempt to start<br />
computer with known-good floppy disk.<br />
4 Replace bad SCSI drive with known-good SCSI drive.<br />
5 Replace RAM SIMM on logic board.<br />
6 Replace logic board. Retain customer’s SIMMs.
Troubleshooting Symptom Charts/Miscellaneous - 33<br />
No sound from<br />
known-good external<br />
speakers<br />
System with internal<br />
modem unable to<br />
recognize graphics or<br />
Ethernet card in<br />
communications slot<br />
Miscellaneous<br />
1 Check that volume is turned on (manually or through Control<br />
Panel).<br />
2 Verify that headphones are unplugged.<br />
3 Verify that speaker connectors are properly connected.<br />
4 Replace logic board. Retain customer’s SIMMs.<br />
1 Replace internal modem.<br />
2 Replace graphics or Ethernet card.
Troubleshooting Symptom Charts/Global Village Modem “Busy Serial Port” - 34<br />
Using modem gives<br />
message: “Can’t find<br />
or can’t access a<br />
modem to use for<br />
registration. Make<br />
sure you have Global<br />
Village software<br />
installed correctly,<br />
reboot your<br />
computer, <strong>and</strong> try<br />
again. If you want to<br />
use a specific modem<br />
for registration,<br />
select it from<br />
Chooser.”<br />
Global Village Modem “Busy Serial Port”<br />
The TelePort Control Panel becomes corrupted when a <strong>Performa</strong><br />
<strong>5200</strong>CD is restarted while AppleTalk is set to “Inactive” in the<br />
Chooser or LocalTalk is <strong>not</strong> the selected AppleTalk Connection in<br />
the Network Control Panel. Follow these steps;<br />
1 Obtain GlobalFax 2.5.2P Update.<br />
2 Restart the computer with extensions off.<br />
3 Double-click <strong>Performa</strong> GlobalFax 2.5.2 Update icon.<br />
4 Click Update button <strong>and</strong> watch for update confirmation<br />
window.<br />
5 Restart computer.<br />
6 Customer should keep backup copy of 2.5.2 Update program<br />
<strong>and</strong> run it after reinstalling software from backup CD.
Troubleshooting Symptom Charts/Global Village Modem “Busy Serial Port” - 35<br />
Resetting modem in<br />
TelePort Control<br />
Panel gives message:<br />
“The current port is<br />
busy <strong>and</strong> can<strong>not</strong> be<br />
opened. Quit any open<br />
communication<br />
application, or turn<br />
off AppleTalk in the<br />
Chooser (if the<br />
modem is connected to<br />
the Printer port),<br />
<strong>and</strong> then reopen the<br />
TelePort control<br />
panel.”<br />
Global Village Modem “Busy Serial Port”<br />
Here’s an alternative fix that doesn’t require GlobalFax 2.5.2P<br />
Update:<br />
1 Replace corrupted control panel in System Folder with<br />
uncorrupted copy of TelePort Control Panel found in Control<br />
Panels folder on backup CDs.<br />
2 Set AppleTalk to “Active” <strong>and</strong> select LocalTalk as the<br />
AppleTalk Connection in Network Control Panel.
K Service Source<br />
Take Apart<br />
<strong>Power</strong> <strong>Macintosh</strong>/<strong>Performa</strong><br />
<strong>5200</strong> <strong>and</strong> <strong>5300</strong> (<strong>not</strong> 5260, 5280)
Take Apart Drive <strong>and</strong> Control Bezel - 1<br />
Drive <strong>and</strong> Control<br />
Bezel<br />
No preliminary steps are<br />
required before you begin<br />
this procedure.
Take Apart Drive <strong>and</strong> Control Bezel - 2<br />
1 Placing your fingertips<br />
in the holes of the finger<br />
latches, pull the two<br />
finger latches down.<br />
2 Swing the drive <strong>and</strong><br />
control bezel up <strong>and</strong> off.
Take Apart Drive <strong>and</strong> Control Bezel - 3<br />
Replacement Note: Insert<br />
the drive bezel hinge tabs<br />
behind the upper corners of<br />
the front bezel opening.<br />
Swing the drive bezel down<br />
until it snaps closed.
Take Apart Floppy Drive - 4<br />
Floppy Drive<br />
Before you begin, remove<br />
the drive <strong>and</strong> control bezel.<br />
Caution: Review the ESD<br />
precautions in Bulletins/<br />
Safety.
Take Apart Floppy Drive - 5<br />
1 Pull up the release<br />
latch, <strong>and</strong> pull out the<br />
floppy drive far enough<br />
to reach the ribbon cable<br />
connector.
Take Apart Floppy Drive - 6<br />
2 Disconnect the floppy<br />
drive from the floppy<br />
drive cable.<br />
Note: Remove the drive<br />
carrier if you are replacing<br />
the floppy drive.<br />
Note: Because screw<br />
placement varies according<br />
to the type of drive used with<br />
the carrier, <strong>not</strong>e the<br />
placement of the screws<br />
before removing them.<br />
Retain the carrier <strong>and</strong><br />
screws, <strong>and</strong> install them on<br />
the new floppy drive.
Take Apart Floppy Drive - 7<br />
3 Remove the four<br />
mounting screws.<br />
4 Remove the carrier from<br />
the floppy drive.
Take Apart CD-ROM Drive - 8<br />
CD-ROM Drive<br />
Before you begin, remove<br />
the following:<br />
• Drive <strong>and</strong> control bezel<br />
• Floppy drive<br />
Note: The CD-ROM drive is<br />
optional.<br />
Caution: Review the ESD<br />
precautions in Bulletins/<br />
Safety.
Take Apart CD-ROM Drive - 9<br />
Push up the release latch<br />
<strong>and</strong> pull the CD-ROM drive<br />
from the chassis.<br />
Note: You may need to use<br />
some initial force to<br />
disconnect the CD-ROM<br />
drive from the internal<br />
chassis/wiring harness.
Take Apart CD-ROM Drive - 10<br />
Note: Perform the following<br />
steps only if you are<br />
replacing the CD-ROM<br />
drive.<br />
1 Disconnect the CD-ROM<br />
audio adapter from the<br />
drive.<br />
2 Disconnect the SCSI<br />
adapter.<br />
3 Remove the four<br />
mounting screws <strong>and</strong><br />
carrier from the CD-<br />
ROM drive.
Take Apart CD-ROM Drive - 11<br />
Replacement Note: Retain<br />
the carrier, screws, <strong>and</strong><br />
adapters for installation on<br />
the new drive.<br />
Replacement Caution:<br />
Before replacing the SCSI<br />
adapter, verify that the SCSI<br />
drive connector pins are <strong>not</strong><br />
bent.
Take Apart Front Panel Control Board - 12<br />
Front Panel<br />
Control Board<br />
Before you begin, remove<br />
the drive <strong>and</strong> control bezel.<br />
Caution: Review the ESD<br />
precautions in Bulletins/<br />
Safety.
Take Apart Front Panel Control Board - 13<br />
Caution: Be sure to grip the<br />
front panel in the area<br />
shown to avoid harming<br />
circuit tracings.<br />
1 Using needle-nose<br />
pliers, grip the front<br />
edge of the front-panel<br />
control board.<br />
2 Pull firmly <strong>and</strong> slide<br />
the front panel control<br />
board out far enough to<br />
reach the ribbon cable<br />
connector.
Take Apart Front Panel Control Board - 14<br />
3 Disconnect the cable<br />
from the front-panel<br />
control board.<br />
Replacement Note: Using a<br />
flat-blade screwdriver,<br />
press the front-panel<br />
control cable back <strong>and</strong> down.
Take Apart Front Panel Control Board - 15<br />
Replacement Note: Tilt the<br />
board up slightly to insert it<br />
into the guide rails.
Take Apart Front Panel Control Board - 16<br />
Replacement Note: The<br />
front edge of the reinstalled<br />
front-panel control board<br />
must be flush with the front<br />
edge of the plastic chassis.
Take Apart I/O Door - 17<br />
I/O Door<br />
No preliminary steps are<br />
required before you begin<br />
this procedure.
Take Apart I/O Door - 18<br />
1 Remove the two security<br />
screws.
Take Apart I/O Door - 19<br />
2 Using your fingertips,<br />
pull the two finger<br />
latches down.<br />
3 Swing the door up <strong>and</strong><br />
off.<br />
Replacement Note: Align the<br />
I/O door hinge tabs <strong>and</strong> slide<br />
the door up into position.<br />
Swing the door down until it<br />
snaps closed.
Take Apart Logic Board - 20<br />
Logic Board<br />
Before you begin, remove<br />
the I/O door.<br />
Caution: Review the ESD<br />
precautions in Bulletins/<br />
Safety.
Take Apart Logic Board - 21<br />
1 Swing out the h<strong>and</strong>le<br />
from its storage<br />
position.<br />
2 Pull out the logic board.<br />
Note: When installing<br />
cards, cover the two screws<br />
(for fan support <strong>and</strong> ground<br />
thermistor mounting) with<br />
tape. These screws are below<br />
the upper chassis, in the<br />
area of the logic board.<br />
Stretching a length of<br />
strong tape (fiber-<br />
reinforced, if possible)<br />
from front to back over the<br />
screws protects cables from<br />
damage.
Take Apart Logic Board - 22<br />
Note: Perform the following<br />
steps only if you are<br />
replacing a defective logic<br />
board.<br />
3 Remove the two Phillips<br />
screws that secure the<br />
fence to the solder side of<br />
the logic board.
Take Apart Logic Board - 23<br />
4 Using a hex nut driver,<br />
remove the two hex nuts<br />
that secure the logic<br />
board fence to the SCSI<br />
connector.<br />
5 Separate the logic board<br />
fence from the logic<br />
board.
Take Apart Logic Board - 24<br />
Replacement Note: Refer to<br />
the logic board <strong>not</strong>e in the<br />
Parts chapter to distinguish<br />
the 8-bit-sound logic board<br />
from the 16-bit-sound logic<br />
board.<br />
Replacement Note: You may<br />
need to remove the 603e<br />
processor on the <strong>5300</strong><br />
series logic board to install<br />
SIMMs. See Upgrade chapter<br />
“<strong>5300</strong> SIMM Upgrade.”<br />
Replacement Note: Verify<br />
that the flange on the logic<br />
board fence is properly<br />
aligned with the mini-DIN
Take Apart Logic Board - 25<br />
shield. Align the flange<br />
around the mini-DIN shield<br />
first, then swing the rest of<br />
the logic board fence into<br />
place.
Take Apart Rear Housing - 26<br />
Rear Housing<br />
Before you begin, remove<br />
the I/O door.<br />
±Warning: This product<br />
contains high voltage <strong>and</strong> a<br />
high-vacuum picture tube.<br />
To prevent serious injury,<br />
review CRT safety in<br />
Bulletins/Safety.<br />
Note: There are two<br />
versions, the original<br />
version <strong>and</strong> Rev. B. See the<br />
Rev. B topic of the Basics<br />
chapter to identify the<br />
version you are servicing.
Take Apart Rear Housing - 27<br />
Caution: The original rear<br />
housing is <strong>not</strong> forward-<br />
compatible with Rev. B<br />
units. The Rev. B rear<br />
housing is backward-<br />
compatible with original<br />
units.<br />
1 Pry off the two screw<br />
covers on each side of the<br />
rear housing.<br />
Tip: Pry up from the<br />
rear edge of the screw<br />
cover.
Take Apart Rear Housing - 28<br />
2 Remove the three torx<br />
screws on each side of<br />
the rear housing.
Take Apart Rear Housing - 29<br />
3 ±Warning: This step<br />
exposes high voltage<br />
components. Follow CRT<br />
safety precautions.<br />
Slide the rear housing<br />
back <strong>and</strong> off.
Take Apart Front Bezel - 30<br />
Front Bezel<br />
Before you begin, remove<br />
the following:<br />
• I/O door<br />
• Rear housing<br />
±Warning: This product<br />
contains high voltage <strong>and</strong> a<br />
high-vacuum picture tube.<br />
To prevent serious injury,<br />
review CRT safety in<br />
Bulletins/Safety.<br />
Note: See Rev. B topic of the<br />
Basics chapter to determine<br />
whether you are servicing
Take Apart Front Bezel - 31<br />
an original or Rev. B<br />
version.<br />
Caution: The Rev. B <strong>and</strong><br />
original versions of the<br />
front bezels are <strong>not</strong><br />
interchangeable.<br />
1 Note: The speaker cable<br />
is the set of two gray,<br />
round cables wrapped<br />
around the ferrite bead.<br />
Disconnect the speaker<br />
cable <strong>and</strong> guide it down<br />
<strong>and</strong> under the metal CRT<br />
frame.
Take Apart Front Bezel - 32<br />
2 Disconnect the<br />
microphone cable <strong>and</strong><br />
guide the cable to the<br />
microphone side of the<br />
metal CRT frame.<br />
3 Pull off the front bezel.
Take Apart Front Bezel - 33<br />
Replacement Note: Guide<br />
the microphone cables<br />
through the plastic<br />
retainers before replacing<br />
the front bezel.<br />
Replacement Note:<br />
Guide the speaker cable<br />
connector behind the metal<br />
CRT frame, <strong>and</strong> then up to<br />
the speaker connector on<br />
the main deflection board.
Take Apart Internal Microphone - 34<br />
Internal<br />
Microphone<br />
Before you begin, remove:<br />
• I/O door<br />
• Rear housing<br />
• Front bezel<br />
±Warning: This product<br />
contains high voltage <strong>and</strong> a<br />
high-vacuum picture tube.<br />
To prevent serious injury,<br />
review CRT safety in<br />
Bulletins/Safety.
Take Apart Internal Microphone - 35<br />
LIft off the microphone.<br />
Replacement Note: Guide<br />
the microphone cable<br />
through the plastic cable<br />
retainers.
Take Apart Rear EMI Shield - 36<br />
Rear EMI Shield<br />
Before you begin, remove<br />
the following:<br />
• I/O door<br />
• Rear housing<br />
• Front bezel<br />
±Warning: This product<br />
contains high voltage <strong>and</strong> a<br />
high-vacuum picture tube.<br />
To prevent serious injury,<br />
review CRT safety in<br />
Bulletins/Safety.<br />
Note: The rear EMI shield<br />
shown here is the original<br />
version. The Rev. B version
Take Apart Rear EMI Shield - 37<br />
is considerably larger, but<br />
removal procedures are<br />
similar.<br />
Caution: Original <strong>and</strong> Rev.<br />
B rear EMI shields are <strong>not</strong><br />
interchangeable.
Take Apart Rear EMI Shield - 38<br />
1 Remove the four screws<br />
from the rear shield.
Take Apart Rear EMI Shield - 39<br />
2 Swivel the rear shield<br />
up <strong>and</strong> lift off.<br />
Replacement Note:<br />
Insert the two corner<br />
hinge tabs into the slots<br />
of the power supply <strong>and</strong><br />
analog board shields.<br />
Then swing the rear<br />
shield down.
Take Apart Speakers, Original Version - 40<br />
Speakers, Original<br />
Version<br />
Before you begin, remove<br />
the following:<br />
• I/O door<br />
• Rear housing<br />
• Front bezel<br />
±Warning: This product<br />
contains high voltage <strong>and</strong> a<br />
high-vacuum picture tube.<br />
To prevent serious injury,<br />
review CRT safety in<br />
Bulletins/Safety.
Take Apart Speakers, Original Version - 41<br />
Note: The <strong>Power</strong><br />
<strong>Macintosh</strong>/<strong>Performa</strong> 5000<br />
series includes two<br />
versions, the original<br />
version <strong>and</strong> Rev. B. See the<br />
Rev. B topic of the Basics<br />
chapter to identify the<br />
version you are servicing.<br />
Caution: The speakers of<br />
the two versions are <strong>not</strong><br />
interchangeable <strong>and</strong> the Take<br />
Apart procedures differ<br />
significantly. If you are<br />
servicing an original<br />
version, use the following<br />
procedures. If you are<br />
servicing a Rev. B version,
Take Apart Speakers, Original Version - 42<br />
Speaker<br />
Locking Tab<br />
Speaker<br />
Mounting<br />
Pins<br />
follow the procedures in<br />
“Speakers, Rev. B.”<br />
1 Place the front bezel face<br />
down.<br />
2 Remove the speaker<br />
cables from the plastic<br />
cable retainers on the<br />
inside of the front bezel.<br />
3 Compress the locking tab<br />
with needle-nose pliers<br />
while prying up the top<br />
edge of the speaker to<br />
clear the security pins<br />
<strong>and</strong> lift off.
Take Apart Speakers, Original Version - 43<br />
Speaker<br />
Locking<br />
Tab<br />
Speaker<br />
Mounting<br />
Pins<br />
Replacement Note: Place<br />
the speaker with the longer<br />
cable on the floppy drive<br />
side of the unit. Align <strong>and</strong><br />
secure the speaker with the<br />
bottom tabs inside the bezel.<br />
Then snap the top of the<br />
speaker over the two<br />
security pins.
Take Apart Speakers, Rev. B - 44<br />
Speakers,<br />
Rev. B<br />
Before you begin, remove<br />
the following:<br />
• I/O door<br />
• Rear housing<br />
• Front bezel
Take Apart Speakers, Rev. B - 45<br />
Note: The <strong>Power</strong><br />
<strong>Macintosh</strong>/<strong>Performa</strong> 5000<br />
series includes two<br />
versions, the original<br />
version <strong>and</strong> Rev. B. See the<br />
Rev. B topic of the Basics<br />
chapter to identify the<br />
version you are servicing.<br />
Caution: The speakers of<br />
the two versions are <strong>not</strong><br />
interchangeable <strong>and</strong> the Take<br />
Apart procedures differ<br />
significantly. If you are<br />
servicing an original<br />
version, refer to “Speakers,<br />
Original Version.”
Take Apart Speakers, Rev. B - 46<br />
1 Press the tab <strong>and</strong> release<br />
the speaker from the<br />
chassis slot.
Take Apart Speakers, Rev. B - 47<br />
2 Tilt the speaker <strong>and</strong><br />
remove it.
Take Apart Speakers, Rev. B - 48<br />
Replacement Note:<br />
• The plastic speakers are<br />
printed “right” <strong>and</strong><br />
“left.” Place the<br />
speakers accordingly as<br />
you face the monitor.<br />
• Guide the wire connecting<br />
the speakers in the<br />
channel between the<br />
monitor <strong>and</strong> chassis.<br />
• Be careful <strong>not</strong> to crimp<br />
the speaker wire as you<br />
guide it from the speaker<br />
to its analog board<br />
connection.
Take Apart Hard Drive - 49<br />
Hard Drive<br />
Before you begin, remove<br />
the I/O door.<br />
Caution: Review the ESD<br />
precautions in Bulletins/<br />
Safety.
Take Apart Hard Drive - 50<br />
1 Using the convenience<br />
pull tab, disconnect the<br />
IDE data cable from the<br />
hard drive connector.<br />
2 Disconnect the power<br />
cable.
Take Apart Hard Drive - 51<br />
3 Using needle-nose<br />
pliers, pull up the<br />
release latch <strong>and</strong> slide<br />
the IDE hard drive from<br />
the chassis.<br />
Replacement Caution: Some<br />
hard drives have sharp edges<br />
near the cable connector that<br />
can rub <strong>and</strong>, therefore,<br />
damage the cable. Avoid<br />
rubbing the cable against the<br />
edge of the drive.
Take Apart Hard Drive - 52<br />
Note: Perform the following<br />
steps only if you are<br />
replacing the hard drive.<br />
Note: Notice the placement<br />
of the carrier <strong>and</strong> screws<br />
before removing them.<br />
Retain the carrier <strong>and</strong><br />
screws, <strong>and</strong> install them on<br />
the new hard drive.<br />
4 Remove the four screws.<br />
5 Remove the carrier from<br />
the hard drive.
Take Apart TV Tuner - 53<br />
TV Tuner<br />
Before you begin, remove<br />
the following:<br />
• I/O door<br />
• Logic board<br />
Note: The TV Tuner is an<br />
option.<br />
Caution: Review the ESD<br />
precautions in Bulletins/<br />
Safety.
Take Apart TV Tuner - 54<br />
1 Remove the Phillips<br />
screw.<br />
2 Slide out the TV Tuner<br />
far enough to reach the<br />
TV Tuner cable.
Take Apart TV Tuner - 55<br />
3 Disconnect the TV Tuner<br />
cable <strong>and</strong> remove the TV<br />
Tuner.
Take Apart <strong>Power</strong> Supply, Original Version - 56<br />
<strong>Power</strong> Supply,<br />
Original Version<br />
Before you begin, remove<br />
the following:<br />
• I/O door<br />
• Rear housing<br />
• Front bezel<br />
• Logic board<br />
• Rear EMI shield<br />
±Warning: This product<br />
contains high voltage <strong>and</strong> a<br />
high-vacuum picture tube.<br />
To prevent serious injury,<br />
review CRT safety in<br />
Bulletins/Safety.
Take Apart <strong>Power</strong> Supply, Original Version - 57<br />
Rev. A <strong>Power</strong> Supply (<strong>5200</strong>)<br />
Rev. B <strong>Power</strong> Supply<br />
(<strong>5200</strong>/<strong>5300</strong>/5400/5500)<br />
Note: The <strong>Power</strong><br />
<strong>Macintosh</strong>/<strong>Performa</strong> 5000<br />
series includes the original<br />
version <strong>and</strong> Rev. B. See the<br />
Rev. B topic of the Basics<br />
chapter to identify the<br />
version you are servicing.<br />
Caution: The power<br />
supplies of the two versions<br />
are <strong>not</strong> interchangeable. If<br />
you are servicing an<br />
original version, use the<br />
following procedures. If you<br />
are servicing a Rev. B<br />
version, follow the<br />
procedure in “<strong>Power</strong><br />
Supply, Rev. B.”
Take Apart <strong>Power</strong> Supply, Original Version - 58<br />
1 Remove the screw <strong>and</strong><br />
grounding cable from the<br />
upper front corner of<br />
the power supply shield.
Take Apart <strong>Power</strong> Supply, Original Version - 59<br />
<strong>Power</strong> Supply<br />
EMI Shield<br />
Screw<br />
2 Remove the screw from<br />
the lower rear corner of<br />
the power supply shield.
Take Apart <strong>Power</strong> Supply, Original Version - 60<br />
<strong>Power</strong> Supply<br />
EMI Shield<br />
Interlocking Tab<br />
Screw<br />
3 Slide the power supply<br />
shield back to clear the<br />
interlocking tab <strong>and</strong><br />
remove the shield.<br />
Replacement Note: Slide<br />
the interlocking tab into<br />
the slot of the CRT metal<br />
frame.
Take Apart <strong>Power</strong> Supply, Original Version - 61<br />
Screw<br />
Ground Cable<br />
4 Remove the screw <strong>and</strong><br />
short grounding cable<br />
from the lower rear<br />
corner of the power<br />
supply.
Take Apart <strong>Power</strong> Supply, Original Version - 62<br />
CRT Frame Bracket<br />
Security Rail<br />
<strong>Power</strong> Supply Board<br />
5 Lift the lower rear<br />
corner of the power<br />
supply board to<br />
disengage the lower rear<br />
bracket.<br />
6 Slide the top front<br />
corner from the CRT<br />
frame bracket. Lift the<br />
power supply enough to<br />
clear the security rail.
Take Apart <strong>Power</strong> Supply, Original Version - 63<br />
2-Pin Degauss Cable<br />
7 Disconnect the 2-pin<br />
degauss cable.
Take Apart <strong>Power</strong> Supply, Original Version - 64<br />
8 Disconnect these cables:<br />
• 2-pin fan cable (CN5)<br />
• 14-pin power cable<br />
(CN6)<br />
• 10-pin video cable<br />
(CN7)
Take Apart <strong>Power</strong> Supply, Original Version - 65<br />
Note: The power<br />
supply-to-analogboard<br />
connectors are<br />
keyed <strong>and</strong> fit very<br />
tightly. You may need to<br />
use a jeweler’s<br />
screwdriver to loosen<br />
the sockets of these<br />
connectors.<br />
• 6-pin power-supplyto-analog-board<br />
cable<br />
(CN3)<br />
• 10-pin powersupply-to-analogboard<br />
cable (CN4)
Take Apart <strong>Power</strong> Supply, Original Version - 66<br />
Rev A <strong>Power</strong> Supply Diagram (<strong>5200</strong>)<br />
CN2<br />
Rear Bracket<br />
CN5<br />
CN6<br />
CN4<br />
CN13<br />
CN3<br />
CN7<br />
Replacement Note: This<br />
diagram shows the location<br />
of the rear bracket <strong>and</strong> the<br />
power supply cable<br />
connections for the original<br />
version. For Rev. B diagram,<br />
See “<strong>Power</strong> Supply, Rev. B”<br />
• Rear bracket<br />
• 2-pin fan cable (CN5)<br />
• 14-pin power cable<br />
(CN6)<br />
• 10-pin video cable<br />
(CN4)<br />
• 6-pin power-supply-toanalog-board<br />
cable (CN3)
Take Apart <strong>Power</strong> Supply, Original Version - 67<br />
Rev A <strong>Power</strong> Supply Diagram (<strong>5200</strong>)<br />
CN2<br />
Rear Bracket<br />
CN5<br />
CN6<br />
CN4<br />
CN13<br />
CN3<br />
CN7<br />
• 10-pin power-supplyto-analog-board<br />
cable<br />
(CN7)<br />
• 2-pin degauss cable<br />
(CN2)<br />
• 2-pin fan thermistor<br />
connector (CN13)<br />
Note: Not present on<br />
some Rev. A power<br />
supply boards. Replace<br />
power supply boards like<br />
for like.
Take Apart <strong>Power</strong> Supply, Rev. B - 68<br />
<strong>Power</strong> Supply,<br />
Rev. B<br />
Before you begin, remove<br />
the following:<br />
• I/O door<br />
• Rear housing<br />
• Front bezel<br />
• Logic board<br />
• Rear EMI shield<br />
±Warning: This product<br />
contains high voltage <strong>and</strong> a<br />
high-vacuum picture tube.<br />
To prevent serious injury,<br />
review CRT safety in<br />
Bulletins/Safety.
Take Apart <strong>Power</strong> Supply, Rev. B - 69<br />
Rev. A <strong>Power</strong> Supply (<strong>5200</strong>)<br />
Rev. B <strong>Power</strong> Supply<br />
(<strong>5200</strong>/<strong>5300</strong>/5400/5500)<br />
Follow the procedures in<br />
“<strong>Power</strong> Supply, Original<br />
Version,” but use the<br />
diagram of power supply<br />
connections.<br />
Note: The <strong>Power</strong><br />
<strong>Macintosh</strong>/<strong>Performa</strong> 5000<br />
series includes two<br />
versions, the original<br />
version <strong>and</strong> Rev. B. See the<br />
Rev. B topic of the Basics<br />
chapter to identify the<br />
version you are servicing.<br />
Caution: The power<br />
supplies of the two versions<br />
are <strong>not</strong> interchangeable. If
Take Apart <strong>Power</strong> Supply, Rev. B - 70<br />
CN9 2-Pin<br />
Rev. B<br />
<strong>5200</strong>/<strong>5300</strong>/5400/5500<br />
<strong>Power</strong> Supply<br />
CN3 2-Pin<br />
CN8 2-Pin<br />
CN4 14-Pin<br />
CN5 10-Pin<br />
CN6 6-Pin<br />
CN7 10-Pin<br />
you are servicing an<br />
original version, use the<br />
procedure in “<strong>Power</strong><br />
Supply, Original Version.”
Take Apart <strong>Power</strong> Supply, Rev. B - 71<br />
Rev. B <strong>Power</strong> Supply Diagram (<strong>5300</strong>/5400/5500)<br />
CN9<br />
CN3<br />
Rear CN2<br />
Bracket<br />
CN8<br />
CN4<br />
CN5<br />
CN6<br />
CN7<br />
Disconnect:<br />
• 2-pin degauss cable<br />
(CN3)<br />
• 2-pin cable (CN2)<br />
• 2-pin fan thermister<br />
cable (CN9)<br />
• 2-pin fan connector<br />
(CN8)<br />
• 14-pin power supply<br />
cable (CN4)<br />
Note: The pull-up tab<br />
(CN5) is fragile.<br />
• 10-pin ribbon cable<br />
(CN5)<br />
• 6-pin cable (CN6)<br />
• 10-pin cable (CN7)
Take Apart Video Board - 72<br />
Video Board<br />
Before you begin,<br />
• Remove the rear housing<br />
• Remove the front bezel<br />
• Remove the logic board<br />
• Remove the rear EMI<br />
shield<br />
• Discharge the CRT<br />
• Remove the anode cap
Take Apart Video Board - 73<br />
±Warning: This product<br />
contains high voltage <strong>and</strong> a<br />
high-vacuum picture tube.<br />
To prevent serious injury,<br />
review CRT safety in<br />
Bulletins/Safety.<br />
Note: Do <strong>not</strong> disconnect the<br />
cables connecting the video<br />
board <strong>and</strong> the analog board.<br />
Note: The <strong>Power</strong><br />
<strong>Macintosh</strong>/<strong>Performa</strong> 5000<br />
series includes the original<br />
version <strong>and</strong> Rev. B. See<br />
“Rev. B” in the Basics<br />
chapter to identify the<br />
version you are servicing.
Take Apart Video Board - 74<br />
Video Board<br />
Caution: The analog/video<br />
board assemblies of the two<br />
versions are <strong>not</strong><br />
interchangeable.<br />
1 If an adhesive glue<br />
secures the video board<br />
to the CRT, cut <strong>and</strong> peel<br />
it off before removing<br />
the board.<br />
2 Caution: Do <strong>not</strong> attempt<br />
to disconnect the video<br />
board from the analog<br />
board. The video board<br />
<strong>and</strong> the analog board are<br />
permanently connected<br />
by several cables <strong>and</strong><br />
form one service unit.
Take Apart Video Board - 75<br />
Pull off the video board.<br />
3 Remove the two long<br />
grounding cables from<br />
the video board.<br />
4 Remove the single short<br />
grounding cable from the<br />
video board.
Take Apart Analog Shield - 76<br />
Analog Shield<br />
Grounding Cable<br />
Screw<br />
Ground Screw<br />
Analog Shield<br />
Before you begin,<br />
• Remove the rear housing<br />
• Remove the front bezel<br />
• Remove the logic board<br />
• Remove the rear EMI<br />
shield<br />
• Discharge the CRT<br />
• Remove the anode cap<br />
• Remove the video board<br />
±Warning: This product<br />
contains high voltage <strong>and</strong> a<br />
high-vacuum picture tube.<br />
To prevent serious injury,<br />
review CRT safety in<br />
Bulletins/Safety.
Take Apart Analog Shield - 77<br />
Analog Shield<br />
Grounding Cable<br />
Screw<br />
Ground Screw<br />
1 Remove the grounding<br />
cable <strong>and</strong> screw from the<br />
upper front corner of<br />
the analog board shield.<br />
2 Remove the screw from<br />
the lower rear side of<br />
the analog board shield.
Take Apart Analog Shield - 78<br />
Analog Shield<br />
Interlocking Tab<br />
Side Runners<br />
3 Slide the analog board<br />
shield back to clear the<br />
interlocking tabs <strong>and</strong><br />
side runners.<br />
4 Remove the analog board<br />
shield.
Take Apart Analog Board, Original Version - 79<br />
Analog Board,<br />
Original Version<br />
Before you begin,<br />
• Remove the front bezel<br />
• Remove the I/O door<br />
• Remove the rear housing<br />
• Remove the logic board<br />
• Remove the rear EMI<br />
shield<br />
• Discharge the CRT<br />
• Remove the anode cap<br />
• Remove the video board<br />
• Remove the analog shield
Take Apart Analog Board, Original Version - 80<br />
±Warning: This product<br />
contains high voltage <strong>and</strong> a<br />
high-vacuum picture tube.<br />
To prevent serious injury,<br />
review CRT safety in<br />
Bulletins/Safety.<br />
Note: Do <strong>not</strong> disconnect the<br />
cables connecting the video<br />
board <strong>and</strong> the analog board.<br />
Note: The <strong>Power</strong><br />
<strong>Macintosh</strong>/<strong>Performa</strong> 5000<br />
series includes the original<br />
version <strong>and</strong> Rev. B. See<br />
“Rev. B” in the Basics<br />
chapter to identify the<br />
version you are servicing.
Take Apart Analog Board, Original Version - 81<br />
Caution: The analog/video<br />
board assemblies of the two<br />
versions are <strong>not</strong><br />
interchangeable. If you are<br />
servicing an original<br />
version, use the following<br />
procedures. If you are<br />
servicing a Rev. B version,<br />
use the following<br />
procedures, but substitute<br />
the cable locations in<br />
“Analog Board, Rev. B.”
Take Apart Analog Board, Original Version - 82<br />
1 Remove the screws at the<br />
lower rear of the analog<br />
board.
Take Apart Analog Board, Original Version - 83<br />
2 Lift up the lower back<br />
corner of the board to<br />
disengage the rear<br />
bracket from the<br />
chassis slot.<br />
3 Slide the analog board<br />
back to clear the<br />
interlocking tab <strong>and</strong> lift<br />
it from the guide rail.<br />
Important: At this point,<br />
you may need to<br />
disconnect the<br />
microphone cable to be<br />
able to slide the analog<br />
board completely out.<br />
4 Lift up the analog board<br />
just enough to clear the
Take Apart Analog Board, Original Version - 84<br />
security rail <strong>and</strong> rest<br />
the analog board on the<br />
top of the chassis.<br />
5 Note: For a diagram of<br />
analog board cable<br />
connections, refer to the<br />
replacement <strong>not</strong>e at the<br />
end of this topic.<br />
Disconnect the yoke<br />
cable at the power<br />
supply.
Do Not<br />
Disconnect<br />
P805<br />
Video<br />
Test Pins<br />
Do Not<br />
Disconnect<br />
Analog-to<br />
Video-<br />
Board<br />
Cable<br />
Take Apart Analog Board, Original Version - 85<br />
P803<br />
Speaker<br />
Degauss<br />
Rev. A Analog Board<br />
P101<br />
Logic<br />
Board<br />
P701<br />
Yoke<br />
P804<br />
P704<br />
P102 10-Pin<br />
6-Pin <strong>Power</strong><br />
<strong>Power</strong> Supply<br />
Supply<br />
Flyback<br />
Transformer<br />
CRT Video Board<br />
P702<br />
Rear<br />
Video<br />
P302<br />
Bracket<br />
Board P301 12-Pin<br />
(Do Not 6-Pin (non<br />
Disconnect) removable)<br />
to Analog<br />
Board<br />
6 Disconnect these cables<br />
from the analog board:<br />
• 6-pin power-supplyto-analog-board<br />
cable<br />
(P102)<br />
• 10-pin powersupply-to-analogboard<br />
cable (P704)<br />
• Logic board connector<br />
cable (P101)<br />
• Single-pin degauss<br />
cable<br />
7 Remove the analog <strong>and</strong><br />
video boards assembly.
Do Not<br />
Disconnect<br />
P805<br />
Video<br />
Test Pins<br />
Do Not<br />
Disconnect<br />
Analog-to<br />
Video-<br />
Board<br />
Cable<br />
Take Apart Analog Board, Original Version - 86<br />
P803<br />
Speaker<br />
Degauss<br />
Rev. A Analog Board<br />
P101<br />
Logic<br />
Board<br />
P701<br />
Yoke<br />
P804<br />
P704<br />
P102 10-Pin<br />
6-Pin <strong>Power</strong><br />
<strong>Power</strong> Supply<br />
Supply<br />
Flyback<br />
Transformer<br />
CRT Video Board<br />
P702<br />
Rear<br />
Video<br />
P302<br />
Bracket<br />
Board P301 12-Pin<br />
(Do Not 6-Pin (non<br />
Disconnect) removable)<br />
to Analog<br />
Board<br />
Replacement Note: This<br />
diagram shows the location<br />
of the rear bracket <strong>and</strong> the<br />
analog board cable<br />
connections:<br />
• Rear bracket<br />
• Degauss cable<br />
• Logic board connector<br />
cable (P101)<br />
• 6-pin power-supply-toanalog-board<br />
cable<br />
(P102)<br />
• 10-pin power-supplyto-analog-board<br />
cable<br />
(P704)<br />
• Yoke cable (P701)<br />
• Speaker cable (P803)
Take Apart Analog Board, Rev. B - 87<br />
Analog Board,<br />
Rev. B<br />
Note: The <strong>Power</strong><br />
<strong>Macintosh</strong>/<strong>Performa</strong> 5000<br />
series includes two<br />
versions, the original<br />
version <strong>and</strong> Rev. B. See the<br />
Rev. B topic in the Basics<br />
chapter to identify the<br />
version you are servicing.
Take Apart Analog Board, Rev. B - 88<br />
Caution: The analog <strong>and</strong><br />
video boards of the two<br />
versions are <strong>not</strong><br />
interchangeable. If you are<br />
servicing a Rev. B version,<br />
use the procedures in<br />
“Analog Board, Original<br />
Version” <strong>and</strong> substitute the<br />
following cable locations.
Take Apart Analog Board, Rev. B - 89<br />
Rev. B Analog Board<br />
P802<br />
P801<br />
P101<br />
P803<br />
P102<br />
Video<br />
Test<br />
Pins<br />
Flyback<br />
P701<br />
Transformer<br />
P103 P702<br />
(Do Not<br />
P703<br />
Disconnect)<br />
CRT Video Board<br />
P301 P302 P306<br />
Analog Black<br />
Board Ground<br />
(Do Not<br />
Disconnect)<br />
Disconnect these video<br />
board cables:<br />
• Ground cable from the<br />
exterior tab of the video<br />
board<br />
• Black grounding<br />
connection (P306)<br />
• 10-pin ribbon cable<br />
(P301)
Take Apart Analog Board, Rev. B - 90<br />
Rev. B Analog Board<br />
P802<br />
P801<br />
P101<br />
P803<br />
P102<br />
Video<br />
Test<br />
Pins<br />
To <strong>Power</strong> Supply<br />
CN2/J6<br />
Flyback<br />
Transformer<br />
P701<br />
P103 P702<br />
(Do Not<br />
P703<br />
Disconnect)<br />
Do Not<br />
Disconnect<br />
CRT Video Board<br />
P310 P302 P306<br />
Analog Black<br />
Board<br />
(Do Not<br />
Ground<br />
Disconnect)<br />
Disconnect these cables:<br />
• 2-pin flyback connector<br />
from power supply<br />
location CN2/J6<br />
• 4-pin yoke cable (P701)<br />
• 4-pin speaker wire<br />
(P803)<br />
• 4-pin mic cable (P802)<br />
• 10-pin ribbon cable<br />
(P101)<br />
• 14-pin ribbon cable<br />
(P801)<br />
• 6-pin power supply-toanalog<br />
board cable<br />
(P103)<br />
• 10-pin power supplyto-analog<br />
board cable<br />
(P703)
Take Apart Internal RGB Cable - 91<br />
Internal<br />
RGB Cable<br />
Internal RGB<br />
Cable<br />
Before you begin,<br />
• Remove the I/O door<br />
• Remove the rear housing<br />
• Remove the rear EMI<br />
shield<br />
• Discharge the CRT<br />
• Remove the anode cap<br />
• Pull off the video board<br />
• Tilt back the analog<br />
shield <strong>and</strong> analog board
Take Apart Internal RGB Cable - 92<br />
P703<br />
Analog Board<br />
P301<br />
Video Board<br />
±Warning: This product<br />
contains high voltage <strong>and</strong> a<br />
high-vacuum picture tube.<br />
To prevent serious injury,<br />
review CRT safety in<br />
Bulletins/Safety.<br />
1 Disconnect the internal<br />
RGB cable at the P703<br />
connector on the analog<br />
board <strong>and</strong> at the P301<br />
connector on the video<br />
board.<br />
Note: You may need to<br />
pry up one or both<br />
ferrite beads if they are<br />
glued to the chassis.
Take Apart Fan - 93<br />
Fan<br />
Before you begin,<br />
• Remove the I/O door<br />
• Remove the rear housing<br />
• Remove the front bezel<br />
• Remove the rear EMI<br />
shield<br />
• Discharge the CRT<br />
• Remove the anode cap<br />
• Remove the video board<br />
• Remove the power supply
Take Apart Fan - 94<br />
±Warning: This product<br />
contains high voltage <strong>and</strong> a<br />
high-vacuum picture tube.<br />
To prevent serious injury,<br />
review CRT safety in<br />
Bulletins/Safety.
Take Apart Fan - 95<br />
1 Remove the fan security<br />
screw.
Take Apart Fan - 96<br />
2 Slide the fan toward the<br />
power supply to release<br />
the two tabs.<br />
3 Remove the fan.
Take Apart Tilt/Swivel Base - 97<br />
Tilt/Swivel Base<br />
Before you begin, remove<br />
the following:<br />
• Front bezel<br />
• Rear housing<br />
±Warning: This product<br />
contains high voltage <strong>and</strong> a<br />
high-vacuum picture tube.<br />
To prevent serious injury,<br />
review CRT safety in<br />
Bulletins/Safety.
Take Apart Tilt/Swivel Base - 98<br />
1 Place the display face<br />
down on a padded surface.<br />
2 Remove the two screws<br />
at the back of the tilt/<br />
swivel base.<br />
3 Separate the back of the<br />
base from the metal<br />
chassis by a few inches.<br />
4 Slide the tilt/swivel<br />
base up <strong>and</strong> remove it<br />
from the chassis.
Take Apart Tilt/Swivel Base - 99<br />
Replacement Note: Align the<br />
tabs at the front of the tilt/<br />
swivel base with the slots in<br />
the chassis. Angle the tilt/<br />
swivel base <strong>and</strong> slide in the<br />
tabs.
Take Apart CRT - 100<br />
CRT<br />
Before you begin,<br />
• Remove the I/O door<br />
• Remove the rear housing<br />
• Remove the front bezel<br />
• Remove the logic board<br />
• Discharge the CRT<br />
• Remove the rear EMI<br />
shield<br />
• Remove the analog shield<br />
• Remove the analog/video<br />
board assembly<br />
• Remove the power supply<br />
• Remove the tilt/swivel<br />
base
Take Apart CRT - 101<br />
±Warning: This product<br />
contains high voltage <strong>and</strong> a<br />
high-vacuum picture tube.<br />
To prevent serious injury,<br />
review CRT safety in<br />
Bulletins/Safety.
Take Apart CRT - 102<br />
±Warning: Support the top<br />
of the CRT. The CRT is very<br />
heavy <strong>and</strong> may fall forward<br />
as you complete this<br />
procedure.<br />
1 Remove the two screws<br />
securing the metal CRT<br />
frame to the chassis.
Take Apart CRT - 103<br />
2 Pry back the metal tab<br />
from the raised slot on<br />
each side of the chassis.
Take Apart CRT - 104<br />
3 Tilt the top of the CRT<br />
<strong>and</strong> frame assembly<br />
forward.<br />
4 Push back the bottom of<br />
the CRT frame to<br />
disengage the line of CRT<br />
frame <strong>and</strong> chassis tabs<br />
<strong>and</strong> slots.<br />
5 Lift off the CRT<br />
assembly.
Take Apart CRT - 105<br />
Replacement Note: Align<br />
the line of tabs on the<br />
CRT frame with the line<br />
of slots on the front of<br />
the chassis.<br />
Important: When<br />
replacing the CRT, move<br />
the degaussing cable<br />
from the old CRT to the<br />
new CRT assembly to<br />
ensure full<br />
functionality of the unit<br />
after the repair.
Take Apart Chassis/Wiring Harness - 106<br />
Chassis/Wiring<br />
Harness<br />
Before you begin,<br />
• Remove the I/O door<br />
• Remove the rear housing<br />
• Remove the front bezel<br />
• Remove the CD-ROM<br />
drive, if any<br />
• Remove the TV Tuner, if<br />
any<br />
• Remove the floppy drive<br />
• Remove the front-panel<br />
control board<br />
• Remove the logic board<br />
• Remove the rear EMI<br />
shield
Take Apart Chassis/Wiring Harness - 107<br />
• Discharge the CRT<br />
• Remove the analog shield<br />
• Remove the analog/video<br />
board assembly<br />
• Remove the power supply<br />
• Remove the tilt/swivel<br />
base<br />
• Remove the CRT<br />
• Remove the fan<br />
Note: The <strong>Power</strong><br />
<strong>Macintosh</strong>/<strong>Performa</strong> 5000<br />
series includes two<br />
versions, the original<br />
version <strong>and</strong> Rev. B. See the<br />
Rev. B topic of the Basics<br />
chapter to identify the<br />
version you are servicing.
Take Apart Chassis/Wiring Harness - 108<br />
Remove the chassis/wiring<br />
harness.<br />
Note: The chassis/wiring<br />
harness includes the metal<br />
chassis, plastic drive bays,<br />
<strong>and</strong> the logic board connector<br />
with cables.
K Service Source<br />
Upgrades<br />
<strong>Power</strong> <strong>Macintosh</strong>/<strong>Performa</strong><br />
<strong>5200</strong> <strong>and</strong> <strong>5300</strong> (<strong>not</strong> 5260/5280)
Upgrades TV or TV/FM Tuner - 1<br />
TV or TV/FM<br />
Tuner<br />
Before you begin, remove<br />
the following:<br />
• I/O door<br />
• Logic board<br />
Note: The TV Tuner is an<br />
option.<br />
Caution: Review the ESD<br />
precautions in Bulletins/<br />
Safety.
Upgrades TV or TV/FM Tuner - 2<br />
1 Remove the Philips<br />
screw.<br />
2 Lift off the metal bracket<br />
from the chassis.
Upgrades TV or TV/FM Tuner - 3<br />
3 Connect the TV Tuner<br />
cable.<br />
4 Slide the TV Tuner into<br />
place.
Upgrades <strong>5200</strong> SIMM Upgrade - 4<br />
SIMM<br />
DRAM SIMM Slot<br />
(1 of 2)<br />
Logic Board<br />
<strong>5200</strong> SIMM<br />
Upgrade<br />
Before you begin, remove<br />
the following:<br />
• I/O door<br />
• Logic board<br />
Caution: Review the ESD<br />
precautions in Bulletins/<br />
Safety.<br />
1 Align the SIMM in the<br />
SIMM slot <strong>and</strong> snap it<br />
into place.
Upgrades <strong>5200</strong> SIMM Upgrade - 5<br />
Clips<br />
Note: The plastic pin on the<br />
SIMM slot should engage the<br />
hole in the SIMM.<br />
Note: Verify that the clips<br />
on both sides of the SIMM<br />
slot snap into place.
Upgrades <strong>5300</strong> SIMM Upgrade - 6<br />
Logic Board<br />
Processor Heat Sink<br />
<strong>5300</strong> SIMM<br />
Upgrade<br />
Before you begin, remove<br />
the following:<br />
• I/O door<br />
• Logic board<br />
Caution: Review the ESD<br />
precautions in Bulletins/<br />
Safety.
Upgrades <strong>5300</strong> SIMM Upgrade - 7<br />
Caution: Take care to avoid<br />
compressing the EMI clips<br />
on the bottom of the logic<br />
board. If possible, support<br />
the underside of the board to<br />
avoid compressing the three<br />
silver-colored EMI clips.<br />
±Replacement Warning:<br />
You must remove the heat<br />
sink of the <strong>5300</strong> series<br />
logic board to install or<br />
replace a SIMM in the slot<br />
next to the processor.
Upgrades <strong>5300</strong> SIMM Upgrade - 8<br />
Back Side<br />
of Logic Board<br />
Heat Sink Tabs<br />
Heat Sink Tabs<br />
1 On the back (tracing<br />
side) of the logic board,<br />
pry off the four corner<br />
tabs of the heat sink.
Upgrades <strong>5300</strong> SIMM Upgrade - 9<br />
Heat Sink<br />
2 Remove the heat sink<br />
from the component side<br />
of the logic board.
Upgrades <strong>5300</strong> SIMM Upgrade - 10<br />
Logic Board<br />
Upgrade SIMM<br />
Processor with<br />
Heat Sink Removed<br />
3 Install the SIMM in the<br />
slot next to the<br />
processor.<br />
Replacement Note: Be<br />
sure to remove the<br />
customer’s SIMMs if you<br />
must return a defective<br />
logic board.
Upgrades Communications Card Installation - 11<br />
Communications<br />
Card Installation<br />
Before you begin, remove<br />
the following:<br />
• I/O door<br />
• Logic board<br />
Caution: Review the ESD<br />
precautions in Bulletins/<br />
Safety.<br />
Note: This procedure shows<br />
installing a modem card,<br />
but the steps are similar for<br />
other communications cards<br />
you might be installing.
Upgrades Communications Card Installation - 12<br />
Logic<br />
Board<br />
Fence<br />
Communication Slot<br />
Two Plastic Tabs<br />
Metal Shield<br />
1 Remove the<br />
communications card<br />
access cover by pushing<br />
the two plastic tabs<br />
apart <strong>and</strong> removing the<br />
metal shield.
Upgrades Communications Card Installation - 13<br />
Logic<br />
Board<br />
Fence<br />
Communications<br />
Card Access Port<br />
Hook<br />
Communication Slot<br />
2 Angle the hook-end of the<br />
card down <strong>and</strong> bring the<br />
hook under <strong>and</strong> up<br />
through the<br />
communications card<br />
access port. The hook<br />
should rest against the<br />
outside of the logic<br />
board fence.
Upgrades Communications Card Installation - 14<br />
Fence<br />
Mounting<br />
Screws<br />
Fence<br />
End-Mount Fence<br />
Mounting<br />
Screws<br />
Side-Mount Fence<br />
Replacement Note: If you<br />
are installing an Ethernet<br />
card <strong>and</strong> its fence does <strong>not</strong><br />
include a hook, replace the<br />
fence.<br />
3 Remove the card.<br />
4 Remove the two card<br />
fence screws.<br />
5 Remove the old fence.<br />
6 Install the replacement<br />
fence on the card.<br />
Note: If the Ethernet card<br />
fence does <strong>not</strong> include a hook<br />
<strong>and</strong> is riveted onto the card,<br />
replace the card.
Upgrades Communications Card Installation - 15<br />
Logic Board<br />
Fence<br />
Hook<br />
Card connector<br />
Communication slot<br />
7 Insert the card connector<br />
into the communications<br />
slot.<br />
Note: Be sure the hook<br />
remains against the<br />
outside of the logic<br />
board fence.<br />
8 Reset the logic board<br />
following the procedure<br />
in “Logic Board Reset”<br />
in the Additional<br />
Procedures chapter.
Upgrades External Video Connector - 16<br />
External Video<br />
Connector<br />
Before you begin, remove<br />
the following:<br />
• I/O door<br />
• Logic board<br />
Caution: Review the ESD<br />
precautions in Bulletins/<br />
Safety.
Upgrades External Video Connector - 17<br />
External Video Connector<br />
Ribbon Cable with Card <strong>and</strong><br />
Connector<br />
Metal Access Shield<br />
Plastic Access Cover<br />
Jack Nuts<br />
Note: The Apple External<br />
Video Connector provides<br />
“mirroring” or display of<br />
the system’s monitor<br />
screen on a presentation<br />
screen. In addition to the<br />
ribbon cable with card <strong>and</strong><br />
the connector, the Apple<br />
External Video Connector<br />
kit includes a metal access<br />
shield, a plastic access<br />
cover, <strong>and</strong> two jack nuts.
External<br />
Video<br />
Connector<br />
Port<br />
Upgrades External Video Connector - 18<br />
Metal Access<br />
Shield<br />
Plastic<br />
Access<br />
Cover<br />
Logic Board<br />
Fence External<br />
Video Slot<br />
1 Remove the plastic<br />
access cover from the<br />
logic board fence.<br />
2 Lift the metal access<br />
shield up <strong>and</strong> out.
Upgrades External Video Connector - 19<br />
External Video Connector<br />
Connector<br />
Slotted Metal<br />
Access Shield<br />
External<br />
Video<br />
Connector<br />
Port<br />
Jack Nuts<br />
Slotted<br />
Plastic<br />
Access<br />
Cover<br />
External<br />
Video Slot<br />
Card<br />
3 Insert the slotted metal<br />
access shield that came<br />
with the External Video<br />
Connector kit.<br />
Note: Make sure the<br />
bottom of the metal<br />
shield engages the two<br />
small hooks on the logic<br />
board fence.<br />
4 Insert the card at the end<br />
of the ribbon cable into<br />
the external video slot on<br />
the logic board.<br />
Note: The pins will fit<br />
only one way; do <strong>not</strong><br />
force them.
Upgrades External Video Connector - 20<br />
External Video Connector<br />
Connector<br />
Slotted Metal<br />
Access Shield<br />
External<br />
Video<br />
Connector<br />
Port<br />
Jack Nuts<br />
Slotted<br />
Plastic<br />
Access<br />
Cover<br />
External<br />
Video Slot<br />
Card<br />
5 Insert the connector end<br />
of the ribbon cable<br />
through the slotted<br />
opening of the shield <strong>and</strong><br />
fence.<br />
6 Secure it with the jack<br />
nuts.<br />
Note: Fold the ribbon<br />
cable to avoid crimping.<br />
7 Insert the slotted plastic<br />
access cover that came<br />
with the kit.<br />
Caution: The external video<br />
connector cable can<br />
sometimes rise up <strong>and</strong><br />
contact the exposed blades of
Upgrades External Video Connector - 21<br />
the fan, which causes a<br />
rattling sound. To avoid this,<br />
be sure to fold or press the<br />
cable down flat.
Upgrades L2 Cache Installation - 22<br />
Notches<br />
Logic Board<br />
L2 Cache Slot<br />
L2 Cache Card<br />
L2 Cache<br />
Installation<br />
Before you begin, remove<br />
the following:<br />
• I/O door<br />
• Logic board<br />
Caution: Review the ESD<br />
precautions in Bulletins/<br />
Safety.<br />
Align the <strong>not</strong>ches in the L2<br />
cache card with the small<br />
ribs inside the L2 cache slot.<br />
Snap the card into place on<br />
the logic board.
Upgrades LC PDS Card Installation - 23<br />
Fence<br />
Access<br />
Cover<br />
LC PDS Card<br />
LC PDS Port<br />
LC PDS Slot<br />
Logic Board<br />
LC PDS Card<br />
Installation<br />
Before you begin, remove<br />
the following:<br />
• I/O door<br />
• Logic board<br />
Caution: Review the ESD<br />
precautions in Bulletins/<br />
Safety.<br />
1 Remove the access cover<br />
from the LC PDS port.<br />
2 Angle the connector end<br />
of the LC PDS card into<br />
the LC PDS port, <strong>and</strong><br />
snap the card into place.
K Service Source<br />
Additional Procedures<br />
<strong>Power</strong> <strong>Macintosh</strong>/<strong>Performa</strong> <strong>5200</strong><br />
<strong>and</strong> <strong>5300</strong> (<strong>not</strong> 5260, 5280)
Logic<br />
Board<br />
Fence<br />
Additional Procedures Battery Verification - 1<br />
Battery<br />
Battery<br />
Verification<br />
Before you begin, remove<br />
the following:<br />
• I/O door<br />
• Logic board<br />
• Battery<br />
Caution: Review the ESD<br />
precautions in Bulletins/<br />
Safety.
Additional Procedures Battery Verification - 2<br />
Negative<br />
Probe<br />
Negative<br />
Battery<br />
Connector<br />
Positive<br />
Probe<br />
Positive<br />
1 Set the voltmeter to the<br />
10 V DC scale.<br />
2 Hold the positive probe<br />
of the voltmeter to the<br />
positive end of the<br />
battery <strong>and</strong> the negative<br />
probe to the negative<br />
end of the battery.<br />
3 If the battery voltage is<br />
below 3.0 V, replace the<br />
battery. Refer to<br />
“Battery Replacement”<br />
in this chapter.
Logic<br />
Board<br />
Fence<br />
Additional Procedures Battery Replacement - 3<br />
Battery<br />
Battery<br />
Replacement<br />
Before you begin, remove<br />
the following:<br />
• I/O door<br />
• Logic board<br />
Caution: Review the ESD<br />
precautions in Bulletins/<br />
Safety.
Additional Procedures Battery Replacement - 4<br />
1 Pull up <strong>and</strong> disconnect<br />
the connector.<br />
2 Pull up <strong>and</strong> remove the<br />
battery from its hook<strong>and</strong>-loop<br />
base.
Logic<br />
Board<br />
Fence<br />
Additional Procedures Logic Board Reset - 5<br />
Battery<br />
Logic Board Reset<br />
Before you begin, remove<br />
the following:<br />
• <strong>Power</strong> cord<br />
• I/O door<br />
• Logic board<br />
Caution: Review the ESD<br />
precautions in Bulletins/<br />
Safety.
Additional Procedures Logic Board Reset - 6<br />
1 Pull up <strong>and</strong> disconnect<br />
the connector.<br />
2 Pull up <strong>and</strong> remove the<br />
battery from its hook<strong>and</strong>-loop<br />
base.<br />
3 Wait 5 to10 minutes,<br />
<strong>and</strong> then replace battery.
Additional Procedures Logic Board Reset - 7<br />
4 Align the logic board at<br />
an upward angle to clear<br />
EMI clips.<br />
5 Fully seat the logic board<br />
in the enclosure.<br />
6 Replace the I/O door <strong>and</strong><br />
power cable.<br />
Note: This procedure resets<br />
PRAM. Be sure to check the<br />
computer’s time/date <strong>and</strong><br />
other system parameter<br />
settings.
Additional Procedures Logic Board Reset - 8<br />
Note: If this procedure<br />
resolves the problem, claim<br />
an adjustment on an SRO. If<br />
<strong>not</strong>, replace defective<br />
component <strong>and</strong> do <strong>not</strong> claim<br />
the adjustment.
K Service Source<br />
REA Procedures<br />
<strong>Power</strong> <strong>Macintosh</strong>/<strong>Performa</strong> <strong>5200</strong><br />
<strong>and</strong> <strong>5300</strong> (<strong>not</strong> 5260, 5280)
REA Procedures Repair Overview for Freezing <strong>and</strong> Video Color Hue Issues - 1<br />
Repair Overview for Freezing <strong>and</strong><br />
Video Color Hue Issues<br />
These procedures describe repairs for system freezes <strong>and</strong><br />
sudden changes in video color hue on the <strong>Power</strong> <strong>Macintosh</strong>/<br />
<strong>Performa</strong> 52xx, 53xx computers (except the 5260 <strong>and</strong><br />
5280).
REA Procedures Repair Overview for Freezing <strong>and</strong> Video Color Hue Issues - 2<br />
<strong>Power</strong> Mac/<strong>Performa</strong> 52xx, 53xx<br />
Perform these steps for <strong>Power</strong> <strong>Macintosh</strong>/<strong>Performa</strong> 52xx,<br />
53xx computers exhibiting system freezes:<br />
• Note the unit’s external cable hookups.<br />
• Remove the I/O door.<br />
• Remove the logic board.<br />
• If the clock chip at U10 is <strong>not</strong> p/n 343S1191 or<br />
343S1121, replace the logic board. (Ignore any letters<br />
following the part number.)<br />
• If the Cache/ROM DIMM is laid out exactly as illustrated<br />
<strong>and</strong> has no sticker on the middle vertical IC, replace the<br />
DIMM.<br />
• If an Ethernet card is installed <strong>and</strong> the card fence doesn’t<br />
hook onto the logic board fence, replace the card fence.<br />
• If you are <strong>not</strong> replacing the logic board, replace the EMI<br />
clips.<br />
• Upgrade RAM for U.S. <strong>and</strong> Canadian Education customers.
REA Procedures Repair Overview for Freezing <strong>and</strong> Video Color Hue Issues - 3<br />
Continue with these steps on <strong>Power</strong> <strong>Macintosh</strong>/<strong>Performa</strong><br />
52xx <strong>and</strong> 53xx computers that exhibit sudden or intermittent<br />
changes in video color hue:<br />
• Remove the rear housing.<br />
• Remove the rear EMI shield.<br />
• Discharge the CRT.<br />
• Remove the anode cap.<br />
• Cut the adhesive holding the video board to the CRT <strong>and</strong><br />
pull off the video board.<br />
• Tilt back the analog board <strong>and</strong> shield.<br />
• Replace the internal RGB cable.<br />
Note: Following all repairs, test, reassemble, <strong>and</strong> label the<br />
unit. For U.S. <strong>and</strong> Canadian <strong>Power</strong> <strong>Macintosh</strong> Education<br />
customers, install System 7.5.3.
REA Procedures Repair Overview for Freezing <strong>and</strong> Video Color Hue Issues - 4<br />
Why Replace the Logic Board/ROM DIMM?<br />
Replacing the logic board or Cache/ROM DIMM addresses<br />
known component issues that can cause system freezes (the<br />
system clock stops <strong>and</strong> moving the mouse does <strong>not</strong> move the<br />
cursor).<br />
Note: Freezes due to Type 11 errors should be addressed<br />
through a clean install of system software or by updating<br />
third-party software.<br />
Why Replace the EMI Clips?<br />
Replacing the EMI clips prevents possible damage to the<br />
logic board during the installation of expansion boards.
REA Procedures Repair Overview for Freezing <strong>and</strong> Video Color Hue Issues - 5<br />
Why Replace the Ethernet Card Fence?<br />
Installing a hooked fence on the Ethernet card provides a way<br />
to hold the card more securely in the communications slot.<br />
Without the hooked fence, the card could rock out of the slot<br />
<strong>and</strong> cause intermittent network connection.
REA Procedures Repair Overview for Freezing <strong>and</strong> Video Color Hue Issues - 6<br />
Why Replace the Internal RGB Cable?<br />
Replacing the internal RGB cable addresses sudden or<br />
intermittent changes in the monitor’s color hue.<br />
Note: If more than 10 percent of units at one location are<br />
exhibiting video color hue issues, the internal RGB cables in<br />
all units should be replaced. Education customers have been<br />
instructed to tape the word “color” to the back of any units<br />
with color hue issues.<br />
Note: If the monitor exhibits a consistent color hue after the<br />
internal RGB cable has been replaced, the analog board<br />
should be replaced.
REA Procedures System Tester - 7<br />
System Tester<br />
The diagnostic application 5XXX/6XXX Tester, which is<br />
included in the Utilities folder on the <strong>Macintosh</strong> 5xxx, 6xxx<br />
System 7.5 v 2.0 Update Service CD, tests for known<br />
component issues causing system freezes in <strong>Power</strong><br />
<strong>Macintosh</strong>/<strong>Performa</strong> 5xxx/6xxx computers. The<br />
application does <strong>not</strong> test for video color hue issues.<br />
When the application finds a problem with a unit, it displays<br />
one of the following two messages:<br />
The logic board has been checked <strong>and</strong> a potential issue<br />
has been found. Please contact Apple Customer Support<br />
or an Apple Authorized Service Provider to have the<br />
logic board replaced as part of the repair extension<br />
program.
REA Procedures System Tester - 8<br />
A potential issue with the Cache has been found. Please<br />
contact Apple Customer Support or an Apple Authorized<br />
Service Provider to have the Cache replaced as part of<br />
the repair extension program.<br />
If the application finds no problem with a unit, it displays<br />
this message:<br />
The logic board has been checked <strong>and</strong> none of the<br />
specific, known hardware issues that are covered under<br />
this program were found. If you are experiencing<br />
problems, we recommend that you verify that any<br />
software applications you are using are compatible<br />
with your computer. You can do this by contacting the<br />
developer of the software. You should also follow the<br />
procedures described in the troubleshooting section of<br />
the User’s Guide to reduce any freezing issues you are<br />
experiencing.
REA Procedures System Tester - 9<br />
You or a customer may run 5XXX/6XXX Tester on units<br />
before you make onsite repair calls, so you can better<br />
estimate the number of logic boards <strong>and</strong> Cache/ROM DIMM<br />
cards to stock <strong>and</strong> transport.
REA Procedures Part Numbers - 10<br />
Part Numbers<br />
Use the following part numbers when ordering replacement<br />
parts included in these procedures:<br />
Logic Board, 603/75 MHz, 8-Bit Sound 661-0931<br />
Logic Board, 603/75 MHz, 16-Bit Sound 661-1008<br />
Logic Board, 603E/100 MHz 661-1041<br />
Cache/ROM DIMM 661-1278<br />
EMI Clips (Pkg. of 25) 922-2320<br />
Fence for Ethernet 10Base-T Card (Pkg. of 2) 922-2329<br />
Fence for Ethernet Thin Coax Card (Pkg. of 2) 922-2330<br />
Fence for Ethernet AAUI Card (Pkg. of 2) 922-2441<br />
Ethernet 10Base-T Card 661-0888<br />
Ethernet AAUI Card 661-0889<br />
Internal RGB Cable 922-2357<br />
SIMM, DRAM, 4 MB, 80 ns, 72-Pin, EDU 922-2397
REA Procedures Part Numbers - 11<br />
System 5xxx, 6xxx Update CD 600-4454<br />
REA Label (Logic Board Repair, Pkg. of 100) 922-2396<br />
VID Label (Logic Board <strong>and</strong> Video Repair,<br />
Pkg. of 100) 922-2395
REA Procedures Before You Begin - 12<br />
Before You Begin<br />
Before you begin the repair procedures,<br />
• Note the unit’s external cable hookups (onsite).<br />
• Start up any U.S. or Canadian Education customer’s<br />
<strong>Power</strong> <strong>Macintosh</strong> 53xx computer <strong>and</strong> check the Total<br />
Memory in the About <strong>Macintosh</strong> selection under the File<br />
menu. If there is more than 8 MB RAM installed, do <strong>not</strong><br />
perform the RAM Upgrade procedure, step 23.<br />
• Turn off the power.<br />
• Disconnect the external <strong>and</strong> power cables (onsite).<br />
• Put on a grounding wriststrap.
REA Procedures Repair Procedures - 13<br />
I/O Door<br />
Repair Procedures<br />
Remove the 52xx, 53xx<br />
I/O Door<br />
1 Remove the two screws.<br />
2 Using your fingertips,<br />
release the two latches.<br />
3 Swing the door up <strong>and</strong> off<br />
the unit.<br />
Replacement Note: Align the<br />
I/O door hinge tabs <strong>and</strong> slide<br />
the door up into position.
REA Procedures Repair Procedures - 14<br />
ROM DIMM<br />
No Sticker<br />
Logic Board<br />
Chip at<br />
U10<br />
Inspect the Logic<br />
Board<br />
4 Grasp the logic board<br />
h<strong>and</strong>le <strong>and</strong> pull out the<br />
logic board.<br />
5 Inspect the clock chip at<br />
location U10. If it is <strong>not</strong><br />
printed with part<br />
number 343S1191 or<br />
343S1121 (ignore any<br />
letters following the<br />
part number), replace<br />
the logic board. Go to<br />
step 13.<br />
Note: The 5XXX/6XXX<br />
Tester will report that
REA Procedures Repair Procedures - 15<br />
ROM DIMM<br />
No Sticker<br />
Logic Board<br />
Chip at<br />
U10<br />
an issue has been found<br />
with the logic board.<br />
6 Inspect the Cache/ROM<br />
DIMM. If it is laid out<br />
exactly as shown in the<br />
illustration on this page,<br />
<strong>and</strong> does <strong>not</strong> include a<br />
sticker on the center<br />
chip, replace the DIMM.<br />
Otherwise, go to step 23.<br />
Note: The 5XXX/6XXX<br />
Tester will report that<br />
an issue has been found<br />
with the Cache/ROM<br />
DIMM.
REA Procedures Repair Procedures - 16<br />
ROM<br />
DIMM<br />
Replace the Cache/<br />
ROM DIMM<br />
7 Hold each end of the<br />
Cache/ROM DIMM<br />
between the thumb <strong>and</strong><br />
forefinger of each h<strong>and</strong>.<br />
Note: You may hold the<br />
DIMM by the chips.<br />
8 Using some force, pull<br />
the DIMM straight up out<br />
of its slot.<br />
9 Hold the logic board<br />
vertically with the<br />
communications slot end<br />
of the board resting on<br />
your workspace.
REA Procedures Repair Procedures - 17<br />
ROM<br />
DIMM<br />
10 Insert the replacement<br />
Cache/ROM DIMM into<br />
the DIMM slot.<br />
Caution: Make sure the<br />
<strong>not</strong>ches in the DIMM<br />
line up with the pegs in<br />
the DIMM slot.<br />
11 Bracing the underside of<br />
the logic board with your<br />
fingertips, use both<br />
thumbs to press down on<br />
the top edge of the DIMM<br />
until you hear it snap<br />
into place.<br />
12 Go to step 23.
REA Procedures Repair Procedures - 18<br />
Replace the Logic<br />
Board<br />
Perform steps 13-16 only<br />
if you are replacing the logic<br />
board.<br />
Note: Replacement logic<br />
boards come without a<br />
fence. When replacing a<br />
logic board, remove the<br />
fence from the old board <strong>and</strong><br />
reinstall it on the<br />
replacement board.
Fence<br />
REA Procedures Repair Procedures - 19<br />
Extended<br />
Hex Nuts<br />
Phillip Screws<br />
Logic Board<br />
13 Remove the two Phillips<br />
screws that secure the<br />
fence to the solder side of<br />
the logic board.<br />
14 Remove the two hex nuts<br />
that secure the logic<br />
board fence to the SCSI<br />
connector.<br />
15 Remove the logic board<br />
fence from the old logic<br />
board <strong>and</strong> reinstall it on<br />
the replacement board.<br />
16 Plug in the logic board<br />
battery.
REA Procedures Repair Procedures - 20<br />
Note: Be sure to transfer<br />
any SIMMs or expansion<br />
cards from the old board to<br />
the replacement board. (See<br />
“Transfer the Double-Sided<br />
DRAM SIMM,” steps 17-<br />
22, “Upgrade RAM for<br />
Education Customers,” step<br />
23, <strong>and</strong> “Replace the<br />
Ethernet Card Fence,” steps<br />
24-28.) Do <strong>not</strong> transfer the<br />
Cache/ROM DIMM to the<br />
replacement board; return<br />
the old board with its Cache/<br />
ROM DIMM installed.
REA Procedures Repair Procedures - 21<br />
Heat Sink<br />
Tabs<br />
Logic Board<br />
Heat Sink<br />
Tab<br />
Transfer the Double-<br />
Sided DRAM SIMM<br />
Perform steps 17-22 if you<br />
are replacing the logic board<br />
<strong>and</strong> a double-sided DRAM<br />
SIMM is installed next to a<br />
processor heat sink. (Some<br />
logic boards do <strong>not</strong> include a<br />
processor heat sink.)<br />
Caution: Be careful <strong>not</strong> to<br />
disturb the layer of thermal<br />
grease on the bottom of the<br />
heat sink <strong>and</strong> the top of the<br />
processor chip.<br />
17 Release the four heat<br />
sink tabs from the
REA Procedures Repair Procedures - 22<br />
Heat Sink<br />
Double-Sided<br />
SIMM<br />
underside of the old<br />
logic board.<br />
18 Remove the heat sink.<br />
19 Remove the doublesided<br />
SIMM next to the<br />
processor.<br />
20 Remove the heat sink<br />
from the replacement<br />
logic board.<br />
21 Install the SIMM next to<br />
the processor on the<br />
replacement board.<br />
22 Reinstall the heat sinks<br />
on both boards.
REA Procedures Repair Procedures - 23<br />
Upgrade RAM for Education Customers<br />
Perform step 23 if you are installing System 7.5.3 on a U.S.<br />
or Canadian Education customer’s unit <strong>and</strong> the unit has 8 MB<br />
RAM installed. (See “Before You Begin.”)<br />
23 Install a 4 MB DRAM SIMM (part number 922-2397)<br />
in the empty DRAM SIMM slot.<br />
Note: The Desktop Repair Extension Program is intended to<br />
address specific hardware issues. Due to the unique needs of<br />
public <strong>and</strong> private nonprofit educational institutions, Apple<br />
is performing some additional services above <strong>and</strong> beyond the<br />
repair extension program. Specifically, to meet the<br />
requirements of certain solutions bundles sold to public <strong>and</strong><br />
private nonprofit educational institutions, Apple is<br />
installing System 7.5.3 <strong>and</strong> additional RAM.
REA Procedures Repair Procedures - 24<br />
Logic<br />
Board<br />
Fence<br />
Card<br />
Fence<br />
Hook<br />
Ethernet Card<br />
Replace the Ethernet<br />
Card Fence<br />
Perform steps 24-28 if an<br />
Apple Ethernet card is<br />
installed on the logic board<br />
(whether or <strong>not</strong> you are<br />
replacing the logic board).<br />
Note on ordering <strong>and</strong> claims<br />
procedures: Do <strong>not</strong> enter the<br />
part number for the card<br />
fence on the SRO.
REA Procedures Repair Procedures - 25<br />
Fence<br />
Mounting<br />
Screws<br />
Fence<br />
End-Mount Fence<br />
Mounting<br />
Screws<br />
Side-Mount Fence<br />
24 Inspect the metal fence<br />
on the Ethernet card.<br />
25 If the card fence hooks<br />
onto the logic board<br />
fence, go to step 29.<br />
26 If the card fence does <strong>not</strong><br />
hook onto the board fence<br />
<strong>and</strong> the card fence is<br />
riveted onto the card,<br />
replace the card.<br />
27 If the card fence does <strong>not</strong><br />
have a hook <strong>and</strong> is<br />
screwed onto the card:<br />
– Remove the card.<br />
– Remove the two card<br />
fence screws.<br />
– Remove the old fence.
REA Procedures Repair Procedures - 26<br />
Hook the card<br />
to the logic<br />
board fence<br />
Hook<br />
Communication<br />
Slot<br />
Ethernet Card<br />
Connector<br />
– Install the replacement<br />
fence on the card.<br />
28 Hook the Ethernet card<br />
fence onto the logic board<br />
fence <strong>and</strong> insert the card<br />
into the communication<br />
slot.
REA Procedures Repair Procedures - 27<br />
Replace the EMI Clips<br />
If you are retaining the original<br />
logic board, you must replace<br />
the board’s three EMI clips<br />
(ground clips). Perform steps<br />
29-32 only if you are <strong>not</strong><br />
replacing the board.<br />
Note on ordering <strong>and</strong> claims<br />
procedures: Please claim part<br />
number 011-0156 when you<br />
replace the EMI clips but do <strong>not</strong><br />
replace the logic board. Do <strong>not</strong><br />
enter the part number for<br />
the clips on the SRO.
REA Procedures Repair Procedures - 28<br />
Logic Board<br />
Squeeze<br />
clip<br />
<strong>and</strong><br />
push<br />
through<br />
board<br />
29 With the logic board<br />
facing right side up,<br />
squeeze together the top<br />
of each EMI clip <strong>and</strong> push<br />
it out through the slot.
REA Procedures Repair Procedures - 29<br />
Bottom of<br />
Logic<br />
Board<br />
Clip<br />
Opening<br />
Clip<br />
Base<br />
30 Turn the logic board<br />
underside facing up.<br />
Orient the first clip with<br />
its open end facing the<br />
logic board fence.<br />
31 Insert the clip into the<br />
slot <strong>and</strong> press firmly on<br />
the clip base until you<br />
hear it snap into place.<br />
Repeat the procedure<br />
for the other two clips.<br />
32 Continue with the steps<br />
on the following page.
REA Procedures Repair Procedures - 30<br />
Remove the Rear<br />
Housing<br />
Perform steps 33-53 if<br />
individual customers report<br />
video color hue issues with<br />
their Rev. A units. If more<br />
than 10 percent of units at<br />
one location are exhibiting<br />
video color hue issues, perform<br />
steps 33-53 on all<br />
units. Otherwise, go to step<br />
54.<br />
Note: Education customers<br />
have been instructed to tape<br />
the word “color” to the back
REA Procedures Repair Procedures - 31<br />
Anode Cap<br />
<strong>and</strong> Aperture<br />
of any units exhibiting<br />
color hue issues.<br />
±Warning: The <strong>Power</strong><br />
<strong>Macintosh</strong>/<strong>Performa</strong> 52xx<br />
<strong>and</strong> 53xx computers contain<br />
high voltage <strong>and</strong> highvacuum<br />
picture tubes. To<br />
prevent serious injury, do<br />
<strong>not</strong> touch the anode cap <strong>and</strong><br />
aperture.
REA Procedures Repair Procedures - 32<br />
Rear Housing<br />
Screws<br />
33 Pry off the two screw<br />
covers on each side of the<br />
rear housing.<br />
Tip: Pry up from the<br />
rear edge of the screw<br />
cover.<br />
34 Remove the three torx<br />
screws on each side of<br />
the rear housing.<br />
35 Slide the rear housing<br />
back <strong>and</strong> off the unit.
REA Procedures Repair Procedures - 33<br />
Internal<br />
RGB Cable<br />
Inspect the Internal<br />
RGB Cable<br />
36 Inspect the internal RGB<br />
cable connecting the<br />
video board at P301 to<br />
the analog board at<br />
P703.
REA Procedures Repair Procedures - 34<br />
P703<br />
Analog Board<br />
Internal<br />
RGB Cable<br />
P301<br />
Video Board<br />
37 If the cable includes<br />
white tape between the<br />
two ferrite beads, you<br />
do <strong>not</strong> need to replace the<br />
cable. You are now<br />
finished with the<br />
necessary hardware<br />
repairs. Go to step 54.
Screws<br />
REA Procedures Repair Procedures - 35<br />
Rear EMI<br />
Shield<br />
Remove the Rear EMI<br />
Shield<br />
38 Remove the four screws<br />
from the rear shield.<br />
39 Swivel the rear shield<br />
up <strong>and</strong> lift it off the unit.<br />
Replacement Note:<br />
Insert the two corner<br />
hinge tabs into the slots<br />
of the power supply <strong>and</strong><br />
analog board shields.<br />
Then swing down the<br />
rear shield.
REA Procedures Repair Procedures - 36<br />
Chassis<br />
Discharge Tool<br />
Anode Cap<br />
<strong>and</strong> Aperture<br />
Discharge the CRT<br />
±Warning: To lessen the<br />
chance of electrical shock,<br />
always discharge the CRT<br />
before working on it.<br />
±Warning: Never discharge<br />
the CRT while<br />
wearing a grounding<br />
wriststrap.<br />
40 Remove your grounding<br />
wriststrap.<br />
41 Attach the clip of the CRT<br />
discharge tool to the<br />
unit’s metal chassis.
REA Procedures Repair Procedures - 37<br />
42 Slide the discharge tool<br />
probe under the anode<br />
cap <strong>and</strong> touch the probe<br />
to the anode aperture.<br />
43 Remove the anode cap.<br />
44 Put your grounding<br />
wriststrap back on.
REA Procedures Repair Procedures - 38<br />
Grounding<br />
Cables<br />
Video<br />
Board<br />
Pull off the Video<br />
Board<br />
In this procedure you pull<br />
the video board off the CRT<br />
so you can reach the internal<br />
RGB cable; you do <strong>not</strong> need to<br />
remove the video board<br />
completely from the unit.<br />
45 Remove the two long<br />
grounding cables from<br />
the video board.<br />
46 lf adhesive secures the<br />
video board to the CRT,<br />
cut <strong>and</strong> peel it off before<br />
removing the board.
REA Procedures Repair Procedures - 39<br />
47 Gently pull the video<br />
board off the CRT.<br />
Replacement Note:<br />
When you reinstall the<br />
video board, make sure<br />
it is fully seated against<br />
the CRT.
REA Procedures Repair Procedures - 40<br />
Analog<br />
Board<br />
Mounting<br />
Screws<br />
Tilt Back the Analog<br />
Board <strong>and</strong> Shield<br />
In this procedure you tilt<br />
the analog board <strong>and</strong> shield<br />
back from the CRT so you can<br />
reach the internal RGB<br />
cable; you do <strong>not</strong> need to<br />
remove the analog board<br />
completely from the unit.<br />
48 Remove the three analog<br />
board mounting screws.<br />
Note: The location of<br />
the mounting screws<br />
may vary slightly in<br />
some units.
REA Procedures Repair Procedures - 41<br />
Video Board<br />
Analog<br />
Board<br />
CRT Frame<br />
Channel<br />
Chassis<br />
Tab<br />
Chassis<br />
Slot<br />
Analog Board Shield<br />
49 Lift up the end of the<br />
analog board facing the<br />
back of the unit, <strong>and</strong><br />
disengage the analog<br />
board shield from the<br />
chassis tabs <strong>and</strong> slot.<br />
50 Lift the analog board <strong>and</strong><br />
shield from the CRT<br />
frame channel.<br />
Replacement Note: Be<br />
sure the bottom edge of<br />
the analog board <strong>and</strong><br />
shield is positioned in<br />
the CRT frame channel.<br />
51 Tilt the analog board <strong>and</strong><br />
shield away from the<br />
CRT.
REA Procedures Repair Procedures - 42<br />
P703<br />
Analog Board<br />
P301<br />
Video Board<br />
Replace the Internal<br />
RGB Cable<br />
52 Disconnect the internal<br />
RGB cable at the P703<br />
connector on the analog<br />
board <strong>and</strong> at the P301<br />
connector on the video<br />
board.<br />
Note: You may need to<br />
pry up one or both<br />
ferrite beads if they are<br />
glued to the chassis.<br />
53 Install the replacement<br />
cable.
REA Procedures Repair Procedures - 43<br />
Note: You are now finished<br />
with the necessary hardware<br />
repairs. Continue with the<br />
steps on the following page.
REA Procedures Repair Procedures - 44<br />
Test, Reassemble, <strong>and</strong><br />
Label the Unit<br />
54 Plug in the unit, start it<br />
up, <strong>and</strong> check the<br />
display. If it still<br />
exhibits a consistent<br />
color hue, <strong>and</strong> you have<br />
already replaced the<br />
internal RGB cable, shut<br />
down the unit <strong>and</strong><br />
replace the analog<br />
board. (For detailed<br />
take-apart<br />
instructions, see the<br />
Take Apart chapter.<br />
55 Reassemble the unit.
REA Procedures Repair Procedures - 45<br />
Label<br />
Location<br />
56 If you are repairing the<br />
unit onsite, reconnect<br />
the external cables.<br />
57 Verify that the unit<br />
starts up correctly.<br />
58 Apply the REA label<br />
(part number 922-<br />
2396) above the FCC ID<br />
number on the back of<br />
the unit.<br />
59 If you have inspected<br />
<strong>and</strong>/or replaced the<br />
internal RGB cable (with<br />
or without replacing the<br />
logic board), apply the<br />
VID label (part number<br />
922-2395) above the
REA Procedures Repair Procedures - 46<br />
FCC ID number on the<br />
back of the unit.<br />
Note: If the labels are <strong>not</strong><br />
available, write the letters<br />
“REA” or “VID” in the<br />
designated area on the back<br />
of the unit.
REA Procedures Install System 7.5.3 - 47<br />
Install System 7.5.3<br />
Perform the following procedures for installing System<br />
7.5.3 for Education <strong>Power</strong> <strong>Macintosh</strong> customers only,<br />
unless customers specifically request no installation.<br />
Note: Give the <strong>Macintosh</strong> 5xxx, 6xxx System 7.5 v 2.0<br />
Update Service CD to <strong>Performa</strong> customers so they can<br />
perform their own installation.<br />
1 Start up the unit.<br />
2 Insert the <strong>Macintosh</strong> 5xxx, 6xxx System 7.5 v 2.0<br />
Update Service CD in the CD-ROM drive.<br />
3 Restart the unit while holding down the C key.<br />
4 Release the C key when you see the Welcome screen.<br />
Note: You will automatically be routed to the Disk First<br />
Aid screen.
REA Procedures Install System 7.5.3 - 48<br />
5 Highlight the Hard Drive icon <strong>and</strong> select Repair.<br />
6 When the unit’s hard drive has been checked (<strong>and</strong><br />
repaired, if necessary), select Quit from the File menu.<br />
Note: If the program returns the message that the<br />
drive could <strong>not</strong> be repaired, stop installation <strong>and</strong><br />
instruct the customer to back up the drive, format it,<br />
<strong>and</strong> reinstall the software.<br />
7 Double-click the System Mover Script icon (Path:<br />
Utilities folder: AppleScripts folder: System Mover<br />
Script folder: System Mover Script).<br />
Important: Do <strong>not</strong> run the System Mover Script on<br />
<strong>Performa</strong> computers; it is designed to work only on<br />
<strong>Power</strong> <strong>Macintosh</strong> 52xx/53xx/62xx/63xx computers.<br />
Note: System Mover Script automatically installs<br />
System 7.5.3 on the unit’s hard drive. It saves a copy of<br />
non-Apple Preferences, Extensions, Control Panels,
REA Procedures Install System 7.5.3 - 49<br />
<strong>and</strong> other non-Apple system files in a folder called<br />
“System Folder (disabled)” <strong>and</strong> then replaces the<br />
existing System Folder.<br />
8 When the System Mover Script finishes installing,<br />
follow the instructions on the screen.<br />
9 When you have finished the full installation, return the<br />
unit to the customer along with the CD. Remind the customer<br />
to follow the instructions in the Read Me document<br />
that appears the first time the system starts up.
K Service Source<br />
Adjustments<br />
<strong>Power</strong> <strong>Macintosh</strong>/<strong>Performa</strong><br />
<strong>5200</strong> <strong>and</strong> <strong>5300</strong> (<strong>not</strong> 5260, 5280)
<strong>5200</strong>/<strong>5300</strong> Adjustments (<strong>not</strong> for 5260, 5280) Light Meter Setup - 1<br />
Side<br />
Switch<br />
Scale<br />
Lens<br />
DIN ASA<br />
2 3 4 5 6 7 8 9 10<br />
Read<br />
Button<br />
Red Area<br />
Light Meter Setup<br />
Model L-248<br />
Note: This topic covers<br />
setup for two light meters:<br />
Models L-248 <strong>and</strong> 246.<br />
1 Press the red button on<br />
the back of the light<br />
meter to check the<br />
battery.<br />
2 If the reading is out of<br />
the red area, replace the<br />
battery.<br />
3 Move the side switch to<br />
its upper position so that
<strong>5200</strong>/<strong>5300</strong> Adjustments (<strong>not</strong> for 5260, 5280) Light Meter Setup - 2<br />
the scale reads 10<br />
through 18.<br />
4 Uncover the lens of the<br />
meter.<br />
5 Place the lens against the<br />
middle of the screen <strong>and</strong><br />
press the read button to<br />
read the scale.
<strong>5200</strong>/<strong>5300</strong> Adjustments (<strong>not</strong> for 5260, 5280) Light Meter Setup - 3<br />
Lens<br />
Model 246<br />
1 Remove the metal slide,<br />
if installed, from the<br />
top of the light meter.<br />
2 Install the white lens<br />
with the red dot.<br />
3 Rotate the lens of the<br />
meter to face the<br />
monitor.<br />
4 Place the lens against the<br />
middle of the screen <strong>and</strong><br />
read the scale.
<strong>5200</strong>/<strong>5300</strong> Adjustments (<strong>not</strong> for 5260, 5280) Geometry - 4<br />
Yoke <strong>and</strong><br />
Wires<br />
Anode Cap<br />
Aperture <strong>and</strong><br />
Anode Wires<br />
Flyback<br />
Transformer<br />
Geometry<br />
Before you begin, remove<br />
the rear housing.<br />
±Warning: This product<br />
contains high voltage <strong>and</strong> a<br />
high-vacuum picture tube.<br />
To prevent serious injury,<br />
review CRT safety in<br />
Bulletins/Safety.<br />
±Warning: Do <strong>not</strong> use<br />
metal alignment tools—they<br />
are a shock hazard.
<strong>5200</strong>/<strong>5300</strong> Adjustments (<strong>not</strong> for 5260, 5280) Geometry - 5<br />
VR305 VR304<br />
Adjustment Controls<br />
Focus Control<br />
CRT Video Board<br />
VR303 VR302 VR301<br />
Screen Control<br />
Flyback<br />
Transformer<br />
Adjustment<br />
Controls<br />
VR601<br />
VR701<br />
SW701<br />
Note: The controls on this<br />
monitor require a small<br />
plastic Phillips-head tool or<br />
a small plastic flat-head tool<br />
to make adjustments.
<strong>5200</strong>/<strong>5300</strong> Adjustments (<strong>not</strong> for 5260, 5280) Geometry - 6<br />
SW701<br />
(backside<br />
of controls)<br />
Adjustment<br />
Controls<br />
VR701<br />
Run<br />
Display Service<br />
Utility<br />
All-White Screen<br />
Horizontal Shift<br />
1 Run Display Service<br />
Utility from the Utilities<br />
folder of the MacTest Pro<br />
CD to display the All-<br />
White Screen.<br />
2 Using a flat-blade<br />
plastic tool, adjust the<br />
horizontal shift control<br />
(VR701) until the<br />
raster is centered.
<strong>5200</strong>/<strong>5300</strong> Adjustments (<strong>not</strong> for 5260, 5280) Geometry - 7<br />
SW701<br />
(backside<br />
of controls)<br />
Adjustment<br />
Controls<br />
VR701<br />
Run<br />
Display Service<br />
Utility<br />
All-White Screen<br />
3 If necessary, use a<br />
plastic tool to reposition<br />
the arm of the horizontal<br />
centering switch<br />
(SW701).<br />
Note: Switch SW701<br />
has three positions. You<br />
can control the<br />
horizontal centering of<br />
the display either by<br />
using SW701 together<br />
with the horizontal shift<br />
control (VR701) or by<br />
using VR701 alone.
<strong>5200</strong>/<strong>5300</strong> Adjustments (<strong>not</strong> for 5260, 5280) Geometry - 8<br />
SW701<br />
(backside<br />
of controls)<br />
Adjustment<br />
Controls<br />
VR601<br />
All-White Screen<br />
Vertical Shift<br />
1 Run Display Service<br />
Utility from the Utilities<br />
folder of the MacTest Pro<br />
CD to display the All-<br />
White Screen.<br />
2 Using a flat-head plastic<br />
adjustment tool, adjust<br />
the vertical shift<br />
(VR601) control until<br />
the raster is centered<br />
(top to bottom) in the<br />
display area.
<strong>5200</strong>/<strong>5300</strong> Adjustments (<strong>not</strong> for 5260, 5280) Geometry - 9<br />
Flyback<br />
Transformer<br />
Focus Control<br />
Run<br />
Display Service<br />
Utility<br />
Focus<br />
Test Pattern<br />
Focus<br />
1 Run Display Service<br />
Utility to display the<br />
Focus test pattern.<br />
2 Using a flat-head plastic<br />
adjustment tool, adjust<br />
the focus control on the<br />
flyback transformer<br />
until the Focus test<br />
pattern reaches the best<br />
center-of-screen<br />
performance.
<strong>5200</strong>/<strong>5300</strong> Adjustments (<strong>not</strong> for 5260, 5280) Geometry - 10<br />
Anode Cap<br />
Microphone<br />
Connector<br />
On-Screen Video<br />
Before you begin,<br />
• Turn off virtual memory<br />
• Turn off the power<br />
• Remove the I/O door<br />
• Remove the rear housing<br />
• Discharge the CRT<br />
• Remove the anode cap<br />
• Disconnect the<br />
microphone cable<br />
• Remove the rear EMI<br />
shield<br />
• Remove the modem card<br />
(if present)
<strong>5200</strong>/<strong>5300</strong> Adjustments (<strong>not</strong> for 5260, 5280) Geometry - 11<br />
Yoke <strong>and</strong><br />
Wires<br />
Anode Cap<br />
Aperture <strong>and</strong><br />
Anode Wires<br />
Flyback<br />
Transformer<br />
±Warning: This product<br />
contains high voltage <strong>and</strong> a<br />
high-vacuum picture tube.<br />
To prevent serious injury,<br />
review CRT safety in<br />
Bulletins/Safety.<br />
±Warning: Never use an<br />
antistatic wriststrap until<br />
after discharging the CRT.
<strong>5200</strong>/<strong>5300</strong> Adjustments (<strong>not</strong> for 5260, 5280) Geometry - 12<br />
P805<br />
Modem<br />
Port<br />
Analog<br />
Board<br />
Monitor<br />
Adjustment<br />
Cable<br />
Rev A Analog Board<br />
P805<br />
1 Remove the three<br />
Phillips screws that<br />
secure the analog board<br />
to the chassis.<br />
2 Tilt the analog board<br />
back, being careful <strong>not</strong><br />
to put stress on the<br />
cables.<br />
3 Locate jumper P805<br />
(Rev. A) or P102<br />
(Rev. B) near the logic<br />
board connector on the<br />
lower left corner of the<br />
analog board.
<strong>5200</strong>/<strong>5300</strong> Adjustments (<strong>not</strong> for 5260, 5280) Geometry - 13<br />
P102<br />
Modem<br />
Port<br />
Analog<br />
Board<br />
Monitor<br />
Adjustment<br />
Cable<br />
Rev B Analog Board<br />
P102<br />
4 Remove the shunt that<br />
covers the pins of<br />
jumper P805 (Rev. A)<br />
or P102 (Rev. B).<br />
5 Note: It is very<br />
important to perform<br />
this step correctly<br />
according to the Rev. A<br />
or Rev. B instructions.
<strong>5200</strong>/<strong>5300</strong> Adjustments (<strong>not</strong> for 5260, 5280) Geometry - 14<br />
P805<br />
Modem<br />
Port<br />
Analog<br />
Board<br />
Monitor<br />
Adjustment<br />
Cable<br />
Rev A Analog Board<br />
P805<br />
• The square<br />
silkscreened marking<br />
at P805 (Rev. A<br />
only) indicates pin 1<br />
on the analog board.<br />
For Rev. A, connect<br />
one end of the monitor<br />
adjustment cable to<br />
P805. Be sure to<br />
position the connector<br />
so the pin 1 opening<br />
is aligned over pin 1<br />
(square marking) on<br />
the analog board.
<strong>5200</strong>/<strong>5300</strong> Adjustments (<strong>not</strong> for 5260, 5280) Geometry - 15<br />
P102<br />
Modem<br />
Port<br />
Analog<br />
Board<br />
Monitor<br />
Adjustment<br />
Cable<br />
Rev B Analog Board<br />
P102<br />
• For Rev. B, connect<br />
one end of the monitor<br />
adjustment cable to<br />
P102. The arrow<br />
mark on the plug<br />
connector (see<br />
graphic) must go over<br />
the pin closer to the<br />
top of the analog<br />
board. Hold the<br />
connector with gold<br />
connectors facing you,<br />
<strong>and</strong> place the<br />
connector on the two<br />
pins at P102.<br />
Important: The<br />
adjustment won’t work
<strong>5200</strong>/<strong>5300</strong> Adjustments (<strong>not</strong> for 5260, 5280) Geometry - 16<br />
Modem<br />
Port<br />
Analog<br />
Board<br />
Monitor<br />
Adjustment<br />
Cable<br />
if the plug is incorrectly<br />
placed on the pins.<br />
6 Connect the other end of<br />
the monitor adjustment<br />
cable to the modem port.<br />
Note: You must use the<br />
modem port. Remove the<br />
internal modem <strong>and</strong><br />
plastic modem port<br />
cover, if present.<br />
7 Route the monitor<br />
adjustment cable so it<br />
stays clear of sharp<br />
edges <strong>and</strong> remains slack.<br />
8 Reinstall the analog<br />
board. Be sure to
<strong>5200</strong>/<strong>5300</strong> Adjustments (<strong>not</strong> for 5260, 5280) Geometry - 17<br />
Yoke &<br />
Wires<br />
Anode Cap<br />
Aperture &<br />
Anode Wires<br />
Flyback<br />
Transformer<br />
Monitor Adjustment<br />
Cable<br />
reconnect the grounding<br />
screw to the EMI shield.<br />
9 ±Warning: Be sure to<br />
remove the antistatic<br />
wriststrap before<br />
replacing the anode cap.<br />
Replace the anode cap.<br />
10 Position the monitor so<br />
you can see the screen.
<strong>5200</strong>/<strong>5300</strong> Adjustments (<strong>not</strong> for 5260, 5280) Geometry - 18<br />
Adjustment 640 x 480 Hz Mode<br />
Horizontal Controls<br />
Vertical Controls<br />
Size<br />
Size Position<br />
Position<br />
Pincushion<br />
Trapezoid<br />
Resolution screen<br />
1 of 5<br />
Run<br />
Display Service Utility<br />
Cancel Save<br />
11 Turn on the power.<br />
12 Run Display Service<br />
Utility to display the onscreen<br />
video adjustment<br />
controls. The controls<br />
appear after selecting<br />
<strong>Power</strong>PC <strong>5200</strong>/<strong>5300</strong>/<br />
5400/5500 in the<br />
pattern selection box <strong>and</strong><br />
then select adjust<br />
geometry.<br />
13 Use the scroll bars to<br />
adjust the horizontal<br />
<strong>and</strong> vertical controls.<br />
14 To cancel settings (<strong>and</strong><br />
revert to the last saved<br />
setting) click Cancel.
<strong>5200</strong>/<strong>5300</strong> Adjustments (<strong>not</strong> for 5260, 5280) Geometry - 19<br />
15 To save your settings (in<br />
the monitor’s selected<br />
resolution) click Save.<br />
16 Important: After you<br />
click Save or Cancel, the<br />
name of the next screen<br />
resolution appears at the<br />
top of the screen. You<br />
must set <strong>and</strong> save the<br />
on-screen video<br />
adjustments for each<br />
remaining screen<br />
resolution. Otherwise,<br />
if you change from a<br />
saved resolution to an<br />
unsaved resolution, the
<strong>5200</strong>/<strong>5300</strong> Adjustments (<strong>not</strong> for 5260, 5280) Geometry - 20<br />
display will appear<br />
misadjusted.<br />
Set <strong>and</strong> save the settings<br />
for each screen<br />
resolution.<br />
After saving the last screen<br />
resolution, exit Display<br />
Service Utility.
<strong>5200</strong>/<strong>5300</strong> Adjustments (<strong>not</strong> for 5260, 5280) Video - 21<br />
Yoke <strong>and</strong><br />
Wires<br />
Anode Cap<br />
Aperture <strong>and</strong><br />
Anode Wires<br />
Flyback<br />
Transformer<br />
Video<br />
Before you begin, remove<br />
the rear housing.<br />
±Warning: This product<br />
contains high voltage <strong>and</strong> a<br />
high-vacuum picture tube.<br />
To prevent serious injury,<br />
review CRT safety in<br />
Bulletins/Safety.<br />
Note: Perform the cutoff<br />
adjustment prior to<br />
adjusting the white balance.
<strong>5200</strong>/<strong>5300</strong> Adjustments (<strong>not</strong> for 5260, 5280) Video - 22<br />
Replacement Note: Perform<br />
the cutoff adjustment<br />
whenever you replace the<br />
CRT or the deflection board,<br />
or whenever the screen<br />
control has been<br />
inadvertently changed.<br />
±Warning: Because<br />
adjustments are made from<br />
the rear of the monitor,<br />
position a mirror to view<br />
the monitor screen. Do <strong>not</strong><br />
reach around the monitor to<br />
adjust the controls.
<strong>5200</strong>/<strong>5300</strong> Adjustments (<strong>not</strong> for 5260, 5280) Video - 23<br />
CRT Video Board<br />
VR301<br />
Cutoff<br />
Note: Perform the cutoff<br />
<strong>and</strong> white balance<br />
adjustments after the<br />
monitor has been on for at<br />
least 10 minutes.<br />
1 Using a fine-tip plastic<br />
adjustment tool, set the<br />
sub-contrast control<br />
(VR301) on the CRT/<br />
video board to its<br />
maximum (fully<br />
clockwise) position. The<br />
screen becomes<br />
brighter.
<strong>5200</strong>/<strong>5300</strong> Adjustments (<strong>not</strong> for 5260, 5280) Video - 24<br />
Screen<br />
Control<br />
Screen<br />
Panel Screen Brightness<br />
Slider<br />
Controls<br />
Screen Contrast<br />
2 From the desktop, select<br />
<strong>and</strong> open the Screen icon<br />
to open the on-screen<br />
control panel.<br />
3 Set the Screen<br />
Brightness slider<br />
control to its minimum<br />
(far left) position.<br />
4 Set the Screen Contrast<br />
slider control to its<br />
maximum (far right)<br />
position.
<strong>5200</strong>/<strong>5300</strong> Adjustments (<strong>not</strong> for 5260, 5280) Video - 25<br />
CRT Video Board<br />
VR303 VR302<br />
5 Using a fine-tip plastic<br />
adjustment tool, set the<br />
green gain (VR303) <strong>and</strong><br />
red gain (VR302)<br />
controls to their middle<br />
positions.
<strong>5200</strong>/<strong>5300</strong> Adjustments (<strong>not</strong> for 5260, 5280) Video - 26<br />
CRT Video Board<br />
VR305 VR304<br />
Run<br />
Display Service<br />
Utility<br />
Gray Bars<br />
Test Pattern<br />
6 Note: Verify that the<br />
display resolution is set<br />
to 640 x 480.<br />
Run Display Service<br />
Utility to display the<br />
Gray Bars test pattern.<br />
7 Using a fine-tip plastic<br />
adjustment tool, set the<br />
red bias (VR304) <strong>and</strong><br />
the green bias (VR305)<br />
controls to their<br />
minimum<br />
(counterclockwise)<br />
positions.
<strong>5200</strong>/<strong>5300</strong> Adjustments (<strong>not</strong> for 5260, 5280) Video - 27<br />
Flyback<br />
Transformer<br />
Screen Control<br />
Gray Bars<br />
Test Pattern<br />
8 Using a plastic<br />
screwdriver, adjust the<br />
screen control on the<br />
flyback transformer<br />
very slowly until the<br />
third darkest bar from<br />
the left is just faintly<br />
visible.<br />
Note: The screen control<br />
is now set correctly <strong>and</strong><br />
shouldn’t have to be<br />
readjusted unless<br />
inadvertently altered.
<strong>5200</strong>/<strong>5300</strong> Adjustments (<strong>not</strong> for 5260, 5280) Video - 28<br />
CRT Video Board<br />
VR305 VR304<br />
Run<br />
Display Service<br />
Utility<br />
Gray Bars<br />
Test Pattern<br />
White Balance<br />
Note: Perform the white<br />
balance adjustments after<br />
the monitor has been on for<br />
at least 10 minutes <strong>and</strong> the<br />
cutoff procedure has just<br />
been completed.<br />
1 Note: Verify that the<br />
display resolution is set<br />
to 640 x 480.<br />
Run Display Service<br />
Utility to display the<br />
Gray Bars test pattern.<br />
2 Using a fine-tip plastic<br />
adjustment tool, adjust<br />
the red bias (VR304)
<strong>5200</strong>/<strong>5300</strong> Adjustments (<strong>not</strong> for 5260, 5280) Video - 29<br />
CRT Video Board<br />
VR305 VR304<br />
Run<br />
Display Service<br />
Utility<br />
Gray Bars<br />
Test Pattern<br />
<strong>and</strong> green bias (VR305)<br />
controls to neutralize<br />
the four darkest bars.<br />
3 If the screen shows a<br />
predominant blue color,<br />
start by adjusting the<br />
green bias control<br />
(VR305) until the blue<br />
color is neutralized<br />
with green <strong>and</strong> it’s<br />
difficult to tell whether<br />
the four darkest bars are<br />
blue or green.<br />
4 Adjust the red bias<br />
control (VR304) until<br />
the bars appear to be<br />
shades of gray.
<strong>5200</strong>/<strong>5300</strong> Adjustments (<strong>not</strong> for 5260, 5280) Video - 30<br />
Note: If the predominant<br />
color appears to be<br />
always too red or too<br />
green, reduce the levels<br />
of both the green <strong>and</strong> red<br />
bias controls to<br />
neutralize the<br />
predominant color. The<br />
darkest bar must remain<br />
completely black, <strong>and</strong><br />
the second darkest bar<br />
should be just barely<br />
visible.
<strong>5200</strong>/<strong>5300</strong> Adjustments (<strong>not</strong> for 5260, 5280) Video - 31<br />
Screen<br />
Control<br />
Panel<br />
Screen<br />
Screen Brightness<br />
Screen Contrast<br />
5 From the desktop, open<br />
the Screen icon to open<br />
the on-screen control<br />
panel.<br />
6 Set the Screen<br />
Brightness slider<br />
control to its center<br />
position.<br />
Note: The screen might<br />
appear too bright <strong>and</strong> out<br />
of focus.
<strong>5200</strong>/<strong>5300</strong> Adjustments (<strong>not</strong> for 5260, 5280) Video - 32<br />
CRT Video Board<br />
VR301<br />
Run<br />
Display Service<br />
Utility<br />
All-White Screen<br />
7 Run Display Service<br />
Utility to display the<br />
All-White Screen test<br />
pattern.<br />
8 Hold a light meter or<br />
photometer against the<br />
center of the screen.
<strong>5200</strong>/<strong>5300</strong> Adjustments (<strong>not</strong> for 5260, 5280) Video - 33<br />
CRT Video Board<br />
VR301<br />
Run<br />
Display Service<br />
Utility<br />
All-White Screen<br />
9 Adjust the sub-contrast<br />
control (VR301) to<br />
decrease the screen<br />
brightness until the<br />
screen luminance<br />
measures<br />
• Upper end of 10 on<br />
the 10 through 18<br />
scale of light meter<br />
Model L-248<br />
• 21 foot c<strong>and</strong>les on the<br />
red scale of light<br />
meter Model 246<br />
• 25 fL (foot lamberts)<br />
on a photometer
<strong>5200</strong>/<strong>5300</strong> Adjustments (<strong>not</strong> for 5260, 5280) Video - 34<br />
CRT Video Board<br />
VR303 VR302<br />
Run<br />
Display Service<br />
Utility<br />
Gray Bars<br />
Test Pattern<br />
10 Run Display Service<br />
Utility to display the<br />
Gray Bars test pattern.<br />
11 In most cases the four<br />
brightest bars will<br />
appear to be shades of<br />
gray, <strong>and</strong> the leftmost<br />
bar will be solid black.<br />
If <strong>not</strong>, adjust the red<br />
(VR302) <strong>and</strong> green<br />
(VR303) gain controls<br />
until the color of the<br />
four brightest bars is<br />
neutralized.
<strong>5200</strong>/<strong>5300</strong> Adjustments (<strong>not</strong> for 5260, 5280) Video - 35<br />
12 Check the screen<br />
luminance again <strong>and</strong><br />
reset it to the proper<br />
reading by repeating the<br />
previous step that set it<br />
to one of the following:<br />
• Upper end of 10 on<br />
light meter Model L-<br />
248<br />
• 21 foot c<strong>and</strong>les on<br />
light meter Model 246<br />
• 25 fL (foot lamberts)<br />
on a photometer
<strong>5200</strong>/<strong>5300</strong> Adjustments (<strong>not</strong> for 5260, 5280) High Voltage - 36<br />
Yoke <strong>and</strong><br />
Wires<br />
Anode Cap<br />
Aperture <strong>and</strong><br />
Anode Wires<br />
Flyback<br />
Transformer<br />
High Voltage<br />
Before you begin,<br />
• Remove the rear housing<br />
• Remove the EMI shield<br />
• Reattach ground wire <strong>and</strong><br />
screw<br />
±Warning: This product<br />
contains high voltage <strong>and</strong> a<br />
high-vacuum picture tube.<br />
To prevent serious personal<br />
injury or equipment<br />
damage, review the CRT<br />
safety instructions in<br />
Bulletins/Safety.
<strong>5200</strong>/<strong>5300</strong> Adjustments (<strong>not</strong> for 5260, 5280) High Voltage - 37<br />
Analog<br />
Board<br />
Chassis<br />
Ground<br />
R751<br />
R749<br />
D713<br />
Black Lead<br />
Rev A<br />
R751<br />
R749<br />
D713<br />
Red Lead<br />
Run<br />
Display Service<br />
Utility<br />
Crosshatch 1<br />
Test Pattern<br />
Voltmeter<br />
Reads<br />
29.5<br />
VDC<br />
Replacement Note: Perform<br />
the high voltage adjustment<br />
whenever you replace the<br />
CRT or the deflection board.<br />
Note: Perform the high<br />
voltage adjustment after the<br />
monitor has been on for at<br />
least 10 minutes.<br />
1 Run Display Service<br />
Utility to display the<br />
Crosshatch test pattern.<br />
2 Locate diode D713 (Rev.<br />
A) or D703 (Rev. B) on<br />
the analog board.
VR501<br />
<strong>5200</strong>/<strong>5300</strong> Adjustments (<strong>not</strong> for 5260, 5280) High Voltage - 38<br />
Analog<br />
Board<br />
R751<br />
R749<br />
D713<br />
Black Lead<br />
Rev B<br />
D749<br />
D703<br />
J74<br />
R768<br />
Red Lead<br />
Chassis<br />
Ground Red Lead<br />
Run<br />
Display Service<br />
Utility<br />
Crosshatch 1<br />
Test Pattern<br />
Voltmeter<br />
Reads<br />
29.5<br />
VDC<br />
3 Connect a digital<br />
voltmeter as follows:<br />
• Attach the red<br />
(positive) lead of the<br />
voltmeter to the<br />
cathode side of diode<br />
D713 (Rev. A) or<br />
D703 (Rev. B).<br />
• Attach the black<br />
(negative) lead of the<br />
voltmeter to the metal<br />
chassis ground.
<strong>5200</strong>/<strong>5300</strong> Adjustments (<strong>not</strong> for 5260, 5280) High Voltage - 39<br />
VR501<br />
Rev. A Analog Board<br />
Inside<br />
4 Using a fine-tip plastic<br />
adjustment tool, set the<br />
high-voltage<br />
adjustment control<br />
(VR501 on Rev. A, or<br />
VR702 on Rev. B<br />
pictured on next page) so<br />
the voltmeter reads 29.5<br />
volts DC (± 0.1 volt).<br />
Note: The VR501<br />
control is inside the<br />
analog board.
<strong>5200</strong>/<strong>5300</strong> Adjustments (<strong>not</strong> for 5260, 5280) High Voltage - 40<br />
Rev. B<br />
Analog<br />
Board<br />
VR 702<br />
Note: To reach the VR702<br />
high-voltage adjustment<br />
control on Rev. B<br />
computers, tilt back the<br />
analog board. The VR702<br />
control is inside the analog<br />
board.
K Service Source<br />
Exploded View<br />
<strong>Power</strong> <strong>Macintosh</strong>/<strong>Performa</strong> <strong>5200</strong><br />
<strong>and</strong> <strong>5300</strong> (<strong>not</strong> 5260, 5280)
Exploded View 1<br />
Plug (4)<br />
922-1396<br />
EMI Shield<br />
(Rev. A)<br />
922-1476<br />
I/O Door<br />
922-1397<br />
Hard Drive<br />
661-0146 500 MB<br />
661-0955 1 GB<br />
661-0999 800 MB<br />
661-1139 1.2 GB<br />
661-1106 1.2 GB<br />
Speakers (Rev. B)<br />
922-1858<br />
EMI Shield<br />
(Rev. B)<br />
922-2066<br />
RAYOVAC Computer<br />
Clock<br />
Battery<br />
Logic Board<br />
661-0931 75 MHz (Rev. A)<br />
661-1008 75 MHz (Rev. B)<br />
661-1041 100 MHz<br />
Rear Housing<br />
922-1395 (Rev. A)<br />
922-1861 (Rev. B)<br />
Analog Shield<br />
922-1468<br />
52/<strong>5300</strong> Exploded View<br />
Speakers (Rev. A)<br />
922-1389<br />
Hard<br />
Drive<br />
Carrier<br />
922-1124<br />
Guides<br />
922-1177 (Right)<br />
922-1186 (Left)<br />
Chassis<br />
Assembly<br />
922-1390 (Rev. A)<br />
922-2043 (Rev. B)<br />
Monitor St<strong>and</strong>,<br />
Tilt/Swivel Base<br />
922-1399<br />
CRT<br />
Assembly<br />
661-0952 (Rev.A)<br />
661-0954 (Rev. B)<br />
Fan<br />
922-1391<br />
CD<br />
Connector<br />
Adapter<br />
922-1820<br />
CD Audio<br />
Adapter<br />
922-1822<br />
CD-ROM Drive<br />
661-0913 (600i)<br />
52/<strong>5300</strong> Exploded View<br />
Microphone<br />
922-1392 (Rev. A)<br />
922-2044 (Rev. B)<br />
Front Bezel<br />
922-1400 (Rev. A)<br />
922-1857 (Rev. B)<br />
Drive <strong>and</strong><br />
Control<br />
Bezel<br />
922-1398<br />
<strong>Power</strong> Supply<br />
661-0930 (Rev. A)<br />
661-0331<br />
(Rev. A w/ therm. con.)<br />
661-1117 (Rev. B)<br />
Analog/Video<br />
Board Assembly<br />
661-0928 (Rev. A)<br />
661-1356<br />
Floppy<br />
Drive<br />
Carrier<br />
922-1133<br />
922-1124<br />
EMI <strong>Power</strong><br />
Supply<br />
Shield<br />
922-1467<br />
Floppy<br />
Drive<br />
661-0121<br />
Front-Panel<br />
Control<br />
Board<br />
922-1388<br />
CD-ROM<br />
Drive<br />
Carrier<br />
922-0850