SERVICE MANUAL - Weber Motor: Weber Motor
SERVICE MANUAL - Weber Motor: Weber Motor
SERVICE MANUAL - Weber Motor: Weber Motor

You also want an ePaper? Increase the reach of your titles
YUMPU automatically turns print PDFs into web optimized ePapers that Google loves.
406555_SHB<br />
Rev 1.0<br />
10.07.2012<br />
en_English<br />
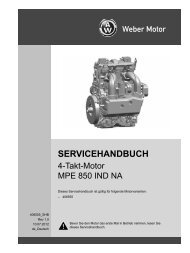
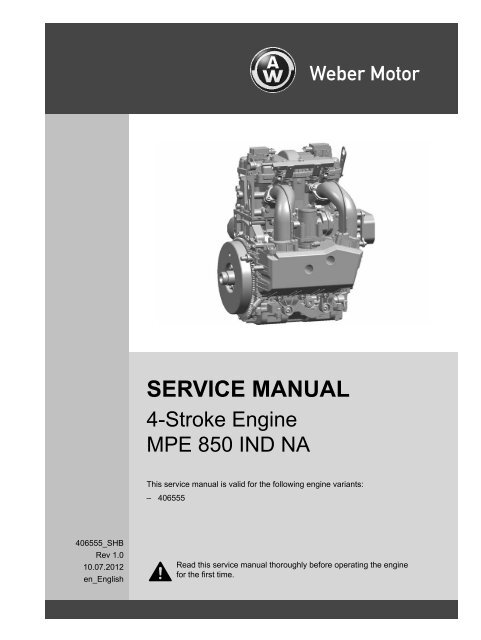
<strong>SERVICE</strong> <strong>MANUAL</strong><br />
4-Stroke Engine<br />
MPE 850 IND NA<br />
This service manual is valid for the following engine variants:<br />
– 406555<br />
Read this service manual thoroughly before operating the engine<br />
for the first time.
- Translation of the original service manual -<br />
<strong>Weber</strong> <strong>Motor</strong> GmbH strives to make continual improvements as part of the ongoing technical development of<br />
its products. All documentation is therefore subject to technical modifications.<br />
Reprints and translations, in whole or in part, require written permission from <strong>Weber</strong> <strong>Motor</strong> GmbH.<br />
All rights reserved according to the copyright law.<br />
<strong>Weber</strong> <strong>Motor</strong> GmbH<br />
Otto-Lilienthal-Str. 5<br />
88677 Markdorf<br />
Germany<br />
www.weber-motor.com
Table of contents<br />
Table of contents<br />
1 About this document 6<br />
1.1 Meaning of the symbols and signal words .......................................6<br />
2 Safety 7<br />
2.1 Meaning of the safety alert symbol and signal words ..............................7<br />
2.2 Important safety messages ..................................................8<br />
3 Description 11<br />
3.1 Intended use ............................................................ 11<br />
3.2 Identification. ............................................................ 11<br />
3.3 Fuel ...................................................................12<br />
3.4 Engine oil ...............................................................12<br />
3.5 Coolant. ................................................................13<br />
3.6 Engine components and information ..........................................14<br />
3.7 Technical specifications ....................................................15<br />
4 Operation 16<br />
4.1 Service intervals. .........................................................16<br />
4.2 Operation during the break-in period ..........................................18<br />
4.3 Before operation .........................................................19<br />
4.3.1 Checking coolant level. ...............................................19<br />
4.3.2 Checking oil level. ...................................................19<br />
5 Special scenarios 20<br />
5.1 Engine idle for more than 30 days ............................................20<br />
6 Malfunctions 21<br />
7 Dealer and servicing network 22<br />
7.1 Locating a workshop ......................................................22<br />
7.2 Service and spare parts ....................................................22<br />
7.3 Repairs. ................................................................22<br />
7.4 Warranty. ...............................................................22<br />
8 Service tasks in the workshop 23<br />
8.1 Safety messages workshop .................................................23<br />
8.2 Tools and accessories .....................................................24<br />
8.2.1 <strong>Weber</strong> <strong>Motor</strong> service case .............................................24<br />
8.2.2 Equipment workshop .................................................25<br />
8.2.3 Supplies ...........................................................26<br />
8.3 Changing engine oil and oil filter .............................................27<br />
4 SHB MPE850 Rev 1.1 | 406555 |
SHB MPE850 Rev 1.1 | 406555 |<br />
Table of contents<br />
8.3.1 Changing engine oil ..................................................27<br />
8.3.2 Replacing oil filter ...................................................27<br />
8.4 Checking and adjusting valve play. ...........................................28<br />
8.4.1 Checking valve play. .................................................28<br />
8.4.2 Adjusting valve play with valve adjustment kit ..............................32<br />
8.4.3 Adjusting valve play without special tool ..................................36<br />
6.5 Replacing spark plugs .....................................................39<br />
8.6 Checking spark plugs. .....................................................41<br />
8.7 Changing coolant .........................................................44<br />
8.8 Replacing fuel filter .......................................................44<br />
8.9 Preparing the engine for storage .............................................45<br />
8.10 Disposal ................................................................46<br />
9 Confirmation of service tasks 47<br />
Appendix 49<br />
Engine manufacturer ......................................................49<br />
Index ..................................................................50<br />
5
1 About this document<br />
1.1 Meaning of the symbols and signal words<br />
1 About this document<br />
This service manual was designed to help you operate the engine safely and reliably.<br />
Observe the following information:<br />
– Read this service manual thoroughly before operating the engine for the first time.<br />
– The service manual is for the engine in your portable fire pump.<br />
– Keep the service manual in a safe place.<br />
– Make sure that all personnel using the portable fire pump have access to the service manual.<br />
– If you sell the portable fire pump, always pass on the service manual to the new owner.<br />
– The latest version of the service manual is available for download in other languages from our web site<br />
www.weber-motor.com.<br />
– Always read the portable fire pump manufacturer‘s documentation.<br />
– Some figures in this service manual are general illustrations and may differ from the actual engine.<br />
1.1 Meaning of the symbols and signal words<br />
Item Meaning<br />
NOTICE The signal word NOTICE indicates potential property damage.<br />
Information The signal word Information indicates specific features and recommendations.<br />
Tools, service parts and supplies required for tasks covered in the chapter.<br />
6 SHB MPE850 Rev 1.1 | 406555 |
2 Safety<br />
This engine is state-of-the-art and built according to recognized safety-technical regulations. Ignoring the<br />
information in this service manual may result in personal injury or property damage.<br />
Read and observe the following safety messages carefully before operating the engine for the first time.<br />
Observe all generally applicable laws and regulations in addition to the information in this service manual:<br />
– accident prevention<br />
– environmental protection<br />
– handling of hazardous materials<br />
– personal safety equipment<br />
– traffic laws<br />
2.1 Meaning of the safety alert symbol and signal words<br />
Item Meaning<br />
WARNING<br />
CAUTION<br />
SHB MPE850 Rev 1.1 | 406555 |<br />
2 Safety<br />
2.1 Meaning of the safety alert symbol and signal words<br />
The safety alert symbol draws your attention to possible dangers.<br />
The signal word WARNING indicates a potentially dangerous situation that may<br />
lead to a serious or fatal injury.<br />
The signal word CAUTION indicates a potentially dangerous situation that may<br />
lead to a minor or moderately severe injury.<br />
7
2 Safety<br />
2.2 Important safety messages<br />
2.2 Important safety messages<br />
Service tasks<br />
Service tasks in the workshop<br />
Malfunctions<br />
Spare parts<br />
Add-on parts and modifications<br />
Hot engine components<br />
In order to keep your engine in a safe operating condition, regular<br />
servicing is essential. It is your responsibility to ensure that the engine is<br />
serviced correctly.<br />
► Perform regular inspections and observe the specified service<br />
intervals.<br />
All service tasks described in Chapter 8 Service tasks in the workshop<br />
require special technical knowledge of the engine.<br />
► All service tasks described in chapter 8 Service tasks in the<br />
workshop must be performed by a workshop authorized by <strong>Weber</strong><br />
<strong>Motor</strong> or the portable fire pump manufacturer.<br />
Engine malfunctions pose a safety risk to personnel.<br />
► Only operate the engine when in perfect condition.<br />
► All malfunctions must be repaired immediately in a workshop<br />
authorized by <strong>Weber</strong> <strong>Motor</strong> or the portable fire pump manufacturer.<br />
All the components in your engine have been carefully tested and fulfill<br />
strict quality and safety requirements. Externally supplied parts cannot<br />
fulfill these requirements.<br />
► Always use original <strong>Weber</strong> <strong>Motor</strong> spare parts.<br />
The consequences of attaching add-on parts and making unauthorized<br />
modifications to the engine are unknown and pose a safety risk to<br />
personnel.<br />
► Modifications and the attachment of add-on parts is only permitted if<br />
approved or instigated by <strong>Weber</strong> <strong>Motor</strong>.<br />
Engine components become extremely hot during operation.<br />
► Do not touch any engine components during operation.<br />
► Switch off the engine and wait until the components have cooled.<br />
8 SHB MPE850 Rev 1.1 | 406555 |
Engine power supply<br />
Engine exhaust gases<br />
Handling of fuel, engine oil and<br />
coolant<br />
Fuel<br />
SHB MPE850 Rev 1.1 | 406555 |<br />
2 Safety<br />
2.2 Important safety messages<br />
Some service tasks require disconnection of the engine from the power<br />
supply. Starting the engine inadvertently may endanger the safety of<br />
personnel.<br />
Read the portable fire pump manufacturer‘s documentation for more<br />
information.<br />
► Disconnect the engine from the power supply when requested.<br />
Engine exhaust gases contain carbon monoxide (CO). Inhalation of<br />
carbon monoxide can deprive the body of oxygen and result in organ<br />
damage or even death by asphyxiation.<br />
► When operating the engine in enclosed spaces, use exhaust hoses<br />
to direct the engine exhaust gases into the open.<br />
Operating materials pose a health risk.<br />
► Always read the manufacturer's instructions.<br />
► Always wash your hands prior to eating, smoking and using the<br />
toilet as well as at the end of the working shift when working with<br />
operating materials.<br />
Operating materials are hazardous to the environment.<br />
► Never allow operating materials to escape into the groundwater,<br />
water courses or sewage system. Always dispose of operating<br />
materials according to applicable national regulations.<br />
Danger of slipping on spilled fluids.<br />
► Always use a filler neck or funnel when filling components with<br />
operating materials.<br />
► Always clean up any spilled operating materials immediately.<br />
Fuel is highly flammable. Vapors may ignite and cause an explosion.<br />
► Do not smoke in the vicinity of the engine and do not allow naked<br />
flames or sparks near the engine or the fuel system.<br />
► Never fill with fuel while the engine is running.<br />
► Do not start the engine if there is a smell of fuel or you suspect that<br />
fuel is leaking. Have a workshop authorized by <strong>Weber</strong> <strong>Motor</strong> or the<br />
portable fire pump manufacturer inspect the engine immediately.<br />
► Fuel on hot surfaces can cause fires.<br />
► Do not extinguish with water. In the event of a fire, use foam, dry<br />
chemical or carbon dioxide extinguishers.<br />
9
2 Safety<br />
2.2 Important safety messages<br />
California Proposition 65<br />
Warning against chemicals/hazardous materials according to the law of<br />
the state of California. This product contains chemicals known to the State<br />
of California to cause cancer, birth defects, or other reproductive harm.<br />
10 SHB MPE850 Rev 1.1 | 406555 |
3 Description<br />
3.1 Intended use<br />
The MPE 850 IND NA has been designed for powering portable fire pumps.<br />
The engine was not designed or intended for any other use.<br />
3.2 Identification<br />
Each engine is assigned two identification<br />
numbers. Both numbers are printed on a label 1<br />
affixed to the engine.<br />
The 6-digit part number 2 is the number of the<br />
engine variant.<br />
The 8-digit serial number 3 is a unique number<br />
for each individual engine.<br />
The labels with the part number and the serial<br />
number are located on the valve cover 4 .<br />
The 8-digit serial number is also engraved on the<br />
crankcase 5 .<br />
Take the time to enter the part number and serial<br />
number in chapter 9 Confirmation of service<br />
tasks. Both numbers are required when making<br />
queries about your engine.<br />
SHB MPE850 Rev 1.1 | 406555 |<br />
1<br />
2<br />
3<br />
4<br />
5<br />
3 Description<br />
3.1 Intended use | 3.2 Identification<br />
009999<br />
11
3 Description<br />
3.3 Fuel | 3.4 Engine oil<br />
3.3 Fuel<br />
Fuel quality<br />
3.4 Engine oil<br />
Engine oil<br />
Fill quantity<br />
Engine damage and loss of power caused by fuel with an insufficient<br />
octane rating.<br />
Fuel with an insufficient octane rating causes knocking during combustion.<br />
Which results in excessive loads and damage to the crank drive within a<br />
short time.<br />
► Always use fuel with the recommended octane rating.<br />
unleaded gasoline („super unleaded“), with an octane rating of at least<br />
95 ROZ or 85 MOZ<br />
USA: at least Premium 91, unleaded<br />
Engine damage due to incorrect engine oil grade or viscosity.<br />
An incorrect engine oil grade or viscosity causes excessive wear and<br />
moving parts may start to seize up.<br />
► Always use the recommended engine oil.<br />
► Do not mix engine oils of different grades or degrees of viscosity.<br />
0W 40 completely synthetic, at least API SJ, ACEA A3/B3<br />
See the portable fire pump manufacturer‘s documentation.<br />
Information! <strong>Weber</strong> <strong>Motor</strong> recommends you always keep a supply of engine oil to hand. Consult<br />
your local portable fire pump dealer.<br />
12 SHB MPE850 Rev 1.1 | 406555 |
3.5 Coolant<br />
Coolant additive<br />
Mixing ratio<br />
Fill quantity<br />
Approved coolant additives<br />
SHB MPE850 Rev 1.1 | 406555 |<br />
3 Description<br />
3.5 Coolant<br />
Freezing, overheating or corrosion due to incorrect mixing ratio or<br />
unauthorized coolant additives.<br />
An incorrect mixing ratio reduces the cooling capacity.<br />
Combining different coolant additives may trigger a chemical reaction and<br />
they may lose their effectiveness.<br />
► Use the same coolant throughout the year in the mixing ratio<br />
specified.<br />
► When topping up the coolant, do not change the mixing ratio.<br />
► Always use approved coolant additives when topping up the<br />
coolant.<br />
Coolant additive based on ethylene glycol, silicate- and nitrite- free,<br />
suitable for aluminium engines<br />
50 % water + 50 % coolant additive<br />
See the portable fire pump manufacturer‘s documentation.<br />
BASF Glysantin G 30<br />
Chevron Havoline Extended Life Coolant XLC+B<br />
Valvoline Zerex G 30<br />
Information! <strong>Weber</strong> <strong>Motor</strong> recommends you always keep an adequate supply of ready mixed<br />
coolant to hand. Consult your local portable fire pump dealer.<br />
13
3 Description<br />
3.6 Engine components and information<br />
3.6 Engine components and information<br />
– Coolant circuit vent 1<br />
– Exhaust ducts 2<br />
– Oil filter 3<br />
– Coolant circuit to the heat<br />
exchanger 4<br />
– Coolant circuit from the heat<br />
exchanger 5<br />
– Engine oil supply 6<br />
– Engine oil return 7<br />
– 1st cylinder 8<br />
– 2nd cylinder 9<br />
– Fuel supply 10<br />
– Air intake 11<br />
– Engine rotation direction 12<br />
– Stub shaft 13<br />
– Crankcase vent 14<br />
1<br />
2<br />
3<br />
4<br />
5<br />
6<br />
7<br />
8<br />
9<br />
10<br />
11<br />
12<br />
13<br />
14<br />
14 SHB MPE850 Rev 1.1 | 406555 |
3.7 Technical specifications<br />
Type<br />
Displacement<br />
Number of cylinders<br />
Bore x stroke<br />
Compression ratio<br />
Engine power<br />
Speed limit<br />
Idle speed<br />
Carburation<br />
Lubrication system<br />
Cooling system<br />
Engine management system<br />
Throttle body<br />
Ignition system<br />
Starter system<br />
Generator, internal<br />
Weight<br />
Dimensions<br />
482 mm [19 in]<br />
SHB MPE850 Rev 1.1 | 406555 |<br />
420 mm [17 in] 408 mm [16 in]<br />
3 Description<br />
3.7 Technical specifications<br />
4-stroke gasoline engine, parallel twin with balance shaft and overhead<br />
camshaft (SOHC)<br />
846 cm³<br />
2<br />
89 mm x 68 mm [3.5 in x 2.7 in]<br />
11,5 : 1<br />
Godiva 1710: 42 kW [57 PS] @ 5600 min-1 [rpm] SAE J1349<br />
Godiva 1210: 22 kW [30 PS] @ 5250 min-1 [rpm] SAE J1349<br />
6500 min-1 [rpm]<br />
1250 – 1750 min-1 [rpm]<br />
sequential multipoint intake manifold<br />
dry sump<br />
closed coolant circuit<br />
Synerject Easy-U<br />
electronically controlled, dia. = 44 mm [1.73 in]<br />
electronic ignition<br />
electric starter<br />
> 450 W @ 4000 min-1 [rpm]<br />
55 kg [121 lb] without engine oil and coolant<br />
see figure<br />
15
4 Operation<br />
4.1 Service intervals<br />
4 Operation<br />
Familiarize yourself with the portable fire pump before operating the engine. Read the portable fire pump<br />
manufacturer‘s documentation.<br />
4.1 Service intervals<br />
In order to keep your engine in a safe operating condition, regular servicing is essential.<br />
The following service tasks can be performed by trained mechanics.<br />
Activity before operation<br />
Check oil level<br />
Check coolant level<br />
1 or at least once a week<br />
16 SHB MPE850 Rev 1.1 | 406555 |<br />
■ 1<br />
■ 1
The following service tasks require mechanical knowledge and special technical knowledge of this engine.<br />
These service tasks must be performed in a workshop authorized by <strong>Weber</strong> <strong>Motor</strong> or the portable fire pump<br />
manufacturer.<br />
Activity<br />
Change engine oil and oil filter<br />
Check and adjust valve play<br />
Replace spark plugs<br />
Check spark plugs<br />
Change coolant<br />
Engine internal preservative<br />
Fuel stabilizer<br />
Replace fuel filter<br />
SHB MPE850 Rev 1.1 | 406555 |<br />
1st service<br />
after 25 h 1<br />
subsequent service intervals preparing for<br />
storage4 every 100 h1 every 200 h1 ■ 2 ■ 2 ■<br />
■ ■ 3<br />
See the portable fire pump manufacturer‘s<br />
documentation.<br />
See the portable fire pump manufacturer‘s<br />
documentation.<br />
1 h = hours of operation<br />
2 or at least once a year if the hours of operation specified above are not reached before that<br />
3 or at least every two years if the hours of operation specified above are not reached before that<br />
4 if you do not intend to operate the engine for more than 30 days<br />
■ 3<br />
4 Operation<br />
4.1 Service intervals<br />
■<br />
■<br />
■<br />
17
4 Operation<br />
4.2 Operation during the break-in period<br />
4.2 Operation during the break-in period<br />
The way you operate the engine during the first five hours of operation is a major factor in achieving the<br />
required performance and extending the service life of the engine.<br />
Observe the following points to ensure that the engine parts break in properly:<br />
Avoid<br />
Good<br />
Engine speeds over 5500 min-1 [rpm]<br />
long periods of idle operation<br />
long operating periods at low engine speeds<br />
long operating periods at the same engine speed<br />
long operating periods at full load<br />
changes in engine speed<br />
when the engine is warm, momentary bursts of acceleration<br />
18 SHB MPE850 Rev 1.1 | 406555 |
4.3 Before operation<br />
4.3.1 Checking coolant level<br />
See the portable fire pump manufacturer‘s documentation.<br />
4.3.2 Checking oil level<br />
See the portable fire pump manufacturer‘s documentation.<br />
SHB MPE850 Rev 1.1 | 406555 |<br />
4 Operation<br />
4.3 Before operation<br />
Danger of overheating caused by a lack of coolant.<br />
Insufficient coolant leads to deformation, stress cracking and leaks in the<br />
cylinder head gasket.<br />
The increase in pressure will cause the hoses to leak.<br />
► Always check the coolant level before operating the engine.<br />
Information! Your engine uses a dry sump lubrication system. Engine oil is pumped from the<br />
engine into the oil tank while the engine is operating. When the engine is switched off, a portion of the<br />
engine oil flows from the oil tank slowly back into the engine. Therefore inspect the oil level immediately<br />
after switching off the engine.<br />
Engine damage caused by a lack of engine oil.<br />
A lack of engine oil will cause moving components in the engine to seize.<br />
► Always check the oil level before operating the engine.<br />
Engine damage caused by excessive engine oil.<br />
If the quantity of engine oil is excessive, oil may enter the intake system<br />
through the crankcase vent and damage the engine.<br />
► Check the oil level as described in the portable fire pump<br />
manufacturer‘s documentation.<br />
► Measure the engine oil filling quantity before topping up the engine<br />
oil.<br />
19
5 Special scenarios<br />
5.1 Engine idle for more than 30 days<br />
5 Special scenarios<br />
5.1 Engine idle for more than 30 days<br />
If you do not intend to operate the engine for 30 days or more, prepare the engine for storage. Preparing the<br />
engine for storage will prevent the cylinder from corroding and ensure the engine starts again correctly at the<br />
end of the storage period.<br />
Preparations for storage require special technical knowledge. Preparations must be performed in a workshop<br />
authorized by <strong>Weber</strong> <strong>Motor</strong> or the portable fire pump manufacturer.<br />
20 SHB MPE850 Rev 1.1 | 406555 |
6 Malfunctions<br />
SHB MPE850 Rev 1.1 | 406555 |<br />
6 Malfunctions<br />
In the event of a malfunction, please contact a workshop authorized by <strong>Weber</strong> <strong>Motor</strong> or the portable fire<br />
pump manufacturer immediately.<br />
21
7 Dealer and servicing network<br />
7.1 Locating a workshop | …<br />
7 Dealer and servicing network<br />
7.1 Locating a workshop<br />
An extensive global dealer and servicing network is available. The dealer and servicing network provides<br />
assistance with any queries relating to the engine. Visit our web site www.weber-motor.com for a list of all<br />
authorized <strong>Weber</strong> <strong>Motor</strong> workshops.<br />
7.2 Service and spare parts<br />
<strong>Weber</strong> <strong>Motor</strong> offers a selection of accessories to prepare you for the most important situations. Visit your<br />
local portable fire pump dealer or our web site www.weber-motor.com for more information.<br />
7.3 Repairs<br />
Repairs require mechanical knowledge and special technical knowledge of this engine. <strong>Weber</strong> <strong>Motor</strong><br />
recommends you have any repairs performed by a workshop authorized by <strong>Weber</strong> <strong>Motor</strong> or the portable fire<br />
pump manufacturer.<br />
7.4 Warranty<br />
In the case of warranty claims, always consult a workshop authorized by the portable fire pump<br />
manufacturer. If that is not possible, contact your local portable fire pump dealer.<br />
22 SHB MPE850 Rev 1.1 | 406555 |
8 Service tasks in the workshop<br />
8.1 Safety messages workshop<br />
Service tasks in the workshop<br />
Service manual<br />
Engine power supply<br />
Protective equipment<br />
Tools<br />
SHB MPE850 Rev 1.1 | 406555 |<br />
8 Service tasks in the workshop<br />
8.1 Safety messages workshop<br />
All service tasks described in the following chapter require mechanical<br />
knowledge and special technical knowledge of this engine.<br />
► All service tasks described in chapter 8 Service tasks in the<br />
workshop must be performed by a workshop authorized by <strong>Weber</strong><br />
<strong>Motor</strong> or the portable fire pump manufacturer.<br />
Before reading chapter 8 Service tasks in the workshop, you must have<br />
read and understood all other information in the service manual.<br />
► Read through the service manual carefully before performing any<br />
service tasks. Pay particular attention to the safety messages.<br />
All service tasks require disconnection of the engine from the power<br />
supply. Starting the engine inadvertently may endanger the safety of<br />
personnel.<br />
Read the portable fire pump manufacturer‘s documentation for more<br />
information.<br />
► Disconnect the engine from the power supply before performing<br />
any servicing tasks.<br />
► Only reconnect the power supply to the engine once all service<br />
tasks are complete and all protective equipment is correctly fitted.<br />
Missing protective equipment poses a safety risk to personnel.<br />
► Attach all protective equipment after completing the service tasks.<br />
Unsuitable tools pose a safety risk to personnel.<br />
► Always use tools listed in chapter 8.2 Tools and accessories.<br />
23
8 Service tasks in the workshop<br />
8.2 Tools and accessories<br />
8.2 Tools and accessories<br />
8.2.1 <strong>Weber</strong> <strong>Motor</strong> service case<br />
<strong>Weber</strong> <strong>Motor</strong> offers a service case that contains the following service parts. Visit your local portable fire<br />
pump dealer or our web site www.weber-motor.com for more information.<br />
Figure Description<br />
Oil filter<br />
Spark plug<br />
Champion RC7PYCBX<br />
Feeler gauge<br />
0.05 – 2 mm<br />
Sealing kit valve cover<br />
Figure Description<br />
Valve adjustment<br />
shims in different sizes<br />
Serrated lock washer<br />
Valve adjustment kit<br />
24 SHB MPE850 Rev 1.1 | 406555 |
8.2.2 Equipment workshop<br />
Figure Description<br />
SHB MPE850 Rev 1.1 | 406555 |<br />
Hexagon screwdriver 5<br />
Torque wrench<br />
8 – 32 Nm<br />
[5 – 24 lbf ft]<br />
with extension and<br />
insert adapter<br />
Reversible ratchet<br />
with extension and<br />
insert adapter<br />
Hexagon screwdriver<br />
socket 5<br />
Caliper<br />
Measuring accuracy<br />
0.05 mm<br />
8 Service tasks in the workshop<br />
8.2 Tools and accessories<br />
In addition to the service case, you will require the following tools and accessories for service tasks. The<br />
figures are only examples of suitable tools. All tools and accessories are available from specialist retailers.<br />
Figure Description<br />
Bar magnet<br />
Spark plug wrench<br />
Wrench size 16 mm<br />
[5/8“]<br />
Diameter: maximum<br />
22 mm [0.87 in]<br />
Spark plug brush<br />
Universal strap wrench<br />
Universal pliers<br />
25
8 Service tasks in the workshop<br />
8.2 Tools and accessories<br />
8.2.3 Supplies<br />
You will require the following supplies to perform service tasks. Unless otherwise specified, use the products<br />
as directed by the manufacturer. All supplies are available from specialist retailers.<br />
Supplies Recommended products<br />
Anti-Seize assembly paste for lubricating threaded<br />
connections<br />
Engine internal preservative Liqui Moly, Germany<br />
Fuel stabilizer Liqui Moly, Germany<br />
Weicon Anti-Seize „High-Tech“ ASW 040 P<br />
Loctite 8150<br />
Sealing surface cleaner Liqui Moly brake and parts cleaner AIII, Germany<br />
26 SHB MPE850 Rev 1.1 | 406555 |
8.3 Changing engine oil and oil filter<br />
8.3.1 Changing engine oil<br />
See the portable fire pump manufacturer‘s documentation.<br />
8.3.2 Replacing oil filter<br />
– Protective gloves<br />
– Oil filter<br />
► Pump engine oil out. (See the portable fire<br />
pump manufacturer‘s documentation.)<br />
CAUTION! Risk of burning on oil filter. The oil<br />
filter can become very hot. Wear protective<br />
gloves.<br />
► Unscrew the oil filter 1 using a universal<br />
strap wrench.<br />
► Replace the oil filter 2 .<br />
► Clean the sealing surface 3 with sealing<br />
surface cleaner.<br />
► Coat the oil filter seal 4 lightly with engine<br />
oil.<br />
► Screw in the oil filter by hand.<br />
Anziehdrehmoment:<br />
10 Nm [7.4 lbf ft]<br />
► Fill with engine oil. (See the portable fire<br />
pump manufacturer‘s documentation.)<br />
► Start the engine and allow to run for<br />
1 – 2 minutes.<br />
SHB MPE850 Rev 1.1 | 406555 |<br />
– Universal strap wrench<br />
– Sealing surface cleaner<br />
1<br />
2<br />
3<br />
4<br />
8 Service tasks in the workshop<br />
8.3 Changing engine oil and oil filter<br />
27
8 Service tasks in the workshop<br />
8.4 Checking and adjusting valve play<br />
8.4 Checking and adjusting valve play<br />
8.4.1 Checking valve play<br />
– Sealing kit valve cover<br />
– Serrated lock washers<br />
– Feeler gauge<br />
Check valve play with a cold engine.<br />
WARNING! Danger of serious cuts from the<br />
gear on the camshaft when the engine is<br />
started. Disconnect the engine from the power<br />
supply.<br />
► Disconnect the wire harness connector from<br />
the ignition coils 1 and sensor camshaft<br />
2 .<br />
► Unscrew bolts 3 .<br />
► Unplug ignition coils 4 .<br />
► Unscrew bolts 5 .<br />
► Remove valve cover 6 .<br />
– Anti-Seize assembly paste<br />
– Hexagon screwdriver 5 mm<br />
– Torque wrench<br />
28 SHB MPE850 Rev 1.1 | 406555 |<br />
1<br />
2<br />
3<br />
4<br />
5<br />
6<br />
– Hexagon screwdriver<br />
socket 5 mm
Information! The camshaft is turned using the crankshaft. The portable fire pump manufacturer<br />
has devised a suitable procedure for this. Read the portable fire pump manufacturer‘s documentation for<br />
more information. Always turn the crankshaft in the same direction as the engine rotates. (See chapter 3.6<br />
Engine components and information.) Two rotations of the crankshaft correspond to one rotation of the<br />
camshaft.<br />
Checking the valve play on the 2nd cylinder<br />
► Turn the camshaft until the position of the<br />
camshaft is as illustrated. (See the portable<br />
fire pump manufacturer‘s documentation.)<br />
The camshaft is marked at the 2nd cylinder end<br />
only.<br />
The marking 7 ends flush with the cross<br />
bar.<br />
All rocker arms 8 on the cylinder have a<br />
certain amount of play.<br />
► Check the valve play 9 of all valves on the<br />
cylinder using a feeler gauge.<br />
Required valve play:<br />
0,2 – 0,3 mm<br />
► If the valve play of one or more valves is not<br />
right, continue with chapter 8.4.2 Adjusting<br />
valve play.<br />
SHB MPE850 Rev 1.1 | 406555 |<br />
7<br />
8<br />
9<br />
8 Service tasks in the workshop<br />
8.4 Checking and adjusting valve play<br />
29
8 Service tasks in the workshop<br />
8.4 Checking and adjusting valve play<br />
Checking the valve play on the 1st cylinder<br />
► Turn the camshaft until the position of the<br />
camshaft is as illustrated. (See the portable<br />
fire pump manufacturer‘s documentation.)<br />
The camshaft is marked at the 2nd cylinder end<br />
only.<br />
The marking 10 is not visible.<br />
All rocker arms 11 on the cylinder have a<br />
certain amount of play.<br />
► Check the valve play 12 of all valves on the<br />
cylinder using a feeler gauge.<br />
Required valve play:<br />
0,2 – 0,3 mm<br />
► If the valve play of one or more valves is not<br />
right, continue with chapter 8.4.2 Adjusting<br />
valve play.<br />
► Replace valve cover seals 13 .<br />
10<br />
11<br />
12<br />
13<br />
30 SHB MPE850 Rev 1.1 | 406555 |
► Clean the sealing surface 14 with sealing<br />
surface cleaner.<br />
► Put the valve cover 15 on.<br />
► Apply Anti-Seize assembly paste to all bolts<br />
16 .<br />
► Tighten the bolts in the sequence shown 17<br />
.<br />
Tightening torque:<br />
8 Nm +2 Nm [5.9 lbf ft +1.5 lbf ft]<br />
► Insert the ignition coils 18 .<br />
► Replace serrated lock washers 19 .<br />
Assemble the bolts 20 , washers 21 and<br />
serrated lock washers as illustrated.<br />
Tightening torque:<br />
8 Nm +2 Nm [5.9 lbf ft +1.5 lbf ft]<br />
► Connect the wire harness connectors to the<br />
ignition coils 22 and sensor camshaft 23 .<br />
► Start the engine and allow to run for<br />
1 – 2 minutes.<br />
SHB MPE850 Rev 1.1 | 406555 |<br />
14<br />
15<br />
16<br />
17<br />
18<br />
19<br />
20<br />
21<br />
22<br />
23<br />
5<br />
3<br />
8 Service tasks in the workshop<br />
8.4 Checking and adjusting valve play<br />
8<br />
1<br />
2<br />
7<br />
4<br />
6<br />
31
8 Service tasks in the workshop<br />
8.4 Checking and adjusting valve play<br />
8.4.2 Adjusting valve play with valve adjustment kit<br />
– Valve adjustment shims<br />
– Caliper<br />
– Bar magnet<br />
Adjusting the valve play on the 2nd cylinder<br />
WARNING! Danger of serious cuts from the<br />
gear on the camshaft when the engine is<br />
started. Disconnect the engine from the power<br />
supply.<br />
► Turn the camshaft until the position of the<br />
camshaft is as illustrated. (See the vehicle<br />
manufacturer‘s documentation.)<br />
The camshaft is marked at the 2nd cylinder end<br />
only.<br />
The marking 1 ends flush with the cross<br />
bar.<br />
All rocker arms 2 on the cylinder have a<br />
certain amount of play.<br />
► Continue with the section Replacing valve<br />
adjustment shim.<br />
– Valve adjustment kit<br />
– Hexagon screwdriver 5<br />
– Torque wrench<br />
32 SHB MPE850 Rev 1.1 | 406555 |<br />
1<br />
2<br />
– Hexagon screwdriver<br />
socket 5<br />
Information! The camshaft is turned using the crankshaft. The portable fire pump manufacturer<br />
has devised a suitable procedure for this. Read the portable fire pump manufacturer‘s documentation for<br />
more information. Always turn the crankshaft in the same direction as the engine rotates. (See chapter 3.6<br />
Engine components and information.) Two rotations of the crankshaft correspond to one rotation of the<br />
camshaft.
Adjusting the valve play on the 1st cylinder<br />
► Turn the camshaft until the position of the<br />
camshaft is as illustrated. (See the vehicle<br />
manufacturer‘s documentation.)<br />
The camshaft is marked at the 2nd cylinder end<br />
only.<br />
The marking 3 ends flush with the cross<br />
bar. Otherwise, no inscription is visible.<br />
All rocker arms 4 on the cylinder have a<br />
certain amount of play.<br />
► Continue with the section Replacing valve<br />
adjustment shim.<br />
Replacing valve adjustment shim.<br />
NOTICE! Engine damage from small components<br />
in the engine or cylinder head. Operating the<br />
engine when there are small components in the<br />
crankcase and cylinder head can result in serious<br />
damage and cause the crank drive to seize.<br />
► Cover the chain channel 6 .<br />
► Hold the valve adjustment tool 7 in<br />
position.<br />
► Screw in the bolts 5 .<br />
Tightening torque:<br />
8 Nm +2 Nm [5.9 lbf ft +1.5 lbf ft]<br />
SHB MPE850 Rev 1.1 | 406555 |<br />
3<br />
4<br />
5<br />
6<br />
7<br />
8 Service tasks in the workshop<br />
8.4 Checking and adjusting valve play<br />
33
8 Service tasks in the workshop<br />
8.4 Checking and adjusting valve play<br />
► Position the rocker arm pusher 8 on the<br />
rocker arm 9 .<br />
► Press down the slide plate 11 using the<br />
rocker arm pusher 10 until the pin 12<br />
engages.<br />
► Remove the valve adjustment shim 13<br />
using a bar magnet.<br />
► Measure the valve adjustment shim using a<br />
caliper.<br />
► Insert the new valve adjustment shim.<br />
10<br />
11<br />
12<br />
13<br />
34 SHB MPE850 Rev 1.1 | 406555 |<br />
8<br />
9
► Hold the rocker arm pusher 14 in position.<br />
► Press down the slide plate 15 slightly using<br />
the rocker arm pusher.<br />
► Slide the pin 16 forward by hand.<br />
► Slowly release the rocker arm pusher.<br />
The valve spring slides the slide plate<br />
upwards again.<br />
► Unscrew the bolts 17 .<br />
► Remove the valve adjustment tool 18 .<br />
► Remove the cover from the chain channel.<br />
NOTICE! Valve breakage due to insufficient valve<br />
play.<br />
► Check the valve play.<br />
► Continue with chapter 8.4.1 Checking valve<br />
play.<br />
SHB MPE850 Rev 1.1 | 406555 |<br />
14<br />
15<br />
16<br />
17<br />
18<br />
8 Service tasks in the workshop<br />
8.4 Checking and adjusting valve play<br />
35
8 Service tasks in the workshop<br />
8.4 Checking and adjusting valve play<br />
8.4.3 Adjusting valve play without special tool<br />
– Valve adjustment shims<br />
– Caliper<br />
Adjusting the valve play on the 2nd cylinder<br />
WARNING! Danger of serious cuts from the<br />
gear on the camshaft when the engine is<br />
started. Disconnect the engine from the power<br />
supply.<br />
► Turn the camshaft until the position of the<br />
camshaft is as illustrated. (See the vehicle<br />
manufacturer‘s documentation.)<br />
The camshaft is marked at the 2nd cylinder end<br />
only.<br />
The marking 1 ends flush with the cross<br />
bar.<br />
All rocker arms 2 on the cylinder have a<br />
certain amount of play.<br />
► Continue with the section Replacing valve<br />
adjustment shim.<br />
– Bar magnet<br />
– Universal pliers<br />
Information! The camshaft is turned using the crankshaft. The portable fire pump manufacturer<br />
has devised a suitable procedure for this. Read the portable fire pump manufacturer‘s documentation for<br />
more information. Always turn the crankshaft in the same direction as the engine rotates. (See chapter 3.6<br />
Engine components and information.) Two rotations of the crankshaft correspond to one rotation of the<br />
camshaft.<br />
36 SHB MPE850 Rev 1.1 | 406555 |<br />
1<br />
2
Adjusting the valve play on the 1st cylinder<br />
► Turn the camshaft until the position of the<br />
camshaft is as illustrated. (See the vehicle<br />
manufacturer‘s documentation.)<br />
The camshaft is marked at the 2nd cylinder end<br />
only.<br />
The inscription 3 is not visible.<br />
All rocker arms 4 on the cylinder have a<br />
certain amount of play.<br />
► Continue with the section Replacing valve<br />
adjustment shim.<br />
Replacing valve adjustment shim.<br />
NOTICE! Engine damage from small components<br />
in the engine or cylinder head. Operating the<br />
engine when there are small components in the<br />
crankcase and cylinder head can result in serious<br />
damage and cause the crank drive to seize.<br />
► Cover the chain channel 5 .<br />
► Remove the rocker axle 6 using a<br />
universal pliers.<br />
► Remove the rocker arm 7 .<br />
► Remove the valve adjustment shim 8<br />
using a bar magnet.<br />
► Measure the valve adjustment shim using a<br />
caliper.<br />
SHB MPE850 Rev 1.1 | 406555 |<br />
3<br />
4<br />
5<br />
6<br />
7<br />
8<br />
8 Service tasks in the workshop<br />
8.4 Checking and adjusting valve play<br />
37
8 Service tasks in the workshop<br />
8.4 Checking and adjusting valve play<br />
► Insert the new valve adjustment shim 9 .<br />
► Hold the rocker arm 10 in position.<br />
► Check if the circlip 12 is installed.<br />
► Slide in the rocker axle 11 .<br />
► Remove the cover from the chain channel.<br />
NOTICE! Valve breakage due to insufficient valve<br />
play.<br />
► Check the valve play.<br />
► Continue with chapter 8.4.1 Checking valve<br />
play.<br />
10<br />
11<br />
12<br />
38 SHB MPE850 Rev 1.1 | 406555 |<br />
9
6.5 Replacing spark plugs<br />
– Spark plugs<br />
– Serrated lock washer<br />
– Hexagon screwdriver 5 mm<br />
– Torque wrench<br />
Remove spark plugs with a cold engine.<br />
► Disconnect the wire harness connectors<br />
from the ignition coils 1 .<br />
► Unscrew bolts 2 .<br />
► Unplug ignition coils 3 .<br />
► Remove the spark plugs 4 using a spark<br />
plug wrench.<br />
► Replace the spark plugs.<br />
► Install the spark plugs using a spark plug<br />
wrench.<br />
Tightening torque:<br />
20 Nm +6 Nm [14.8 lbf ft ±4.4 lbf ft]<br />
SHB MPE850 Rev 1.1 | 406555 |<br />
– Reversible ratchet<br />
– Hexagon screwdriver<br />
socket 5 mm<br />
– Spark plug wrench<br />
1<br />
2<br />
3<br />
4<br />
6 Service tasks in the workshop<br />
6.5 Replacing spark plugs<br />
39
6 Service tasks in the workshop<br />
6.5 Replacing spark plugs<br />
► Insert the ignition coils 5 .<br />
► Replace serrated lock washers 6 .<br />
Assemble the bolts 7 , washers 8 and<br />
serrated lock washers as illustrated.<br />
Tightening torque:<br />
8 Nm +2 Nm [5.9 lbf ft +1.5 lbf ft]<br />
► Connect the wire harness connectors to the<br />
ignition coils 9 .<br />
► Start the engine and allow to run for<br />
1 – 2 minutes.<br />
40 SHB MPE850 Rev 1.1 | 406555 |<br />
5<br />
6<br />
7<br />
8<br />
9
8.6 Checking spark plugs<br />
– Serrated lock washer<br />
– Hexagon screwdriver 5 mm<br />
– Torque wrench<br />
– Reversible ratchet<br />
Remove spark plugs with a cold engine.<br />
► Disconnect the wire harness connectors<br />
from the ignition coils 1 .<br />
► Unscrew bolts 2 .<br />
► Unplug ignition coils 3 .<br />
► Remove the spark plugs 4 using a spark<br />
plug wrench.<br />
SHB MPE850 Rev 1.1 | 406555 |<br />
– Hexagon screwdriver<br />
socket 5 mm<br />
– Spark plug wrench<br />
– Feeler gauge<br />
1<br />
2<br />
3<br />
4<br />
8 Service tasks in the workshop<br />
8.6 Checking spark plugs<br />
– Spark plug brush<br />
41
8 Servicearbeiten in der Werkstatt<br />
8.6 Zündkerzen prüfen<br />
► If the electrodes 5 are extremely sooty,<br />
clean carefully using a spark plug brush.<br />
► Check the spark plug gap 6<br />
gauge.<br />
using a feeler<br />
Required spark plug gap:<br />
0,69 – 0,84 mm [0.028 – 0.032 in]<br />
► If the spark plug gap is not satisfactory,<br />
replace the spark plug. Always replace spark<br />
plugs in pairs.<br />
► Install the spark plugs 7 using a spark<br />
plug wrench.<br />
Tightening torque:<br />
20 Nm +6 Nm [14.8 lbf ft ±4.4 lbf ft]<br />
► Insert the ignition coils 8 .<br />
► Replace serrated lock washers 9 .<br />
Assemble the bolts 10 , washers 11 and<br />
serrated lock washers as illustrated.<br />
Tightening torque:<br />
8 Nm +2 Nm [5.9 lbf ft +1.5 lbf ft]<br />
11<br />
42 SHB MPE850 Rev 1.1 | 406555 |<br />
5<br />
6<br />
7<br />
8<br />
9<br />
10
► Connect the wire harness connectors to the<br />
ignition coils 12 .<br />
► Start the engine and allow to run for<br />
1 – 2 minutes.<br />
SHB MPE850 Rev 1.1 | 406555 |<br />
12<br />
8 Servicearbeiten in der Werkstatt<br />
8.6 Zündkerzen prüfen<br />
43
8 Service tasks in the workshop<br />
8.7 Changing coolant | …<br />
8.7 Changing coolant<br />
See the portable fire pump manufacturer‘s documentation.<br />
8.8 Replacing fuel filter<br />
See the portable fire pump manufacturer‘s documentation.<br />
44 SHB MPE850 Rev 1.1 | 406555 |
8.9 Preparing the engine for storage<br />
– Engine internal preservative<br />
– Fuel stabilizer<br />
► Change engine oil and oil filter (See chapter 8.3 Changing engine oil and oil filter.)<br />
► Fill up the fuel tank. Add a fuel stabilizer according to the manufacturer's instructions.<br />
► Check spark plugs. (See chapter 8.6<br />
Checking spark plugs.)<br />
► Spray engine internal preservative into the<br />
cylinder through the spark plug bores 1<br />
according to the manufacturer's instructions.<br />
Do not start the engine again.<br />
SHB MPE850 Rev 1.1 | 406555 |<br />
1<br />
8 Service tasks in the workshop<br />
8.9 Preparing the engine for storage<br />
45
8 Service tasks in the workshop<br />
8.10 Disposal<br />
8.10 Disposal<br />
When disposing of operating materials, replaced parts or the whole engine, always comply with the relevant<br />
applicable national laws and guidelines.<br />
46 SHB MPE850 Rev 1.1 | 406555 |
9 Confirmation of service tasks<br />
Have the workshop personnel provide certification confirming that your engine was serviced. You can use the<br />
following documents.<br />
Engine variant (6-digit)<br />
Serial number (8-digit)<br />
Date:<br />
Status hours of operation:<br />
Company seal, signature<br />
Date:<br />
Status hours of operation:<br />
Company seal, signature<br />
Date:<br />
Status hours of operation:<br />
Company seal, signature<br />
SHB MPE850 Rev 1.1 | 406555 |<br />
_ _ _ _ _ _ Date of initial registration _________________<br />
_ _ _ _ _ _ _ _<br />
Work carried out:<br />
� Engine oil and oil filter<br />
changed<br />
� Valve play checked<br />
� Spark plugs replaced<br />
� Coolant changed<br />
� Fuel Filter replaced<br />
......................................<br />
......................................<br />
......................................<br />
......................................<br />
Date:<br />
Status hours of operation:<br />
Company seal, signature<br />
Date:<br />
Status hours of operation:<br />
Company seal, signature<br />
Date:<br />
Status hours of operation:<br />
Company seal, signature<br />
9 Confirmation of service tasks<br />
Work carried out:<br />
� Engine oil and oil filter<br />
changed<br />
� Valve play checked<br />
� Spark plugs replaced<br />
� Coolant changed<br />
� Fuel Filter replaced<br />
......................................<br />
......................................<br />
......................................<br />
......................................<br />
47
9 Confirmation of service tasks<br />
Date:<br />
Status hours of operation:<br />
Company seal, signature<br />
Date:<br />
Status hours of operation:<br />
Company seal, signature<br />
Date:<br />
Status hours of operation:<br />
Company seal, signature<br />
Date:<br />
Status hours of operation:<br />
Company seal, signature<br />
Work carried out:<br />
� Engine oil and oil filter<br />
changed<br />
� Valve play checked<br />
� Spark plugs replaced<br />
� Coolant changed<br />
� Fuel Filter replaced<br />
......................................<br />
......................................<br />
......................................<br />
......................................<br />
48 SHB MPE850 Rev 1.1 | 406555 |<br />
Date:<br />
Status hours of operation:<br />
Company seal, signature<br />
Date:<br />
Status hours of operation:<br />
Company seal, signature<br />
Date:<br />
Status hours of operation:<br />
Company seal, signature<br />
Date:<br />
Status hours of operation:<br />
Company seal, signature<br />
Work carried out:<br />
� Engine oil and oil filter<br />
changed<br />
� Valve play checked<br />
� Spark plugs replaced<br />
� Coolant changed<br />
� Fuel Filter replaced<br />
......................................<br />
......................................<br />
......................................<br />
......................................<br />
Work carried out:<br />
� Engine oil and oil filter<br />
changed<br />
� Valve play checked<br />
� Spark plugs replaced<br />
� Coolant changed<br />
� Fuel Filter replaced<br />
......................................<br />
......................................<br />
......................................<br />
......................................
Appendix<br />
Engine manufacturer<br />
Engine manufacturer<br />
SHB MPE850 Rev 1.1 | 406555 |<br />
<strong>Weber</strong> <strong>Motor</strong> GmbH<br />
Otto-Lilienthal-Str. 5<br />
88677 Markdorf<br />
Germany<br />
www.weber-motor.com<br />
Appendix<br />
Engine manufacturer<br />
49
Appendix<br />
Index<br />
B<br />
Index<br />
Break-in period, engine 18<br />
C<br />
Components, engine 14<br />
Coolant, change 44<br />
Coolant level, check 19<br />
Coolant, specification 13<br />
D<br />
Dealer and servicing network 22<br />
Direction of rotation, engine 14<br />
Disposal 46<br />
E<br />
Engine oil, change 27<br />
Engine oil, specification 12<br />
F<br />
Fuel filter, replace 44<br />
Fuel, specification 12<br />
I<br />
Identifikation, engine 11<br />
Intended use, engine 11<br />
L<br />
Locating a workshop 22<br />
M<br />
Malfunctions 21<br />
Manufacturer, engine 49<br />
O<br />
Oil Filter, replace 27<br />
Oil level, check 19<br />
P<br />
Part number, engine 11<br />
R<br />
Repairs 22<br />
S<br />
Serial number, engine 11<br />
Service case, overview 24<br />
Service intervals 16<br />
Spark plugs, check 41<br />
Spark plugs, replace 39<br />
Spark plugs, spark plug gap 41<br />
Storage, preparation 45<br />
Supplies, overview 26<br />
50 SHB MPE850 Rev 1.1 | 406555 |<br />
T<br />
Technical specifications 15<br />
Tools, overview 25<br />
V<br />
Valve play, adjust without special tool 36<br />
Valve play, adjust with valve adjustment kit 32<br />
Valve play, check 28<br />
W<br />
Warranty 22