Manual e.Tool ME3011bc config 4.01.1_P r04 - Helmut Mauell do ...
Manual e.Tool ME3011bc config 4.01.1_P r04 - Helmut Mauell do ...
Manual e.Tool ME3011bc config 4.01.1_P r04 - Helmut Mauell do ...

You also want an ePaper? Increase the reach of your titles
YUMPU automatically turns print PDFs into web optimized ePapers that Google loves.
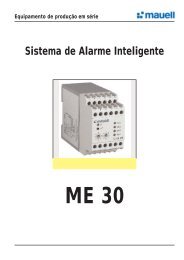
Alarm System<br />
SERIAL PRODUCTS<br />
Digital Alarms Annunciator<br />
e.<strong>Tool</strong> ME3011 Config<br />
Software <strong>Manual</strong><br />
<strong>Manual</strong> e.<strong>Tool</strong> ME3011 <strong>config</strong> 4.02.3_E r06 1/35
1 – Instruction<br />
Introduction 4<br />
2 – Software Installation<br />
e.<strong>Tool</strong> ME3011 <strong>config</strong> Installation 5<br />
System Requirement 5<br />
Installation Procedure 5<br />
3 – Software Start<br />
Software Authentication 8<br />
Getting System Access 8<br />
First Access 8<br />
4 – Software Interface<br />
e.<strong>Tool</strong> ME3011 <strong>config</strong> Interface 9<br />
Main Menu 10<br />
Project 11<br />
New 11<br />
Open 12<br />
Visualization Mode 12<br />
Export/Import 13<br />
Export 13<br />
Import 14<br />
Edit Mode 15<br />
Save as... 16<br />
Close 16<br />
Exit 16<br />
Configuration 17<br />
Communication 17<br />
Language 17<br />
Users 18<br />
Visualization Mode 18<br />
Edit Mode 18<br />
<strong>Tool</strong>s 19<br />
Administrative <strong>Tool</strong>s 19<br />
User Configuration 19<br />
Visualization Mode 19<br />
Insert Mode 20<br />
Edit Mode 21<br />
Clock Adjustment 22<br />
Help 22<br />
<strong>Manual</strong> 22<br />
About 22<br />
Fast Button Access 23<br />
Status Bar 24<br />
5 – Configuring the Annuciators<br />
Annunciator Configuration Group 24<br />
Visualization and Tags Configuration Group 25<br />
Visualization 25<br />
Operation Mode 25<br />
<strong>Manual</strong> e.<strong>Tool</strong> ME3011 <strong>config</strong> 4.02.3_E r06 2/35
Configuration Mode 25<br />
Tags Configuration 26<br />
Representation Group 27<br />
Configuration Group 28<br />
General Configuration 29<br />
Power Supply Alarm 30<br />
Communication 30<br />
Point Configuration 31<br />
6 – Language Configuration<br />
Language Configuration 33<br />
Index Archive: ListID 33<br />
Text Archive: .txt 33<br />
Insert the New Language 34<br />
Modifying the Archive ListID.txt 34<br />
Insert the Text Archive 34<br />
Selecting the Language Just Insert 34<br />
This manual is subject to changes without previous advice<br />
Tabelas de Revisões<br />
Autor da Revisão Revisão Versão Data<br />
raf 00 2.01.1 22.11.06<br />
dro 01 3.01.1 22.03.07<br />
dro 02 3.xx.x 16.05.07<br />
ama 03 3.xx.x 17.10.07<br />
lha 04 4.xx.x 09.03.09<br />
lha 05 4.02.1 12.03.09<br />
lha 06 4.02.3 11.03.09<br />
<strong>Manual</strong> e.<strong>Tool</strong> ME3011 <strong>config</strong> 4.02.3_E r06 “Empresa incentivada pela Lei de Informática” 3/35
Dear Customer,<br />
INTRODUCTION<br />
<strong>Mauell</strong> thanks you for trusting us on choosing our products. It is a pleasure to provide you all necessary<br />
information on the newest member of its <strong>Mauell</strong> annunciator family This manual presents all information needed to<br />
<strong>config</strong>uration ME3011 annunciators family through software e.<strong>Tool</strong> ME3011 <strong>config</strong> 3.xx.x .<br />
<strong>Mauell</strong> hopes that this manual helps you explore totally the potential of the new ME 3011 annunciator.<br />
Please contact us, if any <strong>do</strong>ubt persists about <strong>config</strong>uration through software or the equipment operation, after<br />
reading it. Our technical team is always available to clear any <strong>do</strong>ubt you may deem necessary. The contacts can<br />
realized for the e-mail mauell@mauell.com.br; for the site www.mauell.com.br; for the fax +55 11 2117 5354 or still<br />
for the fone +55 11 2117 5353.<br />
In order to help us on our support service have the series number and the firmware version with you, as these<br />
data are essential for clearing the <strong>do</strong>ubts and for technical assistance.<br />
<strong>Manual</strong> e.<strong>Tool</strong> ME3011 <strong>config</strong> 4.02.3_E r06 4/35
1- System Requirement<br />
e.<strong>Tool</strong> ME3011 <strong>config</strong> INSTALLATION<br />
The minimum <strong>config</strong>uration of hardware and software for the e.<strong>Tool</strong> ME 3011 <strong>config</strong> installation is:<br />
• Computer Pentium III 1,4 GHz or over;<br />
• Memory of 128 Mbytes or over (256 Mbytes is recommended);<br />
• Win<strong>do</strong>ws® 2000 Professional or Win<strong>do</strong>ws® XP Professional;<br />
• Microsoft .Net Framework 1.1;<br />
• Video resolution of 1024 x 768 dpi (recommended) or over;<br />
2- Installation Procedure<br />
To the software installation in your computer, it is necessary executed the file Setup e.<strong>Tool</strong> ME3011 <strong>config</strong><br />
.msi. Therefore, follow the procedure bellow:<br />
� Start;<br />
� Execute;<br />
� Search;<br />
� Search the file e.<strong>Tool</strong> ME3011 <strong>config</strong> .msi in the software file e.<strong>Tool</strong> ME3011 <strong>config</strong>;<br />
With this, the following screen will appear:<br />
Press the button Next to continue. The next screen will appear:<br />
Select the desired language to startup the software. The languages available are: Portuguese, English, Spanish,<br />
or German.<br />
<strong>Manual</strong> e.<strong>Tool</strong> ME3011 <strong>config</strong> 4.02.3_E r06 5/35
After the language selection, press the button Next to continue, and following screen will appear:<br />
Select the destination of the software installation. Default is C:\Arquivos de Programas\<strong>Helmut</strong> <strong>Mauell</strong>\e.<strong>Tool</strong> ME<br />
3011 <strong>config</strong>\. Also, select Who will access the software, if every user (Everyone), or only the user that is executing<br />
the installation (Just me).<br />
Proceed with the installation pressing the button Next, and following picture will appear:<br />
Now with all information included, the software will be ready to start the installation. For this, proceed pressing<br />
the button Next.<br />
<strong>Manual</strong> e.<strong>Tool</strong> ME3011 <strong>config</strong> 4.02.3_E r06 6/35
The software will be installed and wait until the operation is completed. When the installation is finished, the<br />
picture bellow will appear:<br />
Just press the button Close and the software installation e.<strong>Tool</strong> ME 3011 <strong>config</strong> will be finished.<br />
<strong>Manual</strong> e.<strong>Tool</strong> ME3011 <strong>config</strong> 4.02.3_E r06 7/35
SOFTWARE AUTHENTICATION<br />
The software, create a shortcut standart in the paste <strong>Helmut</strong> <strong>Mauell</strong>, located in the program group of the<br />
Win<strong>do</strong>ws main menu and another Win<strong>do</strong>ws desktop. The program execute click in the shortcut call e.<strong>Tool</strong> ME3011<br />
<strong>config</strong>.<br />
The e.<strong>Tool</strong> ME3011 <strong>config</strong> software <strong>do</strong>n’t need hard-key to be start.<br />
1 – Getting System Access<br />
When the program start, the software loading the system modules automatically, and after that appear this<br />
screen :<br />
Types the user and the password in field respective and press the button OK for the system access.<br />
2 – First Access<br />
If the first access to the system, use the following data:<br />
• User: mauell<br />
• Password: mauell<br />
After the system access, create the new administrator user and delete the count “mauell” (or keep with a<br />
different password), as the procedure “Users Configuration” in the item 4 (SOFTWARE INTERFACE).<br />
<strong>Manual</strong> e.<strong>Tool</strong> ME3011 <strong>config</strong> 4.02.3_E r06 8/35
Selected:<br />
After to enter in the system, the software presents of following form:<br />
e.TOOL ME3011 CONFIG INTERFACE<br />
• Online; Is achieved a search in the communication <strong>do</strong>ors of the computer in order to find a annunciator<br />
connected and open it immediately.<br />
• Offline; The system <strong>do</strong>esn’t open any project (except if exist a default project <strong>config</strong>ured).<br />
Can divide the software e.<strong>Tool</strong> ME3011BC <strong>config</strong> interface in 3 parts:<br />
• Main Menu;<br />
• Fast Access Button;<br />
• Status Bar.<br />
<strong>Manual</strong> e.<strong>Tool</strong> ME3011 <strong>config</strong> 4.02.3_E r06 9/35
The image bellow presents the software main menu:<br />
This is hierarchy of the main menu:<br />
• Project<br />
o New<br />
o Open<br />
o Save<br />
o Save as<br />
o Close<br />
o Exit<br />
• Configuration<br />
o Communication<br />
o Language<br />
o Users<br />
• <strong>Tool</strong>s<br />
o Administrative <strong>Tool</strong>s<br />
� User’s Configuration<br />
o Clock Adjustment<br />
• Help<br />
o <strong>Manual</strong><br />
o About<br />
In the following pages describes each main menu subitems.<br />
MAIN MENU<br />
<strong>Manual</strong> e.<strong>Tool</strong> ME3011 <strong>config</strong> 4.02.3_E r06 10/35
1 - Project<br />
1.1 - New<br />
When this option access, the next screen is appear:<br />
Project Offline Information:<br />
• Project’s Name: Field with the project’s name of the created. This name is have to be only, and not<br />
possible project register with the same name.<br />
• Project Description: Field with additional information on the project.<br />
• Annunciator’s Name: Identification of the annunciator.<br />
• Model: Indicates what kind of annunciator to be registered.<br />
• Format: Identify the points quantity of the annunciator, or be, annunciator physical format.<br />
All the information must be filled. Verify in the format field if the inserted points, corresponds with of the<br />
annunciator points who are installed. Being correct the information is enough to the project register. Software is<br />
present the following screen, informing waits while inserts in the database the project, annunciators and points.<br />
If option create project and open, the project is automatically opened following subitem “Visualization<br />
Mode” of the item “Open”<br />
<strong>Manual</strong> e.<strong>Tool</strong> ME3011 <strong>config</strong> 4.02.3_E r06 11/35
1.2 - Open<br />
Visualization Mode<br />
When this option access, the next screen is appear:<br />
Through this win<strong>do</strong>w it is possible to visualize all the registered projects, and is possible to modify the<br />
<strong>config</strong>urations of the selected project.<br />
Registered Projects:<br />
This table shows all the registered projects in the database. When selecting a project in this table, automatically<br />
its information appear in the project data group.<br />
Standard Project:<br />
This item the user is available if to possess right of “Define a Standard Project” and when enable, this item<br />
<strong>config</strong>ure software so that the selected project is automatically loaded when is started e.<strong>Tool</strong> ME3011 <strong>config</strong><br />
software.<br />
Project Data:<br />
• Project’s Name: Inform the selected project’s name.<br />
• Project Description: Show the information of the selected project, <strong>config</strong>ured during project created.<br />
• Annunciator’s Name: Inform the annunciator’s name that was inserted in the registered project’s..<br />
• Model: Shows the annunciator’s.<br />
• Format: Inform the physical format registered in the project created.<br />
• Creation Date: Inform of the project creation date and hour.<br />
• Owner: Inform the user who created the selected project.<br />
• Communication Port: Field with the communication port choice. The possibilities are COM1 the COM8.<br />
• Speed: Field with the communication port speed.<br />
• Parity: Field with the communication port parity.<br />
• Stop Bit: Field with the stopbit information.<br />
Export Button:<br />
<strong>Manual</strong> e.<strong>Tool</strong> ME3011 <strong>config</strong> 4.02.3_E r06 12/35
This item the user is available if to possess right of “Export”. This button is used to export the <strong>config</strong>urations of<br />
the selected project for an archive with extension .hmb. This way is possible save all project <strong>config</strong>urations that<br />
database in a archive and later add in safe project in the program. And also to export a e.<strong>Tool</strong> ME 3011 view data<br />
base (See Item Export).<br />
Import Button:<br />
This item the user is available if to possess right of “Export”. This button is used to import the project<br />
<strong>config</strong>urations previous exported. The custom inset get all the information of an archive with extension (.hmb) and<br />
add again in the database project. And Also to export a e.<strong>Tool</strong> ME 3011 view database (See Item Import).<br />
Open Button:<br />
To project open, that’s enough selected in the project’s list, next press the button “Open”. The annunciator<br />
visualization screen is appear.<br />
Edit Button:<br />
This item the user is available if to possess right of “Edit Project”. The edit button enable the fields for the edition<br />
of the selected project. With this, the win<strong>do</strong>w is pass to Edit Mode.<br />
Delete Button:<br />
This item the user is available if to possess right of “Delete Project”. This button is used to selected project delete<br />
of the database. For this, that’s enough selected in the project’s list, next press the button “Delete”.<br />
Close Button:<br />
Screen close, without opening project.<br />
Export/Import<br />
The buttons export and import allow the interchange of the projects and tools of the e.<strong>Tool</strong> <strong>config</strong> and e.<strong>Tool</strong><br />
view. This operation can be executed in two ways: Import / Export for archive that allows the use of information as<br />
<strong>config</strong> much as view, or directly for e.<strong>Tool</strong> view database.<br />
Export<br />
In the button press, the screen appear for the user choice export as archive (.hmb), or export directly e.<strong>Tool</strong> ME<br />
3011 view database, as show figure below::<br />
After select for export as e.<strong>Tool</strong> ME 3011 view database, press next. The screen appear asking for the local<br />
selected where the archive is exported.<br />
<strong>Manual</strong> e.<strong>Tool</strong> ME3011 <strong>config</strong> 4.02.3_E r06 13/35
Inform the local where the archive is exported, press ok, the archive is exported and ready for used as <strong>config</strong><br />
much as view..<br />
Import<br />
In the button press, the screen appear for the user choice import as archive (.hmb), or import directly e.<strong>Tool</strong> ME<br />
3011 view database, as show figure below:<br />
After select for export as e.<strong>Tool</strong> ME 3011 view database, press next. The screen appear asking for the local<br />
selected where the archive is imported.<br />
Inform the local where the archive is imported, press ok, and e.<strong>Tool</strong> ME 3011 view registered project’s database<br />
appear.<br />
<strong>Manual</strong> e.<strong>Tool</strong> ME3011 <strong>config</strong> 4.02.3_E r06 14/35
Selected the used project and press next. The selected project is available in the ME 3011 <strong>config</strong> project screen..<br />
Edit Mode<br />
In the Edit Mode, the screen is following form:<br />
The Project Description Field and data project for alteration of the annunciators is enable. The creation date field<br />
is update for current date and hour, and the owner is update for current user, that the take over the project.<br />
Project Data:<br />
• Project’s Name: The edited project’s name field.<br />
• Project’s Description: Field used for edited or insert information in the selected project.<br />
• Annunciator’s Name: Annunciator’s name field informed in the project created.<br />
• Format: Inform the physical format registered in the project created.<br />
• Point Quality: Inform the annunciators points number.<br />
• Creation Date: Inform the date and hour of the project creation.<br />
• Owner: Inform the user of project creation selected.<br />
• Communication Port: Communication Port field choice. The possibilities are COM1 the COM8.<br />
• Speed: Communication port speed field.<br />
• Parity: Communication port parity field.<br />
• Stop Bit: Stopbit field information.<br />
Cancel Button:<br />
When pressing the button “Cancel” the screen come back the visualization mode, and the project is not modified.<br />
All the alterations are disrespected.<br />
<strong>Manual</strong> e.<strong>Tool</strong> ME3011 <strong>config</strong> 4.02.3_E r06 15/35
Apply Button:<br />
For add the new project <strong>config</strong>urations, this enough press apply button.<br />
After the process, the screen come back this visualization mode.<br />
1.3 – Save as...<br />
The save as... item only available when is have an open project and the user is available if to possess right of<br />
“Save as...”. His function is copy the current project for other name. All current project data is copied for the new<br />
project.<br />
Press Project – Save as..., the next screen is appear:<br />
In the available field, types the project name that’s contain the same information of the current project. In the<br />
example above, all project <strong>config</strong>uration ‘test’ is copied for the new project that have types name. The “Save as...”<br />
button is realize the process of the project copy for the database insert. With this, program takes over the new<br />
project as current project. The cancel button disrespects the copy and come back the annunciator <strong>config</strong>uration<br />
screen.<br />
1.4 - Close<br />
The Close item only available when is have an open project. His function is close the open project, and make the<br />
program comes back to the beggining state.<br />
1.5 - Exit<br />
The Exit item the finish execution the e.<strong>Tool</strong> ME3011 <strong>config</strong> program.<br />
<strong>Manual</strong> e.<strong>Tool</strong> ME3011 <strong>config</strong> 4.02.3_E r06 16/35
2 – Configuration<br />
2.1 - Communication<br />
The <strong>config</strong>uration - Communication options only available when is <strong>do</strong>n’t have an open project. If the<br />
communication port closed and the user is available if to possess right of “Communication”. When option access, the<br />
screen is following appear:<br />
.<br />
Through this screen, the all <strong>config</strong>ured annunciator communication is possible to <strong>config</strong>ure.<br />
Annunciator Data:<br />
• Communication Port: Communication Port field choice. The possibilities are COM1 the COM8.<br />
• Speed: Communication port speed field.<br />
• Parity: Communication port parity field.<br />
• Stop Bit: Stopbit field information.<br />
OK Button:<br />
When press “OK” button the database and current project is update with the new communications information<br />
Cancel Button:<br />
When press “Cancel” button all alterations is disrespected.<br />
2.2 - Language<br />
The Configuration – Language menu contains a list with the available languages. The languages that follow<br />
software are Portuguese, English, Spanish and Deutsch. Enough press in the desired language to modify of the<br />
program language standard. Beyond these languages, also are possible created new languages for the local<br />
languages or modify the existing languages, as explained in the item 6 “Languages Configuring”.<br />
<strong>Manual</strong> e.<strong>Tool</strong> ME3011 <strong>config</strong> 4.02.3_E r06 17/35
2.3 - Users<br />
Visualization Mode<br />
This item only available when is <strong>do</strong>n’t have an open project in the moment. When press Configuration – Users,<br />
the screen is following appear:<br />
The current user information appear, and the following options are possible:<br />
Logoff Button:<br />
When press “Logoff” the authentication screen appear, so that the new user connects in the system.<br />
Close Button:<br />
When press “Close” button the screen is finished and alterations is disrespected.<br />
Edit Button:<br />
When press “Edit” button is possible modify the user password, as well as the name. The win<strong>do</strong>w pass to Edit<br />
Mode.<br />
Edit Mode<br />
The screen will move automatically as the shows figure following:<br />
With this the fields appear: Current Password, New Password, Confirm the Password. Moreover, User’s name is<br />
enable.<br />
• User’s Name: Name user’s field, now with the edition possibility.<br />
• Current Password: User current password field..<br />
• New Password: User new password field<br />
• Confirm the Password: User new password field.<br />
Apply Button:<br />
When press “Apply” button, the system verify that current password field is really the stored user password.<br />
Moreover, through a comparison between New Password field and Confirm the Password field, verifying if both are<br />
identical. Case all the data are correct, the user is modified as the alterations.<br />
Cancel Button:<br />
When press “Cancel” button all alterations is disrespected.<br />
<strong>Manual</strong> e.<strong>Tool</strong> ME3011 <strong>config</strong> 4.02.3_E r06 18/35
3 – <strong>Tool</strong>s<br />
3.1 – Administrative <strong>Tool</strong>s<br />
3.1.1 – User’s Configuration<br />
Visualization Mode<br />
When press <strong>Tool</strong>s – Administrative <strong>Tool</strong>s – User’s Configuration, the screen is following appear:<br />
Through this screen, is possible created new users, delete users, beside realize all the necessary alterations with<br />
the system registered users, with modify the name, category (Administrator or Restrict User) and password.<br />
This tool access is restricted to users who possess at least one of the rights of modify the user (Create User / Edit<br />
User / Delete User).<br />
Registered Project:<br />
This table shows all the registered projects in the database. When selecting a project in this table, automatically<br />
its information appear in the project data group.<br />
User Data:<br />
• Login: Inform the user login selected in registered user’s table.<br />
• User’s Name: Inform the user name selected in registered user’s table.<br />
• Category: Inform where the group is the user selected in registered user’s table.<br />
Delete Button:<br />
This item the user is available if to possess right of “Delete Project”. This button is used to selected project delete<br />
of the database. For this, that’s enough selected in the project’s list, next press the button “Delete”.<br />
Close Button:<br />
Finish the user’s <strong>config</strong>urations.<br />
New Button:<br />
This item the user is available if to possess right of “Create User”. This Button is used for the create a new user.<br />
With this, win<strong>do</strong>w pass to Insert Mode.<br />
Edit Button:<br />
This item the user is available if to possess right of “Edit Project”. The edit button enable the fields for the edition<br />
of the selected project. With this, the win<strong>do</strong>w is pass to Edit Mode.<br />
<strong>Manual</strong> e.<strong>Tool</strong> ME3011 <strong>config</strong> 4.02.3_E r06 19/35
Insert Mode<br />
In the Insert Mode, that the user only is available if to possess right, the use data is enable, as the shows figure<br />
below:<br />
The Login, User’s Name, Category and Permissions fields are enable, and appear new controls:<br />
User Data:<br />
• Login: Login access field of the new system registered user. Desired representation of the user.<br />
• User’s Name: Name field with the new system registered user.<br />
• Category: Where the group is the user. Are two considered groups:<br />
o 1 - Administrator: All the data <strong>config</strong>uration is allow (insert, deleted and modified), no<br />
restriction. This mode, the permissions list is not visible, because the user possess all the permissions.<br />
o 2 – Restrict User: Restriction possess define in the permissions list. The permissions list<br />
only is visible if the selected “Restrict User” category.<br />
• Type the Password: User current password field.<br />
• Confirm the Password: User current password field..<br />
• Permissions: Only is visible if the user is “Restrict User” <strong>config</strong>ured. Contains all the custom block.<br />
When is the selected item, the user possess the right on the item. The itens existing is:<br />
o Create Project;<br />
o Edit Project;<br />
o Delete Project;<br />
o Export;<br />
o Import;<br />
o Save as...;<br />
o Standard Project;<br />
o Create User;<br />
o Edit User;<br />
o Delete User;<br />
o Communication;<br />
o Clock Adjustment;<br />
o Enter Configuration Mode;<br />
o Visual Point Configuration;<br />
o Delete event Register;<br />
o Obtains all Annunciator Data ;<br />
o Send all data to annunciator;<br />
o Edit annunciator format;<br />
o Edit power supply alarm;<br />
o Edit MODBUS protocol;<br />
o Edit point <strong>config</strong>uration;<br />
<strong>Manual</strong> e.<strong>Tool</strong> ME3011 <strong>config</strong> 4.02.3_E r06 20/35
Insert Button:<br />
This button is used to insert the user system, as the desired <strong>config</strong>uration.<br />
Cancel Button:<br />
When press “Cancel” button, the screen return to visualization state, without user insert..<br />
Edit Mode<br />
In the Edit Mode, case the user to possess right of “Edit User”, the User Data field selected is enable, as the<br />
shows figure below:<br />
The User Data selected in the table registered user’s are automatically fields respective transfers. The User’s<br />
Name and Category fields is enable to edit, and appear the Type the Password, Confirm the Password and the<br />
Permission List, Beside the Update and Cancel Buttons.<br />
User’s Data:<br />
• Login: Login user access field selected in the registered user table. Only Read.<br />
• User’s Name: User Name field selected in the registered user table. This field can edited.<br />
• Category: Where the group is the user. Are two considered groups:<br />
o 1 - Administrator: All the data <strong>config</strong>urations is allowed (insert, deleted and modified), no<br />
restriction.<br />
o 2 – Restrict User: Restriction possess to deleted and system data modify. Don’t possess<br />
Administrative <strong>Tool</strong>s Access, beside <strong>do</strong>n’t project modify which the user is not owner.<br />
• Type the Password: User current password field.<br />
• Confirm the Password: User current password field.<br />
• Permissions list: Only is visible if the user is “Restrict User” <strong>config</strong>ured. Contains all the custom block.<br />
When is the selected item, the user possess the right on the item.<br />
Update Button:<br />
This button is used to modify the User data selected in the registered user table, as the new values represented<br />
in fields..<br />
Cancel Button:<br />
When press “Cancel” button, the screen return to visualization state, without user insert.<br />
<strong>Manual</strong> e.<strong>Tool</strong> ME3011 <strong>config</strong> 4.02.3_E r06 21/35
3.2 – Clock Adjustment<br />
The Clock Adjustment option only available when to exist the open project and when the monitoring is off.<br />
Moreover, the user is available if to possess right of “Clock Adjustment”. When press <strong>Tool</strong>s – Clock Adjustment, the<br />
screen is following appear:<br />
To the clock Adjustment, have the following options:<br />
System Time<br />
This option adjust the annunciators hours with the current time of the computer.<br />
Alternative Time<br />
This option adjust the annunciators hours with a time to operator define.<br />
OK Button<br />
This button send the new time <strong>config</strong>uration to annunciator.<br />
Cancel Button<br />
The button finish the screen without <strong>config</strong>uring annunciators time.<br />
4 - Help<br />
4.1 - <strong>Manual</strong><br />
When press Help – <strong>Manual</strong>, the help of the product is appear.<br />
4.2 - About<br />
When press Help – About, the win<strong>do</strong>w with product information is appear, as the figure below:<br />
<strong>Manual</strong> e.<strong>Tool</strong> ME3011 <strong>config</strong> 4.02.3_E r06 22/35
The image below represented the software fast access buttons:<br />
Are they:<br />
New. See sub item 1.1 of the item “Main Menu”.<br />
Open. See sub item 1.2 of the item “Main Menu”.<br />
Save: Button to save project modifies.<br />
Close. See sub item 1.4 of the item “Main Menu”.<br />
Communication port. Button to open or close the communication port.<br />
FAST ACCESS BUTTONS<br />
Enter Configuration Mode. This button start the on line annunciators <strong>config</strong>uration mode.<br />
Exit <strong>config</strong>uration mode. This button stop the on line annunciators <strong>config</strong>uration mode.<br />
Delete event registers. This button delete memory annunciator event registers.<br />
Data Upload/Download. This button give option of upload or <strong>do</strong>wnload all annunciator data.<br />
Help. See subitem 4.1 of the item “Main Menu”.<br />
<strong>Manual</strong> e.<strong>Tool</strong> ME3011 <strong>config</strong> 4.02.3_E r06 23/35
The image bellow represent the software status bar:<br />
Items of the status bar:<br />
STATUS BAR<br />
Warning: Inform important warning can have this software,<br />
as error with annunciator communication, Opened and Closed communication port.<br />
permission access.<br />
User: Inform which is the user in the system and his group of the<br />
Project: Inform the project name case that some open project exists. On<br />
the contrary, inform that open project <strong>do</strong>es not exist.<br />
ANNUNCIATORS CONFIGURATION GROUP<br />
After to open a project in the e.<strong>Tool</strong> ME3011 <strong>config</strong> software, the following win<strong>do</strong>w to appear:<br />
Can divide this win<strong>do</strong>w in 3 parts:<br />
• Visualization and Tags Configuration Group;<br />
• Representation Group;<br />
• Configuration Group;<br />
<strong>Manual</strong> e.<strong>Tool</strong> ME3011 <strong>config</strong> 4.02.3_E r06 24/35
VISUALIZATION AND TAGS CONFIGURATION GROUP<br />
The Visualization and Tags Configuration Group allows visualizing the specified distinct properties in the<br />
annunciator, and <strong>config</strong>ured tags of the user specified points.<br />
Can divide this group in 2 parts:<br />
• Visualization;<br />
• Configuration;<br />
1 - Visualization<br />
The Visualization field, is used to visualize the user insert data in the start the project, as the image bellow:<br />
In this field can divide in 2 groups:<br />
• Operation Mode;<br />
• Configuration Mode;<br />
1.1 – Operation Mode<br />
In the operation mode, see in the representation screen, the annunciator as <strong>config</strong>ured in the <strong>config</strong>uration<br />
screen (See Subitem 2), as the image below:<br />
This annunciator representation informs the point color and the tag value insert in the screen <strong>config</strong>uration<br />
(See Subitem 2).<br />
1.2 – Configuration Mode<br />
In the <strong>config</strong>uration mode, see in the representation screen, the abbreviation as the points of the<br />
annunciator had been <strong>config</strong>ured, as image below:<br />
This annunciator representation informs the abbreviation of the <strong>config</strong>uration that was inserted in the same.<br />
<strong>Manual</strong> e.<strong>Tool</strong> ME3011 <strong>config</strong> 4.02.3_E r06 25/35
2 – Tags Configuration<br />
The tags <strong>config</strong>uration field, is used is used to <strong>config</strong>ure tags of the annunciator, as image below:<br />
In this screen the color can be <strong>config</strong>ured that the point goes to assume, the tag value, and also to insert a<br />
commentary or description on the same.<br />
This item is available if the user to possess right the option “Edit Points” or is system administrator. In<br />
<strong>config</strong>uration, the following options exist:<br />
• Registered Points Table: This table supplies the information on the exiting point in the current<br />
annunciator and its respective information, as Tag and color.<br />
• Point Identify: This field supplies information of the point selected at the moment, for its edition. When<br />
selecting a point in the Registered Points table, automatically this field is update.<br />
• Tag: This field possess in the maximum 5 characters, and identifies the point in the annunciator<br />
drawing who is in the visualization group. When selecting a point in the registered points table, automatically this<br />
field is update (Case value exists).<br />
• Description: Through this field it is possible to record information on the selected point in the<br />
registered points table, Such as point full name, Beside additional information.<br />
• Color: This field allows to select the color of the selected point. The available colors are: Yellow, Blue,<br />
Green, Red and White.<br />
• Apply Button: When press the button, all the alterations made in Tag, Color and Description fields of<br />
the respective point is update.<br />
<strong>Manual</strong> e.<strong>Tool</strong> ME3011 <strong>config</strong> 4.02.3_E r06 26/35
REPRESANTATION GROUP<br />
The Representation Group, is the annunciator mode presents the physical appearance that was specified, as<br />
shows the figure below:<br />
In this screen it has a peculiarity, in it the possibility exists to verify the <strong>config</strong>uration that is in each point. It<br />
is enough to pass mouse on the point that it desires to verify, thus show the information <strong>config</strong>ured in each point, as<br />
shows the figure below:<br />
<strong>Manual</strong> e.<strong>Tool</strong> ME3011 <strong>config</strong> 4.02.3_E r06 27/35
CONFIGURATION GROUP<br />
The Configuration Group, is where made use all the annunciator <strong>config</strong>uration, and is made use in the<br />
inferior base of the e.Toll <strong>config</strong> software, as shows the figure below:<br />
This bar is composed for 4 parts, that are made use in:<br />
• General Configuration;<br />
• Power Supply Alarm;<br />
• Communication;<br />
• Point Configuration;<br />
<strong>Manual</strong> e.<strong>Tool</strong> ME3011 <strong>config</strong> 4.02.3_E r06 28/35
1- General Configuration<br />
The General Configuration field, of the annunciator <strong>config</strong>uration has as purpose in accordance with win<strong>do</strong>w<br />
and specification below:<br />
The follows below <strong>config</strong>uration parameters:<br />
• Automatic HA time(s) - Time for automatic horn acknowledge that can bedefine from 2,5s up to 45<br />
hours in 2,5 steps.<br />
• Automatic LA time(s) - Time for automatic light acknowledge that can be define from 2,5s up to 45<br />
hours in 2,5s steps.<br />
• Automatic HA/LA – Automatic light and horn acknowledge, when enable, acknowledge is execute<br />
after time define HA and LA.<br />
• Simultaneous HA/LA- Allows the simultaneous horn and light acknowledge in accordance with HA<br />
time.<br />
• Lamp Test – When the enable lamp test, all LEDs light simultaneous.<br />
• Functional Test - When the enable functional test the annunciator show ISA Mode programming in<br />
the each win<strong>do</strong>w.<br />
• Lamp and Horn Test - When the enable lamp and horn test the anunciator execute the test in<br />
question.<br />
• Horn Sleep Mode – When enable, Disable alarms horn indication.<br />
• Lamp Sleep Mode - When enable, Disable alarms lamp indication..<br />
• Sleep Mode Remote – Enable the lamp check for the external button.<br />
• Internal Horn – Enable or Disable the internal horn.<br />
• Logical Input - Enable commands and alarms for the communication net.<br />
• Synchronism of LEDs - Master: : Informs if the annunciator will be the master in the synchronism<br />
LEDs with the rest of the network annunciators<br />
• RCX4(Energized) - Disable, contact Normally Open, Enable Normally Closed.<br />
• RCX5(Energized) - Disable, contact Normally Open, Enable Normally Closed.<br />
• RCX6(Energized)- Disable, contact Normally Open, Enable Normally Closed.<br />
• RCX4(A) - Disable – Without Acknowledge, Enable – With Acknowledge LA/HA – Disable – Lamp<br />
Acknowledge (LA) - Enable – Horn Acknowledge (HA)<br />
• RCX5(A) - Disable – Without Acknowledge, Enable – With Acknowledge LA/HA – Disable – Lamp<br />
Acknowledge (LA) - Enable – Horn Acknowledge (HA)<br />
• RCX6(A) - Disable – Without Acknowledge, Enable – With Acknowledge LA/HA – Disable – Lamp<br />
Acknowledge (LA) - Enable – Horn Acknowledge (HA)<br />
• Acknowledging Alarm – Must be enable when are used the ISA Mode ISA 1B.<br />
• Event Registering – This option enables event registering. On each new alarm the annunciator<br />
records the alarm with time stamp in its internal memory.<br />
• RTC - Real Time Clock. This option enables na internal counter in the annunciator which contains the<br />
time (clock); it is adjustable via ‘clock Adjustment’ in the tool menu.<br />
• RTC Sync – RTC synchronization. This option enables flashing GPS synchronization in all networked<br />
annunciators.<br />
<strong>Manual</strong> e.<strong>Tool</strong> ME3011 <strong>config</strong> 4.02.3_E r06 29/35
• IRIG-B –This command allows that the annunciator’s clock is synchronized across the protocol IRIG –<br />
B, to selected it is necessary that the RTC Sync is enabled. When the command IRIG-B is not enabled, the<br />
annunciator’s clock will be synchronized across pulses per second – PPS.<br />
• Fault Led - The fault Led indicates the occurrence of failed annunciator by the relay selected,<br />
indicated in front of the fault Led icon.<br />
After to effect all the <strong>config</strong>urations in the border and the user to desire to send them it the annunciator, used<br />
send data to annunciator button in the <strong>config</strong>uration bar, this button send the information only selected border.<br />
2 – Power Supply Alarm<br />
The power supply alarm field, has for purpose the alarms <strong>config</strong>uration for voltage fault Vdc and Vac, as the<br />
win<strong>do</strong>w and specification below:<br />
The follows below power supply alarm <strong>config</strong>uration parameters, as much for Vdc (Continuous Voltage),<br />
much for Vac (Alternate Voltage):<br />
• Enable - Enables or disables the Vdc/Vca alarms (continuous or alternate voltage fault).<br />
ISA Mode – Display of visual and acoustic status of each alarm (ISA Mode). In this field the choice possibilities are:<br />
o ISA-1<br />
o ISA-1A<br />
o ISA-1B<br />
o ISA-2A<br />
o ISA-2C<br />
o ISA-4A<br />
o ISA-4AR<br />
o ESTATE<br />
• Activity – Selection of contact mode for alarming . Disable – Normally Open (alarming with voltage<br />
presence); Disable – Normally Closed (alarming with voltage absence).<br />
• Internal Horn – Selection of internal horn function mode in the event of alarm. The choice<br />
possibilities are:<br />
o Off<br />
o Continuous<br />
o Intermittent 1<br />
o Intermittent 2<br />
• Filter – The filter of presence alarm, from 2,5ms to 600ms in 2,5ms steps<br />
• RCX4 / RCX5 and RCX6 – Auxiliary contact which, when selected, will be activated simultaneously<br />
with the related alarm..<br />
• Win<strong>do</strong>w/Keyboard – When enabled the Vdc/Vca alarm fault will be displayed in a win<strong>do</strong>w, and no<br />
more on the control panel. In this way the lower win<strong>do</strong>w on the left of the control panel will be dedicated for Vdc/Vca<br />
alarming.<br />
After to effect all the <strong>config</strong>urations in the border and the user to desire to send them it the annunciator, used<br />
send data to annunciator button in the <strong>config</strong>uration bar, this button send the information only selected border.<br />
<strong>Manual</strong> e.<strong>Tool</strong> ME3011 <strong>config</strong> 4.02.3_E r06 30/35
3 - Communication<br />
The communication field, has for purpose the alarms <strong>config</strong>uration modbus communication, as the win<strong>do</strong>w<br />
and specification below:<br />
The follows below modbus communication <strong>config</strong>uration parameters:<br />
• Modbus - Enables the modbus protocol in the annunciator.<br />
• Address - Definition of the address of the annunciator in the modbus net.<br />
• Speed – Data communication speed via Modbus protocol. It is measured in bits per second. Can be<br />
selected in 110, 300, 1200, 2400, 4800, 9600 and 19200 bps.<br />
• Parity – Information on existence or not of a parity bit with in the communication. Can be selected:<br />
None, Odd or Even.<br />
• Stop Bit – Quantity of stop bits to be sent to signalize the end of data transmission in the<br />
communication media. Can be selected 1 or 2 stop bits.<br />
After to effect all the <strong>config</strong>urations in the border and the user to desire to send them it the annunciator,<br />
used send data to annunciator button in the <strong>config</strong>uration bar, this button send the information only selected border.<br />
4 – Point Configuration<br />
The point <strong>config</strong>uration Field, has for purpose the <strong>config</strong>uration of each point of the annunciator, as the<br />
win<strong>do</strong>w and specification below:<br />
When selecting a point, the same appears in blue, as shows figure below:<br />
A point can also be selected more than, thus the parameters that will be <strong>config</strong>ured will be sent to all the<br />
selected points.<br />
<strong>Manual</strong> e.<strong>Tool</strong> ME3011 <strong>config</strong> 4.02.3_E r06 31/35
The follows below annunciator point <strong>config</strong>uration parameters:<br />
ISA Mode – Display of visual and acoustic status of each alarm (ISA Mode) In this field the choice possibilities are:<br />
o ISA-1<br />
o ISA-1A<br />
o ISA-1B<br />
o ISA-2A<br />
o ISA-2C<br />
o ISA-4A<br />
o ISA-4AR<br />
o ESTATE<br />
• Activity – Selection of contact mode for alarming. Disable – Normally Open (alarming with voltage<br />
presence); Disable – Normally Closed (Alarming with voltage absence).<br />
• Internal Horn – Selection of internal horn function mode in the event of alarm. The choice<br />
possibilities are:<br />
o Off<br />
o Continuous<br />
o Intermittent 1<br />
o Intermittent 2<br />
• Filter – The filter of presence alarm, from 2,5ms to 600ms in 2,5ms steps<br />
• RCX4 / RCX5 and RCX6 – Auxiliary contact which, when selected, will be activated simultaneously<br />
with the related alarm.<br />
• Physical Input – Enable alarm inputs.<br />
• Buttons – Buttons of send data for representation screen, that is, not send for annunciator, keeps only<br />
in database.<br />
Send data to all points.<br />
Send data to selected points.<br />
After to effect all the <strong>config</strong>urations in the border and the user to desire to send them it the annunciator,<br />
used send data to annunciator button in the <strong>config</strong>uration bar, this button send the information only selected border<br />
<strong>Manual</strong> e.<strong>Tool</strong> ME3011 <strong>config</strong> 4.02.3_E r06 32/35
LANGUADE CONFIGURATION<br />
The software family e.<strong>Tool</strong> allows the insertion of new languages, beyond already the existing ones<br />
(Portuguese, English, Spanish and Deutsch). This functionality leaves software in such a way most dynamic that the<br />
proper user of the system can modify or include software desired.<br />
The archives of <strong>config</strong>uration of the language meet in the installation directory program (the standard is<br />
C:\Arquivos de Programas\<strong>Helmut</strong> <strong>Mauell</strong>\e.<strong>Tool</strong> ME3011 <strong>config</strong>\).<br />
The system of languages functions with an index archive (extension txt) that it lists the existing languages<br />
and an archive with the translations (extension txt) that it takes the name of the language.<br />
INDEX ARQUIVE: ListID<br />
The archive of index of the existing languages is ListID.txt. In this archive information meet on the amount<br />
of existing languages, and its respective names. The standard of the archive is the following one:<br />
4<br />
Português<br />
English<br />
Español<br />
Deutsch<br />
Number four (in the first line of the archive) represents the amount of existing languages in software.<br />
The following lines represent the name of the existing language. OBS: The name of the language must the<br />
same be of the name of the archive of texts of the corresponding language. In the example above, the existing<br />
languages are Portuguese, English, Spanish and Deutsch<br />
TEXT ARCHIVE: .txt<br />
The archive of texts will possess all the texts translated into the new language. The existing archives for<br />
standard are: Português.txt, English.txt, Español.txt and Deutsch.txt, each one I contend its respective translation for<br />
its language, of each line that composes the archive.<br />
An important detail is that if it <strong>do</strong>es not have to modify the sequence of the lines of the archive of texts.<br />
Software makes the reading of the archive, and each line corresponds to a text of software.<br />
<strong>Manual</strong> e.<strong>Tool</strong> ME3011 <strong>config</strong> 4.02.3_E r06 33/35
INSERT THE NEW LANGUAGE<br />
To include a new language in software, it will be necessary to carry through alterations in the ListID.txt<br />
archive, and to create a new archive with the name of the Language, also with extensão.txt, on the basis of<br />
some existing language already. We will simulate below the inclusion of the Français language. The name of the<br />
language can be any the one its choice.<br />
1 Modifying the archive ListID.txt<br />
First backup of the current ListID.txt archive effects one. After, it edits the archive (notepad) and modifies<br />
the amount of languages in the first line. In the example above, before he was 4, and now it will pass to 5. It<br />
includes in the last line the word français. The archive will possess the following characteristics now:<br />
5<br />
Português<br />
English<br />
Español<br />
Deutsch<br />
Français<br />
The alteration of the archive must be made with care, therefore an error can influence permanently in<br />
software.<br />
2 - Insert the Text Archive<br />
For the creation of the archive of texts of the Français language, it is necessary to copy an existing archive<br />
already (Português.txt) and glue with the Français.txt name. The name of the archive must the same be enclosed<br />
name in ListID.txt. Created the archive with this name, it is enough to edit it and to modify the texts of Portuguese<br />
(used archive as base) for Frenchman.<br />
3 - Selecting the language just insert<br />
After the alterations to have been carried through, are enough to open software again, and in the menu<br />
Configuration/Language, the inserted language will consist in the list of available languages. It is enough to select it<br />
that software automatically will go to move for the chosen language.<br />
<strong>Manual</strong> e.<strong>Tool</strong> ME3011 <strong>config</strong> 4.02.3_E r06 34/35
Brazil Representatives and<br />
branches – Worldwide :<br />
<strong>Helmut</strong> <strong>Mauell</strong> <strong>do</strong> Brasil<br />
Est. Estadual Salva<strong>do</strong>r de Leone, 2998 Argentina Hungary<br />
06850-000 – Itapecerica da Serra - SP Austria Great Britain<br />
Tel.: +55 (0) 11 2117 5353<br />
Belgium Iran<br />
Fax.: +55 (0) 11 2117 5354 Singapore Kuwait<br />
www.mauell.com.br Denmark Malaysia<br />
mauell@mauell.com.br Spain Norway<br />
Abu Dhabi<br />
Poland<br />
Empresa incentivada pela Lei de Informática<br />
E.A.U.<br />
USA Czech Republic<br />
Germany Finland Sweden<br />
France Switzerland<br />
<strong>Helmut</strong> <strong>Mauell</strong> GmbH Netherlands Turkey<br />
Am Rosenhügel 1–7<br />
D-42553 Velbert<br />
Tel.:+49 (0)20 53/1 30<br />
Fax.:+49 (0)20 53/1 36 53<br />
www.mauell.com<br />
info@mauell.com<br />
<strong>Manual</strong> e.<strong>Tool</strong> ME3011 <strong>config</strong> 4.02.3_E r06