Kamatics Karon Design Guide - Kaman Corporation
Kamatics Karon Design Guide - Kaman Corporation
Kamatics Karon Design Guide - Kaman Corporation

You also want an ePaper? Increase the reach of your titles
YUMPU automatically turns print PDFs into web optimized ePapers that Google loves.
KAMATICS CORPORATION<br />
40<br />
KAMAN<br />
KAMATICS Tech Note 18<br />
Sheet 2 of 4<br />
(1) Use a heavy duty drill press with a quill diameter of not less than 2 inches, and gearing that will give<br />
not less than 200 pounds of force at the chuck with usual operator input. Set the drill press for<br />
approximately 80 rpm for 1 inch or smaller bore diameters, or proportionately slower for larger<br />
bearings.<br />
(2) Set the rollers of the swaging tool to agree with the diameter of the bearing swage groove. The<br />
distance between the inside edges of the rollers should be .005-.010” larger than the diameter of the<br />
center of the groove, as a starting point. Tighten all the parts, making sure the rollers turn freely.<br />
The fit of the pilot in the guides of the primary and the secondary anvils should be tight without<br />
binding.<br />
(3) Install the swaging tool in the chuck of the drill press.<br />
(4) Apply the specified installation finish (primer, sealant, etc.) to the ID of the housing and the OD of<br />
the bearing.<br />
(5) Install the bearing centered in housing. Make sure the outer race of the bearing is flush to 0.010<br />
inch above the housing surface, or as specified on the installation drawing.<br />
(6) Apply a thin layer of general purpose grease to the swaging groove to prevent galling. Try not to let<br />
the grease get on the KAron surfaces of the inner race.<br />
CAUTION: MINIMIZE THE AMOUNT OF GREASE OR OTHER LUBRICANTS WHICH<br />
MIGHT GET INTO KARON-LINED BEARINGS. LUBRICANTS CAN COLLECT<br />
CONTAMINATION AND THUS SHOULD BE AVOIDED.<br />
(7) Set the surface to be swaged perpendicular to the axis of the spindle.<br />
(8) Swage the first side of until the lip is swaged out into the swaging groove. Inspect the swaging lip to<br />
insure that sufficient swaging has occurred. There should be less than .005” gap between the outside<br />
of the lip and the housing, which can be checked with a wire feeler gage. If the lip has not swaged<br />
over adequately after two attempts, increase the distance between the inside edges of the rollers an<br />
additional .005” and re-swage.<br />
(9) Turn the assembly over and swage the second side.<br />
NOTE: Do not let the rollers touch the bottom or the inner face of the swaging groove in the<br />
bearing outer race. This can cause binding of the bearing to the extent that the ball<br />
cannot be turned in the housing.<br />
(10) Clean the lubricant from the bearing with a rag wet with a small amount of methyl ethyl ketone,<br />
acetone, or similar solvent. Protect the inner race from the solvent and all lubricants.<br />
(11) Examine the swaged lip for clearance and galling. Gall marks should be avoided, and is caused<br />
when the rollers did not turn or the roller lubrication was insufficient.<br />
(12) The stake is completed when the swaged lip touches the housing chamfer and the gap at the outer<br />
edge is less than .005”.<br />
(13) Unless specified by the overhaul instructions, the no-load breakaway torque of an installed KAronlined<br />
spherical bearing must not be more than two times the uninstalled maximum breakaway torque<br />
specified in the bearing specification or standard.<br />
(14) If required, give the bearing a push-out load test. Apply the load only to the outer race. The bearing<br />
must not move in the housing or come loose.<br />
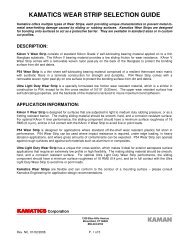
DIMENSIONS FOR ROLLER SUPPORT,<br />
A DIA = AS REQ TO FIT DRILL OR MILL CHUCK (BEARING I.D. MIN)<br />
B DIA = SLIP FIT IN BEARING I.D.(PRESS FIT ON SUPPORT)<br />
C MIN = (BALL WIDTH - RACE WIDTH)/2 + MAX BRG GROOVE DEPTH + .020