PARAGON 4 PARAGON 5 PARAGON 6 - Horizon Fitness
PARAGON 4 PARAGON 5 PARAGON 6 - Horizon Fitness
PARAGON 4 PARAGON 5 PARAGON 6 - Horizon Fitness

Create successful ePaper yourself
Turn your PDF publications into a flip-book with our unique Google optimized e-Paper software.
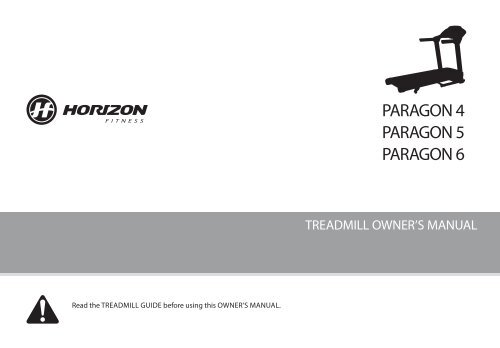
Read the TREADMILL GUIDE before using this OWNER’S MANUAL.<br />
<strong>PARAGON</strong> 4<br />
<strong>PARAGON</strong> 5<br />
<strong>PARAGON</strong> 6<br />
TREADMILL OWNER’S MANUAL
ASSEMBLY<br />
WARNING<br />
There are several areas during the assembly process that special attention must be paid. It is very important to follow the assembly<br />
instructions correctly and to make sure all parts are firmly tightened. If the assembly instructions are not followed correctly, the<br />
treadmill could have frame parts that are not tightened and will seem loose and may cause irritating noises. To prevent damage<br />
to the treadmill, the assembly instructions must be reviewed and corrective actions should be taken.<br />
Before proceeding, find your treadmill’s serial number located on the front stabilizer tube and enter it in the space provided<br />
below. Also locate the model name which is next to the serial number.<br />
ENTER YOUR SERIAL NUMBER AND MODEL NAME IN THE BOXES BELOW:<br />
SERIAL NUMBER:<br />
MODEL NAME: HORIZON TREADMILL<br />
3
Paragon 6<br />
shown<br />
4<br />
LESEGESTELL<br />
FLASCHENHALTER<br />
ARMSTANGEN MIT PULSFÜHLERN<br />
KONSOLENMASTABDECKUNG<br />
ARMSTANGE<br />
KONSOLENMAST<br />
MOTORABDECKUNG<br />
TRANSPORTROLLEN<br />
SEITLICHE TRITTFLÄCHE<br />
LAUFMATTE<br />
KONSOLENKONTROLLE UND DISPLAYFENSTER<br />
KONSOLE<br />
LÜFTER<br />
REICHWEITEKONTROLLE<br />
SICHERHEITSSCHLÜSSEL HALTERUNG<br />
AN/AUS SCHALTER<br />
HAUPTSICHERUNG<br />
STROMKABEL<br />
ENDKAPPE<br />
HINTERE JUSTIERFÜßE
TOOLS INCLUDED:<br />
F 5 mm L-Wrench/Screwdriver<br />
F 6 mm T-Wrench<br />
F Screwdriver (not included)<br />
PARTS INCLUDED:<br />
F 1 Console Assembly<br />
F 2 Console Masts<br />
F 1 Hardware Kit<br />
F 1 Safety Key<br />
F 1 Power Cord<br />
F 2 Handlebar Cover Set<br />
F 2 Water Bottle Holder<br />
NEED HELP?<br />
If you have questions or if<br />
there are any missing parts,<br />
contact your local dealer.<br />
PRE ASSEMBLY<br />
UNPACKING<br />
Place the treadmill carton on a level flat surface. It is recommended that you place a<br />
protective covering on your floor. Take CAUTION when handling and transporting this<br />
unit. Never open box when it is on its side. Once the banding straps have been removed,<br />
do not lift or transport this unit unless it is fully assembled. Unpack and assemble the unit<br />
where it will be used. Never grab hold of any portion of the incline frame and attempt to<br />
lift or move the treadmill.<br />
WARNING<br />
DO NOT ATTEMPT TO LIFT THE TREADMILL! Do not move or lift treadmill<br />
from packaging until specified to do so in the assembly instructions. You may<br />
remove the plastic wrap from console masts.<br />
WARNING<br />
FAILURE TO FOLLOW THESE INSTRUCTIONS COULD RESULT IN INJURY!<br />
NOTE: During each assembly step, ensure that ALL nuts and bolts are in place and<br />
partially threaded in before completely tightening any ONE bolt.<br />
NOTE: A light application of grease may aid in the installation of hardware. Any grease,<br />
such as lithium bike grease is recommended.<br />
ALL<br />
MODELS<br />
5
Paragon 6<br />
Shown<br />
6<br />
ASSEMBLY STEP 1<br />
BOLT (A)<br />
M8 x 10<br />
Qty: 2<br />
BOLT(A)<br />
HARDWARE FOR STEP 1 :<br />
LEFT CONSOLE MAST<br />
RIGHT CONSOLE MAST<br />
MAIN FRAME BRACKET<br />
A Cut the yellow banding straps and lift the running<br />
deck upward to remove all contents from underneath<br />
the running deck.<br />
B Open HARDWARE BAG 1<br />
C Screw in the 2 BOLT(A) to the MAIN FRAME<br />
BRACKET.<br />
D Connect the CONSOLE CABLES at RIGHT<br />
CONSOLE MAST an carefully tuck wires to<br />
CONSOLE MAST to avoid damage.<br />
E Align and attach right CONSOLE MAST with MAIN<br />
FRAME BRACKET using BOLT(A) and repeat on the<br />
other side.<br />
NOTE: Do not pinch console cable when placing<br />
the mast onto the main frame bracket. You may<br />
need extra help assembling step 1 o 2
ASSEMBLY STEP 2<br />
BOLT (B)<br />
M8 x 70 mm<br />
Qty: 8<br />
FLAT WASHERS (D)<br />
SPRING WASHERS (C)<br />
BOLTS (B)<br />
HARDWARE FOR STEP 2 : A Open HARDWARE BAG 2<br />
SPRING WASHER (C)<br />
Φ 8.2 mm<br />
Qty: 8<br />
RIGHT CONSOLE MAST<br />
LEFT CONSOLE MAST<br />
FLAT WASHER (D)<br />
Φ 8.2 mm<br />
Qty: 8<br />
B Attach CONSOLE MAST to MAIN FRAME<br />
BRACKET using 4 BOLTS (B), 4 SPRING<br />
WASHERS (C) and 4 FLAT WASHERS (D).<br />
C Repeat step B on other side.<br />
NOTE: Do not tighten bolts until step 4 is complete.<br />
Paragon 6<br />
Shown<br />
7
Paragon 6<br />
Shown<br />
8<br />
ASSEMBLY STEP 3<br />
BOLT (E)<br />
M8 x 20 mm<br />
Qty: 6<br />
SPRING WASHER (F)<br />
Φ 8.2 x Φ14<br />
Qty: 6<br />
CONSOLE MAST BRACKET<br />
ARC WASHER (H)<br />
HARDWARE FOR STEP 3 :<br />
FLAT WASHER (G)<br />
Φ 8.2 mm<br />
Qty: 4<br />
ARC WASHER (H)<br />
Φ 8.2 mm<br />
Qty: 2<br />
HANDLEBAR<br />
BOLT (E)<br />
SPRING WASHER (F)<br />
FLAT WASHER (G)<br />
A Open HARDWARE BAG 3.<br />
B Slide HANDLEBAR onto CONSOLE MAST<br />
BRACKET and attach using 3 BOLTS (E), 3<br />
SPRING WASHERSS(F), 2 FLAT WASHERS(G) &<br />
1 ARC WASHER (H).<br />
(Refer to graphic at left for more details)<br />
C Repeat on other side.<br />
NOTE: Be careful not to pinch any wires.
ASSEMBLY STEP 4<br />
BOLT (I)<br />
M8 x 15 mm<br />
Qty: 4<br />
BOLT (I)<br />
SPRING WASHER (C)<br />
FLAT WASHER (D)<br />
(<strong>PARAGON</strong> 6)<br />
HARDWARE FOR STEP 4 :<br />
SPRING WASHER (C)<br />
Φ 8.2 mm<br />
Qty: 4<br />
BOLT (I)<br />
SPRING WASHER (C)<br />
FLAT WASHER (D)<br />
FLAT WASHER (D)<br />
Φ 8.2 mm<br />
Qty: 4<br />
A Open HARDWARE BAG 4.<br />
B Gently hold the CONSOLE above the<br />
CONSOLE MAST.<br />
C Connect the CONSOLE CABLES, carefully<br />
tucking wires in masts to avoid damage.<br />
D Attach the CONSOLE to the CONSOLE<br />
MAST using 4 BOLTS (I), 4 SPRING<br />
WASHERS (C) and 4 FLAT WASHERS (D).<br />
E Fold the DECK into the upright position until<br />
the foot latch engages. Make sure the spacing<br />
between the HANDLEBARS and the DECK<br />
are the same then tighten BOLTS from step 2<br />
to step 4.<br />
Paragon 6<br />
Shown<br />
9
Paragon 6<br />
Shown<br />
10<br />
ASSEMBLY STEP 5<br />
(<strong>PARAGON</strong> 6)<br />
SCREW (J)<br />
Φ 4 x 12<br />
Qty: 8<br />
HARDWARE BAG 5: A Open HARDWARE BAG 5.<br />
LEFT COVER<br />
SCREW (J)<br />
RIGHT COVER<br />
RIGHT HANDLEBAR<br />
B Carefully attach RIGHT CONSOLE MAST OUTER<br />
& INNER COVER together using 4 SCREWS (J)<br />
and adjust the gaps between console shell and<br />
CONSOLE MAST OUTER COVERS. Then tighten 4<br />
BOLTS (I) from step 4<br />
C Attach the left and right INNER COVERS using 4<br />
SCREWS (J).<br />
NOTE: Connect and screw in the outer cover<br />
before fixing the inner cover. Be careful not to<br />
scratch or brake the plastic while assembling.<br />
Make sure the cover set is centered and well<br />
assembled before tighten the screws.
ASSEMBLY STEP 5<br />
LEFT WATER<br />
BOTTLE HOLDER<br />
(<strong>PARAGON</strong> 6)<br />
SCREW (K)<br />
Φ 4 x 10<br />
Qty: 2<br />
SCREW (K)<br />
HARDWARE FOR STEP 5 :<br />
RIGHT WATER<br />
BOTTLE HOLDER<br />
A Gently attach the LEFT WATER BOTTLE HOLDER<br />
to the CONSOLE with front edge facing down.<br />
B Once the LEFT WATER BOTTLE HOLDER is in<br />
place carefully push through the WATTER BOTTLE<br />
HOLDER to its position until you hear a“click”at rear<br />
edge.<br />
C Make sure the LEFT WATER BOTTLE HOLDER is<br />
well assembled then fix it with 1 SCREW (K) from<br />
the back.<br />
D Repeat the previous step on the opposite side.<br />
Paragon 6<br />
Shown<br />
11
Paragon 6<br />
Shown<br />
12<br />
ASSEMBLY STEP 7<br />
(<strong>PARAGON</strong> 6)<br />
YOU ARE FINISHED!<br />
Paragon 4<br />
Max. User Weight: 136 kg / 300 lbs.<br />
Product Weight: 100 kg / 220 lbs.<br />
Overall Dimension: 182 x 91 x 149 cm / 72” x 36” x 59”<br />
Folding Dimension: 99 x 91 x 168 cm / 39” x 36” x 66”<br />
Complies with EN957-1, EN957-6, HB<br />
Paragon 5<br />
Max. User Weight: 159 kg / 350 lbs.<br />
Product Weight: 103 kg / 227 lbs.<br />
Overall Dimension: 182 x 91 x 149 cm / 72” x 36” x 59”<br />
Folding Dimension: 99 x 91 x 168 cm / 39” x 36” x 66”<br />
Complies with EN957-1, EN957-6, HB<br />
Paragon 6<br />
Max. User Weight: 159 kg / 350 lbs.<br />
Product Weight: 110 kg / 243 lbs.-127 kg / 280 lbs.<br />
Overall Dimension: 194 x 91 x 149 cm / 76” x 36” x 59”<br />
Folding Dimension: 105 x 91 x 178 cm / 41” x 36” x 70”<br />
Complies with EN957-1, EN957-6, HB
TREADMILL OPERATION<br />
This section explains how to use your treadmill’s console and programming. The BASIC OPERATION section in the<br />
TREADMILL GUIDE has instructions for the following:<br />
• LOCATION OF THE TREADMILL<br />
• USING THE SAFETY KEY<br />
• FOLDING THE TREADMILL<br />
• MOVING THE TREADMILL<br />
• LEVELING THE TREADMILL<br />
• TENSIONING THE RUNNING BELT<br />
• CENTERING THE RUNNING BELT<br />
• USING THE HEART RATE FUNCTION<br />
15
Paragon 4<br />
Shown<br />
16<br />
TIME<br />
ZEIT<br />
INCLINE<br />
STEIGUNG<br />
WARNING! Model is only for homeuse.<br />
Attach safety key clip to clothing before starting and remove safety key when not in use. Heart rate monitoring systems<br />
may be inaccurate. Over exercise may result in serious injury or death. To avoid injury, stand on the side rails before<br />
starting treadmill. Read and follow all instructions before operating. Keep children away from this equipment.<br />
2 % 4 % 6 %<br />
8 % 10 % 12 %<br />
CHANGE<br />
DISPLAY<br />
ANZEIGENWECHSEL<br />
SET INCLINE<br />
STEIGUNG BESTÄTIGEN<br />
START<br />
QUICK START<br />
SCHNELLSTART<br />
A B C<br />
HR (Beats Per Minute)<br />
HR (Pulsschlag pro Minute)<br />
CALORIES KALORIEN<br />
HEART RATE<br />
HERZFREQUENZ<br />
<strong>PARAGON</strong> 4<br />
TARGET HEART RATE ZONE<br />
ZIELHERZFREQUENZZONEN<br />
220<br />
200<br />
180<br />
160<br />
140<br />
120<br />
100<br />
80<br />
20 25 30 35 40 45 50 55 60 65 70<br />
AGE<br />
ALTER<br />
220 - AGE = MHR<br />
(220 - ALTER = MHR)<br />
(MAXIMALE HERZFREQUENZ)<br />
(MAXIMUM HEART RATE)<br />
DISTANCE<br />
ENTFERNUNG<br />
SPEED<br />
GESCHWINDIGKEIT<br />
EnergySaver<br />
ENERGIESPARMODUS<br />
WARNUNG! Nur für den Heimgebrauch.<br />
Befestigen Sie den Sicherheitsclip an Ihrer Kleidung, bevor Sie das Gerät starten. Herzfrequenzüberwachungssysteme<br />
können ungenau sein. Übermäßiges Training kann zu ernsthaften Verletzungen oder zum Tod führen. Um das Risiko<br />
von Verletzungen einzudämmen, stellen Sie sich auf die seitlichen Trittflächen, bevor Sie das Gerät starten.<br />
Lesen und befolgen Sie die Bedienungsanleitung vor der Erstbenutzung. Halten Sie Kinder von dem Gerät fern.<br />
D E F G H I J K H L M N O P<br />
HIGH MAXIUMUM<br />
(80%-100%)<br />
MODERATE DURCHSCHNITT<br />
(65%-85%)<br />
LOW MINIMUM<br />
(55%-65%)<br />
2<br />
km/h<br />
2 mph<br />
12 8<br />
km/h<br />
mph<br />
4 3<br />
km/h<br />
mph<br />
16 10<br />
km/h<br />
mph<br />
8 5<br />
km/h<br />
mph<br />
18 11<br />
SET SPEED<br />
GESCHWINDIGKEIT BESTÄTIGEN<br />
STOP<br />
HOLD TO RESET<br />
FÜR NULLSTELLUNG GEDRÜCKT HALTEN<br />
km/h<br />
mph<br />
ENTER<br />
EINGABE
<strong>PARAGON</strong> 4 CONSOLE OPERATION<br />
Note: There is a thin protective sheet of clear plastic on the overlay of the console that should be removed before use.<br />
A) LED DISPLAY WINDOWS: Time, Distance, Speed, Incline, Calories, Heart Rate.<br />
B) DOT-MATRIX DISPLAY WINDOW: displays workout level, progress and workout profiles.<br />
C) ENERGY SAVER : To minimize energy consumption, your machine will enter energy saver mode automatically (after entering stand-by mode<br />
for 15 mins) and could be quickly waken up with a touch of a button.<br />
D) INCLINE KEYS : used to adjust incline in small increments (0.5% Increments).<br />
E) CHANGE DISPLAY BUTTON: used to scroll through display modes. Press to change display feedback during workout.<br />
F) START: press to begin exercising, start your workout, or resume exercising after pause.<br />
G) SET INCLINE BUTTON : used to confirm quick adjustment of incline.<br />
H) QUICK ADJUST KEYPAD : used to reach desired speed or incline more quickly.<br />
I) MULTIPLE STORAGE AREA : used to keep your cellphone, keys or remote controller.<br />
J) SAFETY KEY POSITION: enables treadmill when safety key is inserted.<br />
K) READING RACK : holds reading materials.<br />
L) SET SPEED BUTTON: used to confirm quick adjustment of speed.<br />
M) STOP: press to pause/end your workout. Hold for 3 seconds to reset the console.<br />
N) ENTER BUTTON: used to confirm setting of workout program or user profile.<br />
O) SPEED KEYS : used to adjust speed in small increments (0.1 KMH increments).<br />
P) WATER BOTTLE POCKETS : holds personal workout equipment.<br />
Paragon 4<br />
Shown<br />
17
Paragon 5<br />
Shown<br />
18<br />
WARNING! Model is only for homeuse.<br />
Attach safety key clip to clothing before starting and remove safety key when not in use. Heart rate monitoring systems<br />
may be inaccurate. Over exercise may result in serious injury or death. To avoid injury, stand on the side rails before<br />
starting treadmill. Read and follow all instructions before operating. Keep children away from this equipment.<br />
2 % 4 % 6 %<br />
8 % 10 % 12 %<br />
CHANGE<br />
DISPLAY<br />
ANZEIGENWECHSEL<br />
SET INCLINE<br />
STEIGUNG BESTÄTIGEN<br />
START<br />
QUICK START<br />
SCHNELLSTART<br />
A B<br />
FAN<br />
VENTILATOR<br />
<strong>PARAGON</strong> 5<br />
EnergySaver<br />
ENERGIESPARMODUS<br />
PRESS TO SWITCH<br />
FÜR ANZEIGENWECHSEL DRÜCKEN<br />
PERFORMANCE FILING SYSTEM<br />
WARNUNG! Nur für den Heimgebrauch.<br />
Befestigen Sie den Sicherheitsclip an Ihrer Kleidung, bevor Sie das Gerät starten. Herzfrequenzüberwachungssysteme<br />
können ungenau sein. Übermäßiges Training kann zu ernsthaften Verletzungen oder zum Tod führen. Um das Risiko<br />
von Verletzungen einzudämmen, stellen Sie sich auf die seitlichen Trittflächen, bevor Sie das Gerät starten.<br />
Lesen und befolgen Sie die Bedienungsanleitung vor der Erstbenutzung. Halten Sie Kinder von dem Gerät fern.<br />
2<br />
2<br />
km/h<br />
12 8<br />
mph<br />
km/h<br />
mph<br />
4 3<br />
km/h<br />
mph<br />
16 10<br />
km/h<br />
mph<br />
8 5<br />
SET SPEED<br />
GESCHWINDIGKEIT BESTÄTIGEN<br />
E F G H I J K L M N O I P Q R S T<br />
C<br />
D<br />
STOP<br />
HOLD TO RESET<br />
FÜR NULLSTELLUNG GEDRÜCKT HALTEN<br />
km/h<br />
mph<br />
18 12<br />
km/h<br />
mph<br />
ENTER<br />
EINGABE
<strong>PARAGON</strong> 5 CONSOLE OPERATION<br />
Note: There is a thin protective sheet of clear plastic on the overlay of the console that should be removed before use.<br />
A) LCD DISPLAY WINDOWS: Time, Distance,Speed, Incline, Calories, Heart Rate.<br />
B) DOT-MATRIX DISPLAY WINDOW: displays workout level, progress and workout profiles.<br />
C) COMMUNICATION WINDOW: Passport synchronisation, proFILE display information and other communication texts.<br />
D) ENERGY SAVER : To minimize energy consumption, your machine will enter energy saver mode automatically (after entering stand-by mode<br />
for 15 mins) and could be quickly waken up with a touch of a button.<br />
E) INCLINE KEYS : used to adjust incline in small increments (0.5% Increments).<br />
F) CHANGE DISPLAY BUTTON: used to scroll through display modes. Press to change display feedback during workout.<br />
G) START: press to begin exercising, start your workout, or resume exercising after pause.<br />
H) SET INCLINE BUTTON : used to confirm quick adjustment of incline.<br />
I) QUICK ADJUST KEYPAD : used to reach desired speed or incline more quickly.<br />
J) MULTIPLE STORAGE AREA : used to keep your cellphone, keys or remote controller.<br />
K) FAN BUTTON: Allows user to select among 3 different fan speed.<br />
L) FAN: High quality personal blower fan provides 3 stages adjustment.<br />
M) SAFETY KEY POSITION: enables treadmill when safety key is inserted.<br />
N) READING RACK : holds reading materials.<br />
O) PROFILE BUTT ON: used to scroll through proFILE display modes. Must be pressed after selecting user.<br />
P) SET SPEED BUTTON: used to confirm quick adjustment of speed.<br />
Q) STOP: press to pause/end your workout. Hold for 3 seconds to reset the console.<br />
R) ENTER BUTTON: used to confirm setting of workout program or user profile.<br />
S) SPEED KEYS : used to adjust speed in small increments (0.1 KMH increments).<br />
T) WATER BOTTLE POCKETS : holds personal workout equipment.<br />
Paragon 5<br />
Shown<br />
19
Paragon 6<br />
Shown<br />
20<br />
CHANGE<br />
DISPLAY<br />
WARNING! Model is only for homeuse.<br />
Attach safety key clip to clothing before starting and remove safety key when not in use. Heart rate monitoring systems<br />
may be inaccurate. Over exercise may result in serious injury or death. To avoid injury, stand on the side rails before<br />
starting treadmill. Read and follow all instructions before operating. Keep children away from this equipment.<br />
2 % 4 % 6 %<br />
8 % 10 % 15 %<br />
ANZEIGENWECHSEL<br />
SET INCLINE<br />
STEIGUNG BESTÄTIGEN<br />
START<br />
QUICK START<br />
SCHNELLSTART<br />
A B<br />
FAN<br />
VENTILATOR<br />
<strong>PARAGON</strong> 6<br />
EnergySaver<br />
ENERGIESPARMODUS<br />
PRESS TO SWITCH<br />
FÜR ANZEIGENWECHSEL DRÜCKEN<br />
PERFORMANCE FILING SYSTEM<br />
WARNUNG! Nur für den Heimgebrauch.<br />
Befestigen Sie den Sicherheitsclip an Ihrer Kleidung, bevor Sie das Gerät starten. Herzfrequenzüberwachungssysteme<br />
können ungenau sein. Übermäßiges Training kann zu ernsthaften Verletzungen oder zum Tod führen. Um das Risiko<br />
von Verletzungen einzudämmen, stellen Sie sich auf die seitlichen Trittflächen, bevor Sie das Gerät starten.<br />
Lesen und befolgen Sie die Bedienungsanleitung vor der Erstbenutzung. Halten Sie Kinder von dem Gerät fern.<br />
SET SPEED<br />
GESCHWINDIGKEIT BESTÄTIGEN<br />
E F G H I J K L M N O I P Q R S T<br />
C<br />
D<br />
2<br />
2<br />
km/h<br />
12 8<br />
mph<br />
km/h<br />
mph<br />
4 3<br />
km/h<br />
mph<br />
16 10<br />
STOP<br />
km/h<br />
mph<br />
HOLD TO RESET<br />
FÜR NULLSTELLUNG GEDRÜCKT HALTEN<br />
8 5<br />
km/h<br />
mph<br />
20 12<br />
ENTER<br />
EINGABE<br />
km/h<br />
mph
<strong>PARAGON</strong> 6 CONSOLE OPERATION<br />
Note: There is a thin protective sheet of clear plastic on the overlay of the console that should be removed before use.<br />
A) LED DISPLAY WINDOWS: Time, Distance, Calories, Speed, Incline, Heart Rate.<br />
B) DOT-MATRIX DISPLAY WINDOW: displays workout level, progress and workout profiles.<br />
C) COMMUNICATION WINDOW: Passport synchronisation, proFILE display information and other communication texts.<br />
D) ENERGY SAVER : To minimize energy consumption, your machine will enter energy saver mode automatically (after entering stand-by mode<br />
for 15 mins) and could be quickly waken up with a touch of a button.<br />
E) INCLINE KEYS : used to adjust incline in small increments (0.5% Increments).<br />
F) CHANGE DISPLAY BUTTON: used to scroll through display modes. Press to change display feedback during workout.<br />
G) START: press to begin exercising, start your workout, or resume exercising after pause.<br />
H) SET INCLINE BUTTON : used to confirm quick adjustment of incline.<br />
I) QUICK ADJUST KEYPAD : used to reach desired speed or incline more quickly.<br />
J) MULTIPLE STORAGE AREA : used to keep your cellphone, keys or remote controller.<br />
K) FAN BUTTON: Allows user to select among 3 different fan speed.<br />
L) FAN: High quality personal blower fan provides 3 stages adjustment.<br />
M) SAFETY KEY POSITION: enables treadmill when safety key is inserted.<br />
N) READING RACK : holds reading materials.<br />
O) PROFILE BUTT ON: used to scroll through profile display modes. Must be pressed after selecting user.<br />
P) SET SPEED BUTTON: used to confirm quick adjustment of speed.<br />
Q) STOP: press to pause/end your workout. Hold for 3 seconds to reset the console.<br />
R) ENTER BUTTON: used to confirm setting of workout program or user profile.<br />
S) SPEED KEYS : used to adjust speed in small increments (0.1 KMH increments).<br />
T) WATER BOTTLE POCKETS : holds personal workout equipment.<br />
Paragon 6<br />
Shown<br />
21
Paragon 4<br />
Shown<br />
22<br />
<strong>PARAGON</strong> 4 DISPLAYS<br />
TIME<br />
ZEIT<br />
INCLINE<br />
STEIGUNG<br />
DISPLAY WINDOWS<br />
CALORIES KALORIEN<br />
HEART RATE<br />
HERZFREQUENZ<br />
• TIME: Shown as minutes : seconds. View the time<br />
remaining or the time elapsed in your workout.<br />
• DISTANCE: Shown as km or miles. Indicates distance<br />
traveled or distance remaining during your workout.<br />
• SPEED: Shown as MPH or KMPH. Indicates how fast<br />
your walking or running surface is moving.<br />
• INCLINE: Shown as percent. Indicates the incline of your<br />
walking or running surface.<br />
• CALORIES: Total calories burned or calories remaining<br />
left to burn during your workout.<br />
DISTANCE<br />
ENTFERNUNG<br />
SPEED<br />
GESCHWINDIGKEIT<br />
EnergySaver<br />
ENERGIESPARMODUS<br />
• HEART RATE: Shown as BPM (beats per minute). Used to<br />
monitor your heart rate (displayed when contact is made with<br />
both pulse grips).<br />
• DOT-MATRIX LED WINDOW (8 × 8): To display Program<br />
name, Program profiles and communication text<br />
• PROGRAM PROFILES: Represents the profile of the<br />
program being used (speed during speed based programs<br />
and incline during incline based programs).
<strong>PARAGON</strong> 5 DISPLAYS<br />
DISPLAY WINDOWS<br />
• TIME: Shown as minutes : seconds. View the time<br />
remaining or the time elapsed in your workout.<br />
• DISTANCE: Shown as km or miles. Indicates distance<br />
traveled or distance remaining during your workout.<br />
• SPEED: Shown as MPH or KMPH. Indicates how fast<br />
your walking or running surface is moving.<br />
• INCLINE: Shown as percent. Indicates the incline of your<br />
walking or running surface.<br />
• CALORIES: Total calories burned or calories remaining<br />
left to burn during your workout.<br />
• HEART RATE: Shown as BPM (beats per minute). Used<br />
to monitor your heart rate (displayed when contact is<br />
made with both pulse grips).<br />
EnergySaver<br />
ENERGIESPARMODUS<br />
• DOT-MATRIX LED WINDOW (10 × 12): To display Program<br />
name, Program profiles and communication text<br />
• PROGRAM PROFILES: Represents the profile of the<br />
program being used (speed during speed based programs<br />
and incline during incline based programs).<br />
• CIRCLE: Shows your progress of your current lap (400M circle<br />
run).<br />
• LAPS: Shows how many laps have you completed<br />
• ALPHANUMERIC DISPLAY WINDOW: Passport<br />
synchronisation, proFILE display information and other<br />
communication texts.<br />
Paragon 5<br />
Shown<br />
23
Paragon 6<br />
Shown<br />
24<br />
<strong>PARAGON</strong> 6 DISPLAYS<br />
DISPLAY WINDOWS<br />
• TIME: Shown as minutes : seconds. View the time<br />
remaining or the time elapsed in your workout.<br />
• DISTANCE: Shown as km or miles. Indicates distance<br />
traveled or distance remaining during your workout.<br />
• SPEED: Shown as MPH or KMPH. Indicates how fast<br />
your walking or running surface is moving.<br />
• INCLINE: Shown as percent. Indicates the incline of your<br />
walking or running surface.<br />
• CALORIES: Total calories burned or calories remaining<br />
left to burn during your workout.<br />
• HEART RATE: Shown as BPM (beats per minute). Used<br />
to monitor your heart rate (displayed when contact is<br />
made with both pulse grips).<br />
EnergySaver<br />
ENERGIESPARMODUS<br />
• DOT-MATRIX LED WINDOW (10 × 12): To display Program<br />
name, Program profiles and communication text<br />
• PROGRAM PROFILES: Represents the profile of the<br />
program being used (speed during speed based programs<br />
and incline during incline based programs).<br />
• CIRCLE: Shows your progress of your current lap (400M circle<br />
run).<br />
• LAPS: Shows how many laps have you completed<br />
• ALPHANUMERIC DISPLAY WINDOW: Passport<br />
synchronisation, proFILE display information and other<br />
communication texts.
GETTING STARTED<br />
1) Check to make sure no objects are placed on the belt that<br />
will hinder the movement of the treadmill.<br />
2) Plug in the power cord and turn the treadmill ON.<br />
3) Stand on the side rails of the treadmill.<br />
4) Attach the safety key clip to part of your clothing making<br />
sure that it is secure and will not become detached during<br />
operation.<br />
5) Insert the safety key into the safety keyhole in the console.<br />
6) You have two options to start your workout:<br />
A) QUICK START UP<br />
Simply press the START key to begin working out.<br />
Time, distance, and calories will all count up from zero. OR...<br />
B) SELECT A PROGRAM<br />
1) Select USER 1, USER 2 or GUEST using on the<br />
PROGRAMMING BUTTON and press ENTER to confirm.<br />
2) Give your personal weight and select a program using<br />
on the PROGRAMMING BUTTON and press ENTER to<br />
confirm.<br />
3) Complete the program setup using on the<br />
PROGRAMMING BUTTON and press ENTER to confirm.<br />
4) When setup is complete, press START to begin your<br />
workout.<br />
DATE AND CLOCK SETUP<br />
1) Enter Setup mode: Press and hold quick<br />
speed 2 and 4 buttons for 3 seconds<br />
2) Use on the PROGRAMMING<br />
BUTTON to change settings and press<br />
ENTER to confirm.<br />
3) Settings include: Month, Day, Year, Hour,<br />
Minute, and AM/PM.<br />
4) Review settings: You can review your<br />
settings at any time while in setup mode.<br />
Press ENTER to scroll through settings.<br />
5) Exit setup mode: To confirm the date and<br />
time, press and hold ENTER for 3 seconds.<br />
TO CLEAR SELECTION/RESET<br />
THE CONSOLE<br />
Hold STOP key for 3 seconds.<br />
FINISHING YOUR WORKOUT<br />
When your workout is complete, the display<br />
will flash “WORKOUT COMPLETE” and beep.<br />
Your workout information will stay displayed on<br />
the console for 30 seconds and then reset.<br />
ALL<br />
MODELS<br />
25
ALL<br />
MODELS<br />
26<br />
PROGRAM INFORMATION<br />
NOTE:<br />
1) If speed or incline are changed during your workout, the remaining segments will be affected accordingly.<br />
2) Paragon 4 contains 8 programs: Manual, Intervals, Weight Loss, Hill Run, 5K, 10K, HRC, Custom<br />
3) Paragon 5 contains 10 programs: Manual, Intervals, Peak Intervals, Weight Loss, Hill Run, 5K, 10K, HRC, Custom 1, Custom 2<br />
4) Paragon 6 contains 15 programs: Manual, Intervals, Speed Intervals, Peak Intervals, Weight Loss, Hill Run, Hill Climb, 5K, 10K,<br />
Pacer, HRC 1, HRC 2, Custom 1, Custom 2, Custom 3<br />
1) MANUAL: Adjust your speed and incline manually during your workout.<br />
2) INTERVALS: Walk or run a series of alternating incline levels. Time-based goal with 10 difficulty levels to choose from. Warm-up<br />
and cool down last 4:00 minutes each and are included in program times.<br />
Level 1<br />
Level 2<br />
Level 3<br />
Level 4<br />
Level 5<br />
Level 6<br />
Level 7<br />
Level 8<br />
Level 9<br />
Level 10<br />
Segments Warm-Up 1 2 Cool Down<br />
Time 4:00 min 90 sec 30 sec 4:00 min<br />
Speed (British) 1 1.5 2 4 1.5 1<br />
Speed (Metric) 1.6 2.4 3.2 6.4 2.4 1.6<br />
Speed (British) 1 1.5 2 4.5 1.5 1<br />
Speed (Metric) 1.6 2.4 3.2 7.2 2.4 1.6<br />
Speed (British) 1.3 1.9 2.5 5 1.9 1.3<br />
Speed (Metric) 2 3 4 8 3 2<br />
Speed (British) 1.3 1.9 2.5 5.5 1.9 1.3<br />
Speed (Metric) 2 3 4 8.8 3 2<br />
Speed (British) 1.5 2.3 3 6 2.3 1.5<br />
Speed (Metric) 2.4 3.6 4.8 9.6 3.6 2.4<br />
Speed (British) 1.5 2.3 3 6.5 2.3 1.5<br />
Speed (Metric) 2.4 3.6 4.8 10.4 3.6 2.4<br />
Speed (British) 1.8 2.6 3.5 7 2.6 1.8<br />
Speed (Metric) 2.8 4.1 5.6 11.2 4.1 2.8<br />
Speed (British) 1.8 2.6 3.5 7.5 2.6 1.8<br />
Speed (Metric) 2.8 4.1 5.6 12 4.1 2.8<br />
Speed (British) 2 3 4 8 3 2<br />
Speed (Metric) 3.2 4.8 6.4 12.8 4.8 3.2<br />
Speed (British) 2 3 4 8.5 3 2<br />
Speed (Metric) 3.2 4.8 6.4 13.6 4.8 3.2
3) SPEED INTERVALS (<strong>PARAGON</strong> 6 ONLY): Walk or run a series of alternating speed levels. Time-based goal with 10 difficulty<br />
levels to choose from. Warm-up and cooldown last 4:00 minutes each and are included in program times.<br />
Level 1<br />
Level 2<br />
Level 3<br />
Level 4<br />
Level 5<br />
Level 6<br />
Level 7<br />
Level 8<br />
Level 9<br />
Level 10<br />
Segments Warm-Up 1 2 Cool Down<br />
Time 4:00 min 60 sec 30 sec 4:00 min<br />
Speed (British) 1 1.5 2 4 1.5 1<br />
Speed (Metric) 1.6 2.4 3.2 6.4 2.4 1.6<br />
Speed (British) 1 1.5 2 4.5 1.5 1<br />
Speed (Metric) 1.6 2.4 3.2 7.2 2.4 1.6<br />
Speed (British) 1.3 1.9 2.5 5 1.9 1.3<br />
Speed (Metric) 2 3 4 8 3 2<br />
Speed (British) 1.3 1.9 2.5 5.5 1.9 1.3<br />
Speed (Metric) 2 3 4 8.8 3 2<br />
Speed (British) 1.5 2.3 3 6 2.3 1.5<br />
Speed (Metric) 2.4 3.6 4.8 9.6 3.6 2.4<br />
Speed (British) 1.5 2.3 3 6.5 2.3 1.5<br />
Speed (Metric) 2.4 3.6 4.8 10.4 3.6 2.4<br />
Speed (British) 1.8 2.6 3.5 7 2.6 1.8<br />
Speed (Metric) 2.8 4.1 5.6 11.2 4.1 2.8<br />
Speed (British) 1.8 2.6 3.5 7.5 2.6 1.8<br />
Speed (Metric) 2.8 4.1 5.6 12 4.1 2.8<br />
Speed (British) 2 3 4 8 3 2<br />
Speed (Metric) 3.2 4.8 6.4 12.8 4.8 3.2<br />
Speed (British) 2 3 4 8.5 3 2<br />
Speed (Metric) 3.2 4.8 6.4 13.6 4.8 3.2<br />
ALL<br />
MODELS<br />
27
ALL<br />
MODELS<br />
28<br />
4) PEAK INTERVALS (<strong>PARAGON</strong> 5 & <strong>PARAGON</strong> 6 ONLY): Walk or run a series of alternating speed and<br />
incline levels. Time-based goal with 10 difficulty levels to choose from. MANUAL: Adjust your speed and incline<br />
manually during your workout.<br />
Level 1<br />
Level 2<br />
Level 3<br />
Level 4<br />
Level 5<br />
Level 6<br />
Level 7<br />
Level 8<br />
Level 9<br />
Level 10<br />
Segments Warm-Up 1 2 Cool Down<br />
Time 4:00 min 90 sec 30 sec 4:00 min<br />
Speed (British) 1 1.5 2 4 1.5 1<br />
Speed (Metric) 1.6 2.4 3.2 6.4 2.4 1.6<br />
Incline 1 1.5 0.5 1.5 1.5 0<br />
Speed (British) 1 1.5 2 4.5 1.5 1<br />
Speed (Metric) 1.6 2.4 3.2 7.2 2.4 1.6<br />
Incline 1.5 2.5 3 6.5 2.5 1.5<br />
Speed (British) 1.3 1.9 2.5 5 1.9 1.3<br />
Speed (Metric) 2 3 4 8 3 2<br />
Incline 2 3 4 7.5 3 2<br />
Speed (British) 1.3 1.9 2.5 5.5 1.9 1.3<br />
Speed (Metric) 2 3 4 8.8 3 2<br />
Incline 2 3 4 8 3 2<br />
Speed (British) 1.5 2.3 3 6 2.3 1.5<br />
Speed (Metric) 2.4 3.6 4.8 9.6 3.6 2.4<br />
Incline 2.5 3.5 4.5 8.5 3.5 2.5<br />
Speed (British) 1.5 2.3 3 6.5 2.3 1.5<br />
Speed (Metric) 2.4 3.6 4.8 10.4 3.6 2.4<br />
Incline 2.5 3.5 4.5 9 3.5 2.5<br />
Speed (British) 1.8 2.6 3.5 7 2.6 1.8<br />
Speed (Metric) 2.8 4.1 5.6 11.2 4.1 2.8<br />
Incline 2.5 4 5.5 9.5 4 3<br />
Speed (British) 1.8 2.6 3.5 7.5 2.6 1.8<br />
Speed (Metric) 2.8 4.1 5.6 12 4.1 2.8<br />
Incline 3 4 5.5 9.5 4 3<br />
Speed (British) 2 3 4 8 3 2<br />
Speed (Metric) 3.2 4.8 6.4 12.8 4.8 3.2<br />
Incline 3 4.5 6 10 5 3<br />
Speed (British) 2 3 4 8.5 3 2<br />
Speed (Metric) 3.2 4.8 6.4 13.6 4.8 3.2<br />
Incline 3 4.5 6 10 5 3
5) WEIGHT LOSS: Promotes weight loss by increasing and decreasing the speed and incline, while keeping you in your fat burning<br />
zone. Speed and Incline changes, segments repeat every 30 seconds.<br />
Level 1<br />
Level 2<br />
Level 3<br />
Level 4<br />
Level 5<br />
Level 6<br />
Level 7<br />
Level 8<br />
Level 9<br />
Level 10<br />
Segments Warm-Up 1 2 3 4 5 6 7 8 Cool Down<br />
Time 4:00 min 30 sec 30 sec 30 sec 30 sec 30 sec 30 sec 30 sec 30 sec 4:00 min<br />
Speed (British) 1 1.5 2 2.5 3 3.5 4 3.5 3 2.5 2.3 1.5<br />
Speed (Metric) 1.6 2.4 3.2 4 4.8 5.6 6.4 5.6 4.8 4 3.6 2.4<br />
Incline 0 0.5 1.5 1.5 1 0.5 0.5 0.5 1 1.5 0.5 0<br />
Speed (British) 1.3 1.9 2.5 3 3.5 4 4.5 4 3.5 3 2.6 1.8<br />
Speed (Metric) 2 3 4 4.8 5.6 6.4 7.2 6.4 5.6 4.8 4.1 2.8<br />
Incline 0 0.5 1.5 1.5 1 0.5 1 0.5 1 1.5 0.5 0<br />
Speed (British) 1.5 2.3 3 3.5 4 4.5 5 4.5 4 3.5 3 2<br />
Speed (Metric) 2.4 3.6 4.8 5.6 6.4 7.2 8 7.2 6.4 5.6 4.8 3.2<br />
Incline 0.5 1 2 2 1.5 1 1 1 1.5 2 1 0.5<br />
Speed (British) 1.8 2.6 3.5 4 4.5 5 5.5 5 4.5 4 3.4 2.3<br />
Speed (Metric) 2.8 4.1 5.6 6.4 7.2 8 8.8 8 7.2 6.4 5.4 3.6<br />
Incline 0.5 1 2 2 1.5 1 1 1 1.5 2 1 0.5<br />
Speed (British) 2 3 4 4.5 5 5.5 6 5.5 5 4.5 3.8 2.5<br />
Speed (Metric) 3.2 4.8 6.4 7.2 8 8.8 9.6 8.8 8 7.2 6 4<br />
Incline 1 1.5 2.5 2.5 2 1.5 1.5 1.5 2 2.5 1.5 1<br />
Speed (British) 2.3 3.4 4.5 5 5.5 6 6.5 6 5.5 5 4.1 2.8<br />
Speed (Metric) 3.6 5.4 7.2 8 8.8 9.6 10.4 9.6 8.8 8 6.5 4.4<br />
Incline 1 1.5 2.5 2.5 2 1.5 1.5 1.5 2 2.5 1.5 1<br />
Speed (British) 2.5 3.8 5 5.5 6 6.5 7 6.5 6 5.5 4.5 3<br />
Speed (Metric) 4 6 8 8.8 9.6 10.4 11.2 10.4 9.6 8.8 7.2 4.8<br />
Incline 1.5 2 3 3 2.5 2 2 2 2.5 3 2 1.5<br />
Speed (British) 2.8 4.1 5.5 6 6.5 7 7.5 7 6.5 6 4.9 3.3<br />
Speed (Metric) 4.4 6.5 8.8 9.6 10.4 11.2 12 11.2 10.4 9.6 7.8 5.2<br />
Incline 1.5 2 3 3 2.5 2 2 2 2.5 3 2 1.5<br />
Speed (British) 3 4.5 6 6.5 7 7.5 8 7.5 7 6.5 5.3 3.5<br />
Speed (Metric) 4.8 7.2 9.6 10.4 11.2 12 12.8 12 11.2 10.4 8.4 5.6<br />
Incline 2 2.5 3.5 3.5 3 2.5 2.5 2.5 3 3.5 2.5 2<br />
Speed (British) 3.3 4.9 6.5 7 7.5 8 8.5 8 7.5 7 5.6 3.8<br />
Speed (Metric) 5.2 7.8 10.4 11.2 12 12.8 13.6 12.8 12 11.2 8.9 6<br />
Incline 2 2.5 3.5 3.5 3 2.5 2.5 2.8 3 3.5 2.5 2<br />
ALL<br />
MODELS<br />
29
ALL<br />
MODELS<br />
30<br />
6) HILL RUN: Simulates a hill ascent and descent. This program helps tone muscle and improve cardiovascular<br />
ability. Incline changes and segments repeat every 30 seconds.<br />
Segments Warm-Up 1 2 3 4 5 6 7 8 9 10 Cool Down<br />
Time 4:00 min 30 sec 30 sec 30 sec 30 sec 30 sec 30 sec 30 sec 30 sec 30 sec 30 sec 4:00 min<br />
Level 1 0 0 1 1.5 2 2.5 3 3 2.5 2 1.5 1 0 0<br />
Level 2 0 0 1.5 2 2.5 3 3.5 3.5 3 2.5 2 1.5 0 0<br />
Level 3 0 1 2 2.5 3 3.5 4 4 3.5 3 2.5 2 1 0<br />
Level 4 0 1.5 2.5 3 3.5 4 4.5 4.5 4 3.5 3 2.5 1.5 0<br />
Level 5 0 1.5 3 3.5 4 4.5 5 5 4.5 4 3.5 3 1.5 0<br />
Level 6 0 1.5 3.5 4 4.5 5 5.5 5.5 5 4.5 4 3.5 1.5 0<br />
Level 7 0 1.5 4 4.5 5 5.5 6 6 5.5 5 4.5 4 1.5 0<br />
Level 8 0 2 4.5 5 5.5 6 6.5 6.5 6 5.5 5 4.5 2 0<br />
Level 9 0 2 5 5.5 6 6.5 7 7 6.5 6 5.5 5 2 0<br />
Level 10 0 2 5.5 6 6.5 7 7.5 7.5 7 6.5 6 5.5 2 0<br />
7) HILL CLIMB (<strong>PARAGON</strong> 6 ONLY): A more intense version of HILL RUN. Simulates a mountain ascent and<br />
descent. This program helps tone muscle and improve cardiovascular ability. Incline changes and segments<br />
repeat every 30 seconds.<br />
Segments Warm-Up 1 2 3 4 5 6 7 8 9 10 11 12 13 14 15 Cool Down<br />
Time 4:00 min 30 sec 30 sec 30 sec 30 sec 30 sec 30 sec 30 sec 30 sec 30 sec 30 sec 30 sec 30 sec 30 sec 30 sec 30 sec 4:00 min<br />
Level 1 0 0.5 0 0 1 3 1 3 2 3 2 3.5 2 3 2 3 1 3 1 0.5 0<br />
Level 2 0 0.5 0 0 1 3 2 3 2 3 2.5 3.5 2.5 3 2 3 2 3 1 0.5 0<br />
Level 3 0.5 1 0.5 0.5 1.5 3.5 1.5 3.5 2.5 3.5 2.5 4 2.5 3.5 2.5 3.5 1.5 3.5 1.5 1 0.5<br />
Level 4 0.5 1 0.5 0.5 1.5 3.5 2.5 3.5 2.5 3.5 3 4 3 3.5 2.5 3.5 2.5 3.5 1.5 1 0.5<br />
Level 5 1 1.5 1 1 2 4 2 4 3 4 3 4.5 3 4 3 4 2 4 2 1.5 1<br />
Level 6 1 1.5 1 1 2 4 3 4 3 4 3.5 4.5 3.5 4 3 4 3 4 2 1.5 1<br />
Level 7 1.5 2 1.5 1.5 2.5 4.5 2.5 4.5 3.5 4.5 3.5 5 3.5 4.5 3.5 4.5 2.5 4.5 2.5 2 1.5<br />
Level 8 1.5 2 1.5 1.5 2.5 4.5 3.5 4.5 3.5 4.5 4 5 4 4.5 3.5 4.5 3.5 4.5 2.5 2 1.5<br />
Level 9 2 2.5 2 2 3 5 3 5 4 5 4 5.5 4 5 4 5 3 5 3 2.5 2<br />
Level 10 2 2.5 2 2 3 5 4 5 4 5 4.5 5.5 4.5 5 4 5 4 5 3 2.5 2
8-9) 5K & 10K: Walk a series of alternating incline levels. Distance based goal with 4 difficulty levels to choose from. Distance<br />
shown as kilometers. Segments repeat until distance is reached.<br />
Segments Warm-Up 1 2 3 4 5 6 7 8 9 10 11 12 13 14 15 Cool Down<br />
Time 4:00 min 0.16 km 0.16 km 0.16 km 0.16 km 0.16 km 0.16 km 0.16 km 0.16 km 0.16 km 0.16 km 0.16 km 0.16 km 0.16 km 0.16 km 0.16 km 4:00 min<br />
Level 1 0 0.5 1 3 1 3 2 3 2 3.5 2 3 2 3 1 3 1 0.5 0<br />
Level 2 0 0.5 1 3 2 3 2 3 2.5 3.5 2.5 3 2 3 2 3 1 0.5 0<br />
Level 3 0.5 1 1.5 3.5 1.5 3.5 2.5 3.5 2.5 4 2.5 3.5 2.5 3.5 1.5 3.5 1.5 1 0.5<br />
Level 4 0.5 1 1.5 3.5 2.5 3.5 2.5 3.5 3 4 3 3.5 2.5 3.5 2.5 3.5 1.5 1 0.5<br />
Level 5 1 1.5 2 4 2 4 3 4 3 4.5 3 4 3 4 2 4 2 1.5 1<br />
Level 6 1 1.5 2 4 3 4 3 4 3.5 4.5 3.5 4 3 4 3 4 2 1.5 1<br />
Level 7 1.5 2 2.5 4.5 2.5 4.5 3.5 4.5 3.5 5 3.5 4.5 3.5 4.5 2.5 4.5 2.5 2 1.5<br />
Level 8 1.5 2 2.5 4.5 3.5 4.5 3.5 4.5 4 5 4 4.5 3.5 4.5 3.5 4.5 2.5 2 1.5<br />
Level 9 2 2.5 3 5 3 5 4 5 4 5.5 4 5 4 5 3 5 3 2.5 2<br />
Level 10 2 2.5 3 5 4 5 4 5 4.5 5.5 4.5 5 4 5 4 5 3 2.5 2<br />
10) PACER (<strong>PARAGON</strong> 6 ONLY): Trains you to run at a steady “race pace”. Enter in the distance plus the time limit, and the<br />
program calculates a steady pace.<br />
HEART RATE TRAINING<br />
The first step in knowing the right intensity for your<br />
training is to find out your maximum heart rate (max<br />
HR = 220 – your age). The age-based method<br />
provides an average statistical prediction of your<br />
max HR and is a good method for the majority of<br />
people, especially those new to heart rate training.<br />
The most precise and accurate way of determining<br />
your individual max HR is to have it clinically tested<br />
by a cardiologist or exercise physiologist through<br />
the use of a maximal stress test. If you are over the<br />
age of 40, overweight, have been sedentary for<br />
several years, or have a history of heart disease<br />
Target Heart<br />
Rate Zone<br />
VERY HARD<br />
90 – 100%<br />
HARD<br />
80 – 90%<br />
MODERATE<br />
70 – 80%<br />
LIGHT<br />
60 – 70%<br />
VERY LIGHT<br />
50 – 60%<br />
Workout<br />
Duration<br />
Example THR<br />
Zone (age 30)<br />
Your<br />
THR Zone<br />
Recommended For<br />
< 5 min 171 – 190 bpm Fit persons and for athletic training<br />
2 – 10 min 152 – 171 bpm Shorter workouts<br />
10 – 40 min 133 – 152 bpm Moderately long workouts<br />
40 – 80 min 114 – 133 bpm<br />
Longer and frequently repeated shorter<br />
exercises<br />
20 – 40 min 104 – 114 bpm Weight management and active recovery<br />
in your family, clinical testing is recommended. This chart gives examples of the heart rate range for a 30 year old exercising at 5<br />
different heart rate zones. For example, a 30-year-old’s max HR is 220 – 30 = 190 bpm and 90% max HR is 190 × 0.9 = 171 bpm.<br />
ALL<br />
MODELS<br />
31
ALL<br />
MODELS<br />
32<br />
11-12) HRC – ALL MODELS: Once the HRC program is selected, press ‘enter’. To adjust your target heart rate,<br />
press the plus (+) or minus (-) incline buttons.<br />
Your target heart rate should be set at a number that you will be able to exercise at throughout the majority of your<br />
workout. Once you have chosen your target heart rate, press the ‘Start’ button and begin your workout.<br />
• There is a 4-minute warm-up built into this program at level 1 incline.<br />
• After 4 minutes, the incline will gradually adjust to bring your heart rate (within+/- 5 beats) of the target number you<br />
selected at the beginning of the program.<br />
• Once the user is at the target heart rate zone (plus or minus 5 beats), the elevation level will remain at the current<br />
resistance level.<br />
• If there is no heart rate detected, the unit will not change incline levels up or down.<br />
• If the user is more than 25 beats per minute above the target heart rate zone, the console will shut down for safety reasons.<br />
NOTE:<br />
• The chest strap is required to use the HRC program, with HRC program you can only choose time as your workout<br />
target.<br />
• Target heart rate is selected in multiples of 5 beats.<br />
• The large dot matrix window displays your heart rate during exercise. The middle row represents your target heart<br />
rate (THR) and the other rows equal +/-2 heart beats. If you are working out beneath your THR, the LEDs below<br />
the middle row will illuminate. If you are over, the display LCD/LED above the middle row will illuminate. Your current<br />
heart rate is represented by the flashing column and the window will refresh every 5 seconds.
13-15) CUSTOM PROGRAMS : Lets you create and reuse a perfect workout for you with specific speed, incline and time<br />
combination. The ultimate in personal programming. Time-based goal.<br />
8) Select CUSTOM 1, CUSTOM 2 or CUSTOM 3 using and press enter on the programming button .<br />
9) Select WEIGHT using and press enter on the programming button .<br />
10) Select TIME using and press enter on the programming button .<br />
11) Select SPEED for segments 1 through 15 using and press enter to set each segment.<br />
12) Select INCLINE for segments 1 through 15 using and press enter to set each segment.<br />
13) Press START to begin exercising. At this time, your program has been successfully saved into memory and can be used for future<br />
workouts.<br />
NOTES:<br />
• While using your saved program, you are able to adjust the speed or incline, but any changes will not be saved.<br />
• To reset the memory, press and hold enter for 5 seconds.<br />
• p4 only has 1 CUSTOM program while P5 has 2 and P6 has 3 custom programs.<br />
ALL<br />
MODELS<br />
33
ALL<br />
MODELS<br />
34<br />
PROFILE PERFORMANCE TRACKER<br />
Research shows that those who journal their fitness routines or workouts, on average, achieve greater success than those who do<br />
not. Because your new training machine is equipped with HORIZON’s exclusive PROFILE Performance Tracker, you’ve taken an<br />
important step towards achieving your fitness goals.<br />
The integrated PROFILE software allows you to track your fitness progress over time without the need for paper journals or logs.<br />
With PROFILE, you can easily compare your current workout to your last, average or lifetime workout totals. With quick access to<br />
feedback like duration of workout or calories burned during previous workouts, you’ll be able to see the progress you’ve made. Read<br />
further to learn about how PROFILE can help motivate you to enhance your performance.<br />
SETUP<br />
To activate PROFILE, a user MUST be chosen before the program<br />
begins. To select a USER 1 or 2, use the PROGRAMMING BUTTON<br />
and press ENTER to confirm. All accumulated data specifically relates<br />
to the user that is chosen. NOTE: If no user is selected and clock and<br />
date are not set, no data will be tracked.<br />
RESET<br />
Reset all recorded information for USER 1 or USER<br />
2 by selecting the user and then holding down the<br />
PROFILE button for 10 seconds. Note: This step is<br />
permanent and will delete ALL previously accumulated<br />
data for the chosen user.<br />
ACCUMULATED DATA<br />
Once PROFILE is activated, you can scroll through your accumulated data in multiple formats by pressing the PROFILE button. A<br />
workout is saved when: the program ends, the console is paused and not resumed within 5 minutes, or the STOP button is held to<br />
reset the console.<br />
1) CURRENT WORKOUT: The console automatically defaults to current workout, displaying your progress in real time.<br />
2) AVERAGE WORKOUT: This option allows you to see your average accumulated data for the last 30 workouts. The following<br />
information will be shown in each display window:<br />
• INCLINE - Average incline level.<br />
• TIME - Average workout time.<br />
• CALORIES - Average calories burned.<br />
• PACE - Average pace of workouts.<br />
• DISTANCE - Average workout distance.<br />
• SPEED - Average speed of workouts.
PROFILE PERFORMANCE TRACKER<br />
3) LAST WORKOUT: This option allows you to view your accumulated data from your last workout. The current workout becomes<br />
the last workout once a program has ended or the console has been reset. The following information will be shown in each<br />
display window:<br />
• INCLINE- Average incline of last workout.<br />
• TIME - Total time of last workout.<br />
• CALORIES - Total calories burned during last workout.<br />
• PACE - Average pace of last workout.<br />
• DISTANCE - Total distance of last workout.<br />
• SPEED - Average speed of last workout.<br />
4) WEEKLY GOAL: Indicates the weekly goal you set.<br />
• LEFT – Indicates the time or distance you have left to complete to meet your weekly goal.<br />
• TIME or DISTANCE – The total time or distance goal you selected and the time or distance you have left to complete to meet<br />
your weekly goal.<br />
• The GOAL and LEFT will display alternately every 3 seconds.<br />
• GOAL DONE will appear when goal is completed.<br />
• If the date and clock are not set and/or a weekly goal is not set, WEEKLY GOAL will display zeros.<br />
• The time or distance left for the weekly goal will reset at the end of each week.<br />
5) WEEKLY TOTAL: View your accumulated data from the last Sunday to the present day. NOTE: This data is based on week to<br />
date NOT the previous seven days. For instance, if you have not used the machine since Sunday, the console will read zeros.<br />
The following information will be shown in each display window:<br />
• INCLINE - Average incline level.<br />
• TIME - Total time of workout.<br />
• CALORIES - Average calories burned.<br />
• PACE - Average pace of weekly workout.<br />
• DISTANCE - Total distance of workout.<br />
• SPEED - Average speed of weekly workout.<br />
NOTE: If the date and clock are not set, weekly total will default to the last workout data.<br />
ALL<br />
MODELS<br />
35
ALL<br />
MODELS<br />
36<br />
3) LIFETIME TOTAL: This option allows you to view the the total accumulated data. The following information will be shown in each<br />
display window:<br />
• INCLINE - Average incline level.<br />
• TIME - Total accumulated time. NOTE: If time is greater than 59:59, the time will no longer display minutes and will display<br />
hours only.<br />
• CALORIES - Average calories burned.<br />
• PACE - Average pace.<br />
• DISTANCE - Total accumulated distance.<br />
• SPEED - Average speed.<br />
WEEKLY GOAL SETUP<br />
1) Select USER 1 or USER 2.<br />
2) Press PROFILE button and scroll to WEEKLY GOAL.<br />
3) To enter setup mode: Press ENTER. Use on the PROGRAMMING BUTTON to set a TIME GOAL. Leave time at 00:00 if<br />
you want to set a distance goal.<br />
4) Press ENTER again and use on the PROGRAMMING BUTTON to set a DISTANCE GOAL. If the distance is changed<br />
from 0.00, distance will be the goal. NOTE: You may only set a time or distance goal, not both.<br />
3) Press ENTER again to exit the setup mode.|<br />
ENERGY SAVER (STANDBY MODE)<br />
This machine has an energy saver mode. The display will automatically enter standby mode (energy saver mode) after 15 minutes of<br />
inactivity after paused. Almost all power for the machine will be off except for some circuits that are needed to detect a key press,<br />
indicating the console should “wake up”. This feature can be turned off by entering the engineering menu.<br />
To enter the engineering menu, press and hold the incline and speed buttons for 3-5 seconds. Use incline and speed to<br />
navigate through the menu to ENG3. Press ENTER to select. Use incline and speed to select ENRGY SAVER ON or OFF.<br />
Press and hold STOP for 3-5 seconds to exit ENG3. Press and hold STOP again for 3-5 seconds to exit the engineering menu.
SYNCING TREADMILL WITH PASSPORT<br />
(<strong>PARAGON</strong> 6 ONLY)<br />
1) Use the arrow keys on the Passport remote to scroll to<br />
the setup icon and press select.<br />
2) Follow the on-screen prompt to press and hold the<br />
incline up and stop buttons on the console.<br />
3) Once your snyc is success, your treadmill message bar<br />
will change from RF Sync to Passport ready.<br />
4) Besides point 3, the message displayed on-screen will<br />
notify you if the sync was a success or failure.<br />
NOTE: See Passport Owner’s Manual for more information.<br />
ALL<br />
MODELS<br />
37
38<br />
Paragon 4<br />
shown<br />
<strong>PARAGON</strong> 4 EXPLODED VIEW<br />
B15<br />
B16<br />
B27<br />
B25x2<br />
B39x8<br />
B41<br />
K15x2<br />
K50x4<br />
K28x2<br />
K29x2<br />
K14x2<br />
Q02<br />
Q06<br />
Q07<br />
Q08<br />
Q10<br />
Q11<br />
P10<br />
P20<br />
AM1<br />
M19<br />
M02<br />
M03<br />
R03<br />
R02<br />
AR1<br />
AR2<br />
AK1<br />
AH1<br />
AC1<br />
AC2<br />
K24x2<br />
K26x2<br />
K27x2<br />
K25x4<br />
K21x2<br />
Q12x19<br />
N03<br />
N04<br />
P31<br />
N43<br />
V06x2<br />
V08x2<br />
Z02x8 Z04x8<br />
Z03x8<br />
Z05x4<br />
Z06x4<br />
Z07x4<br />
Z05x2<br />
Z06x2<br />
Z08x2<br />
Q33x4<br />
Q12x8<br />
V10x2<br />
Q12x9<br />
B46x2<br />
M11x2<br />
M12x2<br />
M16x2<br />
M41<br />
B48x2<br />
B51x4<br />
B50x2<br />
B40x2<br />
Q33x6<br />
H29x2<br />
M14<br />
B21x2<br />
B47x2<br />
H22<br />
H33x2<br />
H17x2<br />
Q01<br />
H30x2<br />
H25x2<br />
H32x2<br />
V05<br />
K18x2<br />
K16x2<br />
Q09<br />
M15<br />
M33<br />
M10<br />
M33<br />
M17<br />
M24x6<br />
M40x2<br />
M38x2<br />
M12x2<br />
Z10x8<br />
N06<br />
N05<br />
H31x2<br />
H32x2<br />
B57x8<br />
B58x8<br />
R04x2<br />
R09<br />
Q20x4<br />
B28x8<br />
Z09x4<br />
Z03x4<br />
Z04x4<br />
Q22<br />
P04<br />
P01<br />
P13<br />
P02<br />
P09<br />
P21<br />
P17<br />
P18<br />
P19<br />
R07x2<br />
R07<br />
P11<br />
Q14x6<br />
H26<br />
B17x4<br />
B20x4<br />
P07<br />
H17x2<br />
Z01x2<br />
P25x4<br />
P14x2<br />
H09x4<br />
B47x2<br />
P30<br />
6<br />
1<br />
3<br />
2<br />
4<br />
P26<br />
5<br />
5
NO. DESCRIPTION<br />
1 MOTOR SET;SA;TM446-2KM;<br />
2 ARM REST SET;R;V;HB;<br />
3 ARM REST SET;L;TM447-2KM;HB;<br />
4 LOCK LATCH SET;TM447-2KM<br />
5 SIDE RAIL SET;SA;TM446-2KM;<br />
6 CONSOLE SET;SA;SBOM;TM446-2KM;<br />
AC1 CONSOLE MAST SET;L;PAINTING;AZ40-1C<br />
AC2 CONSOLE MAST SET;R;PAINTING;AZ40-1C;<br />
AH1 ELEVATION RACK SET;PAINTING;AZ40-1C;<br />
AK1 BASE FRAME SET;PAINTING;AZ40-1C;<br />
AM1 MOTOR FIXNG PLATE;-;-;PAINTING;AZ40-1C<br />
AR1 ROLLER SET;FRONT;PATTERN;TM616<br />
AR2 ROLLER SET;REAR;TM116<br />
B15 FIXING PLATE;ROLLER;R;PAINTING;AZ40-1C<br />
B16 FIXING PLATE;ROLLER;L;PAINTING;AZ40-1C<br />
B17 WASHER;SPL;Φ8.2XΦ15.4X2.0T;<br />
B20 WASHER;FLT;Φ8.2XΦ19.0X2.0T;<br />
B21 NUT;NLK;M8X1.25P;BZN;<br />
B25 WHEEL;NYLON;TM196;TM196-K13E<br />
B27 TM DECK;670X1220X20T;SILICON;<br />
B28 SCREW;FH;M8X1.25PX28L;HS;BP<br />
B39 RVN;HX;NHS-610-3.0(M6X1.0P);YZN;<br />
B40 NUT;NLK;M10X1.5P;BAN;<br />
B41 AIR STICK;DAMPING;70KG;-;<br />
B46 CUSHION;OR;Φ30X20L;TM439;<br />
B47 CUSHION;BU;Φ30X20L;TM439;<br />
NO. DESCRIPTION<br />
B48 CUSHION;BL;Φ30X20L;TM439;<br />
B50 SCREW;BH;M8X1.25PX50L-20L;HS;P-T<br />
B51 SCREW;BH;M8X1.25PX15L;HS;BZN;<br />
B57 FIXPIECE;SIDE RAIL;TM187-141A-00<br />
B58 SCREW;FH;Φ5X15L;SM;PH;BAN;POT<br />
H09 WASHER;FLT;Φ12.5XΦ19.0X1.0T;;BZN;<br />
H17 WASHER;FLT;Φ10.5XΦ20.0X1.0T;TFN;<br />
H22 SCREW;BH;M10X1.5PX80L-15L;-;HS;-;BAN;<br />
H25 WASHER;FLT;Φ12.3XΦ26.0X2.0T;TFN;<br />
H26 SCREW;BH;M10X1.5PX75L-15L;-;HS;-;BAN;<br />
H29 SCREW;NLK;M8X1.25P;BZN;<br />
H30 SCREW;NLK;M8X1.25P;BZN;<br />
H31 WASHER,PP,BLACK,TM439<br />
H32 NUT;NLK;M8X1.25P;BZN;<br />
H33 NUT;NLK;M10X1.5P;BAN;<br />
K14 END;STUFF;TM446-2KM<br />
K15 REAR CARRIAGE ROLLER;NYLON+30%G;TM369<br />
K16 FLAT;60C;TM196-K12B<br />
K18 FRONT CARRIAGE ROLLER;NYLON PA6;Φ46XΦ10<br />
K21 SCREW;BH;Φ4X10L;SM;PH;BZN;POT<br />
K24 SCREW;BH;M10X1.5PX40L-15L;MT;HS;G8.8;CHM<br />
K25 SCREW;BH;M4X0.7PX42L;PH;<br />
K26 SCREW;BH;M8X1.25PX50L-18L;MT;HS;G8.8;CHM<br />
K27 NUT;NLK;M8X1.25P;CHM;<br />
K28 PEDAL;SKID;TM367<br />
K29 HALT PLATE;WHEEL;TM367<br />
Paragon 4<br />
shown<br />
39
Paragon 4<br />
shown<br />
40<br />
NO. DESCRIPTION<br />
K50 FRONT LEVELER<br />
M02 MOTOR;AC ELEVATION;220V;80MM;225;10PIN;J<br />
M03 MCB;DIGITAL 1.75HP;220V;MLH0910HEPE;S490<br />
M10 NUT;NLK;M10X1.5P;;BAN;<br />
M11 SCREW;SH;5/16”18UNCX16L;HS;BP<br />
M12 WASHER;SPL;Φ8.2XΦ15.4X2.0T;<br />
M14 SCREW;HH;3/8-16UNCX45L-15L;HE;BZN;P-T<br />
M15 SCREW;HEX;M10X55L-14L;BED<br />
M16 WASHER;ARC;Φ8.2XΦ18.0X1.5T;BAN;<br />
M17 NUT;NLK;3/8’-16UNC;BAN;<br />
M19 MOTOR ELASTOMER PAD;RUBBER;TM16<br />
M24 SCREW;BH;Φ4X12L;TC;PH;BZN;POT<br />
M33 WASHER;FLT;Φ10.2XΦ20.0X2.0T;BZN;<br />
M38 WASHER;FLT;Φ8.2XΦ19.0X2.0T;<br />
M40 NUT;NLK;M8X1.25P;BZN;<br />
M41 SCREW;BH;M8X1.25PX15L;HS;BZN;<br />
N03 COVER;ARM REST;L1;ABS;75140;TM447<br />
N04 COVER;ARM REST;L2;ABS;75140;TM447<br />
N05 COVER;ARM REST;R1;ABS;75140;TM447<br />
N06 COVER;ARM REST;R2;ABS;75140;TM447<br />
N43 SAFETY KEY SET;TM637<br />
P01 SWITCH;POWER;KCD3;TM196;TM196-P01A<br />
P02 POWER SOCKET SET;CE(80,800,300);16AWG<br />
P04 BREAKER;THROUGH ELECTRIC CURRENT;7A 250V<br />
P07 WIRE;SF CON;BLACK;250LOCK300L 16AWG;<br />
P09 WIRE;BS CON;BLACK;250LOCK2 60L;<br />
NO. DESCRIPTION<br />
P10 INDUCTANCE;6MH 200,300;ADD LABEL;TM80<br />
P11 WIRE;CTRL BOARD PWR;WHITE;250LOCK300L<br />
P13 SCREW;FH;M3X0.5PX10L;PH;ZN;<br />
P14 WIRE;CONNECT;TM639-1US;<br />
P17 SCREW;BH;M5X0.8PX25L;CT;PH;NKL;<br />
P18 NUT;HX;M5X0.8P;SS41;NKL;<br />
P19 WASHER;TOOTH;Φ5.3XΦ10.0X0.6T;BAN;<br />
P20 WAVE FILTER(6A);06SS-2DC-C<br />
P21 WAVE TUBE;CR-11SP;Φ14XΦ10.7;200M/COIL<br />
P25 SCREW;TRH;Φ4X10L;TC;PH;NKL;POT<br />
P26 PWR CORD(INDIA);1.5MM;LONG2M<br />
P26 PWR CORD;EXTERNAL(NZL);1.5MM;LONG2M<br />
P26 PWR CORD;EXTERNAL;1.5MM;LONG2M<br />
P26 PWR CORD(CHINA);1.5MM;LONG2M<br />
P26 PWR CORD;EXTERNAL;HK;1.5MM;LONG2M<br />
P26 PWR CORD;USA;16AWG;LONG2M<br />
P26 PWR CORD GROUP;ISRAEL;1.5MM;LONG2M<br />
P26 EXTERNAL PWR(ARGENTINA)1.5MM 2M;<br />
P26 EXTERNAL PWD WIRE;(AFRICA);1.5MM 2M;<br />
P26 EXTERNAL PWD WIRE(JPN);1.25MM 2M;<br />
P26 EXTERNAL PWR CORD(SWITZERLAND);<br />
P26 EXTERNAL PWR CORD;BRIZIL;1.5MM2;2M<br />
P26 WIRE;EXTERNAL PWR;SET;CHILE USED;JIS2 U<br />
P30 WIRE;CONSOLE;UP;BLACK;850MM;CKM254301-8P<br />
P31 WIRE;CONSOLE;1350L(SM-8AX2)<br />
Q01 MOTOR COVER;U;ABS;75140
NO. DESCRIPTION<br />
Q02 COVER;MOTOR;D;PP;BL<br />
Q06 PATCH;MOTOR COVER;TM446<br />
Q07 PLASTIC COVER;L;BL;TM447;<br />
Q08 PLASTIC COVER;R;BL;TM447;<br />
Q09 END CAP;R;ABS;BL;TM447;<br />
Q10 END CAP;L;ABS;BL;TM447;<br />
Q11 PLASTIC PLATE;D;HIPS;TM446;<br />
Q12 SCREW;TRH;Φ4X10L;SM;PH;;BZN;POT<br />
Q14 CLIP; STANDARD; FE; ZNC<br />
Q20 SCREW;BH;Φ4X15L;SM;PH;BZN;POT<br />
Q22 SCREW;BH;Φ4X30L;SM;PH;POT<br />
Q33 SCREW;TRH;Φ4X15L;SM;PH;BAN;POT<br />
R02 TM BELT;508X2895X1.6T;SILICON;PAHS;TM446<br />
R03 BELT;POLY-V;PULLEY;POLY-V;8PJ;430 F<br />
R04 SCREW;SH;M8X1.25PX90L;HS;ZN;<br />
R07 WASHER;FLT;Φ8.3XΦ16.0X1.3T;BZN;<br />
R09 SCREW;SH;M8X1.25PX55L;HS;BAN;<br />
V05 SPEC LABEL;CE;TM446<br />
V06 STICKER;WARNING;TM381<br />
V08 WARNING LABEL;ENGLISH AND GERMAN;CAUT<br />
V10 DECORATED LABEL;COVER;TM447;<br />
Z01 SCREW;M8X1.25PX9L-D10X11.2L;HE;45#;BOX<br />
Z02 SCREW;BH;M8X1.25PX70L;HS;CHM;<br />
Z03 WASHER;SPL;Φ 8.2XΦ15.4X2.0T;CHM;<br />
Z04 WASHER;FLT;Φ8.2XΦ15.0X1.2T;CHM;<br />
Z05 SCREW;BH;M8X1.25PX20L;HS;BZN;BP<br />
NO. DESCRIPTION<br />
Z06 WASHER;SPL;Φ8.2XΦ15.4X2.0T;<br />
Z07 WASHER;FLT;Φ8.2XΦ16.0X1.4T;BZN;<br />
Z08 WASHER;ARC;Φ8.2XΦ16.0X1.0T;65MN;BZN<br />
Z09 SCREW;BH;M8X1.25PX15L;HS;CHM;<br />
Z10 SCREW;BH;Φ4X12L;TC;PH;;BZN;POT<br />
Paragon 4<br />
shown<br />
41
42<br />
Paragon 5<br />
shown<br />
<strong>PARAGON</strong> 5 EXPLODED VIEW<br />
B<br />
N43<br />
B15<br />
B16<br />
B27<br />
B25x2<br />
B39x8<br />
B41<br />
K15x2<br />
K50x4<br />
K28x2<br />
K29x2<br />
K14x2<br />
Q02<br />
Q06<br />
Q07<br />
Q08<br />
Q10<br />
Q11<br />
P10<br />
P20<br />
AM1<br />
M19<br />
M02<br />
M03<br />
R03<br />
R02<br />
AR1<br />
AR2<br />
AK1<br />
AH1<br />
AC1<br />
AC2<br />
K24x2<br />
K26x2<br />
K27x2<br />
K25x4<br />
K21x2<br />
Q12x13<br />
N03<br />
N04<br />
P31<br />
V08x2<br />
Z02x8 Z04x8<br />
Z03x8<br />
Z05x4<br />
Z06x4<br />
Z07x4<br />
Z05x2<br />
Z06x2<br />
Z08x2<br />
Q33x4<br />
Q12x8<br />
V10x2<br />
Q12x9<br />
B46x2<br />
M11x2<br />
M12x2<br />
M16x2<br />
M41<br />
B48x2<br />
B51x4<br />
B50x2<br />
B40x2<br />
Q33x6<br />
H29x2<br />
B21x2<br />
B47x2<br />
Q01<br />
H30x2<br />
H25x2<br />
H32x2<br />
V05<br />
K18x2<br />
K16x2<br />
Q09<br />
M15<br />
M33<br />
M10<br />
M33<br />
M17<br />
M24x6<br />
M40x2<br />
M38x2<br />
Z10x8<br />
N06<br />
N05<br />
H31x2<br />
H32x2<br />
B57x8<br />
B58x8<br />
R04x2<br />
R09<br />
Q20x4<br />
B28x8<br />
Z09x4<br />
Z03x4<br />
Z04x4<br />
Q22<br />
Q34x6<br />
P04<br />
P01<br />
P13<br />
P02<br />
P09<br />
P21<br />
P17<br />
P18<br />
P19<br />
R07x2<br />
R07<br />
P07<br />
P11<br />
Q14x6<br />
B17x4<br />
B20x4<br />
M14<br />
H17x2<br />
H17x2<br />
Z01x2<br />
B47x2<br />
H09x4<br />
P25x4<br />
P14x2<br />
P30<br />
6<br />
3<br />
H22<br />
H33x2<br />
H26<br />
4<br />
2<br />
1<br />
P26<br />
5<br />
5
NO. DESCRIPTION<br />
1 MOTOR SET;SA;TM447-2KM;<br />
2 ARM REST SET;R;V;HB;<br />
3 ARM REST SET;L;TM447-2KM;HB;<br />
4 LOCK LATCH SET;TM447-2KM<br />
5 SIDE RAIL SET;SA;TM446-2KM;<br />
6 CONSOLE SET;SA;S BOM;TM447-2KM;<br />
AC1 CONSOLE MAST SET;L;PAINTING;AZ40-1C<br />
AC2 CONSOLE MAST SET;R;PAINTING;AZ40-1C;<br />
AH1 ELEVATION RACK SET;PAINTING;AZ40-1C;<br />
AK1 BASE FRAME SET;PAINTING;AZ40-1C;<br />
AM1 MOTOR FIXNG PLATE;PAINTING;AZ40-1C;<br />
AR1 ROLLER SET;FRONT;TEXTURE;TM115<br />
AR2 ROLLER SET;REAR;TM116<br />
B15 FIXING PLATE;ROLLER;R;PAINTING;AZ40-1C<br />
B16 FIXING PLATE;ROLLER;L;PAINTING;AZ40-1C<br />
B17 WASHER;SPL;Φ8.2XΦ15.4X2.0T;<br />
B20 WASHER;FLT;Φ8.2XΦ19.0X2.0T;<br />
B21 NUT;NLK;M8X1.25P;BZN;<br />
B25 WHEEL;NYLON;TM196;TM196-K13E<br />
B27 TM DECK;670X1220X20T;SILICON;<br />
B28 SCREW;FH;M8X1.25PX28L;HS;BP<br />
B39 RVN;HX;NHS-8125-3.0(M8X1.25P);YZN;<br />
B40 NUT;NLK;M10X1.5P;BAN;<br />
NO. DESCRIPTION<br />
B41 AIR STICK;DAMPING;70KG;-;<br />
B46 CUSHION;OR;Φ30X20L;TM439;<br />
B47 CUSHION;BU;Φ30X20L;TM439;<br />
B48 CUSHION;BL;Φ30X20L;TM439;<br />
B50 SCREW;BH;M8X1.25PX50L-20L;HS;P-T<br />
B51 SCREW;BH;M8X1.25PX15L;HS;BZN;<br />
B57 FIXPIECE;SIDE RAIL;TM187-141A-00<br />
B58 SCREW;FH;Φ5X15L;SM;PH;BAN;POT<br />
H09 WASHER;FLT;Φ12.5XΦ19.0X1.0T;BZN;<br />
H17 WASHER;FLT;Φ10.5XΦ20.0X1.0T;TFN;<br />
H22 SCREW;BH;M10X1.5PX80L-15L;-;HS;-;BAN;<br />
H25 WASHER;FLT;Φ12.3XΦ26.0X2.0T;TFN;<br />
H26 SCREW;BH;M10X1.5PX75L-15L;-;HS;-;BAN;<br />
H29 SCREW;NLK;M8X1.25P;BZN;<br />
H30 SCREW;NLK;M8X1.25P;BZN;<br />
H31 WASHER,PP,BLACK,TM439<br />
H32 NUT;NLK;M8X1.25P;BZN;<br />
H33 NUT;NLK;M10X1.5P;BAN;<br />
K14 END;STUFF;TM446-2KM<br />
K15 REAR CARRIAGE ROLLER;NYLON+30%G;TM369<br />
K16 FLAT;60C;TM196-K12B<br />
K18 FRONT CARRIAGE ROLLER; NYLON PA6;Φ46XΦ10<br />
K21 SCREW;BH;Φ4X10L;SM;PH;BZN;POT<br />
Paragon 5<br />
shown<br />
43
Paragon 5<br />
shown<br />
44<br />
NO. DESCRIPTION<br />
K24 SCREW;BH;M10X1.5PX40L-15L;MT;HS;G8.8;CHM<br />
K25 SCREW;BH;M4X0.7PX42L;;PH;<br />
K26 SCREW;BH;M8X1.25PX50L-18L;MT;HS;G8.8;CHM<br />
K27 NUT;NLK;M8X1.25P;CHM;<br />
K28 PEDAL;SKID;TM367<br />
K29 HALT PLATE;WHEEL;TM367<br />
K50 FRONT LEVELER<br />
M02 MOTOR;AC ELEVATION;220V;80MM;225;10PIN;J<br />
M03 MOTOR CONTROLLER;2-2.75HP;220V;12V;MLH09<br />
M10 NUT;NLK;M10X1.5P;BAN;<br />
M11 SCREW;SH;5/16”18UNCX16L;HS;BP<br />
M12 WASHER;SPL;Φ8.2XΦ15.4X2.0T;<br />
M14 SCREW;HH;3/8-16UNCX45L-15L;HE;BZN;P-T<br />
M15 SCREW;HEX;M10X55L-14L;BED<br />
M16 WASHER;ARC;Φ8.2XΦ18.0X1.5T;BAN;<br />
M17 NUT;NLK;3/8’-16UNC;BAN;<br />
M19 MOTOR ELASTOMER PAD;RUBBER;TM16<br />
M24 SCREW;BH;Φ4X12L;TC;PH;BZN;POT<br />
M33 WASHER;FLT;Φ10.2XΦ20.0X2.0T;BZN;<br />
M38 WASHER;FLT;Φ8.2XΦ19.0X2.0T;<br />
M40 NUT;NLK;M8X1.25P;BZN;<br />
M41 SCREW;BH;M8X1.25PX15L;HS;BZN;<br />
N03 COVER;ARM REST;L1;ABS;75140;TM447<br />
NO. DESCRIPTION<br />
N04 COVER;ARM REST;L2;ABS;75140;TM447<br />
N05 COVER;ARM REST;R1;ABS;75140;TM447
45<br />
Paragon 6<br />
shown<br />
<strong>PARAGON</strong> 6 EXPLODED VIEW<br />
B15<br />
B16<br />
B27<br />
B25x2<br />
B39x8<br />
B41<br />
K15x2<br />
K50x4<br />
K28x2<br />
K29x2<br />
K14x2<br />
Q02<br />
Q06<br />
Q07<br />
Q08<br />
Q10<br />
Q11<br />
P10<br />
P20<br />
AM1<br />
M19<br />
M02<br />
M03<br />
R03<br />
R02<br />
AR1<br />
AR2<br />
AK1<br />
AH1<br />
AC1<br />
AC2<br />
K24x2<br />
K26x2<br />
K27x2<br />
K25x4<br />
K21x2<br />
Q12x15<br />
N03<br />
N04<br />
P31<br />
V08x2<br />
Z02x8 Z04x8<br />
Z03x8<br />
Z05x4<br />
Z06x4<br />
Z07x4<br />
Q33x4<br />
Q12x8<br />
V10x2<br />
Q12x9<br />
B46x2<br />
M11x2<br />
M12x2<br />
M16x2<br />
M41<br />
B48x2<br />
B51x4<br />
B50x2<br />
B40x2<br />
Q33x6<br />
H29x2<br />
M14<br />
B21x2<br />
B47x2<br />
Q01<br />
H30x2<br />
H25x2<br />
H32x2<br />
V05<br />
K18x2<br />
K16x2<br />
Q09<br />
M15<br />
M33<br />
M10<br />
M33<br />
M17<br />
M24x6<br />
M40x2<br />
M38x2<br />
Z10x8<br />
N06<br />
N05<br />
H31x2<br />
H32x2<br />
B57x8<br />
B58x8<br />
R04x2<br />
R09<br />
Q20x4<br />
B28x8<br />
Z09x4<br />
Z03x4<br />
Z04x4<br />
Q22<br />
Q34x6<br />
P04<br />
P01<br />
P13<br />
P02<br />
P09<br />
BS連接線(黑色)<br />
P21<br />
P17<br />
P18<br />
P19<br />
R07x2<br />
R07<br />
P07<br />
P11<br />
Q14x6<br />
B17x4<br />
B20x4<br />
H17x2<br />
H17x2<br />
Z01x2<br />
B47x2<br />
H09x4<br />
P25x4<br />
P14x2<br />
P30<br />
6<br />
Z05x2<br />
Z06x2<br />
Z08x2<br />
3<br />
H22<br />
H33x2<br />
H26<br />
4<br />
2<br />
N43<br />
P26<br />
1<br />
5<br />
5
Paragon 6<br />
shown<br />
46<br />
NO. DESCRIPTION<br />
1 MOTOR SET;SA;TM447-2KM;<br />
2 ARM REST SET;R;V;HB;<br />
3 ARM REST SET;L;TM447-2KM;HB;<br />
4 LOCK LATCH SET;TM447-2KM<br />
5 SIDE RAIL SET;SA;TM448-2KM;<br />
6 CONSOLE SET;SA;S BOM;TM448-2KM;<br />
AC1 CONSOLE MAST SET;L;PAINTING;AZ40-1C<br />
AC2 CONSOLE MAST SET;R;PAINTING;AZ40-1C;<br />
AH1 ELEVATION RACK SET;PAINTING;AZ40-1C;<br />
AK1 BASE FRAME SET;PAINTING;AZ40-1C;<br />
AM1 MOTOR FIXNG PLATE;PAINTING;AZ40-1C;<br />
AR1 ROLLER SET;FRONT;TEXTURE;TM115<br />
AR2 ROLLER SET;REAR;TM116<br />
B15 FIXING PLATE;ROLLER;R;PAINTING;AZ40-1C<br />
B16 FIXING PLATE;ROLLER;L;PAINTING;AZ40-1C<br />
B17 WASHER;SPL;Φ8.2XΦ15.4X2.0T;<br />
B20 WASHER;FLT;Φ8.2XΦ19.0X2.0T;<br />
B21 NUT;NLK;M8X1.25P;BZN;<br />
B25 WHEEL;NYLON;TM196;TM196-K13E<br />
B27 TM DECK;670X1370X20T;TM448<br />
B28 SCREW;FH;M8X1.25PX28L;HS;BP<br />
B39 RVN;HX;NHS-8125-3.0(M8X1.25P);YZN;<br />
B40 NUT;NLK;M10X1.5P;;BAN;<br />
NO. DESCRIPTION<br />
B41 AIR STICK;DAMPING;80KG;-;<br />
B46 CUSHION;OR;Φ30X20L;TM439;<br />
B47 CUSHION;BU;Φ30X20L;TM439;<br />
B48 CUSHION;BL;Φ30X20L;TM439;<br />
B50 SCREW;BH;M8X1.25PX50L-20L;HS;P-T<br />
B51 SCREW;BH;M8X1.25PX15L;HS;BZN;<br />
B57 FIXPIECE;SIDE RAIL;TM187-141A-00<br />
B58 SCREW;FH;Φ5X15L;SM;PH;;BAN;POT<br />
H09 WASHER;FLT;Φ12.5XΦ19.0X1.0T;BZN;<br />
H17 WASHER;FLT;Φ10.5XΦ20.0X1.0T;TFN;<br />
H22 SCREW;BH;M10X1.5PX80L-15L;-;HS;-;BAN;<br />
H25 WASHER;FLT;Φ12.3XΦ26.0X2.0T;TFN;<br />
H26 SCREW;BH;M10X1.5PX75L-15L;-;HS;-;BAN;<br />
H29 SCREW;NLK;M8X1.25P;BZN;<br />
H30 SCREW;NLK;M8X1.25P;BZN;<br />
H31 WASHER,PP,BLACK,TM439<br />
H32 NUT;NLK;M8X1.25P;BZN;<br />
H33 NUT;NLK;M10X1.5P;BAN;<br />
K14 END;STUFF;TM446-2KM<br />
K15 REAR CARRIAGE ROLLER;NYLON+30%G;TM369<br />
K16 FLAT;60C;TM196-K12B<br />
K18 FRONT CARRIAGE ROLLER;NYLON PA6;Φ46XΦ10<br />
K21 SCREW;BH;Φ4X10L;SM;PH;BZN;POT
NO. DESCRIPTION<br />
K24 SCREW;BH;M10X1.5PX40L-15L;MT;HS;G8.8;CHM<br />
K25 SCREW;BH;M4X0.7PX42L;PH;<br />
K26 SCREW;BH;M8X1.25PX50L-18L;MT;HS;G8.8;CHM<br />
K27 NUT;NLK;M8X1.25P;CHM;<br />
K28 PEDAL;SKID;TM367<br />
K29 HALT PLATE;WHEEL;TM367<br />
K50 FRONT LEVELER<br />
M02 MOTOR;AC ELEVATION;220V;80MM;225;10PIN;J<br />
M03 MOTOR CONTROLLER;2-2.75HP;220V;12V;MLH09<br />
M10 NUT;NLK;M10X1.5P;BAN;<br />
M11 SCREW;SH;5/16”18UNCX16L;HS;BP<br />
M12 WASHER;SPL;Φ8.2XΦ15.4X2.0T;<br />
M14 SCREW;HH;3/8-16UNCX45L-15L;HE;BZN;P-T<br />
M15 SCREW;HEX;M10X55L-14L;BED<br />
M16 WASHER;ARC;Φ8.2XΦ18.0X1.5T;BAN;<br />
M17 NUT;NLK;3/8’-16UNC;BAN;<br />
M19 MOTOR ELASTOMER PAD;RUBBER;TM16<br />
M24 SCREW;BH;Φ4X12L;TC;PH;;BZN;POT<br />
M33 WASHER;FLT;Φ10.2XΦ20.0X2.0T;BZN;<br />
M38 WASHER;FLT;Φ8.2XΦ19.0X2.0T;<br />
M40 NUT;NLK;M8X1.25P;;BZN;<br />
M41 SCREW;BH;M8X1.25PX15L;HS;BZN;<br />
N03 COVER;ARM REST;L1;ABS;75140;TM447<br />
NO. DESCRIPTION<br />
N04 COVER;ARM REST;L2;ABS;75140;TM447<br />
N05 COVER;ARM REST;R1;ABS;75140;TM447<br />
N06 COVER;ARM REST;R2;ABS;75140;TM447<br />
N43 SAFETY KEY SET;TM637<br />
P01 SWITCH;POWER;KCD3;TM196;TM196-P01A<br />
P02 POWER SOCKET SET;CE(80,800,300);16AWG<br />
P04 BREAKER;CURRENT;10A 250V;TM18<br />
P07 WIRE;SF CON;BLACK;250LOCK300L 16AWG;<br />
P09 WIRE;BS CON;BLACK;250LOCK2 60L;<br />
P10 INDUCTANCE;6MH 200,300;ADD LABEL;TM80<br />
P11 WIRE;CTRL BOARD PWR;WHITE;250LOCK300L<br />
P13 SCREW;FH;M3X0.5PX10L;PH;ZN;<br />
P14 WIRE;CONNECT;TM639-1US;<br />
P17 SCREW;BH;M5X0.8PX25L;CT;PH;NKL;<br />
P18 NUT;HX;M5X0.8P;SS41;NKL;<br />
P19 WASHER;TOOTH;Φ5.3XΦ10.0X0.6T;BAN;<br />
P20 WAVE FILTER(6A);06SS-2DC-C<br />
P21 WAVE TUBE;CR-11SP;Φ14XΦ10.7;200M/COIL<br />
P25 SCREW;TRH;Φ4X10L;TC;PH;NKL;POT<br />
P26 PWR CORD(INDIA);1.5MM;LONG2M<br />
P26 PWR CORD;EXTERNAL(NZL);1.5MM;LONG2M<br />
P26 PWR CORD;EXTERNAL;1.5MM;LONG2M<br />
P26 PWR CORD(CHINA);1.5MM;LONG2M<br />
Paragon 6<br />
shown<br />
47
Paragon 6<br />
shown<br />
48<br />
NO. DESCRIPTION<br />
P26 PWR CORD;EXTERNAL;HK;1.5MM;LONG2M<br />
P26 PWR CORD;USA;16AWG;LONG2M<br />
P26 PWR CORD GROUP;ISRAEL;1.5MM;LONG2M<br />
P26 EXTERNAL PWR(ARGENTINA)1.5MM 2M;<br />
P26 EXTERNAL PWD WIRE;(AFRICA);1.5MM 2M;<br />
P26 EXTERNAL PWD WIRE(JPN);1.25MM 2M;<br />
P26 EXTERNAL PWR CORD(SWITZERLAND);<br />
P26 EXTERNAL PWR CORD;BRIZIL;1.5MM2;2M<br />
P26 WIRE;EXTERNAL PWR;SET;;CHILE USED;JIS2 U<br />
P30 WIRE;CONSOLE;UP;BLACK;850MM;CKM254301-8P<br />
P31 WIRE;CONSOLE;1350L(SM-8AX2)<br />
Q01 MOTOR COVER;U;ABS;75140<br />
Q02 COVER;MOTOR;D;PP;BL<br />
Q06 PATCH;MOTOR COVER;TM446<br />
Q07 PLASTIC COVER;L;BL;TM447;<br />
Q08 PLASTIC COVER;R;BL;TM447;<br />
Q09 END CAP;R;ABS;BL;TM447;<br />
Q10 END CAP;L;ABS;BL;TM447;<br />
Q11 PLASTIC PLATE;HIPS;BL;TM448<br />
Q12 SCREW;TRH;Φ4X10L;SM;PH;BZN;POT<br />
Q14 CLIP; STANDARD; FE; ZNC<br />
Q20 SCREW;BH;Φ4X15L;SM;PH;BZN;POT<br />
Q22 SCREW;BH;Φ4X30L;SM;PH;POT<br />
NO. DESCRIPTION<br />
Q33 SCREW;TRH;Φ4X15L;SM;PH;BAN;POT<br />
Q34 SCREW;BH;Φ4X8L;SM;PH;POT<br />
R02 TM BELT;508X3190X3.1T;SILICON<br />
R03 BELT;POLY-V;8P 470;<br />
R04 SCREW;SH;M8X1.25PX90L;HS;ZN;<br />
R07 WASHER;FLT;Φ8.3XΦ16.0X1.3T;BZN;<br />
R09 SCREW;SH;M8X1.25PX55L;HS;BAN;<br />
V05 SPEC LABEL;CE;TM448;<br />
V08 WARNING LABEL;ENGLISH AND GERMAN;CAUT<br />
V10 DECORATED LABEL;COVER;TM447;<br />
Z01 SCREW;M8X1.25PX9L-D10X11.2L;HE;45#;BOX<br />
Z02 SCREW;BH;M8X1.25PX70L;HS;CHM;<br />
Z03 WASHER;SPL;Φ 8.2XΦ15.4X2.0T;CHM;<br />
Z04 WASHER;FLT;Φ8.2XΦ15.0X1.2T;CHM;<br />
Z05 SCREW;BH;M8X1.25PX20L;HS;BZN;BP<br />
Z06 WASHER;SPL;Φ8.2XΦ15.4X2.0T;<br />
Z07 WASHER;FLT;Φ8.2XΦ16.0X1.4T;BZN;<br />
Z08 WASHER;ARC;Φ8.2XΦ16.0X1.0T;65MN;BZN<br />
Z09 SCREW;BH;M8X1.25PX15L;HS;CHM;<br />
Z10 SCREW;BH;Φ4X12L;TC;PH;;BZN;POT
D: Entsorgungshinweis<br />
<strong>Horizon</strong> <strong>Fitness</strong> - Produkte sind recyclebar. Führen Sie das Gerät am Ende der Nutzungsdauer einer sachgerechten<br />
Entsorgung zu (örtliche Sammelstelle).<br />
GB: Waste Disposal<br />
<strong>Horizon</strong> <strong>Fitness</strong> products are recyclable. At the end if its useful life please dispose of this article correctly and safely<br />
(local refuse sites).<br />
F: Remarque relative à la gestion des dèchets<br />
<strong>Horizon</strong> <strong>Fitness</strong> sont recyclables. A la fin sa durrèe d`utilisation, remettez I´appareil à un centre de gestion de dèchets<br />
correct (collecte locale).<br />
NL: Verwijderingsaanwijzing<br />
<strong>Horizon</strong> <strong>Fitness</strong> producten zijn recycleerbaar. Breng het apparaat aan het einde van de gebruiksduur naar een op<br />
recycling gespecialiseerd bedrijf (plaatselijk verzamelpunt).<br />
E: Informaciones para la evacuaciòn<br />
Los productos de <strong>Horizon</strong> <strong>Fitness</strong> son riciclables. Cuando se termina la vida ùtil de un aparato o una màquina,<br />
entrèguelos an una impresa local de eleiminaciòn de residuos para su reciclaje.<br />
I: Indicazione sullo smaltimento<br />
I prodotti <strong>Horizon</strong> <strong>Fitness</strong> sono reciclabill. Quando I`apparecchio non servirà più, portatelo in un apposito punto di<br />
raccolta della Vostra città (Punti di raccolta comunall).<br />
PL: Wskazòwka dotyczàca usuwania odpadòw.<br />
Producty firmy <strong>Horizon</strong> <strong>Fitness</strong> podlegajà recyklingowi. Pod koniec okresu o`ywalnoÈcl pros`z oddac urzàdzenie do<br />
wlaÈciwego punkto usuwania odpadòw (lokalny punkt zbiorczy).<br />
ALL<br />
MODELS<br />
49
TREADMILL OWNER’S MANUAL<br />
Paragon 4 / 5 / 6 Owner’s Manual 070212 Rev. 1 © 2012 <strong>Horizon</strong> <strong>Fitness</strong>