MANUAL AMOLADORA.indd - Rothenberger
MANUAL AMOLADORA.indd - Rothenberger
MANUAL AMOLADORA.indd - Rothenberger

Create successful ePaper yourself
Turn your PDF publications into a flip-book with our unique Google optimized e-Paper software.
GB Operation<br />
Mounting the protection cover<br />
As the case may be, when using the machine, the<br />
protection cover must the set so that you are protected<br />
from flying splinters or sparks.<br />
• Adjust the protection cover by simply turning it<br />
powerfully. The protection cover can be turned about<br />
±45°.<br />
The protection cover protects you from flying splinters<br />
when it is turned toward you.<br />
• Here, make sure that your hands are protected.<br />
Grinding discs<br />
Only use grinding tools whose allowable rotation speed<br />
is at least as high as the highest idle running rotation<br />
speed of the machine. The allowable perimeter speed<br />
of the discs must be 80 m/s. Read the perimeter speed<br />
on the label of the disc being used.<br />
• Allow the new separating disc to run idle for about<br />
one minute in a test run.<br />
Vibrating discs may not be used. Protect the discs from<br />
blows, crushes, as well as oil.<br />
Mounting the grinding discs<br />
DANGER!<br />
Danger of burning!<br />
Grinding and separating discs<br />
will become very hot during<br />
operation.<br />
They could catch fire.<br />
• Change the discs after they<br />
have cooled down.<br />
• Clean the wheel flange (12), the clamping nut<br />
(16), and the metal camping surface (15) of the<br />
grinding disc.<br />
• Attach the wheel flange (12) with the longitudinal<br />
slot underneath on the grinding spindle (10).<br />
• Attach the grinding wheel (14). The wheel<br />
flange (12) has a high central band with a rubber<br />
ring; this must engage exactly in the hole of the<br />
grinding disc (15).<br />
• Press the spindle locking device (6).<br />
• Turn the grinding disc (14)/ grinding spindle (10)<br />
until the spindle locking device locks.<br />
• Screw on the clamping nut (16) and tighten it<br />
with the hook wrench (17).<br />
• Check before turning the machine on, that the<br />
grinding disc rotates freely.<br />
38<br />
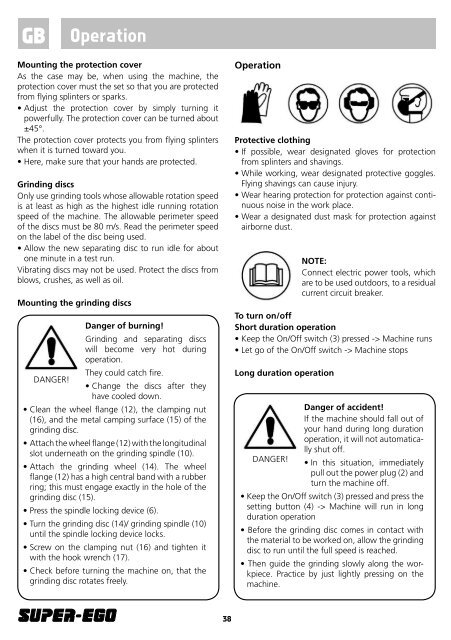
Operation<br />
Protective clothing<br />
• If possible, wear designated gloves for protection<br />
from splinters and shavings.<br />
• While working, wear designated protective goggles.<br />
Flying shavings can cause injury.<br />
• Wear hearing protection for protection against continuous<br />
noise in the work place.<br />
• Wear a designated dust mask for protection against<br />
airborne dust.<br />
NOTE:<br />
Connect electric power tools, which<br />
are to be used outdoors, to a residual<br />
current circuit breaker.<br />
To turn on/off<br />
Short duration operation<br />
• Keep the On/Off switch (3) pressed -> Machine runs<br />
• Let go of the On/Off switch -> Machine stops<br />
Long duration operation<br />
DANGER!<br />
Danger of accident!<br />
If the machine should fall out of<br />
your hand during long duration<br />
operation, it will not automatically<br />
shut off.<br />
• In this situation, immediately<br />
pull out the power plug (2) and<br />
turn the machine off.<br />
• Keep the On/Off switch (3) pressed and press the<br />
setting button (4) -> Machine will run in long<br />
duration operation<br />
• Before the grinding disc comes in contact with<br />
the material to be worked on, allow the grinding<br />
disc to run until the full speed is reached.<br />
• Then guide the grinding slowly along the workpiece.<br />
Practice by just lightly pressing on the<br />
machine.