Minicámara de domo de alta velocidad 1/4” D&N EDMC-2221 - Videor
Minicámara de domo de alta velocidad 1/4” D&N EDMC-2221 - Videor
Minicámara de domo de alta velocidad 1/4” D&N EDMC-2221 - Videor

Create successful ePaper yourself
Turn your PDF publications into a flip-book with our unique Google optimized e-Paper software.
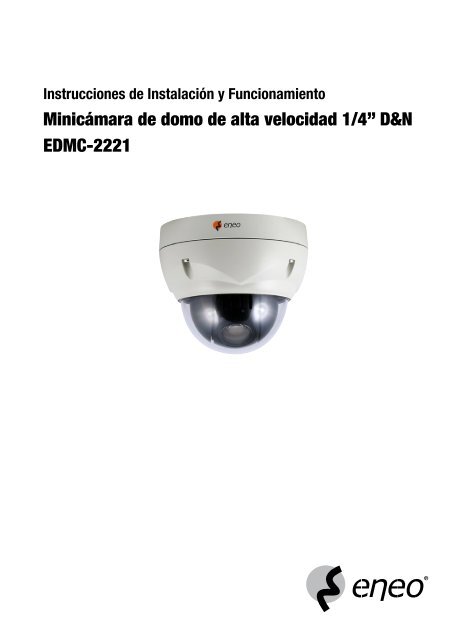
Instrucciones <strong>de</strong> Instalación y Funcionamiento<br />
<strong>Minicámara</strong> <strong>de</strong> <strong>domo</strong> <strong>de</strong> <strong>alta</strong> <strong>velocidad</strong> 1/<strong>4”</strong> D&N<br />
<strong>EDMC</strong>-<strong>2221</strong>
Contents<br />
. Introducción................................................................................................... 3<br />
. Instrucciones <strong>de</strong> seguridad ............................................................................ 3<br />
. Descripción General....................................................................................... 4<br />
.3 Requisitos para el funcionamiento ................................................................. 5<br />
. Instalación y Configuración ............................................................................ 6<br />
. Contenido <strong>de</strong>l Paquete ................................................................................... 6<br />
. Instalación básica .......................................................................................... 7<br />
.3 Configuración básica sistema <strong>de</strong> cámara <strong>de</strong> <strong>domo</strong> PTZ.................................. 8<br />
.4 Ajuste <strong>de</strong> la terminación <strong>de</strong> la cámara <strong>de</strong> <strong>domo</strong> ............................................. 9<br />
.5 Protocolo <strong>de</strong> ajuste <strong>de</strong> la cámara <strong>de</strong> <strong>domo</strong>...................................................<br />
.6 Ajuste <strong>de</strong> la dirección (ID) <strong>de</strong> la cámara <strong>de</strong> <strong>domo</strong> .........................................<br />
.7 Conexión <strong>de</strong>l cableado ................................................................................. 5<br />
3. Programación y funcionamiento................................................................... 6<br />
3. Inicio <strong>de</strong> la pantalla...................................................................................... 6<br />
3. Menú principal (Main Menu)......................................................................... 7<br />
3.3 Menú preajustado (Preset Menu).................................................................. 8<br />
3.4 Menú recorrido (Tour Menu).........................................................................<br />
3.5 Menú escaneado automático (Auto Scan Menu) ........................................... 3<br />
3.6 Menú <strong>de</strong>l título <strong>de</strong> zona................................................................................ 5<br />
3.7 Menú <strong>de</strong> alarma (Alarm Menu)..................................................................... 7<br />
3.8 Menú <strong>de</strong> preparación <strong>de</strong> la cámara (Camera Setup Menu) ........................... 9<br />
3.9 Menú <strong>de</strong> preparación <strong>de</strong>l <strong>domo</strong> (Dome Setup Menu) .................................... 37<br />
4. Resolución <strong>de</strong> problemas............................................................................. 44<br />
5. Especificaciones .......................................................................................... 45<br />
6. Medidas....................................................................................................... 50<br />
Apéndice - Lista <strong>de</strong> funciones <strong>de</strong>l protocolo PELCO............................................... 5<br />
Montage- und Betriebsanleitung<br />
Installation and Operating Instructions<br />
Mo<strong>de</strong> d’emploi<br />
Instrucciones <strong>de</strong> manejo<br />
⇒<br />
www.vi<strong>de</strong>or.com
1. Introducción<br />
1.1 Instrucciones <strong>de</strong> seguridad<br />
• Antes <strong>de</strong> conectar el sistema y ponerla en servicio, lea primero estas<br />
instrucciones <strong>de</strong> seguridad y las instrucciones <strong>de</strong> manejo.<br />
• Conserve las instrucciones <strong>de</strong> manejo cuidadosamente para po<strong>de</strong>rlas utilizar en<br />
el futuro.<br />
• Proteger la cámara para impedir la entrada <strong>de</strong> agua y humedad, lo que podría<br />
causar un daño permanente a los aparatos. Si a pesar <strong>de</strong> todo hubiese entrado<br />
humedad, no encienda nunca la cámara en estas condiciones y entréguela para<br />
su verificación a un taller especializado autorizado.<br />
• La cámara no <strong>de</strong>be funcionar nunca fuera <strong>de</strong> sus características técnicas.<br />
Esto podría <strong>de</strong>struir la cámara.<br />
• Utilizar la cámara sólo <strong>de</strong>ntro <strong>de</strong> una gama <strong>de</strong> temperatura <strong>de</strong> - 0°C a +40°C y<br />
una humedad <strong>de</strong>l aire máxima <strong>de</strong>l 90%.<br />
• Para <strong>de</strong>sconectar el sistema <strong>de</strong> la corriente <strong>de</strong> alimentación tire <strong>de</strong>l cable, pero<br />
sólo agarrando la clavija. No tire directamente <strong>de</strong>l cable.<br />
• Al ten<strong>de</strong>r los cables <strong>de</strong> conexión es imprescindible tener en cuenta las<br />
siguientes instrucciones: los cables se <strong>de</strong>berán ten<strong>de</strong>r <strong>de</strong> tal manera que no<br />
que<strong>de</strong>n sometidos a carga, no que<strong>de</strong>n plegados ni dañados y no pueda<br />
penetrar humedad en ellos.<br />
• No intente <strong>de</strong>smontar la tarjeta <strong>de</strong> la cámara <strong>de</strong>l Domo.<br />
• El equipo pue<strong>de</strong> ser abierto porpersonal calificado. Cualquier intervención<br />
ajena, como abra la carcasa, anula todo <strong>de</strong>recho a la garantía.<br />
• No orientar la cámara nunca contra el sol con el diafragma abierto.<br />
Podría <strong>de</strong>struirse el sensor.<br />
• La instalación, el mantenimiento y la reparación <strong>de</strong>berán ser realizados<br />
exclusivamente por talleres especializados autorizados.<br />
Antes <strong>de</strong> abrir la carcasa es imprescindible <strong>de</strong>sconectar el equipo <strong>de</strong> la red.<br />
• Utilice sólo piezas <strong>de</strong> recambio originales y accessorios originales <strong>de</strong><br />
Vi<strong>de</strong>or E. Hartig GmbH.<br />
• Utilice siempre un producto suave para limpiar la carcasa <strong>de</strong>l aparato.<br />
No emplee jamás un disolvente o gasolina que pudiera dañar permanentemente<br />
la superficie.<br />
3
NOTA: Se trata <strong>de</strong> una instalación <strong>de</strong> la clase A.<br />
Esta instalación pue<strong>de</strong> producir perturbaciones en el área habitable.<br />
En este caso conviene pedir a un operario que realice las mediciones<br />
correspondientes y tome las medidas oportunas.<br />
1.2 Descripción General<br />
El controlador <strong>de</strong> teclado <strong>de</strong> Domo PTZ y la cámara <strong>de</strong> Domo PTZ componen los<br />
módulos <strong>de</strong> construcción <strong>de</strong> cualquier sistema <strong>de</strong> vigilancia/seguridad. Utilizando<br />
múltiplex controladores <strong>de</strong> teclado y múltiples cámaras <strong>de</strong> <strong>domo</strong> no hay ningún<br />
espacio que sea <strong>de</strong>masiado gran<strong>de</strong> para po<strong>de</strong>r vigilarlo. Una arquitectura ampliable<br />
y flexible facilita las funciones <strong>de</strong> control remoto para una diversidad <strong>de</strong> dispositivos<br />
exteriores <strong>de</strong> conmutación tales como multiplexadores y DVRs.<br />
• <strong>Minicámara</strong> <strong>de</strong> Domo para día y noche PTZ resistente al vandalismo<br />
• Zoom óptico x y zoom digital x (total 4 x)<br />
• Lente zoom: F .6/3.9-85,8 mm<br />
• Ángulo <strong>de</strong> barrido: Giro continuo 360°<br />
• Rango <strong>de</strong> <strong>velocidad</strong> horizontal: 375°/seg. máx.<br />
• 60 preajustes / 4 ciclos <strong>de</strong> escaneado automático<br />
• 4 Ciclos con 4 preajustes cada uno<br />
• Posición <strong>de</strong> origen<br />
• Control <strong>de</strong> menú en pantalla y visualizador <strong>de</strong> i<strong>de</strong>ntificación <strong>de</strong> la cámara<br />
• Obturador <strong>de</strong> <strong>alta</strong> y baja <strong>velocidad</strong> (ESC/DSS)<br />
• Reducción <strong>de</strong>l ruido digital (DNR)<br />
• Entrada / salida <strong>de</strong> alarma<br />
• Interfaz <strong>de</strong> control RS-485<br />
• Tensión <strong>de</strong> alimentación: VDC/ 4VAC<br />
4
1.3 Requisitos para el funcionamiento<br />
Configuración Típica <strong>de</strong>l Sistema<br />
5
2. Instalación y Configuración<br />
2.1 Contenido <strong>de</strong>l Paquete<br />
El paquete contiene lo siguiente:<br />
Cámaras con Domo<br />
Manual <strong>de</strong> instrucciones (este documento)<br />
Hoja <strong>de</strong> plantilla<br />
Kit <strong>de</strong> accesorios<br />
4 tornillos <strong>de</strong> montaje (PH 6x35.0)<br />
4 anclajes <strong>de</strong> plástico<br />
4 juntas tóricas<br />
llave Torx<br />
Manual <strong>de</strong> accesorios<br />
bloque terminal <strong>de</strong> conectores<br />
bloque terminal <strong>de</strong> 3 conectores<br />
bloque terminal <strong>de</strong> 4 conectores<br />
Hoja <strong>de</strong> plantilla<br />
6
2.2 Instalación básica<br />
. Realice los objetos <strong>de</strong> montaje y el agujero para el cable en el lugar apropiado<br />
(techo) don<strong>de</strong> se vaya a instalar la cámara <strong>domo</strong> utilizando la hoja <strong>de</strong> plantilla<br />
suministrada.<br />
ADVERTENCIA: La masa total <strong>de</strong> la unidad <strong>de</strong> la cámara es <strong>de</strong> aproximada-<br />
mente 1,3 kg. Compruebe si el techo don<strong>de</strong> se va a instalar la<br />
cámara <strong>de</strong> <strong>domo</strong> es suficientemente fuerte como para<br />
soportar la masa <strong>de</strong> la unidad. De lo contrario, la cámara <strong>de</strong><br />
<strong>domo</strong> podría caerse y causar lesiones.<br />
Hoja <strong>de</strong> plantilla<br />
Anclaje <strong>de</strong> plástico (4x)<br />
Cinta <strong>de</strong> seguridad<br />
Junta tórica<br />
Tornillo <strong>de</strong> montaje<br />
Tornillo Torx<br />
. Saque cada hilo a través <strong>de</strong>l agujero para el cable y conecte la tensión <strong>de</strong><br />
alimentación, RS-485 y el bloque terminal <strong>de</strong> entrada-salida <strong>de</strong> alarma.<br />
3. Por favor tenga cuidado que la cinta <strong>de</strong> seguridad este adherida en la placa,<br />
para evitar que este no que<strong>de</strong> enclavada.<br />
7
4. Afloje los tornillos torx (4) <strong>de</strong> la cubierta <strong>de</strong>l <strong>domo</strong> y fije la base <strong>de</strong>l <strong>domo</strong><br />
firmemente con los tornillos <strong>de</strong> montaje suministrados (4), los anclajes <strong>de</strong><br />
plástico (4) y las juntas tóricas (4).<br />
5. Sujete la cubierta <strong>de</strong> la carcasa con los (4) tornillos torx.<br />
2.3 Configuración básica sistema <strong>de</strong> cámara <strong>de</strong> <strong>domo</strong> PTZ<br />
PRECAUCIÓN: No conecte el cable <strong>de</strong> alimentación hasta haber completado<br />
todas las <strong>de</strong>más conexiones. Una vez completada la conexión<br />
<strong>de</strong> las cámaras <strong>de</strong>berá cortar el cable sobrante.<br />
8
2.4 Ajuste <strong>de</strong> la terminación <strong>de</strong> la cámara <strong>de</strong> <strong>domo</strong><br />
El dispositivo que esté conectado al final <strong>de</strong> la línea, tanto si es una cámara <strong>de</strong><br />
<strong>domo</strong> o un controlador <strong>de</strong> teclado, <strong>de</strong>berá tener el cable <strong>de</strong> comunicación terminado<br />
poniendo para ello el apropriado conmutador. Sin una terminación a<strong>de</strong>cuada se<br />
pue<strong>de</strong>n producir errores en las señales <strong>de</strong> control. La longitud total <strong>de</strong>l cable <strong>de</strong><br />
comunicaciones no <strong>de</strong>be ser superior a , km.<br />
RS-485 Terminación S/W<br />
DIP SW3 3<br />
Terminado ON<br />
No terminado OFF<br />
Conmutador<br />
Dip 3<br />
9
Diagrama <strong>de</strong> terminación<br />
0
2.5 Protocolo <strong>de</strong> ajuste <strong>de</strong> la cámara <strong>de</strong> <strong>domo</strong><br />
Conmutador<br />
Dip 2<br />
No. 1 No. 2 BPS<br />
OFF OFF 400bps<br />
ON OFF 4800bps<br />
OFF ON 9600bps<br />
ON ON 9 00bps<br />
Ajuste <strong>de</strong> la ID <strong>de</strong>l <strong>domo</strong><br />
Función <strong>de</strong> la cámara <strong>de</strong> <strong>domo</strong><br />
Función <strong>de</strong>l protocolo <strong>de</strong> la cámara <strong>de</strong> <strong>domo</strong><br />
S/W - No. ON OFF Función<br />
7 NTSC * PAL NTSC/PAL *<br />
No. 8 No. 9 No. 10 Protocolo<br />
OFF ON OFF Fastrax-II<br />
OFF OFF OFF Pelco-D<br />
ON OFF OFF Pelco-P<br />
Conmutador Dip 1<br />
Selección <strong>de</strong> funciones <strong>de</strong> la cámara <strong>de</strong> <strong>domo</strong> (conmutador dip 1)<br />
* El modo NTSC sólo está<br />
disponible con el módulo <strong>de</strong><br />
cámara NTSC incorporado<br />
Selección <strong>de</strong>l protocolo <strong>de</strong> la cámara <strong>de</strong> <strong>domo</strong> (conmutador dip 1)<br />
Ajuste <strong>de</strong> la <strong>velocidad</strong> binaria <strong>de</strong> la cámara <strong>de</strong> <strong>domo</strong> (conmut. dip 2)
2.6 Ajuste <strong>de</strong> la dirección (ID) <strong>de</strong> la cámara <strong>de</strong> <strong>domo</strong><br />
Con el fin <strong>de</strong> prevenir errores en el funcionamiento y <strong>de</strong>fectos <strong>de</strong> funcionamiento<br />
cada cámara <strong>de</strong> <strong>domo</strong> <strong>de</strong>be tener una dirección exclusiva (ID).<br />
El ajuste por <strong>de</strong>fecto <strong>de</strong> fábrica es dirección .<br />
Para ajustar la dirección (ID) <strong>de</strong> la cámara <strong>de</strong> <strong>domo</strong> y para seleccionar el protocolo,<br />
véanse las figuras y la tabla siguiente.<br />
AJUSTE ID<br />
Dirección ID SW1 SW2 SW3 SW4 SW5 SW6<br />
3<br />
4<br />
5<br />
6<br />
7<br />
8<br />
9<br />
0<br />
3<br />
4<br />
5<br />
6<br />
7<br />
8<br />
9<br />
0<br />
ON<br />
OFF<br />
ON<br />
OFF<br />
ON<br />
OFF<br />
ON<br />
OFF<br />
ON<br />
OFF<br />
ON<br />
OFF<br />
ON<br />
OFF<br />
ON<br />
OFF<br />
ON<br />
OFF<br />
ON<br />
OFF<br />
OFF<br />
ON<br />
ON<br />
OFF<br />
OFF<br />
ON<br />
ON<br />
OFF<br />
OFF<br />
ON<br />
ON<br />
OFF<br />
OFF<br />
ON<br />
ON<br />
OFF<br />
OFF<br />
ON<br />
ON<br />
OFF<br />
OFF<br />
OFF<br />
OFF<br />
ON<br />
ON<br />
ON<br />
ON<br />
OFF<br />
OFF<br />
OFF<br />
OFF<br />
ON<br />
ON<br />
ON<br />
0N<br />
OFF<br />
OFF<br />
OFF<br />
OFF<br />
ON<br />
OFF<br />
OFF<br />
OFF<br />
OFF<br />
OFF<br />
OFF<br />
OFF<br />
ON<br />
ON<br />
ON<br />
ON<br />
ON<br />
ON<br />
ON<br />
ON<br />
OFF<br />
OFF<br />
OFF<br />
OFF<br />
OFF<br />
OFF<br />
OFF<br />
OFF<br />
OFF<br />
OFF<br />
OFF<br />
OFF<br />
OFF<br />
OFF<br />
OFF<br />
OFF<br />
OFF<br />
OFF<br />
OFF<br />
OFF<br />
ON<br />
ON<br />
ON<br />
ON<br />
ON<br />
OFF<br />
OFF<br />
OFF<br />
OFF<br />
OFF<br />
OFF<br />
OFF<br />
OFF<br />
OFF<br />
OFF<br />
OFF<br />
OFF<br />
OFF<br />
OFF<br />
OFF<br />
OFF<br />
OFF<br />
OFF<br />
OFF<br />
OFF
3<br />
Dirección ID SW1 SW2 SW3 SW4 SW5 SW6<br />
3<br />
4<br />
ON<br />
OFF<br />
ON<br />
OFF<br />
OFF<br />
ON<br />
ON<br />
OFF<br />
ON<br />
ON<br />
ON<br />
OFF<br />
OFF<br />
OFF<br />
OFF<br />
ON<br />
ON<br />
ON<br />
ON<br />
ON<br />
OFF<br />
OFF<br />
OFF<br />
OFF<br />
5<br />
6<br />
7<br />
8<br />
ON<br />
OFF<br />
ON<br />
OFF<br />
OFF<br />
ON<br />
ON<br />
OFF<br />
OFF<br />
OFF<br />
OFF<br />
ON<br />
ON<br />
ON<br />
ON<br />
ON<br />
ON<br />
ON<br />
ON<br />
ON<br />
OFF<br />
OFF<br />
OFF<br />
OFF<br />
9<br />
30<br />
3<br />
3<br />
ON<br />
OFF<br />
ON<br />
OFF<br />
OFF<br />
ON<br />
ON<br />
OFF<br />
ON<br />
ON<br />
ON<br />
OFF<br />
ON<br />
ON<br />
ON<br />
OFF<br />
ON<br />
ON<br />
ON<br />
OFF<br />
OFF<br />
OFF<br />
OFF<br />
ON<br />
33<br />
34<br />
35<br />
36<br />
ON<br />
OFF<br />
ON<br />
OFF<br />
OFF<br />
ON<br />
ON<br />
OFF<br />
OFF<br />
OFF<br />
OFF<br />
ON<br />
OFF<br />
OFF<br />
OFF<br />
OFF<br />
OFF<br />
OFF<br />
OFF<br />
OFF<br />
ON<br />
ON<br />
ON<br />
ON<br />
37<br />
38<br />
39<br />
40<br />
ON<br />
OFF<br />
ON<br />
OFF<br />
OFF<br />
ON<br />
ON<br />
OFF<br />
ON<br />
ON<br />
ON<br />
OFF<br />
OFF<br />
OFF<br />
OFF<br />
ON<br />
OFF<br />
OFF<br />
OFF<br />
OFF<br />
ON<br />
ON<br />
ON<br />
ON<br />
4<br />
4<br />
43<br />
44<br />
ON<br />
OFF<br />
ON<br />
OFF<br />
OFF<br />
ON<br />
ON<br />
OFF<br />
OFF<br />
OFF<br />
OFF<br />
ON<br />
ON<br />
ON<br />
ON<br />
ON<br />
OFF<br />
OFF<br />
OFF<br />
OFF<br />
ON<br />
ON<br />
ON<br />
ON<br />
45<br />
46<br />
47<br />
48<br />
ON<br />
OFF<br />
ON<br />
OFF<br />
OFF<br />
ON<br />
ON<br />
OFF<br />
ON<br />
ON<br />
ON<br />
OFF<br />
ON<br />
ON<br />
ON<br />
OFF<br />
OFF<br />
OFF<br />
OFF<br />
ON<br />
ON<br />
ON<br />
ON<br />
ON<br />
49<br />
50<br />
5<br />
5<br />
ON<br />
OFF<br />
ON<br />
OFF<br />
OFF<br />
ON<br />
ON<br />
OFF<br />
OFF<br />
OFF<br />
OFF<br />
ON<br />
OFF<br />
OFF<br />
OFF<br />
OFF<br />
ON<br />
ON<br />
ON<br />
ON<br />
ON<br />
ON<br />
ON<br />
ON<br />
53<br />
54<br />
55<br />
56<br />
ON<br />
OFF<br />
ON<br />
OFF<br />
OFF<br />
ON<br />
ON<br />
OFF<br />
ON<br />
ON<br />
ON<br />
OFF<br />
OFF<br />
OFF<br />
OFF<br />
ON<br />
ON<br />
ON<br />
ON<br />
ON<br />
ON<br />
ON<br />
ON<br />
ON
Por ejemplo:<br />
Dirección ID<br />
1<br />
Dirección ID<br />
2<br />
Dirección ID<br />
63<br />
Dirección ID SW1 SW2 SW3 SW4 SW5 SW6<br />
57<br />
58<br />
59<br />
60<br />
6<br />
6<br />
63<br />
ON<br />
OFF<br />
ON<br />
OFF<br />
ON<br />
OFF<br />
ON<br />
OFF<br />
ON<br />
ON<br />
OFF<br />
OFF<br />
ON<br />
ON<br />
4<br />
OFF<br />
OFF<br />
OFF<br />
ON<br />
ON<br />
ON<br />
ON<br />
ON<br />
ON<br />
ON<br />
ON<br />
ON<br />
ON<br />
ON<br />
ON<br />
ON<br />
ON<br />
ON<br />
ON<br />
ON<br />
ON<br />
ON<br />
ON<br />
ON<br />
ON<br />
ON<br />
ON<br />
ON<br />
SW1 SW2 SW3 SW4 SW5 SW6<br />
ON OFF OFF OFF OFF OFF<br />
SW1 SW2 SW3 SW4 SW5 SW6<br />
OFF ON OFF OFF OFF OFF<br />
SW1 SW2 SW3 SW4 SW5 SW6<br />
ON ON ON ON ON ON
2.7 Conexión <strong>de</strong>l cableado<br />
2.7.1 Conectar al RS-485<br />
La cámara <strong>de</strong> <strong>domo</strong> pue<strong>de</strong> funcionar con control remoto mediante un dispositivo o<br />
un sistema <strong>de</strong> control externo, como por ejemplo un teclado <strong>de</strong> control, utilizando la<br />
interfaz RS-485 semi-duplex.<br />
2.7.2 Conexión <strong>de</strong>l conector <strong>de</strong> salida <strong>de</strong> ví<strong>de</strong>o<br />
Conecte el conector <strong>de</strong> salida <strong>de</strong> ví<strong>de</strong>o (BNC) al monitor o a la entrada <strong>de</strong> ví<strong>de</strong>o <strong>de</strong>l DVR.<br />
2.7.3 Conexión <strong>de</strong> las alarmas<br />
• AI (Alarma conectada)<br />
Para disparar la cámara <strong>de</strong> <strong>domo</strong> con el fin <strong>de</strong> que reaccione ante los<br />
acontecimientos se pue<strong>de</strong>n utilizar dispositivos exteriores.<br />
En los conectores Al (entrada alarma) y G (masa) se pue<strong>de</strong>n conectar<br />
conmutadores mecánicos o eléctricos.<br />
Véase el Capítulo 3 – Programación y funcionamiento para configurar la entrada<br />
<strong>de</strong> alarma.<br />
• G (Masa)<br />
NOTA: Todos los conectores marcados G o GND son comunes.<br />
Conecte el lado <strong>de</strong> masa <strong>de</strong> la entrada <strong>de</strong> alarma y/o <strong>de</strong> la salida <strong>de</strong> alarma a<br />
los conectores G (masa).<br />
• AO (salida alarma)<br />
La cámara <strong>de</strong> <strong>domo</strong> pue<strong>de</strong> activar dispositivos exteriores tales como<br />
zumbadores o luces.<br />
Conecte el dispositivo a los conectores AO (salida alarma) y G (masa).<br />
Véase el Capítulo 3 – Programación y funcionamiento para configurar la salida<br />
<strong>de</strong> alarma.<br />
5
2.7.4 Conexión <strong>de</strong> la corriente<br />
Conecte la corriente <strong>de</strong> 4VAC ó VDC A a la cámara <strong>de</strong> <strong>domo</strong>.<br />
Cuando utilice un adaptador para VDC, conecte el polo positivo (+) a la posición<br />
„AC+” y el polo negativo (-) a la posición „AC-”.<br />
Utilice sólo transformadores <strong>de</strong> corriente certificados/listados <strong>de</strong> Clase .<br />
3. Programación y funcionamiento<br />
NOTA: Los símbolos indicados a continuación indican que se requiere alguna<br />
acción mediante el controlador <strong>de</strong> joystick<br />
/ : mueva el joystick en sentido hacia arriba y hacia abajo<br />
/ : mueva el joystick en sentido hacia la <strong>de</strong>recha y hacia la izquierda<br />
: gire el joystick<br />
KEY : pulse la tecla <strong>de</strong>finida<br />
3.1 Inicio <strong>de</strong> la pantalla<br />
START UP<br />
PROTOCOL: FASTRAX-II<br />
6<br />
DOME: 0<br />
Vx.xx
3.2 Menú principal (Main Menu)<br />
/ : mueva el cursor hacia arriba y hacia abajo<br />
: seleccione<br />
MAIN MENU<br />
PRESET<br />
TOUR<br />
AUTO SCAN<br />
AREA TITLE<br />
ALARM<br />
CAMERA SETUP<br />
DOME SETUP<br />
EXIT<br />
/ ESC : salir <strong>de</strong>l menú actual<br />
El MAIN MENU (Menú principal) visualiza todas las funciones disponibles <strong>de</strong>l <strong>domo</strong>.<br />
Para visualizar este MENU (Menú) principal <strong>de</strong>be pulsar la tecla MAIN MENU (Menú<br />
principal).<br />
7
3.3 Menú preajustado (Preset Menu)<br />
PRESET MENU<br />
NUMBER: 0<br />
TITLE:<br />
0/ 34567890 / 34567890<br />
* * *<br />
/ 34567890 3/ 34567890<br />
4/ 34567890 5/ 34567890<br />
HOME POSITION OFF<br />
EXIT<br />
306. 0 7.4<br />
/ : mueva el cursor hacia arriba y hacia abajo<br />
/ : mueva el cursor hacia la izquierda y hacia la <strong>de</strong>recha o seleccione o<br />
modifique valores<br />
: cambie caracteres en TITLE (título): o mueva la cámara <strong>de</strong>l <strong>domo</strong> al<br />
punto preajustado que ha sido salvado en el NUMBER: xx.<br />
/ ESC : salir <strong>de</strong>l menú actual<br />
Si se necesitan ver <strong>de</strong> forma rutinaria lugares específicos, se <strong>de</strong>ben programar<br />
preajustes.<br />
Un preajuste es una escena <strong>de</strong> ví<strong>de</strong>o programada con ajustes memorizados <strong>de</strong><br />
barrido horizontal, inclinación y zoom.<br />
Una vez que se haya programado, al seleccionar el número preajustado en su<br />
teclado o DVR se recuperan automáticamente los preajustes. A<strong>de</strong>más, los preajustes<br />
se pue<strong>de</strong>n asignar a la función <strong>de</strong> origen o posición <strong>de</strong> origen. El <strong>domo</strong> es capaz <strong>de</strong><br />
hasta 60 preajustes si se utiliza un teclado exterior.<br />
8
3.3.1 Efectuar preajustes en el MENÚ<br />
. Desplazarse al NUMBER: 01 (Número: 0 ) y seleccionar el número preajustado<br />
mediante el joystick.<br />
. Pulse IRIS OPEN o el botón CTRL para mover la posición <strong>de</strong>l <strong>domo</strong> y<br />
entonces aparecerá en la pantalla el mensaje „CONTROL”.<br />
3. Mueva el <strong>domo</strong> a la posición <strong>de</strong>seada utilizando el joystick y ajuste el nivel <strong>de</strong><br />
zoom utilizando .<br />
4. Pulse IRIS CLOSE o suelte el botón CTRL y entonces <strong>de</strong>saparece en la<br />
pantalla el mensaje <strong>de</strong> „CONTROL”.<br />
5. Aparece la marca ’*’ y se salva automáticamente el preajuste.<br />
Para introducir el TITLE (título), lleve el cursor a título: y ajuste el título a<strong>de</strong>cuado<br />
mediante el joystick. Si no selecciona el título <strong>de</strong>l preajuste, se visualizará<br />
PRESETxx. (xx: el número <strong>de</strong> preajuste recuperado)<br />
Des<strong>de</strong> los preajustes salvados pue<strong>de</strong> seleccionar la Home Position (Posición <strong>de</strong><br />
origen).<br />
3.3.2 Preparar preajuste abreviado (ShortCut)<br />
. Antes <strong>de</strong> nada, <strong>de</strong>splace el <strong>domo</strong> a la posición <strong>de</strong>seada utilizando el joystick y<br />
ajuste el nivel <strong>de</strong> zoom utilizando .<br />
. Pulse el PRESET NUMBER (Número <strong>de</strong> preajuste) que <strong>de</strong>see salvar y pulse<br />
sucesivamente los botones CTRL/PGM y PRST.<br />
Por ejemplo, si <strong>de</strong>sea salvar el número 23, pulse sucesivamente los botones<br />
2 + 3 + CTRL/PGM + PRST.<br />
9
3.3.3 Recuperar preajustes<br />
Pulse el Preset Number (Número <strong>de</strong> preajuste) y pulse el botón PRST.<br />
Por ejemplo, si <strong>de</strong>sea recuperar el ajuste 13, pulse sucesivamente los botones<br />
1 + 3 + PRST.<br />
3.3.4 Borrar preajustes<br />
Les preajustes individuales se pue<strong>de</strong>n sobreescribir solamente con una nueva<br />
posición o suprimir en el menú Inicializar <strong>domo</strong> (véase capítulo 3.9.8) todo<br />
totalmente.<br />
3.3.5 Posición <strong>de</strong> origen<br />
La posición <strong>de</strong> origen es la <strong>de</strong> los preajustes que han sido salvados. Si pulsa el<br />
botón HOME, el PTZ irá a la posición <strong>de</strong> origen.<br />
0
3.4 Menú recorrido (Tour Menu)<br />
TOUR MENU<br />
TOUR:<br />
TITLE: = = = = = = = = = =<br />
DWELL TIME: 0 SEC<br />
SPEED: 07<br />
= = = = = = = = = = = = = = = =<br />
= = = = = = = = = = = = = = = =<br />
SAVE<br />
EXIT<br />
/ : mueva el cursor hacia arriba y hacia abajo<br />
/ : mueva el cursor hacia la izquierda y hacia la <strong>de</strong>recha o seleccione o<br />
modifique valores<br />
: cambie carácter en TITLE: o cambie el número <strong>de</strong> preajuste salvado en<br />
la marca „ = = ”<br />
/ ESC : salir <strong>de</strong>l menú actual
3.4.1 Establecer recorridos<br />
. Mueva el cursor a TOUR: y seleccione el número <strong>de</strong> recorrido utilizando el<br />
joystick.<br />
. Para introducir el título <strong>de</strong>l recorrido, mueva el cursor a TITLE: y establezca el<br />
título a<strong>de</strong>cuado mediante el joystick. Si no se selecciona ningún título, se<br />
visualizará TOURxx. (xx: el número <strong>de</strong>l recorrido recuperado)<br />
3. Establezca el tiempo <strong>de</strong> permanencia (5~99 segundos) utilizando el joystick en<br />
DWELL TIME.<br />
4. SPEED (<strong>velocidad</strong>) pue<strong>de</strong> seleccionarse <strong>de</strong> al 0. ( = lenta, 0 =rápida)<br />
5. Mueva el cursor a „ == ” y seleccione el número preajustado a<strong>de</strong>cuado<br />
mediantey . Cada punto se pue<strong>de</strong> ir introduciendo <strong>de</strong> modo progresivo.<br />
6. Mueva el cursor hacia la <strong>de</strong>recha en el menú SAVE para salvar este recorrido.<br />
7. Mueva el cursor hacia la <strong>de</strong>recha en el menú EXIT para salir <strong>de</strong> este menú.<br />
3.4.2 Suprimir recorrido<br />
. Mueva el cursor a TOUR: y seleccione el número <strong>de</strong> recorrido que <strong>de</strong>see<br />
anular.<br />
. Pulse el botón HOME y el recorrido seleccionado quedará anulado.<br />
3.4.3 Recuperar recorrido<br />
Pulse el Tour Number (Número <strong>de</strong> recorrido) y pulse el botón TOUR. Por ejemplo,<br />
si <strong>de</strong>sea recuperar el recorrido 3, pulse sucesivamente los botones 3 + TOUR.<br />
Al encen<strong>de</strong>r el TOUR ELEMENT en el OSD DISPLAY MENU (Menú <strong>de</strong> visualización<br />
OSD), se visualizará el número preajustado consistente en el recorrido recuperado.
3.5 Menú escaneado automático (Auto Scan Menu)<br />
AUTO SCAN MENU<br />
SCAN:<br />
TITLE: = = = = = = = = = =<br />
START POINT: 000.0 000.0<br />
END POINT: 000.0 000.0<br />
SCAN DIR.: CW<br />
SPEED: 07<br />
SWAP: OFF<br />
SAVE<br />
EXIT<br />
/ : mueva el cursor hacia arriba y hacia abajo<br />
/ : mueva el cursor hacia la izquierda y hacia la <strong>de</strong>recha o seleccione o<br />
modifique valores<br />
: cambie el carácter en TITLE<br />
/ ESC : salir <strong>de</strong>l menú actual<br />
3.5.1 Establecer escaneados automáticos<br />
. Mueva el cursor a SCAN y seleccione el número <strong>de</strong> escaneado utilizando para<br />
ello el joystick.<br />
. Para introducir el título <strong>de</strong>l escaneado automático, mueva el cursor a TITLE<br />
y establezca el título a<strong>de</strong>cuado mediante el uso <strong>de</strong>l joystick. Si no se selecciona<br />
ningún título, se visualizará SCANxx. (xx: el número <strong>de</strong> escaneado recuperado)<br />
3. Mueva el cursor a START POINT y pulse el botón IRIS OPEN o CTRL para<br />
mover la posición <strong>de</strong>l <strong>domo</strong> y entonces aparecerá en la pantalla el mensaje<br />
„CONTROL”.<br />
4. Mueva el <strong>domo</strong> al punto <strong>de</strong> origen <strong>de</strong> barrido horizontal <strong>de</strong>seado, al punto <strong>de</strong><br />
inclinación <strong>de</strong> la gama <strong>de</strong> escaneado automático y a la posición <strong>de</strong>l zoom.<br />
3
5. Pulse IRIS CLOSE o suelte el botón CTRL y entonces <strong>de</strong>saparece en la<br />
pantalla el mensaje <strong>de</strong> „CONTROL”. Queda salvado automáticamente.<br />
6. Mueva el cursor a END POINT: Mueva el <strong>domo</strong> al punto final <strong>de</strong>seado <strong>de</strong><br />
barrido horizontal <strong>de</strong> la gama <strong>de</strong> escaneado automático y establezca la posición<br />
final pulsando el botón IRIS OPEN o CTRL.<br />
Cuando haya terminado el ajuste, pulse IRIS CLOSE o suelte el botón CTRL.<br />
NOTA: En este punto solamente se podrá ajustar la posición <strong>de</strong> barrido<br />
horizontal.<br />
7. SCAN DIR. significa dirección <strong>de</strong> escaneado automático. CW es en el sentido<br />
<strong>de</strong> las agujas <strong>de</strong>l reloj y CCW es en el sentido contrario a las agujas <strong>de</strong>l reloj.<br />
8. SPEED (Velocidad) pue<strong>de</strong> seleccionarse <strong>de</strong> al 0. ( = lenta, 0 =rápida)<br />
9. SWAP, cambiará la posición <strong>de</strong> barrido horizontal entre START POINT (Punto<br />
inicial) y END POINT (Punto final).<br />
0. Seleccione SAVE para salvar este escaneado automático.<br />
. Seleccione EXIT para salir <strong>de</strong> este menú.<br />
3.5.2 Establecer escaneado automático 1 abreviado<br />
Se pue<strong>de</strong>n ajustar los límites <strong>de</strong> barrido horizontal <strong>de</strong>l escaneado automático<br />
utilizando para ello el pulsador <strong>de</strong> ShortCut.<br />
. En primer lugar mueva el <strong>domo</strong> al punto inicial <strong>de</strong>seado <strong>de</strong> barrido horizontal y<br />
<strong>de</strong> inclinación, utilizando para ello el joystick.<br />
. Pulse sucesivamente los botones 6 + 5 + PGM + PRST. Se visualizará<br />
entonces „SAVING: PAN LEFT AND TILT” y el mensaje <strong>de</strong>saparecerá <strong>de</strong>spués<br />
<strong>de</strong> unos pocos segundos.<br />
3. Para ajustar el punto final <strong>de</strong> barrido horizontal, mueva el <strong>domo</strong> a la posición<br />
<strong>de</strong>seada utilizando para ello el joystick.<br />
4. Pulse sucesivamente los botones 6 + 6 + PGM + PRST.<br />
Se visualizará entonces „SAVING: PAN RIGHT” y el mensaje también<br />
<strong>de</strong>saparecerá <strong>de</strong>spués <strong>de</strong> unos pocos segundos.<br />
4
3.5.3 Suprimir escaneado automático<br />
. Mueva el cursor a SCAN y seleccione el número <strong>de</strong> escaneado que <strong>de</strong>sea<br />
suprimir.<br />
. Pulse el botón HOME y el escaneado seleccionado quedará anulado.<br />
3.5.4 Recuperar escaneado automático<br />
Pulse el Número <strong>de</strong> escaneado automático y a continuación pulse el botón SCAN.<br />
Por ejemplo, si <strong>de</strong>sea recuperar el escaneado , pulse sucesivamente los botones<br />
2 + SCAN.<br />
Si no se selecciona ningún título, se visualizará SCANxx. (xx: el número <strong>de</strong><br />
escaneado recuperado)<br />
3.6 Menú <strong>de</strong>l título <strong>de</strong> zona<br />
AREA TITLE MENU<br />
AREA:<br />
TITLE: AREA<br />
START POINT: 000.0<br />
END POINT: 045.0<br />
SAVE<br />
EXIT<br />
/ : mueva el cursor hacia arriba y hacia abajo<br />
/ : mueva el cursor hacia la izquierda y hacia la <strong>de</strong>recha o seleccione o<br />
modifique valores<br />
: cambie el carácter en TITLE<br />
/ ESC : salir <strong>de</strong>l menú actual<br />
5
3.6.1 Establecer títulos <strong>de</strong> zona<br />
Cada título <strong>de</strong> zona tiene un valor por <strong>de</strong>fecto. Hay 8 títulos <strong>de</strong> zona que divi<strong>de</strong>n 360<br />
grados en 8 partes iguales.<br />
. Para modificar y pasar a otro valor, mueva a START POINT (Punto inicial) y<br />
pulse el botón IRIS OPEN o CTRL para mover la posición <strong>de</strong>l <strong>domo</strong> y<br />
entonces aparecerá en la pantalla el mensaje „CONTROL”.<br />
. Mueva el <strong>domo</strong> al punto inicial <strong>de</strong>seado <strong>de</strong> la gama <strong>de</strong> la zona <strong>de</strong>l título y<br />
establezca el punto inicial.<br />
3. Pulse IRIS CLOSE o suelte el botón CTRL y entonces <strong>de</strong>saparece en la<br />
pantalla el mensaje <strong>de</strong> „CONTROL”.<br />
4. El END POINT (Punto final) es el mimo que el START POINT (Punto inicial).<br />
Pero el END POINT (Punto final) <strong>de</strong>be ser mayor que el START POINT (Punto<br />
inicial).<br />
5. Seleccione SAVE para salvar este título <strong>de</strong> zona.<br />
6. Seleccione EXIT para salir <strong>de</strong> este menú.<br />
3.6.2 Suprimir títulos <strong>de</strong> zona<br />
. Mueva el cursor a AREA y seleccione el número <strong>de</strong> zona que <strong>de</strong>sea suprimir.<br />
. Pulse el botón HOME y se suprimirá la zona seleccionada.<br />
3.6.3 Visualizar títulos <strong>de</strong> zona<br />
Al encen<strong>de</strong>r el AREA TITLE en el OSD DISPLAY MENU (Menú <strong>de</strong> visualización<br />
OSD) y salir <strong>de</strong> este menú, se visualizará en la pantalla AREAx (x: número <strong>de</strong>l título<br />
<strong>de</strong> la zona)<br />
6
3.7 Menú <strong>de</strong> alarma (Alarm Menu)<br />
ALARM MENU<br />
INPUT: OFF<br />
OUTPUT:<br />
OPTION:<br />
PRESET:<br />
HOLDING TIME:<br />
SAVE AND EXIT<br />
EXIT<br />
/ : mueva el cursor hacia arriba y hacia abajo<br />
/ : mueva el cursor hacia la izquierda y hacia la <strong>de</strong>recha o seleccione o<br />
modifique valores<br />
/ ESC : salir <strong>de</strong>l menú actual<br />
7
3.7.1 Establecer alarma<br />
• INPUT (Entrada): NC / NO /OFF<br />
Se pue<strong>de</strong>n seleccionar los tipos <strong>de</strong> entrada <strong>de</strong> alarma. NC significa normalmente<br />
cerrado, NO significa normalmente abierto. Si selecciona los tipos <strong>de</strong><br />
entrada como OFF, no se tiene en cuenta la entrada <strong>de</strong> alarma.<br />
• OUTPUT (Salida): NC / NO / OFF<br />
Aquí se pue<strong>de</strong>n seleccionar los tipos <strong>de</strong> salida <strong>de</strong> alarma: NC significa normalmente<br />
cerrado, NO significa normalmente abierto. Si selecciona los tipos <strong>de</strong><br />
salida como OFF, no se tiene en cuenta la salida <strong>de</strong> alarma.<br />
• OPTION (Opción): TIME OUT / MOMENTARY<br />
TIME OUT: La alarma se restablece automáticamente cuando expira el tiempo<br />
<strong>de</strong> duración <strong>de</strong> la alarma.<br />
MOMENTARY: Cuando se dispara la alarma, el <strong>domo</strong> mantendrá la activación<br />
<strong>de</strong> la misma hasta que se rearme manualmente.<br />
• PRESET: xx<br />
El número <strong>de</strong> preajuste seleccionado se recupera cuando se activa la alarma.<br />
La alarma permanece en la posición preajustada durante la alarma. Una vez<br />
que haya <strong>de</strong>saparecido la alarma, la cámara <strong>de</strong> <strong>domo</strong> vuelve a su función<br />
anterior.<br />
• HOLDING TIME (Tiempo <strong>de</strong> permanencia): 10~99 SEC<br />
Se activa cuando la opción es TIME OUT y pue<strong>de</strong> seleccionarse <strong>de</strong>s<strong>de</strong><br />
0 segundos hasta 99 segundos.<br />
3.7.2 Disparar alarma<br />
Si <strong>de</strong>sea disparar la alarma, pulse el botón ALRM en cualquier opción <strong>de</strong> alarma.<br />
8
3.8 Menú <strong>de</strong> preparación <strong>de</strong> la cámara (Camera Setup Menu)<br />
CAMERA SETUP MENU<br />
FOCUS CONTROL<br />
WB CONTROL<br />
AE CONTROL<br />
L/L CONTROL<br />
PICTURE<br />
NIGHT SHOT CONTROL<br />
INITIALIZE CAMERA<br />
EXIT<br />
/ : mueva el cursor hacia arriba y hacia abajo<br />
: seleccione<br />
/ ESC : salir <strong>de</strong>l menú actual<br />
• FOCUS CONTROL (Control <strong>de</strong> enfoque)<br />
Controla el modo <strong>de</strong> enfoque y el zoom digital<br />
• WB CONTROL<br />
Controla el modo <strong>de</strong> equilibrado <strong>de</strong>l blanco<br />
• AE CONTROL<br />
Controla las opciones <strong>de</strong> exposición automática<br />
• L/L CONTROL<br />
Controla el acceso entre el cambio <strong>de</strong> bloqueo <strong>de</strong> línea y modo interno<br />
• PICTURE (Imagen)<br />
Controla los ajustes <strong>de</strong> niti<strong>de</strong>z, imagen simétrica, negativo/positivo, DNR, PIP<br />
• NIGHT SHOT CONTROL (Control disparo nocturno)<br />
Controla el filtro <strong>de</strong> eliminación <strong>de</strong> IR<br />
• INITIALIZE CAMERA (Inicializar cámara)<br />
Restablece los ajustes por <strong>de</strong>fecto sólo para el menú <strong>de</strong> preparación <strong>de</strong> la cámara<br />
9
3.8.1 Menú <strong>de</strong> control <strong>de</strong> enfoque<br />
FOCUS CONTROL MENU<br />
MODE: AUTO<br />
DISTANCE: .0M<br />
DIGITAL ZOOM: OFF<br />
SAVE AND EXIT<br />
EXIT<br />
/ : mueva el cursor hacia arriba y hacia abajo<br />
/ : mueva el cursor hacia la izquierda y hacia la <strong>de</strong>recha o seleccione o<br />
modifique valores<br />
/ ESC : salir <strong>de</strong>l menú actual<br />
• MODE (Modo): AUTO / MANUAL<br />
Pue<strong>de</strong> seleccionar el modo <strong>de</strong> enfoque, automático o manual.<br />
• DISTANCE (Distancia): 0.1 / 1.0 / 1.5 / 2.5 / 6.0 M<br />
La cámara no enfoca a distancias más próximas que esta gama.<br />
• DIGITAL ZOOM: ON / OFF<br />
Cuando se pone en OFF, el zoom <strong>de</strong> la cámara utiliza sólo el modo <strong>de</strong> zoom<br />
óptico.<br />
30
3.8.2 Menú control WB<br />
WB CONTROL MENU<br />
MODE: AWB<br />
RGAIN:<br />
BGAIN:<br />
SAVE AND EXIT<br />
EXIT<br />
/ : mueva el cursor hacia arriba y hacia abajo<br />
/ : mueva el cursor hacia la izquierda y hacia la <strong>de</strong>recha o seleccione o<br />
modifique valores<br />
/ ESC : salir <strong>de</strong>l menú actual<br />
• MODE: AWB / INDOOR / OUTDOOR / MANUAL / WAWB<br />
AWB: Modo balance automático <strong>de</strong> blancos<br />
INDOOR: Modo balance <strong>de</strong> blancos en interior<br />
OUTDOOR: Modo balance <strong>de</strong> blancos en exterior<br />
MANUAL: Modo Manual. Pue<strong>de</strong> ajustar manualmente la Ganancia R y B.<br />
WAWB: Modo <strong>de</strong> balance <strong>de</strong> blancos automático <strong>de</strong> gran alcance<br />
• R-GAIN (Ganancia R): 0 ~ 255<br />
La ganancia <strong>de</strong> color rojo se pue<strong>de</strong> ajustar únicamente en modo manual.<br />
• B-GAIN (Ganancia B): 0 ~255<br />
La ganancia <strong>de</strong> color azul se pue<strong>de</strong> ajustar únicamente en modo manual.<br />
3
3.8.3 Menú control AE (AE Control Menu)<br />
AE CONTROL MENU<br />
MODE: AUTO<br />
SHOT: NORMAL<br />
SHUTTER:<br />
IRIS:<br />
GAIN:<br />
BRIGHT: 30<br />
BLC MODE: OFF<br />
BLC LEVEL: – –<br />
SAVE AND EXIT<br />
EXIT<br />
/ : mueva el cursor hacia arriba y hacia abajo<br />
/ : mueva el cursor hacia la izquierda y hacia la <strong>de</strong>recha o seleccione o<br />
modifique valores<br />
/ ESC : salir <strong>de</strong>l menú actual<br />
• MODE: AUTO / SHUTTER PRI / IRIS PRI / MANUAL / FLICKERLESS<br />
AUTO: significa que todas las funciones se activan automáticamente.<br />
SHUTTER PRI(oridad): significa que se pue<strong>de</strong>n ajustar únicamente el valor<br />
<strong>de</strong>l obturador y los <strong>de</strong>más se controlan automáticamente.<br />
IRIS PRI(oridad): Pue<strong>de</strong> ajustar únicamente el valor <strong>de</strong>l diafragma y los<br />
<strong>de</strong>más están en modo automático.<br />
MANUAL: En este modo se pue<strong>de</strong> ajustar el obturador, el diafragma y la<br />
ganancia.<br />
FLICKERLESS: Esta función se utiliza para eliminar el parpa<strong>de</strong>o cuando<br />
el formato <strong>de</strong> la señal <strong>de</strong> la cámara no coinci<strong>de</strong> con la frecuencia <strong>de</strong> la<br />
fuente <strong>de</strong> alimentación utilizada.<br />
3
• SHOT: NORMAL / LOW-SHUTTER / WDR / DIS<br />
Low-Shutter (Obturador lento) significa un modo <strong>de</strong> <strong>velocidad</strong> <strong>de</strong><br />
obturación lenta.<br />
WDR significa Gama Dinámica Avanzada (WDR/EDR)<br />
DIS significa Estabilización <strong>de</strong> la Imagen Digital<br />
• SHUTTER (Obturador): X60 / X32 / X16 / X8 / ... / 2000 / 4000 / 10000<br />
En este menú se pue<strong>de</strong> ajustar la <strong>velocidad</strong> <strong>de</strong>l obturador.<br />
• IRIS (Diafragma): F1.6 / F2 / F2.8 / F4 / F5.6 / F8 / F11 / F16 / F22 / F32 /<br />
CLOSE<br />
En este menú se pue<strong>de</strong> controlar el número F <strong>de</strong> la lente.<br />
• GAIN (Ganancia): 0 ~ 30 DB<br />
El valor se pue<strong>de</strong> modificar <strong>de</strong>s<strong>de</strong> 0 a 30.<br />
• BRIGHT (Brillo): 0 ~ 90<br />
El valor <strong>de</strong> brillo se pue<strong>de</strong> modificar <strong>de</strong>s<strong>de</strong> 0 a 90.<br />
• BLC MODE: ON / OFF<br />
La compensación <strong>de</strong> contraluz está activada cuando se pone en ON.<br />
• BLC LEVEL: 0 ~ 90<br />
El nivel BLC pue<strong>de</strong> seleccionarse <strong>de</strong>s<strong>de</strong> 0 a 90.<br />
33
3.8.4 Menú <strong>de</strong> control L/L<br />
L/L CONTROL MENU<br />
SYNC: INTERNAL<br />
PHASE:<br />
SAVE AND EXIT<br />
EXIT<br />
/ : mueva el cursor hacia arriba y hacia abajo<br />
/ : mueva el cursor hacia la izquierda y hacia la <strong>de</strong>recha o seleccione o<br />
modifique valores<br />
/ ESC : salir <strong>de</strong>l menú actual<br />
• MODE: INTERNAL / LINE LOCK<br />
INTERNAL (Interno): Sincroniza la cámara con un cristal interno.<br />
Se recomienda esta elección si hay ruido en la línea <strong>de</strong> corriente.<br />
LINE LOCK: Sincroniza la cámara con la corriente alterna.<br />
Esta selección elimina la rotación <strong>de</strong> la imagen en sistemas <strong>de</strong> cámaras<br />
múltiples.<br />
• PHASE (Fase): PAL (0 ~ 620), NTSC (0 ~ 519)<br />
Optimiza el modo <strong>de</strong> bloqueo <strong>de</strong> línea para eliminar la rotación <strong>de</strong> la imagen en<br />
aplicaciones <strong>de</strong> corriente multifásica.<br />
34
3.8.5 Menú imagen<br />
PICTURE MENU<br />
SHARPNESS: 08<br />
MIRROR: OFF<br />
NEGA/POSI: POSI<br />
DNR: ON<br />
PIP: OFF<br />
SAVE AND EXIT<br />
EXIT<br />
/ : mueva el cursor hacia arriba y hacia abajo<br />
/ : mueva el cursor hacia la izquierda y hacia la <strong>de</strong>recha o seleccione o<br />
modifique valores<br />
/ ESC : salir <strong>de</strong>l menú actual<br />
• SHARPNESS (Niti<strong>de</strong>z): 0 ~ 15<br />
La niti<strong>de</strong>z se pue<strong>de</strong> controlar <strong>de</strong>s<strong>de</strong> 0 a 5 y el valor por <strong>de</strong>fecto es 8.<br />
• MIRROR (Espejo): ON / OFF<br />
La imagen ví<strong>de</strong>o se pue<strong>de</strong> invertir a lo largo <strong>de</strong> una línea vertical.<br />
• NEGA/POSI: NEGA / POSI<br />
Se pue<strong>de</strong> ver la pantalla en NEGAtivo o la pantalla en POSItivo.<br />
• DNR: ON / OFF<br />
El DNR significa Reducción <strong>de</strong> Ruido Digital.<br />
• PIP: ON / OFF<br />
PIP significa Imagen <strong>de</strong>ntro <strong>de</strong> Imagen. Si se selecciona el estado ON,<br />
la pantalla pequeña aparecerá en la esquina inferior <strong>de</strong>recha.<br />
35
3.8.6 Menú <strong>de</strong> control <strong>de</strong> disparo nocturno<br />
NIGHT SHOT CONTROL MENU<br />
D/N MODE: AUTO<br />
D/N LEVEL: HIGH<br />
DELAY: 0 SEC<br />
SAVE AND EXIT<br />
EXIT<br />
/ : mueva el cursor hacia arriba y hacia abajo<br />
/ : mueva el cursor hacia la izquierda y hacia la <strong>de</strong>recha o seleccione o<br />
modifique valores<br />
/ ESC : salir <strong>de</strong>l menú actual<br />
• D/N MODE: AUTO / BW / COLOR / GLOBAL<br />
AUTO: La cámara pasa el conmutador automáticamente <strong>de</strong> color a blanco<br />
y negro, <strong>de</strong>pendiendo <strong>de</strong> la luz ambiental, permitiendo que la cámara sea<br />
eficaz en entornos <strong>de</strong> día/noche.<br />
GLOBAL: Si pulsa 888 + ENTR(GLBL) en un estado <strong>de</strong> ajuste global, cada<br />
uno <strong>de</strong> los <strong>domo</strong>s cambiará al estado BW. Si pulsa 999 + ENTR(GLBL)<br />
en un estado <strong>de</strong> ajuste global, cada <strong>domo</strong> cambiará al estado COLOR.<br />
En esta situación, no importa la ID <strong>de</strong>l <strong>domo</strong>.<br />
• D/N LEVEL: HIGH / MID / LOW<br />
Ajuste la ganancia CAG cuando el modo BN pasa al modo COLOR.<br />
Esto solamente es efectivo en caso <strong>de</strong> seleccionar el modo AUTO.<br />
• DELAY: 0 / 10 / 15 / 20 SEC<br />
Ajuste el tiempo <strong>de</strong> trabajo <strong>de</strong>l filtro cuando trabaje en D/N. Esto solamente es<br />
efectivo en caso <strong>de</strong> seleccionar el modo AUTO.<br />
36
3.8.7 Inicializar la cámara<br />
Si utiliza este menú, se inicializan todas las opciones <strong>de</strong> ajuste <strong>de</strong> la cámara como<br />
ajustes por <strong>de</strong>fecto.<br />
CAMERA WILL BE INITIALIZED!!<br />
ARE YOU SURE?<br />
NO<br />
YES<br />
3.9 Menú <strong>de</strong> preparación <strong>de</strong>l <strong>domo</strong> (Dome Setup Menu)<br />
DOME SETUP MENU<br />
TILT AUTO FLIP: ON<br />
TILT LIMIT: OFF<br />
AUTO CALIBRATION<br />
PASSWORD<br />
OSD DISPLAY: ON<br />
HOME FUNCTION<br />
INITIALIZE DOME<br />
DOME INFORMATION<br />
SAVE AND EXIT<br />
EXIT<br />
/ : mueva el cursor hacia arriba y hacia abajo<br />
/ : mueva el cursor hacia la izquierda y hacia la <strong>de</strong>recha o seleccione o<br />
modifique valores<br />
/ ESC : salir <strong>de</strong>l menú actual<br />
37
3.9.1 Inclinación automática rápida: ON / OFF<br />
Permite que la cámara <strong>de</strong> <strong>domo</strong> gire automáticamente 80 grados cuando la cámara<br />
se inclina a su posición más baja.<br />
Cuando la cámara alcanza el piso con 90 grados <strong>de</strong> inclinación hacia abajo, se<br />
<strong>de</strong>tiene.<br />
Suelte instantáneamente la palanca <strong>de</strong>l joystick y a continuación tire hacia abajo<br />
para activar la función rápida.<br />
La <strong>velocidad</strong> <strong>de</strong> seguimiento será la misma que antes.<br />
3.9.2 Límite <strong>de</strong> inclinación: ON / OFF<br />
OFF: La gama <strong>de</strong> inclinación <strong>de</strong> la cámara es <strong>de</strong> 0 ~ 90 grados.<br />
ON: La gama <strong>de</strong> inclinación <strong>de</strong> la cámara es <strong>de</strong> 0 ~ 90 grados.<br />
38
3.9.3 Menú <strong>de</strong> autocalibrado<br />
AUTO CALIBRATION MENU<br />
EXECUTION<br />
EXIT<br />
PRESS ENTER OR MENU TO EXECUTE<br />
/ : mueva el cursor hacia arriba y hacia abajo<br />
: seleccione<br />
/ ESC : salir <strong>de</strong>l menú actual<br />
Si hay un error en el ángulo <strong>de</strong> la cámara, simplemente pulse la tecla ENTR o<br />
MENU para la EXECUTION (Ejecución) <strong>de</strong>l AUTO CALIBRATION MENU (Menú <strong>de</strong><br />
autocalibrado.<br />
El motor <strong>de</strong>l Pan (barrido horizontal) / Tilt (inclinación) ajustará su ángulo automáticamente.<br />
39
3.9.4 Menú código <strong>de</strong> acceso<br />
PASSWORD MENU<br />
DISPLAY: OFF<br />
CHANGE PASSWORD: = = = =<br />
SAVE AND EXIT<br />
EXIT<br />
/ : mueva el cursor hacia arriba y hacia abajo<br />
/ : mueva el cursor hacia la izquierda y hacia la <strong>de</strong>recha o seleccione o<br />
modifique valores<br />
: cambie el carácter en CHANGE PASSWORD .<br />
/ ESC : salir <strong>de</strong>l menú actual<br />
Si <strong>de</strong>sea proteger la totalidad <strong>de</strong>l menú, seleccione ON en el DISPLAY MENU<br />
(Menú pantalla).<br />
Aparecerá el PASSWORD MENU (Menú password) cuando se pulse el botón MENU<br />
para entrar en el MAIN MENU (Menú principal). Una vez que se haya seleccionado<br />
el código <strong>de</strong> acceso correcto, mueva el joystick hacia la <strong>de</strong>recha y podrá ver el<br />
MAIN MENU (Menú principal).<br />
El código <strong>de</strong> acceso por <strong>de</strong>fecto es „123<strong>4”</strong>.<br />
40
3.9.5 MENÚ visualización OSD<br />
OSD DISPLAY MENU<br />
DOME ID: ON<br />
PT POSITION: ON<br />
PAN DIRECTION: OFF<br />
TOUR ELEMENT: OFF<br />
AREA TITLE: OFF<br />
ALL DISPLAY<br />
DEFAULT<br />
SAVE AND EXIT<br />
EXIT<br />
/ : mueva el cursor hacia arriba y hacia abajo<br />
/ : mueva el cursor hacia la izquierda y hacia la <strong>de</strong>recha o seleccione o<br />
modifique valores<br />
/ ESC : salir <strong>de</strong>l menú actual<br />
Con ví<strong>de</strong>o solamente pue<strong>de</strong> ver ví<strong>de</strong>o o algún carácter. Cada elemento está en<br />
condiciones <strong>de</strong> manejarlo en varios. La PT POSITION (posición PT) significa<br />
posición <strong>de</strong> barrido horizontal / inclinación.<br />
Si la PAN DIRECTION (Dirección pan) está ON, aparece ‚N’ en los 0 grados. Si está<br />
ON el TOUR ELEMENT (Elemento recorrido), el número preajustado correspondiente<br />
al recorrido recuperado se visualiza en la esquina inferior izquierda.<br />
Si se selecciona ALL DISPLAY (Toda la pantalla), se convierte todo el menú en<br />
estado ON. Por DEFECTO solamente se conecta DOME ID (ID <strong>domo</strong>) y<br />
PT POSITION (Posición PT) y el resto queda OFF.<br />
4
3.9.6 Menú función retorno al origen<br />
/ : mueva el cursor hacia arriba y hacia abajo<br />
/ : mueva el cursor hacia la izquierda y hacia la <strong>de</strong>recha o seleccione o<br />
modifique valores<br />
/ ESC : salir <strong>de</strong>l menú actual<br />
MODE (Modo): ON / OFF<br />
HOME FUNCTION MENU<br />
MODE: OFF<br />
FUNCTION TYPE:<br />
FUNCTION NUMBER:<br />
DWELL TIME:<br />
SAVE AND EXIT<br />
EXIT<br />
FUNCTION TYPE (Tipo <strong>de</strong> función): PRESET / TOUR / AUTO SCAN<br />
FUNCTION NUMBER (Número <strong>de</strong> función): XX<br />
DWELL TIME (Tiempo <strong>de</strong> permanencia): 10 ~ 600 SEC<br />
La función <strong>de</strong> retorno al origen se pue<strong>de</strong> ajustar <strong>de</strong> modo que la cámara vaya<br />
automáticamente a un preajuste, a un recorrido o a un escaneado automático,<br />
<strong>de</strong>spués <strong>de</strong> que el control <strong>de</strong>l teclado haya estado inactivo durante cierto tiempo.<br />
Por ejemplo, el modo está ON, si ha seleccionado Auto Scan y el tiempo <strong>de</strong><br />
permanencia es <strong>de</strong> 0 seg.<br />
Si el control <strong>de</strong>l teclado está inactivo durante 0 segundos, la cámara pasa a Auto<br />
Scan hasta que se <strong>de</strong>tenga.<br />
4
3.9.7 Inicializar <strong>domo</strong><br />
/ : mueva el cursor hacia arriba y hacia abajo<br />
: seleccione<br />
/ ESC : salir <strong>de</strong>l menú actual<br />
INITIALIZE DOME MENU<br />
PRESET DATA<br />
TOUR DATA<br />
AUTO SCAN DATA<br />
AREA TITLE DATA<br />
DOME SETUP DATA<br />
ALL DOME DATA<br />
EXIT<br />
Todos los datos se pue<strong>de</strong>n inicializar por separado. Pulsando la tecla ENTR o MENU<br />
en ALL DOME DATA (todos los datos <strong>de</strong>l <strong>domo</strong>), se inicializarán todos los datos <strong>de</strong>l<br />
<strong>domo</strong> (preajuste, recorrido, escaneado automático, título <strong>de</strong> la zona, preparación <strong>de</strong>l<br />
<strong>domo</strong>), excepto el ajuste <strong>de</strong> la cámara.<br />
3.9.8 Información <strong>de</strong>l <strong>domo</strong><br />
PRESS ENTER OR MENU TO EXECUTE<br />
DOME INFORMATION<br />
VERSION Vx.xx<br />
EXIT<br />
Este menú únicamente visualiza la información relativa a la versión <strong>de</strong> software <strong>de</strong>l<br />
<strong>domo</strong>.<br />
43
4. Resolución <strong>de</strong> problemas<br />
Si observa dificulta<strong>de</strong>s en el manejo <strong>de</strong> su cámara, vea el cuadro siguiente.<br />
Si estas directrices no le permiten resolver el problema, consulte a un técnico<br />
autorizado.<br />
Problema Comprobación<br />
No aparece nada en la<br />
pantalla.<br />
La imagen en la pantalla<br />
es tenue.<br />
La cámara no funciona<br />
a<strong>de</strong>cuadamente y la<br />
superficie <strong>de</strong> la carcasa<br />
<strong>de</strong> la cámara está caliente.<br />
El contraste en la pantalla<br />
es <strong>de</strong>masiado débil.<br />
La imagen en la pantalla<br />
parpa<strong>de</strong>a.<br />
• Compruebe todas las conexiones <strong>de</strong> los cables<br />
y la corriente <strong>de</strong> la unidad <strong>de</strong> interfaz.<br />
• ¿ Está sucia la lente ? En caso afirmativo,<br />
limpie la lente con un trapo suave y limpio.<br />
• ¿ Está conectada la cámara a la corriente<br />
correcta ?<br />
• Ajuste el dispositivo <strong>de</strong> contraste <strong>de</strong>l monitor.<br />
• ¿ Está la cámara expuesta a una luz intensa ?<br />
En caso afirmativo, cambie la posición <strong>de</strong> la<br />
cámara.<br />
• ¿ Está orientada la cámara directamente hacia<br />
el sol o una luz fluorescente ?<br />
En caso afirmativo cambie la posición <strong>de</strong> la<br />
cámara.<br />
Compruebe el ajuste sin centelleo <strong>de</strong> la<br />
cámara.<br />
44
5. Especificaciones<br />
Tipo <strong>EDMC</strong>-<strong>2221</strong><br />
Nº <strong>de</strong> artículo 74 3<br />
Estándar <strong>de</strong> ví<strong>de</strong>o CCIR/PAL<br />
Sistema Día y noche<br />
Dimensiones <strong>de</strong>l sensor /<strong>4”</strong><br />
Formación <strong>de</strong> imagen CCD, Sony Super HAD Interline Transfer CCD<br />
Elementos <strong>de</strong> imagen<br />
activos<br />
Aprox. 480.000, 795(H) x 596(V)<br />
Sincronización Interna/bloqueo línea AC<br />
Relación señal-ruido 50 dB (estando <strong>de</strong>sconectado el CAG)<br />
Sensibilidad (para una<br />
señal <strong>de</strong> ví<strong>de</strong>o <strong>de</strong>l 50%)<br />
0,3Lux, (color); 0, 6Lux (blanco y negro).<br />
Resultado <strong>de</strong> la medición VT en F .<br />
Modos <strong>de</strong> exposición Modo automático o manual: Diafragma,<br />
obturador y CAG.<br />
Modo automático: Prioridad <strong>de</strong>l diafragma,<br />
prioridad <strong>de</strong>l disparador<br />
Resolución horizontal 480TVL<br />
Velocidad (control manual) 50°/seg.<br />
Velocidad prefijada 375°/seg.<br />
Gama <strong>de</strong> rotación Continua: 360°<br />
Gama <strong>de</strong> inclinación 0° ~ 90°<br />
Preajustes <strong>de</strong><br />
posicionamiento<br />
60 preajustes<br />
Recorridos Hasta 4 recorridos <strong>de</strong> protección programables<br />
por el usuario con 6 preajustes cada uno<br />
Autoescan 4 escaneados automáticos programables por el<br />
usuario, <strong>velocidad</strong>: 7°/seg.<br />
Posición <strong>de</strong> aparcamiento Incluida<br />
programable<br />
Títulos <strong>de</strong> las zonas 8 zonas con etiqueta programable<br />
45
Procesado digital<br />
<strong>de</strong> la señal (DSP)<br />
Control automático<br />
<strong>de</strong> ganancia (CAG)<br />
Sí<br />
Automático, 30 dB máx. (conectado /<br />
<strong>de</strong>sconectado conmutable)<br />
Modos <strong>de</strong>l obturador Obturador <strong>de</strong> <strong>alta</strong> y baja <strong>velocidad</strong><br />
Obturador electrónico<br />
manual (MES)<br />
Obturador <strong>de</strong> baja <strong>velocidad</strong><br />
(DSS)<br />
Velocidad <strong>de</strong> integración No<br />
/50 ~ / 0.000 seg.<br />
/30 seg. ~ seg. (60 Fps.)<br />
Gama dinámica amplia Conmutable conectada/<strong>de</strong>sconectada<br />
Reducción <strong>de</strong>l ruido digital<br />
(DNR)<br />
Función <strong>de</strong> ausencia<br />
<strong>de</strong> parpa<strong>de</strong>o<br />
Equilibrado <strong>de</strong>l blanco<br />
(ATW)<br />
Compensación<br />
<strong>de</strong> contraluz<br />
Corrección <strong>de</strong> la apertura<br />
(APC)<br />
Sí<br />
Suministrada<br />
Automático (AWB) seleccionable para interiores y<br />
exteriores, o manual. Modo automático <strong>de</strong> gama<br />
amplia (WAWB)<br />
BLC, conmutable conectada / <strong>de</strong>sconectada<br />
Horizontal y vertical<br />
Filtro <strong>de</strong> corte IR Sí, filtro conmutable motorizad. (La función<br />
automática dipen<strong>de</strong> <strong>de</strong> la cantidad <strong>de</strong> luz), o en<br />
mo<strong>de</strong>o <strong>de</strong> día o noche (ajuste mediante menú)<br />
Salidas <strong>de</strong> ví<strong>de</strong>o (tipo) CVBS, VBS<br />
Salidas <strong>de</strong> ví<strong>de</strong>o Vp-p, (C)VBS, 75 ohms, BNC<br />
Montura <strong>de</strong> la lente Lente integrada<br />
Tipo <strong>de</strong> lente Zoom<br />
Lente F .6 ~ F75/3.9 ~ 85,8 mm (<br />
x zoom digital)<br />
x zoom óptico,<br />
Campo <strong>de</strong> aplicación Seguridad<br />
Dimensiones <strong>de</strong>l formato<br />
nominal<br />
/3”<br />
46
Tecnología esférica No<br />
Distancia focal 3,9-85,8 mm<br />
Ángulo <strong>de</strong> visión horizontal 49,5- ,4°<br />
Zoom digital x<br />
Gama <strong>de</strong> apertura (F) F .6 ~ F360<br />
Gama <strong>de</strong>l zoom x<br />
Control <strong>de</strong> enfoque Automático (anulación manual y programable:<br />
0, m/ ,0m/ ,5m/ ,5m/6,0m)<br />
Control <strong>de</strong>l diafragma Diafragma automático, anulación manual<br />
Distancia mínima <strong>de</strong><br />
enfoque (MOD)<br />
0, ~ ,0m<br />
Montaje <strong>de</strong> filtro No disponible<br />
Montura No aplicable<br />
Entrada <strong>de</strong> alarma<br />
Salida <strong>de</strong> alarma<br />
Ajustes <strong>de</strong> la imagen Brillo (90 escalones), niti<strong>de</strong>z ( 5 escalones), espejo<br />
Preparación accionada<br />
por menú<br />
Lenguaje <strong>de</strong>l menú Inglés<br />
Conectada/<strong>de</strong>sconectada conmutable<br />
Control <strong>de</strong> la función OSD Día/noche, AGC, BLC, AWB, diafragma, MOD, PIP,<br />
congelación <strong>de</strong> la imagen, zoom digital, reducción<br />
didital <strong>de</strong>l ruido (DNR) conectado/<strong>de</strong>sconectado,<br />
imagen símetrica (horiz.), estabilización digital<br />
<strong>de</strong> la imagen (DIS), gama dinámica avanzado<br />
(WDR/EDR) y modo obturador<br />
Visualización <strong>de</strong> texto Disponible<br />
Corrección <strong>de</strong> niti<strong>de</strong>z Gama <strong>de</strong> ajuste: 0 ~ 5<br />
Brillo Gama: 0 ~ 90<br />
Conmutación Día/Noche Automática o manual<br />
Protección <strong>de</strong><br />
funcionamiento<br />
Disponible<br />
Direcciones Hasta 63 ID <strong>de</strong>l <strong>domo</strong><br />
47
Control <strong>de</strong>l teclado Control en modo directo con teclados Eneo serie<br />
EDC-KBD(M) o en combinación con las series DLR,<br />
DTR y DPR <strong>de</strong> Eneo DVR<br />
Control Remoto Ajustes remotos <strong>de</strong> la cámara a través <strong>de</strong>l teclado<br />
Interfaces seriales RS-485, 9600 baudios, posibilidad <strong>de</strong> seleccionar<br />
63 direcciones <strong>de</strong> ID <strong>de</strong> cámara. A<strong>de</strong>más <strong>de</strong>l<br />
control por teclado a través <strong>de</strong> la serie Eneo EDC-<br />
KBD(M), es posible el control a través <strong>de</strong> la matriz,<br />
conmutadores y teclado con protocolo Pelco P&D.<br />
Gama <strong>de</strong> temperatura<br />
(funcionamiento)<br />
- 0°C ~ +40°C<br />
Calentador No<br />
Índice <strong>de</strong> protección IP66, en caso <strong>de</strong> instalación conforme al manual<br />
Tensión <strong>de</strong> alimentación VDC/ 4VAC<br />
Consumo <strong>de</strong> energía vatios máx.<br />
Resistente al vandalismo Sí<br />
Burbuja 4,3” ( 0 mm), Acrílica/transparente<br />
Color (burbuja) Transparente<br />
Fijación <strong>de</strong> la cámara No<br />
Montura <strong>de</strong> la cámara Montaje en techo o utilizando escuadra para pared<br />
y techo <strong>EDMC</strong>/CWB( )<br />
Soporte Montaje en techo, montaje en pared<br />
Carcasa Carcasa para exterior<br />
Material <strong>de</strong> la carcasa Aluminio<br />
Color (carcasa) Pantone gris frío C<br />
Peso ,3 kg<br />
Certificados BGV-Kassen, CE<br />
48
Accesorios<br />
Nº <strong>de</strong> Art. Tipo Descripción<br />
70527 NE-132/AC24V Unidad <strong>de</strong> alimentación <strong>de</strong> corriente<br />
4VAC ( ,0A)<br />
30VAC/<br />
70449 NE-128 Unidad <strong>de</strong> alimentación <strong>de</strong> tensión 30V/ 4VAC-<br />
5A, IP66<br />
74088 EDC-KBD1 Teclado <strong>de</strong>l sistema con joystick <strong>de</strong> 3 ejes,<br />
VDC/ 30VAC<br />
74149 KBD-2 Teclado <strong>de</strong>l sistema con joystick <strong>de</strong> 3 ejes y<br />
lanza<strong>de</strong>ra, VDC/ 30VAC<br />
74092 EDC-KBDM-3 Teclado <strong>de</strong>l sistema con joystick, monitor <strong>de</strong> 5”<br />
VDC/ 30VAC, protocolo Fastrax<br />
74089 EDC-CR1 Convertidor RS- 3 /RS-485, repetidor RS-485<br />
74094 EDC-COAX Tarjeta <strong>de</strong> telemetría coaxial para serie<br />
VPT-4 /4 , EDC/<strong>EDMC</strong>, montado<br />
74124 FASTRAX_CONFIG Software <strong>de</strong> configuración para cámaras <strong>de</strong><br />
<strong>domo</strong> Eneo Fastrax, Minitrax y VKC- 4 6<br />
74155 <strong>EDMC</strong>/CWB-1 Kit <strong>de</strong> montaje para pared o colgante para<br />
cámara <strong>de</strong> <strong>domo</strong> <strong>EDMC</strong> serie <strong>EDMC</strong> y NTD<br />
49
6. Medidas<br />
110<br />
150<br />
154<br />
Dimensiones: mm<br />
52<br />
25<br />
130<br />
50<br />
85.6<br />
4x 6.5<br />
85.6
Apéndice - Lista <strong>de</strong> funciones <strong>de</strong>l protocolo PELCO<br />
Función Tecla Nº<br />
preajuste<br />
5<br />
Cómo hacerlo Ejemplo<br />
PRESET (Preajuste) PRESET - 60 No.+PRESET +PRESET<br />
PRESET, shortcut saving<br />
(Preajuste, salvado<br />
abreviado)<br />
NOTE - 60 NOTE NOTE<br />
RUN PAN ZERO (Marcha<br />
barrido horizontal cero)<br />
PRESET 34 No.+PRESET 34+PRESET<br />
SCAN (Escaneado) PRESET 6 -64 No.+PRESET 6 +PRESET<br />
SCAN LEFT LIMIT (Escaneado<br />
límite izquierdo)<br />
NOTE 65 NOTE NOTE<br />
SCAN RIGHT LIMIT<br />
(Escaneado límite <strong>de</strong>recho)<br />
NOTE 66 NOTE NOTE<br />
TOUR (Vuelta) PRESET 7 - 74 No.+PRESET 7 +PRESET<br />
ALARM RESET<br />
(Rearme <strong>de</strong> la alarma)<br />
PRESET 90 No.+PRESET 90+PRESET<br />
HOME (Origen) PRESET 9 No.+PRESET 9 +PRESET<br />
DOME MENU (Menú <strong>domo</strong>) PRESET 95 No.+PRESET 95+PRESET<br />
ESC KEY (Tecla ESC) PRESET 96 No.+PRESET 96+PRESET<br />
CTRL_KEY (In Menu)<br />
Tecla CTRL (en el menú)<br />
PRESET 95 No.+PRESET 95+PRESET<br />
VERSION DISPLAY<br />
(Visualización <strong>de</strong> la versión)<br />
PRESET 99 No.+PRESET 99+PRESET<br />
NOTA: Para programar la posición <strong>de</strong> la cámara introduzca el número <strong>de</strong><br />
preajuste <strong>de</strong>seado (1-60) y mantenga pulsado „PRESET” durante<br />
2 segundos.<br />
En los modos CM6700 y CM6800 aparece una etiqueta en el monitor.<br />
Seleccione „SET” y pulse „ACK”, o eche el joystick hacia la <strong>de</strong>recha y<br />
suéltelo.
eneo ® es una marca registrada <strong>de</strong> Vi<strong>de</strong>or E. Hartig GmbH<br />
Venta a treaves <strong>de</strong> los distribuidores especializados.<br />
Vi<strong>de</strong>or E. Hartig GmbH<br />
Carl-Zeiss-Straße 8 · 633 Rö<strong>de</strong>rmark/Germany<br />
Tel. +49 (0) 6074 / 888-0 · Fax +49 (0) 6074 / 888- 00<br />
www.vi<strong>de</strong>or.com<br />
5<br />
V 1.05<br />
Sujeto a modificaciones técnicas.<br />
© Copyright by Vi<strong>de</strong>or E. Hartig GmbH<br />
05/ 0 0