Operating Instructions Air Conditioner - Panasonic
Operating Instructions Air Conditioner - Panasonic
Operating Instructions Air Conditioner - Panasonic
Create successful ePaper yourself
Turn your PDF publications into a flip-book with our unique Google optimized e-Paper software.
F566312<br />
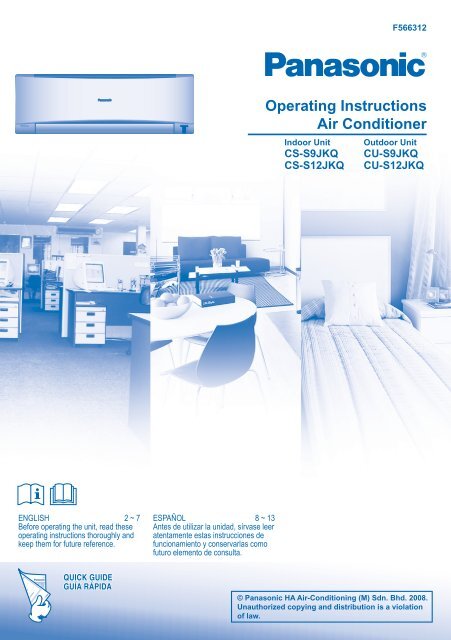
<strong>Operating</strong> <strong>Instructions</strong><br />
<strong>Air</strong> <strong>Conditioner</strong><br />
Indoor Unit<br />
CS-S9JKQ<br />
CS-S12JKQ<br />
Outdoor Unit<br />
CU-S9JKQ<br />
CU-S12JKQ<br />
ENGLISH 2 ~ 7<br />
Before operating the unit, read these<br />
operating instructions thoroughly and<br />
keep them for future reference.<br />
QUICK GUIDE<br />
GUÍA RÁPIDA<br />
ESPAÑOL 8 ~ 13<br />
Antes de utilizar la unidad, sírvase leer<br />
atentamente estas instrucciones de<br />
funcionamiento y conservarlas como<br />
futuro elemento de consulta.<br />
© <strong>Panasonic</strong> HA <strong>Air</strong>-Conditioning (M) Sdn. Bhd. 2008.<br />
Unauthorized copying and distribution is a violation<br />
of law.
SAFETY PRECAUTIONS<br />
DEFINITION<br />
The instructions to be followed are classified by the following symbols:<br />
This symbol denotes an action that<br />
is PROHIBITED.<br />
These symbols denote actions that<br />
are COMPULSORY.<br />
To prevent personal injury, injury to others, or property damage, please observe the following.<br />
Incorrect operation due to failure to follow instructions may cause harm or damage, the seriousness of which is classified as below:<br />
Warning This sign warns of death or serious injury. Caution<br />
This sign warns of<br />
injury or damage<br />
to property.<br />
Remote Control<br />
• Do not use rechargeable<br />
(Ni-Cd) batteries.<br />
• Do not allow infants and<br />
small children to play<br />
with the remote control<br />
to prevent them from<br />
accidentally swallowing the<br />
batteries.<br />
• Remove the batteries if the<br />
unit is not going to be used<br />
for a long period of time.<br />
• New batteries of the same<br />
type must be inserted<br />
following the polarity stated<br />
to prevent malfunction of<br />
the remote control.<br />
Indoor Unit<br />
• Do not install, remove and<br />
reinstall the unit by yourself;<br />
improper installation will<br />
cause leakage, electric<br />
shock or fire. Please consult<br />
authorized dealer or<br />
specialist for the installation<br />
work.<br />
• Do not insert your fingers or<br />
other objects into the unit,<br />
rotating parts may cause<br />
injury.<br />
• Do not attempt to repair the<br />
unit by yourself.<br />
<strong>Air</strong> inlet<br />
Indoor Unit<br />
• Do not install the unit in a<br />
potentially explosive atmosphere.<br />
• Do not wash the unit with water,<br />
benzene, thinner or scouring<br />
powder.<br />
• Do not use for other purposes<br />
such as preservation of food.<br />
• Do not use any combustible<br />
equipment in front of the airflow<br />
outlet.<br />
• Do not expose directly to cold air<br />
for a long period.<br />
• Ensure that the drainage pipe is<br />
connected properly. Otherwise,<br />
leakage may occur.<br />
• Aerate the room regularly.<br />
Power Supply<br />
• Do not share the same power outlet with<br />
other equipment.<br />
• Do not modify power cords.<br />
• Do not use extension cords.<br />
• Do not operate with wet hands.<br />
• Do not operate or stop the unit by<br />
inserting or pulling out the power plug.<br />
• Insert the power plug properly.<br />
• Use the specified supply cord.<br />
• If the supply cord is damaged, it must be<br />
replaced by the manufacturer, its service<br />
agent or similarly qualified persons in<br />
order to avoid a hazard.<br />
• Dust on the electric power plug should be<br />
periodically wiped with a dry cloth.<br />
• This equipment must be earthed and<br />
strongly recommended to be installed<br />
with Earth Leakage Circuit Breaker<br />
(ELCB) or Residual Current Device<br />
(RCD). Otherwise, it may cause electrical<br />
shock or fire in case of malfunction.<br />
• In case of emergency or abnormal<br />
conditions (burnt smell, etc), turn off the<br />
power supply and unplug, and please<br />
consult authorized dealer.<br />
<strong>Air</strong><br />
outlet<br />
<strong>Air</strong> inlet<br />
<strong>Air</strong> inlet<br />
<strong>Air</strong> outlet<br />
Power Supply<br />
• Do not pull the cord to disconnect<br />
the plug.<br />
• Switch off the power supply<br />
and unplug before cleaning or<br />
servicing.<br />
• Turn off the power supply and<br />
unplug if the unit is not used for a<br />
long period of time.<br />
• This air conditioner is equipped<br />
with a built-in surge protective<br />
device. However, in order<br />
to further protect your air<br />
conditioner from being damaged<br />
by abnormally strong lightning<br />
activity, you may want to<br />
disconnect it from the power<br />
supply. Do not touch the air<br />
conditioner during lightning, it may<br />
cause electric shock.<br />
Outdoor Unit<br />
• Do not sit or step on the unit, you<br />
may fall down accidentally.<br />
2<br />
Outdoor Unit<br />
• Do not insert your fingers or other objects<br />
into the unit, rotating parts may cause<br />
injury.<br />
• Do not touch the sharp aluminium<br />
fin, sharp parts may cause injury.<br />
• After long periods of use, make<br />
sure the installation rack is not<br />
damaged.
REGULATORY INFORMATION<br />
This appliance is not intended for use by persons (including children) with reduced<br />
physical, sensory or mental capabilities, or lack of experience and knowledge,<br />
unless they have been given supervision or instruction concerning use of the<br />
appliance by a person responsible for their safety. Children should be supervised to<br />
ensure that they do not play with the appliance.<br />
OPERATION CONDITION<br />
Use this air conditioner under the following temperature range<br />
Temperature (°C)<br />
Indoor<br />
Outdoor<br />
*DBT *WBT *DBT *WBT<br />
Maximum 32 23 43 26<br />
COOLING<br />
Minimum 16 11 16 11<br />
* DBT: Dry bulb temperature<br />
* WBT: Wet bulb temperature<br />
Thank you for purchasing<br />
<strong>Panasonic</strong> <strong>Air</strong> <strong>Conditioner</strong><br />
TABLE OF CONTENTS<br />
SAFETY PRECAUTIONS<br />
2<br />
REGULATORY INFORMATION<br />
3<br />
PRODUCT OVERVIEW &<br />
OPERATIONS<br />
4~5<br />
CARE & CLEANING<br />
6<br />
TROUBLESHOOTING<br />
7<br />
QUICK GUIDE<br />
BACK COVER<br />
ENGLISH<br />
Replacement or installation of power plugs shall be performed by authorized/<br />
qualified personnel only. The wires in this mains lead are coloured in accordance<br />
with the following code:<br />
Terminals<br />
Red<br />
Black<br />
Green/Yellow<br />
wires<br />
live<br />
neutral<br />
earth<br />
colours (GB Standard)<br />
brown<br />
blue<br />
green-yellow<br />
Wiring colour may vary depending on a country wiring code’s standard.<br />
NOTE :<br />
The illustrations in this manual are<br />
for explanation purposes only and<br />
may differ from the actual unit. It is<br />
subjected to change without notice<br />
for future improvement.<br />
Information for Users on Collection and Disposal of Old Equipment and used Batteries<br />
[Information on Disposal in other Countries outside the European Union]<br />
These symbols are only valid in the European Union. If you wish to discard these items, please contact your<br />
local authorities or dealer and ask for the correct method of disposal.<br />
Note for the battery symbol (bottom two symbol examples):<br />
This symbol might be used in combination with a chemical symbol. In this case it complies with the<br />
requirement set by the Directive for the chemical involved.<br />
Pb<br />
• Do not switch ON the unit when waxing the floor. After waxing, aerate the room properly before operating the unit.<br />
• Do not install the unit in oily and smoky areas.<br />
3
PRODUCT OVERVIEW & OPERATIONS<br />
e-ion AIR PURIFYING SYSTEM<br />
Do not touch during operation<br />
e-ion filters e-ion charging wire Active e-ion Generator<br />
Auto OFF/ON button<br />
• Used when remote control is misplaced<br />
or malfunction.<br />
Action<br />
Press once.<br />
Press and hold until 1 beep is<br />
heard, then release.<br />
Press the button to turn off.<br />
Mode<br />
Auto<br />
Cooling<br />
Front panel<br />
Receiver<br />
Horizontal airflow<br />
direction louver<br />
• Manually<br />
adjustable.<br />
Vertical airflow<br />
direction louver<br />
• Do not adjust<br />
by hand.<br />
Maximum distances: 8m<br />
INDICATOR<br />
(Red/Orange/Blue)<br />
(Green)<br />
(Orange)<br />
(Orange)<br />
(Orange)<br />
(Blue)<br />
(Blue)<br />
TO TURN ON OR OFF THE UNIT<br />
POWER<br />
Remote control<br />
display<br />
• Please be aware of the OFF indication on the remote<br />
control display to prevent the unit from starting/stopping<br />
improperly.<br />
TO SET TEMPERATURE<br />
MILD DRY<br />
COOLING<br />
• For cool and dry modes, the range of temperature for<br />
selection is 16°C ~ 30°C.<br />
• <strong>Operating</strong> the unit within the recommended temperature<br />
could induce energy saving.<br />
COOL mode : 26°C ~ 28°C.<br />
DRY mode : 1°C ~ 2°C lower than room temperature.<br />
TO SELECT OPERATION MODE<br />
4<br />
AUTO mode - For your convenience<br />
• Unit selects operation mode every 30 minutes according to<br />
temperature setting, outdoor and room temperature. During<br />
operation mode selection the power indicator blinks.<br />
COOL mode - To enjoy cool air<br />
DRY mode - To dehumidify the environment<br />
• Unit operates at low fan speed to give a gentle cooling<br />
operation.
TO SELECT FAN SPEED<br />
(5 OPTIONS)<br />
• For AUTO, the indoor fan speed is automatically adjusted<br />
according to the operation mode.<br />
TO ADJUST VERTICAL AIRFLOW<br />
DIRECTION (5 OPTIONS)<br />
• Keeps the room ventilated.<br />
• If AUTO is set, the louvers swing up/down automatically.<br />
TO ENJOY CLEAN &<br />
FRESH AIR<br />
• Generates negative ions to produce fresh air effect and<br />
attract dust which will then be captured at the positively<br />
charged e-ion filters.<br />
TO MONITOR AIR<br />
QUALITY<br />
• Detects air quality; e-ion<br />
operation activates when air<br />
quality is at dirty level.<br />
Indicator<br />
Blue<br />
Orange<br />
Red<br />
PATROL SENSOR<br />
<strong>Air</strong> Quality<br />
Clean<br />
Moderate<br />
Dirty<br />
• Regardless of air quality, to maintain air freshness e-ion<br />
activates automatically (PATROL SENSOR indicator turn<br />
red) when:<br />
- 2 minutes after the unit is on, or<br />
- exceeds 4 hours at clean level.<br />
• Fan speed is adjusted automatically.<br />
TO IMPROVE HUMIDITY<br />
AND MOISTURE LEVEL<br />
• This operation reduces air dryness and provides you with<br />
a comfortable living environment.<br />
• When vertical airflow direction is set to AUTO, it stops at<br />
lower position to avoid cold air contact. However, you can<br />
adjust the louver direction manually.<br />
TO ENJOY QUIET<br />
ENVIRONMENT<br />
• This operation reduces airflow noise.<br />
MILD DRY COOLING<br />
QUIET<br />
TO ACHIEVE<br />
TEMPERATURE QUICKLY<br />
• This operation will stop automatically after 4 hours.<br />
POWERFUL<br />
• , , and can be activated<br />
in all modes and can be cancelled by pressing the<br />
respective button again.<br />
TO SET THE TIMER<br />
• To turn ON or OFF the unit at a preset time.<br />
Select ON or<br />
OFF timer.<br />
Set the time.<br />
TIMER<br />
Confirm.<br />
• To cancel ON or OFF timer, press or then<br />
press .<br />
• When ON Timer is set, the unit may start earlier (up<br />
to 15 minutes) before the actual set time in order to<br />
achieve the desired temperature on time.<br />
• Timer operation is based on the clock set in the remote<br />
control and repeats daily once set. For clock setting,<br />
please refer to Remote Control Preparation at back<br />
cover.<br />
• If timer is cancelled manually or due to power failure,<br />
you can restore the previous setting (once power is<br />
resumed) by pressing .<br />
OPTIONAL SETTINGS<br />
Patrol starts automatically with the unit<br />
switched on with .<br />
Press and hold for 5 seconds, then release<br />
to disable or restore this setting.<br />
Press and hold for 5 seconds to dim or<br />
restore the unit’s indicator brightness.<br />
Press and hold for approximately 10<br />
seconds to show temperature setting in<br />
°C or °F.<br />
Press and hold for approximately 5 seconds<br />
to show 12-hour (am/pm) or 24-hour time<br />
indication.<br />
Press to restore the remote control’s default<br />
setting.<br />
ENGLISH<br />
• only can be activated in COOL mode and can<br />
be cancelled by pressing the button again.<br />
• and or , and can<br />
not be selected at the same time.<br />
• and can be activated even when the unit<br />
is turned off. In this condition, fan speed and air swing<br />
can not be adjusted.<br />
, Not used in normal operations.<br />
Use curtains to screen off sunlight and outdoor heat to<br />
reduce power consumption during cool mode.<br />
5
CARE & CLEANING<br />
CAUTION<br />
• Switch off the power supply and unplug before cleaning.<br />
• Do not touch the aluminium fin, sharp parts may cause injury.<br />
WASHING INSTRUCTIONS<br />
• Do not use benzene, thinner or scouring powder.<br />
• Use only soap ( pH7) or neutral household detergent.<br />
• Do not use water hotter than 40°C.<br />
ALUMINIUM FIN<br />
HINT<br />
• To ensure optimal performance of the unit, cleaning<br />
maintenance have to be carried out at regular intervals.<br />
Dirty unit may caused malfunction and you may retrieve<br />
error code “H99”. Please consult authorized dealer.<br />
FRONT PANEL<br />
Remove Front Panel<br />
• Raise and pull to remove the front<br />
panel.<br />
• Wash gently and dry.<br />
Close Front Panel<br />
Remove<br />
• Press down both ends of the front<br />
panel to close it securely.<br />
e-ion CHARGING WIRE<br />
INDOOR UNIT<br />
e-ion FILTERS<br />
• Clean the filters regularly.<br />
• Wash/rinse the filters gently with water to<br />
avoid damage to the filter surface.<br />
• Dry the filters thoroughly under the shade,<br />
away from fire or direct sunlight.<br />
• Replace any damage filter.<br />
Wipe the unit gently with a soft, dry cloth.<br />
ACTIVE e-ion GENERATOR<br />
Clean with dry cotton bud.<br />
• Active e-ion generator<br />
cleaning is recommended<br />
every 6 months.<br />
6<br />
FOR SEASONAL INSPECTION AFTER EXTENDED<br />
NON-USE<br />
• Checking of remote control batteries.<br />
• No obstruction at air inlet and air outlet vents.<br />
• Use Auto OFF/ON button to select Cooling operation.<br />
After 15 minutes of operation, it is normal to have the following<br />
temperature difference between air inlet and air outlet vents:<br />
Cooling: ≥ 8°C<br />
FOR EXTENDED NON-USE<br />
• Activate e-ion operation for 2~3 hours as an alternative to<br />
remove moisture left in the internal parts thoroughly.<br />
• Turn off the power supply and unplug.<br />
• Remove the remote control batteries.<br />
NON SERVICEABLE CRITERIAS<br />
TURN OFF POWER SUPPLY AND UNPLUG then<br />
please consult authorized dealer under the following<br />
conditions:<br />
• Abnormal noise during operation.<br />
• Water/foreign particles have entered the remote<br />
control.<br />
• Water leaks from Indoor unit.<br />
• Circuit breaker switches off frequently.<br />
• Power cord becomes unnaturally warm.<br />
• Switches or buttons are not functioning properly.
TROUBLESHOOTING<br />
The following symptoms do not indicate malfunction.<br />
Symptom<br />
Mist emerges from indoor unit.<br />
Water flowing sound during operation.<br />
The room has a peculiar odour.<br />
Indoor fan stops occasionally during automatic<br />
fan speed setting.<br />
Operation is delayed a few minutes after<br />
restart.<br />
Outdoor unit emits water/steam.<br />
Timer indicator is always on.<br />
Power indicator blinks before the unit is<br />
switched on.<br />
Cracking sound during operation.<br />
Inconsistent airflow during PATROL operation.<br />
Cause<br />
• Condensation effect due to cooling process.<br />
• Refrigerant flow inside the unit.<br />
• This may due to damp smell emitted by the wall, carpet, furniture or<br />
clothing.<br />
• This helps to remove the surrounding odours.<br />
• The delay is a protection to the unit’s compressor.<br />
• Condensation or evaporation occurs on pipes.<br />
• The timer setting repeats daily once set.<br />
• This is a preliminary step in preparation for the operation when the ON<br />
timer has been set.<br />
• Changes of temperature cause the expansion/contraction of the unit.<br />
• Fan speed is adjusted automatically during patrol operation.<br />
Select QUIET operation to maintain the airflow consistency.<br />
ENGLISH<br />
Check the following before calling for servicing.<br />
Symptom<br />
Cooling operation is not working efficiently.<br />
Noisy during operation.<br />
Remote control does not work.<br />
(Display is dim or transmission signal is weak.)<br />
The unit does not work.<br />
The unit does not receive the signal from the<br />
remote control.<br />
PATROL operation does not work.<br />
Check<br />
• Set the temperature correctly.<br />
• Close all doors and windows.<br />
• Clean or replace the filters.<br />
• Clear any obstruction at the air inlet and air outlet vents.<br />
• Check if the unit has been installed at an incline.<br />
• Close the front panel properly.<br />
• Insert the batteries correctly.<br />
• Replace weak batteries.<br />
• Check if the circuit breaker is tripped.<br />
• Check if timers have been set.<br />
• Make sure the receiver not obstructed.<br />
• Certain fluorescent lights may interfere with signal transmitter. Please<br />
consult authorized dealer.<br />
• Press and hold<br />
for 15 seconds until beep sound is heard, press<br />
again.<br />
Patrol sensor or e-ion indicator on the indoor<br />
unit is blinking. • Press or twice. If the patrol sensor or e-ion indicator still<br />
blinking, please consult authorized dealer.<br />
The unit stops and the timer indicator blinks.<br />
Use remote control to retrieve error code.<br />
1<br />
Press for 5<br />
seconds.<br />
Press for 5<br />
3<br />
seconds to<br />
quit checking.<br />
4 Turn the unit off and reveal the error code to authorized dealer.<br />
2<br />
Press until you hear<br />
beep sound, then jot<br />
down the error code.<br />
Note:<br />
• For certain error, you may<br />
restart the unit with limited<br />
operation with 4 beeps during<br />
operation starts.<br />
7
PRECAUCIONES DE SEGURIDAD<br />
DEFINICIÓN<br />
Las instrucciones que deben seguirse están clasificadas mediante los siguientes símbolos:<br />
Este símbolo denota una acción<br />
que está PROHIBIDA.<br />
Estos símbolos denotan acciones<br />
que son OBLIGATORIAS.<br />
Para prevenir daños personales, daños a otras personas o daños materiales, se deben seguir las instrucciones siguientes.<br />
El uso incorrecto por no seguir las instrucciones puede causar daños o averías; su gravedad se clasifica con las indicaciones siguientes:<br />
Advertencia<br />
Esta indicación advierte del posible peligro de<br />
muerte o de daños graves.<br />
Precaución<br />
Esta indicación<br />
advierte de los<br />
posibles daños<br />
o desperfectos<br />
materiales.<br />
8<br />
Mando a Distancia<br />
• No utilice pilas recargables<br />
(Ni-Cd).<br />
• No permita que bebés y niños<br />
pequeños jueguen con el<br />
mando a distancia para evitar<br />
que ingieran accidentalmente<br />
las pilas.<br />
• Extraiga las pilas si no va a<br />
utilizar la unidad durante un<br />
periodo prolongado de tiempo.<br />
• Para que el mando a distancia<br />
funcione bien, es necesario<br />
insertar las pilas según la<br />
polaridad indicada.<br />
Fuente de energía<br />
• No conecte otros aparatos a la misma toma de<br />
corriente.<br />
• No manipule los cables de alimentación.<br />
• No utilice cables de extensión.<br />
• No utilice la unidad con las manos mojadas.<br />
• No ponga en funcionamiento ni pare la unidad<br />
enchufando o desenchufando el enchufe.<br />
• Inserte el enchufe correctamente.<br />
• Utilice el cable de alimentación especificado.<br />
• Para evitar riesgos, si el cable de alimentación<br />
está dañado y es necesario cambiarlo, deberá<br />
hacerlo el fabricante, un representante del<br />
servicio técnico o una persona calificada.<br />
• Limpie de vez en cuando, con un paño seco, el<br />
polvo sobre el enchufe de energía.<br />
• Este equipo debe ser conectado a tierra y se<br />
recomienda instalar con el disyuntor de fuga a<br />
tierra (ELCB) o el dispositivo corriente residual<br />
(RCD). De otra manera, en caso de una falla,<br />
pueden producirse peligrosas descargas<br />
eléctricas o incendios.<br />
• En caso de emergencia o condiciones<br />
anormales (olor a quemado, etc.), corte y<br />
desenchufe la alimentación de energía y<br />
consulte al distribuidor autorizado.<br />
Unidad Exterior<br />
• No coloque sus dedos u otros objetos en la<br />
unidad, las piezas giratorias pueden causar<br />
lesiones.<br />
Unidad Interior<br />
• No instale, desinstale ni reinstale<br />
la unidad usted mismo; una<br />
instalación incorrecta podría<br />
causar fugas de agua, descargas<br />
eléctricas o incendios. Consulte<br />
con un distribuidor autorizado o<br />
con un especialista para realizar<br />
el trabajo de instalación.<br />
• No coloque sus dedos u otros<br />
objetos en la unidad, las piezas<br />
giratorias pueden causar lesiones.<br />
• No intente reparar la unidad usted<br />
mismo.<br />
Entrada<br />
de aire<br />
Entrada<br />
de aire<br />
Salida<br />
de aire<br />
Entrada<br />
de aire<br />
Salida<br />
de aire<br />
Unidad Interior<br />
• No instale la unidad en una atmósfera<br />
potencialmente explosiva.<br />
• No lave la unidad con agua, benceno,<br />
disolvente o limpiador en polvo.<br />
• No utilice la unidad para otros fines,<br />
como la conservación de alimentos.<br />
• No utilice ningún equipo combustible<br />
en la dirección del flujo de aire.<br />
• No se exponga directamente al aire<br />
frío durante un periodo prolongado de<br />
tiempo.<br />
• Verifique que los tubos de drenaje<br />
estén conectados adecuadamente. De<br />
lo contrario, podrían producirse fuga de<br />
agua.<br />
• Ventile la habitación con regularidad.<br />
Fuente de energía<br />
• No tire del cable para desconectar el<br />
enchufe.<br />
• Apague la unidad y desenchufe<br />
antes de proceder a la limpieza o al<br />
mantenimiento.<br />
• Desconecte la unidad y desenchúfela<br />
si no va a utilizarla durante un periodo<br />
prolongado de tiempo.<br />
• Este aparato de aire acondicionado<br />
dispone de un dispositivo incorporado<br />
de protección frente a sobrecargas.<br />
Sin embargo, y para evitar posibles<br />
averias provocadas por tormentas<br />
eléctricas especialmente violentas, se<br />
recomienda desenchufar la unidad. No<br />
toque el aparato de aire acondicionado<br />
si hay tormentas: podría sufrir una<br />
descarga eléctrica.<br />
Unidad Exterior<br />
• No se siente o pare sobre la unidad, se<br />
podría caer accidentalmente.<br />
• No toque la filosa aleta de aluminio, las<br />
piezas filosas pueden causar lesiones.<br />
• Después de haber utilizado la<br />
unidad durante periodos de tiempo<br />
prolongados, compruebe que el<br />
bastidor de instalación no esté dañado.
INFORMACIÓN REGLAMENTARIA<br />
Este aparato no debe ser utilizado por personas (incluyendo niños) con<br />
discapacidades mentales, sensoriales o físicas, o falta de experiencia y<br />
conocimiento, a menos que hayan recibido formación o supervisión en relación al<br />
uso del aparato por una persona responsable por su seguridad. Los niños deberían<br />
estar supervisados para asegurar que no juegan con el aparato.<br />
CONDICIONES DE FUNCIONAMIENTO<br />
Utilice este aparato de aire acondicionado dentro del siguiente intervalo de<br />
temperaturas<br />
Temperatura (°C)<br />
Interior<br />
Exterior<br />
*DBT *WBT *DBT *WBT<br />
Máxima 32 23 43 26<br />
ENFRIAMIENTO<br />
Mínima 16 11 16 11<br />
* DBT: Temperatura de bulbo seco<br />
* WBT: Temperatura de bulbo húmedo<br />
El reemplazo o instalación de los enchufes deberá realizarse sólo por personal<br />
autorizado/calificado. Los cables en esta red de suministro eléctrica son de colores,<br />
de acuerdo con el siguiente código:<br />
Terminales<br />
Rojo<br />
Negro<br />
Verde/Amarillo<br />
cables<br />
vivo<br />
neutral<br />
tierra<br />
colores (GB estándar)<br />
marrón<br />
azul<br />
verde-amarillo<br />
El color de los cables puede variar dependiendo del estándar de código de<br />
cableado del país.<br />
Muchas gracias por elegir una<br />
unidad de aire acondicionado<br />
<strong>Panasonic</strong><br />
CONTENIDO<br />
PRECAUCIONES DE<br />
SEGURIDAD<br />
INFORMACIÓN<br />
REGLAMENTARIA<br />
DESCRIPCIÓN DEL PRODUCTO<br />
Y OPERACIONES<br />
10~11<br />
CUIDADO Y LIMPIEZA<br />
12<br />
LOCALIZACIÓN DE AVERÍAS<br />
13<br />
GUÍA RÁPIDA<br />
CUBIERTA TRASERA<br />
NOTA :<br />
Las ilustraciones de este manual<br />
sirven únicamente para describir<br />
las explicaciones y pueden no<br />
coincidir exactamente con las del<br />
aparato suministrado. Están sujetas<br />
a cambios sin previo aviso con el<br />
fin de mejorar el producto.<br />
8<br />
9<br />
ESPAÑOL<br />
Información para Usuarios sobre la Recolección y Eliminación de aparatos viejos y baterías usadas<br />
[Informacion sobre la Eliminación en otros Países fuera de la Unión Europea]<br />
Estos símbolos sólo son válidos dentro de la Unión Europea. Si desea desechar estos objetos, por favor<br />
contacte con sus autoridades locales o distribuidor y consulte por el método correcto de eliminación.<br />
Nota sobre el símbolo de la bateria (abajo, dos ejemplos de símbolos):<br />
Este símbolo puede ser usado en combinación con un símbolo químico. En este caso, el mismo cumple con<br />
los requerimientos establecidos por la Directiva para los químicos involucrados.<br />
Pb<br />
• No encienda la unidad cuando encere el piso. Después de encerar, airee la habitación correctamente antes de encender la<br />
unidad.<br />
• No instale la unidad en áreas aceitosas y ahumadas.<br />
9
DESCRIPCIÓN DEL PRODUCTO Y OPERACIONES<br />
Filtros de e-ión<br />
Panel frontal<br />
SISTEMA DE PURIFICACIÓN DE AIRE e-ión<br />
No toque durante el funcionamiento<br />
Cable de carga de<br />
e-iones<br />
Generador de e-iones<br />
activo<br />
Botón de ENCENDIDO/APAGADO<br />
automático (auto OFF/ON)<br />
• Utilizado cuando el mando a distancia<br />
está extraviado o funciona mal.<br />
Acción<br />
Modo<br />
Funcionamiento<br />
Pulsar una vez.<br />
automático<br />
Presione y mantenga<br />
hasta que escuche un Enfriamiento<br />
pitido, luego suéltelo.<br />
Presione el botón para apagar.<br />
INDICADOR<br />
Receptor<br />
Rejilla de<br />
dirección de<br />
corriente de<br />
aire horizontal<br />
• Manualmente<br />
ajustable.<br />
Pantalla del<br />
mando a distancia<br />
Rejilla de<br />
dirección de<br />
corriente de<br />
aire vertical<br />
• No lo ajuste<br />
manualmente.<br />
Distancia máxima: 8m<br />
(Rojo/Naranja/Azul)<br />
(Verde)<br />
(Naranja)<br />
(Naranja)<br />
(Naranja)<br />
(Azul)<br />
(Azul)<br />
ENCENDER O APAGAR LA<br />
POWER<br />
UNIDAD<br />
• Por favor esté al tanto de la indicación OFF en la pantalla<br />
del mando a distancia para impedir que la unidad arranque<br />
o se detenga incorrectamente.<br />
10<br />
MILD DRY<br />
COOLING<br />
PARA AJUSTAR LA TEMPERATURA<br />
• Para los modos frío y seco, el rango de temperaturas para<br />
seleccionar va de 16°C ~ 30°C.<br />
• El funcionamiento de la unidad dentro de la temperatura<br />
recomendada podría resultar en el ahorro de energía.<br />
MODO FRÍO : 26°C ~ 28°C.<br />
MODO DESHUMIDIFICACIÓN : 1°C ~ 2°C menos que la<br />
temperatura ambiente.<br />
SELECCIONAR MODO DE OPERACIÓN<br />
MODO AUTOMÁTICO - Para su conveniencia<br />
• La unidad selecciona el modo de operación cada 30<br />
minutos según el ajuste de temperatura, exterior y la<br />
temperatura ambiente. Durante la selección del modo de<br />
operación el indicador de encendido parpadea.<br />
MODO FRÍO - Para disfrutar de aire frío<br />
MODO DESHUMIDIFICACIÓN - Para deshumidificar el<br />
ambiente<br />
• La unidad funciona en la velocidad de ventilador baja para<br />
proporcionar una agradable refrigeración.
PARA SELECCIONAR LA VELOCIDAD DEL<br />
VENTILADOR (5 OPCIONES)<br />
• Para AUTO (automático), la velocidad de ventilador de interior<br />
es ajustada automáticamente según el modo de operación.<br />
PARA AJUSTAR LA DIRECCIÓN VERTICAL<br />
DE LA CORRIENTE DE AIRE (5 OPCIONES)<br />
• Mantiene la habitación ventilada.<br />
• Si AUTO es programado, las rejillas oscilarán<br />
automáticamente hacia arriba/abajo.<br />
PARA DISFRUTAR DE AIRE<br />
LIMPIO Y FRESCO<br />
• Genera iones negativos para producir el efecto de aire fresco<br />
y atrae el polvo que es capturado en los filtros de e-ion<br />
cargados positivamente.<br />
PARA SUPERVISAR LA PATROL SENSOR<br />
CALIDAD DE AIRE<br />
• Detecta la calidad del aire; el<br />
funcionamiento de e-ion se<br />
activa cuando la calidad del<br />
aire está en el nivel sucio.<br />
Indicador Calidad del aire<br />
Azul Limpio<br />
Naranja Moderado<br />
Rojo<br />
Sucio<br />
• Independientemente de la calidad del aire, para mantener<br />
automáticamente la frescura del aire de e-ion (el indicador de<br />
PATROL SENSOR se pone rojo) si:<br />
- 2 minutos después de encender la unidad, o<br />
- sobrepasó las 4 horas en el nivel limpio.<br />
• La velocidad del ventilador es ajustada automáticamente.<br />
PARA MEJORAR EL<br />
NIVEL DE HUMEDAD<br />
• Este funcionamiento reduce la sequedad del aire y le brinda<br />
un ambiente cómodo para vivir.<br />
• Cuando la dirección del flujo de aire vertical está establecida<br />
en AUTO, se detiene en una posición más baja para evitar<br />
el contacto con el aire frío. Sin embargo, puede ajustar la<br />
dirección de la aleta de forma manual.<br />
PARA DISFRUTAR DE UN<br />
AMBIENTE TRANQUILO<br />
• Esta operación reduce el ruido de corriente de aire.<br />
MILD DRY COOLING<br />
QUIET<br />
ALCANZAR TEMPERATURA POWERFUL<br />
RÁPIDAMENTE<br />
• Esta operación se detendrá automáticamente después de 4<br />
horas.<br />
• Es posible activar , , y<br />
en todos los modos y pueden cancelarse pulsando<br />
nuevamente el botón respectivo.<br />
• sólo se puede activar en el modo COOL y se puede<br />
cancelar pulsando nuevamente el botón.<br />
PARA AJUSTAR EL TEMPORIZADOR<br />
• Conectar o desconectar la unidad a una hora<br />
predeterminada.<br />
TIMER<br />
Seleccione el Ajuste la hora. Confirmar.<br />
temporizador de<br />
activación (ON) o<br />
de desactivación<br />
(OFF).<br />
• Para cancelar el temporizador de encendido (ON) o<br />
el de apagado (OFF), pulse o y, después,<br />
pulse .<br />
• Cuando el temporizador es ajustado en ON, la unidad<br />
puede comenzar (hasta 15 minutos) antes de la hora<br />
real programada para alcanzar la temperatura deseada<br />
a tiempo.<br />
• La operación de temporizador está basada en la<br />
hora programada en el mando a distancia y se repite<br />
diariamente. Para el ajuste del reloj, por favor consulte<br />
Preparación del Mando a Distancia en la contra<br />
portada.<br />
• Si el temporizador es cancelado manualmente o por<br />
una caída en el suministro eléctrico, puede restaurar<br />
el ajuste anterior (cuando vuelva la electricidad)<br />
presionando .<br />
AJUSTES OPCIONALES<br />
Patrol se inicia automáticamente cuando la<br />
unidad se enciende con .<br />
Mantenga pulsado por 5 segundos, y suelte<br />
para activar o desactivar este ajuste.<br />
Mantenga pulsado por 5 segundos para<br />
oscurecer o restablecer el brillo del indicador<br />
de la unidad.<br />
Mantenga pulsado aproximadamente 10<br />
segundos para mostrar la temperatura en<br />
°C o °F.<br />
Mantenga pulsado aproximadamente 5<br />
segundos para mostrar el formato de 12<br />
(am/pm) o 24 horas.<br />
Presione para restablecer el ajuste de<br />
fábrica del mando a distancia.<br />
ESPAÑOL<br />
• y o , y no pueden ser<br />
seleccionados al mismo tiempo.<br />
• y pueden ser activadon incluso cuando la<br />
unidad es apagada. En esta condición, la velocidad de<br />
ventilador y la oscilación de aire no pueden ser ajustadas.<br />
, No utilizado en operaciones normales.<br />
Use cortinas para proteger de luz solar y el calor<br />
exterior y así reducir el consumo eléctrico durante el<br />
modo de frío.<br />
11
CUIDADO Y LIMPIEZA<br />
PRECAUCIÓN<br />
INSTRUCCIONES DE LAVADO<br />
• Apague la unidad y desenchúfela antes de limpiarla.<br />
• No toque la aleta de aluminio, las partes afiladas pueden causar<br />
heridas.<br />
• No utilice benceno, disolvente o limpiador en polvo.<br />
• Utilice sólo jabones ( pH7) o detergentes domésticos<br />
neutros.<br />
• No utilice agua con una temperatura superior a 40°C.<br />
INDICACIONES<br />
• Para garantizar un desempeño óptimo de la unidad,<br />
el mantenimiento de limpieza se debe realizar en<br />
intervalos regulares. La unidad sucia puede causar un<br />
mal funcionamiento y puede recuperar el código de error<br />
“H99”. Consulte al distribuidor autorizado.<br />
ALETA DE ALUMINIO<br />
PANEL FRONTAL<br />
Retire el panel frontal<br />
• Levante y tire del panel frontal para retirarlo.<br />
• Lávelo con cuidado y séquelo.<br />
Cierre el panel frontal<br />
• Pulse hacia abajo los dos extremos del panel<br />
frontal para cerrarlo herméticamente.<br />
FILTROS de e-ión<br />
Extraer<br />
• Limpie los filtros regularmente.<br />
• Lave/enjuague los filtros con agua, con<br />
cuidado para evitar dañar la superficie del<br />
mismo.<br />
• Secar minuciosamente los filtros a la<br />
sombra, lejos del fuego o la luz solar directa.<br />
• Reemplace los filtros dañados.<br />
UNIDAD INTERIOR<br />
CABLE DE CARGA de e-iones<br />
Limpie la unidad suavemente con un paño suave y seco.<br />
GENERADOR de e-iones ACTIVO<br />
Límpielos con un bastoncillo<br />
de algodón seco.<br />
• Se recomienda limpiar el<br />
generador de e-iones activo<br />
cada 6 meses.<br />
12<br />
PARA INSPECCIÓN TEMPORAL DESPUÉS DE UN LARGO<br />
PERÍODO EN DESUSO<br />
• Verifique las pilas del mando a distancia.<br />
• Compruebe que las tomas de entrada y salida de las rejillas de<br />
ventilación no estén obstruidas.<br />
• Use el botón Auto OFF/ON (apagado/encendido automático) para<br />
seleccionar el funcionamiento de Refrigeración. Después de 15<br />
minutos de funcionamiento, es normal tener la siguiente diferencia de<br />
temperatura entre la ventilación del aire que ingresa y el aire que sale.<br />
Enfriamiento: ≥ 8°C<br />
SI NO SE VA A UTILIZAR LA UNIDAD DURANTE UN<br />
PERIODO PROLONGADO DE TIEMPO<br />
• Active la operación e-ion durante 2 a 3 horas como una alternativa<br />
para quitar a fondo la humedad dejada en las partes internas.<br />
• Apague la unidad y desenchúfela.<br />
• Extraiga las pilas del mando a distancia.<br />
NO UTILICE LA UNIDAD SI<br />
APAGUE Y DESENCHUFE EL SUMINISTRO DE<br />
ENERGÍA Y luego consulte con el distribuidor<br />
autorizado bajo las siguientes condiciones:<br />
• Si escucha ruidos extraños durante el<br />
funcionamiento.<br />
• Si entra agua o elementos extraños en el mando a<br />
distancia.<br />
• Si hay escapes de agua de la unidad interior.<br />
• Si el interruptor del circuito se abre frecuentemente.<br />
• El cable de alimentación está demasiado caliente.<br />
• Los interruptores o los botones no funcionan<br />
correctamente.
LOCALIZACIÓN DE AVERÍAS<br />
Las siguientes señales no indican un mal funcionamiento.<br />
Señal<br />
Causa<br />
Sale neblina de la unidad interior.<br />
• Efecto de condensación producido durante el proceso de enfriamiento.<br />
Se escucha un sonido similar a agua fluyendo • Flujo del refrigerante en el interior de la unidad.<br />
durante el funcionamiento.<br />
Hay un olor extraño en la habitación.<br />
• Puede ocurrir debido al olor a humedad producido por las paredes, las alfombras, los<br />
muebles o las telas de la habitación.<br />
El ventilador interior se para de vez en cuando • Con esto se eliminan los malos olores del ambiente.<br />
con la velocidad del ventilador automática.<br />
El aparato tarda varios minutos en funcionar • El retraso responde a un dispositivo de protección del compresor de la unidad.<br />
tras volver a encenderlo.<br />
La unidad exterior emite agua o vapor. • Se produce condensación o evaporación en los tubos.<br />
El indicador TIMER siempre está encendido. • Una vez configurado, el ajuste del temporizador se repite todos los días.<br />
El indicador de encendido parpadea antes de • Se trata de un paso preliminar para preparar el funcionamiento cuando se ha ajustado el<br />
encender la unidad.<br />
temporizador de encendido.<br />
Sonido seco (de chasquido) durante el • Los cambios de temperatura causan la expansión/contracción de la unidad.<br />
funcionamiento.<br />
Corriente de aire inconstante durante<br />
• La velocidad de ventilador es ajustada automáticamente durante la operación patrol.<br />
operación PATROL.<br />
Activa la operación SILENCIOSA (QUIET) para mantener la consistencia de la<br />
circulación de aire.<br />
ESPAÑOL<br />
Compruebe lo siguiente antes de llamar a un técnico.<br />
Señal<br />
La operación frío no funciona<br />
eficientemente.<br />
Funcionamiento ruidoso.<br />
El mando a distancia no funciona.<br />
(La pantalla está oscura o la señal de<br />
transmisión es débil.)<br />
La unidad no funciona.<br />
La unidad no recibe la señal del mando a<br />
distancia.<br />
Compruebe<br />
• Programe la temperatura correctamente.<br />
• Cierre todas las puertas y ventanas.<br />
• Limpie o sustituya los filtros.<br />
• Quite cualquier obstrucción en la entrada y salida de aire.<br />
• Compruebe si la unidad ha sido instalada en una inclinación.<br />
• Cierre el panel delantero correctamente.<br />
• Inserte las baterías correctamente.<br />
• Reemplace las baterías débiles.<br />
• Compruebe si el disyuntor está activado.<br />
• Compruebe si los temporizadores han sido programados.<br />
• Asegúrese de que el receptor no esté obstruido.<br />
• Ciertas luces fluorescentes puede interferir con el transmisor de señal. Consulte con un<br />
distribuidor autorizado.<br />
El funcionamiento PATROL no funciona.<br />
• Pulse y mantenga presionado durante 15 segundos hasta que se escuche un<br />
pitido, pulse nuevamente.<br />
El sensor Patrol o el indicador de e-ión<br />
sobre la unidad de interior titila. • Pulse o dos veces. Si el sensor Patrol o en indicador E-ion todavía<br />
parpadean, consulte con un distribuidor autorizado.<br />
La unidad se detiene y el indicador de tiempo titila.<br />
Use el control remoto para recuperar el código de error.<br />
1<br />
3<br />
Pulse durante<br />
5 segundos.<br />
Pulse durante 5<br />
segundos para<br />
abandonar la<br />
comprobación.<br />
2<br />
Pulse hasta escuchar<br />
un pitido y, después,<br />
apunte el código del<br />
error.<br />
4 Apague la unidad e informe el código de error al distribuidor autorizado.<br />
Nota:<br />
• Para cierto error, puede<br />
reiniciar la unidad con el<br />
funcionamiento limitado con 4<br />
pitidos durante el inicio de la<br />
operación.<br />
13
MEMO
MEMO
QUICK GUIDE/GUÍA RÁPIDA<br />
Remote Control Preparation • Preparación Del Mando A Distancia<br />
1<br />
2<br />
3<br />
4 5 6<br />
1 Pull out • Quite<br />
Insert AAA or R03 batteries (can be used ~ 1 year) •<br />
2 Inserte pilas AAA o R03 (puede ser usado ~ 1 año)<br />
3 Close the cover • Cierre la tapa<br />
4 Press CLOCK • Presione CLOCK<br />
5 Set time • Ajuste la hora<br />
6 Confirm • Confirmar<br />
1<br />
AUTO<br />
DRY COOL<br />
Select the desired mode.<br />
Seleccione el modo deseado.<br />
2<br />
Start/stop the operation.<br />
Inicie/detenga el funcionamiento.<br />
MILD DRY<br />
COOLING<br />
3<br />
Select the desired temperature.<br />
Seleccione la temperature deseada.<br />
F566312<br />
<strong>Panasonic</strong> Corporation<br />
Website: http://panasonic.net/<br />
Printed in Malaysia<br />
OSYW0812-01


