Freestanding Electric Fireplace - World Marketing of America, Inc.
Freestanding Electric Fireplace - World Marketing of America, Inc.
Freestanding Electric Fireplace - World Marketing of America, Inc.

You also want an ePaper? Increase the reach of your titles
YUMPU automatically turns print PDFs into web optimized ePapers that Google loves.
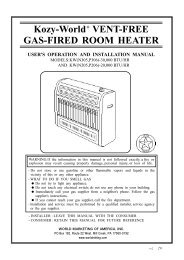
OPERATING INSTRUCTIONS<br />
Once the fireplace heater insert has been properly installed and connected to a ground electrical outlet, it is<br />
ready to operate. Note: ensure the circuit breakers for the power supply are turned on.<br />
The controls are located behind the grill below front glass and can be accessed by pulling the grill up from the top,<br />
forward and down.<br />
Paso 4:<br />
Conecte 2 Izquierdo & PANELS Correctos de<br />
FRENTE de LADO (C1 & C2) a los PANELES<br />
DELANTEROS (D, E & F) con 4 TORNILLOS de<br />
KD (U) (2 tornillos para cada lado por los<br />
conectores plásticos). Vea Figura 4.<br />
C1<br />
E<br />
D<br />
C2<br />
Figura 4<br />
Paso 5:<br />
D<br />
Ponga la asamblea terminada de repisa de<br />
chimenea en el PANEL de BASE (B) con 4<br />
TORNILLOS de KD (U). Vea Figura 5.<br />
C1<br />
E<br />
C2<br />
Lift front grill to access the switches.<br />
1. On/Off: Press this button for main power and flame effect. The indicator light will be on. See below for other<br />
control switches.<br />
B<br />
Figura 5<br />
2. Heat: For heat function ‐ Press this switch while the On/Off switch is in the ON position. The indicator light will be<br />
ON.<br />
3. Temperature Control: To adjust the temperature to your individual requirements, turn the temperature<br />
control dial to the right (clockwise) to increase the desired temperature and to the left for lower<br />
temperature. This temperature control dial can only be used while the On/Off switch and Heat switches<br />
are in the ON position.<br />
Note: When the On/Off switch is turned <strong>of</strong>f, all other heater functions will stop even though the switches<br />
may be in the on position.<br />
Paso 6:<br />
Instale el PRINCIPAL PANEL (UN) a la asamblea<br />
terminada con 4 KD SCEWS (U). Vea Figura 6.<br />
C1<br />
E<br />
A<br />
D<br />
C2<br />
B<br />
Figura 6<br />
~ 6 ~<br />
~ 27 ~