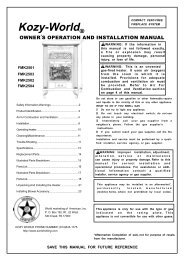
KPH120 English - World Marketing of America, Inc.
KPH120 English - World Marketing of America, Inc.
KPH120 English - World Marketing of America, Inc.

Create successful ePaper yourself
Turn your PDF publications into a flip-book with our unique Google optimized e-Paper software.
Kozy-<strong>World</strong>®<br />
GAS-FIRED INFRARED<br />
OUTDOOR SPACE HEATER<br />
USER’S INSTALLATION, OPERATION AND<br />
MAINTENANCE MANUAL<br />
MODEL : <strong>KPH120</strong> (PROPANE, 11,000 BTU/HR)<br />
FOR YOUR SAFETY<br />
If you smell gas :<br />
1. Shut <strong>of</strong>f gas to the appliance.<br />
2. Extinguish any open flame.<br />
3. If odor continues, immediately call your gas<br />
supplier.<br />
FOR YOUR SAFETY<br />
Do not store or use gasoline or other flammable<br />
vapors and liquids in the vicinity <strong>of</strong> this or any<br />
other gas appliance.<br />
WARNING! For outdoor use only.<br />
‣ INSTALLER : LEAVE THIS MANUAL WITH THE CONSUMER<br />
‣ CONSUMER : RETAIN THIS MANUAL FOR FUTURE REFERENCE
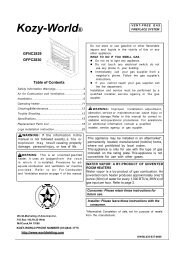
TABLE OF CONTENTS<br />
PAGE NO.<br />
. General Safety Instructions 1<br />
. Heater Assembly Instructions 2<br />
. Self Contained Propane Systems 2<br />
. Gas Supply Connection 3<br />
. Locating Your Heater 3<br />
. Clearance to Combustibles 3<br />
. Lighting 3<br />
. Shutdown & Storage Instructions 4<br />
. Maintenance 4<br />
. Main Burner Removal & Installation 4<br />
. Test Firing Heater 5<br />
. Alternate Gas Supply Systems 5<br />
. Troubleshooting 6<br />
. Parts List 7<br />
. Warranty Information 8<br />
CALIFORNIA PROPOSITION 65 -<br />
WARNING<br />
Fuels used in gas or oil-fired appliances and the<br />
products <strong>of</strong> combustion <strong>of</strong> such fuels, contain<br />
chemicals known to the State <strong>of</strong> California to<br />
cause cancer, birth defects and other reproductive<br />
harm. California Health & Safety Code Sec<br />
25249.6<br />
WARNING<br />
Improper installation, adjustment, alteration, service<br />
or maintenance can cause injury or property<br />
damage. Read the installation, operating and<br />
maintenance instructions thoroughly before<br />
installing or servicing this equipment.<br />
IMPORTANT:<br />
Read this user’s manual carefully and completely before using. Serious injury or death<br />
from burns, fire, explosion and/or carbon monoxide poisoning can result from improper<br />
use.
IMPORTANT SAFETY PRECAUTIONS :<br />
• Children and adults should be alert to high surface temperature<br />
around the burner assembly and heat reflector<br />
when operating this heater.<br />
• Children should be carefully supervised, when they are<br />
in the area <strong>of</strong> the patio heater.<br />
• Always maintain proper clearance from combustible<br />
materials. Minimum clearance from combustibles :<br />
Side 10”; Ceiling 12”; Rear 10”; and Below 30”.<br />
• Heater must be placed on a level and secure surface and<br />
shall be readily accessible.<br />
• Never hang anything including clothes or other flammable<br />
items on the heater.<br />
• Do not operate this heater unless it is completely assembled<br />
with reflector and guard grill in place.<br />
• Adequate clearance around air openings into the combustion<br />
chamber, provisions for accessibility and for<br />
combustion and ventilation air supply must be maintained<br />
at all times when the heater is operating.<br />
• The heater should be inspected before initial use and at<br />
least annually by a qualified person. More frequent<br />
cleaning may be required as necessary. It is imperative<br />
that the control compartment, burner and circulating air<br />
passages <strong>of</strong> the heater be kept clean.<br />
• Never connect heater to an unregulated gas supply.<br />
• The heater is shipped from the factory for propane gas.<br />
This heater is for use with propane gas only, do not convert<br />
heater to any other gas.<br />
• A minimum supply pressure <strong>of</strong> 11” water column is<br />
required for the purpose <strong>of</strong> input adjustment. Any<br />
replacement regulator must be UL listed. The minimum<br />
inlet pressure to the regulator from the gas tank is 5 psi<br />
and maximum pressure is 150 psi.<br />
• Any cleaning agent used on the heater should be <strong>of</strong> a<br />
non-corrosive and non-combustible type.<br />
• The stainless steel emitter screen and gas valve normally<br />
do not require cleaning and should never be painted.<br />
The reflector and control cover may be cleaned but<br />
never painted.<br />
• Propane cylinder must be disconnected when the heater<br />
is not in use.<br />
• Never refill disposable propane cylinders.<br />
• Do not use in high winds or when lightening is present.<br />
PRODUCT FEATURES<br />
. Self Contained<br />
. Lightweight and Moveable<br />
. Integral/Positive Piezo Igniter<br />
. Safety Tip-Over Shut<strong>of</strong>f System<br />
. Uniformly Distributed Heat Pattern<br />
UNPACKING :<br />
1. Remove heater, reflector and guard grill from carton.<br />
2. Remove all protective packaging applied to heater parts<br />
for shipment.<br />
3. Retain carton and packing material until heater is operated<br />
and found in good condition.<br />
Check heater for any shipping damage. If<br />
any <strong>of</strong> the parts show any external or internal<br />
damage or if there is a part missing please<br />
call 1-800-776-9425 for a free replacement.<br />
DO NOT RETURN HEATER TO PLACE<br />
OF PURCHASE.<br />
• Do not move the heater while in operation. Always<br />
allow heater to cool completely before moving.<br />
• This heater is designed for heating purposes only and<br />
should never be used for cooking.<br />
• All gas connections should be checked for leaks utilizing<br />
a soap solution. Never use a flame for gas leak<br />
checks.<br />
1
SPECIFICATIONS<br />
22”<br />
STEP #1<br />
HOW TO ASSEMBLE<br />
STEP #4<br />
STEP #2<br />
36”<br />
STEP #5<br />
STEP #3<br />
13.9”<br />
MODEL NO.<br />
<strong>KPH120</strong><br />
RATING<br />
11,000 BTU/hr<br />
GAS<br />
PROPANE<br />
MIN INLET SUPPLY<br />
PRESSURE<br />
11” WC<br />
MANIFOLD PRESSURE 10.7” WC<br />
SIZE 21.8” x 36”<br />
WEIGHT<br />
7.5 lbs. (3.4 kg)<br />
SELF CONTAINED PROPANE (LP)<br />
GAS SYSTEM :<br />
The self contained gas system for this mini patio heater is designed to be used with a 16.4 oz. Propane gas<br />
cylinder (disposable). Gas cylinder must be constructed and marked in accordance with specifications <strong>of</strong> the<br />
U.S. Department <strong>of</strong> Transportation for Propane Gas Cylinders.<br />
➺ NEVER REFILL DISPOSABLE CYLINDERS.<br />
2
CYLINDER ATTACHMENT TO<br />
HEATER :<br />
• Turn gas control knob clockwise to “ OFF”<br />
CYLINDER REMOVAL :<br />
• Lift and rotate propane cylinder as shown in Fig. 6.<br />
Disconnect cylinder by turning it counter clockwise.<br />
• Remove base assembly door as show in Fig. 1.<br />
Lift and rotate gas pressure regulator outwards<br />
as show in Fig. 2.<br />
Fig. 5 Fig. 6<br />
Fig. 1<br />
LOCATION – FOR OUTDOOR USE ONLY:<br />
• This outdoor patio heater is designed primarily for<br />
temporary heating <strong>of</strong> outdoor areas such as patios, spas,<br />
work areas and outdoor construction sites.<br />
• The installation <strong>of</strong> your patio heater must conform with<br />
local codes or, in the absence <strong>of</strong> local codes, with the<br />
latest edition <strong>of</strong> National Fuel Code ANSI Z223.1. In<br />
Canada, installation must conform to the current<br />
CAN1-B149 INSTALLATION CODE.<br />
• The minimum clearances to combustible materials<br />
(shown below) must be maintained at all times.<br />
Fig. 2<br />
• Attach cylinder to regulator inlet fitting by turning<br />
cylinder clockwise as shown in Fig. 3. Push and rotate<br />
gas cylinder downwards as shown in Fig. 4, till it is<br />
vertically centered in the base assembly as shown in<br />
Fig. 5.<br />
CEILING/OVERHANG<br />
10”<br />
30”<br />
12”<br />
Fig. 3 Fig. 4<br />
LIGHTING INSTRUCTIONS :<br />
1. Turn gas control knob clockwise to “ OFF” position.<br />
2. Remove base assembly door.<br />
3. Connect propane (disposable) cylinder to regulator inlet.<br />
4. Push in and turn gas control knob counter clockwise<br />
to “ IGN/ON” until you hear the igniter click.<br />
Pilot should light. This will light the burner. If needed,<br />
keep pressing and turning the control knob counterclockwise<br />
until the burner lights.<br />
3
5. Keep the control knob depressed for at least 30<br />
seconds after lighting burner. After 30 seconds release<br />
control knob.<br />
6. If burner does not stay lit, repeat steps 4 & 5.<br />
7. When burner is lit, turn gas control knob counterclockwise<br />
to desired setting.<br />
8. Replace base assembly door.<br />
RELIGHTING :<br />
a) Turn gas control knob clockwise to” OFF “ position.<br />
b) Wait 5 minutes before attempting to relight burner.<br />
c) Repeat sets 4 & 5.<br />
SHUTDOWN INSTRUCTIONS :<br />
1. Turn gas control knob clockwise to “ OFF “ position.<br />
2. Remove base assembly door.<br />
3. Disconnect propane cylinder and replace base assembly<br />
door.<br />
NOTICE : White smoke may appear around the emitter<br />
screen during the first few minutes <strong>of</strong> the initial use. This<br />
is not a defect and will go away shortly.<br />
STORAGE :<br />
Never store a propane gas cylinder inside a building or in<br />
the vicinity <strong>of</strong> any gas or oil burning appliance. Cylinder<br />
must be disconnected and removed from the heater base<br />
assembly and stored outdoors in a well ventilated area out<br />
<strong>of</strong> reach <strong>of</strong> children, in accordance with the standard for<br />
the storage and handling <strong>of</strong> liquefied gasses ANSI/NFPA<br />
58-latest edition. The plastic cap supplied with propane<br />
cylinder must be tightly installed when the cylinder is disconnected<br />
from the heater.<br />
SAFETY :<br />
BEWARE<br />
OF SPIDERS!<br />
CAUTION : BURNER TUBES MUST<br />
BE INSPECTED & CLEANED BEFORE<br />
FIRSTUSE.<br />
Spiders and small insects occasionally spin webs or make nests in<br />
the burner tubes and/or orifices during warehousing and transit.<br />
These webs or nests can lead to a gas flow obstruction, which<br />
could result in a fire in and around the burner tubes. This type <strong>of</strong><br />
fire is known as FLASH BACK and can cause serious damage to<br />
your patio heater and create an unsafe operating condition for the<br />
user. Although an obstructed burner tube is not the only cause <strong>of</strong><br />
FLASH BACK, it is the most common cause, and frequent<br />
inspections and cleaning <strong>of</strong> the burner tubes is necessary.<br />
The manufacturer recommends annual inspection and<br />
cleaning <strong>of</strong> the combustion and ventilation air passageways<br />
<strong>of</strong> the heater, burner, burner venturi and main burner<br />
orifice at least once a year or immediately upon indication<br />
<strong>of</strong> any <strong>of</strong> the following symptoms:<br />
• Flash back<br />
• Smell <strong>of</strong> aldehyde together with yellowish flames<br />
• Excessive popping noise<br />
• Diminished and uneven emitter glow<br />
The stainless steel emitter screen normally does not<br />
require cleaning and should NEVER be painted. The<br />
reflector may be cleaned, but never painted. Other painted<br />
portions (post, base assembly) <strong>of</strong> the heater may be<br />
recoated only with high temperature (1200˚F) paint.<br />
NOTE : Installation <strong>of</strong> optional 20 lb. cylinders<br />
and any repairs should be done by a qualified service<br />
person.<br />
MAIN BURNER REMOVAL &<br />
INSTALLATION PROCEDURE :<br />
NOTE : HEATER SURFACE TEMPERATURE MUST<br />
BE COLD BEFORE INITIATING BURNER<br />
REMOVAL.<br />
4
BURNER A S S E M B LY R E M O VA L :<br />
• Remove reflector and emitter screen as an assembly by<br />
removing the screws that fasten the emitter screen to the<br />
emitter support pan.<br />
• Remove base assembly door. Disconnect the gas supply<br />
line and thermocouple wire from the gas control valve.<br />
• Remove two screws which hold the burner bracket and<br />
disconnect ignition wire from the electrode and remove<br />
the main burner assembly.<br />
Emitter Assembly<br />
Mounting Screws<br />
Post<br />
Burner Assembly<br />
Burner Bracket<br />
Gas Control<br />
Cylinder Enclosure<br />
h<br />
Any spider webs, nests or debris can be cleaned with a<br />
straight piece <strong>of</strong> wire and wire brush.<br />
You may use a vacuum cleaner. Never use wood or plastic<br />
toothpicks to clear ports or other openings, because<br />
wood and plastic can break and block the ports.<br />
BURNER ASSEMBLY INSTALLATION :<br />
Install the burner assembly by reversing the aforementioned<br />
burner assembly removal. Upon completion <strong>of</strong><br />
burner assembly installation, make sure it is in the center<br />
<strong>of</strong> the emitter support pan. Now install and secure the<br />
emitter and reflector assembly.<br />
After reassembly, check the burner gas connection for<br />
leaks and then test fire heater. Observe the main burner<br />
flame pattern. It should appear as shown in the following<br />
figure and the flame color should be blue with slight yellow<br />
tipping. If flames extend more than 1/2 inch beyond<br />
surface <strong>of</strong> the emitter screen or black soot is accumulating<br />
on the emitter screen, the heater should be turned <strong>of</strong>f<br />
immediately. The heater should not be operated again<br />
until repairs are made by a qualified service person.<br />
2”<br />
1”<br />
0”<br />
TEST FIRING HEATER :<br />
Test fire your patio heater, following the lighting instructions<br />
applicable to the gas control system employed.<br />
Leak test all gas connections with soap solution. Soap<br />
bubbles indicate gas leakage. DO NOT use a match or<br />
flame to test for gas leaks.<br />
Alternate Propane System : Could be connected to a<br />
20 lb. Propane (LP) gas cylinder, providing the gas<br />
system is installed by a qualified service person. Gas<br />
cylinder must be constructed and marked in accordance<br />
with specifications <strong>of</strong> the U.S. Department <strong>of</strong><br />
Transportation for Propane Gas Cylinders and must also<br />
be equipped with the following :<br />
• A collar to protect the propane gas valve.<br />
• A shut<strong>of</strong>f valve terminating a propane gas cylinder<br />
valve outlet QCV-Type 1.<br />
• A safety relief valve having direct contact with the<br />
vapor space <strong>of</strong> the tank.<br />
• An arrangement <strong>of</strong> vapor withdrawal.<br />
• An approved hose and adapter must be used without<br />
alteration.<br />
• Turn heater gas control knob and gas cylinder valve to<br />
“ OFF” position.<br />
• Propane cylinder equipped with the new style QCV<br />
valve is equipped with right handed threads.<br />
• Propane cylinders have a bleed-<strong>of</strong>f valve. This valve<br />
should be inspected for leaks after each filling <strong>of</strong> the<br />
cylinder. Turn clockwise to reseal.<br />
• Fasten full propane cylinder to a table beneath the patio<br />
heater and connect an approved hose and adapter<br />
assembly to cylinder valve and heater regulator inlet<br />
fitting by turning clockwise.<br />
With heater gas valve still in the “OFF” position, turn ON<br />
tank valve and check for leaks with soap solution.<br />
A LP Cylinder enclosure, if provided by the consumer, must<br />
conform to the following:<br />
a. One side <strong>of</strong> the enclosure shall be completely open; or<br />
b. For enclosure having four sides, a top and a bottom, shall<br />
have at least two openings at cylinder valve level and two<br />
openings at floor level and not less than a total free area <strong>of</strong> 10<br />
square inches at valve level and floor level. Every opening<br />
shall have minimum dimensions so as to permit the entrance<br />
<strong>of</strong> a 1/8 inch diameter rod.<br />
c. Cylinder valves shall be readily accessible for hand<br />
operation. A door on the enclosure is acceptable.<br />
d. A minimum clearance <strong>of</strong> 2 inches between the lower surface<br />
<strong>of</strong> the floor <strong>of</strong> the Lp gas supply cylinder enclosure and the<br />
ground.<br />
e. Secure the gas cylinder with strap.<br />
5
TROUBLESHOOTING<br />
Problem<br />
Burner won’t light<br />
Possible Cause<br />
• Control knob not in IGN/ON position<br />
• Control knob not pressed in while<br />
in IGN/ON position<br />
• Air in the gas line<br />
• Low gas pressure<br />
• Burner orifice clogged<br />
• Blockage in gas line<br />
Ignitor did not spark:<br />
• Ignitor cable not connected to ignitor<br />
• Igniter electrode positioned wrong<br />
• Ignitor electrode broken<br />
• Ignitor wire pinched or broken<br />
What To Do<br />
• Turn control knob to IGN/ON position<br />
• Press in control knob while in IGN/ON<br />
position<br />
• Purge gas lines and repeat ignition<br />
operation.<br />
• Replace cylinder<br />
• Clean burner orifice<br />
• Service by a qualified service<br />
technician<br />
• Connect cable to ignitor<br />
• Correct electrode position<br />
• Replace electrode<br />
• Free ignitor cable, if damaged<br />
replace the assembly<br />
Burner won’t stay lit<br />
Emitter glow is uneven<br />
• Control knob not pressed in long<br />
enough<br />
• Burner flame not touching the<br />
thermocouple<br />
• Thermocouple damaged or<br />
connection loose at gas control<br />
• Bad gas valve<br />
• Corrosion <strong>of</strong> thermocouple contact<br />
• Bad thermocouple<br />
• Tilt switch in trip angle/OFF position<br />
• Heater not level<br />
• Burner tilted<br />
• After burner lights, keep control knob<br />
pressed in for 60 seconds<br />
• Clean pilot assembly<br />
• Tighten connection or replace<br />
thermocouple<br />
• Service by qualified service technician<br />
• Clean thermocouple contact<br />
• Service by qualified service technician<br />
• Reset tilt switch reset angle/On<br />
position by tilting heater<br />
• Level heater<br />
• Go to burner removal & installation<br />
procedure. Straighten burner<br />
Call 1-800-776-9425 for Technical Assistance<br />
6
PARTS LIST<br />
NO. DESCRIPTION PART NO. QTY.<br />
1 Reflector 2PHP001 1 EA<br />
2 Cap Nut 3 EA<br />
3 Flat Washer 6 EA<br />
4 Flat Washer 6 EA<br />
5 Hexa Nut 3 EA<br />
6 Hexa Bolt 3 EA<br />
7 Emitter Ass’y 2PHZ002 1 EA<br />
8 Burner Ass’y 2PHZ004 1 EA<br />
9 Thermocouple 3DSA002 1 EA<br />
9-1 Thermocouple Wire<br />
10 Venturi Ass’y 3PHZ005 1 EA<br />
11 Screw 3 EA<br />
12 Emitter Lower 3PHP002 1 EA<br />
12-1 Machine Screw M4X10 3 EA<br />
13 Guard Ass’y 1PHW001 2 EA<br />
14 Spark Plug 4D0023 1 EA<br />
14-1 Spark Plug Wire<br />
15 T/C Clip 4PHS001 1 EA<br />
16 Screw 3 EA<br />
17 Countersunk Head Screw 2 EA<br />
18 Screw 3 EA<br />
19 Post 3PHT016 1 EA<br />
20 Nozzle RCM02G 1 EA<br />
21 Nozzle Holder RCD01A 1 EA<br />
22 Stiker 1 EA<br />
23 Tubing Outlet Ass’y 3PHT008 1 EA<br />
24 Tubing Outlet Screw RCM08A 1 EA<br />
25 Screw 4 EA<br />
26 Base Upper 1PHI002 1 EA<br />
27 MPU Lead Wire 4PHH008 1 EA<br />
28 Valve DMV100P 1 EA<br />
29 Regulator Ass’y 3PHZ017 1 EA<br />
30 Supporter Pin 4PHM002 1 EA<br />
31 E-Ring 2 EA<br />
32 Spiral Ring 4PHS003A 1 EA<br />
33 Regulator Supporter 3PHP012A 1 EA<br />
34 Base OPHI001 1 EA<br />
35 Leg 4PHR005 3 EA<br />
36 Knob Ass’y 3PHZ015 1 EA<br />
37 Tapping Screw 2 EA<br />
38 Tip Over S/W 1 EA<br />
39 Connector Ass’y 3PHZ013 1 EA<br />
40 Base Door 2PHI006 1 EA<br />
7
LIMITED WARRANTY<br />
This limited warranty is extended to the original retail purchaser <strong>of</strong> this heater and warrants against any defect in materials and<br />
workmanship for a period <strong>of</strong> 1 year from the date <strong>of</strong> retail sale. <strong>World</strong> <strong>Marketing</strong> <strong>of</strong> <strong>America</strong>, <strong>Inc</strong>., at it’s option will either provide<br />
replacement parts, replace or repair the unit, when properly returned to us. (shipping costs, labor costs, etc. are the responsibility <strong>of</strong><br />
the purchaser)<br />
DUTIES OF THE OWNER:<br />
This heating appliance must be operated in accordance with the written instructions furnished with this heater. This warranty shall<br />
not excuse the owner from properly maintaining this heater in accordance with the written instructions furnished with this heater. A<br />
bill <strong>of</strong> sale, canceled check or payment record must be kept to verify purchase date and establish warranty period. Original carton<br />
should be kept in case <strong>of</strong> warranty return <strong>of</strong> unit.<br />
WHAT IS NOT COVERED:<br />
1. Damage resulting from use <strong>of</strong> improper fuel.<br />
2. Damage caused by misuse or use contrary to the owners manual and safety guidelines.<br />
3. Damaged caused by lack <strong>of</strong> normal maintenance.<br />
4. Use <strong>of</strong> non-standard parts or accessories.<br />
5. Damage caused in transit.<br />
Freight charges on warranty parts or heaters to and from the factory shall be responsibility <strong>of</strong> the owner.<br />
This warranty does not imply or assume any responsibility for consequential damages that may result from the use, misuse or the<br />
lack <strong>of</strong> routine maintenance <strong>of</strong> this heating appliance. A cleaning fee and the cost <strong>of</strong> parts may be charged for a appliance failures<br />
resulting from lack <strong>of</strong> maintenance. This warranty does not cover claims which do not involve defective workmanship or materials.<br />
THIS LIMITED WARRANTY IS GIVEN TO THE PURCHASER IN LIEU OF ALL OTHER WARRANTIES. EXPRESSED OR<br />
IMPLIED, INCLUDING BUT NOT LIMITED TO THE WARRANTIES OF MERCHANTABILITY OF FITNESS FOR A PARTIC-<br />
ULAR PURPOSE. THE REMEDY PROVIDED IN THIS WARRANTY IS EXCLUSIVE AND IS GRANTED IN LIEU OF ALL<br />
OTHER REMEDIES. IN NO EVENT WILL WORLD MARKETING OF AMERICA BE LIABLE FOR INCIDENTAL OR CON-<br />
SEQUENTIAL DAMAGES.<br />
Some states do not allow limitations on how long an implied warranty lasts, so the above limitation may not apply to you. Some<br />
states do not allow the exclusion or limitation <strong>of</strong> incidental or consequential damages <strong>of</strong> the above limitation or exclusion may not<br />
apply to you.<br />
CLAIMS HANDLED AS FOLLOWS:<br />
1. Contact us at 1-800-776-9425. Do not return the heater to place <strong>of</strong> purchase.<br />
2. Write or email our Warranty Dept., noting the heater model, the problem, copy <strong>of</strong> the sales receipt or date or purchase.<br />
Send letter to the attention <strong>of</strong> “Warranty Claims Administrator”.<br />
3. DO NOT RETURN THE HEATER TO WORLD MARKETING OF AMERICA, INC. unless instructed to do so by our<br />
Representative. This warranty gives you specific legal rights and you may also have other rights which vary from state to state.<br />
DO NOT RETURN THE HEATER TO PLACE OF PURCHASE.<br />
MODEL:<br />
DATE OF PURCHASE:<br />
PLACE OF PURCHASE:<br />
__________________________________<br />
__________________________________<br />
__________________________________<br />
Please complete and retain for your records.<br />
<strong>World</strong> <strong>Marketing</strong> <strong>of</strong> <strong>America</strong>, <strong>Inc</strong>.<br />
PO Box 192, Route 22 West, Mill Creek, PA 17060<br />
Phone: 1-800-776-9425<br />
Email: info@worldmkting.com<br />
8