EF6123R - World Marketing of America, Inc.
EF6123R - World Marketing of America, Inc.
EF6123R - World Marketing of America, Inc.

You also want an ePaper? Increase the reach of your titles
YUMPU automatically turns print PDFs into web optimized ePapers that Google loves.
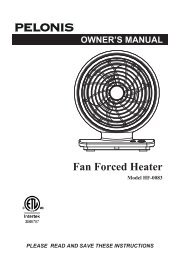
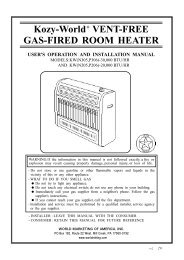
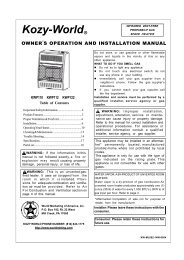
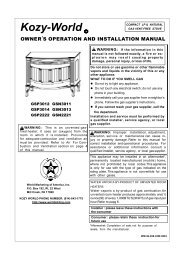
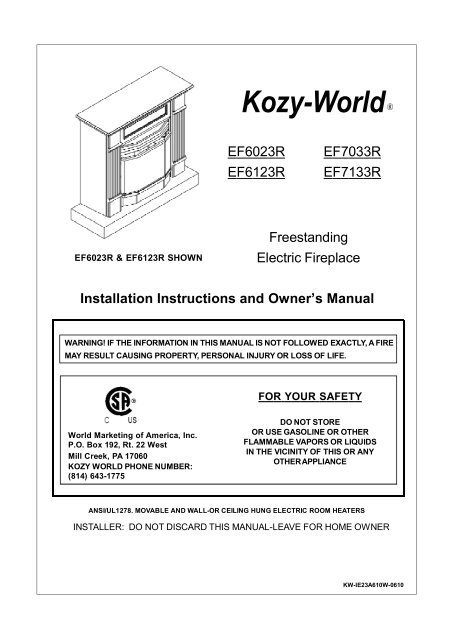
Kozy-<strong>World</strong> ®<br />
EF6023R<br />
<strong>EF6123R</strong><br />
EF7033R<br />
EF7133R<br />
EF6023R & <strong>EF6123R</strong> SHOWN<br />
Freestanding<br />
Electric Fireplace<br />
Installation Instructions and Owner’s Manual<br />
WARNING! IF THE INFORMATION IN THIS MANUAL IS NOT FOLLOWED EXACTLY, A FIRE<br />
MAY RESULT CAUSING PROPERTY, PERSONAL INJURY OR LOSS OF LIFE.<br />
FOR YOUR SAFETY<br />
<strong>World</strong> <strong>Marketing</strong> <strong>of</strong> <strong>America</strong>, <strong>Inc</strong>.<br />
P.O. Box 192, Rt. 22 West<br />
Mill Creek, PA 17060<br />
KOZY WORLD PHONE NUMBER:<br />
(814) 643-1775<br />
DO NOT STORE<br />
OR USE GASOLINE OR OTHER<br />
FLAMMABLE VAPORS OR LIQUIDS<br />
IN THE VICINITY OF THIS OR ANY<br />
OTHER APPLIANCE<br />
ANSI/UL1278. MOVABLE AND WALL-OR CEILING HUNG ELECTRIC ROOM HEATERS<br />
INSTALLER: DO NOT DISCARD THIS MANUAL-LEAVE FOR HOME OWNER<br />
1<br />
KW-IE23A610W-0610
TABLE OF CONTENTS<br />
PLEASE READ THE INSTALLATION & OPERATION INSTRUCTIONS<br />
BEFORE USING THIS APPLIANCE<br />
IMPORTANT: Read all instructions and warnings carefully before starting installation. Failure to follow<br />
these instructions may result in a possible electric shock, fire hazard and will void the warranty.<br />
Important Instructions ….…………………………………………………………....2<br />
Locating Your Electric Fireplace…………………………………….………….......3<br />
Clearance To Combustibles………………………………………….…………......3<br />
Electrical Connections…..……………………………………………….……….....3<br />
Electrical Specifications…………………………………………...……………......3<br />
Installing decorating logs..……………………………………………………........4<br />
Service Instructions…………………………………………………………….…......5<br />
Replacing Light Bulbs…………………………………….……………………........5<br />
Maintenance <strong>of</strong> Motors………………………………………...........…………….…5<br />
Glass Information……………………………………………...........………………..5<br />
Electrical Wiring Diagram……………………………………........………….......…6<br />
Operating Instructions………………………………………………………....…........7<br />
Specification........………………………………………………………………...........8<br />
Replacement Parts..……………………………………………………........9<br />
Replacement Parts List........................……………………………………………..10<br />
21
IMPORTANT INSTRUCTIONS<br />
When using electrical appliances, basic precautions<br />
should always be followed to reduce the risk <strong>of</strong> fire,<br />
electric shock, and injury to persons, including the<br />
following:<br />
1. Read all instructions before using this heater.<br />
2. This appliance is hot when in use. To avoid<br />
burns, do not come in contact with heater. Keep<br />
combustible materials, such as furniture,<br />
pillows, bedding, papers, clothes, and curtains<br />
at least 3 feet (1m.) from the front <strong>of</strong> the heater.<br />
3. Extreme caution is necessary when any heater<br />
is used by or near children or invalids and whenever<br />
the heater is left operating and unattended.<br />
4. Always unplug heater when not in use.<br />
5. Do not operate any heater with a damaged cord<br />
or plug or after the heater malfunctions, has<br />
been dropped or damaged in any manner.<br />
6. Any repairs to this appliance should be carried<br />
out by a qualified service person.<br />
7. Under no circumstances should this electric fireplace<br />
be modified. Parts having to be removed<br />
for servicing must be replaced prior to operating<br />
this electric fireplace again.<br />
8. Do not use outdoors.<br />
9. This heater is not intended for use in bathrooms,<br />
laundry areas or similar indoor locations. Never<br />
use this appliance near a bathtub or other water<br />
container.<br />
10. Do not run cord under carpeting. Do not cover<br />
cord with throw rugs, runners or similar<br />
coverings. Arrange cord away from traffic areas<br />
and where it will not be tripped over.<br />
11. To disconnect heater, turn controls to OFF, then<br />
remove plug from outlet.<br />
12. Connect to properly grounded outlets only.<br />
13. When this appliance is installed, it must be electrically<br />
grounded in accordance with local codes with<br />
the current CSA C22.1 Canadian local codes for<br />
USA installations. Follow local codes and National<br />
Electrical Code, ANSI/NFPA NO.70 and Canadian<br />
Cord: C 22.2 NO.0.<br />
14. Do not insert or allow foreign objects to enter any<br />
ventilation or exhaust opening as this may cause<br />
electric shock, fire or damage to the heater.<br />
15. To prevent a possible fire, do not block air intakes<br />
or exhaust in any manner. Do not use on s<strong>of</strong>t<br />
surfaces, such as a bed, where openings may<br />
become blocked.<br />
16. This heater gets hot and it contains internal parts<br />
that sparks and arcs. Do not use it in areas where<br />
gasoline, paint, or flammable liquids are used or<br />
stored.<br />
17. Use this heater only as described in this manual.<br />
Other uses not recommended by the manufacturer<br />
may cause fire, electric shock, or injury.<br />
18. Avoid the use <strong>of</strong> an extension cord because it may<br />
overheat and cause a risk <strong>of</strong> fire. However if you<br />
must use an extension cord, the cord shall be No.<br />
14AWG minimum size and rated not less than 1900<br />
watt. The extension cord must be a three wire cord<br />
with grounding type plug and cord connector.<br />
19. This electric fireplace heater should not be used<br />
as a drying rack for clothing. Also, do not hang<br />
Christmas stockings or decorations on or near it.<br />
20.SAVE THESE INSTRUCTIONS.<br />
32
LOCATING YOUR ELECTRIC FIREPLACE<br />
Your new freestanding electric fireplace may be installed virtually<br />
anywhere in your home. However when choosing a<br />
location for your new electric fireplace, ensure that the general<br />
instructions are followed. For best effect results, install<br />
the electric fireplace out <strong>of</strong> direct sunlight.<br />
CLEARANCE TO COMBUSTIBLES<br />
Sides....................................0 mm 0 inches<br />
Floor.....................................0 mm 0 inches<br />
Top........................................0 mm 0 inches<br />
ELECTRICAL CONNECTION<br />
A 15 AMP, 120 Volt, 60Hz circuit with a properly grounded outlet<br />
is required. Preferably, the fireplace will be on a dedicated<br />
circuit. Other appliances on the same circuit may cause the<br />
circuit breaker to trip or the fuse to blow when the heater is on<br />
operation. The unit comes standard with a 6’ (1828mm) long<br />
three wire cord exiting from the rear <strong>of</strong> the fireplace. Plan the<br />
installation to avoid the use <strong>of</strong> an extension cord. If an extension<br />
cord must be used, it must be a minimum 14 AWG three<br />
wire with grounding type plug connector and rated no less<br />
than 1900 Watts. The cord shall not be more than 20 feet in<br />
length.<br />
WARNING: Electrical outlet wiring<br />
must comply with local building<br />
codes and all other applicable<br />
regulations to reduce the<br />
risk <strong>of</strong> fire, electrical shock and<br />
injury.<br />
WARNING: Do not use this fireplace<br />
if any part <strong>of</strong> it has been<br />
under water. Immediately call a<br />
qualified service technician to<br />
inspect the fireplace and replace<br />
any part <strong>of</strong> the electrical<br />
system if necessary.<br />
ELECTRICAL SPECIFICATIONS<br />
Voltage:<br />
120 VAC, 60 Hz<br />
Total Amps:<br />
11.5 Amps<br />
Total Watts:<br />
1380 Watts<br />
Heater Rating:<br />
1200 Watts<br />
(Adaptor NOT permitted in Canada)<br />
Under C22.2 NO. 0 standard<br />
43
Installing decorating logs<br />
Installing logs for EF6023R & <strong>EF6123R</strong>:<br />
Installing logs for EF7033R & EF7133R:<br />
1 2 3<br />
1 2 3<br />
FIG 1 - Logs for EF6023R & <strong>EF6123R</strong><br />
1<br />
4 5 6<br />
FIG 5 - Logs for EF7033R & EF7133R:<br />
1 2 3<br />
FIG 2<br />
1.Insert the two pins on log 1 to the two recessed<br />
holes at the middle <strong>of</strong> grate. (See FIG 2).<br />
2<br />
1<br />
FIG 6<br />
1.Place log 1, log 2 and log 3 into the corresponding<br />
holes on grate. (See FIG 6).<br />
4 1 2 3<br />
FIG 3<br />
2.Insert the pin on one end <strong>of</strong> log 2 to the recessed<br />
hole on log 1, with the other end <strong>of</strong> log 2 placed<br />
on the ember bed (where marked). (See FIG 3).<br />
2 1 3<br />
FIG 7<br />
2.Insert the pin on one end <strong>of</strong> log 4 to the recessed<br />
hole on log 1, with the other end <strong>of</strong> log 4 placed<br />
where marked. (See FIG 7).<br />
4 1 2 5 3<br />
3.Place one end <strong>of</strong> log 3 onto the hole on grate,<br />
with the other end placed on log 1 (where marked).<br />
(See FIG 4).<br />
FIG 4<br />
FIG 8<br />
3.Insert the pin on one end <strong>of</strong> log 5 to the recessed<br />
hole on log 2, with the other end <strong>of</strong> log 5 placed<br />
where marked. (See FIG 8).<br />
6 4 1 2 5 3<br />
FIG 9<br />
4.Insert the pin on log 6 to the recessed hole on<br />
log 4, and place log 6 as figure shows. (See FIG 9).<br />
45
MAINTENANCE OF MOTORS<br />
The motors used on the fan and flame generator<br />
assembly are prelubricated for extended<br />
bearing life and require no further lubrication.<br />
However, periodic cleaning/vacuuming <strong>of</strong> the<br />
fan/heater unit is recommended.<br />
WARNING: Make sure that the<br />
power is turned <strong>of</strong>f before<br />
proceeding.<br />
GLASS INFORMATION<br />
1. Under no circumstances should this product be<br />
operated with missing or broken glass.<br />
2. Do not strike or slam the glass.<br />
3. Do not use abrasive cleaners to clean the glass.<br />
4. Replacement glass is available from the manufacturer<br />
and replacement should be carried out<br />
by a qualified service person.<br />
SERVICE INSTRUCTIONS<br />
WARNING: Disconnect power before<br />
attempting any maintenance or<br />
cleaning to reduce the risk <strong>of</strong> fire,<br />
electrical shock or personal injury.<br />
REPLACING LIGHT BULBS<br />
This fireplace uses four clear 120 Volt, 60 Watt, E-<br />
12 socket base light bulbs (small base, chandelier<br />
candle type). The 60 Watt bulbs are located under<br />
the log set/ember bed. For convenience, if one <strong>of</strong><br />
the bulbs burns out, it may be a good idea to replace<br />
all <strong>of</strong> the light bulbs.<br />
1. Turn <strong>of</strong>f power to the unit by unplugging the power cord.<br />
2. Let fireplace cool if it has been operating.<br />
3. Remove the two screws on the top corner <strong>of</strong> screen. Pull<br />
the screen upward slightly, and then pull out.<br />
4. Remove the four screws that secure the log set/ember<br />
bed in position.<br />
5. Remove log set / ember bed and grate assembly.<br />
6. Examine the bulb(s) to determine which bulbs need<br />
to be replaced.<br />
7. While holding the socket, unscrew defective bulb(s)<br />
counterclockwise.<br />
8. Install the new light bulb(s) by holding the socket and<br />
screwing clockwise.<br />
9. Reinstall the log set/ember bed, grate assembly and<br />
screen. Follow the above procedure in reverse order.<br />
WARNING: Do not exceed 60 Watts<br />
per bulb. The use <strong>of</strong> higher rated<br />
bulbs may result in a fire causing<br />
property damage and personal<br />
injury.<br />
56
ELECTRICAL WIRING DIAGRAM<br />
Any electrical repairs or rewiring <strong>of</strong> this unit should be carried out by a licensed electrician in accordance<br />
with national and local codes.<br />
If repairing or replacing any electrical component or wiring, the original<br />
wire routing, color coding and securing location must be followed.<br />
7 6
Operating Instructions<br />
Before programming your transmitter you must<br />
first insert two “AAA” batteries.<br />
Make sure the main power on/<strong>of</strong>f switch is “ON”<br />
position.<br />
1. The ON/OFF button:<br />
*Note: When Fireplace is first operated,<br />
the default setting will be: brightest<br />
flame, and full heating To turn on Heater,<br />
press the “ON/OFF” button. Heaters will<br />
be at the last settings before shutting<br />
down. To turn <strong>of</strong>f heater, press the “ON/<br />
OFF” button again.<br />
Heater Front View<br />
2. Flame brightness setting:<br />
There are six settings for flame<br />
brightness: “1”,“2”,“3”,“4”,“5” and “6<br />
(OFF)”. Press button to decrease<br />
the flame brightness, and button to<br />
increase the flame brightness.<br />
3. Heating level setting:<br />
There are four settings for heating level:<br />
“HI”, “MID”, “LOW”, and “OFF”. Press<br />
button to decrease the Heating level<br />
and button to increase the Heating<br />
level. If set on “HI”, the set room temperature<br />
will be approximately 90°F; set<br />
on “MID”, the set room temperature will<br />
be approximately 80°F; set on “LOW”,<br />
the set room temperature will be<br />
approximately 70°F.<br />
Remote Control Front<br />
Remote Control Back<br />
Manual Operation (without handheld remote)<br />
Press “ON/OFF” button to turn on or <strong>of</strong>f the fireplace.<br />
Press “HEAT Adjust” button to control heater.<br />
Press “FLAME ” button to control the Flame brightness.<br />
7 8
SPECIFICATIONS:<br />
Model: SFE23RE series<br />
Voltage: 120V/60HZ Total Amps: 11.5A<br />
Total Watts: 1380W Heating Ratings: 1200W<br />
Dimensions, <strong>Inc</strong>hes (H x W X D)<br />
Fireplace 38x39 1/2x15 5/8<br />
Carton 42 1/2x41 3/8x17 5/16<br />
Weight, Pounds<br />
Fireplace 132<br />
Shipping 143<br />
Model: SFE33RE series<br />
Voltage: 120V/60HZ Total Amps: 11.5A<br />
Total Watts: 1380W Heating Ratings: 1200W<br />
Dimensions, <strong>Inc</strong>hes (H x W X D)<br />
Fireplace 43 1/2 x 52 3/4 x 16 15/16<br />
Carton 45 x 56 x19<br />
Weight, Pounds<br />
Fireplace 210<br />
Shipping 230<br />
9 8
Replacement Parts<br />
11<br />
13<br />
12<br />
10<br />
14<br />
9<br />
15 16 17<br />
15 16 17<br />
18 19 20<br />
(Logs for SIE33RE)<br />
(Logs for SIE23RE)<br />
10 9
Replacement Parts List<br />
SIE23RE Series<br />
SIE33RE Series<br />
Item<br />
Part Description<br />
SIE23RE<br />
Part Number<br />
SIE33RE<br />
1 Log Set FE23A400 FE33A400<br />
2 Control Box ECRMA1 ECRMA1<br />
3 Receiver ECRRA1 ECRRA1<br />
4 Fan Heater Assembly<br />
NFHTX186 /<br />
VB17-000G<br />
NFHTX186/V-<br />
B17-000G<br />
5 AC Motor FE23A304 FE23A304<br />
6 Power Cord w/Terminal NFHL008-A NFHL008-A<br />
7<br />
Light Bulb Socket<br />
w/W iring Assembly<br />
FE23A306<br />
FE23A306<br />
8 Over Current Protector FE23A305 FE23A305<br />
9<br />
Ember bed generator<br />
Assy<br />
FE23A207<br />
FE33A207<br />
10 Light Bulb VL055-01 VL055-01<br />
11<br />
12<br />
13<br />
14<br />
15<br />
16<br />
17<br />
18<br />
19<br />
20<br />
Remote Control ECRTA1 ECRTA1<br />
Mantel Assy FE23A500-X* FE33A500-X*<br />
Louver ASSY FE23A109-A FE33109-A<br />
Viewing Door FE23A130-W FE33A130-W<br />
Log 1 FE23A403 FE33A403<br />
Log 2 FE23A404 FE33A404<br />
Log 3 FE23A405 FE33A405<br />
Log 4<br />
Log 5<br />
Log 6<br />
FE33A406<br />
FE33A407<br />
FE33A408<br />
1110