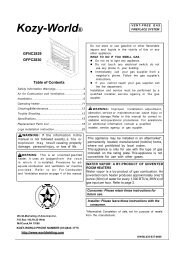
Freestanding Electric Fireplace - World Marketing of America, Inc.
Freestanding Electric Fireplace - World Marketing of America, Inc.
Freestanding Electric Fireplace - World Marketing of America, Inc.

You also want an ePaper? Increase the reach of your titles
YUMPU automatically turns print PDFs into web optimized ePapers that Google loves.
Las LIMITACIONES:<br />
Esta garantía no implica ni asume responsabilidad para daños consecuentes que pueden resultar del uso, del<br />
maltrato, o de la falta de mantenimiento rutinario de este aparato de la calefacción. Un honorario de limpieza<br />
y el costo de partes pueden ser cargados para fracasos de aparato que resultan de la falta de mantenimiento.<br />
Esta garantía no cubre reclamos, que no implican habilidad ni materiales defectuosos. El INCUMPLIMIENTO<br />
MANTENIMIENTO GENERAL (INCLUSIVE LIMPIEZA) VACIARA ESTA GARANTIA.<br />
ESTA GARANTIA LIMITADA ES DADA AL COMPRADOR EN VEZ DE TODAS LAS OTRAS GARANTIAS, EXPRESADO O<br />
IMPLICITO, INCLUSIVE PERO no LIMITADO A LAS GARANTIAS DE COMERCIALIZACION DE la SALUD PARA UN<br />
PROPOSITO PARTICULAR. EL REMEDIO PROPORCIONADO EN ESTA GARANTIA ES EXCLUSIVO Y GRANT EN VEZ<br />
DE TODOS LOS OTROS REMEDIOS. EN ningún ACONTECIMIENTO HACE MARKETING de MUNDO DE AMERICA<br />
ES RESPONSABLE DE el CASUAL O DAÑOS CONSECUENTES.<br />
Algunos estados no permiten limitaciones en cuánto tiempo una garantía implícita dura, así que la limitación<br />
antes mencionada no le puede aplicar. Algunos estados no permiten la exclusión ni la limitación de daños<br />
casuales ni consecuentes tan que la limitación ni exclusión antes mencionadas no le pueden aplicar.<br />
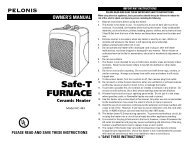
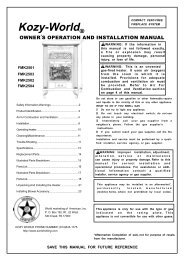
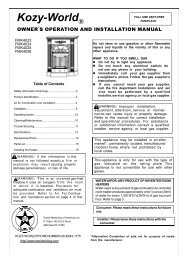
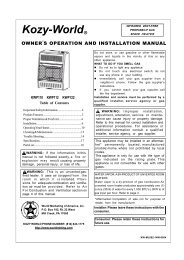
<strong>Freestanding</strong><br />
<strong>Electric</strong> <strong>Fireplace</strong><br />
EF5701<br />
ES5411<br />
EF4534KD<br />
Installation Instructions and Homeowner's Manual<br />
WARNING! IF THE INFORMATION IN THIS MANUAL IS NOT FOLLOWED EXACTLY, A FIRE<br />
MAY RESULT CAUSING PROPERTY DAMAGE, PERSONAL INJURY OR LOSS OF LIFE.<br />
Para su registro, cosa con una grapa su recibo de ventas a este manual y registra lo Siguiente:<br />
La FECHA DE la COMPRA:<br />
Made in China<br />
Comfort Home Products, <strong>Inc</strong>.<br />
12256 William Penn Hwy, Ste A<br />
Huntingdon, PA 16652<br />
FOR YOUR SAFETY<br />
DO NOT STORE<br />
OR USE GASOLINE OR<br />
OTHER FLAMMABLE VAPORS<br />
OR LIQUIDS<br />
IN THE VICINITY OF THIS OR<br />
ANY OTHER APPLIANCE<br />
El LUGAR DE la COMPRA:<br />
El NUMERO DE SERIE:<br />
COMFORT GLOW PHONE NUMBER: (814) 643‐1775<br />
http://www.worldmkting.com<br />
ANSI/UL 1278. MOVABLE AND WALL‐OR CEILING HUNG ELECTRIC ROOM HEATERS<br />
DO NOT DISCARD THIS MANUAL ‐ LEAVE FOR HOME OWNER<br />
CUSTOMER: PLEASE RETAIN THIS MANUAL FOR FUTURE USE<br />
Impreso en China<br />
~ 32 ~<br />
~ 1 ~
TABLE OF CONTENTS<br />
PLEASE READ THE INSTALLATION & OPERATIONS INSTRUCTIONS<br />
BEFORE USING THIS APPLIANCE<br />
IMPORTANT: Read all instructions and warnings carefully before starting installation.<br />
Failure to follow these instructions may result in a possible electric shock, fire hazard<br />
and will void the warranty.<br />
Table <strong>of</strong> Contents___________________________________________________________________ _2<br />
Specifications 3<br />
Important Safety Instructions___________________________________________________________4<br />
Power Instructions__________________________________________________________________ _5<br />
Heater Operation___________________________________________________________________ _6<br />
Service, Maintenance_____________________________________________________________ 7‐8<br />
EF4534KD Assembly Instructions________________________________________________ ___ _9‐12<br />
Replacement Parts_________________________________________ ___________________ __13<br />
Warranty Guidelines __________________________________________________ 14‐16<br />
GARANTIA ELECTRICA PORTATIL de CALENTADORA<br />
La GARANTIA LIMITADA:<br />
Una garantía limitada es extendida al comprador original de esta calentadora y autorizaciones contra falla debido a<br />
defectos industriales por un período de<br />
(1) un año de la fecha de la compra de la venta al por menor. Lea por favor y siga todos los detalles notados abajo.<br />
Los RECLAMOS MANEJARON DE LA SIGUIENTE MANERA:<br />
‐ No REGRESA a COLOCAR DE la COMPRA<br />
‐ Contacta nuestro Departamento de Servicio de Costomer en 1‐800‐776‐9425. Debe tener el número modelo, el<br />
número de serie y la fecha de la compra.<br />
‐Le proporcionarán con instuctions adicional, que puede repuestos de incluse, la reparación o el reemplazo en<br />
nuestra opción.<br />
LLAME 1‐800‐776‐9425 PARA el SERVICIO (9AM‐6PM Lunes‐Viernes)<br />
PEMAIL EEUU EN info@worldmkting.com<br />
Los DEBERES DEL PROPIETARIO:<br />
Este aparato de la calefacción debe ser operado de acuerdo con las instrucciones escritos amuebladas con esta<br />
calentadora. Esta garantía no dispensará al propietario de mantener apropiadamente esta calentadora de acuerdo con<br />
las instrucciones escritos amueblados con esta calentadora. Una escritura de venta, registro de cheque pagado o pago<br />
debe ser mantenido para verificar la compra la fecha y establecer el período de garantía. El cartón original debe ser<br />
mantenido en caso del regreso de garantía de la unidad.<br />
LO QUE no ES CUBIERTO:<br />
1. El daño causado por maltrato o utiliza al contrario del manual de propietarios y pautas de seguridad.<br />
2. El daño causado por una falta de mantenimiento normal.<br />
3. Repare por una persona no autorizada.<br />
4. El daño causado por conexión a un voltaje impropio.<br />
5. Dañado causado por el uso fuera.<br />
~ 2 ~<br />
~ 31 ~
SIEMPRE OBSERVE que ESTAS MEDIDAS DE SEGURIDAD AL OPERAR SU CALENTADORA ELECTRICA<br />
SPECIFICATIONS<br />
Siempre<br />
Siempre<br />
Siempre<br />
Siempre<br />
Siempre<br />
Siempre<br />
Siempre<br />
Lea todas las instrucciones antes de operar.<br />
Sitúe su calentadora eléctrica lejos de muebles o afloje cortinas colgantes.<br />
Mantenga la parrilla trasera lejos de paredes o cortinas por no bloquear la toma de aire. (Si aplicable)<br />
Desenchufe calentadora eléctrica cuando no en uso.<br />
Utilice calentadora eléctrica en una superficie seca plana.<br />
Utilice en 110‐120 voltio 60 alimentación de Hz C.A.<br />
Dirija la cuerda tan no será pisado tropezado sobre ni<br />
pellizcado por muebles.<br />
Model: EF5701<br />
Voltage: 120V/60Hz<br />
Total Amps: 10.4A<br />
Total Watts: 1250W<br />
Heating Ratings: 1150W<br />
(+5%, ‐10%)<br />
Dimensions, <strong>Inc</strong>hes (H x W x D):<br />
<strong>Fireplace</strong>: 23.6 x 25.07 x 12.04<br />
Carton: 25.79 x 27.95 x 15.35<br />
CLEARANCE TO COMBUSTIBLES:<br />
Back...................0"/0mm<br />
Sides..................0"/0mm<br />
Floor...................0"/0mm<br />
Top.....................24"/610mm<br />
Front..................36”/915mm<br />
Siempre<br />
Siempre<br />
Siempre<br />
Nunca<br />
Mantenga cuerdas eléctricas, las cortinas y otro mobiliario lejos de su calentadora eléctrica.<br />
Mantenga su calentadora eléctrica limpia y el filtro libre de polvo. (Si aplicable)<br />
Utilice dentro sólo.<br />
Las cortinas del lugar, la ropa o las toallas sobre calentadora eléctrica secar.<br />
Model: EF5411<br />
Voltage: 120V/60Hz<br />
Total Amps: 10.4A<br />
Total Watts: 1250W<br />
Heating Ratings: 1150W<br />
(+5%, ‐10%)<br />
CLEARANCE TO COMBUSTIBLES:<br />
Back...................0"/0mm<br />
Sides..................0"/0mm<br />
Floor...................0"/0mm<br />
Top.....................24"/610mm<br />
Front..................36”/915mm<br />
Nunca<br />
Nunca<br />
Uso en la presencia de explosivo ni vapores flamables como gas ni pinta.<br />
Tape otro electrodoméstico en el mismo circuito. Los fusibles soplados, peligros tropezados de circuitos<br />
y fuego pueden resultar.<br />
Dimensions, <strong>Inc</strong>hes (H x W x D):<br />
<strong>Fireplace</strong>: 29.52 x 29.7 x 10.23<br />
Carton: 33.86 x 33.86 x 13.38<br />
Nunca<br />
El agua del uso o líquidos para limpiar su calentadora eléctrica.<br />
Nunca<br />
Permita toque descubierto de piel superficies calientes como esto puede causar quemaduras.<br />
Nunca<br />
Deje calentadora eléctrica desatendida.<br />
Model: EF4534KD<br />
CLEARANCE TO COMBUSTIBLES:<br />
Nunca<br />
Nunca<br />
Nunca<br />
Nunca<br />
Deje calentadora eléctrica cuando niños o animales favoritos sean presentes.<br />
Sitúe calentadora eléctrica donde puede caerse en una tina de baño u otros contenedores de agua.<br />
Opere calentadora eléctrica con una cuerda dañada, el tapón o después de que la calentadora falle, o<br />
haya sido dejada caer o Ha Sido Dañada en cualquier.<br />
Corra cuerda bajo alfombrar ni cobertura con tapetes de tiro ni corredores.<br />
Voltage: 120V/60Hz<br />
Total Amps: 10.4A<br />
Total Watts: 1250W<br />
Heating Ratings: 1150W<br />
(+5%, ‐10%)<br />
Dimensions, <strong>Inc</strong>hes (H x W x D):<br />
<strong>Fireplace</strong>: 26.37 x 27.95 x 8.26<br />
Carton: 20.07 x 29.84 x 10.31<br />
Back...................0"/0mm<br />
Sides..................0"/0mm<br />
Floor...................0"/0mm<br />
Top.....................24"/610mm<br />
Front..................36”/915mm<br />
Nunca<br />
Inserte ni permita objetos extranjeros entrar cualquier ventilación ni agotar aperturas, como esto puede<br />
causar un golpe eléctrico, el fuego o el daño.<br />
Assembly Required<br />
~ 30 ~<br />
~ 3 ~
INTENDED USE: This product is intended only for indoor household or <strong>of</strong>fice use.<br />
It is NOT intended for industrial or commercial use. DO NOT USE OUTDOORS<br />
La lista de Partes<br />
IMPORTANT INSTRUCTIONS<br />
PLEASE READ AND SAVE THESE IMPORTANT SAFEFTY INSTRUCTIONS When using electrical appliances, basic<br />
precautions should always be followed to reduce the risk <strong>of</strong> fire, electrical shock, and injury to persons, including<br />
the following:<br />
1. Read all instructions before using this heater.<br />
2. This heater is hot when in use. To avoid burns, do not let bare skin touch hot surfaces. If provided, use handles<br />
when moving this heater. Keep combustible materials, such as furniture, pillows, bedding, papers, clothes and<br />
curtains at least 3 feet (0.9m) from the heater.<br />
3. Extreme caution is necessary when any heater is used by or near children, pets or invalids and whenever the<br />
heater is left operating unattended.<br />
4. Use your heater only in dry environments. This heater is not intended for use in bathrooms, laundry areas and<br />
similar indoor locations. Never locate the heater where it may fall into a bathtub or other water container. Do not<br />
use your heater outdoors. Do not use near sinks, swimming pools or other damp areas such as flooded basements,<br />
garages, etc or anyplace where the heater could come in contact with water.<br />
5. A heater has hot and arcing parts inside. Do not use in areas where gasoline, paint, or flammable liquids are<br />
used or stored.<br />
6. To disconnect heater, first turn controls to <strong>of</strong>f, then remove plug from outlet. Always unplug the heater when<br />
not in use.<br />
7. Always unplug heater by removing the plug end from the outlet when not in use. Never unplug by pulling on<br />
the cord as this can damage the power cord.<br />
8. Do not operate any heater with a damaged cord or plug or after the heater malfunctions, has been dropped or<br />
damaged in any manner. Return heater to authorized service facility for examination, electrical or mechanical<br />
adjustment or repair.<br />
9. Always plug heaters directly into a wall outlet/receptacle. Never use with an extension cord or relocatable<br />
power strip.<br />
10. Do not run cord under carpeting. Do not cover cord with throw rugs, runners, or similar coverings. Arrange<br />
cord away from traffic area and where it will not be tripped over.<br />
11. It is normal for the plug to feel warm to touch; however, a loose fit between the AC outlet (receptacle) and<br />
plug may cause overheating and distortion <strong>of</strong> the plug. Contact a qualified electrician to replace loose or worn<br />
outlet.<br />
12. Do not insert or allow foreign objects to enter any ventilation or exhaust opening as this may cause an<br />
electrical shock or fire, or damage the heater.<br />
13. To prevent a possible fire, do not block air intakes or exhaust in any manner. Do not use on s<strong>of</strong>t surfaces, like a<br />
bed, where openings may become blocked.<br />
14. Do not operate heater with any safeguards removed.<br />
15. Use this heater only as described in this manual. Any other use not recommended by the manufacturer may<br />
cause fire, electric shock, or injury to persons.<br />
16. This heater draws 12.5 amps during operation. To prevent overloading a circuit, do not plug the heater into a<br />
circuit that already has other appliances working.<br />
17. Do not use outdoors.<br />
ITEM DESCRIPTION OEM<br />
1 El Cable alimentación NDF‐62N/94<br />
2 Perilla de termostato NDF62N/62<br />
3 Asamblea de Logset NDF‐62N/25<br />
4 Interruptor de balancín NDF‐62N/31<br />
5 Llamee la Asamblea de Generador NDF‐62N/39,40,56,58,<br />
6 Interruptor de termostato NDF‐62N/63<br />
7 Bombilla NDF‐62N/32<br />
8 Enchufe de bombilla NDF‐62N/51<br />
9 Asamblea de fuelle NDF‐62N/17,18,68<br />
10 Asamblea de calentadora NDF‐62N/65,66<br />
~ 4 ~<br />
~ 29 ~
Paso 7:<br />
Ponga la adición en el lugar e instale la<br />
adición a la repisa de chimenea. Conecte la<br />
parte superior de la adición a la repisa de<br />
chimenea con 3 TORNILLOS (W). Conecte los<br />
CLIPS CRECIENTES en el fondo de la repisa<br />
de chimenea con 2 TORNILLOS (V). Vea<br />
Figura 7 y 8.<br />
Paso 8:<br />
Apriete todos los Tornillos de KD. Y ahora<br />
está listo para disfrutar de su chimenea<br />
siguiendo OPERAR INSTRUCCIONES &<br />
ADVERTENCIAS en este manual.<br />
Figura 7<br />
INSTRUCTIONS FOR POWER<br />
WARNING: Before servicing this heater be sure to unplug heater from wall outlet. Do<br />
not only turn <strong>of</strong>f heater from the main “ON/OFF” switch, be sure to unplug this heater.<br />
Note: The power cord has a polarized plug (with one blade wider than the other) that will only fit in a<br />
polarized outlet one way. If it does not insert easily try reversing the plug. If it still does not fit contact your<br />
electrician to replace your outlet. DO NOT defeat the safety purpose <strong>of</strong> the polarized plug.<br />
ELECTRICAL CONNECTION<br />
A 15 AMP, 120 Volt, 60Hz circuit<br />
with a properly grounded outlet is<br />
required. Preferably, the heater<br />
will be on a dedicated circuit.<br />
Other appliances on the same<br />
circuit may cause the circuit<br />
breaker to trip or the fuse to blow<br />
when the heater is in operation.<br />
The unit comes standard with a 6'<br />
(1828mm) long three wire cord<br />
exiting from the rear <strong>of</strong> the<br />
fireplace.<br />
WARNING: <strong>Electric</strong>al<br />
outlet wiring must comply with<br />
local building codes and all<br />
other applicable regulations to<br />
reduce the risk <strong>of</strong> fire, electrical<br />
shock and injury.<br />
WARNING: Do not use this<br />
fireplace if any part <strong>of</strong> it has been<br />
under water. Immediately call a<br />
qualified service technician to<br />
inspect the fireplace and replace<br />
any part <strong>of</strong> the electrical system if<br />
necessary.<br />
Figura 8<br />
~ 28 ~<br />
~ 5 ~
OPERATING INSTRUCTIONS<br />
Once the fireplace heater insert has been properly installed and connected to a ground electrical outlet, it is<br />
ready to operate. Note: ensure the circuit breakers for the power supply are turned on.<br />
The controls are located behind the grill below front glass and can be accessed by pulling the grill up from the top,<br />
forward and down.<br />
Paso 4:<br />
Conecte 2 Izquierdo & PANELS Correctos de<br />
FRENTE de LADO (C1 & C2) a los PANELES<br />
DELANTEROS (D, E & F) con 4 TORNILLOS de<br />
KD (U) (2 tornillos para cada lado por los<br />
conectores plásticos). Vea Figura 4.<br />
C1<br />
E<br />
D<br />
C2<br />
Figura 4<br />
Paso 5:<br />
D<br />
Ponga la asamblea terminada de repisa de<br />
chimenea en el PANEL de BASE (B) con 4<br />
TORNILLOS de KD (U). Vea Figura 5.<br />
C1<br />
E<br />
C2<br />
Lift front grill to access the switches.<br />
1. On/Off: Press this button for main power and flame effect. The indicator light will be on. See below for other<br />
control switches.<br />
B<br />
Figura 5<br />
2. Heat: For heat function ‐ Press this switch while the On/Off switch is in the ON position. The indicator light will be<br />
ON.<br />
3. Temperature Control: To adjust the temperature to your individual requirements, turn the temperature<br />
control dial to the right (clockwise) to increase the desired temperature and to the left for lower<br />
temperature. This temperature control dial can only be used while the On/Off switch and Heat switches<br />
are in the ON position.<br />
Note: When the On/Off switch is turned <strong>of</strong>f, all other heater functions will stop even though the switches<br />
may be in the on position.<br />
Paso 6:<br />
Instale el PRINCIPAL PANEL (UN) a la asamblea<br />
terminada con 4 KD SCEWS (U). Vea Figura 6.<br />
C1<br />
E<br />
A<br />
D<br />
C2<br />
B<br />
Figura 6<br />
~ 6 ~<br />
~ 27 ~
Paso 1:<br />
Conecte todos los CONECTORES<br />
PLASTICOS a los PANELES (C1, C2, D, E y F)<br />
como mostrado en la Figura 1. (2<br />
TORNILLOS de KD (U) para cada PLASTICO<br />
CONNECTORS(S).)<br />
C1<br />
E<br />
C2<br />
SERVICE AND MAINTENANCE<br />
Disconnect power and unplug the power cord before attempting any maintenance or cleaning to reduce the risk <strong>of</strong><br />
fire, electric shock or damage to persons. The bulbs in your unit can become extremely hot. Allow at least 15<br />
minutes between turning <strong>of</strong>f the unit and removing the light bulbs to avoid the accidental burning <strong>of</strong> skin.<br />
REPLACING THE LIGHT BULB<br />
Paso 2:<br />
Conecte los Pequeños Paneles de Frente (E<br />
& F) a la derecha & Dejó PANEL DELANTERO<br />
(G) con 4 TORNILLOS de KD (U) (2 tornillos<br />
para cada lado). Vea Figura 2.<br />
E<br />
Figura 1<br />
G<br />
Figura 2<br />
G<br />
F<br />
There is one 40‐watt light bulb located under the log‐set bed<br />
CAUTION: The bulbs in your unit can become extremely hot. Allow at<br />
least 15 minutes between turning <strong>of</strong>f the unit and removing the light<br />
bulbs to avoid hot bulbs coming in contact with the skin.<br />
1. Unplug the unit.<br />
2. Remove 12 screws on the cover located on the back <strong>of</strong> fireplace and then remove the rear cover <strong>of</strong> the<br />
unit. There are 2 larger screws and 10 smaller screws.<br />
3. Loosen and remove the burnt out bulb. Relace with new 40‐watt light bulb.<br />
4. Return acess panel and replace screws.<br />
5. Plug the unit in.<br />
Paso 3:<br />
D<br />
Conecte el Panel Delantero (D) a la<br />
derecha & Dejó Paneles de Frente encima<br />
de los paneles (E & F) utilizando 2<br />
TORNILLOS de KD (U). Vea Figura 3<br />
E<br />
F<br />
Figura 3<br />
WARNING: Do not exceed 40<br />
Watts for light bulb. Use <strong>of</strong> a<br />
higher rated bulb may result in a<br />
fire causing property damage and<br />
personal injury.<br />
~ 26 ~<br />
~ 7 ~
MAINTENANCE OF MOTORS<br />
The motors used on both blower fan and flame simulator assembly are prelubricated for the extended<br />
warranty <strong>of</strong> the motor, no further lubrication is required. However, periodic cleaning/vacuuming <strong>of</strong> the<br />
fan/heater unit is recommended.<br />
GLASS INFORMATION<br />
1. Under no circumstances should this product be operated with missing or broken glass.<br />
2. Do not strike or slam the glass.<br />
3. Do not use abrasive cleaners to clean the glass.<br />
WARNING: Make sure that<br />
the power is turned <strong>of</strong>f<br />
before proceeding.<br />
4. Replacement glass is available from the manufacturer and replacement should be carried out by a<br />
qualified service person.<br />
INSTRUCCIONES de ASAMBLEA<br />
EF4534KD<br />
La NOTA: Una calentadora eléctrica completa de la chimenea debe consistir en dos partes: la repisa de<br />
chimenea de madera y la calentadora de chimenea que cada empacó en un cartón separado. No es<br />
recomendado para utilizar la de chimenea sin la repisa de chimenea de madera. Desembale la calentadora de<br />
chimenea y repisa de chimenea. Quite todos los materiales que empacan.<br />
LA LISTA de PARTES: CANTIDAD<br />
A) PARTE SUPERIOR 1<br />
B) BASE 1<br />
C1) LADO CORRECTO 1<br />
C2) LADO IZQUIERDO 1<br />
D) PANEL DELANTERO 1<br />
E) PEQUEÑA FRENTE CORRECTA 1<br />
F) PEQUEÑA FRENTE IZQUIERDA 1<br />
G) El DERECHO & DEJO FRENTE 2<br />
R) CLIPS MONTAR 2<br />
S) CONECTORES PLASTICOS 12<br />
U) KD SCREWS (6X18mm) 42<br />
V) 6x12 mm SCREWS 2<br />
W) 6X8 mm SCREWS 3<br />
WARNING: Wait until the unit<br />
has completely cooled before<br />
attempting any cleaning.<br />
CLEANING<br />
To clean the unit, first turn <strong>of</strong>f controls on unit and unplug unit from power source.<br />
To clean the glass door: remove dust with clean dry cloth or to remove finger prints and other marks<br />
clean glass with clean damp cloth. Do not use abrasive cleaners or spray liquids on glass door surfaces.<br />
Metal and metal painted parts should be cleaned with clean damp cloth only. Do not use abrasive<br />
cleaners or spray liquids on this surface.<br />
La ADVERTENCIA: Asegúrese de que los<br />
controles de calentadora están en la<br />
LEJOS posición y no son conectado.<br />
El CUIDADO: Coloque un pedazo de cartón u hoja protectora en el piso para evitar rasguñar la superficie<br />
decorativa de su repisa de chimenea durante la asamblea.<br />
Por favor no aprieta completamente los tornillos de KD hasta que todos los paneles sean reunidos.<br />
~ 8 ~<br />
~ 25 ~
MANTENIMIENTO<br />
Desconecte el poder y desenchufe el cable de alimentación antes de procurar cualquier mantenimiento o limpiando<br />
para reducir el riesgo del fuego, la descarga eléctrica o el daño a personas. Las bombillas en su unidad pueden llegar a<br />
ser muy calientes. Permita por lo menos 15 minutos entre apagar la unidad y quitar los focos para evitar el ardor<br />
accidental de piel.<br />
INFORMACION de VIDRIO<br />
1. Deba en ningún concepto este producto es operado con perder o vidrio roto.<br />
2. No golpee ni azote el vidrio.<br />
3. No utilice limpiadores abrasivos para limpiar el vidrio.<br />
4. El vidrio de recambio está disponible del fabricante y el reemplazo debe ser llevado a cabo por una<br />
persona calificada de servicio.<br />
LIMPIEZA<br />
La ADVERTENCIA: Aségurese de<br />
que el poder es apagado antes de<br />
continuar.<br />
La ADVERTENCIA: Espere hasta<br />
que la unidad haya refrescado<br />
completamente antes de procurar<br />
cualquier limpieza.<br />
Para limpiar la unidad, primero vuelta lejos controles en la unidad y desenchufar la unidad de la fuente de<br />
alimentación.<br />
Para limpiar la puerta vidriera: quite polvo con tela seca limpia o para quitar dedo impresiones y otras marcas<br />
limpian vidrio con trapo húmedo limpio. No utilice limpiadores abrasivos ni rocíe líquidos en superficies de<br />
puerta vidriera.<br />
ASSEMBLY INSTRUCTIONS<br />
EF4534KD<br />
NOTE: A complete electric fireplace heater should consist <strong>of</strong> two parts: the wooden mantel and the fireplace<br />
heater each packed in a separate carton. It is not recommended to use the fireplace heater without the<br />
wooden mantel. Unpack the fireplace heater and mantel. Remove all packing materials.<br />
PARTS LIST:<br />
QUANTITY<br />
A) TOP PANEL 1<br />
B) BASE PANEL 1<br />
C1) RIGHT SIDE PANEL 1<br />
C2) LEFT SIDE PANEL 1<br />
D) FRONT PANEL 1<br />
E) SMALL RIGHT FRONT PANEL 1<br />
F) SMALL LEFT FRONT PANEL 1<br />
G) RIGHT & LEFT FRONT PANEL 2<br />
R) MOUNTING CLIPS 2<br />
S) PLASTIC CONNECTORS 12<br />
U) KD SCREWS (6X18mm) 42<br />
V) 6x12 mm SCREWS 2<br />
W) 6X8 mm SCREWS 3<br />
WARNING: Make sure the fireplace<br />
INSERT controls are in the OFF position<br />
and the INSERT is NOT plugged in.<br />
CAUTION: Place a piece <strong>of</strong> cardboard or protective sheet on the floor in order to avoid scratching the<br />
decorative surface <strong>of</strong> your mantel during assembly.<br />
Please DO NOT fully tighten the KD screws until all panels are assembled.<br />
El metal y el metal pintaron las partes deben ser limpiadas con trapo húmedo limpio sólo. No utilice<br />
limpiadores abrasivos ni rocíe líquidos en esta superficie.<br />
~ 24 ~<br />
~ 9 ~
Step 1:<br />
D<br />
SERVICIO INSTRUCCIONES<br />
Attach all PLASTIC CONNECTORS (S) to the<br />
PANELS (C1, C2, D, E and F) as shown in<br />
Figure 1. (2 KD SCREWS (U) for each<br />
PLASTIC CONNECTORS(S).)<br />
C1<br />
E<br />
F<br />
C2<br />
Desconecte el poder y desenchufe el cable de alimentación antes de procurar cualquier mantenimiento o<br />
limpiando para reducir el riesgo del fuego, la descarga eléctrica o el daño a personas. Las bombillas en su unidad<br />
pueden llegar a ser muy calientes. Permita por lo menos 15 minutos entre apagar la unidad y quitar los focos para<br />
evitar el ardor accidental de piel.<br />
REEMPLAZAR EL FOCO<br />
Figure 1<br />
El CUIDADO: Las bombillas en su unidad pueden llegar a ser muy<br />
calientes. Permita por lo menos 15 minutos entre apagar la<br />
unidad y quitar los focos para evitar bombillas calientes que<br />
entran contacto con la piel.<br />
Step 2:<br />
Attach the Small Front Panels (E & F) to<br />
the Right & Left FRONT PANEL (G) with 4<br />
KD SCREWS (U) (2 screws for each side).<br />
See Figure 2.<br />
E<br />
G<br />
G<br />
F<br />
Hay uno foco que de 40 vatios situó bajo el logset<br />
1. Desenchufe la unidad.<br />
2. Quite 12 tornillos en la cobertura situada en la espalda de chimenea y entonces quite la cobertura trasera de la<br />
unidad. Hay 2 tornillos más grande y 10 tornillos más pequeños.<br />
3. Afloje y quite el bombilla. Relace con nuevo foco de 40 vatios.<br />
4. Regrese panel de acess y reemplace tornillos<br />
5. Conecte la unidad.<br />
Figure 2<br />
Step 3:<br />
D<br />
Attach the Front Panel (D) to the Right &<br />
Left Front Panels on top <strong>of</strong> the panels (E &<br />
F) using 2 KD SCREWS (U). See Figure 3.<br />
E<br />
Figure 3<br />
F<br />
WARNING: Do not exceed 60<br />
Watts for light bulb. Use <strong>of</strong> a<br />
higher rated bulb may result in a<br />
fire causing property damage and<br />
personal injury.<br />
~ 10 ~<br />
~ 23 ~
INSTRUCCIONES OPERADORAS<br />
Una vez que la adición de calentadora de chimenea ha sido instalada apropiadamente y ha sido conectada a una toma de<br />
electricidad del suelo, está listo para operar. La nota: asegure que los cortacircuitos sean prendidos.<br />
Step 4:<br />
Attach 2 Left & Right SIDE FRONT PANELS<br />
(C1 & C2) to the FRONT PANELS (D, E & F)<br />
with 4 KD SCREWS (U) (2 screws for each<br />
side through the plastic connectors). See<br />
Figure 4.<br />
C1<br />
E<br />
D<br />
C2<br />
Figure 4<br />
Los controles son situados detrás de la parrilla debajo de vidrio delantero y pueden ser conseguir acceso a tirando la<br />
parrilla arriba de la parte superior, el delantero y abajo.<br />
Step 5:<br />
D<br />
Put the finished mantel assembly onto the<br />
BASE PANEL (B) with 4 KD SCREWS (U). See<br />
Figure 5.<br />
C1<br />
E<br />
C2<br />
B<br />
Levante parrilla delantera para conseguir acceso a los interruptores.<br />
Figure 5<br />
1. On/Off: Apriete este botón para principal efecto del poder y la llama. La luz del indicador estará en. Vea abajo para<br />
otros interruptores de control.<br />
2. Heat: Para la función de calor ‐ Aprieta este interruptor mientras el On/Off es prendido. La luz del indicador estará<br />
EN.<br />
Step 6:<br />
A<br />
D<br />
3. El Control de temperatura: Para ajustar la temperatura a sus requisitos individuales, gire la esfera de control de<br />
temperatura a la derecha aumentar la temperatura deseada y a la izquierda para la temperatura más baja. Esta<br />
esfera del control de temperatura sólo puede ser utilizada mientras el On/Off y los interruptores Heat son<br />
prendidos.<br />
Install the TOP PANEL (A) to the finished<br />
assembly with 4 KD SCEWS (U). See Figure 6.<br />
C1<br />
E<br />
C2<br />
La nota: Cuando el cambio apagado, todas las otras funciones de calentadora pararán aunque los interruptores puedan<br />
ser prendidos<br />
B<br />
Figure 6<br />
~ 22 ~<br />
~ 11 ~
Step 7:<br />
Put the insert in place and install the<br />
insert to the mantel. Attach the top <strong>of</strong><br />
the insert to the mantel with 3 SCREWS<br />
(W). Attach the MOUNTING CLIPS on<br />
the bottom <strong>of</strong> the mantel with 2<br />
SCREWS (V). See Figure 7 and 8.<br />
Step 8:<br />
Tighten all KD Screws. And now you are<br />
ready to enjoy your fireplace by<br />
following OPERATING INSTRUCTIONS &<br />
WARNINGS in this manual.<br />
Figure 7<br />
Las INSTRUCCIONES PARA el PODER<br />
La ADVERTENCIA: Antes de atender a esta calentadora está seguro desenchufar calentadora de la salida de pared. No<br />
sólo apaguecalentadora del principal interruptor de EN/LEJOS, esté seguro desenchufar esta calentadora.<br />
La nota: El cable de alimentación tiene un tapón polarizado (con una hoja más ancha que el otro) que sólo quedará en<br />
una salida polarizado de un solo sentido. Si no inserta intenta de invertir fácilmente el tapón. Si todavía no queda<br />
contacto que su electricista para reemplazar su salida. No derrote el propósito de la seguridad del tapón polarizado.<br />
CONEXION ELECTRICA<br />
Un 15 amperio, 120 Voltio, 60 circuito de Hz con<br />
una salida apropiadamente moler es requerido.<br />
Preferiblemente, la calentadora estará en un<br />
circuito dedicado. Otros aparatos en el mismo<br />
circuito pueden causar que el cortacircuitos<br />
tropiece o el fusible para soplar cuando la<br />
calentadora esté en la operación. La unidad viene<br />
estándar con un 6' (1828 Mm) larga tres cuerda de<br />
alambre que sale por detrás de la chimenea.<br />
Planee la instalación para evitar el uso de un<br />
alargador.<br />
La ADVERTENCIA: Alambrar de toma<br />
de electricidad debe conformarse con<br />
códigos locales de edificio y todas las<br />
otras regulaciones aplicables para<br />
reducir el riesgo del fuego, golpe y<br />
herida eléctricos.<br />
La ADVERTENCIA: No utilice esta<br />
chimenea si ninguna parte de ello ha<br />
estado bajo agua. Llame<br />
inmediatamente a un técnico calificado<br />
de servicio a inspeccionar la chimenea<br />
y reemplazar cualquier parte del<br />
sistema eléctrico si necesario.<br />
Figure 8<br />
~ 12 ~<br />
~ 21 ~
USO DESTINADO<br />
Este producto es pensado sólo para interior de la casa o el uso de la <strong>of</strong>icina. No es pensado para el valor<br />
industrial ni el uso comercial. No UTILICE FUERA<br />
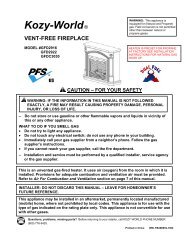
REPLACEMENT PARTS LIST<br />
INSERT<br />
INSTRUCCIONES IMPORTANTES<br />
LEA POR FAVOR Y SALVO ESTAS INSTRUCCIONES IMPORTANTES de SAFEFTY cuando se usa electrodomésticos,<br />
precauciones básicas siempre deben ser seguidas para reducir el riesgo del fuego, de golpe eléctrico, y de la<br />
herida a personas, inclusive lo Siguiente:<br />
1. Lea todas las instrucciones antes de utilizar esta calentadora<br />
2. Esta calentadora tiene calor cuando en el uso. Para evitar quemaduras, no permiten toque descubierto de piel<br />
superficies calientes. Si proporcionado, asideros de uso al mover esta calentadora. Mantenga materiales<br />
combustibles, como muebles, ropa de cama de almohadas, los papeles, la ropa y las cortinas por lo menos 3 pies<br />
(0,9) de la calentadora.<br />
3. El cuidado extremo es necesario cuando cualquier calentadora es utilizada por o cerca de niños, los animales<br />
favoritos o los inválidos y siempre que la calentadora sea dejada operando desatendido.<br />
4. Utilice su calentadora sólo en ambientes secos. Esta calentadora no es pensada para el uso en cuartos de baño,<br />
áreas de ropa sucia y ubicaciones interiores semejantes. Nunca sitúe la calentadora donde puede caerse en una<br />
bañera u otro contenedor de agua. No utilice su calentadora fuera. No utilice cerca fregaderos, las albercas ni otras<br />
áreas húmedas como sótanos inundados, los garajes, etc ni en algún lugar donde la calentadora podría entrar<br />
contacto con agua.<br />
5. Una calentadora tiene caliente y las partes de arcing adentro. No utilice en áreas donde gasolina, la pintura, ni<br />
líquidos flamables son utilizados ni son almacenados.<br />
6. Para desconectar calentadora, primero controles de vuelta a lejos, el quita tapón de la salida. Siempre<br />
desenchufe la calentadora cuando no en uso.<br />
7. Siempre desenchufe calentadora quitando el fin de tapón de la salida cuando no en uso. Nunca desenchufe<br />
tirando de la cuerda como esto puede dañar el cable de alimentación.<br />
8. No opere ninguna calentadora con una cuerda ni el tapón dañados ni después de que la calentadora falle, haya<br />
sido dejada caer o ha sido dañada en ninguna manera. Regrese calentadora a la facilidad autorizada del servicio<br />
para el examen, ajuste reparación eléctricos o mecánicos.<br />
9. Siempre tape calentadoras directamente en un salida/receptáculo de pared. Nunca utilice con un alargador ni la<br />
tira del poder de relocatable.<br />
10. No corra cuerda bajo alfombrar. No cubra cuerda con tapetes de tiro, con los corredores, ni con cubiertas<br />
semejantes. Arregle cuerda lejos de área de tráfico y de donde no será tropezado sobre.<br />
11. Es normal para el tapón para sentirse tibio tocar; sin embargo, un ataque flojo entre la salida de C.A.<br />
(receptáculo) y el tapón puede causar recalentar y deformación del tapón. Contacte a un electricista calificado para<br />
reemplazar salida floja o gastada.<br />
12. No inserte ni permita objetos extranjeros entrar ninguna ventilación ni el escape que abren como esto puede<br />
causar un golpe o el fuego eléctricos, o dañar la calentadora<br />
13. Para prevenir un fuego posible, no bloquea tomas de aire ni agota en ninguna manera. No utilice en superficies<br />
suaves, como una cama, donde aperturas pueden llegar a ser bloqueadas.<br />
14. No opere calentadora con cualquier medidas de protección quitado.<br />
15. Utilice esta calentadora sólo como descrito en este manual. Cualquier otro uso no recomendado por el<br />
fabricante puede causar el fuego, la descarga eléctrica, ni la herida a personas.<br />
16. Esta calentadora dibuja 12,5 amperios durante operación. Para prevenir sobrecargando un circuito, no tapa la<br />
calentadora en un circuito que ya tiene otros aparatos que trabaja.<br />
17. No utilice fuer.<br />
~ 20 ~<br />
ITEM DESCRIPTION OEM<br />
1 Power Cord & Plug NDF‐62N/94<br />
2 T‐stat Knob NDF62N/62<br />
3 <strong>Electric</strong> Log Set NDF‐62N/25<br />
4 Rocker Switch NDF‐62N/31<br />
5 Flame Generator Assembly NDF‐62N/39,40,56,58,<br />
6 T‐stat switch NDF‐62N/63<br />
7 Bulb NDF‐62N/32<br />
8 Bulb socket NDF‐62N/51<br />
9 Blower Assembly NDF‐62N/17,18,68<br />
10 Heater Assembly NDF‐62N/65,66<br />
~ 13 ~
ALWAYS OBSERVE THESE SAFETY PRECAUTIONS WHEN OPERATING YOUR ELECTRIC HEATER<br />
ALWAYS Read all instructions before operating.<br />
ALWAYS Locate your electric heater away from furniture or loose hanging drapes.<br />
ALWAYS Keep the rear grill away from walls or drapes so as not to block the air intake. (If applicable)<br />
ALWAYS Unplug electric heater when not in use.<br />
ALWAYS Use electric heater on a flat dry surface.<br />
ALWAYS Use on 110‐120 volt 60Hz AC power supply.<br />
Las ESPECIFICACIONES<br />
El modelo: EF5701<br />
El voltaje: 120V/60Hz<br />
Amperios totales: 10.4A<br />
Los Vatios totales: 1250W<br />
La calefacción Calificaciones: 1150W<br />
(+5%, ‐10%)<br />
Las dimensiones, Pulgadas (H X W X D):<br />
Chimenea: 23.6 x 25.07 x 12.04<br />
Caja: 25.79 x 27.95 x 15.35<br />
El ESPACIO LIBRE A<br />
COMBUSTIBLES<br />
Espalda...............0"/0mm<br />
Lados..................0"/0mm<br />
Piso....................0"/0mm<br />
Partesuperior….24"/610mm<br />
Frente...............36”/915mm<br />
ALWAYS<br />
Route the cord so it will not be walked on tripped over or pinched by furniture.<br />
ALWAYS<br />
Keep electrical cords, drapes and other furnishings away from your electric heater.<br />
ALWAYS<br />
ALWAYS<br />
NEVER<br />
NEVER<br />
NEVER<br />
Keep your electric heater clean and the filter free <strong>of</strong> dust. (If applicable)<br />
Use indoors only.<br />
Place drapes, clothing or towels over electric heater to dry.<br />
Use in the presence <strong>of</strong> explosive or flammable vapors such as gas or paint.<br />
Plug another electrical appliance into the same circuit. Blown fuses, tripped circuits and fire hazards<br />
may result.<br />
El modelo: EF5411<br />
El voltaje: 120V/60Hz<br />
Amperios totales: 10.4A<br />
Los Vatios totales: 1250W<br />
La calefacción Calificaciones: 1150W<br />
(+5%, ‐10%)<br />
Las dimensiones, Pulgadas (H X W X D):<br />
Chimenea: 29.52 x 29.7 x 10.23<br />
Caja: 33.86 x 33.86 x 13.38<br />
El ESPACIO LIBRE A<br />
COMBUSTIBLES<br />
Espalda...............0"/0mm<br />
Lados..................0"/0mm<br />
Piso....................0"/0mm<br />
Partesuperior….24"/610mm<br />
Frente...............36”/915mm<br />
NEVER<br />
Use water or liquids to clean your electric heater.<br />
NEVER<br />
Let bare skin touch hot surfaces as this may cause burns.<br />
NEVER<br />
NEVER<br />
NEVER<br />
NEVER<br />
Leave electric heater unattended.<br />
Leave electric heater when children or pets are present.<br />
Locate electric heater where it may fall into a bath tub or other water containers.<br />
Operate electric heater with a damaged cord, plug or after the heater malfunctions, or has been<br />
dropped or damaged in any manner.<br />
NEVER Run cord under carpeting or cover with throw rugs or runners.<br />
NEVER<br />
Insert or allow foreign objects to enter any ventilation or exhaust openings, as this may cause an<br />
electrical shock, fire or damage.<br />
El modelo: EF4534KD<br />
El voltaje: 120V/60Hz<br />
Amperios totales: 10.4A<br />
Los Vatios totales: 1250W<br />
La calefacción Calificaciones: 1150W<br />
(+5%, ‐10%)<br />
Las dimensiones, Pulgadas (H X W X D):<br />
Chimenea: 26.37 x 27.95 x 8.26<br />
Caja: 20.07 x 28.84 x 10.31<br />
La asamblea Requirió<br />
El ESPACIO LIBRE A<br />
COMBUSTIBLES<br />
Espalda...............0"/0mm<br />
Lados..................0"/0mm<br />
Piso....................0"/0mm<br />
Partesuperior….24"/610mm<br />
Frente...............36”/915mm<br />
~ 14 ~<br />
~ 19 ~
INDICE DE MATERIAS<br />
LEA POR FAVOR LA INSTALACION & INSTRUCCIONES de OPERACIONES<br />
ANTES DE UTILIZAR ESTE APARATO<br />
IMPORTANTE: Lea todas las instrucciones y las advertencias con cuidado antes de comenzar instalación. El<br />
fracaso para seguir estas instrucciones puede tener como resultado una descarga eléctrica posible, peligro<br />
de fuego y vaciar la garantía.<br />
Índice de materias___________________________________________________________________ _____18<br />
las Especificaciones____________________________________________________________________ _19<br />
Instrucciones importantes de Seguridad___________________________________________________ ____20<br />
Enchufe Instrucciones_____________________________________________________________________ 21<br />
Operación de calentadora ____________________________________________________________ 22<br />
El servicio, el Mantenimiento _________________________________________________________ 23‐24<br />
Instrucciones de Asamblea EF4534KD__________________________________________________ ___25‐28<br />
La lista de Partes_________________________________________________________________________ 29<br />
Pautas de garantía___________________________________________________________________ __ 30‐32<br />
PORTABLE ELECTRIC HEATER WARRANTY<br />
LIMITED WARRANTY:<br />
Alimited warranty is extended to the original purchaser <strong>of</strong> this heater and warrants against malfunction due<br />
to manufacturing defects for a period <strong>of</strong> (1) one year from the date <strong>of</strong> retail purchase. Please read and follow<br />
all details noted below.<br />
CLAIMS HANDLED AS FOLLOWS:<br />
‐ DO NOT RETURN TO PLACE OF PURCHASE<br />
‐ Contact our Customer Service Department at 1‐800‐776‐9425. You must have the model number,<br />
serial number and date <strong>of</strong> purchase.<br />
‐ They will provide you with further instuctions, which may include replacement parts, repair or<br />
replacement at our option.<br />
DUTIES OF THE OWNER:<br />
CALL 1‐800‐776‐9425 FOR SERVICE (9AM‐6PM MON.‐FRI.) or<br />
EMAIL US AT info@worldmkting.com<br />
This heating appliance must be operated in accordance with the written instructions furnished with this heater.<br />
This warranty shall not excuse the owner from properly maintaining this heater in accordance with the written<br />
instructions furnished with this heater. A bill <strong>of</strong> sale, cancelled check or payment record must be kept to verify<br />
purchase date and establish warranty period. Original carton should be kept in case <strong>of</strong> warranty return <strong>of</strong> unit.<br />
WHAT IS NOT COVERED:<br />
1. Damage caused by misuse or use contrary to the owners manual and safety guidelines.<br />
2. Damage caused by a lack <strong>of</strong> normal maintenance.<br />
3. Repair by an unauthorized person.<br />
4. Damage caused by connection to an improper voltage.<br />
5. Damaged caused by use outdoors.<br />
~ 18 ~<br />
~ 15 ~
LIMITATIONS:<br />
This warranty does not imply or assume any responsibility for consequential damages that may result from the<br />
use, misuse, or the lack <strong>of</strong> routine maintenance <strong>of</strong> this heating appliance. A cleaning fee and the cost <strong>of</strong> parts<br />
may be charged for appliance failures resulting from lack <strong>of</strong> maintenance. This warranty does not cover claims,<br />
which do not involve defective workmanship or materials. FAILURE TO PERFORM GENERAL MAINTENANCE<br />
(INCLUDING CLEANING) WILL VOID THIS WARRANTY.<br />
THIS LIMITED WARRANTY IS GIVEN TO THE PURCHASER IN LIEU OF ALL OTHER WARRANTIES, EXPRESSED OR<br />
IMPLIED, INCLUDING BUT NOT LIMITED TO THE WARRANTIES OF MERCHANTABILITY OF FITNESS FOR A<br />
PARTICULAR PURPOSE. THE REMEDY PROVIDED IN THIS WARRANTY IS EXCLUSIVE AND IS GRANTED IN LIEU OF<br />
ALL OTHER REMEDIES. IN NO EVENT WILL WORLD MARKETING OF AMERICA BE LIABLE FOR INCIDENTAL OR<br />
CONSEQUENTIAL DAMAGES.<br />
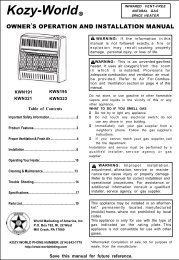
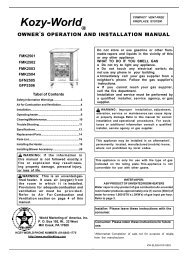
Chimenea Eléctrica<br />
EF5701<br />
EF5411<br />
EF4534KD<br />
Some states do not allow limitations on how long an implied warranty lasts, so the above limitation may not<br />
apply to you. Some states do not allow the exclusion or limitation <strong>of</strong> incidental or consequential damages so<br />
the above limitation or exclusion may not apply to you.<br />
Instrucciones de instalación y el Manual de Propietario<br />
¡ADVERTENCIA! SI LA INFORMACION EN ESTE MANUAL no ES SEGUIDA EXACTAMENTE, UN RESULTADO<br />
del FUEGO mayo que CAUSA DAÑO de PROPIEDAD, HERIDA O PERDIDA PERSONALES DE la VIDA.<br />
DATE OF PURCHASE:<br />
PLACE OF PURCHASE:<br />
For your record, staple your sales receipt to this manual and record the following<br />
Hencho en China<br />
Comfort Home Products, <strong>Inc</strong>.<br />
12256 William Penn Hwy, Ste A<br />
Huntingdon, PA 16652<br />
PARA SU SEGURIDAD<br />
No ALMACENE ni UTILICE<br />
GASOLINA ni OTROS VAPORES<br />
de FLAMABLE ni los LIQUIDOS<br />
EN LA VECINDAD DE ESTE<br />
niCUALQUIER OTRO APARATO<br />
SERIAL NUMBER:<br />
COMFORT GLOW PHONE NUMBER: (814) 643‐1775<br />
http://www.worldmkting.com<br />
MODEL NUMBER:<br />
ANSI/UL 1278. MOVABLE AND WALL‐OR CEILING HUNG ELECTRIC ROOM HEATERS<br />
No DESECHE ESTE MANUAL ‐ HOJA PARA el PROPIETARIO<br />
CLIENTE: RETENGA POR FAVOR ESTE MANUAL PARA FUTURO USO<br />
Printed in China<br />
~ 16 ~<br />
~ 17 ~