2011 10 Cambridge Pre-Packaged Olde English Paver Fireplace Kit ...
2011 10 Cambridge Pre-Packaged Olde English Paver Fireplace Kit ...
2011 10 Cambridge Pre-Packaged Olde English Paver Fireplace Kit ...
- No tags were found...
Create successful ePaper yourself
Turn your PDF publications into a flip-book with our unique Google optimized e-Paper software.
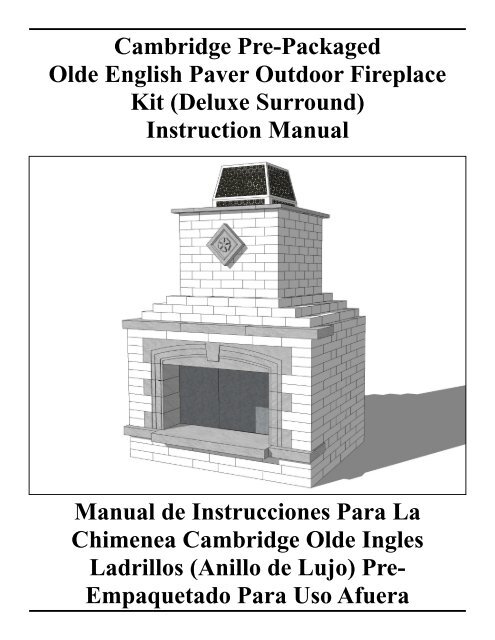
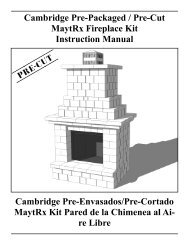
<strong>Cambridge</strong> <strong>Pre</strong>-<strong>Packaged</strong><strong>Olde</strong> <strong>English</strong> <strong>Paver</strong> Outdoor <strong>Fireplace</strong><strong>Kit</strong> (Deluxe Surround)Instruction ManualManual de Instrucciones Para LaChimenea <strong>Cambridge</strong> <strong>Olde</strong> InglesLadrillos (Anillo de Lujo) <strong>Pre</strong>-Empaquetado Para Uso Afuera
<strong>Cambridge</strong> <strong>Pre</strong>-<strong>Packaged</strong><strong>Olde</strong> <strong>English</strong> <strong>Paver</strong> <strong>Fireplace</strong> <strong>Kit</strong> Deluxe Surround<strong>2011</strong>Layer Reference Guide:Guía de Referencia:32313029282726252423222120191817161514131211<strong>10</strong>98Finished 7Grade6543212 3/4” Above Top of Foundation 4” Concrete slab (4000 PSI) 6” Compacted 3/4” stone1
<strong>Cambridge</strong> <strong>Pre</strong>-<strong>Packaged</strong><strong>Olde</strong> <strong>English</strong> <strong>Paver</strong> <strong>Fireplace</strong> <strong>Kit</strong> Deluxe Surround<strong>2011</strong>Shim Placement Detail:Place Blue, or Red shim here. Place Blue, or R2
<strong>Cambridge</strong> <strong>Pre</strong>-<strong>Packaged</strong><strong>Olde</strong> <strong>English</strong> <strong>Paver</strong> <strong>Fireplace</strong> <strong>Kit</strong> Deluxe Surround<strong>2011</strong><strong>Cambridge</strong> <strong>Fireplace</strong>:This unit is capable of burning natural gas, propane and wood. If either propane or natural gas is thepreferred method of burning, seek a licensed professional plumber before construction. Also, if usingpropane or natural gas, a knockout is located on either side of the unit to facilitate gas piping. All pipingand knockouts must be completed before installing blocks around unit as the unit will become inaccessiblewhen construction is completed.Tools Required for <strong>Fireplace</strong> <strong>Kit</strong> Installation:Safety GogglesEar ProtectionDust MaskGlovesShovels (digging & flat)Metal Cutters for banding on cubesMason Hammer (chipping, hammer)Road Stone RakeTamper (Hand or Mechanical)WheelbarrowLevel (2’ and 6’ recommended)Speed SquareCaulk Gun <strong>10</strong> oz or 28 oz (depends on what sizeadhesive is purchased)Rubber Mallet14” Demo saw with diamond bladeTape MeasureMarking Device (pencil, soap stone, etc)Chalk LineHand BroomConcrete Tools (Trowel/Floats)6 Foot ladder or scaffold according to your company’sstate, and OSHA safety policyDrill & 1/16” bit5/16” nut driver7 ¼” Circular saw with wood blade4” Electric grinder4” Diamond cup grinder15’ Ratchet strapItems Included in the <strong>Fireplace</strong> <strong>Kit</strong>:1 - Lennox Stainless Steel <strong>Fireplace</strong> with instructionmanual1 - 4 Foot air-cooled chimney1 - Black powder coated termination cap1 - Galvanized flashing for top of completed fireplace1 - Reinforced concrete lintels 48” x 4” x 6”4 - Reinforced concrete lintels 32” x 4” x 6”3 - Plastic shim pack sheet for leveling lintels orblock as needed1 - Cast Stone Surround Deluxe3 - Cubes of <strong>Cambridge</strong> <strong>Olde</strong> <strong>English</strong> <strong>Paver</strong>s1 - Installation manual for concrete pad and <strong>Olde</strong><strong>English</strong> <strong>Paver</strong>sMaterial Required:¾” clean stone (approx. 1 ton)Concrete (approx. 17-80 lb bags)<strong>Cambridge</strong> concrete adhesive (approx. 6-29 oz. or17-<strong>10</strong>.3 oz. tubes)(4 pcs) 2” x 4” x 8’ lumber2 ½” wood screws½” rebar (approx. 11’)Silicone for flashing3
<strong>Cambridge</strong> <strong>Pre</strong>-<strong>Packaged</strong><strong>Olde</strong> <strong>English</strong> <strong>Paver</strong> <strong>Fireplace</strong> <strong>Kit</strong> Deluxe Surround<strong>2011</strong>Chimenea de <strong>Cambridge</strong>:Esta unidad es capaz de quemar gas natural, propano, y la madera. Si bien el propano o el gas naturales el método preferido de la quema, buscar un profesional con licencia antes de construcción. Asimismo,si utiliza gas propano o gas natural, un golpe de gracia se encuentra a ambos lados de la unidad parafacilitar la tubería de gas. Todas las tuberías y los golpes de gracia debe ser completado antes de instalarlos bloques alrededor de la unidad como la unidad se convertirá en inaccesibles cuando se complete laconstrucción.Herramientas Necesarias Para la Instalación Del<strong>Kit</strong> de Chimenea:Gafas de seguridadProtección auditivaMáscara de polvoGuantesPalas (excavación y plano)Cortadores de Metal de bandas en los cubosMatrillo de Mason (astillado, martillo)Camino del rastrillo de PiedraSabotaje (manual o mecánica)CarretillaNivel (2’ y 6’ recomendado)Velocidad de la PlazaPistola para calafatear <strong>10</strong> oz o 28 oz (depende dequé tamaño es comprar pegamento)Martillo de goma14” Demo sierra con disco de diamanteCinta métricaDispositivo de marcado (lápiz, piedra jabón, etc)Línea de tizaEscoba de manoHerramientas concretas (paleta / flotadores)6 pies escalera o andamio de acuerdo al estadode su empresa, y la política de seguridad deOSHATaladro y 1 / 16” bits5 / 16”tuerca conductor7 ¼”Sierra circular con hoja de madera4” amoladora eléctrica4” amoladora de la taza del diamante15’ correa de trinqueteArtículos Incluidos en el <strong>Kit</strong> de Chimenea:1-Lennox de acero inoxidable de chimenea conmanual de instrucciones1-4 pies chimenea enfriado por aire1-Polvo Negro tapa de terminación de cubierta1-Galvanizado intermitente para la tapa de la chimeneacompleta1-Dinteles de hormigón armado de 48” x 4” x 6”4-Dinteles de hormigón armado de 32” x 4” x 6”3-Hoja de calza plástico para nivelar dinteles o bloquearcuando sea necesario1-Anillo de la piedra del molde de lujo3-Cubos de <strong>Olde</strong> Inglés ladrillos1-Manual de instalación para la plataforma de concretoy <strong>Olde</strong> Inglés ladrillosMaterial Necesario:¾” piedra limpia (aprox. 1 tonelada)Hormigón (aprox. 17bolsas de 80 libras)<strong>Cambridge</strong> concretas adhesivo (aprox. 6-29 oz o 17-<strong>10</strong>.3 oz. tubos)(4 piezas) de 2” x 4” x 8’de madera2 ½”tornillos para madera½” barra de refuerzo (aprox. 11’)Silicona para el flasheo4
<strong>Cambridge</strong> <strong>Pre</strong>-<strong>Packaged</strong><strong>Olde</strong> <strong>English</strong> <strong>Paver</strong> <strong>Fireplace</strong> <strong>Kit</strong> Deluxe Surround<strong>2011</strong><strong>Fireplace</strong> Concrete Pad Construction:Call 811 for information on underground utility marking. Select desired location and excavate 52” L x65 3/4” W x 12 3/4” D area for concrete pad. Fill excavated area with approximately 6” of ¾” cleangravel, compacting every 3”. Frame remaining 4” with 2” x 4” lumber to create a level pad. (Be sure 2”x 4” wood frame is perfectly level, front to back and side to side) See attached drawing for details ofsteel reinforcement rod placement. Fill 2” x 4” wood frame with a 4,000 PSI strong concrete mix.*Allow pad to cure for minimum of 48 hours.*Note: (Wood Box Additions) If you are going to add fire wood box extensions, either a single unit or aset it will be necessary to construct an additional concrete pad for each unit added.Chimenea Construcción Base de Concreto:Llame al 811 para obtener información sobre la utilidad de metro marcado. Seleccione la ubicación deseaday excavar 52” de largo x 65 3/4” W x 12 3/4” D área de plataforma de concreto. Llene la zona excavadacon aproximadamente 6 "de ¾" limpia grava, compactando cada 3”. Marco restantes 4"con 2” x4” de madera para crear una plataforma de nivel. (Asegúrese de 2” x 4” marco de madera está perfectamentehorizontal, de adelante hacia atrás y de lado a lado) Véanse los detalles del dibujo para la colocaciónde varillas de acero de refuerzo. Llene 2” x 4” marco de madera con una mezcla de concreto 4000PSI fuerte.*Deje que la almohadilla para curar por un mínimo de 48 horas.* Nota: (El texto añadido Caja para la lena) Si usted va a agregar el fuego extensiones caja para la lena,ya sea una sola unidad o conjunto será necesario construir más plataformas de concreto para cada unidadadicional.5
<strong>Cambridge</strong> <strong>Pre</strong>-<strong>Packaged</strong><strong>Olde</strong> <strong>English</strong> <strong>Paver</strong> <strong>Fireplace</strong> <strong>Kit</strong> Deluxe Surround<strong>2011</strong><strong>Fireplace</strong> Concrete Pad Detail-Cross Section DrawingConcreta del cojín de la Chimenea Detail-Dibujo Seccionado TransversalmenteTop View-Footing Detail / Vision Superior-Detaile De Pie52”65 3/4”6
<strong>Cambridge</strong> <strong>Pre</strong>-<strong>Packaged</strong><strong>Olde</strong> <strong>English</strong> <strong>Paver</strong> <strong>Fireplace</strong> <strong>Kit</strong> Deluxe Surround<strong>2011</strong>Stones Included In The <strong>Kit</strong>:48” Lintel (1 Piece)32” Lintel (4 Pieces)Headstone (1 Piece)Cut Large to remove 2 3/4”x8 1/4” (1 Piece)Large (125 Pieces) Small Cast Stone Legs (4 Pieces) Large Cast Stone Legs (4 Pieces)7
<strong>Cambridge</strong> <strong>Pre</strong>-<strong>Packaged</strong><strong>Olde</strong> <strong>English</strong> <strong>Paver</strong> <strong>Fireplace</strong> <strong>Kit</strong> Deluxe Surround<strong>2011</strong>4”x4”4 1/2”x4 1/4” Small Cut (1 Piece) Cut Small to remove 1”x2” (1 Piece) 4”x4” Cut Stone (1 Piece)You will need to cut the mediumstones to measure 8 1/4” x5 1/2” (7times) for this kit.8 1/4”x5 1/2” Medium (7 Pieces) Cut Medium to remove 2 1/4”x4” (1 Piece) Small (221 Pieces)You will need to cut the large stonesto measure 8 1/4” x8 1/4” (4 times)for this kit.8 1/4”x8 1/4” Large Cut (4 Pieces) Medium (82 Pieces) 6 3/4”x6 3/4” Medium Cut(1 Pieces)8
<strong>Cambridge</strong> <strong>Pre</strong>-<strong>Packaged</strong><strong>Olde</strong> <strong>English</strong> <strong>Paver</strong> <strong>Fireplace</strong> <strong>Kit</strong> Deluxe Surround<strong>2011</strong>Mantel Left Corner (1 Piece) Mantel Center (1 Piece) Mantel Right Corner (1 Piece)Front Left Corner Cap (2 Pieces) Front Center Cap (2 Pieces) Front Right Corner Cap (2 Pieces)Hearth Left Corner (1 Piece) Hearth Center (1 Piece) Hearth Right Corner (1 Piece)You will need to cut the large stonesto measure 5 1/2” x13 3/4” (6 times)for this kit.Large to remove 3”x4” (1 Piece) Large to remove 3”x3” (1 Piece) 5 1/2”x13 3/4” Large (6 Pieces)9
<strong>Cambridge</strong> <strong>Pre</strong>-<strong>Packaged</strong><strong>Olde</strong> <strong>English</strong> <strong>Paver</strong> <strong>Fireplace</strong> <strong>Kit</strong> Deluxe Surround<strong>2011</strong>Layer 1:Piece Count = (<strong>10</strong>) Small, (15) Medium, (12)LargeMark a line 4” in on all sides on the concrete padto mark the outside perimeter of the fireplace.Apply concrete adhesive and install per photo.Capa 1:Numero de Piezas = (<strong>10</strong>) Pequeño, (15) Mediano,(12)GrandeMarque una línea 4” de todo los lados del cojín deconcreto a marca el perímetro exterior de la chimenea.Aplique el pegamento concreto e instálelo por lafoto.<strong>10</strong>
<strong>Cambridge</strong> <strong>Pre</strong>-<strong>Packaged</strong><strong>Olde</strong> <strong>English</strong> <strong>Paver</strong> <strong>Fireplace</strong> <strong>Kit</strong> Deluxe Surround<strong>2011</strong>Layer 1-A:Firebox Placement: Install firebox unit 8 ¼”from the front of layer 1 and 9” in on the leftand right side. Attach 4ft air-cooled chimney permanufactures instructions enclosed in the firebox.Capa 1-A:Colocacion de la caja de fuegos:Instale unidad de la caja de fuegos 8 ¼” delfrente de la capa 1 y 9” adentro en lado izquierdoy derecho. Ate la chimenea refrigerada de 4 piespor fabrica la instruccion.11
<strong>Cambridge</strong> <strong>Pre</strong>-<strong>Packaged</strong><strong>Olde</strong> <strong>English</strong> <strong>Paver</strong> <strong>Fireplace</strong> <strong>Kit</strong> Deluxe Surround<strong>2011</strong>Layer 1-B:Remove firebox top support with a Phillipsscrewdriver. Take the 8 screws out removing thefirebox top face support. This will not be neededfor the install. See photo for details.Capa 1-B:Quite la ayuda de tapa del lugar de la caja de fuegoscon un destornillador de Philips. Tome los 8tornillos hacia fuera que quitan la caja de fuegosayuda de cara superior. Esto no será necesariopara la instalaci n. Vea la foto para los detalles.12
<strong>Cambridge</strong> <strong>Pre</strong>-<strong>Packaged</strong><strong>Olde</strong> <strong>English</strong> <strong>Paver</strong> <strong>Fireplace</strong> <strong>Kit</strong> Deluxe Surround<strong>2011</strong>Layer 2:Piece Count = (2) Small, (3) Medium, (<strong>10</strong>) LargeApply concrete adhesive and install per photo.Capa 2:Numero de Piezas = (2) Pequeño, (3) Mediano,(<strong>10</strong>) GrandeAplique el pegamento concreto e instálelo por lafoto.13
<strong>Cambridge</strong> <strong>Pre</strong>-<strong>Packaged</strong><strong>Olde</strong> <strong>English</strong> <strong>Paver</strong> <strong>Fireplace</strong> <strong>Kit</strong> Deluxe Surround<strong>2011</strong>Layer 3:Piece Count = (2) Small, (3) Medium, (<strong>10</strong>) LargeApply concrete adhesive and install per photo.Capa 3:Numero de Piezas = (2) Pequeño, (3) Mediano,(<strong>10</strong>) GrandeAplique el pegamento concreto e instálelo por lafoto.14
<strong>Cambridge</strong> <strong>Pre</strong>-<strong>Packaged</strong><strong>Olde</strong> <strong>English</strong> <strong>Paver</strong> <strong>Fireplace</strong> <strong>Kit</strong> Deluxe Surround<strong>2011</strong>Layer 3-A: Hearth LayerCenter the large cast Hearth piece to the front ofthe firebox. Make sure it is centered with11inches on both sides and flush with the frontof the firebox as shown.Capa 3-A: Capa del HogarCentro de la gran elenco pieza Hogar al frente dela caja de fuego. Asegúrese de que esté centradocon 11inches a ambos lados como se muestra15
<strong>Cambridge</strong> <strong>Pre</strong>-<strong>Packaged</strong><strong>Olde</strong> <strong>English</strong> <strong>Paver</strong> <strong>Fireplace</strong> <strong>Kit</strong> Deluxe Surround<strong>2011</strong>Place Blue, or Red shim here.Layer 4:Piece Count = (2) Small, (3) Medium, (6) Large,(2) Cast Stone Hearth CornersInstall the left and right hearth end pieces thenpaving stones as shown.Apply concrete adhesive and install per photo.16Capa 4:Numero de Piezas = (2) pequeños, (3 )medianos,(6) Grandes, (2) Reparto de las esquinas CasaHogarInstale izquierdos y derechos de los pedazos deextremo del hogar y ladrillos como se muestra.Aplique el pegamento concreto e instálelo por lafoto.
<strong>Cambridge</strong> <strong>Pre</strong>-<strong>Packaged</strong><strong>Olde</strong> <strong>English</strong> <strong>Paver</strong> <strong>Fireplace</strong> <strong>Kit</strong> Deluxe Surround<strong>2011</strong>Layer 5:Piece Count = (2) Small, (3) Medium, (6) LargeCut (1) Large 13 ¾” x 5 ½”Cut (1) Medium 8 ¼” x 5 ½”.(There are red 1/8”shims and blue 1/16” shimsin your kit, these are to be installed when necessaryto maintain level height between courses).Note: There are 8 cast pieces that make up thelegs for the surround: (4) Large, (4) Small.Install (2) of the large cast stone legs as shown.Make sure you maintain the 30” opening asshown.Apply concrete adhesive and install per photo.Capa 5:Numero de Piezas = (2) Pequeños, (3) Medianos,(6) GrandesCorte (1) Grande hay 13 ¾” x 5 ½”Corte (1) Mediano hay 8 ¼” x 5 ½”Hay calzas rojos 1/8” y calzas azules 1/16” en suequipo, se van a instalar entre las piezas parasegurarse que este nivel.Nota: Hay 8 pedazos echados que componen laspiernas para el anillo: (4) Grande, (4) Pequeño.Instale (2) piernas grandes de la piedra del moldecomo se muestra. Cerciórese de mantener 30”abertura como se muestra. Aplique el pegamentoconcreto e instále por la foto.17
<strong>Cambridge</strong> <strong>Pre</strong>-<strong>Packaged</strong><strong>Olde</strong> <strong>English</strong> <strong>Paver</strong> <strong>Fireplace</strong> <strong>Kit</strong> Deluxe Surround<strong>2011</strong>Place Blue, or Red shim here.Layer 6:Piece Count = (2) Small, (2) Medium, (6) LargeCut (1) Large 13 ¾” x 5 ½”Cut (1) Medium 8 ¼” x 5 ½”.Apply concrete adhesive and install per photo.* Pay special attention to the placement of mediumand large cut pieces to ensure breaking ofbond lines on the side of fireplace.Capa 6:Numero de Piezas = (2) Pequeños, (2) Medianos,(6) GrandesCorte (1) Grande hay 13 ¾” x 5 ½”Corte (1) Mediano hay 8 ¼” x 5 ½”Aplique el pegamento concreto e instálelo por lafoto.*Especial atención a la colocación de los pedazosmedianos y grandes del corte para asegurar lafractura de líneas en enlace en el lado de la chimenea.18
<strong>Cambridge</strong> <strong>Pre</strong>-<strong>Packaged</strong><strong>Olde</strong> <strong>English</strong> <strong>Paver</strong> <strong>Fireplace</strong> <strong>Kit</strong> Deluxe Surround<strong>2011</strong>Layer 7:Piece Count = (2) Small, (2) Medium, (7) Large,(2) Small cast leg stonesCut (1) Large 8 ¼” x 8 ¼”.Install the (2) Small cast stone leg pieces.Apply concrete adhesive and install per photo.Make sure you maintain the 30” opening asshown.Capa 7:Numero de Piezas = (2) Pequeños, (2) Medianos,(7) Grandes, (2) Pequeñas piedras de la pierna delmoldeCorte (1) Grande hay 8 ¼” x 8 ¼”Instale (2) Pequeñas piedras de pierna de moldeAplique el pegamento concreto e instale toda lapiedra por foto.Cerciórese mantener 30” abretura como se muestra.19
<strong>Cambridge</strong> <strong>Pre</strong>-<strong>Packaged</strong><strong>Olde</strong> <strong>English</strong> <strong>Paver</strong> <strong>Fireplace</strong> <strong>Kit</strong> Deluxe Surround<strong>2011</strong>Place Blue, or Red shim here.Layer 8:Piece Count = (2) Small, (2) Medium, (7) LargeCut (1) Large 8 ¼” x 8 ¼”Apply concrete adhesive and install per photo.Capa 8:Numero de Piezas = (2) Pequeños, (2) Medianos,(7) GrandesCorte (1) Grande hay 8 ¼” x 8 ¼”Aplique el pegamento concreto e instale por foto.20
<strong>Cambridge</strong> <strong>Pre</strong>-<strong>Packaged</strong><strong>Olde</strong> <strong>English</strong> <strong>Paver</strong> <strong>Fireplace</strong> <strong>Kit</strong> Deluxe Surround<strong>2011</strong>Large cut to13 3/4”x 5 1/2”Medium cut to8 1/4”x 5 1/2”Layer 9:Piece Count = (2) Small, (2) Medium, (6) Large,(2) Large cast stone leg pieces.Cut (1) Large 13 ¾” x 5 ½”Cut (1) Medium 8 ¼” x 5 ½”Install the (2) Large cast stone leg pieces.Apply concrete adhesive and install per photo.Make sure you maintain the 30” opening asshown.Capa 9:Numero de Piezas = (2) Pequeños, (2) Medianos,(6) Grandes, (2) Pedazos grandes de la pierna dela piedra del molde.Corte (1) Grande hay 13 ¾” x 5 ½”Corte (1) Mediano hay 8 ¼” x 5 ½”Instale (2) Pedazos grandes de la pierna de la piedradel molde.Aplique el pegamento concreto e instálelo por lafoto.Cerciórese mantener 30” abertura como se muestra.21
<strong>Cambridge</strong> <strong>Pre</strong>-<strong>Packaged</strong><strong>Olde</strong> <strong>English</strong> <strong>Paver</strong> <strong>Fireplace</strong> <strong>Kit</strong> Deluxe Surround<strong>2011</strong>Medium cut to8 1/4”x 5 1/2”Large cut to13 3/4”x5 1/2”Place Blue, or Red shim here.Layer <strong>10</strong>:Piece Count = (2) Small, (2) Medium, (6) LargeCut (1) Large 13 ¾” x 5 ½”Cut (1) Medium 8 ¼” x 5 ½”.Apply concrete adhesive and install per photo.Capa <strong>10</strong>:Numero de Piezas = (2) Pequeños, (2) Medianos,(6) GrandesCorte (1) Grande hay 13 ¾” x 5 ½”Corte (1) Mediano hay 8 ¼” x 5 ½”Aplique el pegamento concreto e instale por foto.22
<strong>Cambridge</strong> <strong>Pre</strong>-<strong>Packaged</strong><strong>Olde</strong> <strong>English</strong> <strong>Paver</strong> <strong>Fireplace</strong> <strong>Kit</strong> Deluxe Surround<strong>2011</strong>Large cut to8 1/4”x 8 1/4”Layer 11:Piece Count = (2) Small, (2) Medium, (7) Large,(2) Small cast stone leg pieces.Cut (1) Large 8 ¼” x 8 ¼”Install the (2) Small cast stone leg pieces.Apply concrete adhesive and install per photo.Make sure you maintain the 30” opening asshown.Capa 11:Numero de Piezas = (2) Pequeños, (2) Medianos,(7) Grandes, (2) Pequeñas piedras de pierna demoldeCorte (1) Grande hay 8 ¼” x 8 ¼”Instale (2) Pequeños pedazos de la pierna de lapiedra del molde.Aplique el pegamento concreto e instálelo por lafoto.Cerciórese mantener 30” abretura como se muestra.23
<strong>Cambridge</strong> <strong>Pre</strong>-<strong>Packaged</strong><strong>Olde</strong> <strong>English</strong> <strong>Paver</strong> <strong>Fireplace</strong> <strong>Kit</strong> Deluxe Surround<strong>2011</strong>Large cut to8 1/4”x 8 1/4”Place Blue, or Red shim here.Layer 12:Piece Count = (2) Small, (2) Medium, (7) LargeCut (1) Large 8 ¼” x 8 ¼”Apply concrete adhesive and install per photo.Capa 12:Numero de Piezas = (2) Pequeños, (2) Medianos,(7) GrandesCorte (1) Grande hay 8 ¼” x 8 ¼”Aplique el pegamento concreto e instálelo por lafoto.24
<strong>Cambridge</strong> <strong>Pre</strong>-<strong>Packaged</strong><strong>Olde</strong> <strong>English</strong> <strong>Paver</strong> <strong>Fireplace</strong> <strong>Kit</strong> Deluxe Surround<strong>2011</strong>Layer 12-A: Headstone Placement:Prior to installing the headstone, measure thespace between cast leg stones to ensure 30” opening.Install the large head stone onto the castsurround leg stones .Line up the cast details between the headstoneand legs then glue into place.Check the opening on the surround making sureyou maintained the 30” between the left andright sides of the surround legs.Capa 12-A: Colocación de lápida:Antes de instalar la lápida mortuoria, mida elespacio entre las piedras echadas de la pierna paraasegurar 30” abretura. Instale la piedra principalgrande sobre el anillo del molde piedras de lapierna.Alinéese los detalles del molde entre la lápida mortuoriay las piernas entonces pegan en lugar.Compruebe abertura en el anillo cerciorándose deque usted mantuvo 30” entre los lados izquierdosy derechos de las piernas del anillo.25
<strong>Cambridge</strong> <strong>Pre</strong>-<strong>Packaged</strong><strong>Olde</strong> <strong>English</strong> <strong>Paver</strong> <strong>Fireplace</strong> <strong>Kit</strong> Deluxe Surround<strong>2011</strong>Large cut to13 3/4”x 5 1/2”Layer 13:Piece Count = (2) Small, (2) Medium, (6) LargeCut (1) Large 13 ¾” x 5 ½”Cut (1) Medium 8 ¼” x 5 ½”Apply concrete adhesive and install per photo.Capa 13:Numero de Piezas = (2) Pequeños, (2) Medianos,(6) GrandesCorte (1) Grande hay 13 ¾” x 8 ¼”Corte (1) Mediano hay 8 ¼” x 5 ½”Aplique el pegamento concreto e instale por foto.26
<strong>Cambridge</strong> <strong>Pre</strong>-<strong>Packaged</strong><strong>Olde</strong> <strong>English</strong> <strong>Paver</strong> <strong>Fireplace</strong> <strong>Kit</strong> Deluxe Surround<strong>2011</strong>Medium cut to8 1/4”x 5 1/2”Large cut to13 3/4”x 5 1/2”Layer 14:Piece Count = (2) Small, (2) Medium, (6) LargeCut (1) Large 13 ¾” x 5 ½”Cut (1) Medium 8 ¼” x 5 ½”Apply concrete adhesive and install per photo.Capa 14:Numero de Piezas = (2) Pequeños, (2) Medianos,(6) GrandesCorte (1) Grande hay 13 ¾” x 8 ¼”Corte (1) Mediano hay 8 ¼” x 5 ½”Aplique el pegamento concreto e instale por foto.27
<strong>Cambridge</strong> <strong>Pre</strong>-<strong>Packaged</strong><strong>Olde</strong> <strong>English</strong> <strong>Paver</strong> <strong>Fireplace</strong> <strong>Kit</strong> Deluxe Surround<strong>2011</strong>Layer 15:Piece Count = (2) Small, (2) Medium, (6) LargeCut (1) Large notch cut – see photo for cut detailCut (1) Medium 8 ¼” x 5 ½”Apply concrete adhesive and install per photo.Capa 15:Numero de Piezas = (2) Pequeños, (2) Medianos,(6) GrandesCorte (1) Muesca grande del corte - vea la fotopara cortar el detalleCorte (1) Mediano hay 8 ¼” x 5 ½”28Aplique el pegamento concreto e instale por foto.
<strong>Cambridge</strong> <strong>Pre</strong>-<strong>Packaged</strong><strong>Olde</strong> <strong>English</strong> <strong>Paver</strong> <strong>Fireplace</strong> <strong>Kit</strong> Deluxe Surround<strong>2011</strong>Layer 15-A: Lintel Placemen:Install (1) 48” lintel 4 ¾” in from the left andright sides and 11” in from front face.Apply concrete adhesive and install per photo.Capa 15-A: Colocación del Dintel:Instale (1) 48” dintel 4 ¾” adentro de los ladosizquierdos y derechos y 11” adentro de la cara delantera.Aplique el pegamento concreto e instálelo por lafoto.29
<strong>Cambridge</strong> <strong>Pre</strong>-<strong>Packaged</strong><strong>Olde</strong> <strong>English</strong> <strong>Paver</strong> <strong>Fireplace</strong> <strong>Kit</strong> Deluxe Surround<strong>2011</strong>Large cutto removea 4”x 4”notchSmall cut to removea 2”x 1” cornerLarge cut toremove a3”x 3” cornerLayer 16:Piece Count = (1) Small, (3) Medium, (8) LargeCut (1) Small piece to remove a 2” x 1” piecefrom a corner.Cut (1) Large piece to remove a 4” x 4” notchedpiece.Cut (1) Large piece to remove a 3” x 3” corner.Apply concrete adhesive and install per photo.Capa 16:Numero de Piezas = (1) Pequeños, (3) Medianos,(8) GrandesCorte (1) Pequeño pedazo para quitar un 2” x 1”pedazo de esquina.Corte (1) Pedazo grande para quitar 4” x 4” muescasde esquina.Corte (1) Pedazo grande para quitar 3” x 3” esquina.30
<strong>Cambridge</strong> <strong>Pre</strong>-<strong>Packaged</strong><strong>Olde</strong> <strong>English</strong> <strong>Paver</strong> <strong>Fireplace</strong> <strong>Kit</strong> Deluxe Surround<strong>2011</strong>Layer 17:Piece Count = (1) Small, (3) Medium, (5) LargeCut (1) Small 4” x 4 ½”Cut (1) Medium to remove a 2 ¼” x 4 ¼” piecefrom a corner(2) Cast stone mantel corners and (1) Cast stonecenter mantel piece.Overhang mantel piece by 1 ¾” on left and rightand back flush against lintel.Apply concrete adhesive and install per photo.31Capa 17:Numero del Piezas = (1) Pequeño, (3) Medianos,(5) GrandesCorte (1) Pequeño 4” x 4 ½”Corte (1) Mediano para quitar 2 ¼” x 4¼” pedazode esquina(2) Esquinas de piedra de la chimenea y (1) Centrode piedra de la chimenea.Sobresalga el pedazo de la chimenea 1 ¾” encendidoa la izquierda e a la derecha y lávelo contradintel.Aplique el pegamento concreto e instálelo por lafoto.
<strong>Cambridge</strong> <strong>Pre</strong>-<strong>Packaged</strong><strong>Olde</strong> <strong>English</strong> <strong>Paver</strong> <strong>Fireplace</strong> <strong>Kit</strong> Deluxe Surround<strong>2011</strong>13”Layer 17-A: Lintel Placement:Install (4) 32” lintels 13” from the left and rightsides and 4” from the back.Apply concrete adhesive and install per photo.Capa 17-A: Colocacion del Dintel:Instale (4) 32” dinteles 13” lado izquierdo yderecho 4” de la parte posterior.Aplique el pegamento concreto e instálelo por lafoto.32
<strong>Cambridge</strong> <strong>Pre</strong>-<strong>Packaged</strong><strong>Olde</strong> <strong>English</strong> <strong>Paver</strong> <strong>Fireplace</strong> <strong>Kit</strong> Deluxe Surround<strong>2011</strong>Layer 18:Piece Count = (12) Small, (4) Medium, (4) LargeInstall 2 3/16” step-in on the left and right. Theback is flush.Apply concrete adhesive and install per photo.Capa 18:Numero de Piezas = (12) Pequeños, (4) Medianos,(4) GrandesInstale 2 3/16” paso en los lados izquierdo y derecho.La parte posterior es rasante.Aplique el pegamento concreto e instálelo por lafoto.33
<strong>Cambridge</strong> <strong>Pre</strong>-<strong>Packaged</strong><strong>Olde</strong> <strong>English</strong> <strong>Paver</strong> <strong>Fireplace</strong> <strong>Kit</strong> Deluxe Surround<strong>2011</strong>Layer 19:Piece Count = (9) Small, (<strong>10</strong>) MediumCut (1) Small piece to create a 4” x 4” piece.Cut (1) Medium to create a 6 ¾” x 6 ¾” piece.Install 4” step-in on left and right sides. Frontand back are flush.Apply concrete adhesive and install per photo.Capa 19:Numero de Piezas = (9) Pequeños, (<strong>10</strong>) MedianosCorte (1) Pedazo pequeño para crear 4”x 4”.Corte (1) Pedazo mediano para crear 6¾”x 6 ¾”Instale 4” paso adrento en el lado izquierdos y derechos.El frente y la parte posterior son rasantes.Aplique el pegamento concreto e instálelo por lafoto.34
<strong>Cambridge</strong> <strong>Pre</strong>-<strong>Packaged</strong><strong>Olde</strong> <strong>English</strong> <strong>Paver</strong> <strong>Fireplace</strong> <strong>Kit</strong> Deluxe Surround<strong>2011</strong>Layer 20:Piece Count = (16) MediumInstall 5” step-in on left and right sides. Frontand back are flush.Apply concrete adhesive and install per photo.Capa 20:Numero de Piezas = (16 ) MedianosInstale un 5” paso adrento en el lado izquierdos yderechos. El frente y la parte posterior son rasantes.Aplique el pegamento concreto e instálelo por lafoto.35
<strong>Cambridge</strong> <strong>Pre</strong>-<strong>Packaged</strong><strong>Olde</strong> <strong>English</strong> <strong>Paver</strong> <strong>Fireplace</strong> <strong>Kit</strong> Deluxe Surround<strong>2011</strong>Layer 21:Piece Count = (16) SmallInstall 2” step-in on left and right sides and 4”step-in on front and back.Apply concrete adhesive and install per photo.Capa 21:Numero de Piezas = (16) PequeñosInstale un 2” paso adrento en el lados izquierdos yderechos y 4” paso adrento en el frente y detrás.Aplique adhesivo de concreto e instale por foto.36
<strong>Cambridge</strong> <strong>Pre</strong>-<strong>Packaged</strong><strong>Olde</strong> <strong>English</strong> <strong>Paver</strong> <strong>Fireplace</strong> <strong>Kit</strong> Deluxe Surround<strong>2011</strong>Layer 22:Piece Count = (16) SmallApply concrete adhesive and install per photo.Capa 22:Numero de Piezas = (16) PequeñosAplique adhesivo de concreto e instale por foto37
<strong>Cambridge</strong> <strong>Pre</strong>-<strong>Packaged</strong><strong>Olde</strong> <strong>English</strong> <strong>Paver</strong> <strong>Fireplace</strong> <strong>Kit</strong> Deluxe Surround<strong>2011</strong>Layer 23:Piece Count = (16) SmallApply concrete adhesive and install per photo.Capa 23:Numero de Piezas = (16) PequeñosAplique adhesivo de concreto e instale por foto38
<strong>Cambridge</strong> <strong>Pre</strong>-<strong>Packaged</strong><strong>Olde</strong> <strong>English</strong> <strong>Paver</strong> <strong>Fireplace</strong> <strong>Kit</strong> Deluxe Surround<strong>2011</strong>Layer 24:Piece Count = (16) SmallApply concrete adhesive and install per photo.Capa 24:Numero de Piezas = (16) PequeñosAplique adhesivo de concreto e instale por foto39
<strong>Cambridge</strong> <strong>Pre</strong>-<strong>Packaged</strong><strong>Olde</strong> <strong>English</strong> <strong>Paver</strong> <strong>Fireplace</strong> <strong>Kit</strong> Deluxe Surround<strong>2011</strong>Layer 25:Piece Count = (16) SmallApply concrete adhesive and install per photo.Capa 25:Numero de Piezas = (16) PequeñosAplique adhesivo de concreto e instale por foto40
<strong>Cambridge</strong> <strong>Pre</strong>-<strong>Packaged</strong><strong>Olde</strong> <strong>English</strong> <strong>Paver</strong> <strong>Fireplace</strong> <strong>Kit</strong> Deluxe Surround<strong>2011</strong>Layer 26:Piece Count = (16) SmallApply concrete adhesive and install per photo.Capa 26:Numero de Piezas = (16) PequeñosAplique adhesivo de concreto e instale por foto41
<strong>Cambridge</strong> <strong>Pre</strong>-<strong>Packaged</strong><strong>Olde</strong> <strong>English</strong> <strong>Paver</strong> <strong>Fireplace</strong> <strong>Kit</strong> Deluxe Surround<strong>2011</strong>Layer 27:Piece Count = (16) SmallApply concrete adhesive and install per photo.Capa 27:Numero de Piezas = (16) PequeñosAplique adhesivo de concreto e instale por foto42
<strong>Cambridge</strong> <strong>Pre</strong>-<strong>Packaged</strong><strong>Olde</strong> <strong>English</strong> <strong>Paver</strong> <strong>Fireplace</strong> <strong>Kit</strong> Deluxe Surround<strong>2011</strong>Layer 28:Piece Count = (16) SmallApply concrete adhesive and install per photo.Capa 28:Numero de Piezas = (16) PequeñosAplique adhesivo de concreto e instale por foto43
<strong>Cambridge</strong> <strong>Pre</strong>-<strong>Packaged</strong><strong>Olde</strong> <strong>English</strong> <strong>Paver</strong> <strong>Fireplace</strong> <strong>Kit</strong> Deluxe Surround<strong>2011</strong>Layer 29:Piece Count = (16) SmallApply concrete adhesive and install per photo.Capa 29:Numero de Piezas = (16) PequeñosAplique adhesivo de concreto e instale por foto44
<strong>Cambridge</strong> <strong>Pre</strong>-<strong>Packaged</strong><strong>Olde</strong> <strong>English</strong> <strong>Paver</strong> <strong>Fireplace</strong> <strong>Kit</strong> Deluxe Surround<strong>2011</strong>Layer 30:Piece Count = (16) SmallApply concrete adhesive and install per photo.Capa 30:Numero de Piezas = (16) PequeñosAplique adhesivo de concreto e instale por foto45
<strong>Cambridge</strong> <strong>Pre</strong>-<strong>Packaged</strong><strong>Olde</strong> <strong>English</strong> <strong>Paver</strong> <strong>Fireplace</strong> <strong>Kit</strong> Deluxe Surround<strong>2011</strong>2” Overhang1” Overhang 1” Overhang2” OverhangLayer 31:Piece Count = (6) Cast Stone Cap PiecesInstall a 1” overhang on the left and right sidesand 2” overhang on the front and back.Apply concrete adhesive and install per photo.Capa 31:Numero de Piezas = (6) Pedazos de piedra del casquilloInstale una 1” proyección encendido a la izquierdae a la derecha y 2” proyección en frente y detrás.Aplique el pegamento concreto e instálelo por lafoto46
<strong>Cambridge</strong> <strong>Pre</strong>-<strong>Packaged</strong><strong>Olde</strong> <strong>English</strong> <strong>Paver</strong> <strong>Fireplace</strong> <strong>Kit</strong> Deluxe Surround<strong>2011</strong>Chase Flashing • El destellar de la persecuciónChase flashing with collar facing up.Persecucion que destella con el revestimiento del collar para arriba.47
<strong>Cambridge</strong> <strong>Pre</strong>-<strong>Packaged</strong><strong>Olde</strong> <strong>English</strong> <strong>Paver</strong> <strong>Fireplace</strong> <strong>Kit</strong> Deluxe Surround<strong>2011</strong>Layer 32:Once the chimney has been centered, take thechase flashing with the collar up and slide itonto the termination cap sleeve until it is flushwith the bottom of the termination cap. (Seephoto top left) See picture detail of how thetermination cap chase flashing and chimneysection should line up inside the block chimneycavity. (See photo top right) Take the entireassembly to the top of the fireplace chimney,carefully slide the termination cap sleeve intothe chimney section while rotating left to rightso the sections line up and sleeve together.Capa 32:Una vez que se ha centrado la chimenea tome lapersecuci n que destella con el collar para arribay deslícela encendido hacia la manga del casquillode la terminacion hasta que sea rasante con laparte inferior del casquillo de la terminaci n.(Véase la foto inferior) Represente el detalle de cmo el destellar de la persecucion del casquillo dela terminacion y la seccion de la chimenea debenalinearse dentro de la cavidad de la chimenea delbloque. (Véase la foto abajo a la derecha) Lleve ala asamblea entera a la tapa de la chimenea, resbalecuidadosamente la manga del casquillo de laterminacion dentro de la secci n de la chimeneamientras que la rotaci n de izquierda a derecha lassecciones se alinea y envuelve tan junta.48
<strong>Cambridge</strong> <strong>Pre</strong>-<strong>Packaged</strong><strong>Olde</strong> <strong>English</strong> <strong>Paver</strong> <strong>Fireplace</strong> <strong>Kit</strong> Deluxe Surround<strong>2011</strong>Once you have the termination cap sleeved into the chimney section, you can apply silicone between thefinal layer of block and the chase flashing to prevent any water or foreign material from entering chimneycavity. Locate the pre-drilled holes in the termination cap, then drill into both sides of the chaseflashing. Fasten termination cap to flashing with sheet metal screws. Do the same on the opposite side.**The first time you go to use your fireplace light a small fire for the first 8 hours of use so you properlyseason the inner fire lining of your firebox.Una vez que usted tiene el casquillo de la terminacion envuelto en la seccion de la chimenea, usted puedeaplicar el silicón entre la capa final de bloque y la persecucion que destella para prevenir cu-alquier aguao material extranjero de la cavidad de la chimenea que entra. Localice los agujeros pretaladrados en casquillode la terminacion. Entonces perfore en ambos lados de destellar de la persecucion. Instale lostornillos y el tornillo de metal de hoja en casquillo. Haga iguales en lado opuesto.** La primera vez que usted va a utilizar su luz de la chimenea un pequeño fuego para las primeras 8horas de uso que usted sazona tan correctamente la guarnicion interna del fuego de su caja del fuego.49
<strong>Cambridge</strong> <strong>Pre</strong>-<strong>Packaged</strong><strong>Olde</strong> <strong>English</strong> <strong>Paver</strong> <strong>Fireplace</strong> <strong>Kit</strong> Deluxe Surround<strong>2011</strong>Medallion Installation For <strong>Fireplace</strong> <strong>Kit</strong>s15’ tie down strap over the medallion andaround all 4 sides of the chimney15’ atan la correa sobre el medallón y alrededorde los 4 lados de la chimeneaOnce you have allowed the adhesive to dry for 24 hrs on the fireplace kit you can now install the medallion.You will need a 15’ ratchet strap to hold it in place while the adhesive dries. Take measurementsfrom top to bottom and right to left of the chimney to find the center. Take the strap and put it aroundthe chimney loosely. Apply concrete adhesive to the back of the medallion and position the orientationeither square or diamond then hold it in place. With another person, position the strap over the medallionaround the chimney and ratchet the strap to hold it in place.*Allow 48 hrs for adhesive to dry then remove ratchet strap.Una vez que usted ha permitido que el pegamento se seque por 24 horas en el kit de la chimenea ustedpuede ahora instalar el medallón. Usted necesitará correa del trinquete 15’ sostenerla en el lugar mientrasque el pegamento se seca. Lleve las medidas de arriba a abajo y derecho a la izquierda de la chimeneaencontrar el centro. Tome la correa y póngala alrededor de la chimenea libremente. Aplique elpegamento concreto a la parte posterior del medallón y coloque el cuadrado de la orientación u o el diamantedespués lo lleva a cabo en el lugar. Con otra persona, coloque la correa sobre el medallón alrededorde la chimenea y ratchet la correa para sostenerla en el lugar.*Permita que 48 horas para que el pegamento entonces se seque quitan la correa del trinquete.50
<strong>Cambridge</strong> <strong>Pre</strong>-<strong>Packaged</strong><strong>Olde</strong> <strong>English</strong> <strong>Paver</strong> <strong>Fireplace</strong> <strong>Kit</strong> Deluxe Surround<strong>2011</strong>VIEWSFRONTRIGHTLEFT51BACK


