Axis P3367-VE Installation Guide - Use-IP
Axis P3367-VE Installation Guide - Use-IP
Axis P3367-VE Installation Guide - Use-IP

You also want an ePaper? Increase the reach of your titles
YUMPU automatically turns print PDFs into web optimized ePapers that Google loves.
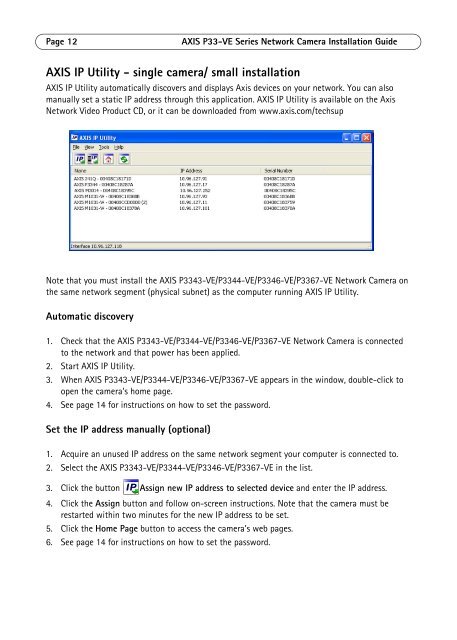
Page 12 AXIS P33-<strong>VE</strong> Series Network Camera <strong>Installation</strong> <strong>Guide</strong>AXIS <strong>IP</strong> Utility - single camera/ small installationAXIS <strong>IP</strong> Utility automatically discovers and displays <strong>Axis</strong> devices on your network. You can alsomanually set a static <strong>IP</strong> address through this application. AXIS <strong>IP</strong> Utility is available on the <strong>Axis</strong>Network Video Product CD, or it can be downloaded from www.axis.com/techsupNote that you must install the AXIS P3343-<strong>VE</strong>/P3344-<strong>VE</strong>/P3346-<strong>VE</strong>/<strong>P3367</strong>-<strong>VE</strong> Network Camera onthe same network segment (physical subnet) as the computer running AXIS <strong>IP</strong> Utility.Automatic discovery1. Check that the AXIS P3343-<strong>VE</strong>/P3344-<strong>VE</strong>/P3346-<strong>VE</strong>/<strong>P3367</strong>-<strong>VE</strong> Network Camera is connectedto the network and that power has been applied.2. Start AXIS <strong>IP</strong> Utility.3. When AXIS P3343-<strong>VE</strong>/P3344-<strong>VE</strong>/P3346-<strong>VE</strong>/<strong>P3367</strong>-<strong>VE</strong> appears in the window, double-click toopen the camera’s home page.4. See page 14 for instructions on how to set the password.Set the <strong>IP</strong> address manually (optional)1. Acquire an unused <strong>IP</strong> address on the same network segment your computer is connected to.2. Select the AXIS P3343-<strong>VE</strong>/P3344-<strong>VE</strong>/P3346-<strong>VE</strong>/<strong>P3367</strong>-<strong>VE</strong> in the list.3. Click the button Assign new <strong>IP</strong> address to selected device and enter the <strong>IP</strong> address.4. Click the Assign button and follow on-screen instructions. Note that the camera must berestarted within two minutes for the new <strong>IP</strong> address to be set.5. Click the Home Page button to access the camera’s web pages.6. See page 14 for instructions on how to set the password.