Axis P3367-VE Installation Guide - Use-IP
Axis P3367-VE Installation Guide - Use-IP
Axis P3367-VE Installation Guide - Use-IP
You also want an ePaper? Increase the reach of your titles
YUMPU automatically turns print PDFs into web optimized ePapers that Google loves.
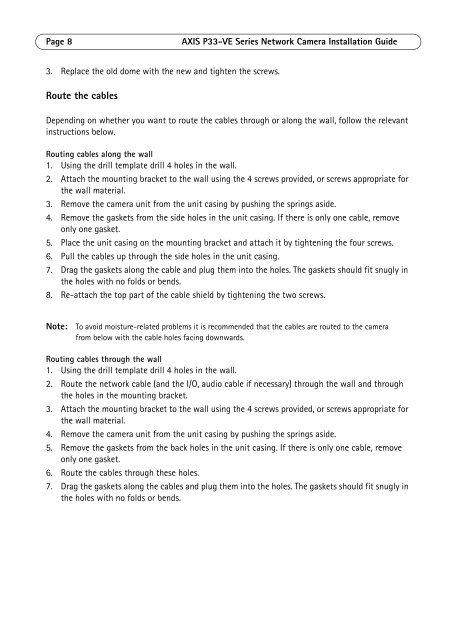
Page 8 AXIS P33-<strong>VE</strong> Series Network Camera <strong>Installation</strong> <strong>Guide</strong>3. Replace the old dome with the new and tighten the screws.Route the cablesDepending on whether you want to route the cables through or along the wall, follow the relevantinstructions below.Routing cables along the wall1. Using the drill template drill 4 holes in the wall.2. Attach the mounting bracket to the wall using the 4 screws provided, or screws appropriate forthe wall material.3. Remove the camera unit from the unit casing by pushing the springs aside.4. Remove the gaskets from the side holes in the unit casing. If there is only one cable, removeonly one gasket.5. Place the unit casing on the mounting bracket and attach it by tightening the four screws.6. Pull the cables up through the side holes in the unit casing.7. Drag the gaskets along the cable and plug them into the holes. The gaskets should fit snugly inthe holes with no folds or bends.8. Re-attach the top part of the cable shield by tightening the two screws.Note: To avoid moisture-related problems it is recommended that the cables are routed to the camerafrom below with the cable holes facing downwards.Routing cables through the wall1. Using the drill template drill 4 holes in the wall.2. Route the network cable (and the I/O, audio cable if necessary) through the wall and throughthe holes in the mounting bracket.3. Attach the mounting bracket to the wall using the 4 screws provided, or screws appropriate forthe wall material.4. Remove the camera unit from the unit casing by pushing the springs aside.5. Remove the gaskets from the back holes in the unit casing. If there is only one cable, removeonly one gasket.6. Route the cables through these holes.7. Drag the gaskets along the cables and plug them into the holes. The gaskets should fit snugly inthe holes with no folds or bends.


