

Brochure Ellistra français / english - Implants International
Brochure Ellistra français / english - Implants International
Brochure Ellistra français / english - Implants International

You also want an ePaper? Increase the reach of your titles
YUMPU automatically turns print PDFs into web optimized ePapers that Google loves.
technique opératoire surgical technique<br />
Toutes les voies d’abord standard sont possibles pour l’implantation de la cupule press-fit.<br />
The <strong>Ellistra</strong> Press-fit Acetabular Component can be inserted through any standard approach.<br />
1 Préparation du cotyle<br />
Exciser la capsule articulaire sur toute sa circonférence<br />
de manière à pouvoir identifier clairement les limites<br />
osseuses du cotyle et à pouvoir introduire la fraise.<br />
Eliminer toutes les structures fibreuses, chondrales et<br />
ossifiées qui empêchent la préparation du cotyle.<br />
1 Acetabular preparation<br />
Excise the joint capsule circumferentially in order to<br />
define the landmarks of the bony acetabulum and allow<br />
insertion of the reamer. Clear any fibrous/chondral<br />
tissue and osteophytes that may interfere with the<br />
preparation.<br />
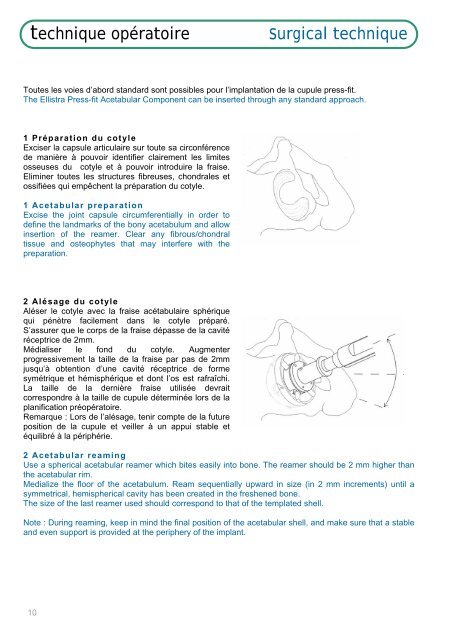
2 Alésage du cotyle<br />
Aléser le cotyle avec la fraise acétabulaire sphérique<br />
qui pénètre facilement dans le cotyle préparé.<br />
S’assurer que le corps de la fraise dépasse de la cavité<br />
réceptrice de 2mm.<br />
Médialiser le fond du cotyle. Augmenter<br />
progressivement la taille de la fraise par pas de 2mm<br />
jusqu’à obtention d’une cavité réceptrice de forme<br />
symétrique et hémisphérique et dont l’os est rafraîchi.<br />
La taille de la dernière fraise utilisée devrait<br />
correspondre à la taille de cupule déterminée lors de la<br />
planification préopératoire.<br />
Remarque : Lors de l’alésage, tenir compte de la future<br />
position de la cupule et veiller à un appui stable et<br />
équilibré à la périphérie.<br />
2 Acetabular reaming<br />
Use a spherical acetabular reamer which bites easily into bone. The reamer should be 2 mm higher than<br />
the acetabular rim.<br />
Medialize the floor of the acetabulum. Ream sequentially upward in size (in 2 mm increments) until a<br />
symmetrical, hemispherical cavity has been created in the freshened bone.<br />
The size of the last reamer used should correspond to that of the templated shell.<br />
Note : During reaming, keep in mind the final position of the acetabular shell, and make sure that a stable<br />
and even support is provided at the periphery of the implant.<br />
10