NatUral GaS Grill oWNEr'S maNUal 3100 & 4100 - Weber.com
NatUral GaS Grill oWNEr'S maNUal 3100 & 4100 - Weber.com
NatUral GaS Grill oWNEr'S maNUal 3100 & 4100 - Weber.com

Create successful ePaper yourself
Turn your PDF publications into a flip-book with our unique Google optimized e-Paper software.
coNNEctioN — Natural Gas <strong>Grill</strong>s<br />
m caUtioN: the appliance and its individual shutoff valve<br />
must be disconnected from the gas supply piping system<br />
during any pressure testing of that system at test pressures<br />
in excess of 1/2 psig (14” wc).<br />
m caUtioN: the appliance must be isolated from the gas<br />
supply piping system by closing its individual manual<br />
shutoff valve during any pressure testing of the gas supply<br />
piping system at test pressures equal to or less than 1/2 psig<br />
(14” wc).<br />
m WarNiNG: Never use an open flame when testing for gas<br />
leaks! Use of an open flame may result in serious bodily<br />
injury or death, or in a fire or an explosion causing damage<br />
to property.<br />
imPortaNt<br />
If there are local codes that apply to portable gas grills, you will have to conform to<br />
them. Installation must conform with local codes or, in the absence of local codes,<br />
with either the National Fuel Gas Code, ANSI Z223.1/NFPA 54, Natural Gas and<br />
Propane Installation Code, CSA B149.1, or Propane Storage and Handling Code,<br />
B149.2,or the Standard for Recreational Vehicles, ANSI A 119.2/NFPA 1192, and<br />
CSA Z240 RV Series, Recreational Vehicle Code, as applicable.<br />
imPortaNt<br />
When connecting or replacing any gas pipe or fittings, all joints must be sealed with<br />
leak-proof sealing <strong>com</strong>pound approved for use with natural and propane gases. After<br />
making connections, check all joints for leaks using soapy water and a brush.<br />
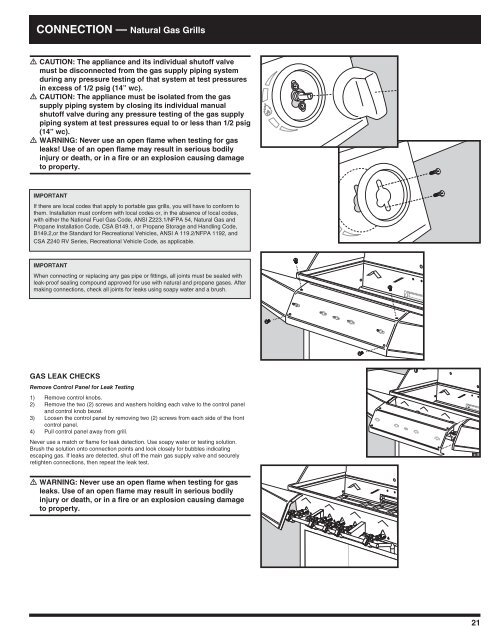
<strong>GaS</strong> lEaK chEcKS<br />
Remove Control Panel for Leak Testing<br />
1) Remove control knobs.<br />
2) Remove the two (2) screws and washers holding each valve to the control panel<br />
and control knob bezel.<br />
3) Loosen the control panel by removing two (2) screws from each side of the front<br />
control panel.<br />
4) Pull control panel away from grill.<br />
Never use a match or flame for leak detection. Use soapy water or testing solution.<br />
Brush the solution onto connection points and look closely for bubbles indicating<br />
escaping gas. If leaks are detected, shut off the main gas supply valve and securely<br />
retighten connections, then repeat the leak test.<br />
m WarNiNG: Never use an open flame when testing for gas<br />
leaks. Use of an open flame may result in serious bodily<br />
injury or death, or in a fire or an explosion causing damage<br />
to property.<br />
21