DUCATI 748 - 749 â 999 avec le - Pichard-Racing
DUCATI 748 - 749 â 999 avec le - Pichard-Racing
DUCATI 748 - 749 â 999 avec le - Pichard-Racing

Create successful ePaper yourself
Turn your PDF publications into a flip-book with our unique Google optimized e-Paper software.
__________________________________________________________Instructions de montage<br />
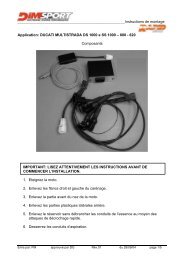
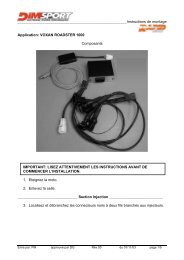
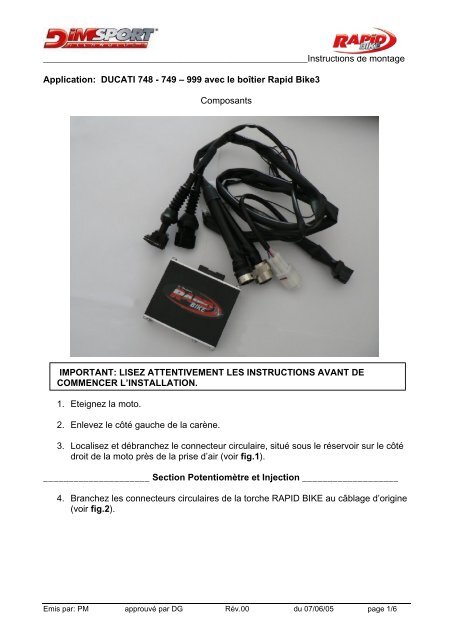
Application: <strong>DUCATI</strong> <strong>748</strong> - <strong>749</strong> – <strong>999</strong> <strong>avec</strong> <strong>le</strong> boîtier Rapid Bike3<br />
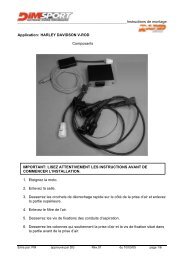
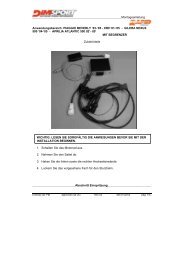
Composants<br />
IMPORTANT: LISEZ ATTENTIVEMENT LES INSTRUCTIONS AVANT DE<br />
COMMENCER L’INSTALLATION.<br />
1. Eteignez la moto.<br />
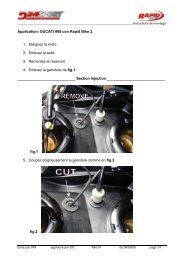
2. En<strong>le</strong>vez <strong>le</strong> côté gauche de la carène.<br />
3. Localisez et débranchez <strong>le</strong> connecteur circulaire, situé sous <strong>le</strong> réservoir sur <strong>le</strong> côté<br />
droit de la moto près de la prise d’air (voir fig.1).<br />
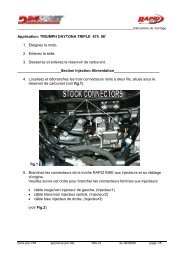
_____________________ Section Potentiomètre et Injection ___________________<br />
4. Branchez <strong>le</strong>s connecteurs circulaires de la torche RAPID BIKE au câblage d’origine<br />
(voir fig.2).<br />
Emis par: PM approuvé par DG Rév.00 du 07/06/05 page 1/6
__________________________________________________________Instructions de montage<br />
<strong>DUCATI</strong> <strong>749</strong>/<strong>999</strong><br />
fig.1<br />
fig.2<br />
<strong>DUCATI</strong> <strong>748</strong><br />
fig.1<br />
Emis par: PM approuvé par DG Rév.00 du 07/06/05 page 2/6
__________________________________________________________Instructions de montage<br />
fig.2<br />
_________________________ Section Pick-Up _____________________________<br />
5. Localisez et débranchez <strong>le</strong> connecteur noir à trois fils situé sur <strong>le</strong> côté gauche de la<br />
moto près de la batterie (voir fig.3 et fig.4).<br />
fig.3<br />
Emis par: PM approuvé par DG Rév.00 du 07/06/05 page 3/6
__________________________________________________________Instructions de montage<br />
fig.4<br />
6. Branchez <strong>le</strong> connecteur à trois fils de la torche RAPID BIKE au câblage d’origine.<br />
___________________________ Section Alimentation ________________________<br />
7. Localisez et débranchez <strong>le</strong> connecteur noir à deux fils situé sur <strong>le</strong> côté droit de la<br />
moto (voir fig.5).<br />
fig.5<br />
8. Branchez <strong>le</strong> connecteur à deux fils de la torche RAPID BIKE au câblage d’origine<br />
(voir fig.6).<br />
Emis par: PM approuvé par DG Rév.00 du 07/06/05 page 4/6
__________________________________________________________Instructions de montage<br />
fig.6<br />
IMPORTANT: suivez scrupu<strong>le</strong>usement <strong>le</strong>s points suivants, un non-respect pourrait endommager<br />
sérieusement <strong>le</strong> boîtier é<strong>le</strong>ctronique d’origine.<br />
9. Débranchez <strong>le</strong> pô<strong>le</strong> positif (câb<strong>le</strong> rouge), et <strong>le</strong> pô<strong>le</strong> négatif de la batterie (câb<strong>le</strong> noir).<br />
10. Branchez <strong>le</strong> fil <strong>avec</strong> œil<strong>le</strong>t du câblage RAPID BIKE au pô<strong>le</strong> négatif (voir fig.7).<br />
11. Rebranchez <strong>le</strong> pô<strong>le</strong> positif de la batterie.<br />
fig.7<br />
Emis par: PM approuvé par DG Rév.00 du 07/06/05 page 5/6
__________________________________________________________Instructions de montage<br />
_____________________________ Section Fina<strong>le</strong> ___________________________<br />
12. Branchez <strong>le</strong> câblage au boîtier RAPID BIKE.<br />
13. Contrô<strong>le</strong>z que tous <strong>le</strong>s fils et connections soient branchés correctement.<br />
14. Instal<strong>le</strong>r <strong>le</strong> boîtier RAPID BIKE à la moto au moyen de gaines sous la carène (voir<br />
fig.8).<br />
15. Remontez <strong>le</strong> côté gauche de la carène.<br />
fig.8<br />
Emis par: PM approuvé par DG Rév.00 du 07/06/05 page 6/6