Solis 751 4 in 1 ventilator - Wehkamp.nl
Solis 751 4 in 1 ventilator - Wehkamp.nl
Solis 751 4 in 1 ventilator - Wehkamp.nl

Create successful ePaper yourself
Turn your PDF publications into a flip-book with our unique Google optimized e-Paper software.
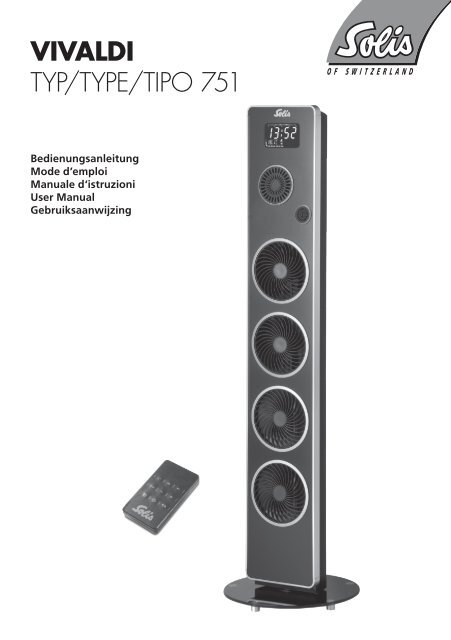
VIVALDI<br />
TYP/TYPE/TIPO <strong>751</strong><br />
Bedienungsa<strong>nl</strong>eitung<br />
Mode d’emploi<br />
Manuale d‘istruzioni<br />
User Manual<br />
Gebruiksaanwijz<strong>in</strong>g<br />
<strong>Solis</strong>_Vivaldi-Betriebsa<strong>nl</strong>eitung.<strong>in</strong>dd 1 10.01.12 13:26
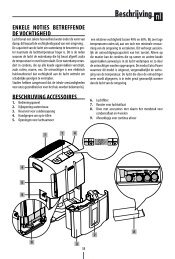
ALLGEMEINE HINWEISE<br />
1. Entfernen Sie die Verpackung und vergewissern Sie sich, dass das Gerät nicht beschädigt ist. Sollten<br />
Sie Zweifel am Zustand des Geräts haben, dann verwenden Sie es nicht und kontaktieren Sie den<br />
technischen Service. Bewahren Sie das Verpackungsmaterial (Plastiktüten, Styropor, Heftklammern<br />
usw.) für K<strong>in</strong>der unzugänglich auf, da sie sich daran verletzen könnten.<br />
Vorsicht:<br />
Dieses Gerät ist nicht geeignet für die Verwendung durch Personen (e<strong>in</strong>schliesslich K<strong>in</strong>dern) mit<br />
verm<strong>in</strong>derten körperlichen, sensorischen oder geistigen Fähigkeiten oder mangelnder Erfahrung<br />
bzw. Fachkenntnis, es sei denn sie werden von e<strong>in</strong>er für deren Sicherheit verantwortlichen Person<br />
entsprechend <strong>in</strong>struiert oder beaufsichtigt.<br />
K<strong>in</strong>der s<strong>in</strong>d zu beaufsichtigen, um sicherzustellen, dass sie nicht mit dem Gerät spielen.<br />
2. Vergewissern Sie sich vor dem Gebrauch, dass die Netzspannung Ihrer Stromsteckdose mit der auf<br />
dem Typenschild genannten Spannung übere<strong>in</strong>stimmt.<br />
Sollte das Netzkabel beschädigt se<strong>in</strong>, so ist es von <strong>Solis</strong> oder e<strong>in</strong>er von <strong>Solis</strong> autorisierten Servicestelle<br />
auszutauschen, um eventuelle Gefahren zu vermeiden.<br />
3. Das Gerät darf nur zu se<strong>in</strong>em bestimmungsgemässen Zweck verwendet werden, d. h. als<br />
Turm<strong>ventilator</strong>. <strong>Solis</strong> übernimmt ke<strong>in</strong>e Haftung für den nicht bestimmungsgemässen oder<br />
nicht ordnungsgemässen Gebrauch.<br />
4. Ziehen Sie vor Re<strong>in</strong>igungs- oder Wartungsarbeiten den Netzstecker oder schalten Sie das Gerät am<br />
Hauptschalter aus.<br />
5. Sollte das Gerät defekt se<strong>in</strong> und/oder nicht ordnungsgemäss funktionieren, so schalten Sie es<br />
aus ohne zu versuchen, es zu reparieren. Sollten Sie diese H<strong>in</strong>weise nicht beachten, so kann die<br />
Sicherheit des Geräts e<strong>in</strong>geschränkt se<strong>in</strong>.<br />
6. Schalten Sie das Gerät bei Nichtgebrauch aus und ziehen Sie den Stecker aus der Steckdose.<br />
7. Der E<strong>in</strong>satz von elektrischen Geräten erfordert die E<strong>in</strong>haltung e<strong>in</strong>iger grundlegenden Regeln:<br />
- Verwenden Sie das Gerät nicht <strong>in</strong> der Nähe von Wasser, z. B. <strong>in</strong> Bädern,<br />
Duschen oder <strong>in</strong> der Nähe von Swimm<strong>in</strong>gpools.<br />
- Berühren Sie das Gerät nicht mit nassen Händen oder Füssen.<br />
- Setzen Sie das Gerät nicht freien Witterungse<strong>in</strong>flüssen aus.<br />
- Platzieren Sie das Gerät nicht unmittelbar unter e<strong>in</strong>er Steckdose.<br />
- Decken Sie den Heizlüfter nicht ab damit es nicht zu e<strong>in</strong>er Überhitzung kommt.<br />
8. Das Gerät verfügt über e<strong>in</strong>en akustischen Signalton, der ausgelöst wird, falls es <strong>in</strong> der Betriebsart<br />
«Heizlüfter» zu e<strong>in</strong>er Überhitzung kommt. Sollte der Signalton ertönen, dann schalten Sie das Gerät<br />
sofort aus.<br />
WICHTIG: Wenn der Signalton erkl<strong>in</strong>gt, dürfen Sie das Gerät NICHT weiter verwenden.<br />
9. Max. Umgebungstemperatur 35° C.<br />
10. Verwenden Sie das Gerät nicht <strong>in</strong> der Nähe von potenziell entflammbaren oder explosiven<br />
Flüssigkeiten oder Gasen.<br />
11. Decken Sie den Heizlüfter nicht ab, damit es nicht zu e<strong>in</strong>er Überhitzung kommt.<br />
Wir empfehlen den E<strong>in</strong>satz e<strong>in</strong>es Fehlerstromschutzschalters (FI-Sicherheitsschalter), um e<strong>in</strong>en<br />
zusätzlichen Schutz bei der Verwendung von elektrischen Geräten zu gewährleisten. Es ist ratsam,<br />
e<strong>in</strong>en Sicherheitsschalter mit e<strong>in</strong>em Nennfehlerbetriebsstrom von maximal 30 mA zu verwenden.<br />
Fachmännischen Rat erhalten Sie bei Ihrem Elektriker.<br />
Das Gerät ist nur für den häuslichen Gebrauch und nicht für den gewerblichen E<strong>in</strong>satz geeignet.<br />
2<br />
<strong>Solis</strong>_Vivaldi-Betriebsa<strong>nl</strong>eitung.<strong>in</strong>dd 2 10.01.12 13:26
1h 6h 12h 18h 24h 1h 1h 6h 6h 12h 12h 18h 18h 24h 24h<br />
1<br />
2<br />
3<br />
8<br />
9<br />
9<br />
10<br />
11<br />
4<br />
4<br />
6<br />
5<br />
6<br />
VORDERSEITE<br />
1. LCD-ANZEIGE<br />
2. LAUTSPRECHER<br />
3. DUFTSCHALENABDECKUNG<br />
4. VENTILATOR-SCHUTZGITTER<br />
5. FRONTABDECKUNG<br />
6. HEIZLÜFTER-SCHUTZGITTER<br />
7. GLASFUSS<br />
7<br />
SEITENANSICHT<br />
8. SD-, USB- oder<br />
AUX-IN-PORT<br />
9. FERNBEDIENUNG<br />
RÜCKSEITE<br />
12<br />
13<br />
9. FERNBEDIENUNG<br />
10. GRIFF<br />
11. GEHÄUSERÜCKSEITE<br />
12. NETZSCHALTER<br />
-WAHLSCHALTER<br />
VENTILATOR/HEIZLÜFTER<br />
13. STECKER<br />
E<strong>in</strong>/Aus Betriebsart Schaltuhr Oszillation Temperatur/<br />
Uhrzeit/<br />
Lautstärke<br />
M<strong>in</strong>us<br />
Temperatur/<br />
Uhrzeit/<br />
Lautstärke<br />
Plus<br />
Musik e<strong>in</strong>/aus<br />
1<br />
3<br />
a = auf<br />
b = zu<br />
b<br />
a<br />
2<br />
4<br />
❙ E<strong>in</strong><br />
Aus<br />
Heizlüfter<br />
Ventilator<br />
MONTAGE<br />
Nehmen Sie das Produkt vorsichtig<br />
aus dem Karton und entfernen<br />
Sie die Plastikverpackung. Befolgen<br />
Sie die Anweisungen <strong>in</strong> den<br />
Abbildungen 1 bis 3, um den<br />
Fuss zu montieren.<br />
Stellen Sie das Gerät auf e<strong>in</strong>er<br />
stabilen ebenen Fläche auf.<br />
Br<strong>in</strong>gen Sie den Netzschalter <strong>in</strong><br />
die Stellung [OFF]. Stecken Sie<br />
das Netzkabel <strong>in</strong> e<strong>in</strong>e Steckdose<br />
mit 220-240 Volt AC. 3<br />
<strong>Solis</strong>_Vivaldi-Betriebsa<strong>nl</strong>eitung.<strong>in</strong>dd 3 10.01.12 13:26
BETRIEBSART VENTILATOR<br />
LANGSAM MITTEL SCHNELL NATÜRLICHER WIND SANFTER WIND<br />
1 2 3<br />
5 Sek<br />
Br<strong>in</strong>gen Sie den Schalter <strong>in</strong><br />
die Stellung [ I ], um das Gerät<br />
e<strong>in</strong>zuschalten und stellen Sie<br />
den anderen Schalter <strong>in</strong> die<br />
Position [ ].<br />
Betätigen Sie die Taste [ ]<br />
und die Temperatur und Uhrzeit<br />
werden abwechselnd während<br />
5 Sekunden angezeigt. Der Ventilator<br />
[ ] dreht daraufh<strong>in</strong> mit<br />
langsamer Geschw<strong>in</strong>digkeit.<br />
Betätigen Sie die MODE-Taste, um<br />
die Geschw<strong>in</strong>digkeit e<strong>in</strong>zustellen:<br />
Sie haben die Wahl zwischen<br />
Langsam Mittel Schnell <br />
Natürlicher W<strong>in</strong>d Sanfter<br />
W<strong>in</strong>d.<br />
BETRIEBSART HEIZLÜFTER<br />
KALT WARM HEISS AUTO<br />
1 2 3<br />
5 Sek<br />
Br<strong>in</strong>gen Sie den Schalter <strong>in</strong> die<br />
Stellung [ I ], um das Gerät e<strong>in</strong>zuschalten<br />
und stellen Sie den anderen<br />
Schalter <strong>in</strong> die Position [ ].<br />
Betätigen Sie die Taste [ ] und<br />
die Temperatur und Uhrzeit<br />
werden abwechselnd während<br />
5 Sekunden angezeigt. Der<br />
Lüfter [ ] heizt mit maximaler<br />
Temperatur.<br />
Betätigen Sie die MODE-Taste, um<br />
die Heizart e<strong>in</strong>zustellen: Sie haben<br />
die Wahl zwischen Automatisch <br />
Kalt Warm Heiss.<br />
Wenn Sie die Betriebsart [AUTO] wählen, bl<strong>in</strong>kt die Temperaturanzeige und Sie können die Solltemperatur<br />
e<strong>in</strong>geben. Betätigen Sie dazu die Tasten [ + ] oder [ - ]. Die Solltemperatur kann zwischen 10° C und 35° C<br />
e<strong>in</strong>gestellt werden. S<strong>in</strong>kt die Umgebungstemperatur unter den e<strong>in</strong>gegebenen Sollwert, so startet der Heizlüfter.<br />
Anzeige bl<strong>in</strong>kt 5 Sekunden.<br />
E<strong>in</strong>gabe bestätigen.<br />
Bitte beachten: Beim Ausschalten der Heizfunktion wird der Ventilator erst nach e<strong>in</strong>er Nachlaufzeit von<br />
ca. 30 Sekunden anhalten.<br />
4<br />
<strong>Solis</strong>_Vivaldi-Betriebsa<strong>nl</strong>eitung.<strong>in</strong>dd 4 10.01.12 13:27
1h 6h 12h 18h 24h<br />
UHRZEIT EINSTELLEN<br />
1 2<br />
1h 1h6h 6h12h 12h18h 18h24h 24h 1h 1h6h 6h12h 12h18h 18h24h<br />
24h<br />
1h 1h6h 6h12h 12h18h 18h24h 24h 1h 1h6h 6h12h 12h18h 18h24h<br />
24h<br />
1h 6h 12h 18h 24h<br />
1h 6h 12h 18h 24h<br />
1h<br />
Halten Sie die [ ]-Taste 3 Sekunden lang betätigt.<br />
Die Stundenanzeige beg<strong>in</strong>nt zu bl<strong>in</strong>ken.<br />
Betätigen Sie die [ + ] oder [ - ]-Tasten, um die<br />
Stunde e<strong>in</strong>zustellen.<br />
6h<br />
1h 6h 12h 18h 24h<br />
1h 1h6h 6h12h 12h18h 18h24h 24h 1h 1h6h 6h12h 12h18h 18h24h<br />
24h<br />
3 4<br />
1h 1h6h 6h12h 12h18h 18h24h 24h 1h 1h6h 6h12h 12h18h 18h24h<br />
24h<br />
1h 6h 12h 18h 24h<br />
1h<br />
6h<br />
Berühren Sie erneut die [ ]- Taste, um die e<strong>in</strong>gegebene<br />
Stundenangabe zu bestätigen.<br />
Daraufh<strong>in</strong> beg<strong>in</strong>nt die M<strong>in</strong>utenanzeige zu bl<strong>in</strong>ken.<br />
ZEITSCHALTUHR EINSTELLEN<br />
Betätigen Sie die [ + ] oder [ - ]-Tasten, um die<br />
M<strong>in</strong>uten e<strong>in</strong>zugeben. Berühren Sie erneut [ ],<br />
um die e<strong>in</strong>gegebene Uhrzeit zu bestätigen.<br />
1h 6h 12h 18h 24h<br />
1h<br />
6h<br />
Die Leiste ist <strong>in</strong> 24 Abschnitte<br />
unterteilt, die den 24 Stunden<br />
e<strong>in</strong>es Tages entsprechen.<br />
Leeres Feld: AUS (Zeitschaltuhr nicht aktiv)<br />
Gefülltes Feld: In Betrieb (Betriebszeit bestätigt)<br />
Bl<strong>in</strong>kendes Feld: Angewählt (wartet auf Bestätigung).<br />
Erfolgt ke<strong>in</strong>e E<strong>in</strong>gabe, bl<strong>in</strong>kt das Feld für 10 Sekunden.<br />
5<br />
<strong>Solis</strong>_Vivaldi-Betriebsa<strong>nl</strong>eitung.<strong>in</strong>dd 5 10.01.12 13:27
ZEITSCHALTUHR EINSTELLEN<br />
1<br />
1h 6h 12h 18h 24h<br />
Nach dem Berühren von [<br />
] bl<strong>in</strong>kt das erste Feld.<br />
1h 6h 12h 18h 24h<br />
1h 1h 1h 6h<br />
6h 6h 12h<br />
12h 12h 1h 18h<br />
18h 18h 6h 24h<br />
24h<br />
24h 12h 18h 24h<br />
2<br />
Mit [ + ] oder [ - ] wählen Sie die gewünschte Uhrzeit aus.<br />
1h 6h 12h 1h18h 6h 24h 12<br />
1h 1h 1h 6h<br />
6h 6h 12h<br />
12h 12h 18h<br />
18h 18h 24h<br />
24h<br />
24h<br />
3 Berühren Sie erneut [ ], um die Uhrzeit zu bestätigen.<br />
Das entsprechende Feld wird ausgefüllt und das nächste Feld beg<strong>in</strong>nt zu bl<strong>in</strong>ken.<br />
Nach 10 Sekunden stoppt das Bl<strong>in</strong>ken und die Zeite<strong>in</strong>stellung ist abgeschlossen.<br />
1h 6h 12h 1h 18h 6h24h<br />
1<br />
1h 1h 6h 1h 6h 12h<br />
6h 12h 18h<br />
12h 18h 24h<br />
18h<br />
1h 24h<br />
24h<br />
6h 12h 18h<br />
1h 6h 12h 18h 24h<br />
Zum E<strong>in</strong>stellen des Betriebs während e<strong>in</strong>er bestimmten Dauer, betätigen Sie die Taste [<br />
Die leeren Felder füllen sich nach und nach .<br />
Das benachbarte Feld bl<strong>in</strong>kt für jeweils 10 Sekunden.<br />
1h 6h 1<br />
1h 6h 12h 18h<br />
1h<br />
1h<br />
6h<br />
6h<br />
12h<br />
12h<br />
18h<br />
18h<br />
24h<br />
24h<br />
1h 6h 12h 18h 24h<br />
].<br />
Zum Löschen der Schaltuhr-E<strong>in</strong>stellung betätigen Sie die Taste [ ]. Verwenden Sie [ + ] oder [ - ], um<br />
das bl<strong>in</strong>kende Feld zu verschieben. Wenn das aktive Feld zu bl<strong>in</strong>ken beg<strong>in</strong>nt , betätigen Sie erneut<br />
die Taste [ ], um die e<strong>in</strong>gestellte Uhrzeit zu löschen. Das Feld ist dann wieder leer .<br />
1h 6h 12h 18h<br />
1h 6h 12h 18h 24h<br />
6<br />
<strong>Solis</strong>_Vivaldi-Betriebsa<strong>nl</strong>eitung.<strong>in</strong>dd 6 10.01.12 13:27
1h 6h 12h 18h 24h<br />
1h 6h 12h 18h 24h<br />
1h 6h 12h 18h 24h<br />
1h 6h 12h 18h 24h<br />
OSZILLATION<br />
Durch Berühren des Symbols [ ] beg<strong>in</strong>nt das Gerät h<strong>in</strong>- und her zu schwenken. Um die Oszillation<br />
abzustellen, drücken Sie erneut auf das Symbol [ ].<br />
1 2<br />
1h 6h 12h 18h 24h<br />
1h 6h 12h 18h 24h<br />
1h 6h 12h 18h 24h<br />
1h 6h 12h 18h 24h<br />
DUFTFUNKTION<br />
Rechts neben dem Lautsprecher bef<strong>in</strong>det sich e<strong>in</strong>e Duftschale. Geben Sie e<strong>in</strong>ige Tropfen Duftstoff auf<br />
den Duftverteiler aus Keramik, legen Sie diesen <strong>in</strong> das Fach e<strong>in</strong> und befestigen Sie die Abdeckung.<br />
(Wichtig: Verwenden Sie ausschliesslich Duftstoffe auf Wasserbasis. Ke<strong>in</strong>e Duftöle verwenden!)<br />
1 2 3<br />
zu<br />
auf<br />
Verwenden Sie e<strong>in</strong>e Münze, um<br />
die Abdeckung wie <strong>in</strong> Abb. 1<br />
gezeigt zu öffnen.<br />
Entnehmen Sie den Duftverteiler<br />
aus Keramik und beträufeln Sie<br />
ihn mit e<strong>in</strong>igen Tropfen Duftstoffes<br />
auf Wasserbasis.<br />
Verwenden Sie e<strong>in</strong>e Münze, um<br />
die Abdeckung wie <strong>in</strong> Abb. 3<br />
gezeigt zu schliessen.<br />
7<br />
<strong>Solis</strong>_Vivaldi-Betriebsa<strong>nl</strong>eitung.<strong>in</strong>dd 7 10.01.12 13:27
MUSIKWIEDERGABE<br />
Unterstützte Kompressionsformate: MP1 / MP2 / MP3<br />
MP3-Bitraten: 8-320 kBit/s sowie VBR (Variable Bitrate)<br />
MP3-Abtastfrequenzen: 16, 32, 44.1, 48, 11.025, 22.050, 24, 8 kHz<br />
Unterstützte Anzahl von Dateien/Ordnern: Dateien: Max. 1000; Ordner: Max. 1000 (e<strong>in</strong>schliesslich Dateien)<br />
Anbr<strong>in</strong>gen der MP3-Halterung<br />
SD<br />
AUX In<br />
USB<br />
SD<br />
AUX In<br />
USB<br />
SD<br />
AUX In<br />
USB<br />
1h 6h 12h 18h 24h<br />
SD<br />
AUX In<br />
USB<br />
SD<br />
AUX In<br />
USB<br />
1 2<br />
1 2 3<br />
1h 6h1h 12h 6h 12h 18h 24h 18h 24h 1h 6h1h 12h 6h 12h 18h 24h 18h 24h<br />
1h 6h 12h 1h 18h 6h 12h 24h 18h 24h 1h 6h 12h 1h 18h 6h 12h 24h 18h 1h24h<br />
6h 12h 18h 24h<br />
Setzen Sie e<strong>in</strong>e SD-Speicherkarte,<br />
oder e<strong>in</strong>en USB-Stick <strong>in</strong> den Port<br />
auf der rechten Seite des Geräts<br />
e<strong>in</strong> oder verb<strong>in</strong>den Sie e<strong>in</strong>en<br />
MP3-Player mit der Buchse<br />
und betätigen Sie [ ], um die<br />
Wiedergabe zu starten.<br />
1h 6h 12h 1h 18h 6h 12h 24h 18h 24h<br />
USB-/SD-Port-Musikwiedergabe.<br />
Mit [ + ] oder [ - ] stellen<br />
Sie die Lautstärke lauter oder<br />
leiser.<br />
AUX-Input – Musikwiedergabe.<br />
Regeln Sie die Lautstärke<br />
über den MP3-Player.<br />
Betätigen Sie [ ], um die<br />
Wiedergabefunktion zu beenden.<br />
1h 6h1h 12h 6h 12h 18h 24h 18h 24h<br />
USB-/SD-Port-Musikwiedergabe. Mit den Tasten | oder | der Fernbedienung spr<strong>in</strong>gen Sie zum<br />
vorhergehenden oder nächsten Musikstück.<br />
AUX-Input-Musikwiedergabe. Verwenden Sie die Tasten des MP3-Players, um zum vorher gehenden<br />
oder nächsten Lied zu spr<strong>in</strong>gen.<br />
8<br />
<strong>Solis</strong>_Vivaldi-Betriebsa<strong>nl</strong>eitung.<strong>in</strong>dd 8 10.01.12 13:27
FERNBEDIENUNG<br />
1. Setzen Sie zwei Batterien vom Typ AAA <strong>in</strong> die Fernbedienung e<strong>in</strong>.<br />
2. Die Fernbedienung enthält die nachfolgend abgebildeten Tasten.<br />
SICHERHEITSFUNKTIONEN<br />
1. Das Gerät ist mit e<strong>in</strong>em Überhitzungsschutzschalter ausgestattet.<br />
2. Bei Überhitzung schaltet der Heizlüfter automatisch ab. Nach dem Abkühlen kann das Gerät erneut<br />
durch den Benutzer gestartet werden.<br />
3. Wird das Gerät gekippt, so sorgt e<strong>in</strong>e Automatik für die Unterbrechung der Stromversorgung.<br />
Auch nach dem erneuten Senkrechtstellen des Geräts startet es nicht. Erst nach Betätigung des<br />
E<strong>in</strong>-/Aus-Schalters auf der Oberseite startet das Gerät erneut.<br />
WARTUNG<br />
WARNUNG:<br />
ZIEHEN SIE VOR DEM TRANSPORT UND VOR WARTUNGSARBEITEN IMMER ZUERST<br />
DEN NETZSTECKER. TAUCHEN SIE DAS GERÄT NICHT IN WASSER EIN!<br />
REINIGUNG: WICHTIG! TAUCHEN SIE DAS GERÄT NICHT IN WASSER EIN!<br />
Re<strong>in</strong>igen Sie die Luftansaugschlitze mit dem Bürstenaufsatz Ihres Staubsaugers.<br />
Benutzen Sie zur Re<strong>in</strong>igung des Gehäuses e<strong>in</strong> weiches Tuch.<br />
ACHTUNG:<br />
LAGERUNG:<br />
Verwenden Sie weder Benz<strong>in</strong>, Re<strong>in</strong>igungsbenz<strong>in</strong>, Verdünner noch ätzende<br />
Re<strong>in</strong>igungsmittel, da diese das Gerät beschädigen können.<br />
NIEMALS ALKOHOL ODER LÖSUNGSMITTEL zur Re<strong>in</strong>igung verwenden.<br />
Bewahren Sie das Gerät zusammen mit der Orig<strong>in</strong>albedienungsa<strong>nl</strong>eitung<br />
an e<strong>in</strong>em kühlen, trockenen Ort auf.<br />
9<br />
<strong>Solis</strong>_Vivaldi-Betriebsa<strong>nl</strong>eitung.<strong>in</strong>dd 9 10.01.12 13:27
Entsorgung<br />
EU 2002/96/EC<br />
H<strong>in</strong>weise zur ordnungsgemässen Entsorgung des Produkts gemäss EU-Richtl<strong>in</strong>ie 2002/96/EC<br />
Das Gerät darf nach Gebrauch nicht als normaler Haushaltsabfall entsorgt werden. Es muss zu e<strong>in</strong>er<br />
örtlichen Abfallsammelstelle oder e<strong>in</strong>em Händler gebracht werden, der es fachgerecht entsorgt. Die<br />
getrennte Entsorgung von elektrischen und elektronischen Geräten vermeidet im Gegensatz zur nicht<br />
fachgerechten Entsorgung mögliche negative Folgen für Umwelt und Gesundheit und ermöglicht die erneute<br />
Nutzung und Rezyklierung der Komponenten mit bedeutenden Energie- und Rohstoffe<strong>in</strong>sparungen.<br />
Um die Verpflichtung zur ordnungsgemässen Entsorgung des Geräts deutlich hervorzuheben, ist es mit<br />
dem Symbol e<strong>in</strong>es durchgestrichenen Abfallconta<strong>in</strong>ers gekennzeichnet.<br />
SOLIS behält sich das Recht vor, jederzeit technische und optische Veränderungen sowie der Produktverbesserung<br />
die<strong>nl</strong>iche Modifikationen vorzunehmen.<br />
SOLIS HELPLINE:<br />
044 874 64 14<br />
(Nur für Kund<strong>in</strong>nen und Kunden <strong>in</strong> der Schweiz)<br />
Dieser Artikel zeichnet sich durch Langlebigkeit und Zuverlässigkeit aus. Sollte aber trotzdem e<strong>in</strong>mal<br />
e<strong>in</strong>e Funktionsstörung auftreten, rufen Sie uns e<strong>in</strong>fach an. Oftmals lässt sich nämlich e<strong>in</strong>e Panne<br />
mit dem richtigen Tipp oder Kniff unkompliziert und e<strong>in</strong>fach wieder beheben, ohne dass Sie das<br />
Gerät gleich zur Reparatur e<strong>in</strong>schicken müssen. Wir stehen Ihnen gerne mit Rat und Tat zur Seite.<br />
10<br />
<strong>Solis</strong>_Vivaldi-Betriebsa<strong>nl</strong>eitung.<strong>in</strong>dd 10 10.01.12 13:27
Bedienungsfeld mit<br />
berührungsempf<strong>in</strong>dlichen<br />
Sensortasten.<br />
Grosse und gut<br />
ablesbare Anzeige<br />
von Betriebsart<br />
sowie Uhrzeit oder<br />
Raumtemperatur.<br />
Musikwiedergabe ab<br />
MP3-Player, SD-Karte<br />
oder USB-Stick.<br />
Zeitschaltuhr zur<br />
Steuerung der<br />
Betriebszeiten.<br />
SOLIS AG<br />
<strong>Solis</strong>-Haus • CH-8152 Glattbrugg-Zürich • Schweiz<br />
Telefon +41 44 874 64 54 • Telefax +41 44 874 64 99<br />
<strong>in</strong>fo@solis.ch • www.solis.ch • www.solis.com<br />
Januar 2012<br />
11<br />
<strong>Solis</strong>_Vivaldi-Betriebsa<strong>nl</strong>eitung.<strong>in</strong>dd 11 10.01.12 13:27
AVERTISSEMENTS<br />
1. Après avoir déballé l‘appareil vérifier son <strong>in</strong>tégrité. En cas de doute ne pas utiliser l‘appareil et contacter<br />
exclusivement un personnel qualifié. Les éléments d‘emballage (sacs en plastique, polystyrène,<br />
agrafes métalliques, etc.) doivent être gardés hors de la portée des enfants dans la mesure où ils<br />
représentent des sources possibles de danger.<br />
Attention:<br />
L’appareil n‘est pas dest<strong>in</strong>é à être utilisé par des personnes (y compris les enfants) aux capacités<br />
physiques, sensorielles ou mentales réduites, ou manquant d‘expérience ou de connaissance, à<br />
mo<strong>in</strong>s qu‘elles n‘aient pu bénéficier, par le biais d‘une personne responsable de leur sécurité, d‘une<br />
surveillance ou d‘<strong>in</strong>structions concernant l‘utilisation de l‘appareil.<br />
Les enfants doivent être surveillés pour éviter qu‘ils ne jouent avec l‘appareil.<br />
2. Avant de brancher l‘appareil vérifier si les données reportées sur la plaquette correspondent à celles<br />
du réseau de distribution électrique.<br />
Si le cordon d‘alimentation est endommagé, il doit être remplacé par le fabricant ou par le Centre<br />
d‘Assistance Agréé ou par un personnel qualifié af<strong>in</strong> d‘éviter des situations dangereuses.<br />
3. Cet appareil est exclusivement dest<strong>in</strong>é à l‘usage pour lequel il a été fabriqué c‘est à dire comme<br />
ventilateur à colonne. Le Fabricant ne pourra être tenu pour responsable des dommages éventuels<br />
dérivant d‘usages impropres ou <strong>in</strong>corrects.<br />
4. Avant d‘effectuer toute opération de nettoyage ou d‘entretien, mettre l‘appareil hors tension en<br />
éteignant l‘<strong>in</strong>terrupteur de l‘<strong>in</strong>stallation.<br />
5. En cas de panne et/ou de mauvais fonctionnement de l‘appareil, le mettre hors service et éviter de<br />
le manipuler. Le non-respect des <strong>in</strong>dications susmentionnées risque de compromettre la sécurité de<br />
l‘appareil.<br />
6. Si l‘appareil n‘est plus utilisé il est recommandé de l‘éte<strong>in</strong>dre et de le débrancher du réseau électrique.<br />
7. L‘utilisation de tout appareil électrique comporte le respect de certa<strong>in</strong>es règles fondamentales,<br />
notamment:<br />
- ne pas utiliser l‘appareil à proximité de sources d‘eau telles que les baignoires, les douches ou les pisc<strong>in</strong>es<br />
- ne pas toucher l‘appareil avec les ma<strong>in</strong>s ou les pieds mouillés ou humide<br />
- ne pas exposer l‘appareil aux agents atmosphériques<br />
- pour éviter la surchauffe ne couvrez pas les grilles de sortie d‘air<br />
- lorsqu‘il est activé, l‘appareil ne devrait pas être placée trop près de la sortie d’électricité<br />
8. L‘appareil est muni d‘un signal sonore qui s‘active en cas de surchauffe pendant la fonction «chauffage».<br />
S‘il sonne, éte<strong>in</strong>dre immédiatement l‘appareil.<br />
IMPORTANT: quand l‘alarme sonne NE PAS utiliser l‘appareil.<br />
9. Température ambiante maxi 35° C.<br />
10. Ne pas utiliser l‘appareil en présence de liquides ou de gaz potentiellement <strong>in</strong>flammables ou explosifs.<br />
11. Pour éviter tout risque de surchauffe, ne pas couvrir l‘appareil.<br />
Nous recommandons l’emploi d’un dispositif de protection à courant différentiel résiduel (commutateur<br />
de sécurité FI) pour garantir une protection supplémentaire dans l’emploi d’appareils électriques.<br />
Il est conseillé d’employer un commutateur de sécurité avec un courant nom<strong>in</strong>al d‘erreur de 30 mA<br />
au maximum. Vous trouverez des conseils professionnels chez votre électricien.<br />
Cet appareil est uniquement dest<strong>in</strong>é à un usage domestique et pas à une utilisation professionnelle.<br />
12<br />
<strong>Solis</strong>_Vivaldi-Betriebsa<strong>nl</strong>eitung.<strong>in</strong>dd 12 10.01.12 13:27
1h 6h 12h 18h 24h 1h 1h 6h 6h 12h 12h 18h 18h 24h 24h<br />
1<br />
2<br />
3<br />
8<br />
9<br />
9<br />
10<br />
11<br />
4<br />
4<br />
6<br />
5<br />
6<br />
DEVANT<br />
1. AFFICHAGE LCD<br />
2. HAUT PARLEUR<br />
3. COUVERCLE PARFUM<br />
4. GRILLE SORTIE VENTILATION<br />
5. COUVERCLE FRONTAL<br />
6. GRILLE SORTIE CHALEUR<br />
7. SOCLE VERRE<br />
7<br />
COTE<br />
8. SD ou USB ou AUX<br />
SUR PORTE<br />
9. COMMANDE A<br />
DISTANCE<br />
ARRIERE<br />
12<br />
13<br />
9. COMMANDE A DISTANCE<br />
10. POIGNÉE<br />
11. BOITIER ARRIERE<br />
12. INTERRUPTEUR<br />
D‘ALIMENTATIONSELECT<br />
VENTIL/CHAUFFAGE<br />
13. PRISE<br />
On/Off Mode Réglage<br />
Heure<br />
Oscillation<br />
Temp/<br />
Horloge/<br />
Dim<strong>in</strong>ution<br />
Volume<br />
Temp/Horloge/<br />
Augmentation<br />
Volume<br />
Musique<br />
On / Off<br />
1<br />
3<br />
a = dévisser<br />
b = vis<br />
b<br />
a<br />
2<br />
4<br />
❙ MARCHE<br />
ARRÊT<br />
CHALEUR<br />
VENTILATION<br />
ASSEMBLÉE<br />
E<strong>nl</strong>ever avec so<strong>in</strong> le produit du carton<br />
et de l‘enveloppe en plastique.<br />
Fixer la base en suivant les <strong>in</strong>dications<br />
des figures 1-2-3. Poser le produit<br />
sur une surface plane.<br />
Placer l‘<strong>in</strong>terrupteur d‘alimentation<br />
électrique sur OFF. Brancher le<br />
cordon d‘alimentation à une prise<br />
électrique 220-240 V ~ AC.<br />
13<br />
<strong>Solis</strong>_Vivaldi-Betriebsa<strong>nl</strong>eitung.<strong>in</strong>dd 13 10.01.12 13:27
MODE VENTILATEUR<br />
BASSE MOYENNE MAXIMUM NATURELLE NUIT<br />
1 2 3<br />
5 sec<br />
Presser le bouton sur [ I ] et<br />
presser le bouton sur le symbole<br />
[ ].<br />
Presser le bouton [ ] la température<br />
et l‘horloge s‘affichent<br />
en alternance pendant 5<br />
secondes,la ventilation m<strong>in</strong>imum<br />
[ ] sera activée.<br />
En appuyant sur le bouton [MODE]<br />
il est possible de sélectionner la<br />
vitesse de ventilation: m<strong>in</strong>imum <br />
moyenne maximum brise<br />
naturelle confort nuit.<br />
MODE CHAUFFAGE<br />
TEMPÉRATURE AMBIENTE CHALEUR BASSE CHALEUR ÉLEVÉE AUTOMATIQUE<br />
1 2 3<br />
5 sec<br />
Presser le bouton sur [ I ] et presser<br />
le bouton sur le symbole [ ].<br />
Presser le bouton du temporisateur<br />
[ ], la température et<br />
l‘horloge s‘affichent en alternance<br />
pendant 5 secondes, la chaleur<br />
maximum [ ] sera activée.<br />
En appuyant sur le bouton [MODE]<br />
il est possible de sélectionner<br />
la fonction «heater-chauffage»<br />
et de choisir: automatique <br />
température ambiante chaleur<br />
m<strong>in</strong>imum chaleur maximum.<br />
Quand on choisit la fonction [AUTO] = AUTOMATIQUE la température commence à clignoter ;la température<br />
souhaitée se configure en appuyant sur [ + ] ou [ - ] et elle est réglable entre 10° C et 35° C.Quand la température<br />
ambiante est <strong>in</strong>férieure à la température configurée, l‘appareil commence à émettre de l‘air chaud.<br />
L‘écran se met à clignoter<br />
pendant 5 secondes et<br />
valide les configurations.<br />
Remarque: Après avoir désactivé la fonction de chauffage, le ventilateur ne s’arrête qu’après avoir fonctionné<br />
encore pendant 30 secondes environ.<br />
14<br />
<strong>Solis</strong>_Vivaldi-Betriebsa<strong>nl</strong>eitung.<strong>in</strong>dd 14 10.01.12 13:27
1h 6h 12h 18h 24h<br />
MISE À L‘HEURE ACTUELLE<br />
1 2<br />
1h 1h6h 6h12h 12h18h 18h24h 24h 1h 1h6h 6h12h 12h18h 18h24h<br />
24h<br />
1h 1h6h 6h12h 12h18h 18h24h 24h 1h 1h6h 6h12h 12h18h 18h24h<br />
24h<br />
1h 6h 12h 18h 24h<br />
Appuyer sur le bouton du temporisateur [ ]<br />
pendant 3 secondes, l‘afficheur des heures se met<br />
alors à clignoter.<br />
1h 6h 12h 18h 24h<br />
1h Appuyer sur [ + 6h ] ou [ - ] pour configurer 12h l‘heure 18h<br />
actuelle.<br />
1h 6h 12h 18h 24h<br />
1h 1h6h 6h12h 12h18h 18h24h 24h 1h 1h6h 6h12h 12h18h 18h24h<br />
24h<br />
3 4<br />
1h 1h6h 6h12h 12h18h 18h24h 24h 1h 1h6h 6h12h 12h18h 18h24h<br />
24h<br />
1h 6h 12h 18h 24h<br />
1h 6h 12h 18h<br />
Appuyer sur le bouton du temporisateur [ ]<br />
pour valider l‘heure configurée. Les m<strong>in</strong>utes se<br />
mettront à clignoter.<br />
RÉGLAGE DU TEMPORISATEUR<br />
Appuyer sur [ + ] ou [ - ] pour configurer les m<strong>in</strong>utes<br />
actuelles, appuyer sur le bouton du temporisateur<br />
[ ] pour valider les m<strong>in</strong>utes configurées.<br />
1h 6h 12h 18h 24h<br />
1h 6h 12h 18h<br />
Les segments sont au nombre<br />
de 24: ils correspondent aux<br />
24 heures du jour.<br />
Segment vide: appareil éte<strong>in</strong>t<br />
Segment noir: <strong>in</strong>dication que l‘appareil sera en marche<br />
Segment clignotant: en attente de validation des<br />
opérations du temporisateur dans les 10 secondes.<br />
15<br />
<strong>Solis</strong>_Vivaldi-Betriebsa<strong>nl</strong>eitung.<strong>in</strong>dd 15 10.01.12 13:27
1h 6h 12h 18h<br />
RÉGLAGE DU TEMPORISATEUR<br />
1<br />
Appuyer sur le bouton du temporisateur [<br />
] , le segment se mettra à clignoter.<br />
1h 6h 12h 18h1h 1h 1h 6h 6h 12h 12h 18h 18h1h 24h<br />
24h 6h<br />
24h 6h<br />
12h 18h<br />
12h 18h<br />
2<br />
Appuyer sur [ + ] ou [ - ] en faisant défiler le segment en avant ou en arrière pour<br />
configurer l‘heure souhaitée de mise en marche.<br />
1h 6h 12h 18h1h 1h 1h 6h 6h 12h 12h 18h 18h 24h 6h 12h 18h<br />
1h 6h 12h 18h24h<br />
24h<br />
3<br />
Appuyer sur le bouton du temporisateur [ ] pour valider l‘heure configurée ,<br />
le segment suivant se mettra à clignoter puis, au bout de 10 secondes, le clignotement<br />
cessera pour <strong>in</strong>diquer que le temporisateur a été configuré.<br />
1h 6h 12h 18h1h 1h 6h 12h 18h 24h 6h 1h12h 6h 18h 12<br />
1h 1h 6h 6h 12h 12h 18h 18h 24h<br />
24h 24h<br />
1h 6h 12h<br />
Si l‘on souhaite configurer l‘horaire de fonctionnement cont<strong>in</strong>u, répéter en appuyant sur le bouton du<br />
temporisateur [ ], le segment deviendra , le segment suivant clignotera pendant 10 secondes.<br />
1h 6h 1<br />
1h 1h 6h 6h 12h 12h18h 18h 24h<br />
1h<br />
24h<br />
6h 12h<br />
1h 6h 12h 18h 24h<br />
Si l‘on souhaite effacer le temps sélectionné, appuyer sur le bouton du temporisateur [ ] et utiliser<br />
les boutons [ + ] ou [ - ] pour annuler les configurations en faisant défiler les segments,les segments ,<br />
deviendront des segments en appuyant sur le bouton du temporisateur [ ].<br />
1h 6h 1<br />
1h 6h 12h<br />
16<br />
<strong>Solis</strong>_Vivaldi-Betriebsa<strong>nl</strong>eitung.<strong>in</strong>dd 16 10.01.12 13:27
1h 6h 12h 18h 24h<br />
1h 6h 12h 18h 24h<br />
1h 6h 12h 18h 24h<br />
1h 6h 12h 18h 24h<br />
OSCILLATION<br />
En appuyant sur le bouton d‘oscillation [ ] l‘appareil commencera à osciller. Pour désactiver cette fonction,<br />
appuyer à nouveau sur le bouton d‘ oscillation [ ].<br />
1 2<br />
1h 6h 12h 18h 24h<br />
1h 6h 12h 18h 24h<br />
1h 6h 12h 18h 24h<br />
1h 6h 12h 18h 24h<br />
PARFUM<br />
À l‘avant de l‘appareil se trouve un diffuseur de parfum. Verser quelques gouttes de parfum sur le<br />
distributeur en céramique, le replacer dans son logement et refermer le couvercle.<br />
(Important : utiliser exclusivement des parfums à base d‘eau, ne pas utiliser de parfums à base d‘huile).<br />
1 2 3<br />
fermer<br />
ouvrir<br />
Ouvrir le couvercle du diffuseur<br />
à l‘aide d‘une pièce de monnaie.<br />
Verser quelques gouttes de<br />
parfum à base d‘eau sur le<br />
distributeur en céramique.<br />
Remettre le couvercle et fermer<br />
à l‘aide de la pièce de monnaie.<br />
17<br />
<strong>Solis</strong>_Vivaldi-Betriebsa<strong>nl</strong>eitung.<strong>in</strong>dd 17 10.01.12 13:27
Ecouter musique<br />
Format de compression: MP1/MP2/MP3<br />
taux b<strong>in</strong>aire MP3: 8-320 kbps et VBR (débit variable =)<br />
taux d‘échantillonnage MP3: 16, 32, 44.1, 48, 11.025, 22.050, 24, 8 kHz<br />
pris en charge nombre de fichiers / dossiers: Dossier: Max. 1000 Dossier: Max. 1000 (y compris le dossier)<br />
Fixation de conteneurs Mp3<br />
SD<br />
AUX In<br />
USB<br />
SD<br />
AUX In<br />
USB<br />
SD<br />
AUX In<br />
USB<br />
1h 6h 12h 18h 24h<br />
SD<br />
AUX In<br />
USB<br />
SD<br />
AUX In<br />
USB<br />
1 2<br />
1 2 3<br />
1h 6h1h 12h 6h 12h 18h 24h 18h 24h 1h 6h1h 12h 6h 12h 18h 24h 18h 24h<br />
1h 6h 12h 1h 18h 6h 12h 24h 18h 24h 1h 6h 12h 1h 18h 6h 12h 24h 18h 1h24h<br />
6h 12h 18h 24h<br />
Introduire une carte SD, un<br />
lecteur mp3 ou un disque U<br />
dans le port correspondant sur<br />
la droite de l‘unité, appuyer sur<br />
le bouton [ ], le Music Play<br />
commencera à fonctionner.<br />
1h 6h 12h 1h 18h 6h 12h 24h 18h 24h<br />
USB/SD-Lecture de la musique.<br />
Appuyez sur la Touche [ + ] o [ - ]<br />
pour regler le volume.<br />
AUX-Lecture de la musique.<br />
Utilisez MP3 pour régler le volume.<br />
Appuyer sur le bouton [ ],<br />
pour éte<strong>in</strong>dre la musique.<br />
1h 6h1h 12h 6h 12h 18h 24h 18h 24h<br />
USB/SD-Lecture de la musique. Vous pouvez utiliser le bouton | ou | de la télécommande<br />
pour lire la piste précédente ou suivante de la musique.<br />
AUX-Lecture de la musique. Utilisez le contrôle de lecteur Mp3 pour lire la piste précédente ou<br />
suivante de la musique.<br />
18<br />
<strong>Solis</strong>_Vivaldi-Betriebsa<strong>nl</strong>eitung.<strong>in</strong>dd 18 10.01.12 13:27
COMMANDE À DISTANCE<br />
1. Introduire deux piles AAA.<br />
2.En regardant les touches de la télécommande:<br />
MESURES DE SECURITE<br />
1. Une protection contre les surcharges thermiques est <strong>in</strong>stallée pour éviter les surchauffes.<br />
2. Lorsqu‘une température de surchauffe est atte<strong>in</strong>te l‘appareil s‘arrête automatiquement.<br />
3. Si l‘appareil est <strong>in</strong>cl<strong>in</strong>é, un système de sécurité coupera automatiquement le pouvoir, après<br />
la reprendre à la position verticale, il ne fonctionne pas, il ne peut fonctionner à nouveau<br />
en appuyant sur on / off sur le haut du corps.<br />
ENTRETIEN<br />
ATTENTION: TOUJOURS DEBRANCHER LA PRISE AVANT DE DEPLACER OU D‘EFFECTUER L‘ENTRETIEN,<br />
NE PAS PLONGER DANS L‘EAU!<br />
NETTOYAGE: IMPORTANT! Pas plonger les appareils dans l‘eau.<br />
Nettoyer l‘entrée d‘air à travers les broussailles d‘aspiration reliée à la dépression.<br />
Nettoyer le boîtier avec un chiffon doux.<br />
ATTENTION: Ne pas utiliser d‘essence, de benzène, de diluant, de nettoyant dur etc. qui pourraient<br />
endommager le ventilateur. NE JAMAIS utiliser d‘ALCOOL OU de SOLVANTS.<br />
STOCKAGE:<br />
stocker l‘appareil avec ces <strong>in</strong>structions dans un endroit sec et frais.<br />
19<br />
<strong>Solis</strong>_Vivaldi-Betriebsa<strong>nl</strong>eitung.<strong>in</strong>dd 19 10.01.12 13:27
Elim<strong>in</strong>ation<br />
EU 2002/96/EC<br />
Indications sur l’élim<strong>in</strong>ation réglementaire du produit conformément à la directive 2002/96/EC<br />
Après usage, l’appareil ne doit pas être élim<strong>in</strong>é avec les ordures ménagères normales. Vous devez<br />
l’apporter dans un centre local de collecte des déchets ou chez un revendeur qui l’élim<strong>in</strong>era de façon appropriée.<br />
Contrairement à une élim<strong>in</strong>ation <strong>in</strong>appropriée, l’élim<strong>in</strong>ation séparée des appareils électriques et<br />
électroniques permet d’éviter les éventuelles conséquences négatives sur l’environnement et la santé et<br />
autorise la réutilisation et le recyclage des composants, a<strong>in</strong>si que des économies d’énergie et de matières<br />
premières significatives. Af<strong>in</strong> d’attirer clairement l’attention sur l’obligation d’élim<strong>in</strong>ation réglementaire<br />
de l’appareil, celui-ci porte un symbole représentant un conteneur à ordures barré.<br />
SOLIS se réserve le droit d’apporter à tout moment des modifications techniques et de présentation, a<strong>in</strong>si<br />
que de procéder à des modifications visant à l’amélioration du produit.<br />
SOLIS HELPLINE:<br />
044 874 64 14<br />
(Uniquement pour clientes et clients en Suisse)<br />
Cet article se dist<strong>in</strong>gue par sa longévité et sa fiabilité. Si un disfonctionnement devait tout de même<br />
survenir, appelez-nous tout simplement. Il arrive souvent qu’une panne soit facile à réparer sans<br />
difficulté grâce au bon conseil et à la bonne astuce, sans que l’appareil ne doive être envoyé chez<br />
un réparateur. Nous vous conseillons et vous aidons volontiers.<br />
<strong>Solis</strong>_Vivaldi-Betriebsa<strong>nl</strong>eitung.<strong>in</strong>dd 20 10.01.12 13:27
Tableau de commande<br />
avec touches tactiles.<br />
Affichage de grandes<br />
dimensions bien lisible, pour<br />
<strong>in</strong>diquer le mode de fonctionnement<br />
a<strong>in</strong>si que l’heure<br />
ou la température ambiante.<br />
Lecture de musique<br />
par lecteur MP3,<br />
carte SD ou clé USB.<br />
Programmateur<br />
pour la commande<br />
des heures de<br />
fonctionnement.<br />
SOLIS SA<br />
<strong>Solis</strong>-Haus • CH-8152 Glattbrugg-Zurich • Suisse<br />
Téléphone +41 44 874 64 54 • Téléfax +41 44 874 64 99<br />
<strong>in</strong>fo@solis.ch • www.solis.ch • www.solis.com<br />
Janvier 2012<br />
<strong>Solis</strong>_Vivaldi-Betriebsa<strong>nl</strong>eitung.<strong>in</strong>dd 21 10.01.12 13:28
AVVERTENZE<br />
1. Dopo aver tolto l‘imballaggio assicurateVi dell‘<strong>in</strong>tegrità dell‘apparecchio. In caso di dubbio non utilizzate<br />
l‘apparecchio e rivolgeteVi al nostro Centro Assistenza Tecnica. Gli elementi dell‘imballaggio (sacchetti<br />
<strong>in</strong> plastica, polistirolo, punti metallici ecc.) non devono essere lasciati alla portata dei<br />
bamb<strong>in</strong>i <strong>in</strong> quanto possibili fonti di pericolo.<br />
Attenzione:<br />
L’apparecchio non è dest<strong>in</strong>ato a essere usato da persone (bamb<strong>in</strong>i compresi) le cui capacità fisiche,<br />
sensoriali o mentali siano ridotte, oppure con mancanza di esperienza o di conoscenza, a meno che<br />
esse abbiano potuto beneficiare, attraverso l’<strong>in</strong>termediazione di una persona responsabile della loro<br />
sicurezza, di una sorveglianza o di istruzioni riguardanti l’uso dell’apparecchio.<br />
I bamb<strong>in</strong>i devono essere controllati per evitare che gioch<strong>in</strong>o con l’apparecchio.<br />
2. Prima di collegare l‘apparecchio accertateVi che i dati di targa siano rispondenti a quelli della rete di<br />
distribuzione. Se il cavo di alimentazione è danneggiato, esso deve essere sostituito dal produttore o<br />
dal Centro Assistenza Autorizzato o da personale qualificato al f<strong>in</strong>e di evitare situazioni pericolose.<br />
3. Questo apparecchio dovrà essere dest<strong>in</strong>ato solo all‘uso per il quale è stato espressamente costruito<br />
e cioè come <strong>ventilator</strong>e a torre. Il costruttore non può essere considerato responsabile per eventuali<br />
danni derivati da usi impropri od errati.<br />
4. Prima di effettuare qualsiasi operazione di pulizia o di manutenzione, spegnete l‘apparecchio e<br />
sconnettetelo dalla rete di alimentazione elettrica togliendo la sp<strong>in</strong>a dalla presa di corrente oppure<br />
spegnendo l‘<strong>in</strong>terruttore dell‘impianto.<br />
5. In caso di guasto e/o di cattivo funzionamento dell‘apparecchio spegnetelo e non manomettetelo.<br />
Il mancato rispetto di quanto sopra può compromettere la sicurezza dell‘apparecchio.<br />
6. Quando decidete di non utilizzare più l‘apparecchio si raccomanda di renderlo <strong>in</strong>operante togliendo<br />
la sp<strong>in</strong>a dalla presa di corrente dopo averlo spento.<br />
7. L‘uso di qualsiasi apparecchio elettrico comporta l‘osservanza di alcune regole fondamentali, <strong>in</strong><br />
particolare: non usare l‘apparecchio nelle vic<strong>in</strong>anze di sorgenti d‘acqua quali vasche, docce o pisc<strong>in</strong>e,<br />
non toccate l‘apparecchio con mani o piedi bagnati o umidi, non lasciate l‘apparecchio esposto ad<br />
agenti atmosferici, per evitare il surriscaldamento non coprire le griglie di uscita dell‘aria, quando è <strong>in</strong><br />
funziona l’apparecchio non deve essere posizionato troppo vic<strong>in</strong>o alla presa di corrente.<br />
8. L‘apparecchio è dotato di un segnalatore acustico che entra <strong>in</strong> funzione <strong>in</strong> caso di surriscaldamento<br />
durante la funzione «riscaldamento». Se dovesse suonare, spegnere immediatamente l‘apparecchio.<br />
IMPORTANTE: quando l‘allarme suona NON utlizzare l‘apparecchio.<br />
9. Temperatura ambiente max 35° C.<br />
10. Non utilizzare l‘apparecchio <strong>in</strong> presenza di liquidi o gas potenzialmente <strong>in</strong>fiammabili o esplosivi.<br />
11. Per evitare il surriscaldamento, non corpire l‘apparecchio.<br />
Per una maggiore protezione durante l’impiego di elettrodomestici, vi consigliamo di usare un <strong>in</strong>terruttore<br />
di sicurezza per correnti di guasto. È consigliabile utilizzare un <strong>in</strong>terruttore di sicurezza con una corrente<br />
di guasto di esercizio nom<strong>in</strong>ale di max. 30 mA. Per una consulenza specializzata rivolgetevi al vostro<br />
elettricista di fiducia.<br />
L‘apparecchio è dest<strong>in</strong>ato esclusivamente all‘uso domestico e non a quello commerciale.<br />
22<br />
<strong>Solis</strong>_Vivaldi-Betriebsa<strong>nl</strong>eitung.<strong>in</strong>dd 22 10.01.12 13:28
1h 6h 12h 18h 24h 1h 1h 6h 6h 12h 12h 18h 18h 24h 24h<br />
1<br />
2<br />
3<br />
8<br />
9<br />
9<br />
10<br />
11<br />
4<br />
4<br />
6<br />
5<br />
6<br />
7<br />
12<br />
13<br />
VISTA FRONTALE<br />
1. LCD-ANZEIGE<br />
2. DIFFUSORE<br />
3. COPERCHIO FRAGRANZE<br />
4. GRIGLIA SCARICO VENTOLA<br />
5. COPERCHIO FRONTALE<br />
6. GRIGLIA SCARICO RISCALDATORE<br />
7. BASE IN VETRO<br />
VISTA LATERALE<br />
8. INGRESSO<br />
SD o USB o AUX<br />
9. TELECOMANDO<br />
VISTA POSTERIORE<br />
9. TELECOMANDO<br />
10. MANIGLIA<br />
11. ALLOGGIAMENTO POSTERIORE<br />
12. INTERRUTTORE ALIMENTAZIONE/<br />
SELEZIONE VENTILATORE-<br />
RISCALDATORE<br />
13. PRESA<br />
Acceso/spento Modalità Impostazione<br />
timer<br />
Oscillazione<br />
Temp/<br />
Orologio/<br />
Dim<strong>in</strong>uzione<br />
volume<br />
Temp/<br />
Orologio/<br />
Aumento<br />
volume<br />
Musica<br />
On/Off<br />
1<br />
3<br />
a = svitare<br />
b = avvitare<br />
b<br />
a<br />
2<br />
4<br />
❙ ACCESO<br />
SPENTO<br />
CALDO<br />
VENTILAZIONE<br />
ASSEMBLAGGIO<br />
Rimuovere il prodotto con cura<br />
dal cartone e dalla busta di plastica.<br />
Fissare la base seguendo<br />
le <strong>in</strong>dicazioni delle figure 1-2-3.<br />
Appoggiare il prodotto su una<br />
superficie piana. Impostare<br />
l‘<strong>in</strong>terruttore per l‘alimentazione<br />
elettrica su OFF. Collegare il cavo<br />
di alimentazione ad una presa<br />
elettrica 220-240 V ~ AC.<br />
23<br />
<strong>Solis</strong>_Vivaldi-Betriebsa<strong>nl</strong>eitung.<strong>in</strong>dd 23 10.01.12 13:28
FUNZIONE VENTILAZIONE<br />
BASSO MEDIO ALTO NATURALE NOTTURNO<br />
1 2 3<br />
5 sec<br />
Premere il pulsante su „I“ e<br />
premere il pulsante sul simbolo<br />
[ ].<br />
Premere il pulsante [ ], la visualizzazione<br />
della temperatura e<br />
dell‘orologio si alterneranno per<br />
5 secondi, la ventilazione bassa<br />
[ ] sarà attivata.<br />
Premendo il pulsante «MODE»<br />
si può selezionare la velocità di<br />
ventilazione: basso medio <br />
massimo brezza naturale <br />
comfort notte.<br />
FUNZIONE RISCALDAMENTO<br />
TEMPERATURA AMBIENTE CALDO MINIMO CALDO MASSIMO AUTOMATICO<br />
1 2 3<br />
5 sec<br />
Premere il pulsante su [ I ] e premere<br />
il pulsante sul simbolo [ ].<br />
Premere il pulsante timer [ ], la<br />
visualizzazione della temperatura<br />
e dell‘orologio si alterneranno<br />
per 5 secondi, il calore massimo<br />
[ ] sarà attivato.<br />
Premendo il pulsante «MODE»<br />
si può selezionare la funzione<br />
«heater-riscaldamento» e si può<br />
scegliere: automatico temperatura<br />
ambiente calore basso <br />
calore alto.<br />
Quando si sceglie la funzione [AUTO] = AUTOMATICO la temperatura <strong>in</strong>izia a lampeggiare; la temperatura<br />
desiderata si imposta premendo [ + ] o [ - ] ed è regolabile tra 10° C e 35° C. Quando la temperatura<br />
ambiente è <strong>in</strong>feriore a quella impostata, l‘apparecchio <strong>in</strong>izia ad emettere aria calda.<br />
24<br />
Il display <strong>in</strong>izia a lampeggiare<br />
per 5 secondi e conferma le<br />
impostazioni.<br />
Attenzione:<br />
Quando si disattiva la modalità riscaldamento, la ventola si fermerà dopo un <strong>in</strong>tervallo di circa 30 secondi.<br />
<strong>Solis</strong>_Vivaldi-Betriebsa<strong>nl</strong>eitung.<strong>in</strong>dd 24 10.01.12 13:28
1h 6h 12h 18h 24h<br />
IMPOSTAZIONE DELL‘ORA ATTUALE<br />
1 2<br />
1h 1h6h 6h12h 12h18h 18h24h 24h 1h 1h6h 6h12h 12h18h 18h24h<br />
24h<br />
1h 1h6h 6h12h 12h18h 18h24h 24h 1h 1h6h 6h12h 12h18h 18h24h<br />
24h<br />
1h 6h 12h 18h 24h<br />
1h 6h 12h 18h 24h<br />
1h 6h 12h<br />
Premere il pulsante timer [ ] per 3 secondi, il Premere [ + ] o [ - ] per impostare l‘ora attuale.<br />
display delle ore <strong>in</strong>izia a lampeggiare.<br />
1h 6h 12h 18h 24h<br />
1h 1h6h 6h12h 12h18h 18h24h 24h 1h 1h6h 6h12h 12h18h 18h24h<br />
24h<br />
3 4<br />
1h 1h6h 6h12h 12h18h 18h24h 24h 1h 1h6h 6h12h 12h18h 18h24h<br />
24h<br />
1h 6h 12h 18h 24h<br />
1h 6h 12h<br />
Premere il pulsante timer [ ] per confermare Premere [ + ] o [ - ] per impostare i m<strong>in</strong>utri attuali,<br />
l‘ora impostata. I m<strong>in</strong>uti <strong>in</strong>izieranno a lampeggiare. premere il tasto timer [ ] per confermare i<br />
m<strong>in</strong>uti impostati.<br />
IMPOSTAZIONE TIMER<br />
1h 6h 12h 18h 24h<br />
1h 6h 12h<br />
I segmenti sono 24: corrispondono<br />
alle 24 ore del giorno.<br />
Segmento vuoto: apparecchio spento.<br />
Segmento nero: <strong>in</strong>dicazione che l‘apparecchio sarà <strong>in</strong> funzione.<br />
Segmento lampeggiante: <strong>in</strong> attesa di conferma delle operazioni timer entro 10 secondi.<br />
25<br />
<strong>Solis</strong>_Vivaldi-Betriebsa<strong>nl</strong>eitung.<strong>in</strong>dd 25 10.01.12 13:28
1h 6h 12h 18h 24h<br />
IMPOSTAZIONE TIMER<br />
1<br />
Premere il pulsante timer [<br />
], il segmento lampeggerà.<br />
1h 6h 12h 1h 18h6h 1h 1h 6h 6h 12h 12h 1h 18h 18h6h 24h<br />
24h 12h 18h<br />
24h 12h 18h<br />
24h<br />
24h<br />
2<br />
Premere [ + ] o [ - ] facendo scorrere il segmento avanti o <strong>in</strong>dietro per impostare<br />
l‘ora desiderata di accensione.<br />
1h 6h 12h 1h 18h6h 1h 1h 6h 6h 12h 12h 18h 18h 24h<br />
24h 12h 1h 18h 6h 24h12<br />
24h<br />
3<br />
Premere il pulsante timer [ ] per confermare l‘ora impostata , il successivo segmento<br />
lampeggerà e dopo 10 secondi non lanpeggerà più <strong>in</strong>dicando così che il timer è<br />
stato impostato.<br />
1h 6h 12h 1h 18h6h 1h<br />
1h 1h 6h 6h 12h 12h 18h 18h 24h<br />
24h 12h 1h 6h 18h 6h 12h 24h12<br />
1h 6h 12h 24h<br />
18h 24h<br />
Se si desidera impostare l‘orario di lavoro cont<strong>in</strong>uo, ripetere premendo il pulsante timer [<br />
diventerà , , il succesivo segmento lampeggerà per 10 secondi.<br />
], il segmento<br />
1h 1h 6h 6h12h<br />
12<br />
1h 6h 12h 18h 24h<br />
1h 6h 12h 18h 24h<br />
1h 6h 12h 18h 24h<br />
Se si desidera cancellare il tempo selezionato, premere il pulsante timer [ ] e utilizzare i pulsanti [ + ] o<br />
[ - ] per annullare le impostazioni facendo scorrere I segmenti, i segmenti , diventeranno segmenti<br />
premendo il pulsante timer [ ].<br />
1h 6h 12h<br />
1h 6h 12h 18h 24h<br />
26<br />
<strong>Solis</strong>_Vivaldi-Betriebsa<strong>nl</strong>eitung.<strong>in</strong>dd 26 10.01.12 13:28
1h 6h 12h 18h 24h<br />
1h 6h 12h 18h 24h<br />
1h 6h 12h 18h 24h<br />
1h<br />
6h<br />
OSCILLAZIONE<br />
Premendo il pulsante di oscillazione [ ] l‘apparecchio <strong>in</strong>izierà ad oscillare.<br />
Per disattivare questa funzione,premere nuovamente il pulsante di oscillazione [<br />
].<br />
1 2<br />
1h 6h 12h 18h 24h<br />
1h 6h 12h 18h 24h<br />
1h 6h 12h 18h 24h<br />
1h 6h 12h 18h 24h<br />
FUNZIONE PROFUMATORE<br />
Sulla parte frontale dell‘apparecchio c‘è un diffusore di profumo. Mettere qualche goccia di profumo<br />
sull‘apposito erogatore di profuno <strong>in</strong> ceramica, rimettere nel vano e richiudere il coperchio.<br />
(Importante: utilizzare solo profumi a base di acqua, non si possono utilizzare profumi a base di olio).<br />
1 2 3<br />
chiudere<br />
aprire<br />
Aprire il coperchio del profumatore<br />
con una moneta.<br />
Mettere sull‘apposito erogatore<br />
di profumo <strong>in</strong> ceramica, qualche<br />
goccia di profumo a base di acqua.<br />
Rimette il coperchio e chiudere<br />
con la moneta.<br />
27<br />
<strong>Solis</strong>_Vivaldi-Betriebsa<strong>nl</strong>eitung.<strong>in</strong>dd 27 10.01.12 13:28
Ascoltare Musica<br />
Formato di compressione: MP1/MP2/MP3<br />
Bit rate MP3: 8-320 kbps e VBR (= Variable BitRate)<br />
MP3 sample rates: 16, 32, 44.1, 48, 11.025, 22.050, 24, 8 kHz<br />
Supportati numero di file / cartelle: File: max. 1000 Cartella: max. 1000 (compreso file)<br />
Fissaggio contenitore porta Mp3<br />
SD<br />
AUX In<br />
USB<br />
SD<br />
AUX In<br />
USB<br />
SD<br />
AUX In<br />
USB<br />
1h 6h 12h 18h 24h<br />
SD<br />
AUX In<br />
USB<br />
SD<br />
AUX In<br />
USB<br />
1 2<br />
1 2 3<br />
1h 6h1h 12h 6h 12h 18h 24h 18h 24h 1h 6h1h 12h 6h 12h 18h 24h 18h 24h<br />
1h 6h 12h 1h 18h 6h 12h 24h 18h 24h 1h 6h 12h 1h 18h 6h 12h 24h 18h 1h24h<br />
6h 12h 18h 24h<br />
Inserire una SD card, lettore Mp3 o<br />
un disco U alla porta corrispondente<br />
sulla destra dell‘unità, premere<br />
[ ] il pulsante ,music-play <strong>in</strong>izierà<br />
a funzionare.<br />
1h 6h 12h 1h 18h 6h 12h 24h 18h 24h<br />
Porta USB/SD-Ascoltare musica.<br />
Premere il tasto [ + ] o [ - ] per<br />
regolare il volume.<br />
Ingresso AUX-Ascoltare musica.<br />
Usare Mp3 per regolare il volume.<br />
Premere il pulsante [<br />
spegnere la musica.<br />
] per<br />
1h 6h1h 12h 6h 12h 18h 24h 18h 24h<br />
Porta USB/SD-Ascoltare musica. È possibile utilizzare il pulsante | o | del telecomando per<br />
riprodurre la traccia precedente o successiva della musica.<br />
Ingresso AUX-Ascoltare musica. Utilizzare Mp3 per riprodurre la traccia precedente o successiva<br />
della musica.<br />
28<br />
<strong>Solis</strong>_Vivaldi-Betriebsa<strong>nl</strong>eitung.<strong>in</strong>dd 28 10.01.12 13:28
TELECOMANDO<br />
1.Inserire due pile stile tipo AAA.<br />
2.Visione dei tasti del telecomando:<br />
MISURE DI SICUREZZA<br />
1. Onde evitare il sovrariscaldamento, l‘unità dispone di un sistema di protezione da sovraccarico termico.<br />
2. Qualora venga raggiunta la temperatura di sovrariscaldamento, il riscaldatore viene automaticamente<br />
spento. Quando l‘apparecchio si è raffreddato, può essere riavviato.<br />
3. Se l‘unità si <strong>in</strong>cl<strong>in</strong>a accidentalmente, un sistema di sicurezza toglierà automaticamente la corrente;<br />
quanto l‘apparecchio sarà <strong>in</strong> posizione verticale, sarò spento e per riprist<strong>in</strong>are le funzioni si dovrà<br />
premere il tasto on/off situato nella parte superiore.<br />
MANUTENZIONE<br />
ATTENZIONE:<br />
SCOLLEGARE SEMPRE IL CAVO DI ALIMENTAZIONE PRIMA DI SPOSTARE L’UNITÀ O<br />
EFFETTUARNE LA MANUTENZIONE. NON IMMERGERE L‘APPARECCHIO IN ACQUA!<br />
PULIZIA:<br />
ATTENZIONE:<br />
IMPORTANTE! NON IMMERGERE L‘UNITA‘ IN ACQUA.<br />
Pulire la presa d’aria mediante l’aspiratore a spazzola collegato all’aspirapolvere.<br />
Pulire il corpo dell‘apparecchio con un panno morbido.<br />
Non utilizzare benz<strong>in</strong>a, benzene, diluenti, detergenti forti ecc. <strong>in</strong> quanto possono<br />
danneggiare il prodotto. NON UTILIZZARE ALCOOL O SOLVENTI.<br />
CONSERVAZIONE: Conservare l‘apparecchio unitamente alle presenti istruzioni all’<strong>in</strong>terno<br />
dell’imballaggio orig<strong>in</strong>ale <strong>in</strong> un luogo fresco e asciutto.<br />
29<br />
<strong>Solis</strong>_Vivaldi-Betriebsa<strong>nl</strong>eitung.<strong>in</strong>dd 29 10.01.12 13:28
Smaltimento<br />
EU 2002/96/EC<br />
Istruzioni per lo smaltimento del prodotto conforme alle prescrizioni secondo la direttiva<br />
EU 2002/96/EC<br />
Alla f<strong>in</strong>e del ciclo di vita, l’apparecchio non deve essere smaltito <strong>in</strong>sieme ai rifiuti domestici. Lo stesso<br />
dovrà essere portato a un centro di raccolta rifiuti locale o a un rivenditore che provvederà al regolare<br />
smaltimento. Rispetto a uno smaltimento non conforme, lo smaltimento separato di apparecchi elettrici<br />
ed elettronici evita conseguenze negative per l’ambiente e per la salute e consente <strong>in</strong>oltre il recupero<br />
e il riutilizzo di componenti con un risparmio energetico e di materia prima notevole. Per richiamare<br />
l’attenzione sull’obbligo di smaltimento regolare dell’apparecchio, lo stesso è contrassegnato con un<br />
simbolo di un contenitore di rifiuti barrato.<br />
SOLIS si riserva il diritto di apportare, <strong>in</strong> qualsiasi momento, modifiche tecniche ed estetiche nonché<br />
modifiche atte a migliorare il prodotto.<br />
SOLIS HELPLINE:<br />
044 874 64 14<br />
(Solo per i clienti <strong>in</strong> Svizzera)<br />
Questo articolo si contraddist<strong>in</strong>gue per la sua lunga durata ed affidabilità. Se ciononostante<br />
dovessero presentarsi dei problemi di funzionamento, ci telefoni. Spesso, un guasto si risolve<br />
senza complicazioni e <strong>in</strong> modo semplice con il consiglio o lo stratagemma giusti senza dovere<br />
spedire subito l’apparecchio per ripararlo. Siamo a Sua disposizione per consigli ed aiuto.<br />
<strong>Solis</strong>_Vivaldi-Betriebsa<strong>nl</strong>eitung.<strong>in</strong>dd 30 10.01.12 13:28
Pannello di controllo<br />
con tasti sensorici<br />
sensibili.<br />
Ampia visualizzazione<br />
delle date operative,<br />
come anche <strong>in</strong>dicazione<br />
orario e temperatura<br />
ambiente.<br />
Riproduzione di musica<br />
tramite lettore MP3,<br />
SD-Card o chiavetta USB.<br />
Timer per controllo<br />
messa <strong>in</strong> funzione.<br />
SOLIS AG<br />
<strong>Solis</strong>-Haus • CH-8152 Glattbrugg-Zurigo • Svizzera<br />
Telefono +41 44 874 64 54 • Fax +41 44 874 64 99<br />
<strong>in</strong>fo@solis.ch • www.solis.ch • www.solis.com<br />
Gennaio 2012<br />
<strong>Solis</strong>_Vivaldi-Betriebsa<strong>nl</strong>eitung.<strong>in</strong>dd 31 10.01.12 13:28
GENERAL DIRECTIONS<br />
1. Remove the packag<strong>in</strong>g and make sure that the appliance is <strong>in</strong>tact. If <strong>in</strong> doubt, do not use it and<br />
contact our Technical Assistance Centre. Packag<strong>in</strong>g materials (plastic bags, polystyrene, staples etc.)<br />
must be kept out of the reach of children as they could be hazardous.<br />
Caution:<br />
This appliance is not <strong>in</strong>tended for use by persons (<strong>in</strong>clud<strong>in</strong>g children) with reduced physical, sensory<br />
or mental capabilities, or lack of experience and knowledge, u<strong>nl</strong>ess they have been given supervision<br />
or <strong>in</strong>struction concern<strong>in</strong>g use of the appliance by a person responsible for their safety. Children<br />
should be supervised to ensure that they do not play with the appliance.<br />
2. Before connect<strong>in</strong>g the appliance, check that the appliance rat<strong>in</strong>g corresponds to the ma<strong>in</strong>s rat<strong>in</strong>g.<br />
If the power cord is damaged, it must be replaced by the manufacturer or his service agent or a similar<br />
qualified person <strong>in</strong> order to avoid a hazard.<br />
3. This appliance must o<strong>nl</strong>y be used for the purpose for which it has been manufactured, i.e. as a tower<br />
fan. The manufacturer is not responsible for any damage caused by improper or <strong>in</strong>correct use.<br />
4. Before clean<strong>in</strong>g or carry<strong>in</strong>g out ma<strong>in</strong>tenance on the appliance, disconnect it from the electrical ma<strong>in</strong>s<br />
by remov<strong>in</strong>g the plug from the electrical outlet or by switch<strong>in</strong>g off the system switch.<br />
5. If the appliance is faulty and/or operat<strong>in</strong>g <strong>in</strong>correctly, switch it off without tamper<strong>in</strong>g with it. If the<br />
above is disregarded, the safety of the appliance may be compromised.<br />
6. Switch off the appliance and remove the plug from the electrical outlet when not <strong>in</strong> use.<br />
7. The use of any electrical appliance calls for the awareness of some basic rules, such as:<br />
- do not use the appliance near sources of water such as baths, showers or swimm<strong>in</strong>g pools<br />
- do not touch the appliance with wet or damp hands or feet<br />
- do not leave the appliance exposed to atmospheric agents<br />
- the appliance must not be located immediately below a socket-outlet<br />
- <strong>in</strong> order to avoid overheat<strong>in</strong>g, do not cover the heater<br />
8. The unit has an acoustic warn<strong>in</strong>g device that is triggered <strong>in</strong> the event of overheat<strong>in</strong>g dur<strong>in</strong>g the<br />
«heat<strong>in</strong>g» function. If it goes off, turn off the appliance immediately. IMPORTANT: when the alarm<br />
sounds, do NOT use the appliance.<br />
9. Max. ambient temperature 35° C.<br />
10. Do not use the appliance <strong>in</strong> the presence of potentially flammable or explosive liquids or gases.<br />
11. In order to avoid overheat<strong>in</strong>g, do not cover the heater.<br />
We recommend the <strong>in</strong>stallation of a residual current circuit-breaker to provide additional protection<br />
when us<strong>in</strong>g electrical appliances. It is advisable to use a circuit-breaker with a nom<strong>in</strong>al fault current<br />
of maximum 30 mA. Your local electrician can advise you.<br />
This appliance is <strong>in</strong>tended for domestic use o<strong>nl</strong>y. It is not suitable for commercial use.<br />
32<br />
<strong>Solis</strong>_Vivaldi-Betriebsa<strong>nl</strong>eitung.<strong>in</strong>dd 32 10.01.12 13:28
1h 6h 12h 18h 24h 1h 1h 6h 6h 12h 12h 18h 18h 24h 24h<br />
1<br />
2<br />
3<br />
8<br />
9<br />
9<br />
10<br />
11<br />
4<br />
4<br />
6<br />
5<br />
6<br />
FRONT<br />
1. LCD<br />
2. SPEAKER<br />
3. PERFUME COVER<br />
4. FAN EXHAUSTED GRILL<br />
5. FRONT COVER<br />
6. HEATER EXHAUSTED GRILL<br />
7. BASE GLASS<br />
7<br />
SIDE<br />
8. SD or USB or AUX<br />
IN PORT<br />
9. REMOTE<br />
CONTROLLER<br />
REAR<br />
12<br />
13<br />
9. REMOTE CONTROLLER<br />
10. HANDLE<br />
11. REAR HOUSING<br />
12. POWER SWITCH -FAN/HEATER<br />
SELECT<br />
13. PLUG<br />
On/Off Mode Timer sett<strong>in</strong>g Oscillation Temp/ Clock/<br />
Volume<br />
Decrease<br />
Temp/ Clock/<br />
Volume<br />
Increase<br />
Music On/Off<br />
1<br />
3<br />
a = loose<br />
b = tight<br />
b<br />
a<br />
2<br />
4<br />
❙ On<br />
Off<br />
HEATER<br />
FAN<br />
ASSEMBLING<br />
Remove the product carefully from<br />
the plastic bag and the carton.<br />
Follow step 1 to 3 to fix base.<br />
Put the heater on a stable flat<br />
surface. Set the ma<strong>in</strong> power switch<br />
to’ OFF’. Plug the<br />
cord set <strong>in</strong>to a 220-240V ~ A.C.<br />
electrical outlet.<br />
33<br />
<strong>Solis</strong>_Vivaldi-Betriebsa<strong>nl</strong>eitung.<strong>in</strong>dd 33 10.01.12 13:28
FAN MODE<br />
LOW SPEED MID SPEED HIGH SPEED NATURE WIND SLEEPING WIND<br />
1 2 3<br />
5 sec<br />
Press the [ I ] button turn on Press the [ ] power button,<br />
power and turn the other switch the temperature and the current<br />
to the [ ]. time display for 5 seconds<br />
alternately,[ ] low speed will<br />
be activated.<br />
Press the «MODE» button can<br />
set speed option: low medium<br />
maximum natural w<strong>in</strong>d <br />
sleep<strong>in</strong>g w<strong>in</strong>d.<br />
HEATER MODE<br />
COOL FAN LOW HEAT HIGH HEAT AUTO<br />
1 2 3<br />
5 sec<br />
Press the [ I ] button turn on power<br />
and turn the other switch to the<br />
[ ].<br />
Press the [ ], power button<br />
the temperature and the current<br />
time display for 5 seconds<br />
alternately, [ ] high heat will<br />
be activated.<br />
Press the «Mode» button can<br />
set heater option: Auto cool<br />
fan low heat high heat.<br />
When chose [AUTO] mode, the temperature will flash and a target temperature can be set by press<strong>in</strong>g [ + ] or<br />
[ - ] -button, the target temperature can be from 10° C to 35° C. When the environment temperature lower<br />
than the target temperature, the heater start to work.<br />
flash for 5 seconds and<br />
confirm selected<br />
Note: When the heat<strong>in</strong>g function is switched off, the fan keeps on work<strong>in</strong>g for approximately 30 seconds<br />
until it switches off.<br />
34<br />
<strong>Solis</strong>_Vivaldi-Betriebsa<strong>nl</strong>eitung.<strong>in</strong>dd 34 10.01.12 13:28
1h 6h 12h 18h 24h<br />
CURRENT TIME SETTING<br />
1 2<br />
1h 1h6h 6h12h 12h18h 18h24h 24h 1h 1h6h 6h12h 12h18h 18h24h<br />
24h<br />
1h 1h6h 6h12h 12h18h 18h24h 24h 1h 1h6h 6h12h 12h18h 18h24h<br />
24h<br />
1h 6h 12h 18h 24h<br />
1h 6h 12h 18h 24h<br />
1h 6h 12h 18h<br />
Press the [ ] timer button for 3 seconds, Press [ + ] or [ - ] button set the current hour.<br />
the hour digit start to flash.<br />
1h 6h 12h 18h 24h<br />
1h 1h6h 6h12h 12h18h 18h24h 24h 1h 1h6h 6h12h 12h18h 18h24h<br />
24h<br />
3 4<br />
1h 1h6h 6h12h 12h18h 18h24h 24h 1h 1h6h 6h12h 12h18h 18h24h<br />
24h<br />
1h 6h 12h 18h 24h<br />
1h 6h 12h 18h<br />
Press the [ ] timer button to confirm the hour<br />
selected, and the m<strong>in</strong>ute digit start to flash.<br />
Press [ + ] or [ - ] button set the current m<strong>in</strong>ute,<br />
press [ ] timer to confirm selected.<br />
1h 6h 12h 18h 24h<br />
1h 6h 12h 18h<br />
TIMER SETTING<br />
Segments hours are 24:<br />
correspond<strong>in</strong>g to 24 hours<br />
of the day<br />
empty dot: off ( canceled) status.<br />
selected dot: work<strong>in</strong>g ( confirmed) status.<br />
flash dot: selected ( wait<strong>in</strong>g confirmation) if without<br />
any timer operations, flash<strong>in</strong>g carry out 10 seconds<br />
35<br />
<strong>Solis</strong>_Vivaldi-Betriebsa<strong>nl</strong>eitung.<strong>in</strong>dd 35 10.01.12 13:28
1h 6h 12h 18h 24h<br />
TIMER SETTING<br />
1<br />
Press<strong>in</strong>g the [<br />
] timer button, one dot will flash.<br />
1h 6h 12h 18h 24h<br />
1h 1h 1h 6h<br />
6h 6h 1h12h 12h 12h 6h 18h<br />
18h 18h 12h 24h<br />
24h<br />
24h 18h 24h<br />
2<br />
Press [ + ] or [ - ] button can move dot for time selection.<br />
1h 6h 12h 18h 24h 1h<br />
1h 1h 1h 6h<br />
6h 6h 12h<br />
12h 12h 18h<br />
18h 18h 24h<br />
24h<br />
24h<br />
6h<br />
3 Press [ ], timer button to confirm the selected time, dot become then<br />
the next dot will become flash<strong>in</strong>g, after10 seconds the dot flash<strong>in</strong>g stops and<br />
the timer sett<strong>in</strong>g is completed.<br />
1h 6h 12h 18h 24h1h<br />
6h<br />
1h 1h 6h 1h 6h 12h<br />
6h 12h 18h<br />
12h<br />
1h 18h 24h<br />
18h<br />
6h 24h<br />
24h<br />
12h 18h 24h<br />
1h 6h 12h 18h 24h<br />
If you want to set the cont<strong>in</strong>uous work<strong>in</strong>g time dur<strong>in</strong>g a certa<strong>in</strong> period of time, repeat press<strong>in</strong>g [<br />
button, the will become .one by one, then next dot will flash for 10 seconds.<br />
]<br />
1h 6h<br />
1h 6h 12h 18h 24h<br />
1h 6h 12h 1h 18h 6h 24h 12h 18h 24h<br />
1h 6h 12h 18h 24h<br />
If you want to cancel the timer sett<strong>in</strong>g ,press [ ]. button, and use [ + ] or [ - ] button to move flash<br />
dot, when the become , press the [ ] button to cancel the selected time and dot will be .<br />
1h 6h 12h 18h 24h<br />
1h 6h 12h 18h 24h<br />
36<br />
<strong>Solis</strong>_Vivaldi-Betriebsa<strong>nl</strong>eitung.<strong>in</strong>dd 36 10.01.12 13:28
1h 6h 12h 18h 24h<br />
1h 6h 12h 18h 24h<br />
1h 6h 12h 18h 24h<br />
1h 6h 12h 18h 24h<br />
OSCILLATING<br />
Press the [ ] oscillation button will allow the appliance to oscillate. To stop the oscillation,<br />
press the [ ] oscillation button once more.<br />
1 2<br />
1h 6h 12h 18h 24h<br />
1h 6h 12h 18h 24h<br />
1h 6h 12h 18h 24h<br />
1h 6h 12h 18h 24h<br />
PERFUME FUNCTION<br />
There is a perfume slot on the right of speaker. Drop some perfume to the ceramic and <strong>in</strong>sert to the slot<br />
and close the cover.<br />
(Important: Must use water-based fragrance, can not use oil-based fragrance)<br />
1 2 3<br />
close<br />
open<br />
Use a co<strong>in</strong> to open the cover as<br />
picture 1 show.<br />
Take out the ceramic and drop<br />
the water-based fragrance.<br />
Use a co<strong>in</strong> and close the cover as<br />
picture 3 show.<br />
37<br />
<strong>Solis</strong>_Vivaldi-Betriebsa<strong>nl</strong>eitung.<strong>in</strong>dd 37 10.01.12 13:28
Music Play<br />
Compression format: MP1/MP2/MP3<br />
MP3 bit rates: 8-320 kbps and VBR (= Variable BitRate)<br />
MP3 sample rates: 16, 32, 44.1, 48, 11.025, 22.050, 24, 8 kHz<br />
Supported Number of Files/Folders: File: Max. 1000 Folder: Max. 1000 (<strong>in</strong>clud<strong>in</strong>g File)<br />
Mp3 bracket assembly<br />
SD<br />
AUX In<br />
USB<br />
SD<br />
AUX In<br />
USB<br />
SD<br />
AUX In<br />
USB<br />
1h 6h 12h 18h 24h<br />
SD<br />
AUX In<br />
USB<br />
SD<br />
AUX In<br />
USB<br />
1 2<br />
1 2 3<br />
1h 6h1h 12h 6h 12h 18h 24h 18h 24h 1h 6h1h 12h 6h 12h 18h 24h 18h 24h<br />
1h 6h 12h 1h 18h 6h 12h 24h 18h 24h 1h 6h 12h 1h 18h 6h 12h 24h 18h 1h24h<br />
6h 12h 18h 24h<br />
Insert a SD card,mp3 player<br />
or a U disk to correspond<strong>in</strong>g<br />
port on right of the unit,and<br />
press the [ ] button , will start<br />
to play music.<br />
1h 6h 12h 1h 18h 6h 12h 24h 18h 24h<br />
USB/SD port-Music play.<br />
Press the [ + ] or [ - ] button to<br />
<strong>in</strong>crease or decrease the volume.<br />
AUX <strong>in</strong>put-Music play.<br />
Use Mp3 player to adjust the<br />
volume.<br />
Press the [<br />
music.<br />
] button to close<br />
1h 6h1h 12h 6h 12h 18h 24h 18h 24h<br />
USB/SD port-Music play. You can use the button | or | of remote control to play previous or next<br />
track of music.<br />
AUX <strong>in</strong>put-Music play. Use Mp3 player control to play previous or next track of music.<br />
38<br />
<strong>Solis</strong>_Vivaldi-Betriebsa<strong>nl</strong>eitung.<strong>in</strong>dd 38 10.01.12 13:28
REMOTE CONTROL<br />
1. lnstall two “AAA” batteries.<br />
2. The Remote Control button is labeled as below.<br />
SAFETY FEATURES<br />
1. A thermal overload protector is built <strong>in</strong> to prevent overheat<strong>in</strong>g.<br />
2. When an overheat temperature is reached, the Heater will be automatically shut off.<br />
Once unit cool down, can be re-booted by user.<br />
3. If the unit is tilted, a safety system automatically will cut off the power, after resume it to vertical<br />
position, it does not operate, it o<strong>nl</strong>y can operate aga<strong>in</strong> by press<strong>in</strong>g on/off switch on the top of body.<br />
MAINTENANCE<br />
WARNING:<br />
ALWAYS UNPLUG THE CORD BEFORE MOVING OR SERVICING,<br />
DO NOT IMMERSE APPLIANCE IN WATER!<br />
CLEANING:<br />
CAUTION:<br />
STORAGE:<br />
IMPORTANT! DO NOT IMMERSE APPLIANCE IN WATER!<br />
Clean the Air I<strong>nl</strong>et with the vacuum brush attachment on your Vacuum cleaner,<br />
Clean the body of the Appliance with a soft Cloth.<br />
Do not use gasol<strong>in</strong>e, benzene, th<strong>in</strong>ner, harsh cleaners, etc. as they will damage<br />
the Appliance. NEVER use ALCOHOL OR SOLVENTS.<br />
Store the Appliance with these <strong>in</strong>structions <strong>in</strong> the orig<strong>in</strong>al <strong>in</strong> a cool, dry place.<br />
39<br />
<strong>Solis</strong>_Vivaldi-Betriebsa<strong>nl</strong>eitung.<strong>in</strong>dd 39 10.01.12 13:28
Disposal<br />
EU 2002/96/EC<br />
Information for correct disposal of the product <strong>in</strong> accordance with the European<br />
Directive 2002/96/EC<br />
At the end of its work<strong>in</strong>g life this equipment must not be disposed of as an household waste. It must be<br />
taken to special local community waste collection centres or to a dealer provid<strong>in</strong>g this service. Dispos<strong>in</strong>g<br />
of electrical and electronic equipment separately avoids possible negative effects on the environment<br />
and human health deriv<strong>in</strong>g from an <strong>in</strong>appropriate disposal and enables its components to be recovered<br />
and recycled to obta<strong>in</strong> significant sav<strong>in</strong>gs <strong>in</strong> energy and resources. In order to underl<strong>in</strong>e the duty to<br />
dispose of this equipment separately, the product is marked with a crossed-out dustb<strong>in</strong>.<br />
SOLIS reserves the right to carry out technical and visual changes and modifications to improve the<br />
product at any time.<br />
SOLIS HELPLINE:<br />
044 874 64 14<br />
(O<strong>nl</strong>y for customers <strong>in</strong> Switzerland)<br />
This item stands out due to its long-life cycle and reliability. Despite this though, if a malfunction ever<br />
occurs, simply give us a call. Often a breakdown can be easily and quickly remedied with the right<br />
tip or technique without hav<strong>in</strong>g to straight away send off the device for repair. We will give you all<br />
the advice and practical support you require.<br />
<strong>Solis</strong>_Vivaldi-Betriebsa<strong>nl</strong>eitung.<strong>in</strong>dd 40 10.01.12 13:29
Control panel<br />
with touch sensitive<br />
buttons.<br />
Large, easily read<br />
display for mode<br />
of operation, time,<br />
or room temperature.<br />
Music playback from<br />
MP3 player, SD card<br />
or USB stick.<br />
Timer to control<br />
operat<strong>in</strong>g times.<br />
SOLIS AG<br />
<strong>Solis</strong>-House • CH-8152 Glattbrugg-Zurich • Switzerland<br />
Phone +41 44 874 64 54 • Fax +41 44 874 64 99<br />
<strong>in</strong>fo@solis.ch • www.solis.ch • www.solis.com<br />
January 2012<br />
<strong>Solis</strong>_Vivaldi-Betriebsa<strong>nl</strong>eitung.<strong>in</strong>dd 41 10.01.12 13:29
ALGEMENE AANWIJZINGEN<br />
1. Verwijder de verpakk<strong>in</strong>g en controleer of het apparaat niet beschadigd is. Wanneer u twijfels hebt<br />
over de toestand van het apparaat, gebruik het dan niet en neem contact op met de technische<br />
dienst. Bewaar het verpakk<strong>in</strong>gsmateriaal (plastic zakken, styropor, nietjes, enz.) op een plek waar<br />
k<strong>in</strong>deren er niet bij kunnen, omdat zij zich eraan zouden kunnen verwonden.<br />
Voorzichtig:<br />
Dit apparaat mag niet worden gebruikt door personen (met <strong>in</strong>begrip van k<strong>in</strong>deren) met beperkte<br />
lichamelijke, sensorische of geestelijke vermogens of gebrek aan kennis en ervar<strong>in</strong>g, tenzij iemand<br />
die verantwoordelijk is voor hun veiligheid, hun leert hoe ze met het apparaat moeten omgaan of<br />
toezicht op hen houdt.<br />
K<strong>in</strong>deren moeten <strong>in</strong> het oog worden gehouden, zodat gewaarborgd is dat ze niet met het apparaat<br />
gaan spelen.<br />
2. Controleer voordat u het apparaat gaat gebruiken, of de netspann<strong>in</strong>g van het stopcontact overeenstemt<br />
met de op het typeplaatje vermelde spann<strong>in</strong>g.<br />
Indien het netsnoer beschadigd is, moet dit om ieder risico uit te sluiten, door <strong>Solis</strong> of een door <strong>Solis</strong><br />
geautoriseerd servicepunt worden vervangen.<br />
3. Het apparaat mag alleen worden gebruikt voor het doel waarvoor het bestemd is, d.w.z. als toren<strong>ventilator</strong>.<br />
Bij gebruik van het apparaat <strong>in</strong> afwijk<strong>in</strong>g van de voorschriften of voor een ander doel dan<br />
dat waarvoor het bestemd is, kan <strong>Solis</strong> niet aansprakelijk worden gesteld.<br />
4. Haal voordat u het apparaat gaat re<strong>in</strong>igen of onderhouden, de netstekker uit het stopcontact of<br />
schakel het apparaat uit met de hoofdschakelaar.<br />
5. Wanneer het apparaat defect is en/of niet goed functioneert, schakel het dan uit. Probeer niet het<br />
zelf te repareren. Wanneer u deze aanwijz<strong>in</strong>gen niet opvolgt, kan uw veiligheid <strong>in</strong> gevaar komen.<br />
6. Wanneer u het apparaat niet gebruikt, schakel het dan uit en haal de netstekker uit het stopcontact.<br />
7. Bij het gebruik van elektrische apparaten moeten enkele fundamentele regels <strong>in</strong> acht worden genomen:<br />
- Gebruik het apparaat niet <strong>in</strong> de buurt van water, bijv. <strong>in</strong> de badkamer, de douche of <strong>in</strong> de buurt<br />
van een zwembad.<br />
- Raak het apparaat niet aan met natte handen of voeten.<br />
- Stel het apparaat niet bloot aan weers<strong>in</strong>vloeden <strong>in</strong> de ope<strong>nl</strong>ucht.<br />
- Plaats het apparaat niet direct onder een stopcontact.<br />
- Dek de <strong>ventilator</strong>kachel niet af om te voorkomen dat hij oververhit raakt.<br />
8. Wanneer het apparaat <strong>in</strong> de gebruiksmodus «<strong>ventilator</strong>kachel» oververhit raakt, kl<strong>in</strong>kt er een geluidssignaal.<br />
Indien u dit geluidssignaal hoort, moet u het apparaat onmiddellijk uitschakelen.<br />
BELANGRIJK! Wanneer het geluidssignaal kl<strong>in</strong>kt, mag u het apparaat NIET langer gebruiken.<br />
9. Max. omgev<strong>in</strong>gstemperatuur 35° C.<br />
10. Gebruik het apparaat niet <strong>in</strong> de buurt van mogelijk ontvlambare of explosieve vloeistoffen en gassen.<br />
11. Dek de <strong>ventilator</strong>kachel niet af om te voorkomen dat hij oververhit raakt.<br />
Om bij het gebruik van elektrische apparaten beter beschermd te zijn, adviseren wij een aardlekschakelaar<br />
te gebruiken. Het verdient aanbevel<strong>in</strong>g een aardlekschakelaar te kiezen met een nom<strong>in</strong>ale<br />
lekstroom van maximaal 30 mA. Voor deskundig advies kunt u terecht bij uw elektricien.<br />
Het apparaat is alleen bedoeld voor huishoudelijke doele<strong>in</strong>den en niet voor professioneel gebruik.<br />
42<br />
<strong>Solis</strong>_Vivaldi-Betriebsa<strong>nl</strong>eitung.<strong>in</strong>dd 42 10.01.12 13:29
1h 6h 12h 18h 24h 1h 1h 6h 6h 12h 12h 18h 18h 24h 24h<br />
1<br />
2<br />
3<br />
8<br />
9<br />
9<br />
10<br />
11<br />
4<br />
4<br />
6<br />
5<br />
6<br />
VOORKANT<br />
1. LCD-DISPLAY<br />
2. LUIDSPREKER<br />
3. GEURSCHAALAFDEKKING<br />
4. BESCHERMROOSTER VENTILATOR<br />
5. FRONTAFDEKKING<br />
6. BESCHERMROOSTER VENTILA-<br />
TORKACHEL<br />
7. GLAZEN VOET<br />
7<br />
ZIJAANZICHT<br />
8. SD-, USB- of<br />
AUX-IN-POORT<br />
9. AFSTANDS-<br />
BEDIENING<br />
ACHTERKANT<br />
12<br />
13<br />
9. AFSTANDSBEDIENING<br />
10. HANDVAT<br />
11. ACHTERKANT BEHUIZING<br />
12. NETSCHAKELAAR<br />
- KEUZESCHAKELAAR VENTI-<br />
LATOR/VENTILATORKACHEL<br />
13. STEKKER<br />
aan/uit<br />
gebruiksmodus<br />
schakelklok oscillatie temperatuur/<br />
tijd/ volume<br />
m<strong>in</strong><br />
temperatuur/<br />
tijd/ volume<br />
plus<br />
muziek<br />
aan/uit<br />
1<br />
3<br />
a = open<br />
b = dicht<br />
b<br />
a<br />
2<br />
4<br />
❙ AAN<br />
UIT<br />
Ventilatorkachel<br />
Ventilator<br />
MONTAGE<br />
Haal het product voorzichtig uit<br />
de doos en verwijder de plastic<br />
verpakk<strong>in</strong>g. Volg de <strong>in</strong>structies <strong>in</strong><br />
de afbeeld<strong>in</strong>gen 1 t/m 3 op om<br />
de voet te monteren.<br />
Plaats het apparaat op een stabiele,<br />
vlakke ondergrond. Zet de netschakelaar<br />
<strong>in</strong> de stand ’OFF’. Steek de<br />
netstekker <strong>in</strong> een stopcontact met<br />
220-240 volt AC.<br />
43<br />
<strong>Solis</strong>_Vivaldi-Betriebsa<strong>nl</strong>eitung.<strong>in</strong>dd 43 10.01.12 13:29
GEBRUIKSMODUS VENTILATOR<br />
LANGZAAM MATIG SNEL SNEL NATUURLIJKE WIND ZACHT BRIESJE<br />
1 2 3<br />
5 sec<br />
Zet de schakelaar <strong>in</strong> de stand [ I ]<br />
om het apparaat <strong>in</strong> te schakelen<br />
en zet de andere schakelaar <strong>in</strong> de<br />
stand [ ].<br />
Bedien de toets [ ]. De<br />
temperatuur en de tijd worden<br />
nu afwisselend 5 seconden<br />
weergegeven. Daarna beg<strong>in</strong>t<br />
de <strong>ventilator</strong> [ ] langzaamte<br />
draaien.<br />
Bedien de MODE-toets om de<br />
snelheid <strong>in</strong> te stellen: u kunt<br />
kiezen tussen langzaam matig<br />
snel snel natuurlijke w<strong>in</strong>d <br />
zacht briesje.<br />
GEBRUIKSMODUS VENTILATORKACHEL<br />
KOUD WARM HEET AUTO<br />
1 2 3<br />
5 sec<br />
Zet de schakelaar <strong>in</strong> de stand [ I ]<br />
om het apparaat <strong>in</strong> te schakelen<br />
en zet de andere schakelaar <strong>in</strong> de<br />
stand [ ].<br />
Bedien de toets [ ]. De<br />
temperatuur en de tijd worden<br />
nu afwisselend 5 seconden<br />
weergegeven. De <strong>ventilator</strong>kachel<br />
verwarmt op miaximale<br />
temperatuur.<br />
Bedien de MODE-toets om de<br />
temperatuur <strong>in</strong> te stellen: u kunt<br />
kiezen tussen automatisch <br />
koud warm heet.<br />
Wanneer u de modus [AUTO] kiest, beg<strong>in</strong>t de temperatuuraanduid<strong>in</strong>g te knipperen en kunt u de gewenste<br />
temperatuur <strong>in</strong>voeren. Gebruik hiervoor de toetsen [ + ] en [ - ]. De gewenste temperatuur kan worden<br />
<strong>in</strong>gesteld op een waarde van 10° C tot 35° C. Wanneer de omgev<strong>in</strong>gstemperatuur lager is dan de <strong>in</strong>gestelde<br />
waarde, beg<strong>in</strong>t de <strong>ventilator</strong>kachel te verwarmen.<br />
De <strong>in</strong>gestelde temperatuur<br />
knippert 5 seconden lang.<br />
Bevestig de <strong>in</strong>gestelde<br />
waarde.<br />
Attentie: Na het uitschakelen van de verwarm<strong>in</strong>gsfunctie loopt de <strong>ventilator</strong> nog ca. 30 sec. door.<br />
44<br />
<strong>Solis</strong>_Vivaldi-Betriebsa<strong>nl</strong>eitung.<strong>in</strong>dd 44 10.01.12 13:29
1h 6h 12h 18h 24h<br />
TIJD INSTELLEN<br />
1 2<br />
1h 1h6h 6h12h 12h18h 18h24h 24h 1h 1h6h 6h12h 12h18h 18h24h<br />
24h<br />
1h 1h6h 6h12h 12h18h 18h24h 24h 1h 1h6h 6h12h 12h18h 18h24h<br />
24h<br />
1h 6h 12h 18h 24h<br />
1h 6h 12h 18h 24h<br />
1h 6h 12h 18h<br />
Houd de [ ] -toets 3 seconden lang vast. De<br />
uuraanduid<strong>in</strong>g beg<strong>in</strong>t te knipperen.<br />
Stel met de toetsen [ + ] en [ - ] het uur van de<br />
dag <strong>in</strong>.<br />
1h 6h 12h 18h 24h<br />
1h 1h6h 6h12h 12h18h 18h24h 24h 1h 1h6h 6h12h 12h18h 18h24h<br />
24h<br />
3 4<br />
1h 1h6h 6h12h 12h18h 18h24h 24h 1h 1h6h 6h12h 12h18h 18h24h<br />
24h<br />
1h 6h 12h 18h 24h<br />
1h 6h 12h 18h<br />
Raak de [ ]-toets nogmaals aan om de <strong>in</strong>gevoerde<br />
uuraanduid<strong>in</strong>g te bevestigen. Nu beg<strong>in</strong>t de<br />
m<strong>in</strong>uten-aanduid<strong>in</strong>g te knipperen.<br />
Stel met de toetsen [ + ] en [ - ] de tijd <strong>in</strong> m<strong>in</strong>uten<br />
<strong>in</strong>. Raak [ ] nogmaals aan om de <strong>in</strong>gevoerde<br />
tijd te bevestigen.<br />
1h 6h 12h 18h 24h<br />
1h 6h 12h 18h<br />
SCHAKELKLOK INSTELLEN<br />
De balk is onderverdeeld <strong>in</strong> 24<br />
segmenten die corresponderen<br />
met de uren van de dag.<br />
Leeg veld: UIT (schakelklok niet actief)<br />
Gevuld veld: <strong>in</strong>gesteld (tijd bevestigd)<br />
Knipperend veld: geselecteerd (wacht op bevestig<strong>in</strong>g)<br />
Wanneer er niets wordt <strong>in</strong>gevoerd, knippert het veld 10 seconden lang.<br />
45<br />
<strong>Solis</strong>_Vivaldi-Betriebsa<strong>nl</strong>eitung.<strong>in</strong>dd 45 10.01.12 13:29
SCHAKELKLOK INSTELLEN<br />
1<br />
Wanneer u [<br />
1h 6h 12h 18h 24h<br />
] aanraakt, gaat het eerste veld knipperen.<br />
1h 6h 12h 18h 24h<br />
1h 1h 1h 6h<br />
6h 6h 12h<br />
12h 12h 18h<br />
18h 18h 24h<br />
24h<br />
24h<br />
1h 6h 12h 18h 24h<br />
2<br />
Met [ + ] en [ - ] kunt u nu de gewenste tijd kiezen.<br />
1h 6h 12h 18h 24h<br />
1h 6h 12h<br />
1h 1h 1h 6h<br />
6h 6h 12h<br />
12h 12h 18h<br />
18h 18h 24h<br />
24h<br />
24h<br />
3 Raak [ ], nogmaals aan om de tijd te bevestigen.<br />
Het betreffende veld wordt gevuld en het volgende veld beg<strong>in</strong>t te knipperen.<br />
Na 10 seconden stopt het knipperen.<br />
De tijd is <strong>in</strong>gesteld.<br />
1h 6h 12h 18h 24h<br />
1h 6h 12h<br />
1h 1h 6h 1h 6h 12h<br />
6h 12h 18h<br />
12h 18h 24h<br />
18h<br />
1h 24h<br />
24h<br />
6h 12h 1<br />
1h 6h 12h 18h 24h<br />
Om de schakelklok <strong>in</strong> te stellen voor een bepaalde tijdsduur, bedient u de toets [ ].<br />
De lege velden worden één voor één gevuld .Het aangrenzende veld knippert telkens<br />
10 seconden lang.<br />
1h 6h 12h<br />
1h 6h 12h 1<br />
1h<br />
1h<br />
6h<br />
6h<br />
12h<br />
12h<br />
18h<br />
18h<br />
24h<br />
24h<br />
1h 6h 12h 18h 24h<br />
Om de schakelklok<strong>in</strong>stell<strong>in</strong>g ongedaan te maken, bedient u de toets [ ]. Met [ + ] en [ - ] kunt u het<br />
knipperende veld verschuiven. Wanneer het actieve veld beg<strong>in</strong>t te knipperen ,en u bedient de toets<br />
[ ] nogmaals, wordt de <strong>in</strong>gestelde tijd gewist. Het veld is dan weer leeg .<br />
1h 6h 12h 1<br />
1h 6h 12h 18h 24h<br />
46<br />
<strong>Solis</strong>_Vivaldi-Betriebsa<strong>nl</strong>eitung.<strong>in</strong>dd 46 10.01.12 13:29
1h 6h 12h 18h 24h<br />
1h 6h 12h 18h 24h<br />
1h 6h 12h 18h 24h<br />
1h 6h 12h 18h 24h<br />
OSCILLATIE<br />
Wanneer u het symbool [ ] aanraakt, gaat het apparaat draaien.<br />
Om de draaibeweg<strong>in</strong>g te stoppen, raakt u het symbool [ ] opnieuw aan.<br />
1 2<br />
1h 6h 12h 18h 24h<br />
1h 6h 12h 18h 24h<br />
1h 6h 12h 18h 24h<br />
1h 6h 12h 18h 24h<br />
GEURFUNCTIE<br />
Rechts naast de luidspreker bev<strong>in</strong>dt zich de geurschaal. Doe een paar druppels geurvloeistof op de keramische<br />
geurverspreider, leg deze <strong>in</strong> het daarvoor bedoelde vak en breng de afdekk<strong>in</strong>g op zijn plaats.<br />
(Belangrijk: gebruik uitsluitend geurvloeistoffen op waterbasis. Gebruik geen geurolie!)<br />
1 2 3<br />
Dicht<br />
Open<br />
Gebruik een munt om de afdekk<strong>in</strong>g<br />
zoals getoond <strong>in</strong> afb. 1 te<br />
openen.<br />
Haal de keramische geurverspreider<br />
uit het apparaat en doe er<br />
een paar druppels geurvloeistof<br />
op waterbasis <strong>in</strong>.<br />
Gebruik een munt om de afdekk<strong>in</strong>g<br />
zoals getoond <strong>in</strong> afb. 3 te<br />
sluiten.<br />
47<br />
<strong>Solis</strong>_Vivaldi-Betriebsa<strong>nl</strong>eitung.<strong>in</strong>dd 47 10.01.12 13:29
MUZIEK AFSPELEN<br />
Ondersteunde compressieformaten: MP1/MP2/MP3<br />
MP3-bitrates: 8 – 320 kBit/s en VBR (variabele bitrate)<br />
MP3-aftastfrequenties: 16, 32, 44.1, 48, 11.025, 22.050, 24, 8 kHz<br />
Ondersteund aantal bestanden/mappen: bestanden: max. 1.000; mappen: max. 1.000 (<strong>in</strong>clusief bestanden)<br />
MP3-houder aanbrengen<br />
SD<br />
AUX In<br />
USB<br />
SD<br />
AUX In<br />
USB<br />
SD<br />
AUX In<br />
USB<br />
1h 6h 12h 18h 24h<br />
SD<br />
AUX In<br />
USB<br />
SD<br />
AUX In<br />
USB<br />
1 2<br />
1 2 3<br />
1h 6h1h 12h 6h 12h 18h 24h 18h 24h 1h 6h1h 12h 6h 12h 18h 24h 18h 24h<br />
1h 6h 12h 1h 18h 6h 12h 24h 18h 24h 1h 6h 12h 1h 18h 6h 12h 24h 18h 1h24h<br />
6h 12h 18h 24h<br />
Steek een SD-geheugenkaart of<br />
een USB-stick <strong>in</strong> de poort aan de<br />
rechterkant van het apparaat of<br />
sluit een MP3-speler aan op de bus<br />
en raak [ ] aan om het afspelen<br />
te starten.<br />
1h 6h 12h 1h 18h 6h 12h 24h 18h 24h<br />
USB-/SD-poort-muziek<br />
afspelen. Met [ + ] en [ - ] kunt<br />
u het volume aanpassen.<br />
AUX-<strong>in</strong>put-muziek afspelen.<br />
Regel het volume met de<br />
MP3-speler.<br />
Raak [ ] aan om het afspelen<br />
te beë<strong>in</strong>digen.<br />
1h 6h1h 12h 6h 12h 18h 24h 18h 24h<br />
USB-/SD-poort-muziek afspelen. Met de toetsen | or | van de afstandsbedien<strong>in</strong>g kunt u naar het<br />
vorige of volgende muziekstuk gaan.<br />
AUX-<strong>in</strong>put-muziek afspelen. Gebruik de toetsen van de MP3-speler om naar het vorige of volgende<br />
lied te gaan.<br />
48<br />
<strong>Solis</strong>_Vivaldi-Betriebsa<strong>nl</strong>eitung.<strong>in</strong>dd 48 10.01.12 13:29
AFSTANDSBEDIENING<br />
1. Doe twee batterijen van het type AAA <strong>in</strong> de afstandsbedien<strong>in</strong>g.<br />
2. Op de afstandsbedien<strong>in</strong>g bev<strong>in</strong>den zich de hieronder afgebeelde toetsen.<br />
VEILIGHEIDSFUNCTIES<br />
1. Het apparaat is beveiligd tegen oververhitt<strong>in</strong>g.<br />
2. Bij oververhitt<strong>in</strong>g wordt de <strong>ventilator</strong>kachel automatisch uitgeschakeld.<br />
Nadat het apparaat is afgekoeld, kan het door de gebruiker weer worden gestart.<br />
3. Wanneer het apparaat wordt gekanteld, wordt de stroomvoorzien<strong>in</strong>g automatisch onderbroken. Ook<br />
wanneer het weer rechtop is gezet, blijft het uitgeschakeld. U kunt het alleen starten met de aan-uitschakelaar<br />
aan de bovenkant van het apparaat.<br />
ONDERHOUD<br />
WAARSCHUWING: HAAL VOORDAT U HET APPARAAT GAAT TRANSPORTEREN OF ONDERHOUDEN,<br />
ALTIJD EERST DE NETSTEKKER UIT HET STOPCONTACT.<br />
DOMPEL HET APPARAAT NIET ONDER IN WATER!<br />
REINIGING:<br />
BELANGRIJK:<br />
OPSLAG:<br />
BELANGRIJK! DOMPEL HET APPARAAT NIET ONDER IN WATER!<br />
Re<strong>in</strong>ig de luchtaanzuigopen<strong>in</strong>gen met de borstel van uw stofzuiger.<br />
Gebruik voor het re<strong>in</strong>igen van de behuiz<strong>in</strong>g een zachte doek.<br />
Gebruik geen benz<strong>in</strong>e, wasbenz<strong>in</strong>e, verdunner of bijtende re<strong>in</strong>ig<strong>in</strong>gsmiddelen,<br />
omdat het apparaat hierdoor beschadigd kan raken. Gebruik voor het re<strong>in</strong>igen<br />
NOOIT ALCOHOL OF OPLOSMIDDELEN.<br />
Bewaar het apparaat samen met de orig<strong>in</strong>ele gebruiksaanwijz<strong>in</strong>g op een koele,<br />
droge plaats.<br />
49<br />
<strong>Solis</strong>_Vivaldi-Betriebsa<strong>nl</strong>eitung.<strong>in</strong>dd 49 10.01.12 13:29
Verwijder<strong>in</strong>g<br />
EU 2002/96/EC<br />
Aanwijz<strong>in</strong>gen voor het verwijderen van het product volgens EU-richtlijn 2002/96/EC<br />
Doe het toestel na afdank<strong>in</strong>g niet bij het normale huisvuil, maar lever het <strong>in</strong> op een plaatselijk afval<strong>in</strong>zamelpunt<br />
of bij een leverancier die ervoor zorgt dat het toestel op de juiste manier wordt verwerkt. Door de<br />
gescheiden <strong>in</strong>zamel<strong>in</strong>g van elektrische en elektronische apparaten worden mogelijke negatieve gevolgen<br />
voor het milieu en de gezondheid voorkomen en is het mogelijk dat de componenten worden hergebruikt<br />
resp. gerecycled, waardoor er veel energie en grondstoffen worden bespaard. Om de verplicht<strong>in</strong>g om<br />
het toestel volgens de voorschriften te verwijderen, duidelijk onder de aandacht te brengen, is hiernaast<br />
het symbool van een doorgekruiste afvalbak afgebeeld.<br />
SOLIS behoudt zich te allen tijde het recht voor van technische en optische wijzig<strong>in</strong>gen en modificaties<br />
ter verbeter<strong>in</strong>g van haar producten.<br />
SOLIS HELPLINE:<br />
044 874 64 14<br />
(Alleen voor klanten <strong>in</strong> Zwitserland)<br />
Dit apparaat heeft een zeer lange levensduur en is erg betrouwbaar. Komt het toch voor dat er een<br />
stor<strong>in</strong>g optreedt kunt U ons zonder meer bellen. Vaak is het probleem met een tip of met een trucje<br />
op te heffen, zonder dat U ons het apparaat hoeft te sturen. Wij beraden U graag.<br />
<strong>Solis</strong>_Vivaldi-Betriebsa<strong>nl</strong>eitung.<strong>in</strong>dd 50 10.01.12 13:29
Bedien<strong>in</strong>gspaneel met<br />
gebruiksvriendelijke<br />
tiptoetsen.<br />
Grote, goed afleesbare<br />
weergave van de gebruiksmodus<br />
en de tijd of<br />
omgev<strong>in</strong>gstemperatuur.<br />
Muziek afspelen van een<br />
MP3-speler, SD-kaart of<br />
USB-stick.<br />
Schakelklok voor het<br />
regelen van de tijd dat<br />
het apparaat werkt.<br />
SOLIS AG<br />
<strong>Solis</strong>-House • Glattbrugg-Zürich, Zwitserland<br />
Telefoon +41 44 874 64 54 • Fax +41 44 874 64 99<br />
<strong>in</strong>fo@solis.ch • www.solis.ch • www.solis.com<br />
Januari 2012<br />
<strong>Solis</strong>_Vivaldi-Betriebsa<strong>nl</strong>eitung.<strong>in</strong>dd 51 10.01.12 13:29
<strong>Solis</strong>_Vivaldi-Betriebsa<strong>nl</strong>eitung.<strong>in</strong>dd 52 10.01.12 13:29
GARANTIESCHEIN<br />
BON DE GARANTIE<br />
GUARANTEE CARD<br />
Kund<strong>in</strong>nen und Kunden <strong>in</strong> der Schweiz senden<br />
das Gerät für alle Reparaturen oder Garantiefälle<br />
bitte direkt an:<br />
Les clientes et clients de Suisse voudront bien<br />
envoyer l’appareil pour réparations ou cas de<br />
garantie directement à:<br />
SOLIS AG<br />
Europastrasse 11<br />
CH-8152 Glattbrugg<br />
Schweiz<br />
Telefon 044 874 64 64<br />
Telefax 044 874 64 99<br />
E-Mail: <strong>in</strong>fo@solis.ch<br />
Internet: www.solis.ch<br />
SOLIS SA<br />
Europastrasse 11<br />
CH-8152 Glattbrugg<br />
Suisse<br />
Téléphone 044 874 64 64<br />
Téléfax 044 874 64 99<br />
E-mail: <strong>in</strong>fo@solis.ch<br />
Internet: www.solis.ch<br />
E<strong>in</strong> Anruf auf unsere Helpl<strong>in</strong>e (044 874 64 14) vor<br />
dem E<strong>in</strong>senden des Gerätes lohnt sich auf jeden<br />
Fall, da Funktionsstörungen mit dem richtigen<br />
Tipp oder Kniff unserer erfahrenen Spezialisten <strong>in</strong><br />
vielen Fällen schnell und unkompliziert behoben<br />
werden können, ohne dass Sie uns das Gerät dazu<br />
e<strong>in</strong>zusenden brauchen.<br />
Il vaut dans tous les cas la pe<strong>in</strong>e d’appeler notre<br />
helpl<strong>in</strong>e (044 874 64 14) avant d’envoyer l’appareil,<br />
car les pannes peuvent être réparées rapidement<br />
et simplement dans beaucoup de cas avec un<br />
bon conseil ou une bonne astuce de nos spécialistes<br />
expérimentés, sans que l’appareil ne doive<br />
nous être retourné.<br />
Kund<strong>in</strong>nen und Kunden im Ausland wenden<br />
sich bitte an die Verkaufsstelle, bei welcher sie<br />
den Artikel erworben haben. Dort wird man<br />
Ihnen gerne weiterhelfen.<br />
Nur mit Verkaufsdatum, Serie-Nr. und Stempel<br />
Nur sowie mit Unterschrift Verkaufsdatum der Verkaufsfirma und Unterschrift gültig. der Verkaufsfirma gültig.<br />
Seulement Das Orig<strong>in</strong>al valable des Verkaufsbeleges avec signature et muss date dem<br />
la vente.<br />
Valid Gerät o<strong>nl</strong>y beigelegt if provided werden. with Fehlt date dieses, of sale kann and signature ke<strong>in</strong>e of seller.<br />
Garantieleistung gewährt werden.<br />
Les clientes et clients à l’étranger sont priés<br />
de s’adresser au po<strong>in</strong>t de vente où ils ont acquis<br />
l’appareil. Ils y obtiendront l‘assistance requise.<br />
Valable uniquement avec la date de vente, le n°<br />
de série et le timbre a<strong>in</strong>si que la signature de<br />
l’entreprise vendeuse. L’orig<strong>in</strong>al de la quittance<br />
de vente doit être jo<strong>in</strong>t à l’appareil. En l’absence<br />
de cette pièce, aucune garantie ne peut être<br />
accordée.<br />
Customers <strong>in</strong> Switzerland should return the<br />
article for all repairs or claims under warranty<br />
directly to:<br />
SOLIS AG<br />
Europastrasse 11<br />
CH-8152 Glattbrugg<br />
Switzerland<br />
Phone 044 874 64 64<br />
Fax 044 874 64 99<br />
e-mail: <strong>in</strong>fo@solis.ch<br />
Internet: www.solis.ch<br />
Before return<strong>in</strong>g the article please call our<br />
helpl<strong>in</strong>e (044 874 64 14) as some malfunctions<br />
can be rectified quickly and easily simply by<br />
receiv<strong>in</strong>g the right tip or advice from our tra<strong>in</strong>ed<br />
specialists. This saves hav<strong>in</strong>g to return the<br />
appliance unnecessarily.<br />
Customers not liv<strong>in</strong>g <strong>in</strong> Switzerland should<br />
return the article to the po<strong>in</strong>t of sale where they<br />
will be provided with assistance.<br />
This guarantee is o<strong>nl</strong>y valid if the card displays<br />
the date of sale, serial no. and stamp as well as<br />
the signature of the po<strong>in</strong>t of sale. The orig<strong>in</strong>al<br />
sales slip must accompany the article. Failure to<br />
provide this <strong>in</strong>formation will render the warranty<br />
<strong>in</strong>valid.<br />
<strong>Solis</strong>_Vivaldi-Betriebsa<strong>nl</strong>eitung.<strong>in</strong>dd 53 10.01.12 13:29
Wir gewähren Ihnen für diesen SOLIS-Apparat<br />
Nous vous accordons pour ce produit SOLIS<br />
This SOLIS appliance is covered by a<br />
2 JAHRE GARANTIE<br />
2 ANS DE GARANTIE<br />
2 YEARS GUARANTEE<br />
nach unseren Lieferbed<strong>in</strong>gungen<br />
selon nos conditions de livraison<br />
as per our delivery conditions<br />
Typ Nr.:<br />
Type N o :<br />
Mod. No:<br />
Fabr./Serie-Nr.:<br />
N o de fabrication/série:<br />
Manuf./serial No:<br />
Verkauft am:<br />
Livré le:<br />
Sold on:<br />
durch:<br />
Magas<strong>in</strong> de vente:<br />
By:<br />
Mit Ihrem Kauf wählten Sie e<strong>in</strong> erstklassiges Produkt, und das Gerät wird Ihnen<br />
sicher lange Zeit Freude bereiten. Der Apparat hat e<strong>in</strong>e sorgfältige Schlusskontrolle<br />
bestanden. Wir leisten hiefür e<strong>in</strong>e Garantie für die Gratis-Reparatur aller<br />
Bestandteile, wenn die Defekte nachweisbar <strong>in</strong>folge Materialfehler entstanden<br />
s<strong>in</strong>d. Die Garantie beg<strong>in</strong>nt mit dem Verkaufsdatum gemäss Verkaufsbeleg. Der<br />
Apparat muss <strong>in</strong> ungeöffnetem Zustand mit komplett ausgefülltem Garantiesche<strong>in</strong><br />
sowie mit dem Orig<strong>in</strong>al des Verkaufsbeleges bei uns e<strong>in</strong>gehen. Schäden,<br />
welche durch normale Abnützung, Verschmutzung, Verkalkung, unsachgemässe<br />
Bedienung, zweckentfremdeten E<strong>in</strong>satz oder falschen Netzanschluss entstanden<br />
s<strong>in</strong>d sowie der Ersatz von zerbrochenen Teilen, fallen nicht unter Garantie und<br />
e<strong>in</strong>e Haftpflicht für Sach- oder Personenschaden wird wegbedungen.<br />
Bei gewerblichem Gebrauch beträgt die Garantiezeit 12 Monate.<br />
En achetant un appareil SOLIS vous avez acquis un produit de la plus haute qualité<br />
qui vous rendra certa<strong>in</strong>ement de bons services pendant longtemps. Avant de<br />
quitter l’us<strong>in</strong>e, l’appareil a été contrôlé soigneusement. Nous nous engageons à<br />
effectuer sans frais toutes les réparations résultant d’un défaut de fabrication ou<br />
de matériel. La garantie commence à la date de vente marquée par le revendeur.<br />
L’appareil est à nous retourner sans avoir été enclenché et accompagné du bon<br />
de garantie dûment rempli et accompagné de l’orig<strong>in</strong>al de la quittance de vente.<br />
Ne sont pas couverts les dommages qui résultent d’une usure normale, de salissures,<br />
d’entartrage, d’un entretien laissant à désirer ou d’un emploi <strong>in</strong>correct ou<br />
d’un raccordement <strong>in</strong>correct au réseau, de même que le remplacement de pièces<br />
cassées. La garantie écarte tout recours qui n’est pas spécifié ci-dessus et ne peut<br />
en aucun cas donner lieu à des poursuites<br />
En cas d’usage <strong>in</strong>dustriel, la durée de garantie est de 12 mois.<br />
By acquir<strong>in</strong>g this appliance you have chosen a first-class product, which will<br />
provide you with lots of satisfaction for a long time to come. The appliance<br />
has passed a very careful f<strong>in</strong>al test. Our warranty covers the free repair of any<br />
defective part which is proven to be due to faulty materials. The warranty<br />
commences on the date of delivery certified on the sales slip. The unit is to be<br />
returned to us without hav<strong>in</strong>g been opened, accompanied by this completed<br />
guarantee card and sales slip. Damage as a result of normal wear and tear,<br />
soil<strong>in</strong>g, <strong>in</strong>correct use, connection to the wrong voltage supply, or replacement<br />
of broken parts is not covered by this warranty and we cannot be held liable for<br />
damage caused to property or persons.<br />
If the appliance is used commercially, the warranty period is 12 months.<br />
<strong>Solis</strong>_Vivaldi-Betriebsa<strong>nl</strong>eitung.<strong>in</strong>dd 54 10.01.12 13:29