Vues eclatées Outils. Notice d'Instructions pour le Remplacement de ...
Vues eclatées Outils. Notice d'Instructions pour le Remplacement de ...
Vues eclatées Outils. Notice d'Instructions pour le Remplacement de ...

You also want an ePaper? Increase the reach of your titles
YUMPU automatically turns print PDFs into web optimized ePapers that Google loves.
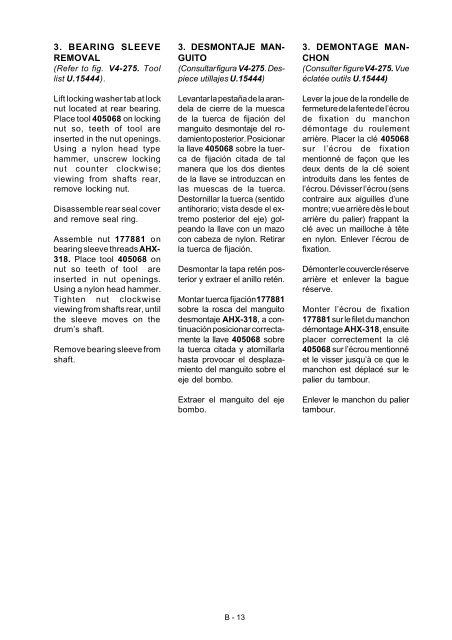
3. BEARING SLEEVE<br />
REMOVAL<br />
(Refer to fig. V4-275. Tool<br />
list U.15444).<br />
Lift locking washer tab at lock<br />
nut located at rear bearing.<br />
Place tool 405068 on locking<br />
nut so, teeth of tool are<br />
inserted in the nut openings.<br />
Using a nylon head type<br />
hammer, unscrew locking<br />
nut counter clockwise;<br />
viewing from shafts rear,<br />
remove locking nut.<br />
Disassemb<strong>le</strong> rear seal cover<br />
and remove seal ring.<br />
Assemb<strong>le</strong> nut 177881 on<br />
bearing s<strong>le</strong>eve threads AHX-<br />
318. Place tool 405068 on<br />
nut so teeth of tool are<br />
inserted in nut openings.<br />
Using a nylon head hammer.<br />
Tighten nut clockwise<br />
viewing from shafts rear, until<br />
the s<strong>le</strong>eve moves on the<br />
drum’s shaft.<br />
Remove bearing s<strong>le</strong>eve from<br />
shaft.<br />
3. DESMONTAJE MAN-<br />
GUITO<br />
(Consultar figura V4-275. Despiece<br />
utillajes U.15444)<br />
Levantar la pestaña <strong>de</strong> la aran<strong>de</strong>la<br />
<strong>de</strong> cierre <strong>de</strong> la muesca<br />
<strong>de</strong> la tuerca <strong>de</strong> fijación <strong>de</strong>l<br />
manguito <strong>de</strong>smontaje <strong>de</strong>l rodamiento<br />
posterior. Posicionar<br />
la llave 405068 sobre la tuerca<br />
<strong>de</strong> fijación citada <strong>de</strong> tal<br />
manera que los dos dientes<br />
<strong>de</strong> la llave se introduzcan en<br />
las muescas <strong>de</strong> la tuerca.<br />
Destornillar la tuerca (sentido<br />
antihorario; vista <strong>de</strong>s<strong>de</strong> el extremo<br />
posterior <strong>de</strong>l eje) golpeando<br />
la llave con un mazo<br />
con cabeza <strong>de</strong> nylon. Retirar<br />
la tuerca <strong>de</strong> fijación.<br />
Desmontar la tapa retén posterior<br />
y extraer el anillo retén.<br />
Montar tuerca fijación 177881<br />
sobre la rosca <strong>de</strong>l manguito<br />
<strong>de</strong>smontaje AHX-318, a continuación<br />
posicionar correctamente<br />
la llave 405068 sobre<br />
la tuerca citada y atornillarla<br />
hasta provocar el <strong>de</strong>splazamiento<br />
<strong>de</strong>l manguito sobre el<br />
eje <strong>de</strong>l bombo.<br />
Extraer el manguito <strong>de</strong>l eje<br />
bombo.<br />
3. DEMONTAGE MAN-<br />
CHON<br />
(Consulter figure V4-275. Vue<br />
éclatée outils U.15444)<br />
Lever la joue <strong>de</strong> la ron<strong>de</strong>l<strong>le</strong> <strong>de</strong><br />
fermeture <strong>de</strong> la fente <strong>de</strong> l’écrou<br />
<strong>de</strong> fixation du manchon<br />
démontage du rou<strong>le</strong>ment<br />
arrière. Placer la clé 405068<br />
sur l’écrou <strong>de</strong> fixation<br />
mentionné <strong>de</strong> façon que <strong>le</strong>s<br />
<strong>de</strong>ux <strong>de</strong>nts <strong>de</strong> la clé soient<br />
introduits dans <strong>le</strong>s fentes <strong>de</strong><br />
l’écrou. Dévisser l’écrou (sens<br />
contraire aux aiguil<strong>le</strong>s d’une<br />
montre; vue arrière dès <strong>le</strong> bout<br />
arrière du palier) frappant la<br />
clé avec un mailloche à tête<br />
en nylon. En<strong>le</strong>ver l’écrou <strong>de</strong><br />
fixation.<br />
Démonter <strong>le</strong> couverc<strong>le</strong> réserve<br />
arrière et en<strong>le</strong>ver la bague<br />
réserve.<br />
Monter l’écrou <strong>de</strong> fixation<br />
177881 sur <strong>le</strong> fi<strong>le</strong>t du manchon<br />
démontage AHX-318, ensuite<br />
placer correctement la clé<br />
405068 sur l’écrou mentionné<br />
et <strong>le</strong> visser jusqu’à ce que <strong>le</strong><br />
manchon est déplacé sur <strong>le</strong><br />
palier du tambour.<br />
En<strong>le</strong>ver <strong>le</strong> manchon du palier<br />
tambour.<br />
B - 13
![Sesión B - [24 x 80]](https://img.yumpu.com/50032046/1/184x260/sesian-b-24-x-80.jpg?quality=85)