- Page 1:
U7000MANUAL DE USUARIOUSER’S MANU
- Page 5 and 6:
MEDIDAS DE SEGURIDADEspañolLa imag
- Page 7 and 8:
EspañolINSTALACIÓN RÁPIDAEjemplo
- Page 9 and 10:
INSTALACIÓN RÁPIDAEspañolIMAGEN
- Page 11 and 12:
INSTALACIÓN RÁPIDAEspañolLista C
- Page 13 and 14:
ÍNDICEEspañol1. Descripción del
- Page 15 and 16:
ÍNDICEEspañol7.1.2.2. Añadir un
- Page 17 and 18:
DESCRIPCIÓN DEL PANEL Y MANDO A DI
- Page 19 and 20:
OPERACIONES BASICASEspañolOSD 2OSD
- Page 21 and 22:
OPERACIONES BASICASEspañolOSD 9OSD
- Page 23 and 24:
OPERACIONES BASICASEspañolOSD 19la
- Page 25 and 26:
MENÚ CANALEspañolOSD 25- Mover:-
- Page 27 and 28:
MENÚ CANAL- Después de haber modi
- Page 29 and 30: INSTALACIÓN4. INSTALACIÓNEspañol
- Page 31 and 32: INSTALACIÓNEspañolOSD 51OSD 52OSD
- Page 33 and 34: INSTALACIÓNEspañolOSD 60OSD 61OSD
- Page 35 and 36: CONFIGURACIÓN5. CONFIGURACIÓN SIS
- Page 37 and 38: CONFIGURACIÓNEspañolOSD 71OSD 72O
- Page 39 and 40: CONFIGURACIÓNEspañolOSD 78que la
- Page 41 and 42: HERRAMIENTAS6. HERRAMIENTASEspañol
- Page 43 and 44: HERRAMIENTASactual. (OSD 91)Una vez
- Page 45 and 46: ADMINISTRAR DVREspañolOSD 97OSD 98
- Page 47 and 48: ADMINISTRAR DVREspañolOSD 105-BORR
- Page 49 and 50: ADMINISTRAR DVREspañolOSD 1157.2.-
- Page 51 and 52: ESPECIFICACIONES TECNICAS8. ESPECIF
- Page 53: U7000ENGLISHUSER’S MANUAL
- Page 56 and 57: QUICK INSTALLATION GUIDEQUICK INSTA
- Page 58 and 59: QUICK INSTALLATION GUIDESecond Audi
- Page 60 and 61: QUICK INSTALLATION GUIDESTEP 4: TIM
- Page 62 and 63: QUICK INSTALLATION GUIDELanguage: T
- Page 64 and 65: INDEX3.3.1. Start-up Channel……
- Page 66 and 67: PANEL & REMOTE CONTROL DESCRIPTION1
- Page 68 and 69: BASIC OPERATIONS2. BASIC OPERATIONS
- Page 70 and 71: BASIC OPERATIONSOSD 5You can use []
- Page 72 and 73: BASIC OPERATIONSOSD 14OSD 15OSD 162
- Page 74 and 75: CHANNEL3. CHANNELOSD 21Press [Menu]
- Page 76 and 77: CHANNELOSD 30OSD 31mode after you c
- Page 78 and 79: CHANNELOSD 413.5. DELETE ALLTo dele
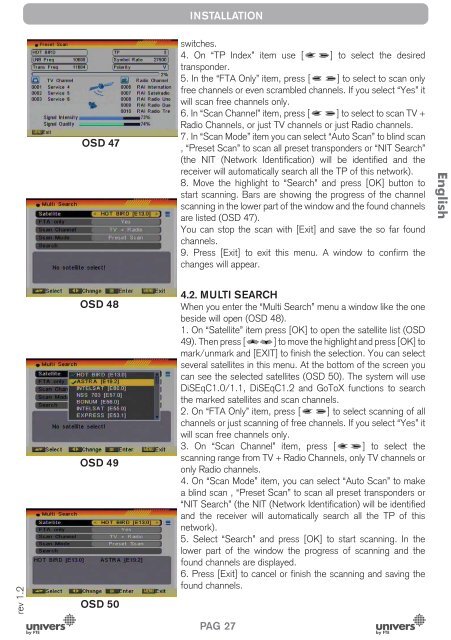
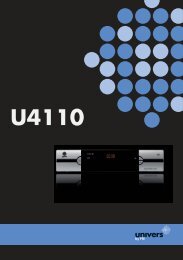
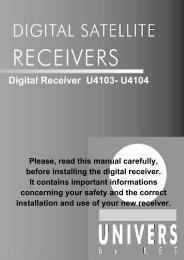
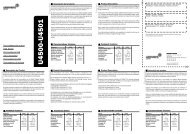
- Page 82 and 83: INSTALLATIONwill search the selecte
- Page 84 and 85: SYSTEM SETUP5. SYSTEM SETUPOSD 65Pr
- Page 86 and 87: SYSTEM SETUPOSD 71OSD 72control the
- Page 88 and 89: SYSTEM SETUPOSD 785.5. PARENTAL LOC
- Page 90 and 91: TOOLS6. TOOLSOSD 83Press [Menu] in
- Page 92 and 93: TOOLS6.4.2. BACKUP TO USBThis optio
- Page 94 and 95: DVR MANAGEMENTrev 1.2OSD 97OSD 98OS
- Page 96 and 97: DVR MANAGEMENTrev 1.2OSD 105OSD 106
- Page 98 and 99: DVR MANAGEMENTrev 1.2OSD 115OSD 116
- Page 100 and 101: CONFORMITY DECLARATION“WE , UNIVE
- Page 103 and 104: MESURES DE SECURITEFrançaisL’éc
- Page 105 and 106: GUIDE D’INSTALLATION RAPIDEExempl
- Page 107 and 108: GUIDE D’INSTALLATION RAPIDEFranç
- Page 109 and 110: GUIDE D’INSTALLATION RAPIDEListe
- Page 111 and 112: INDEX1. Description du panneau et d
- Page 113 and 114: INDEX7.1.2.1. Modifier fichiers et
- Page 115 and 116: DESCRIPTION DE LA TÉLÉCOMMANDE1.3
- Page 117 and 118: COMMANDES DE BASEFrançaisOSD 2OSD
- Page 119 and 120: COMMANDES DE BASEFrançaisOSD 9OSD
- Page 121 and 122: COMMANDES DE BASEFrançaisOSD 16OSD
- Page 123 and 124: MENU CHAÎNEFrançaisOSD 25OSD 26OS
- Page 125 and 126: MENU CHAÎNEFrançaisOSD 35OSD 36OS
- Page 127 and 128: INSTALLATION4. INSTALLATIONOSD 43Ap
- Page 129 and 130: INSTALLATIONFrançaisOSD 51Dans la
- Page 131 and 132:
INSTALLATIONOSD 57obtiendrez alors
- Page 133 and 134:
CONFIGURATION SYSTÈME5. CONFIGURAT
- Page 135 and 136:
CONFIGURATION SYSTÈMEFrançaisOSD
- Page 137 and 138:
CONFIGURATION SYSTÈMEFrançaisOSD
- Page 139 and 140:
OUTILS6. OUTILSOSD 83Appuyez sur la
- Page 141 and 142:
OUTILSFrançaisOSD 91OSD 926.4.2. S
- Page 143 and 144:
GESTION DVRFrançaisOSD 97OSD 98OSD
- Page 145 and 146:
GESTION DVR-RENOMMERAppuyez sur la
- Page 147 and 148:
GESTION DVR- La touche [OK] permet
- Page 149 and 150:
SPÉCIFICATIONS TECHNIQUESFrançais
- Page 151:
U7000ITALIANOMANUALE D’USO
- Page 154 and 155:
INSTALLAZIONE RAPIDAMANUALE DI INST
- Page 156 and 157:
INSTALLAZIONE RAPIDAitaliano, porto
- Page 158 and 159:
INSTALLAZIONE RAPIDAa quel momento.
- Page 160 and 161:
INSTALLAZIONE RAPIDALingua: permett
- Page 162 and 163:
INDICE3.3.1. Canale di Accensione..
- Page 164 and 165:
ItalianoDESCRIZIONE DEI PANNELLI E
- Page 166 and 167:
OPERAZIONI DI BASE2. OPERAZIONI DI
- Page 168 and 169:
OPERAZIONI DI BASErev 1.2OSD 5OSD 6
- Page 170 and 171:
OPERAZIONI DI BASErev 1.2OSD 15OSD
- Page 172 and 173:
MENU CANALE3. MENU CANALEOSD 21Prem
- Page 174 and 175:
MENU CANALErev 1.2OSD 30OSD 31OSD 3
- Page 176 and 177:
MENU CANALEOSD 403.5. CANCELLA TUTT
- Page 178 and 179:
INSTALLAZIONErev 1.2OSD 47OSD 48OSD
- Page 180 and 181:
INSTALLAZIONEOSD 55OSD 56transponde
- Page 182 and 183:
ItalianoINSTALLAZIONEl’orientamen
- Page 184 and 185:
CONFIGURAZIONI SISTEMAIitaliano, po
- Page 186 and 187:
CONFIGURAZIONI SISTEMArev 1.2OSD 74
- Page 188 and 189:
ItalianoCONFIGURAZIONI SISTEMAprogr
- Page 190 and 191:
ACCESORIOSD 876.3. IMPOSTAZIONI DI
- Page 192 and 193:
GESTIONE DEL FILMATO7. GESTIONE DVR
- Page 194 and 195:
GESTIONE DEL FILMATOregistrazioni.3
- Page 196 and 197:
GESTIONE DEL FILMATOrev 1.2OSD 110O
- Page 198 and 199:
SPECIFICHE TECNICHE8. SPECIFICHE TE
- Page 201:
U7000PORTUGUESEMANUAL DO UTILIZADOR
- Page 204 and 205:
PortuguêsINSTALAÇÃO RÁPIDAMANUA
- Page 206 and 207:
INSTALAÇÃO RÁPIDASegundo Áudio:
- Page 208 and 209:
INSTALAÇÃO RÁPIDAencontrados sã
- Page 210 and 211:
INSTALAÇÃO RÁPIDAIdioma: Permite
- Page 212 and 213:
INDICE4. Instalação4.1. Procura
- Page 214 and 215:
DESCRIÇÃO DO PAINEL E DO COMANDO
- Page 216 and 217:
OPERAÇÕES BÁSICAS2. OPERAÇÕES
- Page 218 and 219:
OPERAÇÕES BÁSICASOSD 5Uma vez se
- Page 220 and 221:
OPERAÇÕES BÁSICASOSD 15OSD 16Not
- Page 222 and 223:
MENU CANAL3. MENU CANALOSD 21Carreg
- Page 224 and 225:
MENU CANALrev 1.2OSD 29OSD 30OSD 23
- Page 226 and 227:
MENU CANALOk e pressione [OK] (OSD
- Page 228 and 229:
INSTALAÇÃOOSD 47OSD 48- Toneburst
- Page 230 and 231:
INSTALAÇÃOOSD 54OSD 55- Carregand
- Page 232 and 233:
INSTALAÇÃOsatélite marcado. Ao c
- Page 234 and 235:
CONFIGURAÇÃO SISTEMApredefinido u
- Page 236 and 237:
CONFIGURAÇÃO SISTEMAde baixo cons
- Page 238 and 239:
PortuguêsCONFIGURAÇÃO SISTEMAOSD
- Page 240 and 241:
FERRAMENTASrev 1.2OSD 87OSD 88OSD 8
- Page 242 and 243:
ADMINISTRAR DVR7. ADMINISTRAR DVROS
- Page 244 and 245:
ADMINISTRAR DVRgravações.3. Apare
- Page 246 and 247:
ADMINISTRAR DVRrev 1.2OSD 110OSD 11
- Page 248 and 249:
ESPECIFICAÇÕES TÉCNICAS8. ESPECI
- Page 251:
U7000DEUTSCHBEDIENUNGSANLEITUNG
- Page 254 and 255:
BEDIENUNGSANLEITUNG3.Programmmenü3
- Page 256 and 257:
BEDIENUNGSANLEITUNG7. Media Managem
- Page 258 and 259:
BEDIENUNGSANLEITUNGSprache: Ermögl
- Page 260 and 261:
BEDIENUNGSANLEITUNG0. Erstinbetrieb
- Page 262 and 263:
BEDIENUNGSANLEITUNG0.3. Schnellinst
- Page 264 and 265:
BEDIENUNGSANLEITUNGSchritt 3: Grund
- Page 266 and 267:
BEDIENUNGSANLEITUNG1. Fernbedienung
- Page 268 and 269:
BEDIENUNGSANLEITUNG2. Grundfunktion
- Page 270 and 271:
BEDIENUNGSANLEITUNGGrüne Taste FTA
- Page 272 and 273:
BEDIENUNGSANLEITUNG2.14. Favoritenp
- Page 274 and 275:
BEDIENUNGSANLEITUNGUm eine Aufnahme
- Page 276 and 277:
BEDIENUNGSANLEITUNGVerschiebe:- Mit
- Page 278 and 279:
BEDIENUNGSANLEITUNGDrücken Sie hie
- Page 280 and 281:
BEDIENUNGSANLEITUNG4.0. Installatio
- Page 282 and 283:
BEDIENUNGSANLEITUNGLimit setupWenn
- Page 284 and 285:
BEDIENUNGSANLEITUNG4.1.4 TP IndexW
- Page 286 and 287:
BEDIENUNGSANLEITUNGSie können die
- Page 288 and 289:
BEDIENUNGSANLEITUNGLängeGeben Sie
- Page 290 and 291:
BEDIENUNGSANLEITUNG4.5.3 LöschenAC
- Page 292 and 293:
BEDIENUNGSANLEITUNG5.0. Systemmenü
- Page 294 and 295:
BEDIENUNGSANLEITUNGHINWEIS: Wenn f
- Page 296 and 297:
BEDIENUNGSANLEITUNGPositionDefinier
- Page 298 and 299:
BEDIENUNGSANLEITUNG6.4 Software Upg
- Page 300 and 301:
BEDIENUNGSANLEITUNG“Auto OTA Konf
- Page 302 and 303:
BEDIENUNGSANLEITUNG7.1.1.3. Passwor
- Page 304 and 305:
BEDIENUNGSANLEITUNGVERSCHIEBENMit d
- Page 306 and 307:
BEDIENUNGSANLEITUNG7.2. Multimedia
- Page 308:
9. Troubleshooting / Fehlersuche9.1