A910-24 - Cbe
A910-24 - Cbe
A910-24 - Cbe
- No tags were found...
You also want an ePaper? Increase the reach of your titles
YUMPU automatically turns print PDFs into web optimized ePapers that Google loves.
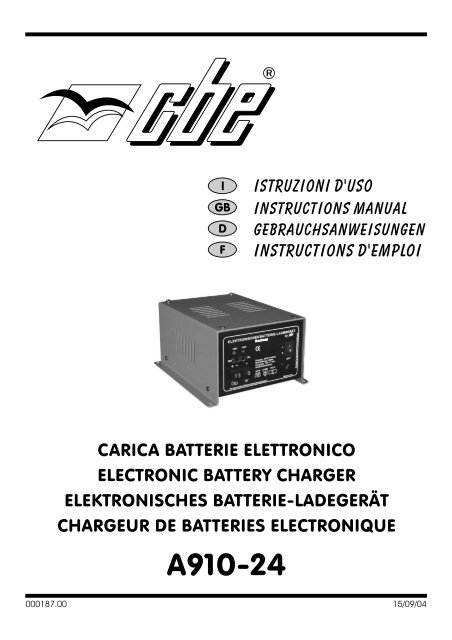
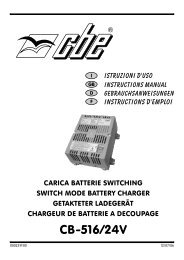
IGBDFistruzioni d'usoINSTRUCTIONS MANUALgebrauchsanweisungenINSTRUCTIONS D'EMPLOIMod. <strong>A910</strong>-<strong>24</strong>CARICA BATTERIE ELETTRONICOELECTRONIC BATTERY CHARGERELEKTRONISCHES BATTERIE-LADEGERÄTCHARGEUR DE BATTERIES ELECTRONIQUE<strong>A910</strong>-<strong>24</strong>000187.0015/09/04
CARICA BATTERIE ELETTRONICO “<strong>A910</strong>-<strong>24</strong>”1ELEKTRONISCHES BATTERIE-LADEGERÄTGel27,6V 28,8V+ +SPb2 3<strong>24</strong>VMod. A 910-<strong>24</strong>Eingang 230V 50 HzNennleistung 150VAAusgang <strong>24</strong>V 5AStromüberwachung>40 Ah ta40/E °C<strong>24</strong>VI0by230 V4Ortsfest in trockenem Raum einbauenVor dem Laden Gebrauchsanweisung lesen!Made in Italy1)LEGENDACommutatore per la scelta del tipo di batteria collegata: “Pb” batteria tipo acido, “Gel” batteria dialimentazione al GEL.NB: impostando in modo errato il commutatore si può danneggiare la batteria servizi.2) Connettore per il collegamento della batteria.3)4)N.C.Interruttore on/off 230V di sicurezza, può rimanere acceso permanentemente.FUNZIONIE' stato studiato per ricaricare batterie da avviamento (Pb/Acido) o da stazionamento (gel), per usocontinuo e collegate in sistema a tampone.Collegato in sistema a tampone può essere messo in parallelo con altre fonti di energia (generatore,carica batterie, pannelli solari, ecc...)Se non è collegata la batteria con una tensione di almeno 3V, il sistema non entra in funzione.Il sistema di ricarica avviene in tre cicli:1) ricarica della batteria con la massima corrente fino al raggiungimento del fine carica di 28,8V (Ledrosso). NB. il fine carica è raggiunto solo se la batteria è efficiente.2) quando è raggiunta la soglia di 28,8V, la carica continua per 20 min. (batt. pb) o per 6 ore e 20min. (batt. gel).3) mantenimento 27,6V costanti (Led verde). In tal modo si garantisce la corrente di mantenimentoper la carica completa. In questa fase il sistema provvede a parzializzare i Tyristor in modo darendere quasi nullo il picco di tensione.- Quando la batteria scende sotto il valore di circa 27,2V, dovuto anche all'inserimento di un carico(utenze), il sistema riparte dalla fase 2.Linea di carica IWUoUV I28,8V27,6VC26,6VV AIW Uo U UoV = Volt A = Ampere C = Carico - Loadt2
CONSIGLI E VERIFICHE PER L'INSTALLAZIONEIMPORTANTE:- L'installazione di questo apparecchio deve essere eseguita solamente dapersonale tecnico specializzato.- In caso di un utilizzo improprio dell'apparecchiatura, ne decade la garanzia ed ilproduttore declina ogni responsabilità per danni a cose o persone.- Non eseguire mai manutenzioni con la rete 230V collegata.ITALIANOCARICA BATTERIE- Installare il carica batterie in un apposito vano, asciutto ed aerato, fissarlo in modo adeguato; il migliorrendimento si ottiene con un'installazione verticale.- Non ostruire le prese d'aria poste sul coperchio ed assicurare un'adeguata ventilazione.- Prima di scollegare l'apparecchio dalla rete 230V spegnere l'interruttore di sicurezza.CAVI- Utilizzare cavi di adeguata sezione, sezione minima 4mm².- Proteggere i cavi da ogni possibile danneggiamento.CARATTERISTICHEAlimentazionePotenza massimaCorrente di carica:- nominale- aritmeticaControllo correnteConsumo (rete 230V scollegata)Controllo automatico fasi di carica- Carica massima- MantenimentoCommutatore scelta batteria (Pb o Gel)Sistema di caricaTempo di carica raggiunta la soglia 28,8V- Batteria piombo- Batteria gelProtezione da sovraccaricoProtezione da sovratemperaturaProtezione da inversione di polaritàInterruttore on/off di sicurezzaFusibile <strong>24</strong>V di protezioneFusibile 230V di protezioneSegnalazione fasi di carica tramite LedCollegamento alla rete 230VCollegamento alla batteriaContenitore in alluminio verniciatoDimensioni (mm)Peso (Kg)<strong>A910</strong>/<strong>24</strong>230 Vac 50 Hz / <strong>24</strong>Vdc150 VA6 A5 A0,3 mA25°C28,8V27,6VTampone20 min.380 min.tipo auto 10Ainterno 3,15ASpina SchukoTerminale 6,3160 x 200 H1053,8di serie3
ELECTRONIC BATTERY CHARGER “A 910-<strong>24</strong>”1ELEKTRONISCHES BATTERIE-LADEGERÄTGel27,6V 28,8V+ +<strong>24</strong>VSPb2 3Mod. A 910-<strong>24</strong>Eingang 230V 50 HzNennleistung 150VAAusgang <strong>24</strong>V 5AStromüberwachung>40 Ah ta40/E 110°C<strong>24</strong>VI0by230 V4Ortsfest in trockenem Raum einbauenVor dem Laden Gebrauchsanweisung lesen!Made in ItalyLEGENDA1) Commutator to choose the connected battery: “Pb” lead-acid battery, “Gel” gel-battery.If the commutator is set wrongly, you can damage the leisure battery.2) Connector for the connection of the battery.3) N.C.4) 230V on/off safety switch; it can be always on.FUNCTIONSIt was studied to charge starter (lead-acid) and leisure (lead-gel) batteries connected as a buffersystem, for continuous operation.If connected in buffer-system it can be paralleled with other energy powers (generator, batterycharger, solar panel, etc...).The battery charger doesn't work if it is not connected to a battery with a voltage of at least 3V.The system recharges the batteries in 3 cycles:1) Battery recharge at the max. Current, until it reaches the 28,8V value od end-charge.NB: this value is reached only if the battery is well-run.2) When the 28,8V value has been reached, the charging goes on for: 20 minutes for lead-acidbatteries, 6 hours and 20 minutes for gel batteries.3) Maintenance recharge at 27,6V continuous.In this way the maintenance current is assured for the full charge. In this cycle the recharging systemchokes the tyristor in order to invalidate the voltage peak.When the battery voltage is under than 27,2V, the system restarst from the 2nd cycle.Charging line IWUoUV I28,8V27,6VC26,6VV AIW Uo U UoV = Volt A = Ampere C = Carico - Loadt4
ADVICE AND CHECKSIMPORTANT:- The installation of this device must be carried out by specialized technicians.- In case of battery charger’s misuse, the guarantee falls off and the manufacturerdeclines all responsibility for damages to people and things.- Do not carry out any maintenance when the battery charger is connected to the230V power supply net.BATTERY CHARGER- Install the battery charger in a dedicated room, dry and ventilated; fix it in a proper way; maximumefficiency can be obtained when installed in vertical position.- Do not cover air intakes and assure an appropriate ventilation.- Before disconnecting the battery charger from 230V power supply, turn the security switch off.CABLES- Use cables with appropriate section, minimum cross section area 4 mm².- Protect cables from any possible damage.SPECIFICATIONSENGLISHMains input voltageMax. powerCharge current- nominal- arithmeticCurrent controlConsumption (no connected mains)Automatic control of charge cycles- Max charge- MaintenanceCommutator for battery choice (Pb/Acid or Pb/Gel)Charge systemLength of 28,8V end-charge phase- Lead type battery- Standing type batteryOverload protectedOvertemperature protectedInversion polarity protectionSecurity on/off switch<strong>24</strong>V fuse230V fuseCharge signalled by LED230V connectionBattery connectionAnodized aluminium caseDimensions (mm)Weight (Kg)Always provided5<strong>A910</strong>-<strong>24</strong>230 Vac 50 Hz / <strong>24</strong>Vdc150 VA6 A5 A0,3 mA25°C28,8V27,6VBuffer battery20 min.380 min.car type 10Ainternal 3,15ASchuko plugTerminals 6,3160 x 200 H1053,8
ELEKTRONISCHES BATTERIE-LADEGERÄT “<strong>A910</strong>-<strong>24</strong>”1ELEKTRONISCHES BATTERIE-LADEGERÄTGel27,6V 28,8V+ +SPb2 3<strong>24</strong>VMod. A 910-<strong>24</strong>Eingang 230V 50 HzNennleistung 150VAAusgang <strong>24</strong>V 5AStromüberwachung>40 Ah ta40/E °C<strong>24</strong>VI0by230 V4Ortsfest in trockenem Raum einbauenVor dem Laden Gebrauchsanweisung lesen!Made in ItalyZEICHENERKLARUNG1) Kommutator für den Wahl der verbundenen Batterie: “Pb” (Bleibatterie) oder “Gel” (Gelbatterie).Bei falscher Einstellung des Umschalters kann man die Aufbaubatterie beschädigen.2) Stecker für den Batterie Anschluss.3) N.C.4) Sicherheitschalter ein/aus 230V. Er kann immer angeschaltet bleiben.FUNKTIONENDas Gerät wurde für die Wiederaufladung folgender Batterietypen entwickelt: Fahrzeug oderVerbraucherbatterien (Gel), bei Dauerbetrieb und im Pufferbetrieb angeschlossen.Wenn das Gerät in Pufferbetrieb angeschlossen ist, kann er in Parallelbetrieb mit weiterenStromquellen (Generator, Ladegeräte, Solarpanele...) angeschlossen werden.Wenn die angeschlossene Batterie nicht zumindest 3V aufweist, startet das System nicht.Die Beladung erfolgt in drei Phasen:1) Aufladung der Batterie mit dem maximalen Strom bis zur Endladungspannung von 28,8V (roteLed).Anmerkung: die Endaufladung wird nur bei gut erhaltener Batterie erreicht.2) Wann der Wert von 28,8V erreicht wird, wird die Beladung für 20 Min. für Bleibatterien, und für 6St. und 20 Min. (für Gelbatterien) fortgeführt.3) 27,6V konstante Erhaltung (grüne Led). Damit wird der Erhaltungsstrom für die vollstandigeAufladung gesichert. Während dieser Phase werden die Thyristoren geregelt, um Spannungspitzenzu vermeiden.Wenn die Batterie unter 27,2V absinkt, auch durch den Einsatz von einem Verbraucher, startet dasSystem die Phase 2 noch einmal wieder.Ladekennlinie IWUoUV I28,8V27,6VC26,6VV AIW Uo U UoV = Volt A = Ampere C = Carico - Loadt6
RATSCHLÄGE UND KONTROLLE ZUM EINBAUWICHTIG : - Einbau von diesem Gerät darf nur vom einem Fachmann durchgeführt werden.- Im Falle vom Mißverbrauch man verwirkt die Garantie und haftet der Herstellerfür keine Sach- oder Personenschaden.- Keine Wartungsarbeiten, wenn 230V Netz anliegt.LADEGERÄT- Ladegerät in einem trockenen und belüfteten Raum einbauen. Einbau muß angemessen durchgeführt.Beste Leistungsfähigkeit wenn vertikal eingebaut.- Die Belüftung beim Deckel nicht verstopfen und eine angemessene Belüftung versichern.- Bevor das Ladegerät vom 230V Netz auszuschließen, den Schalter ausmachen..KABEL- Kabel mit angemessenen Querschnitt benutzen, Mindestquerschnitt 4mm².- Die Kabel gegen alle mögliche Beschädigungen schutzen.TECHNISCHE DATENVersorgungMaximale KraftLadestrom:- genannter- aritmetischerStromkontrolleVerbrauch (Netz 230V ausgeschaltet)Automatische Kontrolle Ladephasen- Maximale Ladung- ErhaltungKommutator Batteriewahl (Blei oder Gel)LadesystemLadezeit Erreichung 28,8V- Bleibatterie- GelbatterieSchutz vor ÜberlastungSchutz vor ÜbertemperaturSchutz vor Verwechslung der PoleSicherheitsschalter on/offSchutzsicherung <strong>24</strong>VSchutzsicherung 230VAnzeige der Ladephasen mittels LedVerbindung am Netz 230VVerbindung an die BatterieAluminiumbehälter pulverbeschichtetDimensionen (mm)GewichtStandard7<strong>A910</strong>-<strong>24</strong>230 Vac 50 Hz / <strong>24</strong>Vdc150 VA6 A5 A0,3 mA25°C28,8V27,6VPufferbetrieb20 Min.380 Min.Wie beim Pkw 10AInnen 3,15ASchuko SteckerKabelschuh 6,3160 x 200 H1053,8 KgDEUTSCH
CHARGEUR DE BATTERIES ELECTRONIQUE “<strong>A910</strong>-<strong>24</strong>”1ELEKTRONISCHES BATTERIE-LADEGERÄTGel27,6V 28,8V+ +<strong>24</strong>VSPb2 3Mod. A 910-<strong>24</strong>Eingang 230V 50 HzNennleistung 150VAAusgang <strong>24</strong>V 5AStromüberwachung>40 Ah ta40/E °C<strong>24</strong>VI0by230 V4Ortsfest in trockenem Raum einbauenVor dem Laden Gebrauchsanweisung lesen!Made in ItalyLEGENDE1)2)3)4)Commutateur pour le choix du type batterie branchée: “Pb” batterie type acid, “Gel” batteried’alimentation au gel.Le commutateur posé d'une manière erronée peut endomager la batterie services.Connecteur pour le branchement de la batterie.N.C.Interrupteur on/off 230V de sûreté, il peut être toujours allumé.FONCTIONSIl a été étudié pour recharger les batteries démarrage (Pb/Acid) ou type stationnement (Pb/Gel),pour usage continu et raccordées en système à tampon.Branché en système à tampon il peut être mis en parallel avec des autre source d’energie(generateur, chargeur, panneau solaires, etc.)Si la batterie raccordée n'a pas au moins un tension de 3V, le système n'entre pas en fonction.Le système de recharge se fait en trois cycles:1) recharge de la batterie avec le maximum de courant jusqu'à atteindre la fin de charge de 28,8V(Led rouge). NB: la fin de charge est atteinte uniquement si la batterie est en bon état.2) lorsque le seuil de 28,8V est atteint, la charge continue pour un temps de 20 min. (batt. Pb/Acid),ou pour 6 heures et 20 min. (batt. Pb/Gel) .3) maintien 27,6V (Led vert) de façon à garantir le courant de maintien pour la charge complète.Dans cette phase le système pourvoit aussi à partager les Tyristors de façon à rendre presque nul lepic de tension.Quand la batterie descend au-dessous de la valeur d'environ 27,2V , dû au branchement d'unecharge (utilisations), le système repart de la phase 2.Ligne de charge IWUoUV I28,8V27,6VC26,6VV AIW Uo U UoV = Volt A = Ampere C = Carico - Loadt8
CONSEILS ET VERIFICATIONS POUR L'INSTALLATIONIMPORTANT:- L'installation de cet appareil doit être faite seulement par un technicienspécialisé.- En cas d'emploi abusif de l'appareil, la garantie déchue et le fabricantdécline toute responsabilité pour les dégâts causés à choses ou personnes.- Ne jamais faire l' entretien avec le réseau 230V branché.CHARGEUR DE BATTERIE- Installer le chargeur de batterie dans un endroit propre, sec et ventilé, le fixer d'une façonconvenable; le meilleur rendement s'obtient avec une installation verticale.- Ne pas obstruer les prises d'air sur le couvercle et assurer une ventilation adéquate.- Avant de débrancher l'appareil du réseau 230V, presser le bouton de sécurité.CABLES2- Utiliser des câbles de section adéquate, minimum 4mm .- Protéger les câbles de tout endommagement.CARACTERISTIQUESAlimentationPuissance maximumCourant de charge :- nominal- arithmétiqueContrôl courantConsommation (reseau 230V débranchée)Contrôl automatique phase de charge- Charge maximum- MaintienCommutateur choix batterie scelta batteria (Pb o Gel)Système de chargeTemps de charge atteint la seuil de 28,8V- Batterie plomb- Batterie gelProtection de surchargeProtection de surtempérateurProtection inversion polaritéInterrupteur on/off de sûretéFusible <strong>24</strong>V de protectionFusible 230V de protectionSignalisation de charge par LedBranchement à la reseau 230VBranchement à la batterieBoîtier en alluminium verniEncombrement (mm)Poidsdi serie9<strong>A910</strong>-<strong>24</strong>230 Vac 50 Hz / <strong>24</strong>Vdc150 VA6 A5 A0,3 mA25°C28,8V27,6VTampon20 min.380 min.type auto 10Aintérieur 3,15Afiche Schukofaston 6,3160 x 200 H1053,8 KgFRANÇAIS
NOTE / NOTES / MERKUNGEN / NOTES10
NOTE / NOTES / MERKUNGEN / NOTES11
89/336 EMC73/23 e 93/68 EECI dati riportati nei fogli di istruzioni possono subire modifiche senza preavviso alcuno, questo è dovuto allecontinue migliorie tecniche. I disegni e i testi riprodotti sono proprietà della CBE. E' vietata la riproduzioneintegrale o parziale e la comunicazione a terzi senza l'autorizzazione scritta.Technical data on instructions sheets can be modified without notice, because technical improvementsare continually made. Design and texts are CBE property. Integral or partial reproductions are noadmitted as well as communications to third parties without written permission.Die in den Gebrauchsanweisungen geführten Daten können ohne Vorankündigung geändert werden, inZusammenhang mit den technischen Verbesserungen. Die veröffentlichten Abbildungen und Texte sindEigentum der Fa. CBE. Jegliche Art von Vervielfältigung, komplett oder teilweise, ist ohne schriftlicheGenehmigung untersagt.Les données reportées dans les pages des instructions peuvent subir des modifications sans aucunpréavis, ceci en vue des continuelles améliorations techniques. Les dessins et les textes reproduits sontde propriété de la CBE. La reproduction totale ou partielle et la communication à tiers, sans autorisationécrite sont interdites.CBE ElettrotecnicaSpini di Gardolo, 116 - 38014 Gardolo (TN) - ItalyTel. +39 0461 991598 - Fax +39 0461 960009 - www.cbe.it - cbe@cbe.it


