Register and win! KMR 1250 B - Kärcher
Register and win! KMR 1250 B - Kärcher
Register and win! KMR 1250 B - Kärcher

Create successful ePaper yourself
Turn your PDF publications into a flip-book with our unique Google optimized e-Paper software.
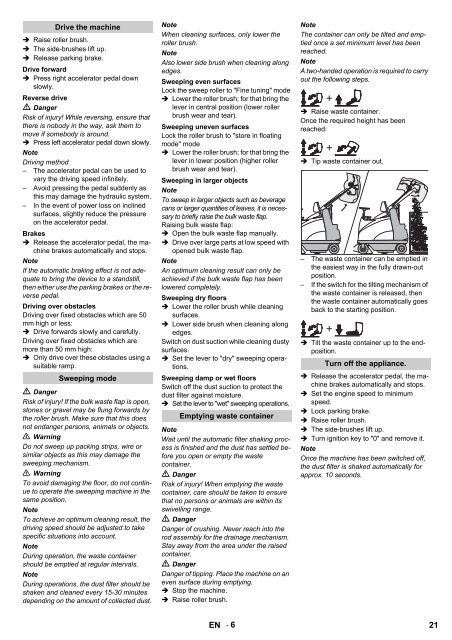
Drive the machine<br />
Raise roller brush.<br />
The side-brushes lift up.<br />
Release parking brake.<br />
Drive forward<br />
Press right accelerator pedal down<br />
slowly.<br />
Reverse drive<br />
Danger<br />
Risk of injury! While reversing, ensure that<br />
there is nobody in the way, ask them to<br />
move if somebody is around.<br />
Press left accelerator pedal down slowly.<br />
Note<br />
Driving method<br />
– The accelerator pedal can be used to<br />
vary the driving speed infinitely.<br />
– Avoid pressing the pedal suddenly as<br />
this may damage the hydraulic system.<br />
– In the event of power loss on inclined<br />
surfaces, slightly reduce the pressure<br />
on the accelerator pedal.<br />
Brakes<br />
Release the accelerator pedal, the machine<br />
brakes automatically <strong>and</strong> stops.<br />
Note<br />
If the automatic braking effect is not adequate<br />
to bring the device to a st<strong>and</strong>still,<br />
then either use the parking brakes or the reverse<br />
pedal.<br />
Driving over obstacles<br />
Driving over fixed obstacles which are 50<br />
mm high or less:<br />
Drive forwards slowly <strong>and</strong> carefully.<br />
Driving over fixed obstacles which are<br />
more than 50 mm high:<br />
Only drive over these obstacles using a<br />
suitable ramp.<br />
Sweeping mode<br />
Danger<br />
Risk of injury! If the bulk waste flap is open,<br />
stones or gravel may be flung forwards by<br />
the roller brush. Make sure that this does<br />
not endanger persons, animals or objects.<br />
Warning<br />
Do not sweep up packing strips, wire or<br />
similar objects as this may damage the<br />
sweeping mechanism.<br />
Warning<br />
To avoid damaging the floor, do not continue<br />
to operate the sweeping machine in the<br />
same position.<br />
Note<br />
To achieve an optimum cleaning result, the<br />
driving speed should be adjusted to take<br />
specific situations into account.<br />
Note<br />
During operation, the waste container<br />
should be emptied at regular intervals.<br />
Note<br />
During operations, the dust filter should be<br />
shaken <strong>and</strong> cleaned every 15-30 minutes<br />
depending on the amount of collected dust.<br />
Note<br />
When cleaning surfaces, only lower the<br />
roller brush.<br />
Note<br />
Also lower side brush when cleaning along<br />
edges.<br />
Sweeping even surfaces<br />
Lock the sweep roller to "Fine tuning" mode<br />
Lower the roller brush; for that bring the<br />
lever in central position (lower roller<br />
brush wear <strong>and</strong> tear).<br />
Sweeping uneven surfaces<br />
Lock the roller brush to "store in floating<br />
mode" mode<br />
Lower the roller brush; for that bring the<br />
lever in lower position (higher roller<br />
brush wear <strong>and</strong> tear).<br />
Sweeping in larger objects<br />
Note<br />
To sweep in larger objects such as beverage<br />
cans or larger quantities of leaves, it is necessary<br />
to briefly raise the bulk waste flap.<br />
Raising bulk waste flap:<br />
Open the bulk waste flap manually.<br />
Drive over large parts at low speed with<br />
opened bulk waste flap.<br />
Note<br />
An optimum cleaning result can only be<br />
achieved if the bulk waste flap has been<br />
lowered completely.<br />
Sweeping dry floors<br />
Lower the roller brush while cleaning<br />
surfaces.<br />
Lower side brush when cleaning along<br />
edges.<br />
Switch on dust suction while cleaning dusty<br />
surfaces.<br />
Set the lever to "dry" sweeping operations.<br />
Sweeping damp or wet floors<br />
Switch off the dust suction to protect the<br />
dust filter against moisture.<br />
Set the lever to "wet" sweeping operations.<br />
Emptying waste container<br />
Note<br />
Wait until the automatic filter shaking process<br />
is finished <strong>and</strong> the dust has settled before<br />
you open or empty the waste<br />
container.<br />
Danger<br />
Risk of injury! When emptying the waste<br />
container, care should be taken to ensure<br />
that no persons or animals are within its<br />
swivelling range.<br />
Danger<br />
Danger of crushing. Never reach into the<br />
rod assembly for the drainage mechanism.<br />
Stay away from the area under the raised<br />
container.<br />
Danger<br />
Danger of tipping. Place the machine on an<br />
even surface during emptying.<br />
Stop the machine.<br />
Raise roller brush.<br />
EN<br />
- 6<br />
Note<br />
The container can only be tilted <strong>and</strong> emptied<br />
once a set minimum level has been<br />
reached.<br />
Note<br />
A two-h<strong>and</strong>ed operation is required to carry<br />
out the follo<strong>win</strong>g steps.<br />
Raise waste container.<br />
Once the required height has been<br />
reached:<br />
Tip waste container out.<br />
– The waste container can be emptied in<br />
the easiest way in the fully drawn-out<br />
position.<br />
– If the switch for the tilting mechanism of<br />
the waste container is released, then<br />
the waste container automatically goes<br />
back to the starting position.<br />
Tilt the waste container up to the endposition.<br />
Turn off the appliance.<br />
Release the accelerator pedal, the machine<br />
brakes automatically <strong>and</strong> stops.<br />
Set the engine speed to minimum<br />
speed.<br />
Lock parking brake.<br />
Raise roller brush.<br />
The side-brushes lift up.<br />
Turn ignition key to "0" <strong>and</strong> remove it.<br />
Note<br />
Once the machine has been switched off,<br />
the dust filter is shaked automatically for<br />
approx. 10 seconds.<br />
21