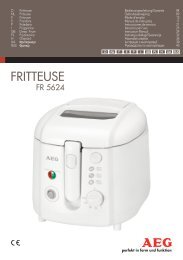
importanti informazioni per la sicurezza simboli indice - E-milione E ...
importanti informazioni per la sicurezza simboli indice - E-milione E ...
importanti informazioni per la sicurezza simboli indice - E-milione E ...

Create successful ePaper yourself
Turn your PDF publications into a flip-book with our unique Google optimized e-Paper software.
POWer<br />
The oven must be plugged into a 230 V ~ 50 Hz grounded electrical outlet.<br />
Never use electrical outlets providing higher or lower voltage. Do not let the power cord touch hot surfaces.<br />
WArninG: When cooking, always use the backing tray to prevent grease dripping<br />
onto the lower heating elements.<br />
• P<strong>la</strong>ce the oven in a f<strong>la</strong>t and stable surface and plug it into a wall socket (230 V ~ 50 Hz).<br />
• Pre-heat the oven for 5-10 minutes before putting the food to be cooked (see “Pre-heating” paragraph).<br />
• P<strong>la</strong>ce the food on the tray.<br />
• Set the tem<strong>per</strong>ature (100° - 250° C), select the desired heating function by using the control knob (see table A) then<br />
p<strong>la</strong>ce the grid to the desired cooking shelf (according to the food to be cooked).<br />
• Set the cooking time by using the timer (max. 60 minutes). The indicator light will switch on.<br />
• This oven is provided with a venti<strong>la</strong>tion system, which allows the heat to spread evenly on the cooking compartment.<br />
This function will be automatically activated once the oven is switched on.<br />
• When using the grid for cooking, always p<strong>la</strong>ce the tray under it, to protect the heating elements from fat.<br />
• Food must be frequently checked during cooking process. Open the door partially in order to avoid heat dis<strong>per</strong>sion,<br />
which may lengthen cooking times.<br />
• Once finished cooking, switch off the appliance by setting all control knobs to “OFF” or “0” and disconnect the oven<br />
from the power supply.<br />
WArninG: Do not insert scissors or knifes into the venti<strong>la</strong>tion slits,<br />
as this may cause damage to the item.<br />
WArninG! HOt surfAce: Do not touch the g<strong>la</strong>ss door or the oven surface<br />
while it is o<strong>per</strong>ating or right after use.<br />
PreHeAtinG<br />
• Select “Oven + Grill” heating function by using the control knob (see table A).<br />
• Turn the thermostat in a clockwise direction to select the desired cooking tem<strong>per</strong>ature.<br />
• Set the cooking time to 5 or 10 minutes, according to the cooking tem<strong>per</strong>ature of the food. For low cooking<br />
tem<strong>per</strong>atures 5 minutes are enough, while for high cooking tem<strong>per</strong>atures 10 minutes are required for preheating.<br />
• The oven will emit a “beep” sound once the set time has e<strong>la</strong>psed and the required tem<strong>per</strong>ature has been reached.<br />
13<br />
EnGlISh