Manuale dell'utente di Crystal Enterprise
Manuale dell'utente di Crystal Enterprise
Manuale dell'utente di Crystal Enterprise
You also want an ePaper? Increase the reach of your titles
YUMPU automatically turns print PDFs into web optimized ePapers that Google loves.
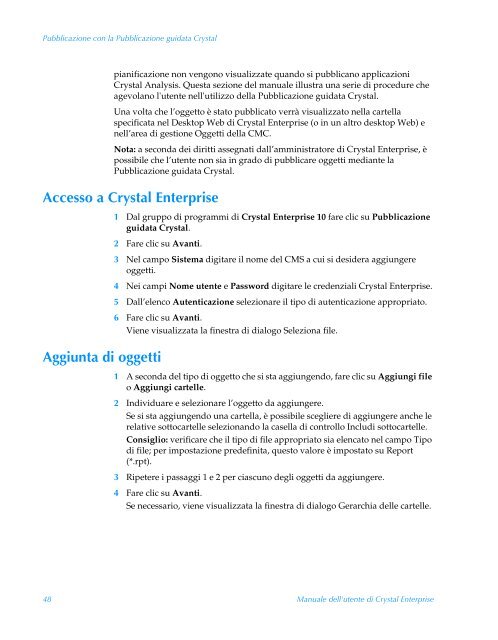
Pubblicazione con la Pubblicazione guidata <strong>Crystal</strong><br />
pianificazione non vengono visualizzate quando si pubblicano applicazioni<br />
<strong>Crystal</strong> Analysis. Questa sezione del manuale illustra una serie <strong>di</strong> procedure che<br />
agevolano l'utente nell'utilizzo della Pubblicazione guidata <strong>Crystal</strong>.<br />
Una volta che l’oggetto è stato pubblicato verrà visualizzato nella cartella<br />
specificata nel Desktop Web <strong>di</strong> <strong>Crystal</strong> <strong>Enterprise</strong> (o in un altro desktop Web) e<br />
nell’area <strong>di</strong> gestione Oggetti della CMC.<br />
Nota: a seconda dei <strong>di</strong>ritti assegnati dall’amministratore <strong>di</strong> <strong>Crystal</strong> <strong>Enterprise</strong>, è<br />
possibile che l’utente non sia in grado <strong>di</strong> pubblicare oggetti me<strong>di</strong>ante la<br />
Pubblicazione guidata <strong>Crystal</strong>.<br />
Accesso a <strong>Crystal</strong> <strong>Enterprise</strong><br />
Aggiunta <strong>di</strong> oggetti<br />
1 Dal gruppo <strong>di</strong> programmi <strong>di</strong> <strong>Crystal</strong> <strong>Enterprise</strong> 10 fare clic su Pubblicazione<br />
guidata <strong>Crystal</strong>.<br />
2 Fare clic su Avanti.<br />
3 Nel campo Sistema <strong>di</strong>gitare il nome del CMS a cui si desidera aggiungere<br />
oggetti.<br />
4 Nei campi Nome utente e Password <strong>di</strong>gitare le credenziali <strong>Crystal</strong> <strong>Enterprise</strong>.<br />
5 Dall’elenco Autenticazione selezionare il tipo <strong>di</strong> autenticazione appropriato.<br />
6 Fare clic su Avanti.<br />
Viene visualizzata la finestra <strong>di</strong> <strong>di</strong>alogo Seleziona file.<br />
1 A seconda del tipo <strong>di</strong> oggetto che si sta aggiungendo, fare clic su Aggiungi file<br />
o Aggiungi cartelle.<br />
2 In<strong>di</strong>viduare e selezionare l’oggetto da aggiungere.<br />
Se si sta aggiungendo una cartella, è possibile scegliere <strong>di</strong> aggiungere anche le<br />
relative sottocartelle selezionando la casella <strong>di</strong> controllo Inclu<strong>di</strong> sottocartelle.<br />
Consiglio: verificare che il tipo <strong>di</strong> file appropriato sia elencato nel campo Tipo<br />
<strong>di</strong> file; per impostazione predefinita, questo valore è impostato su Report<br />
(*.rpt).<br />
3 Ripetere i passaggi 1 e 2 per ciascuno degli oggetti da aggiungere.<br />
4 Fare clic su Avanti.<br />
Se necessario, viene visualizzata la finestra <strong>di</strong> <strong>di</strong>alogo Gerarchia delle cartelle.<br />
48 <strong>Manuale</strong> <strong>dell'utente</strong> <strong>di</strong> <strong>Crystal</strong> <strong>Enterprise</strong>


